Footings
For the top of the footings we used a product from Cosella Dörken called Delta Footing Barrier. Acting as a capillary break, the membrane is supposed to help prevent moisture from wicking up from below the footing, where it could then migrate into the foundation wall and into the basement, or even the wall assembly above (worst case scenario), causing mold or other moisture related damage. It should contribute to making the basement a very livable space (especially when combined with significant amounts of insulation on the exterior walls and under the slab).
Here’s a detail from the construction drawings:
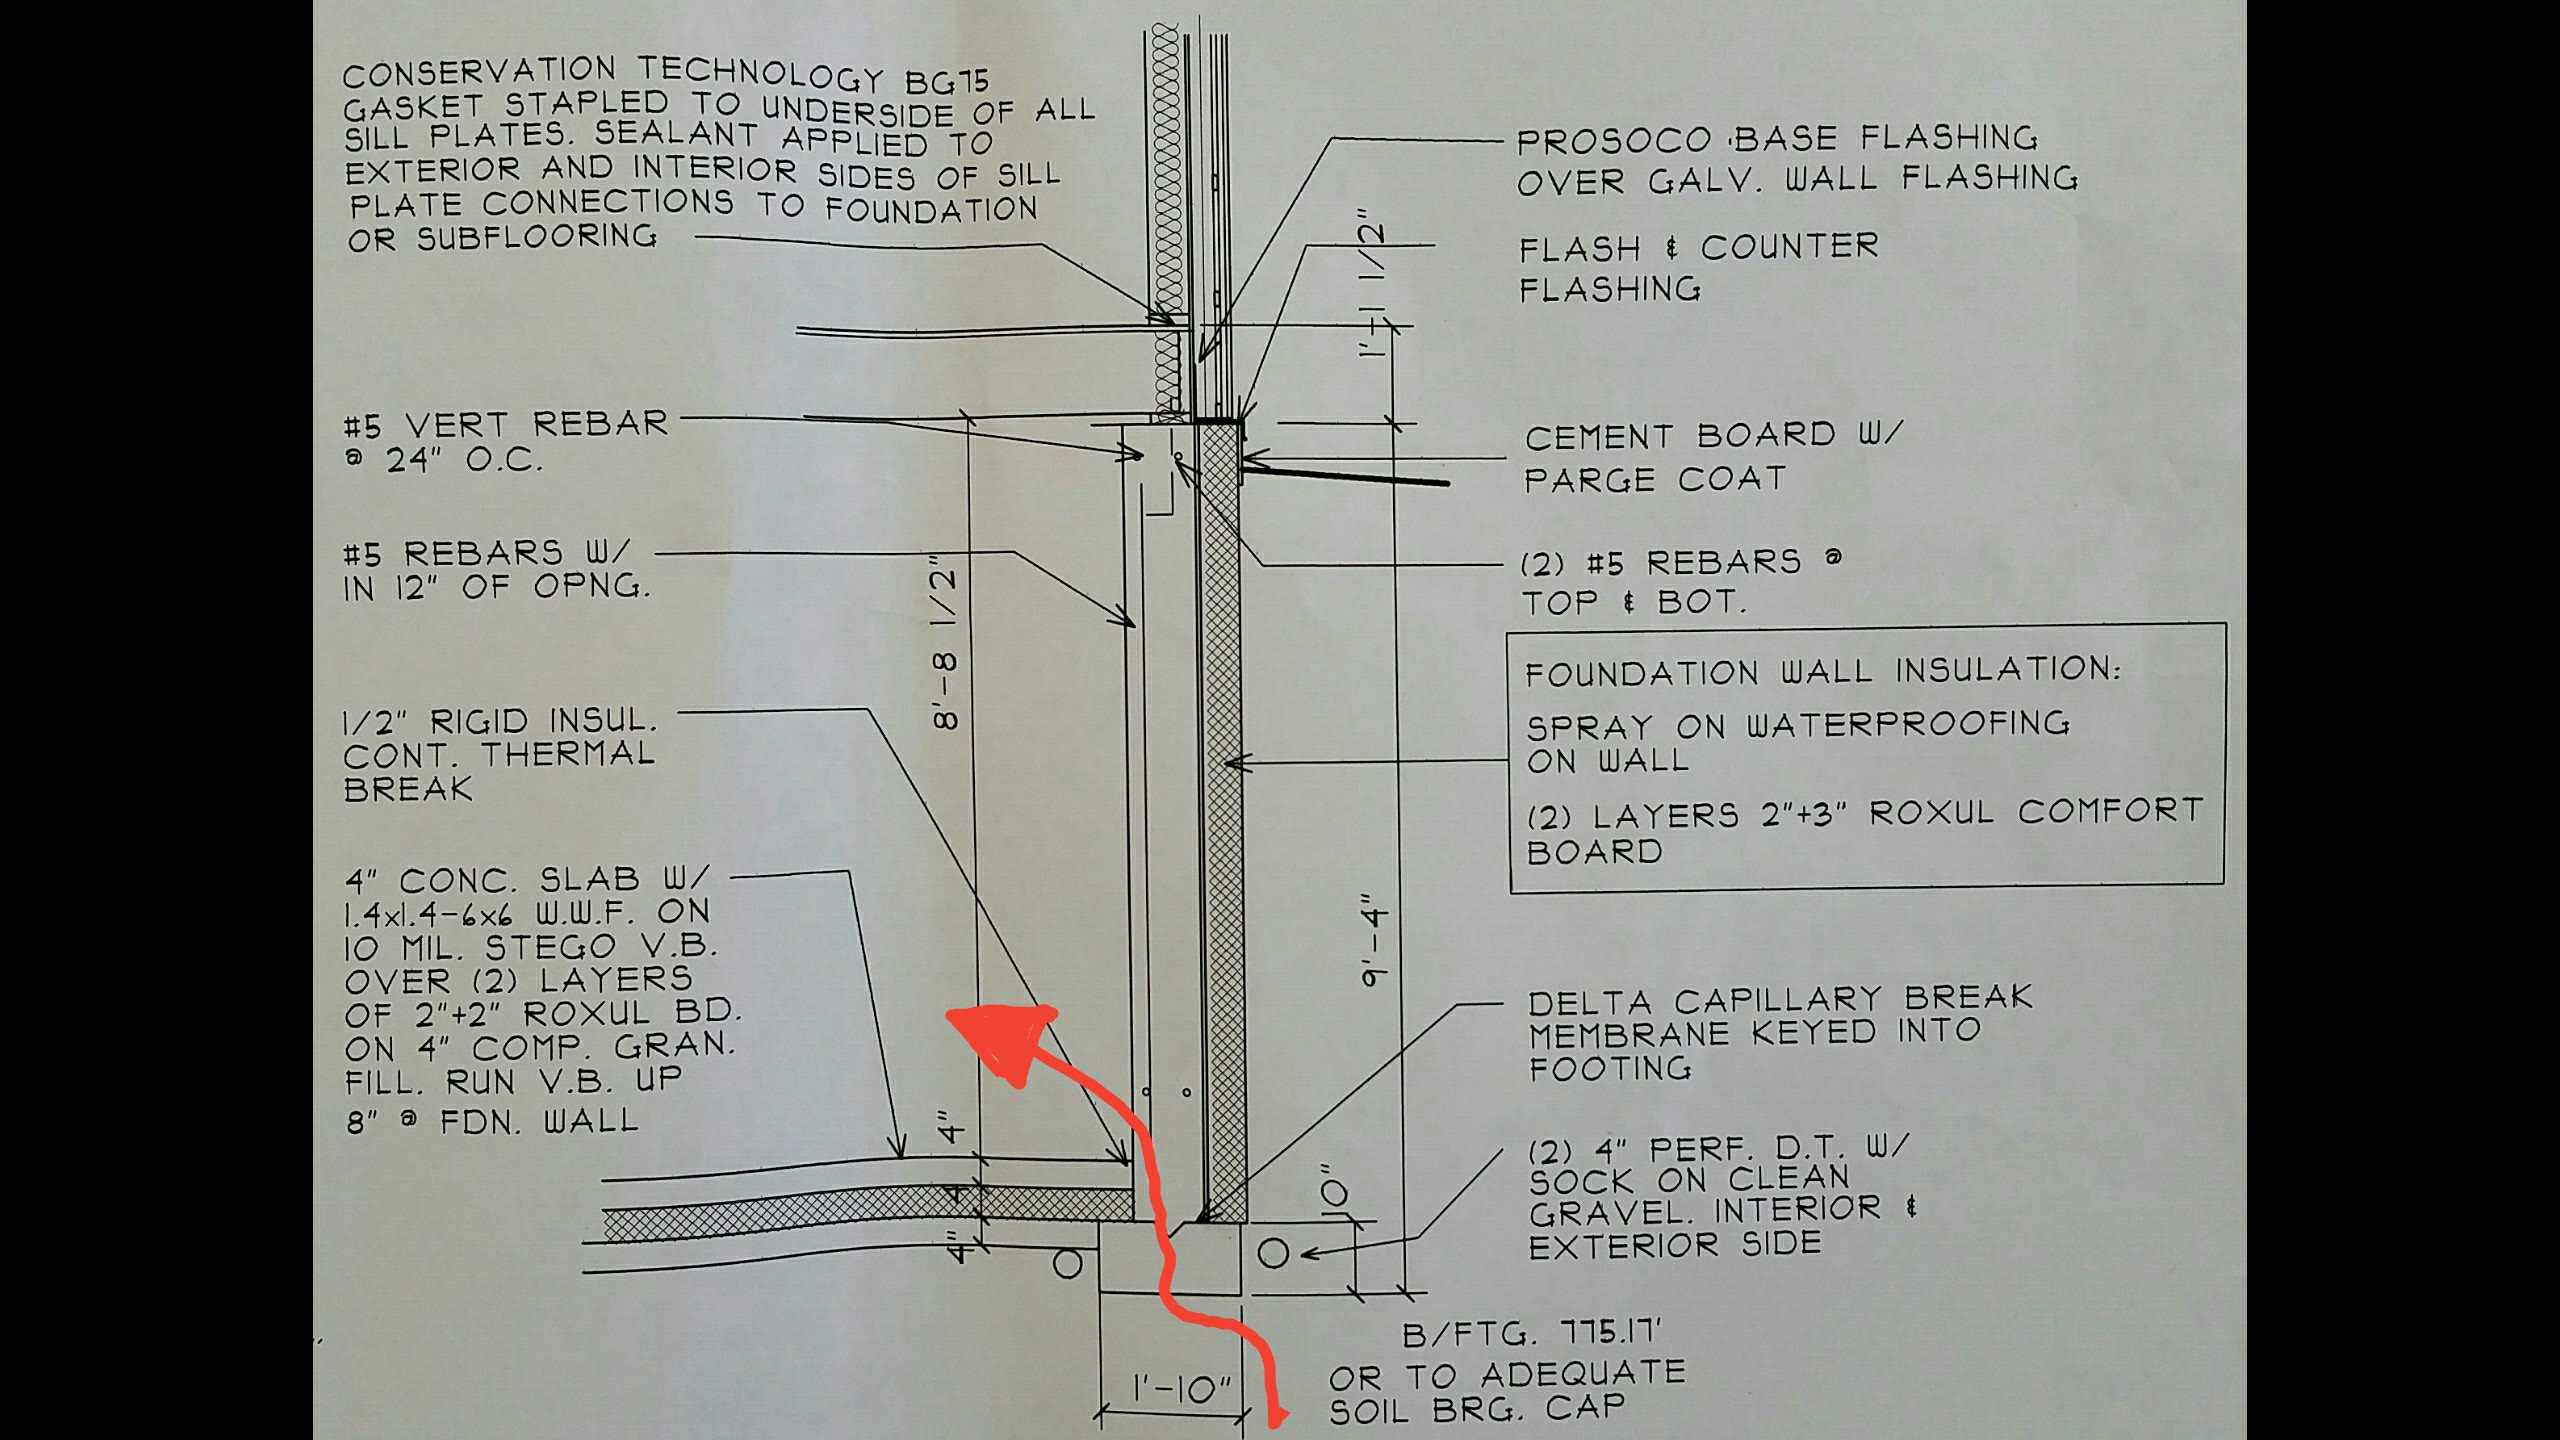
In other words, this junction represents a weak point in our thermal envelope and vapor barrier. Passive House proponents often talk about using a red pen on a construction drawing to follow the air barrier and thermal envelope (the goal: no gaps in air sealing or the layers of insulation) . In theory, you should be able to do this all the way around the structure without once lifting your pen. If you can lift your pen (meaning there’s a gap in your air barrier or thermal envelope — which would be the case without the Delta membrane on top of our footing), then it’s a weak point that should be addressed (if at all possible).
Even with significant insulation on the exterior wall of the foundation (Roxul Comfortboard 80: 2″ + 3″), along with a sprayed-on waterproofing membrane, as well as a vapor barrier (Stego Wrap) and insulation (Roxul Comfortboard 80: 2″ + 2″) under the basement slab, this junction where the three elements meet — slab, footing, wall — is a weak point. Although it doesn’t address the weakness in R-value, at least it should keep the moisture at bay (probably the biggest complaint associated with basements).
With a 9′ basement, we’re hoping the temperatures at this depth are consistently mild enough to avoid any kind of significant energy penalty. I’m confident this will be the case because in our last home, a typical suburban tract house without much insulation, the basement always stayed cool in the summer and warm in the winter, even though the ducts to the basement had been closed off so the space never saw any direct benefit from the HVAC system.
For minimal cost in materials, the Delta membrane seems well worth it for the added peace of mind.
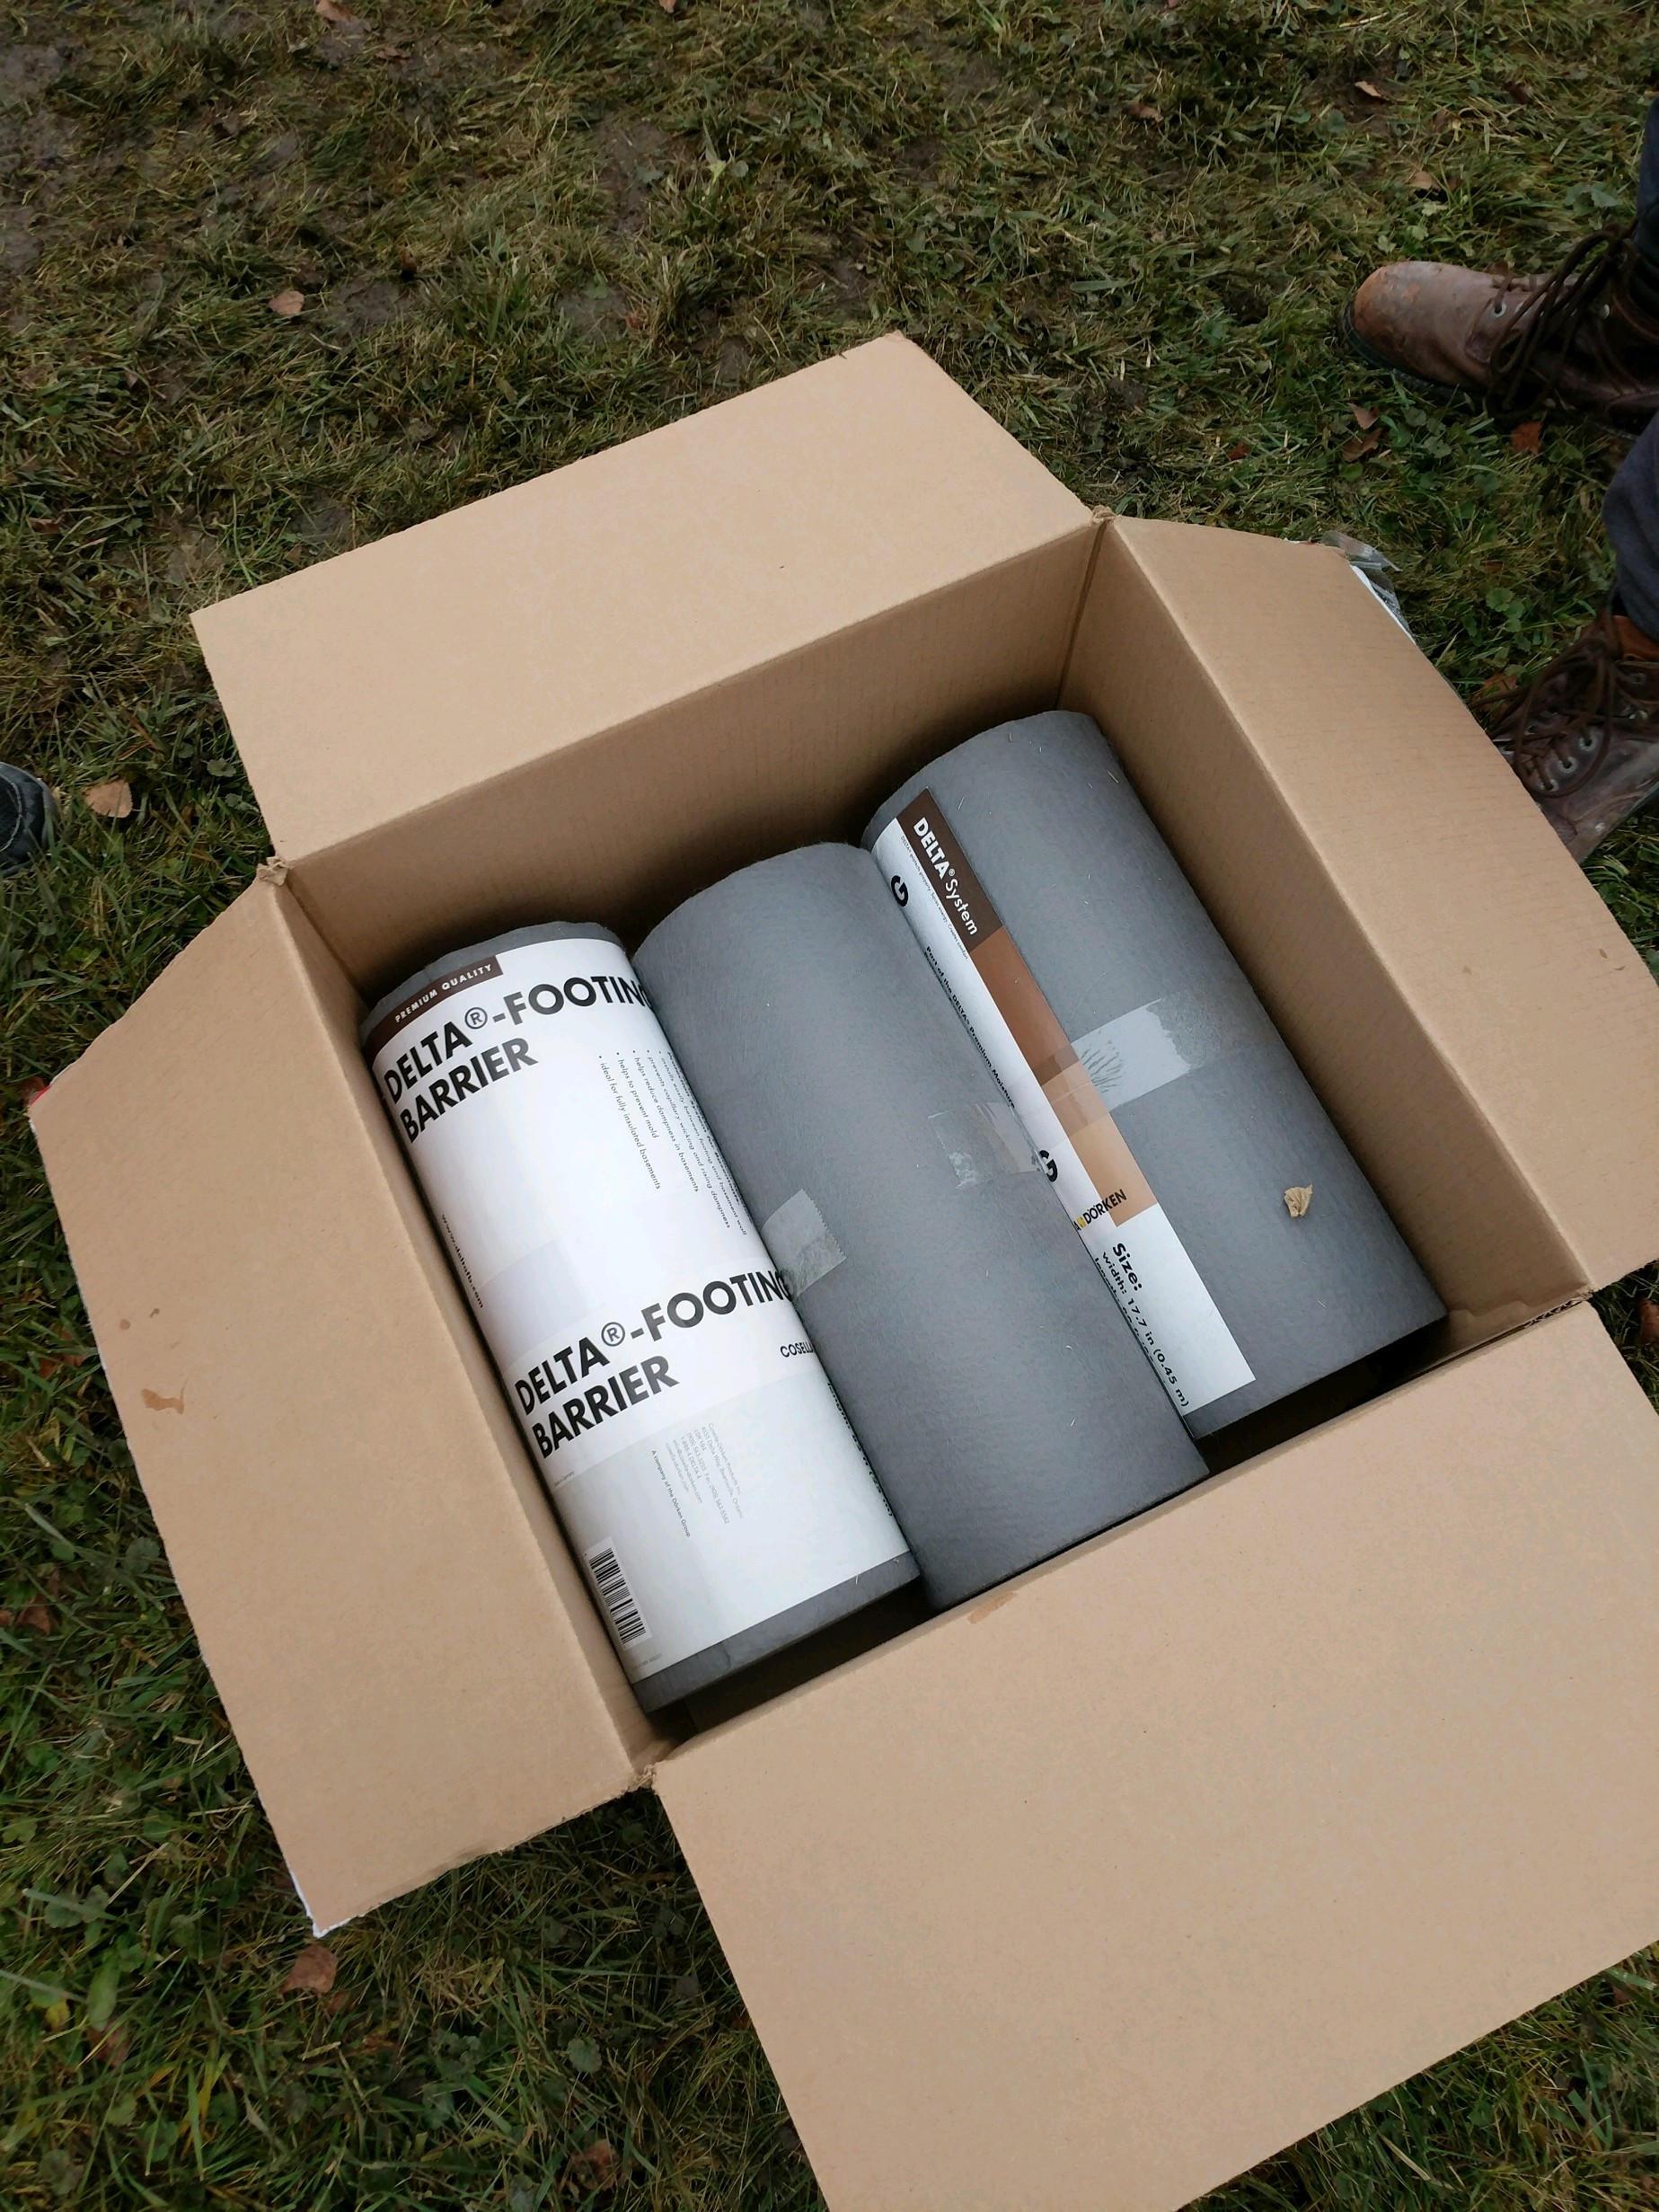
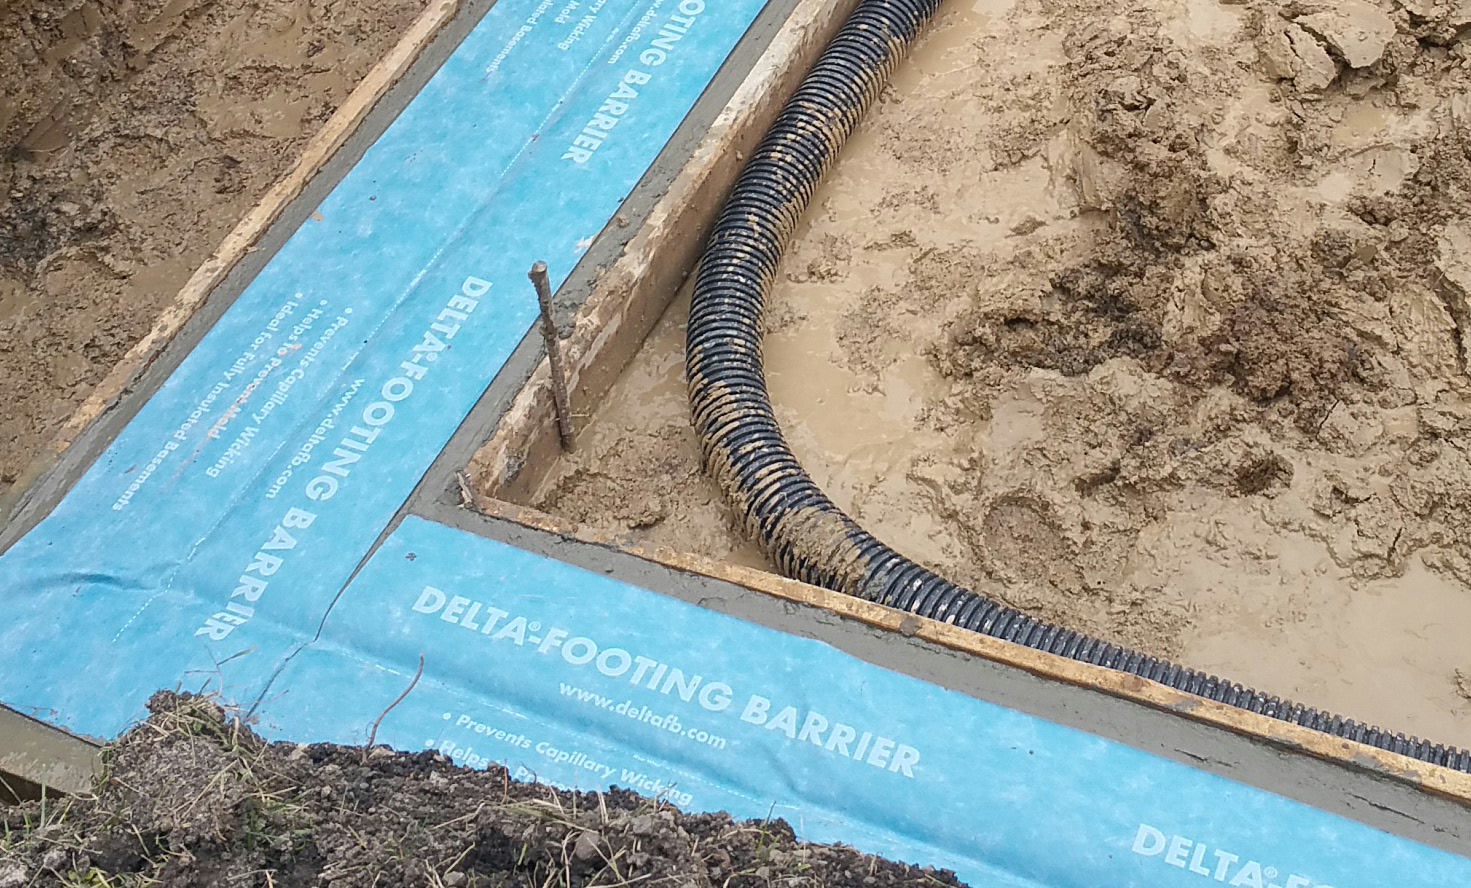
Here is a video and some photos from our job site:
The guys from Tynis Concrete didn’t seem to mind trying something new, and the membrane went on without any issues.
I couldn’t find any local suppliers who carried the Delta membrane, so I ordered online from: spycorbuilding.com

Foundation Walls with Roxul Comfortboard 80
For the walls, first we used a spray-on waterproofing membrane from Tremco:
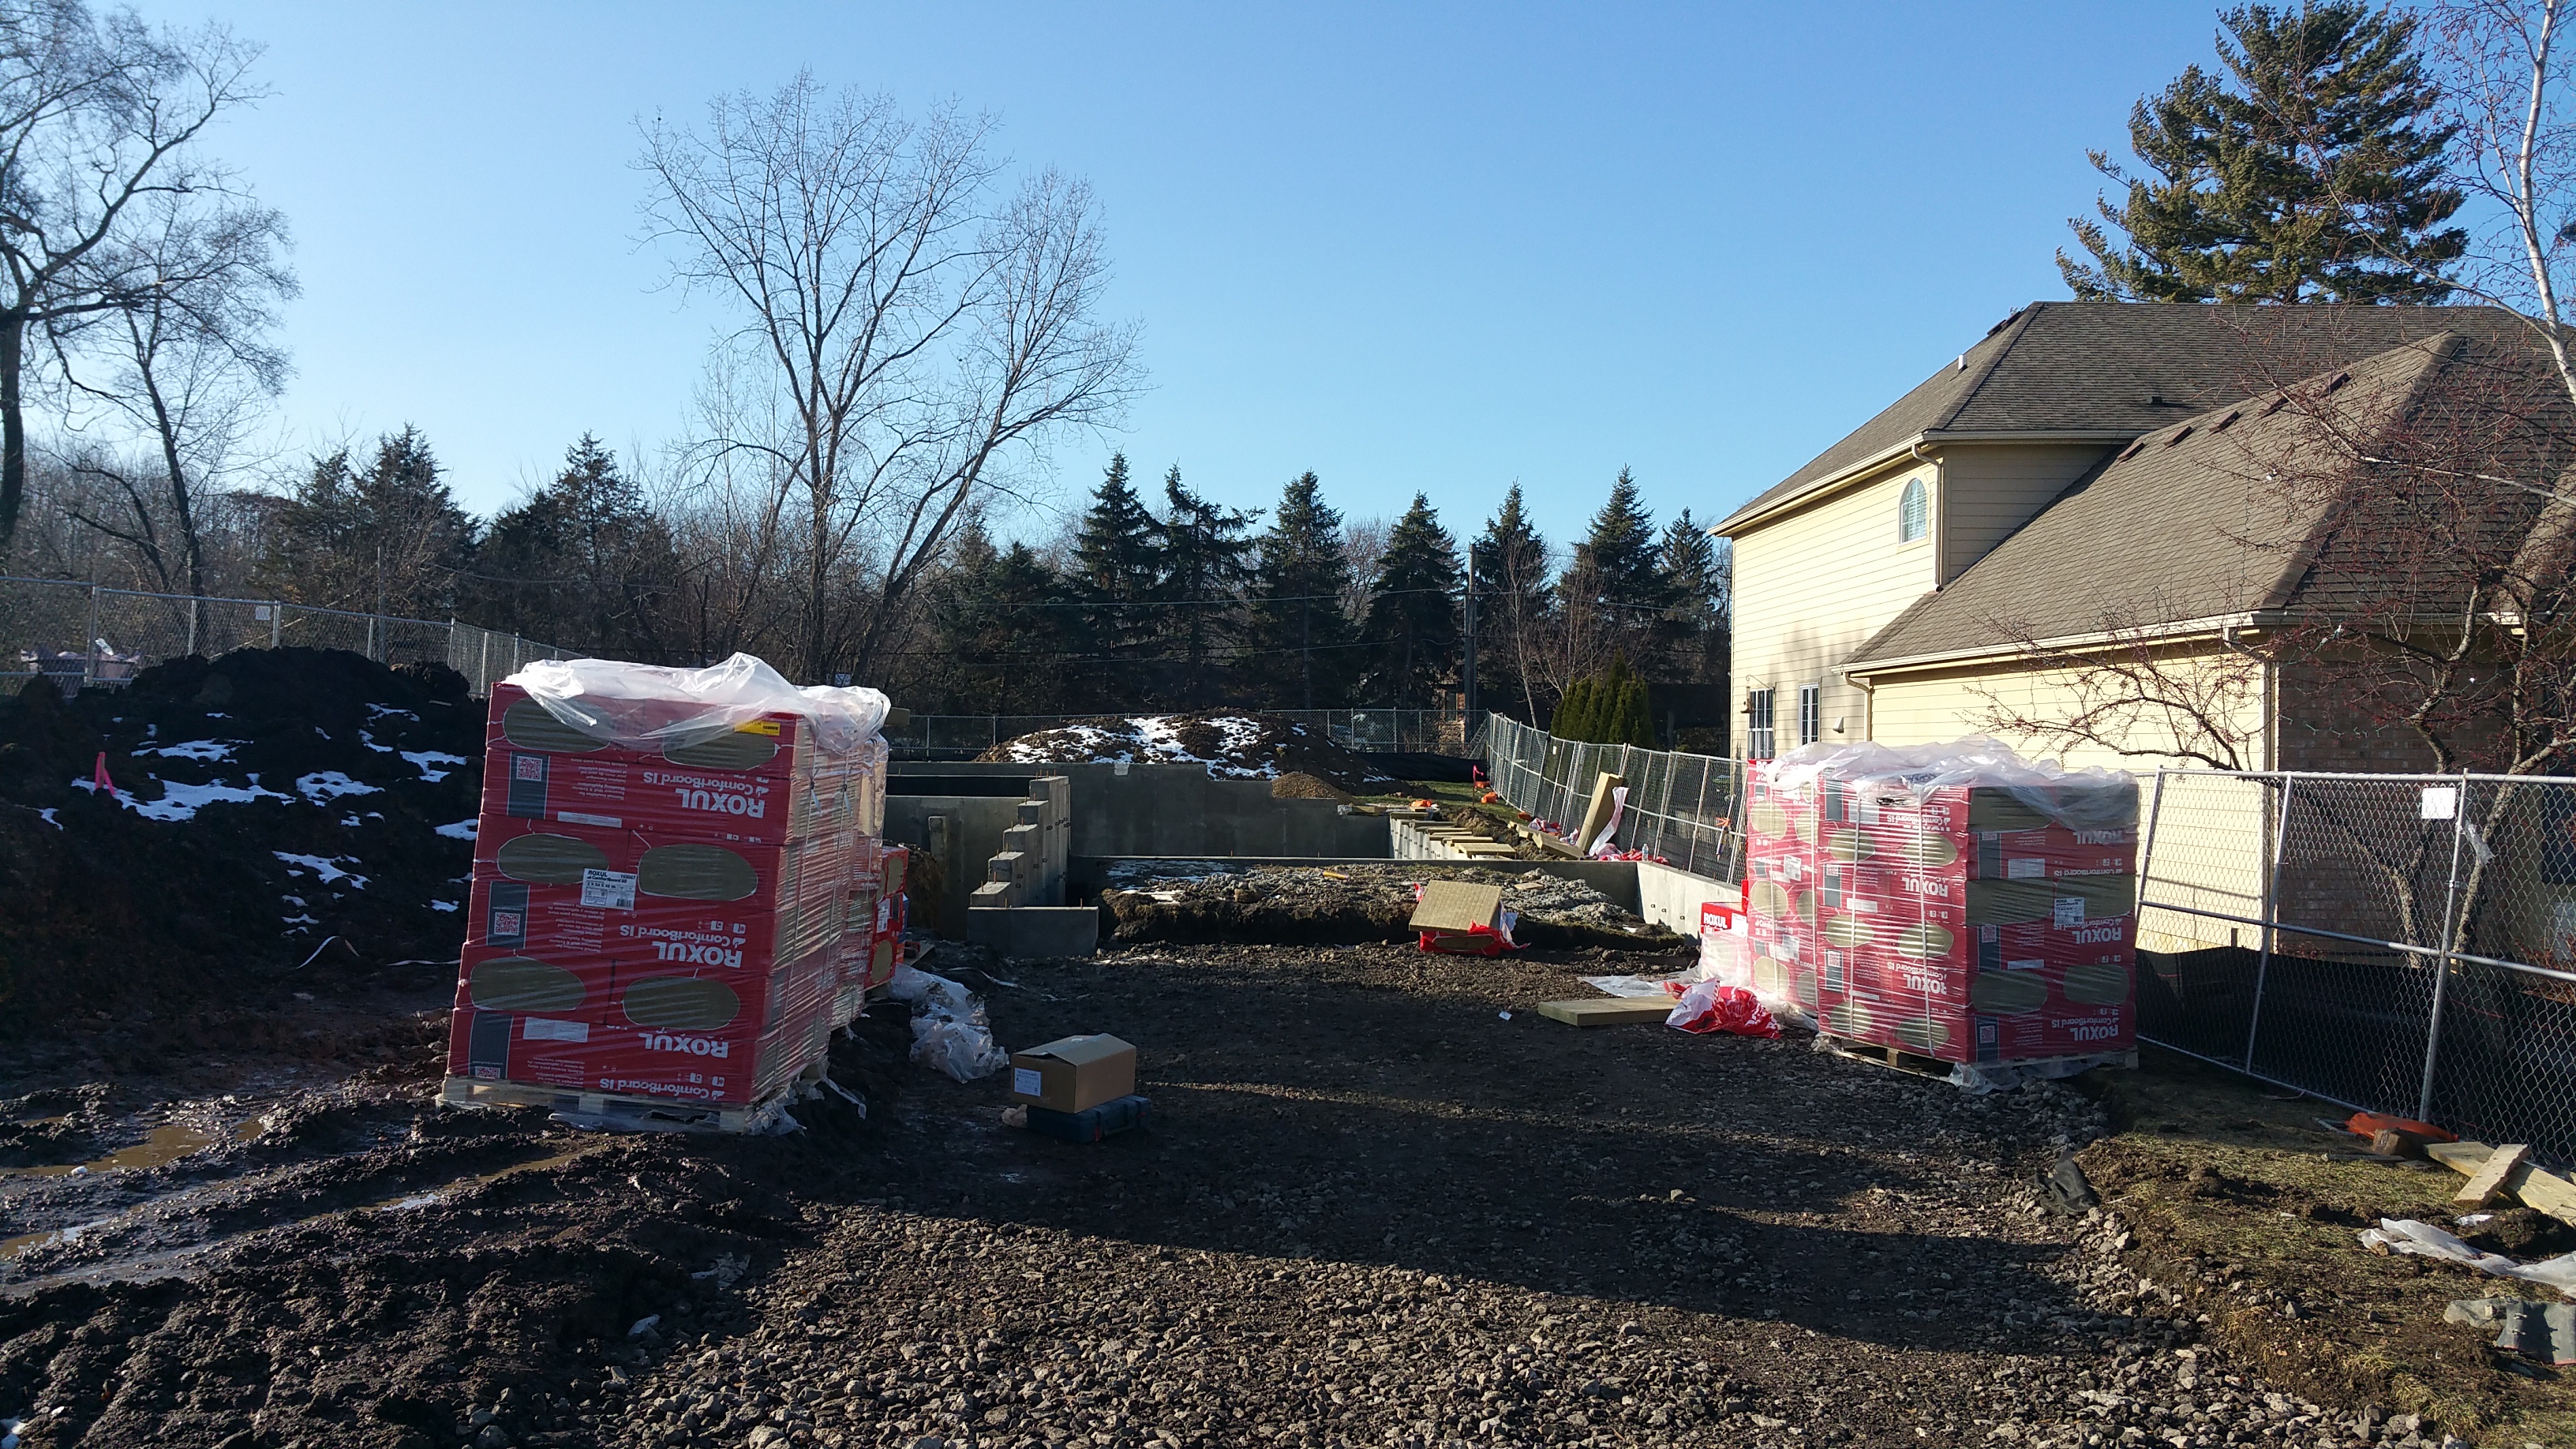
After the waterproofing was complete, we began installing the two layers of Roxul Comfortboard 80 (a dense, rigid form of insulation that can be used below grade, to the exterior side of wall sheathing, and even under a basement slab), which will give the basement foundation walls an R-20 of insulation value.
When questions came up about how to install Roxul, or which product to use where, their technical help via email was great — in our case, Fiona Schofield, who gave us a lot of useful information — including the document below, a study on the long-term condition of Roxul (aka stone, rock, or mineral wool) in a below grade application (i.e. up against an exterior foundation wall):
external-thermal-and-moisture-insulation-of-outer-basement-wall (pdf)
In addition, after finding the video below online, in which what looks to be a European version of Roxul is attached to a cinder block wall with an adhesive, or a thinset mortar,
I contacted Fiona and heard back that it was ok to use an adhesive for our first layer (PL Premium, or similar polyurethane adhesive caulk), so long as we used a mechanical fastener for the second layer. In effect, the first layer just needs to stay on long enough for us to get the second layer up and attached with a mechanical fastener. This really saved us some time since the guys didn’t have to drill two full sets of holes.
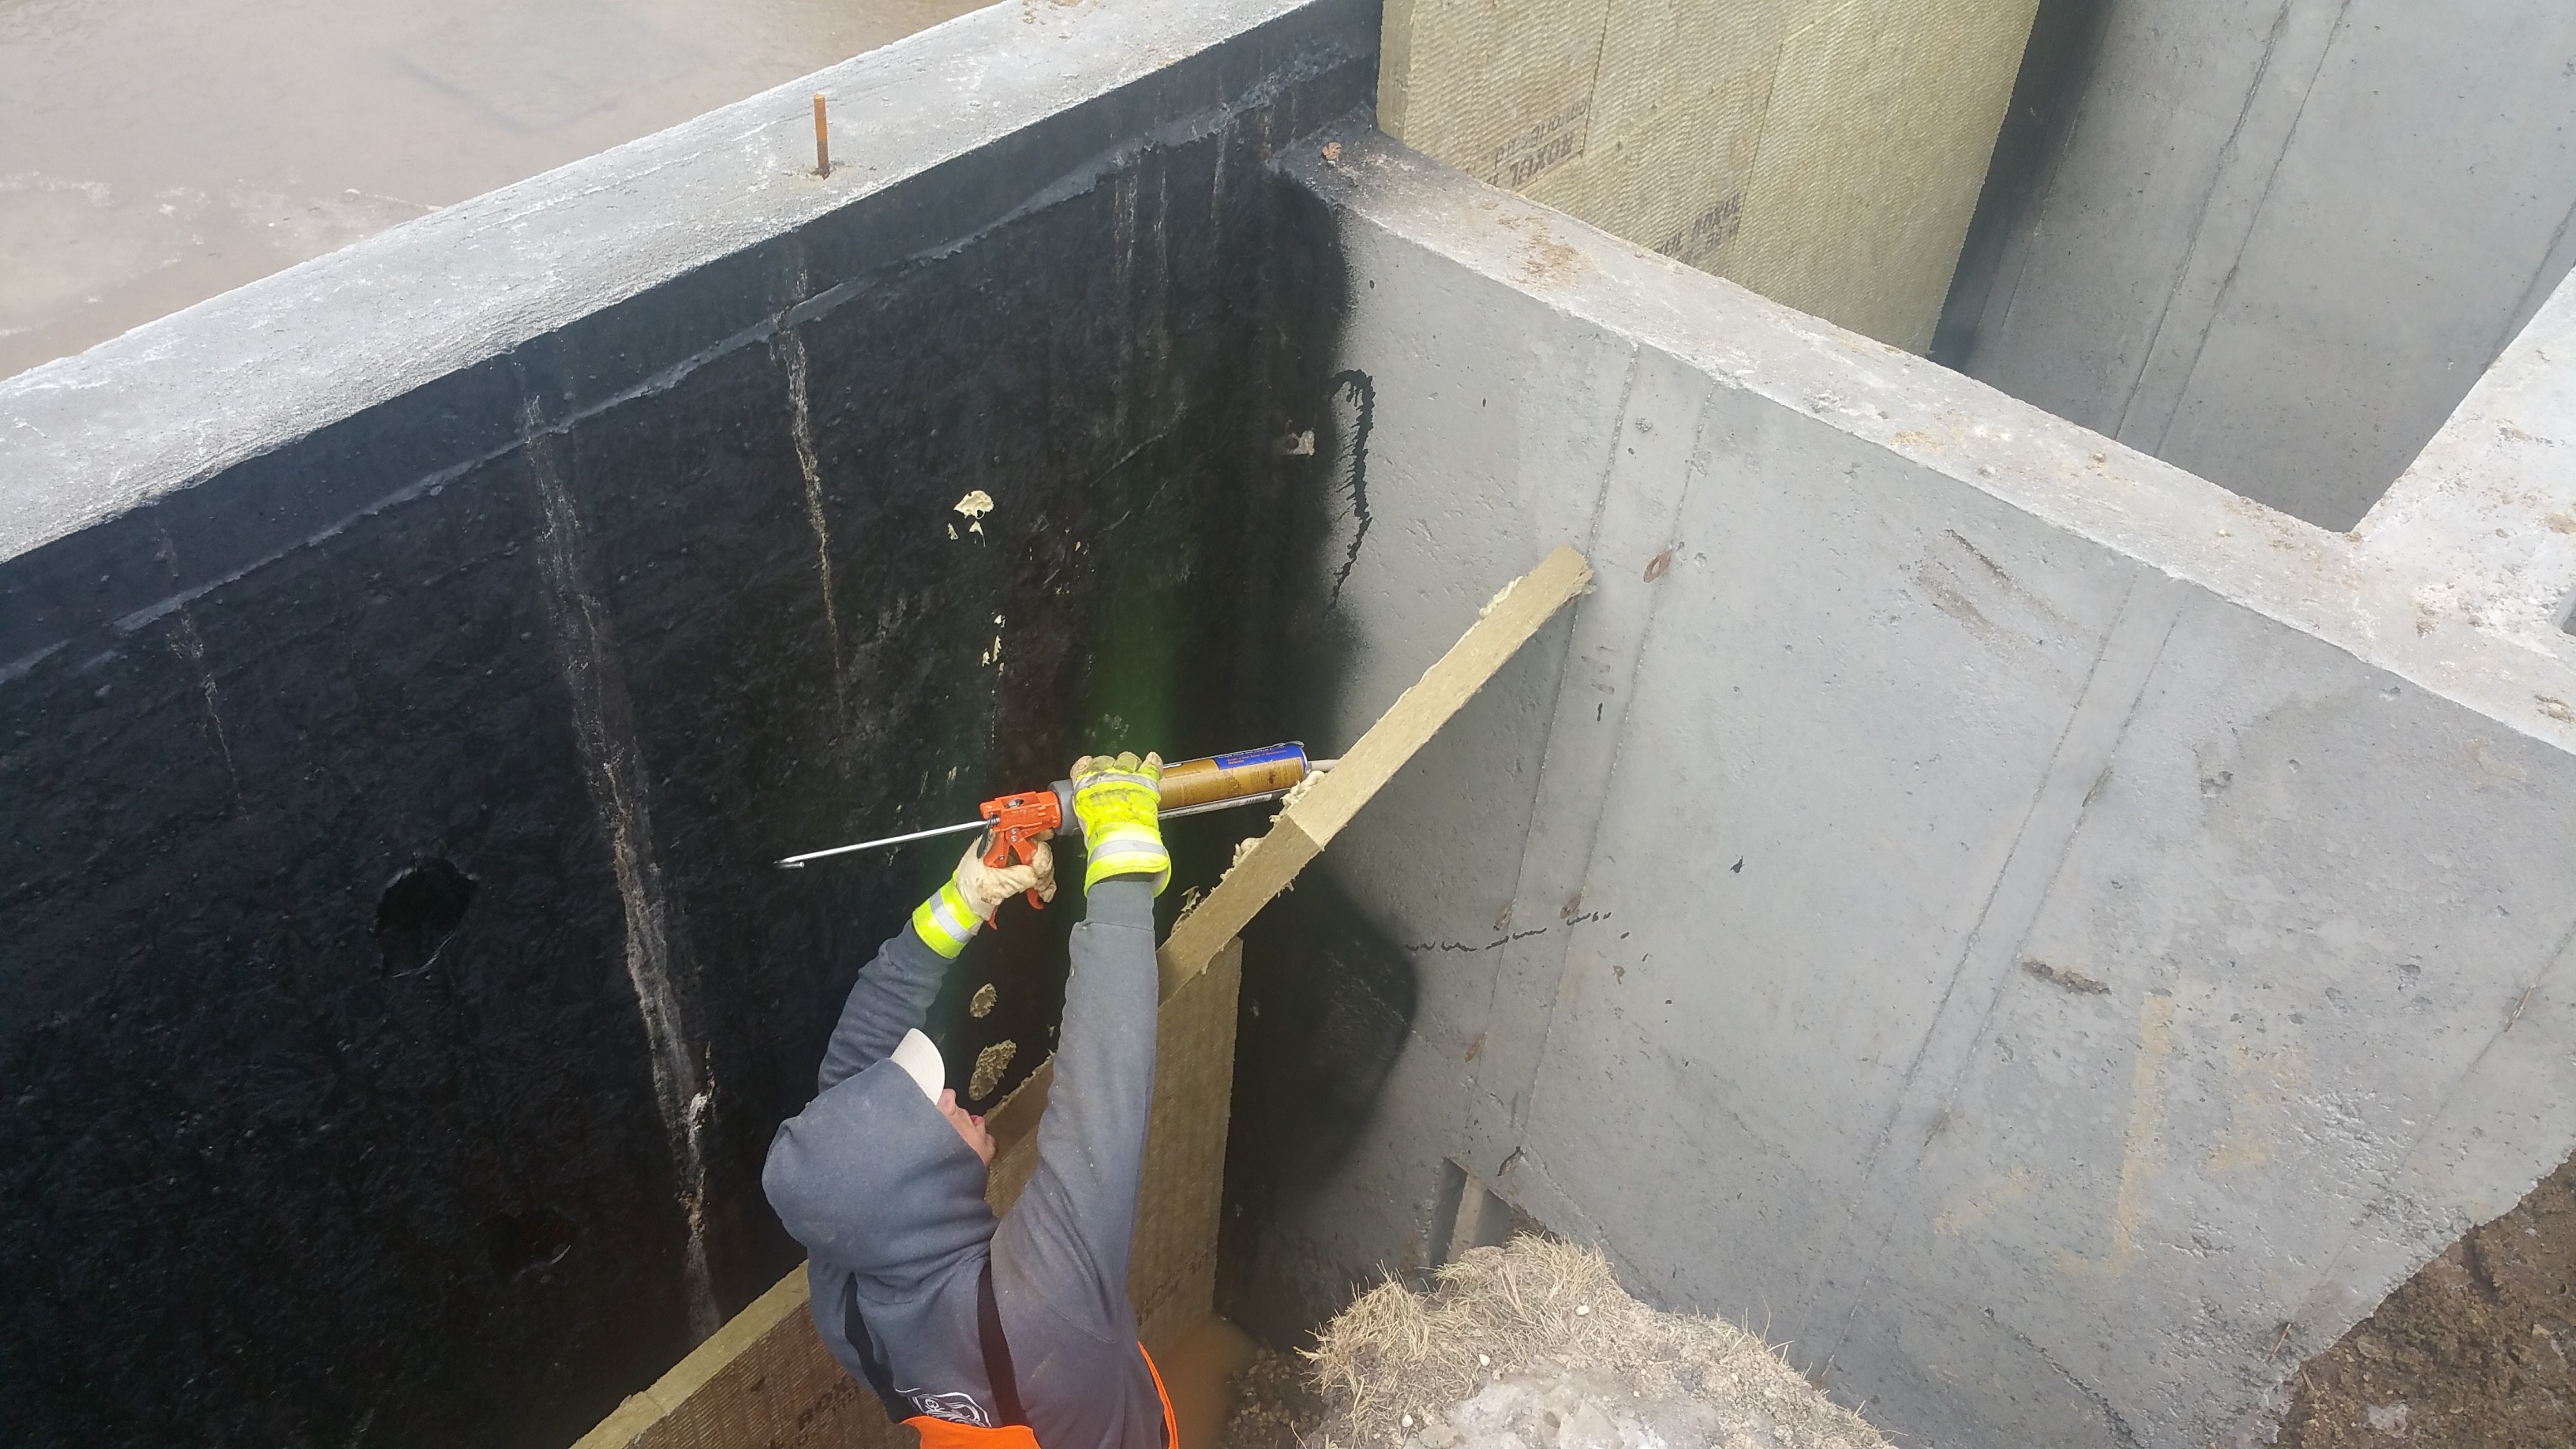
The guys also didn’t seem to mind cutting or otherwise working with the Roxul. We used serrated knives we purchased from Home Depot, made especially for cutting rock wool…
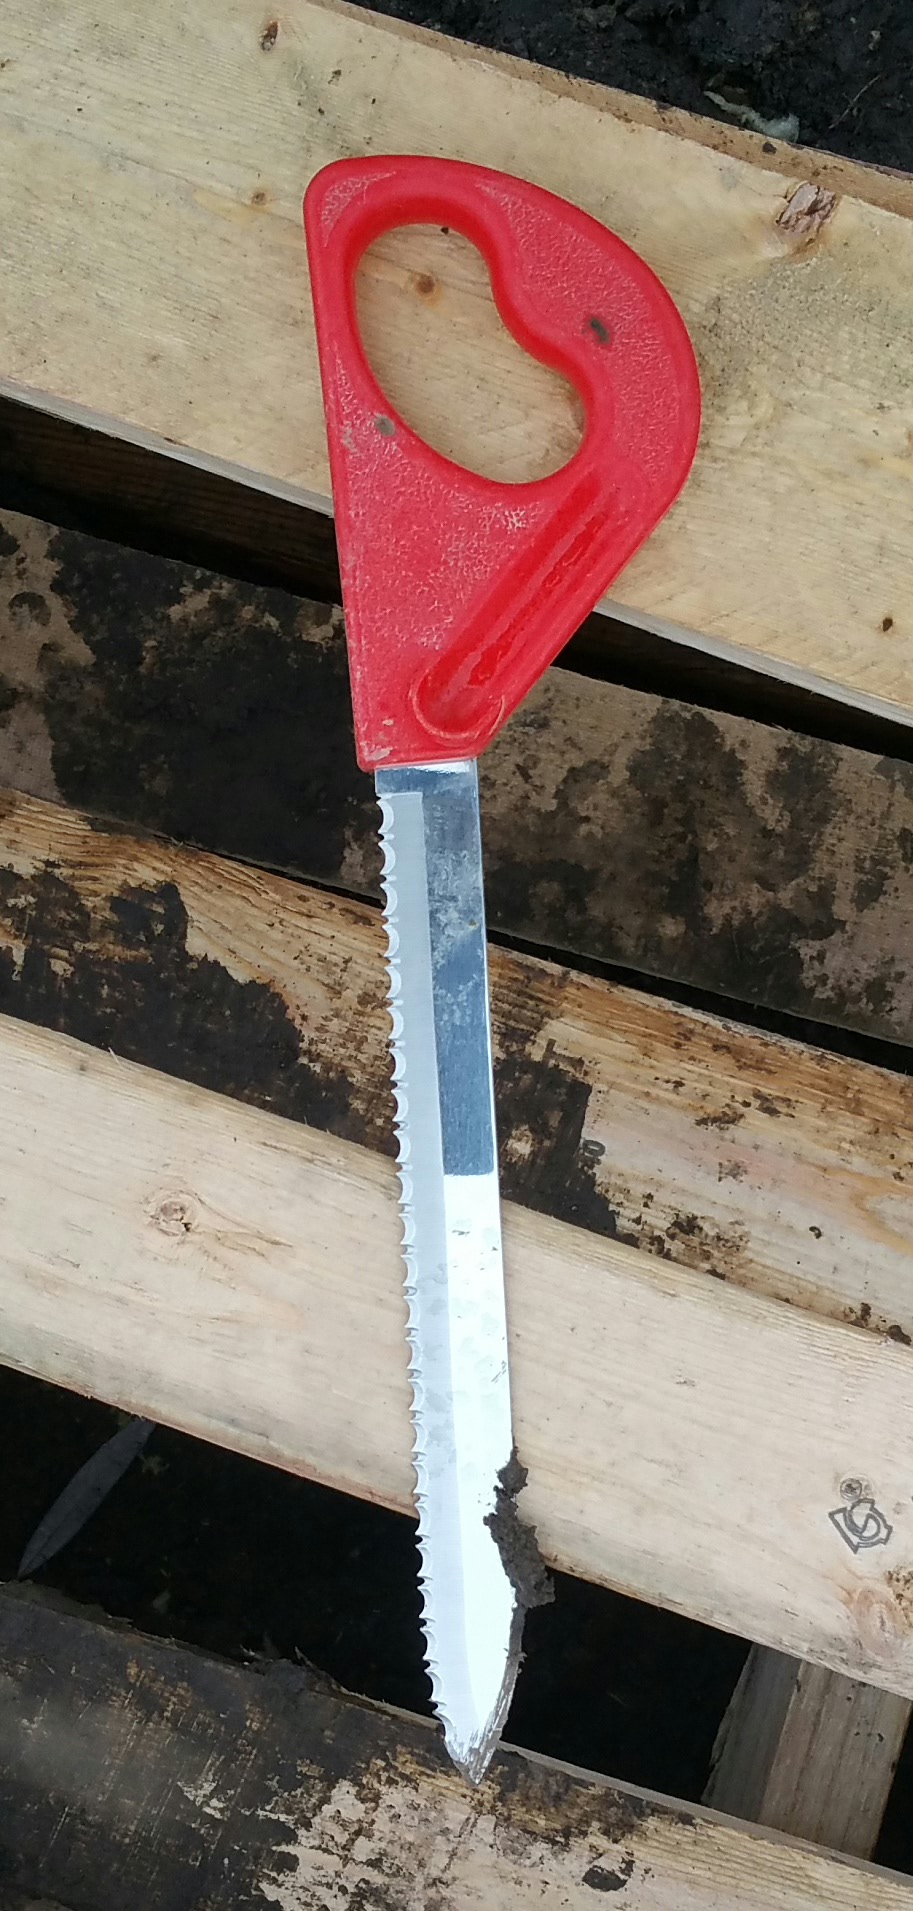
…which worked fine, but then after some experimenting, the guys also began using a small, handheld sawzall (reciprocating saw), and even a table saw, to get the exact-sized pieces we needed to ensure staggered seams. I had my doubts about the table saw, but Phil said the Roxul cut easily, and it really didn’t seem to kick up a lot of dust (although he did wear a dust mask for protection).
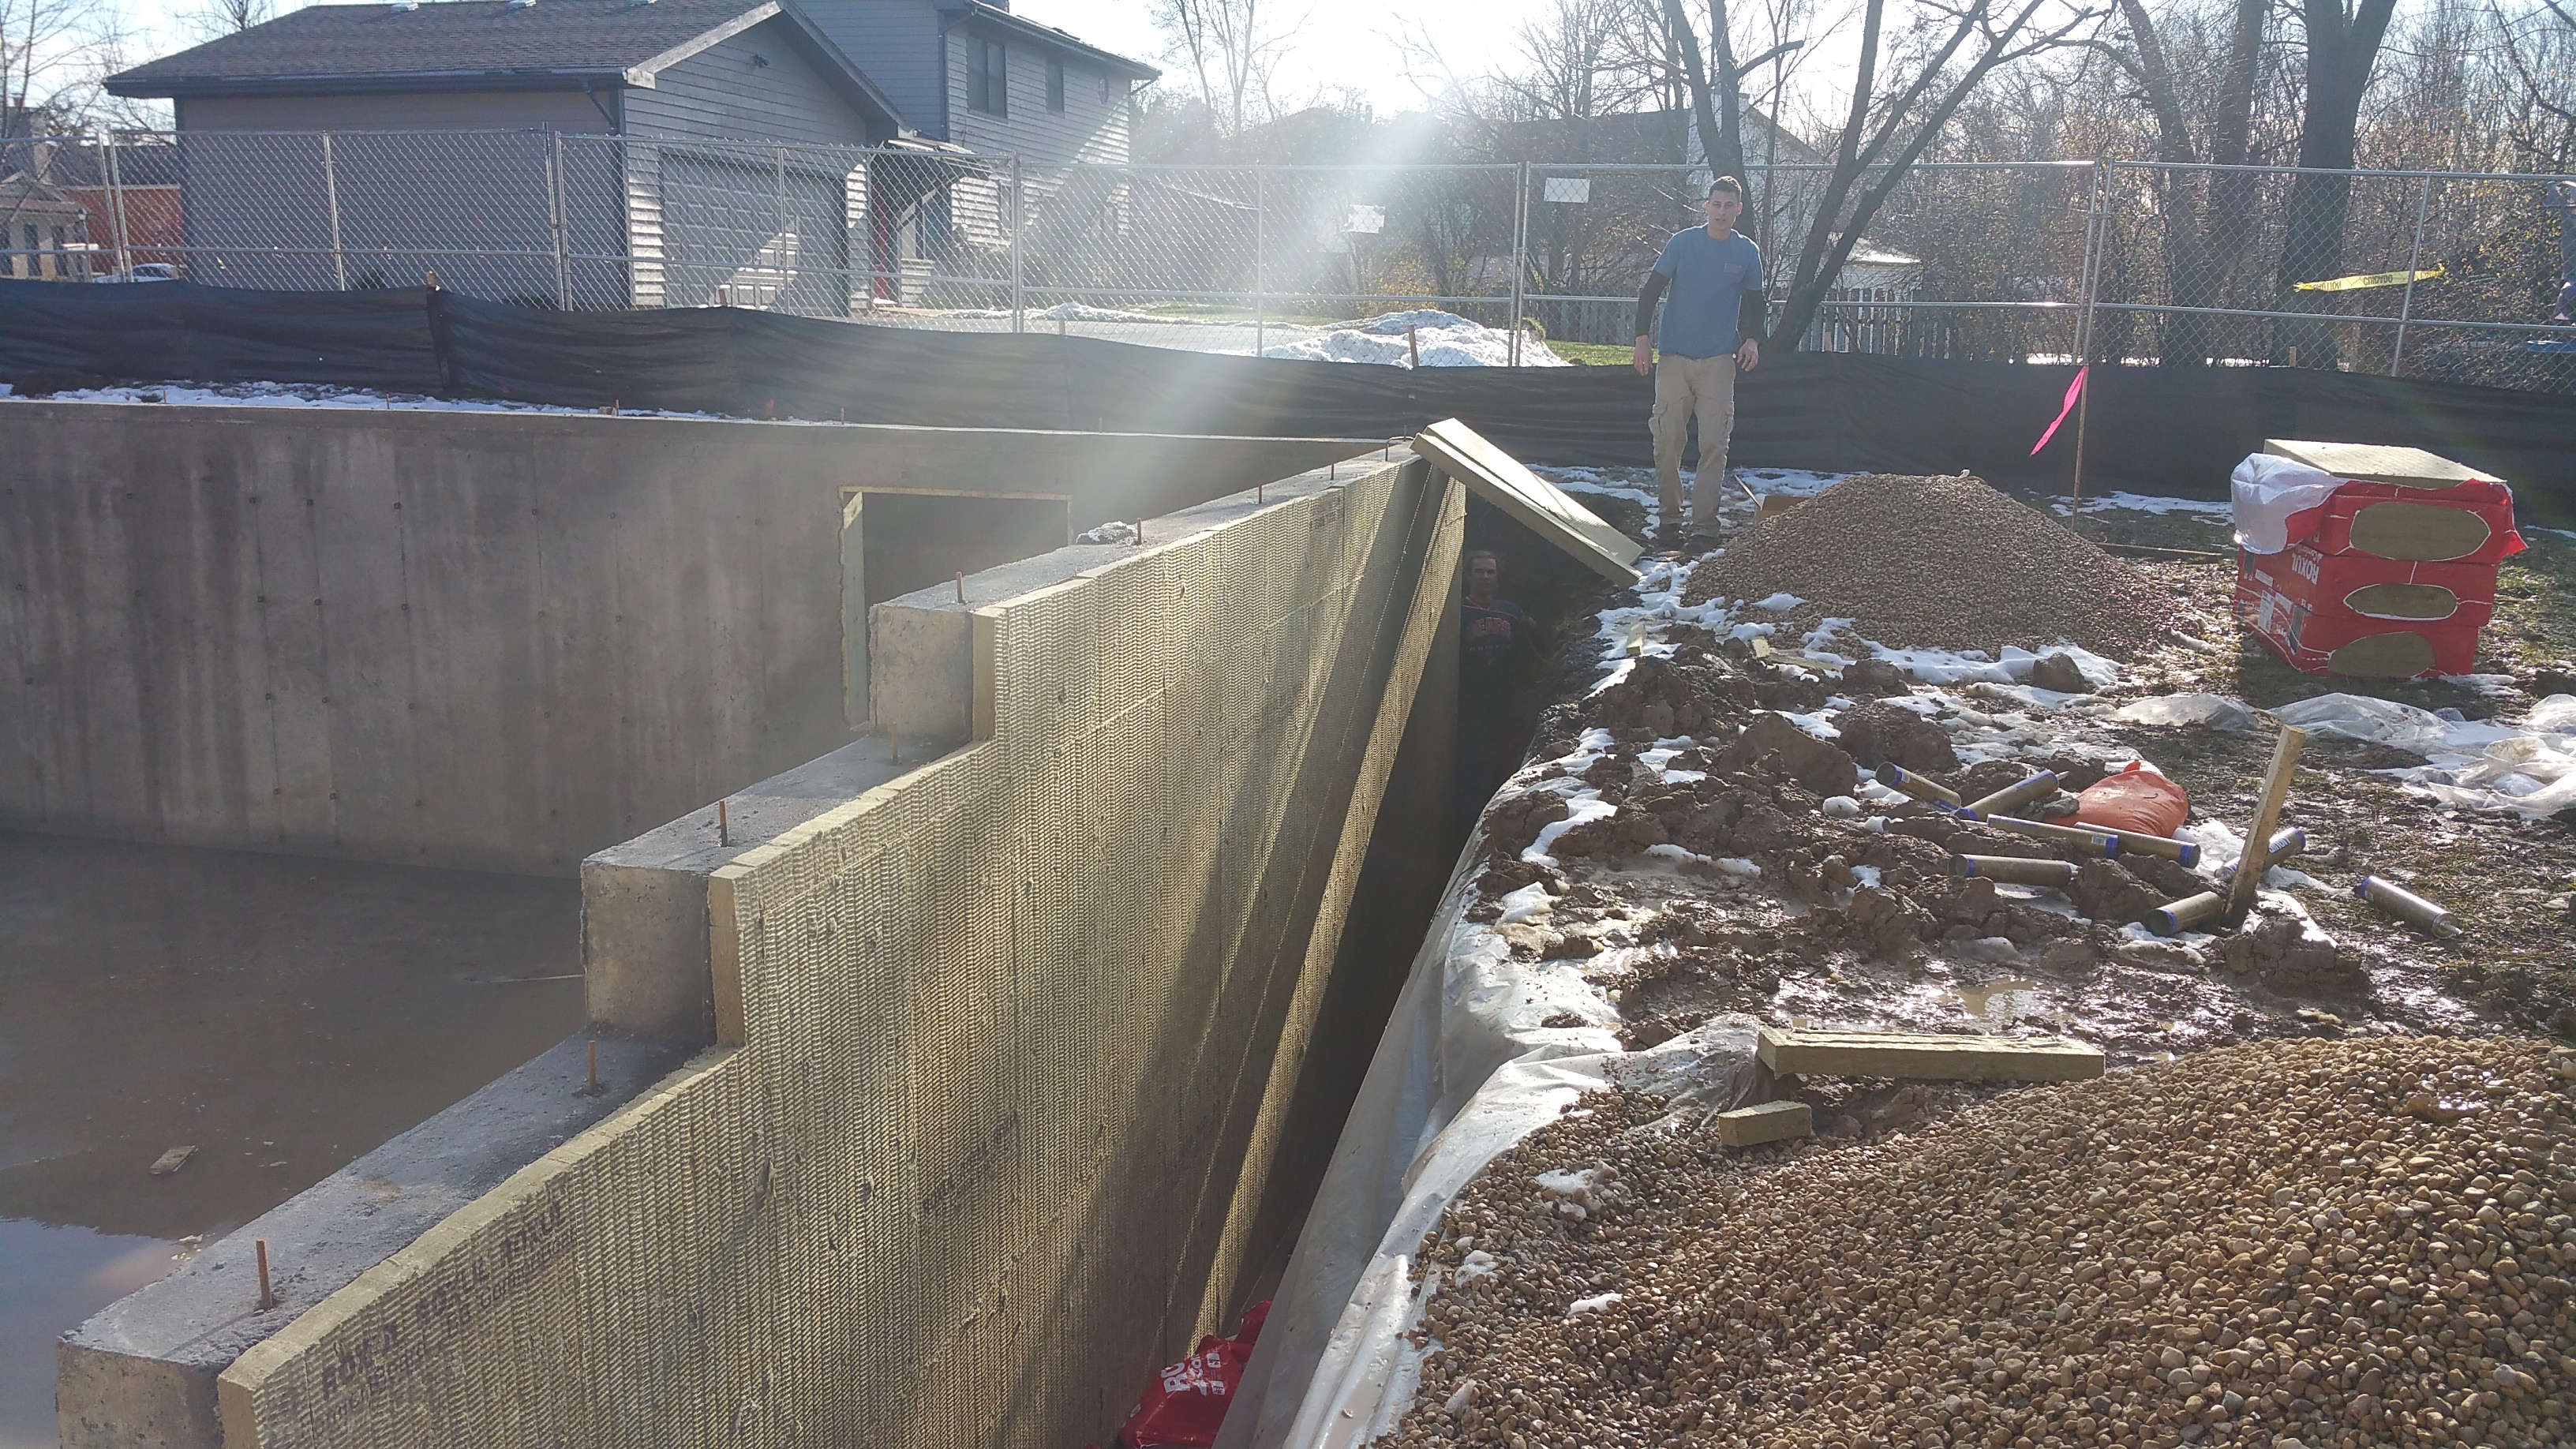
Once the first layer of Roxul (2″ thick) was in place, we could then install our second layer of Roxul (3″ thick) over the top of it.
After a lot of research, and even posting a question on Green Building Advisor…
Attaching Roxul Comfortboard 80 to Exterior of Foundation Walls
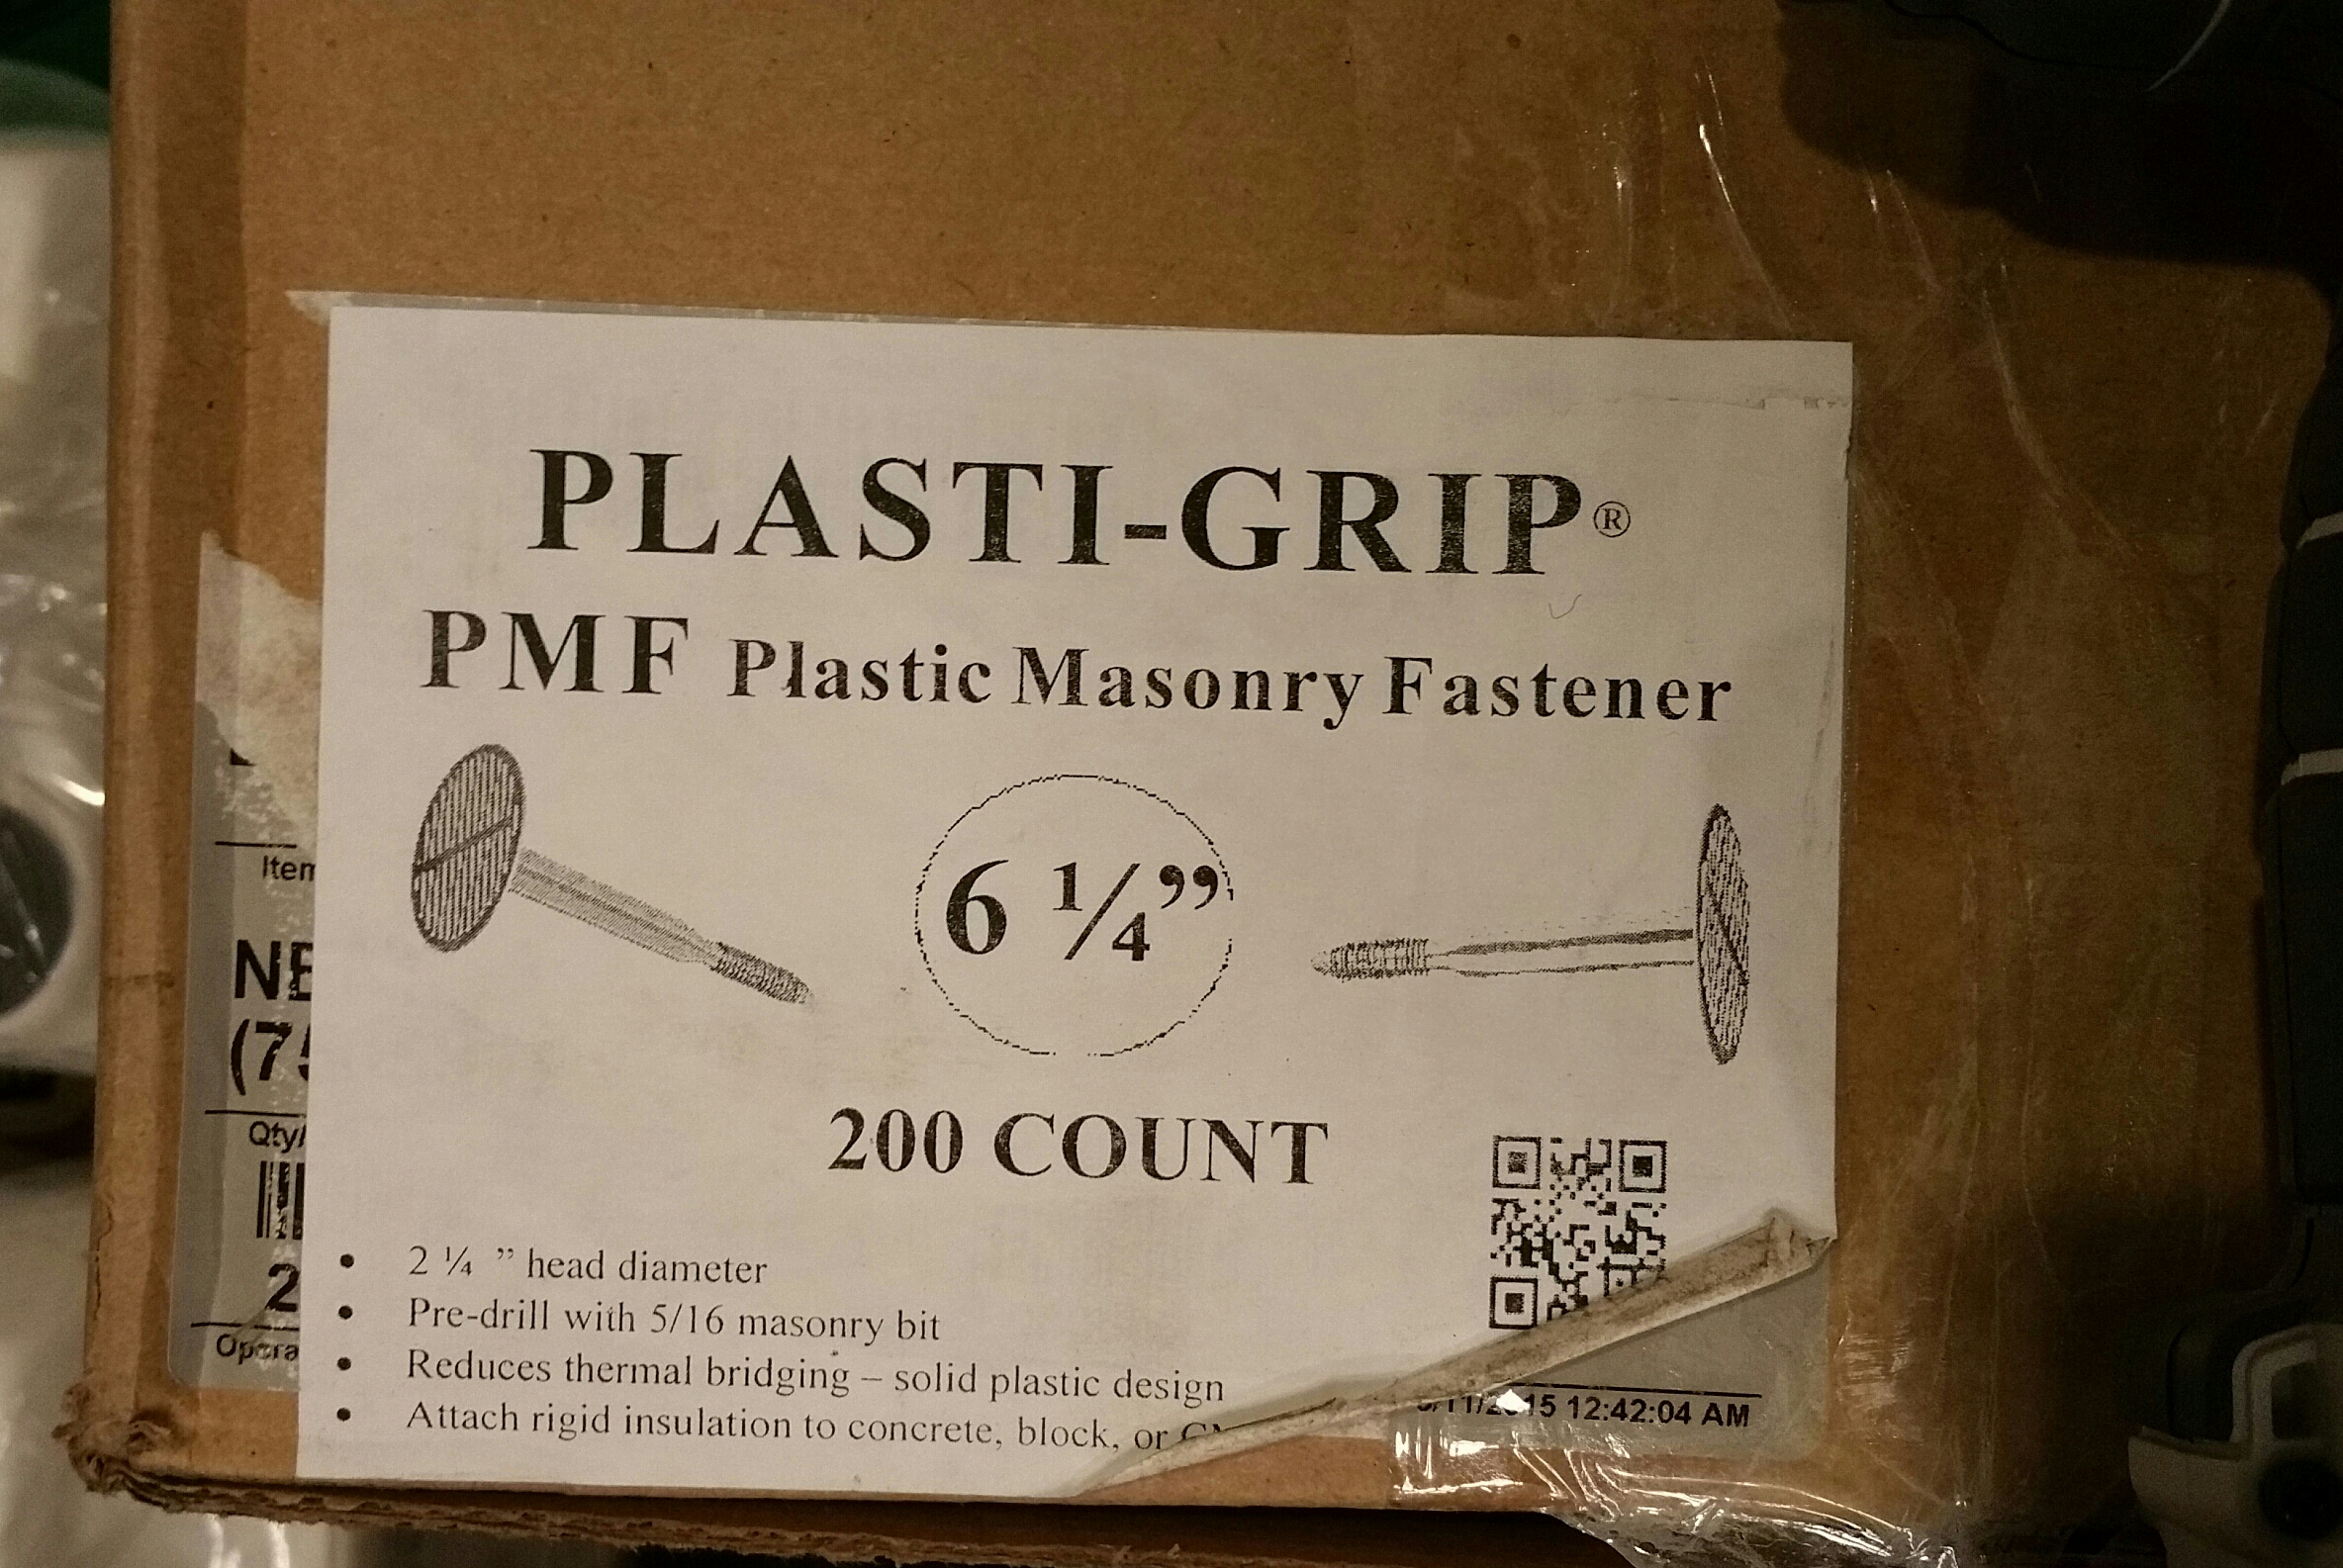
…we decided to go with the Rodenhouse fastener (Plasti-Grip PMF):
These really are as easy to install as depicted in the video. Using a hammer drill with a 5/16″ bit, the guys drilled a hole to the depth of the fastener, before tapping the PMF fastener home with a hammer. It’s a genuinely straightforward process. Sometimes a fastener wouldn’t sit perfectly, but as long as a majority of the fasteners on each board did, it didn’t seem to be a problem. Based on what I read online, they were much easier to work with than if we had to use Tapcon or similar concrete screws.
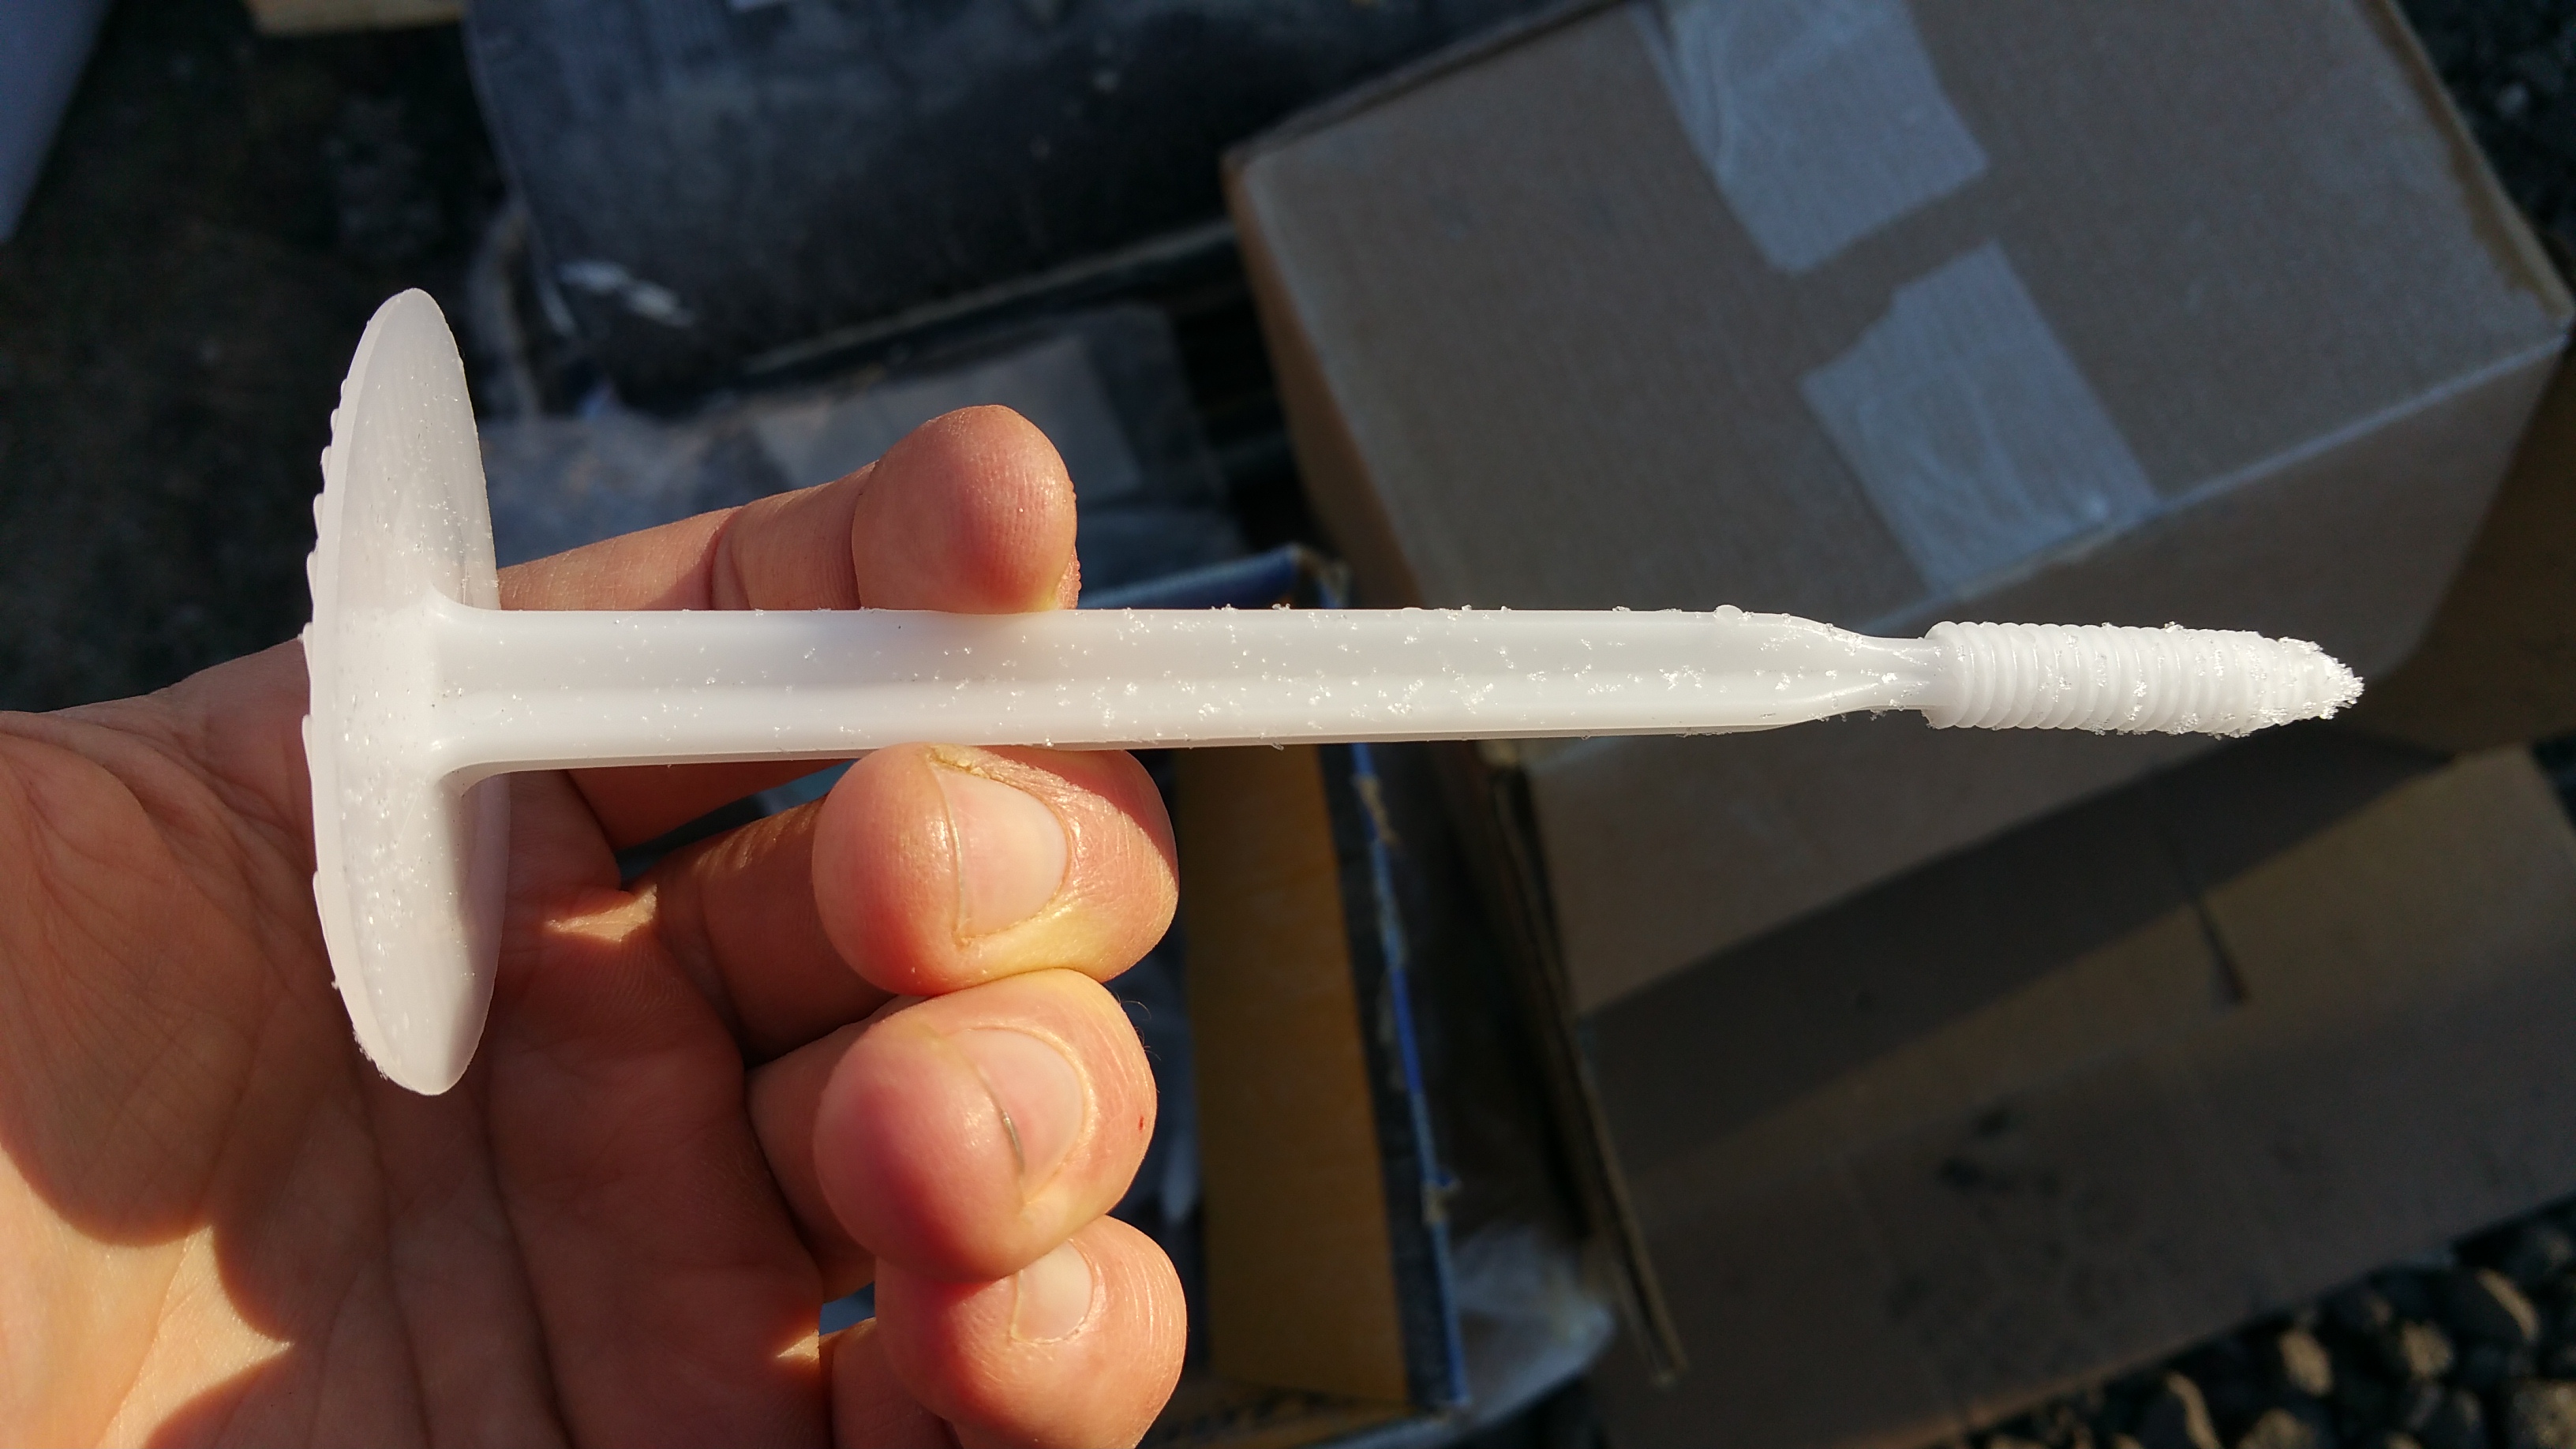
They weren’t cheap, but they were well worth the cost in materials for the savings in labor (and frustration). And Mitch Mahler, from Rodenhouse, was easy to work with via email in terms of ordering or getting answers to technical questions.
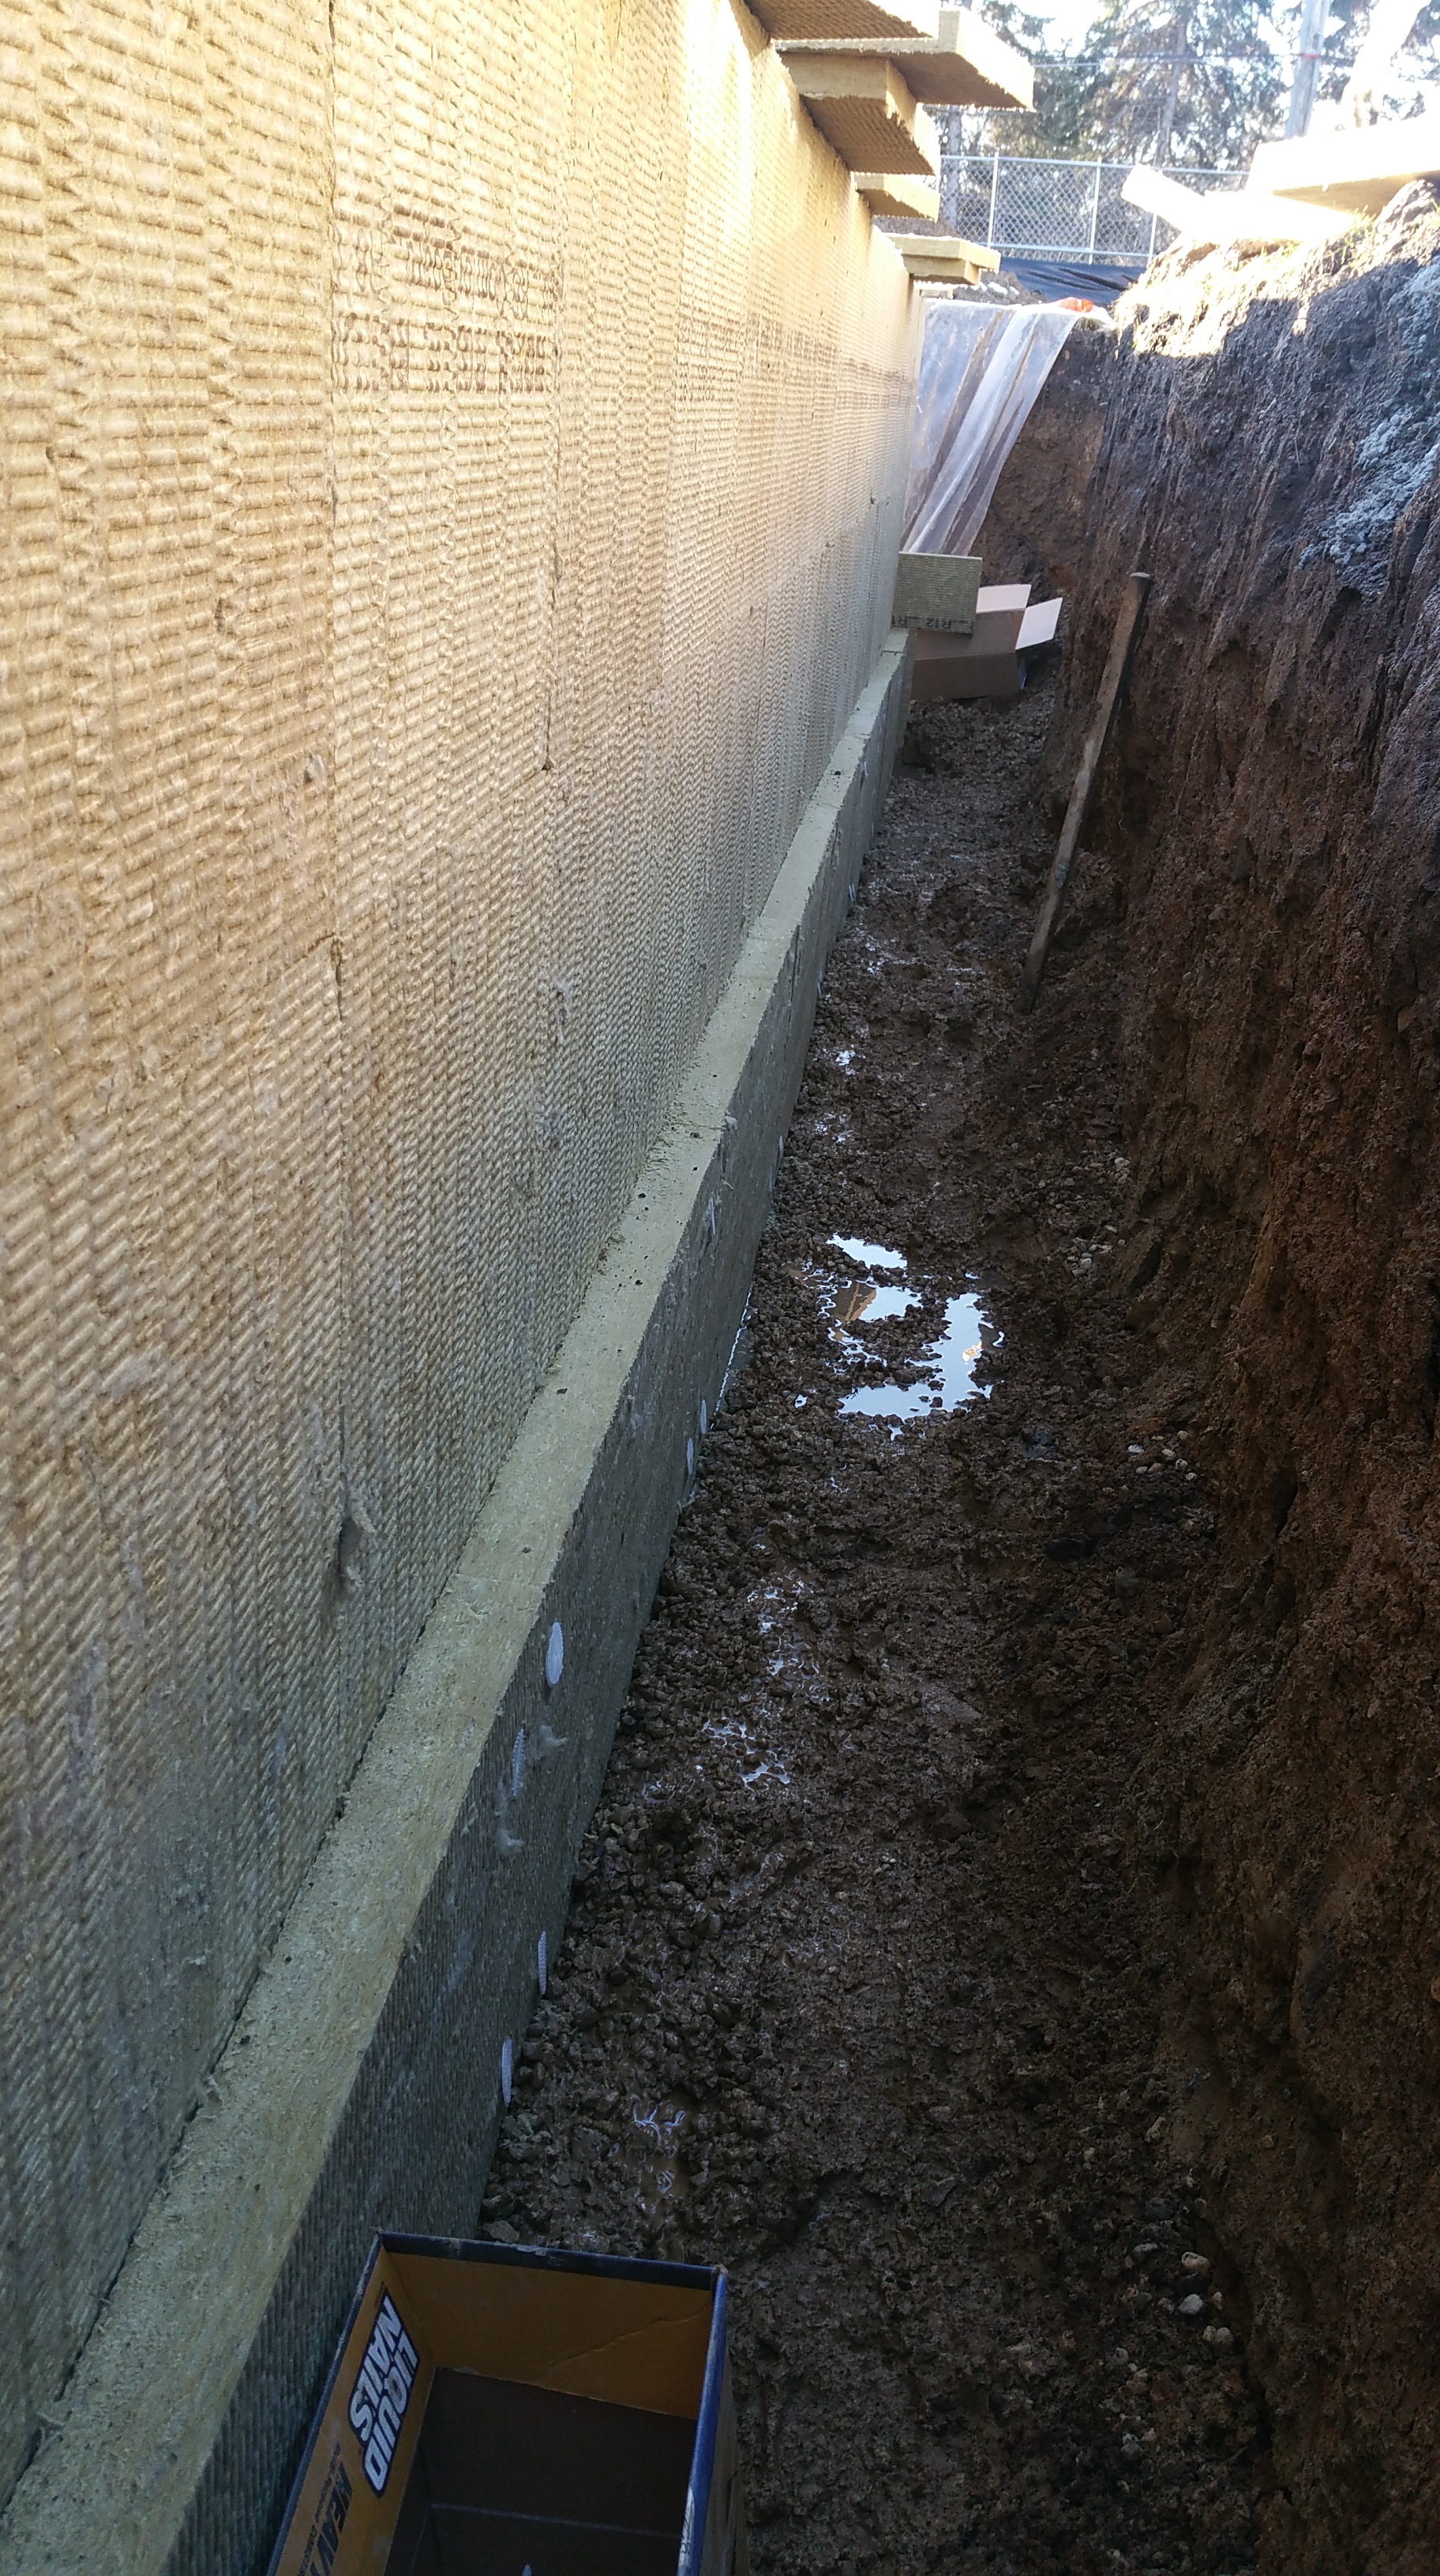
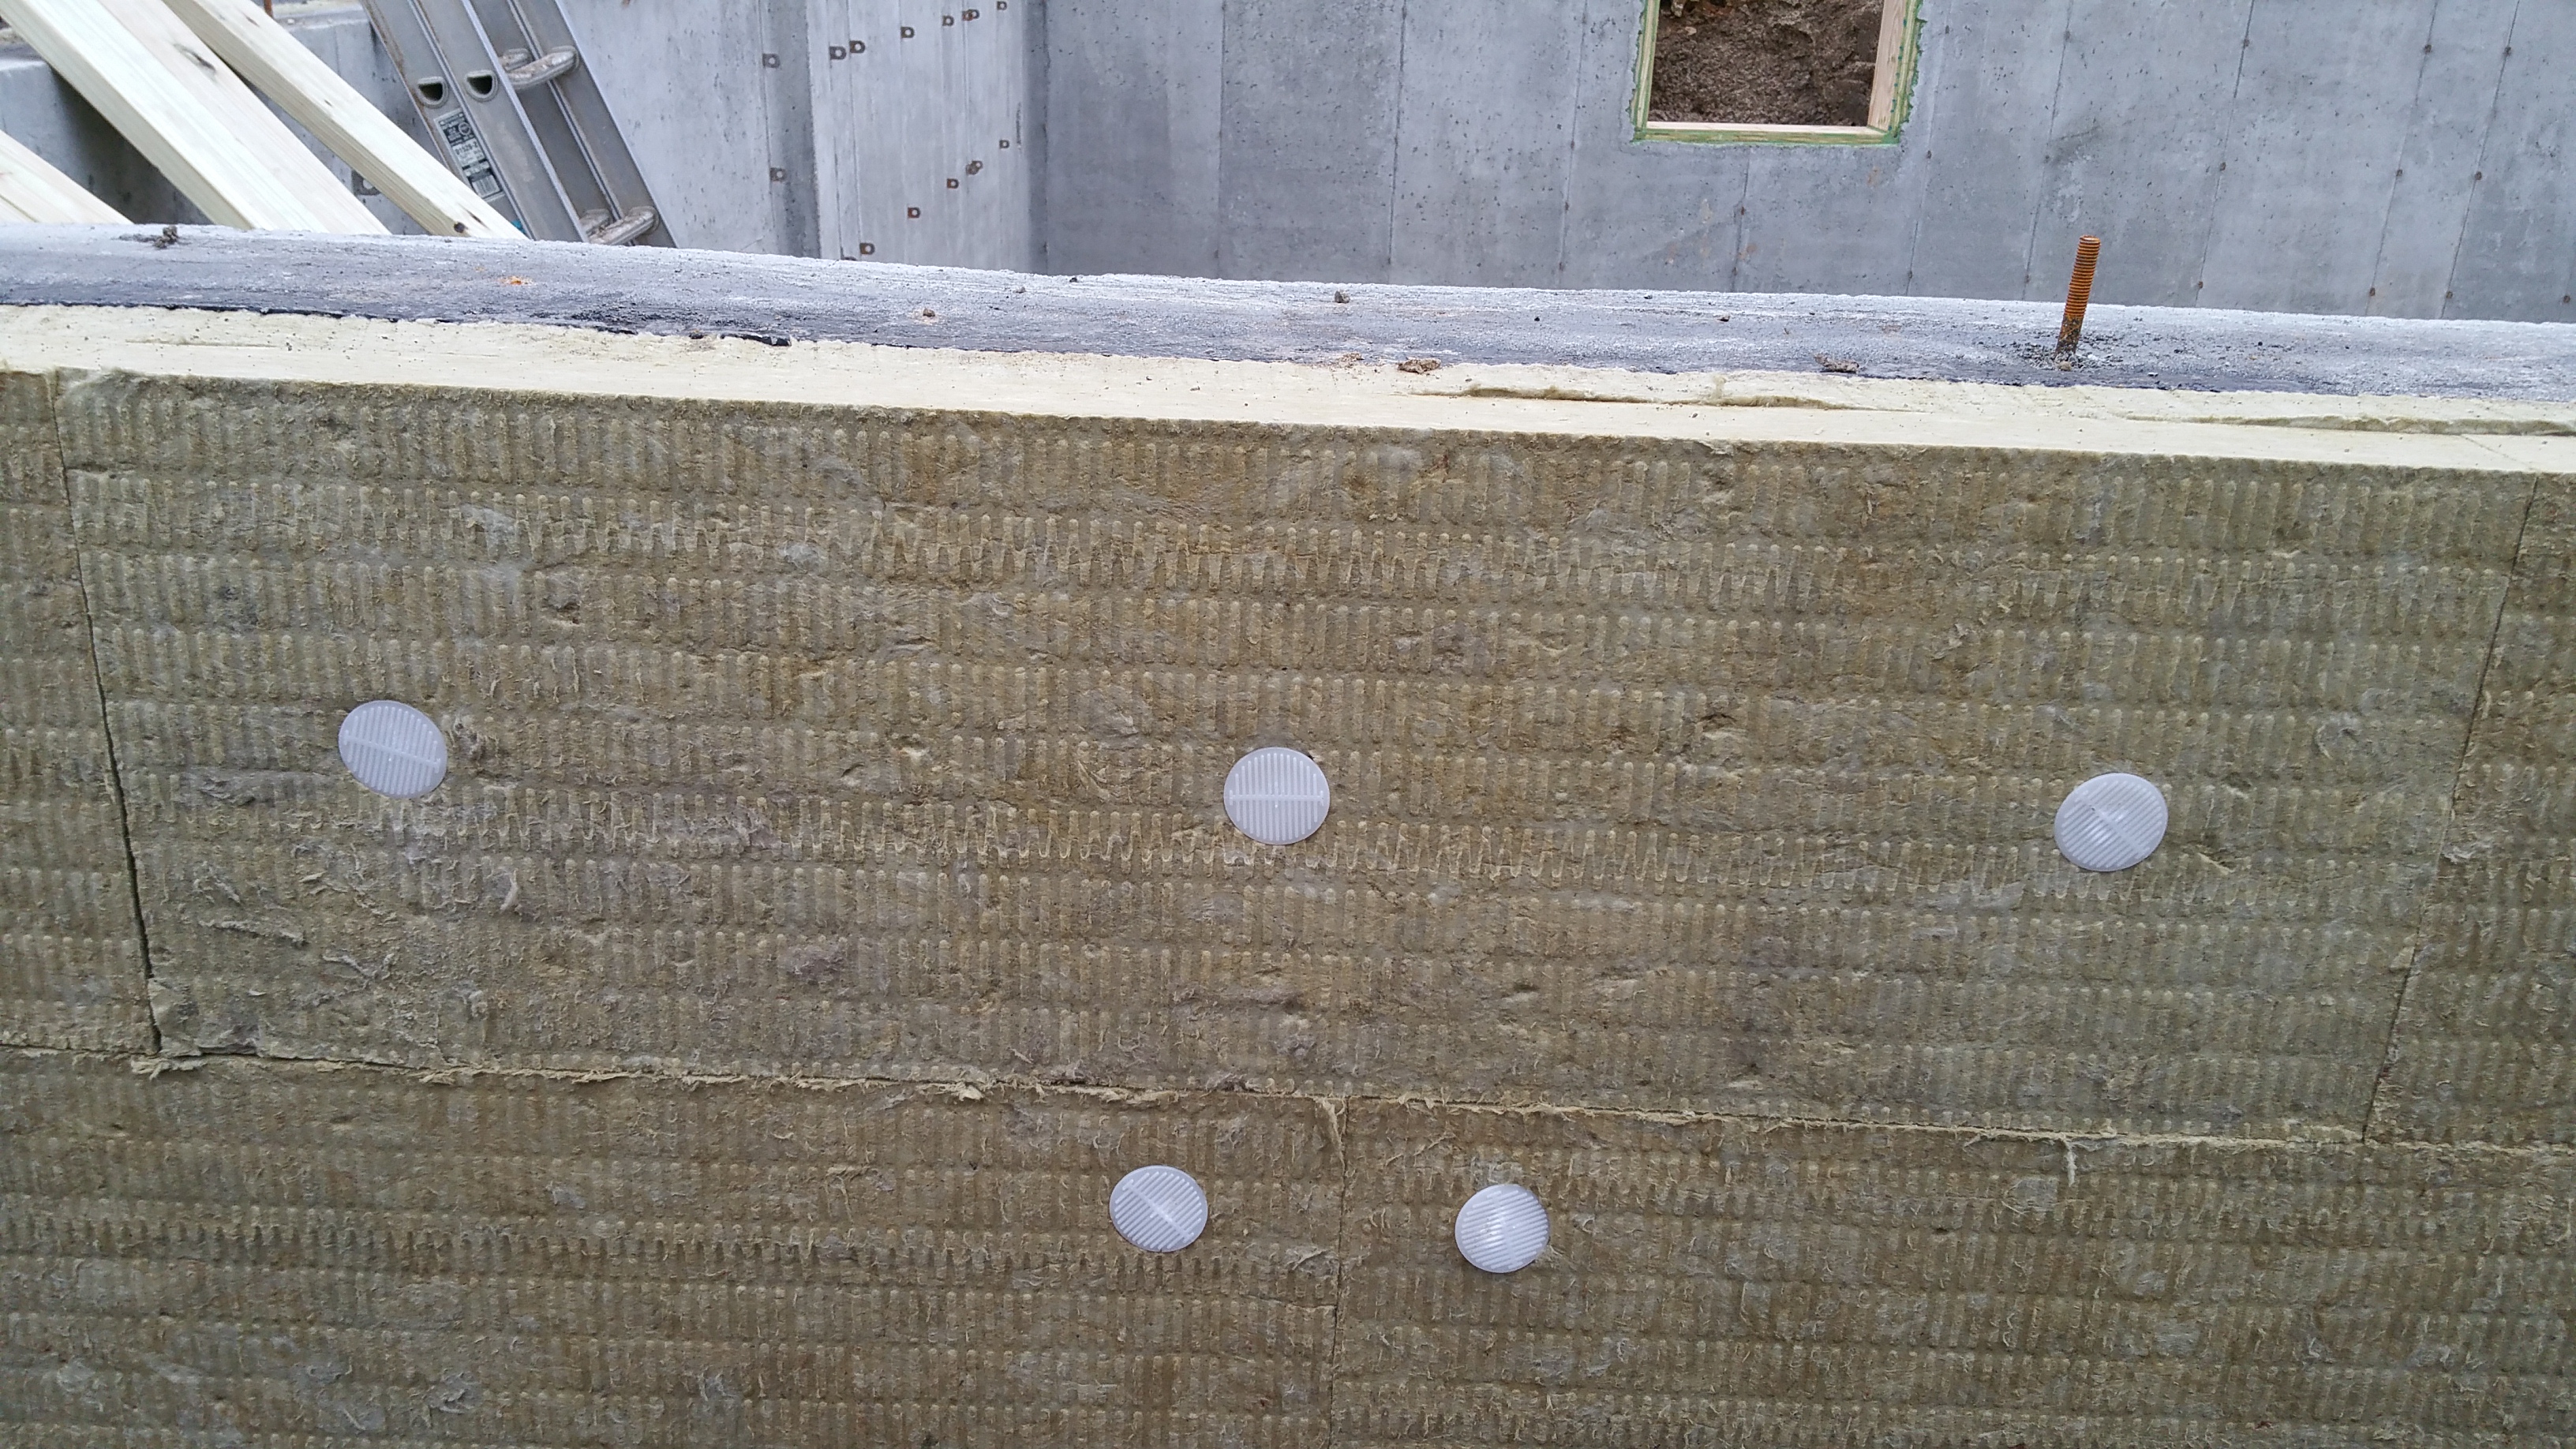
Normally, Roxul recommends 5 fasteners per piece (4 in the corners, 1 in the middle), but we found that 4 on a normal piece, and 3 for a long, narrow piece worked fine — at least for the foundation, where the backfill will help to keep the Roxul in place over the long haul.
Thermal Bridging in the Foundation
Following Passive House science principles, we tried to remove as many points of thermal bridging in the structure as we could. One area where this was addressed in the construction drawings was a 7″ thermal break between the basement foundation and the attached garage foundation. In other words, there would be no physical connection between the garage and house foundations at all. The only connection would occur above, at the level of framing, where they would be tied structurally together. The idea was that we could place our two layers of Roxul (2″ + 3″) in that gap, thus maintaining our 5″ of Roxul on the exterior of the foundation, uninterrupted (the key point here) around the perimeter of the basement foundation.
On the day the footings were installed, however, our concrete subcontractor expressed serious reservations about the long-term structural stability of the framed house and garage above this gap — in effect, he was worried that over time the two foundations might settle and move apart, wreaking havoc with the framed structures above.
So I was back to post another question on Green Building Advisor (a fantastic resource for any green build or self-build) on the topic:
How important is a thermal break between a house foundation and an attached garage foundation?
Here are some photos showing these connections:

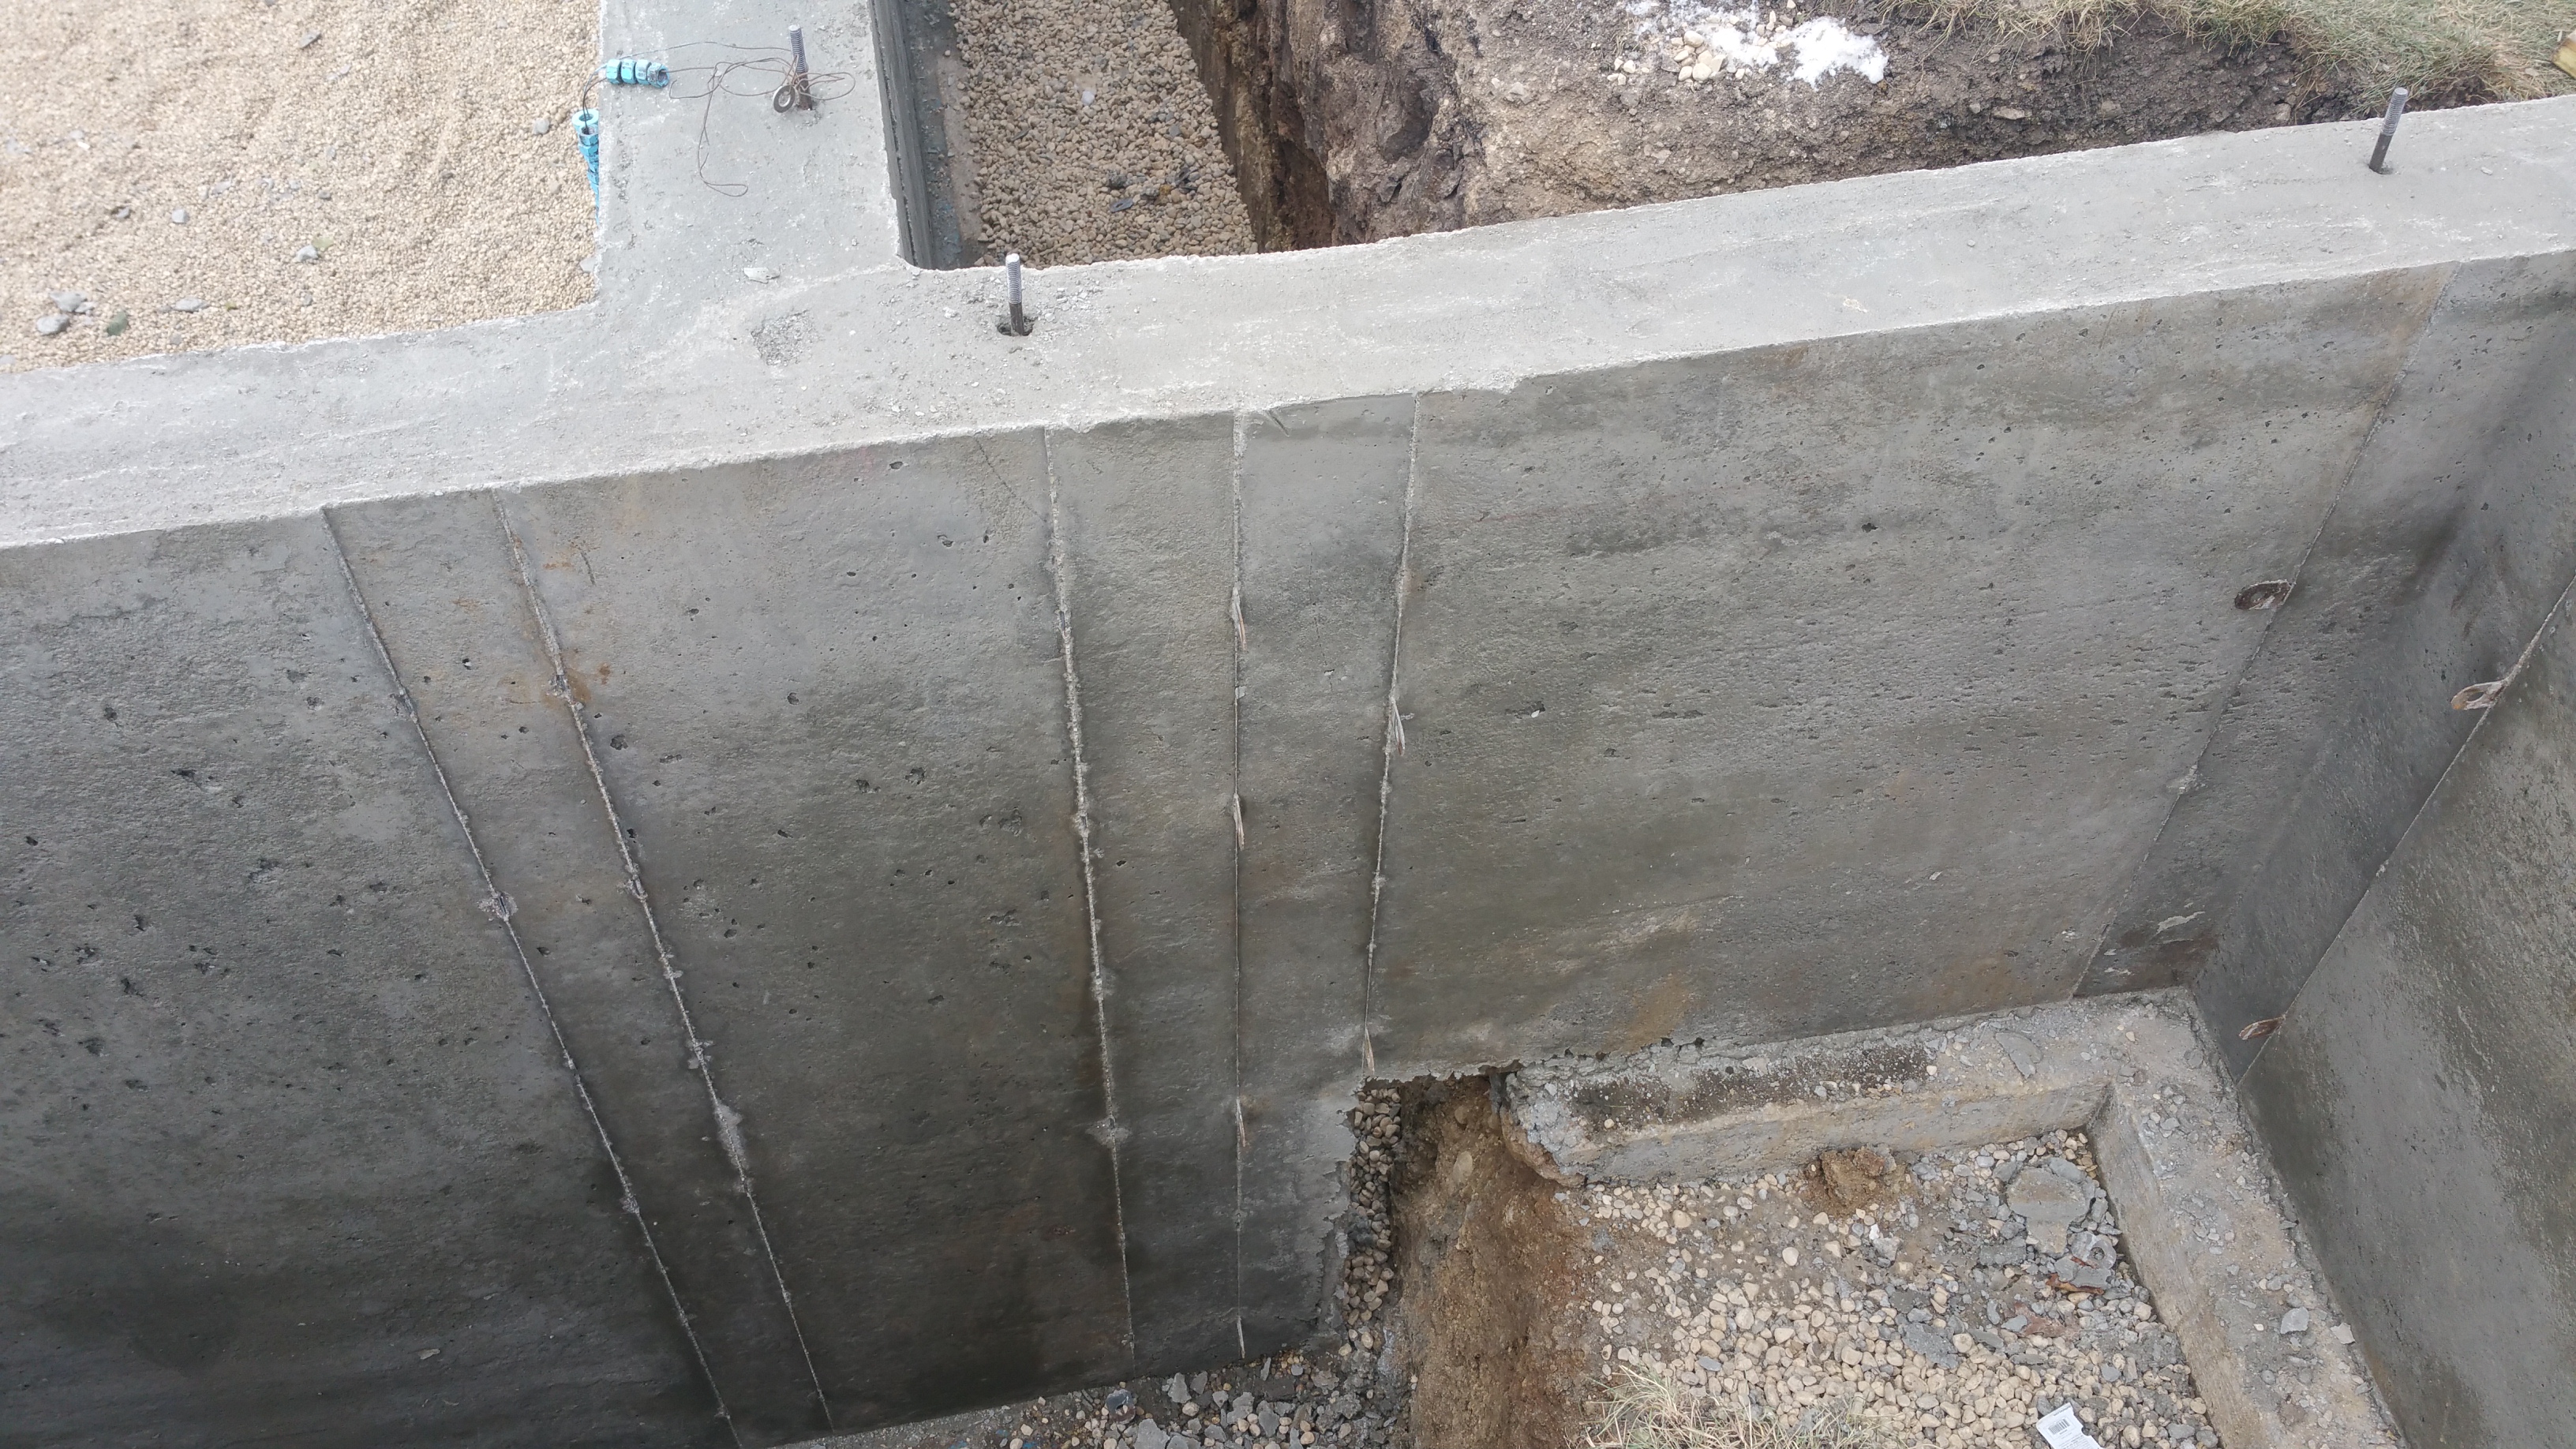
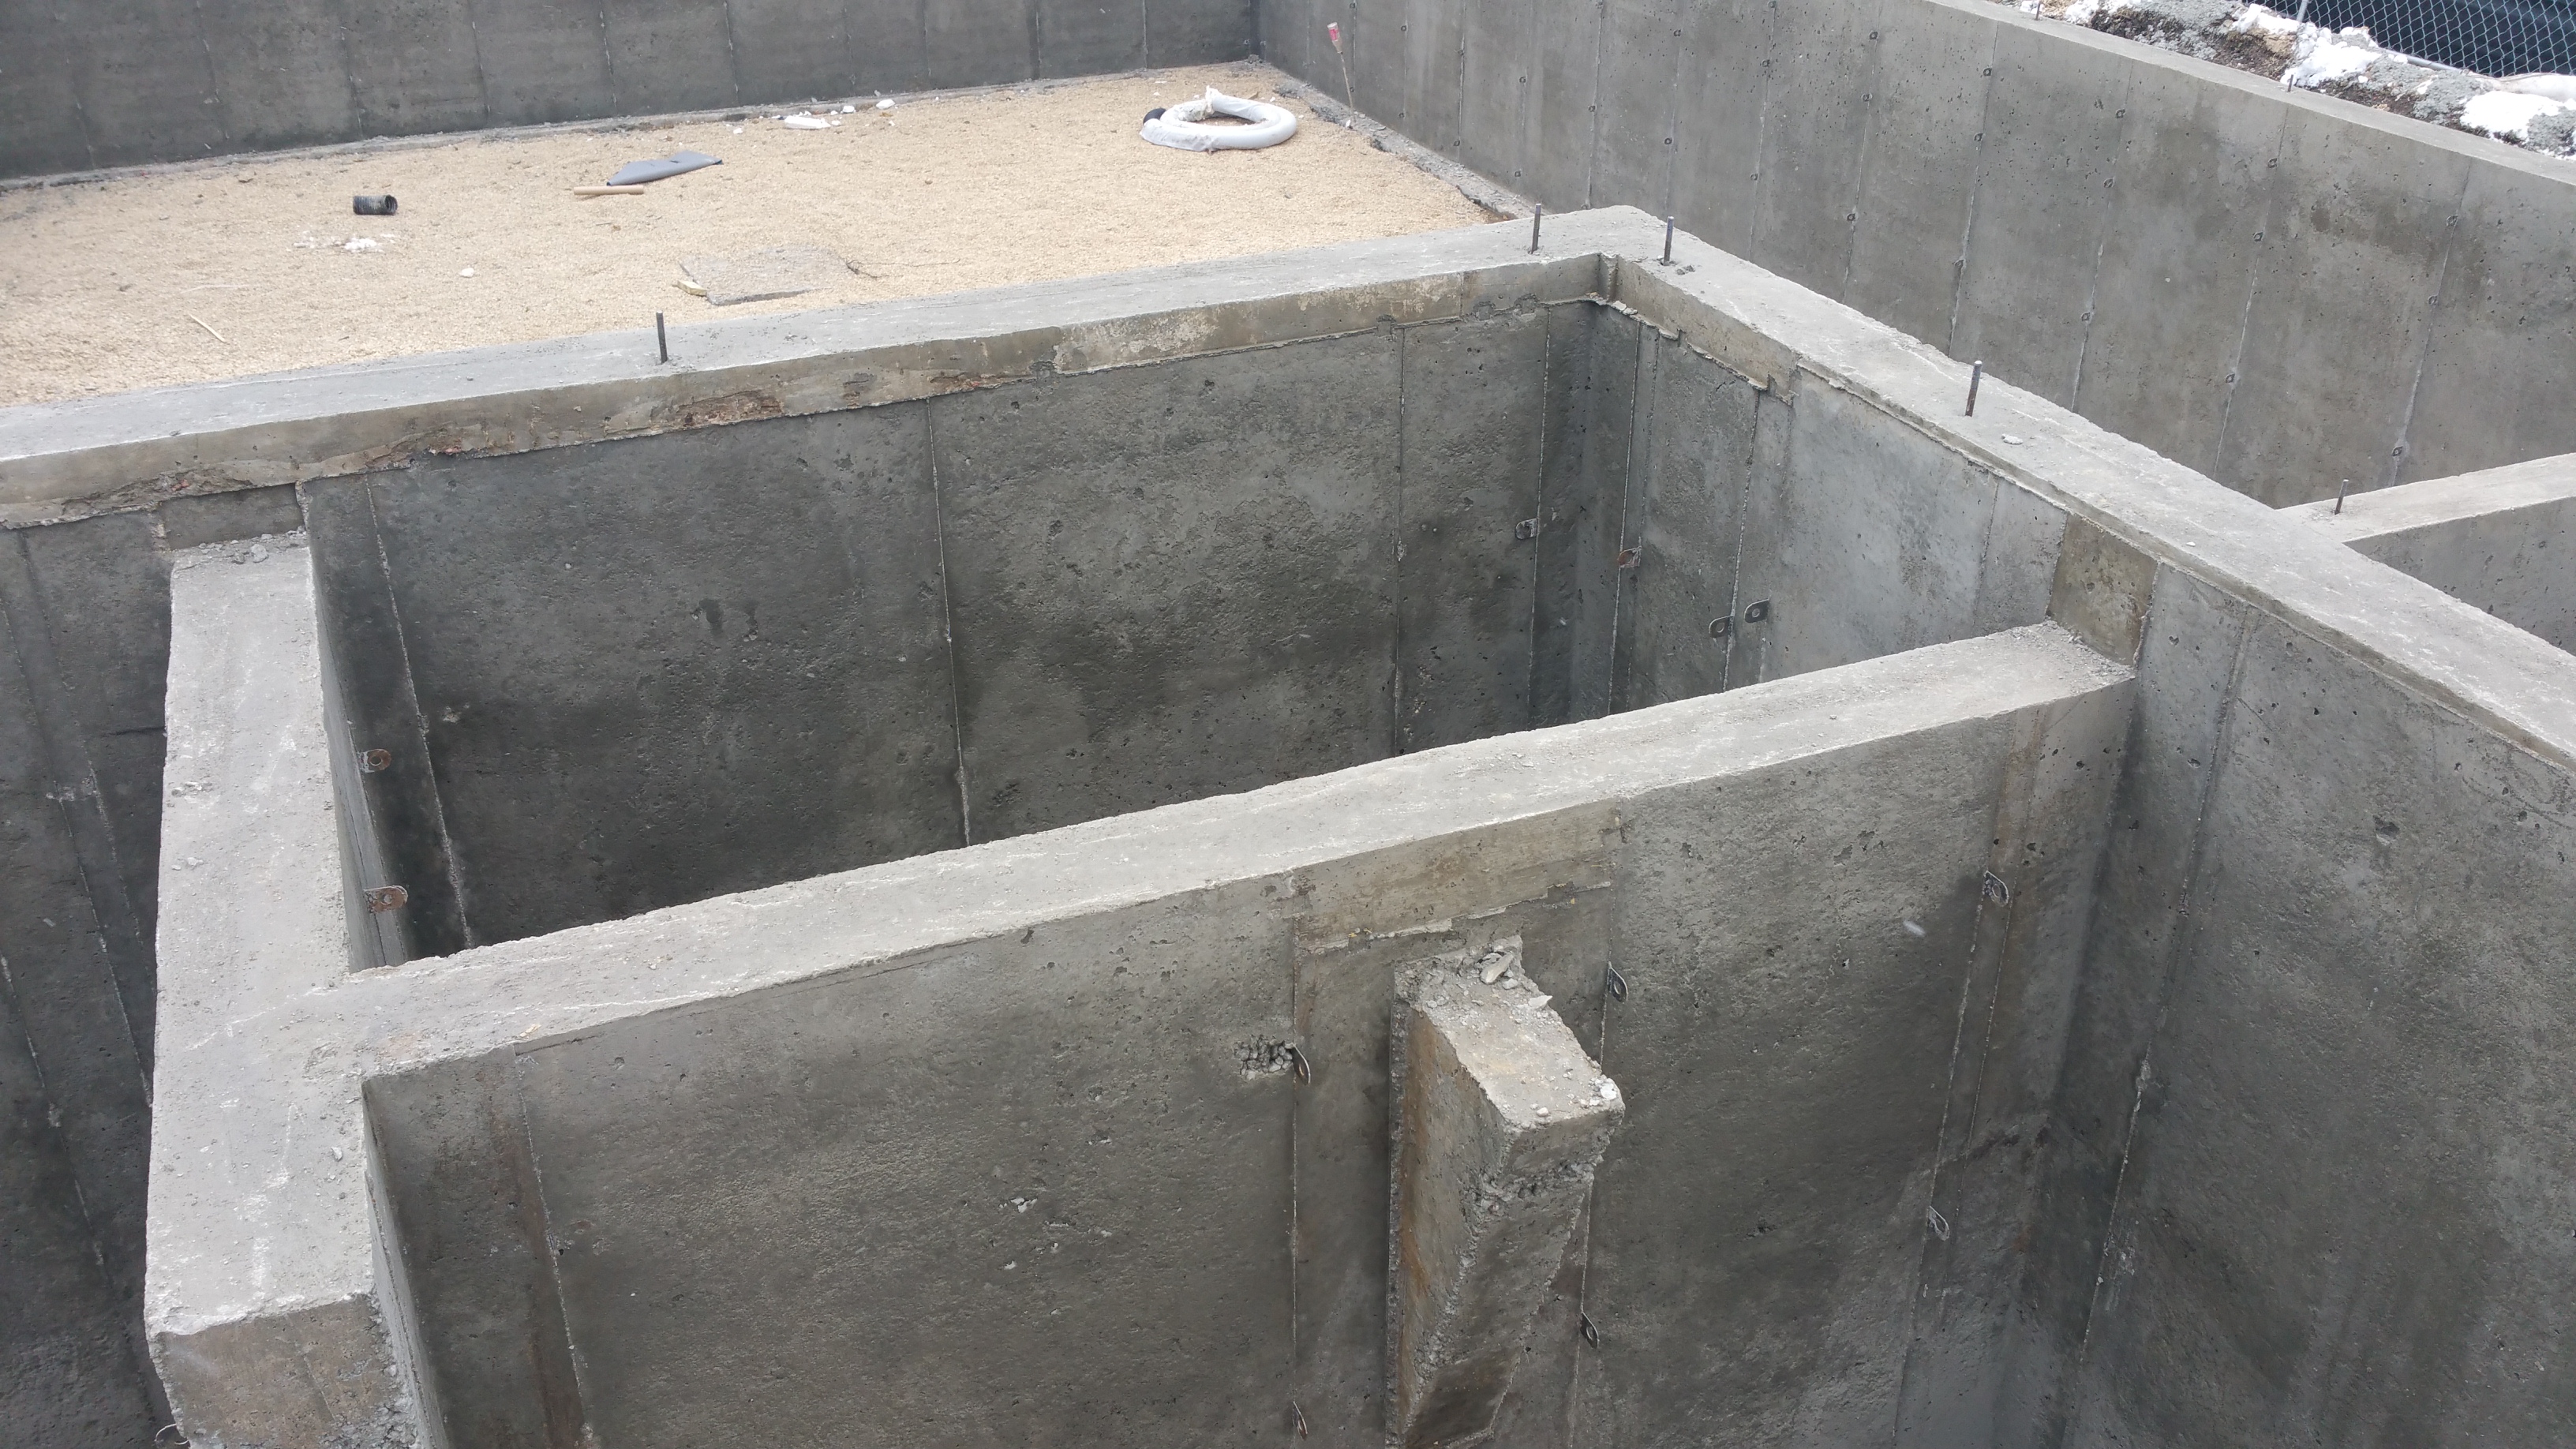
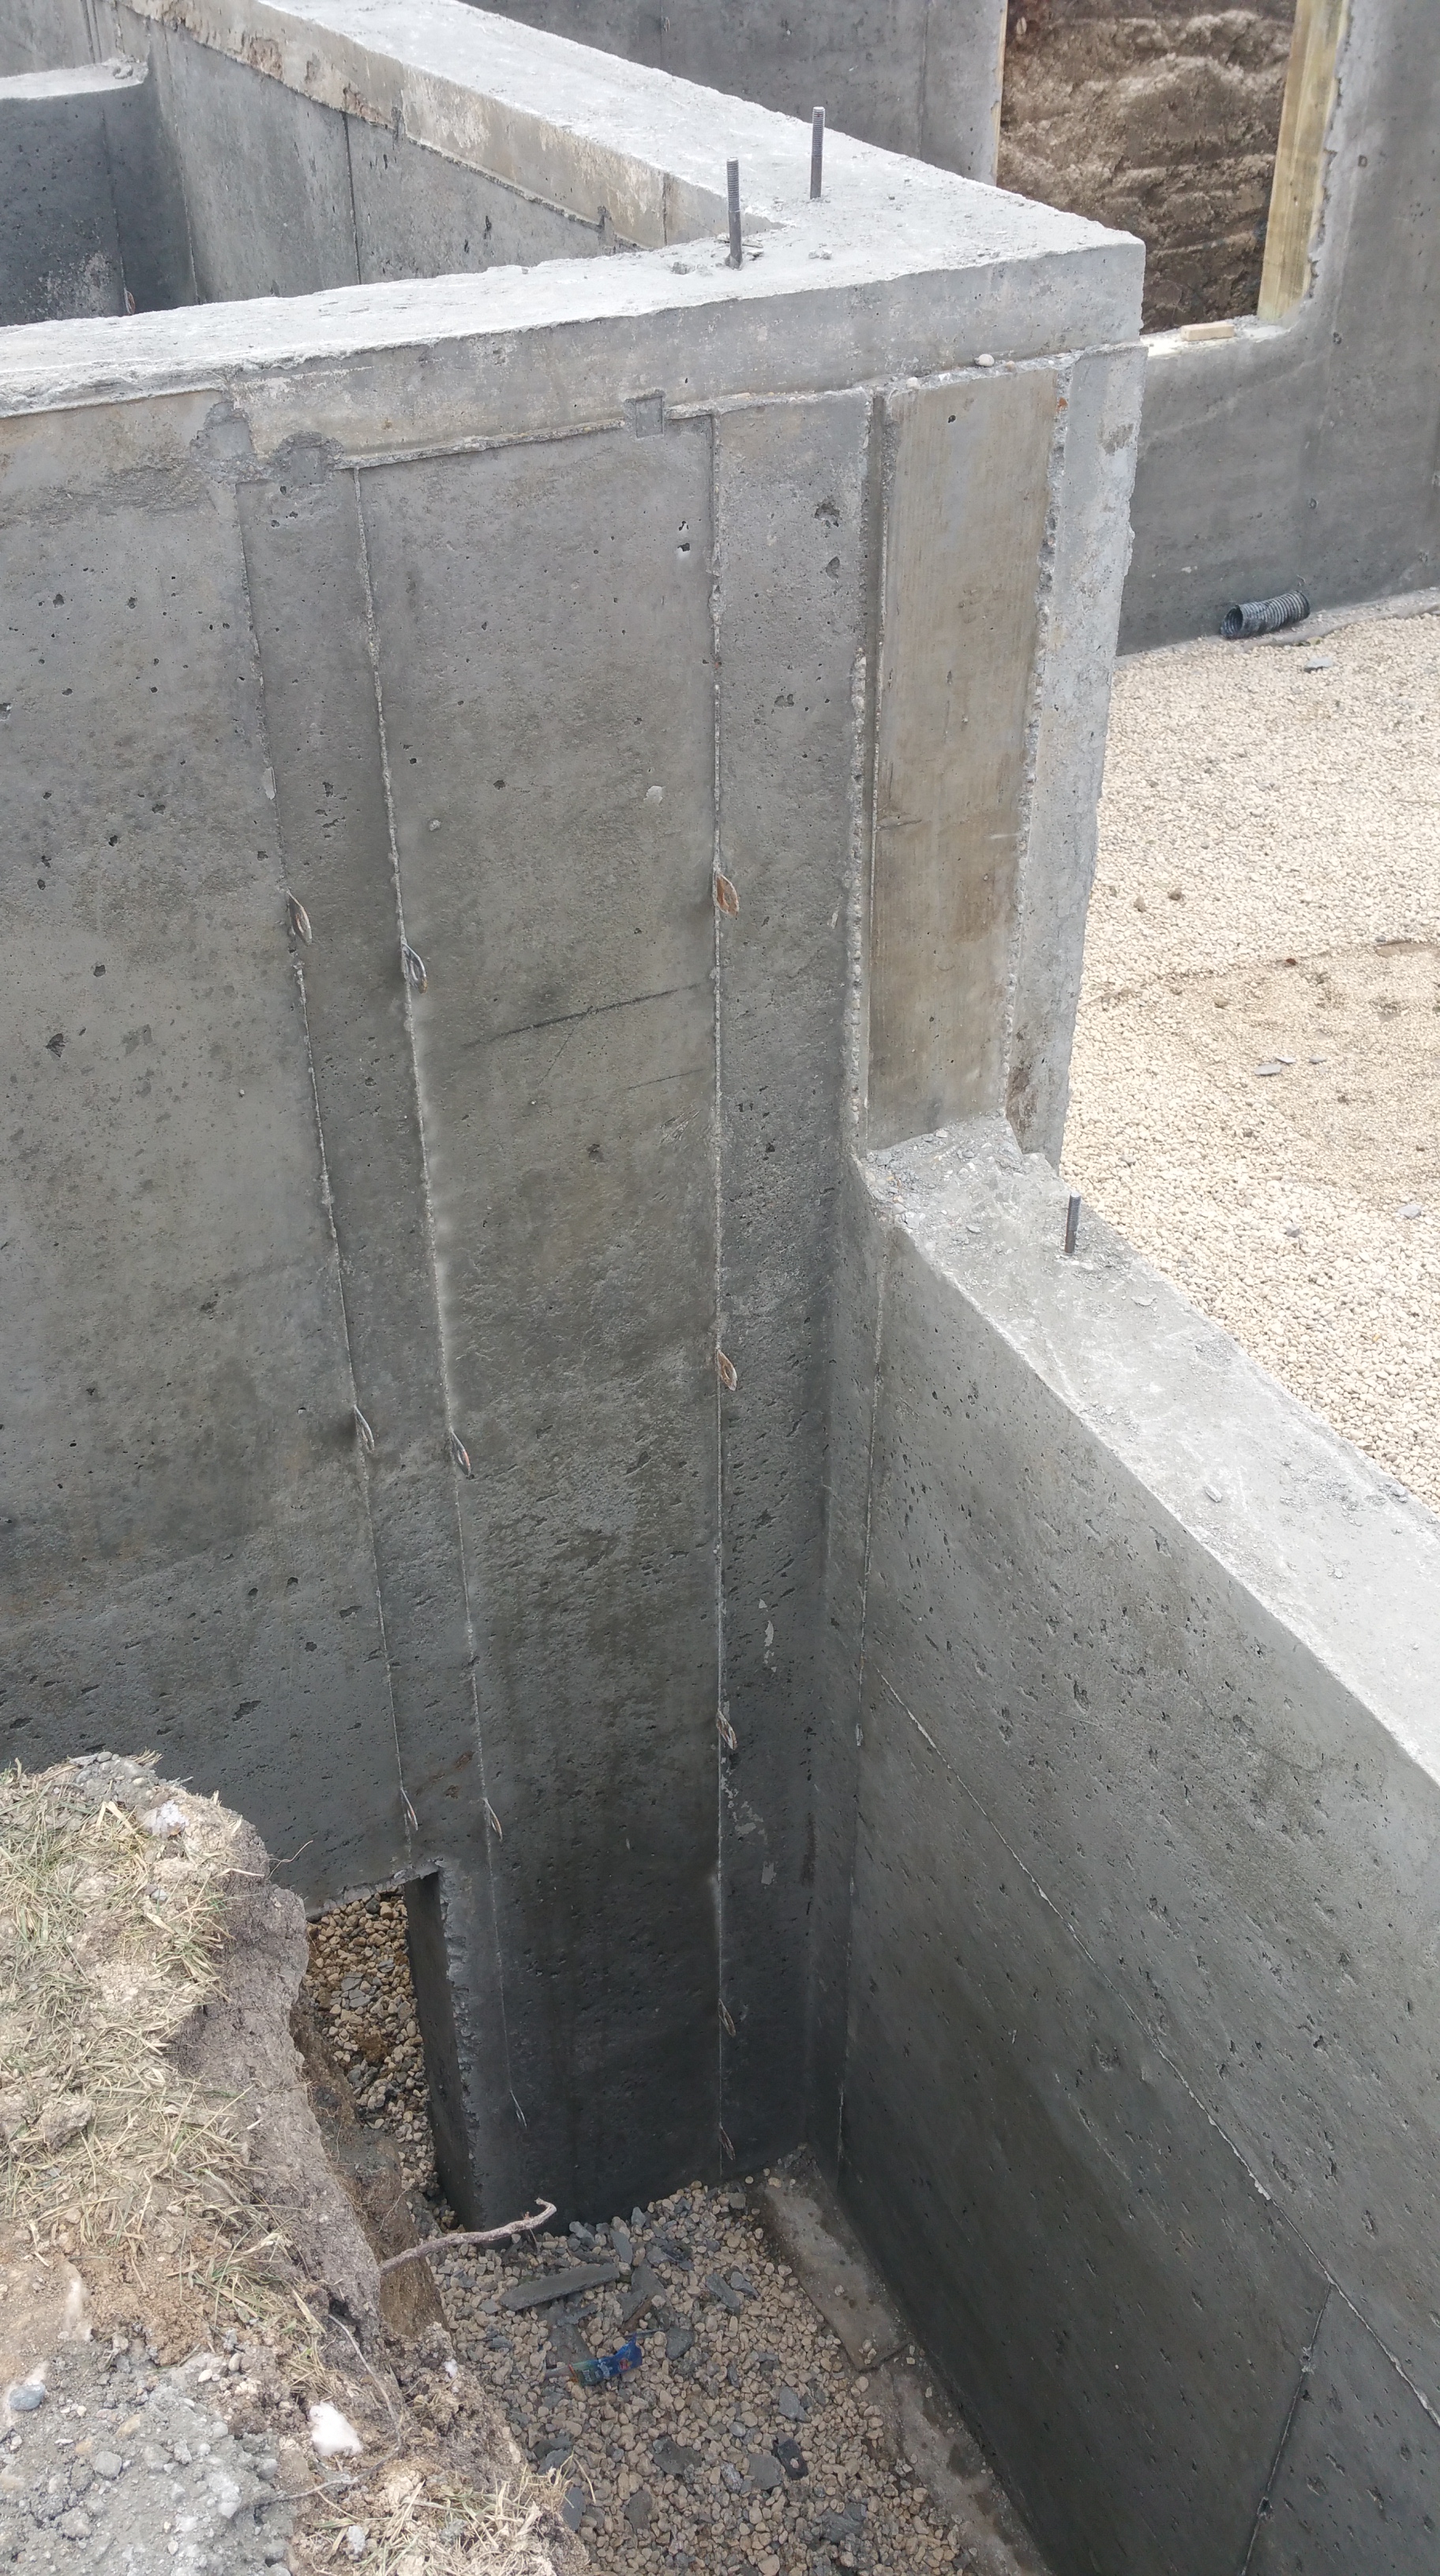
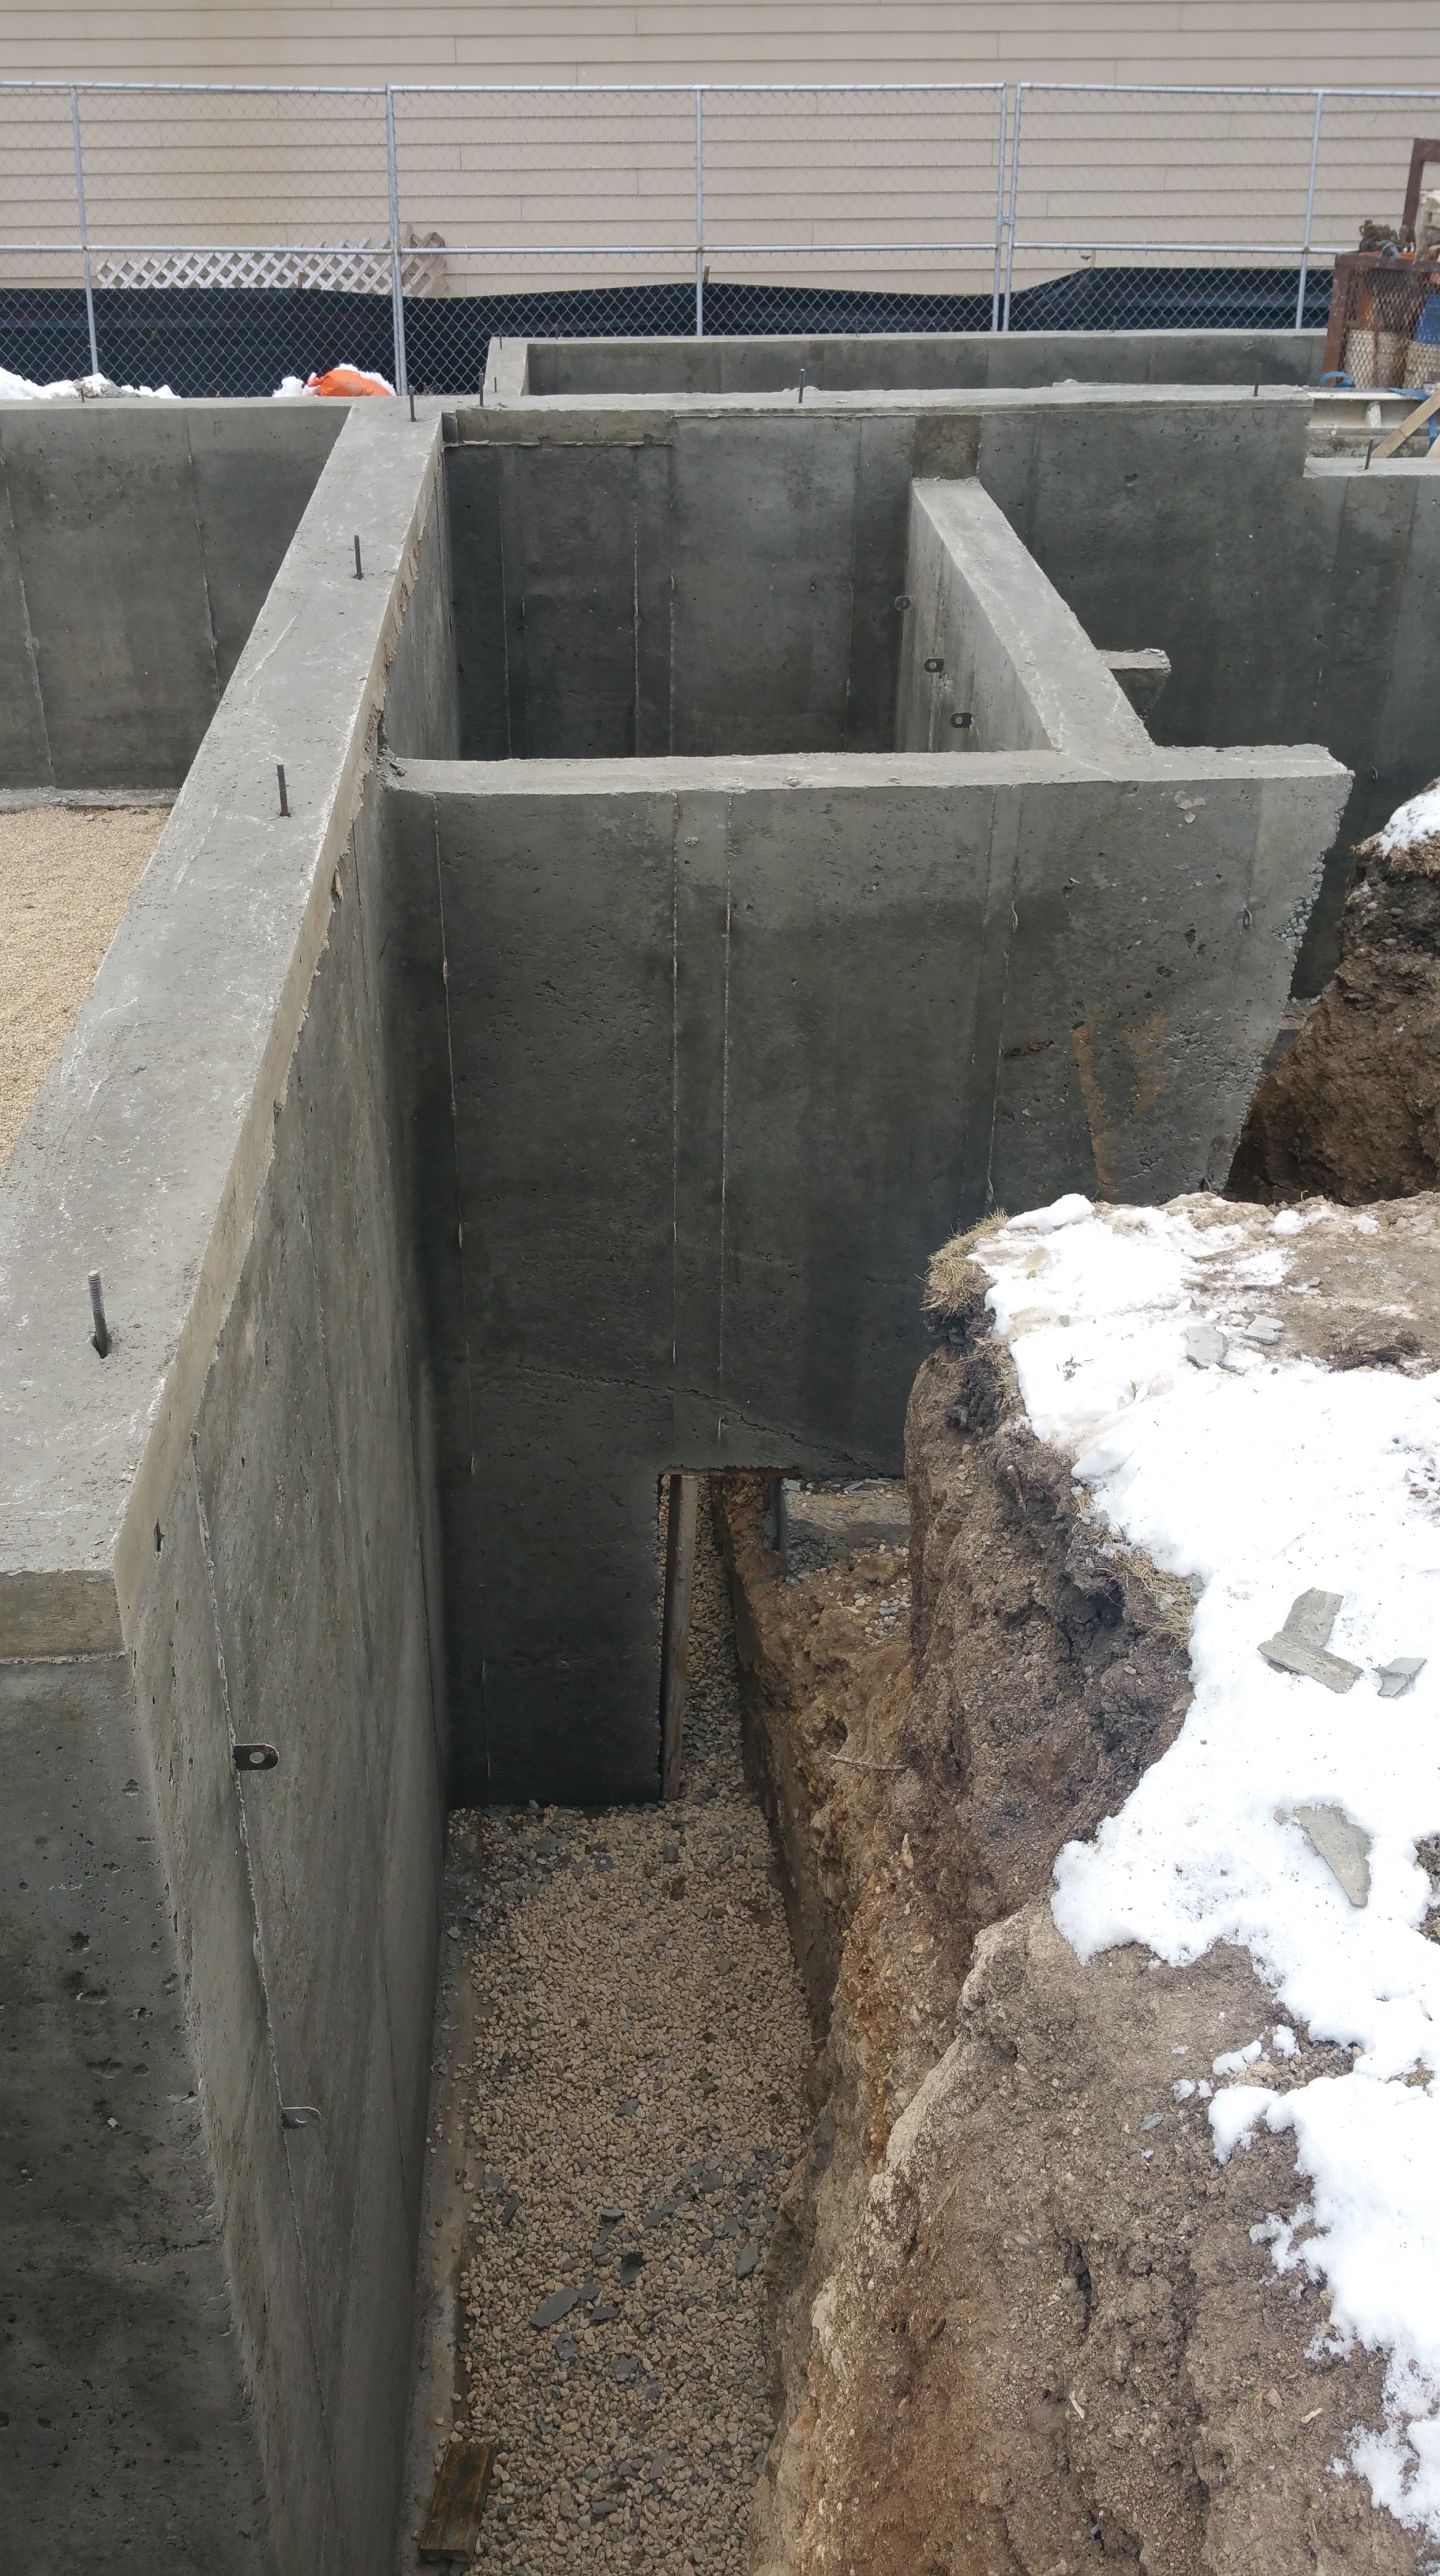
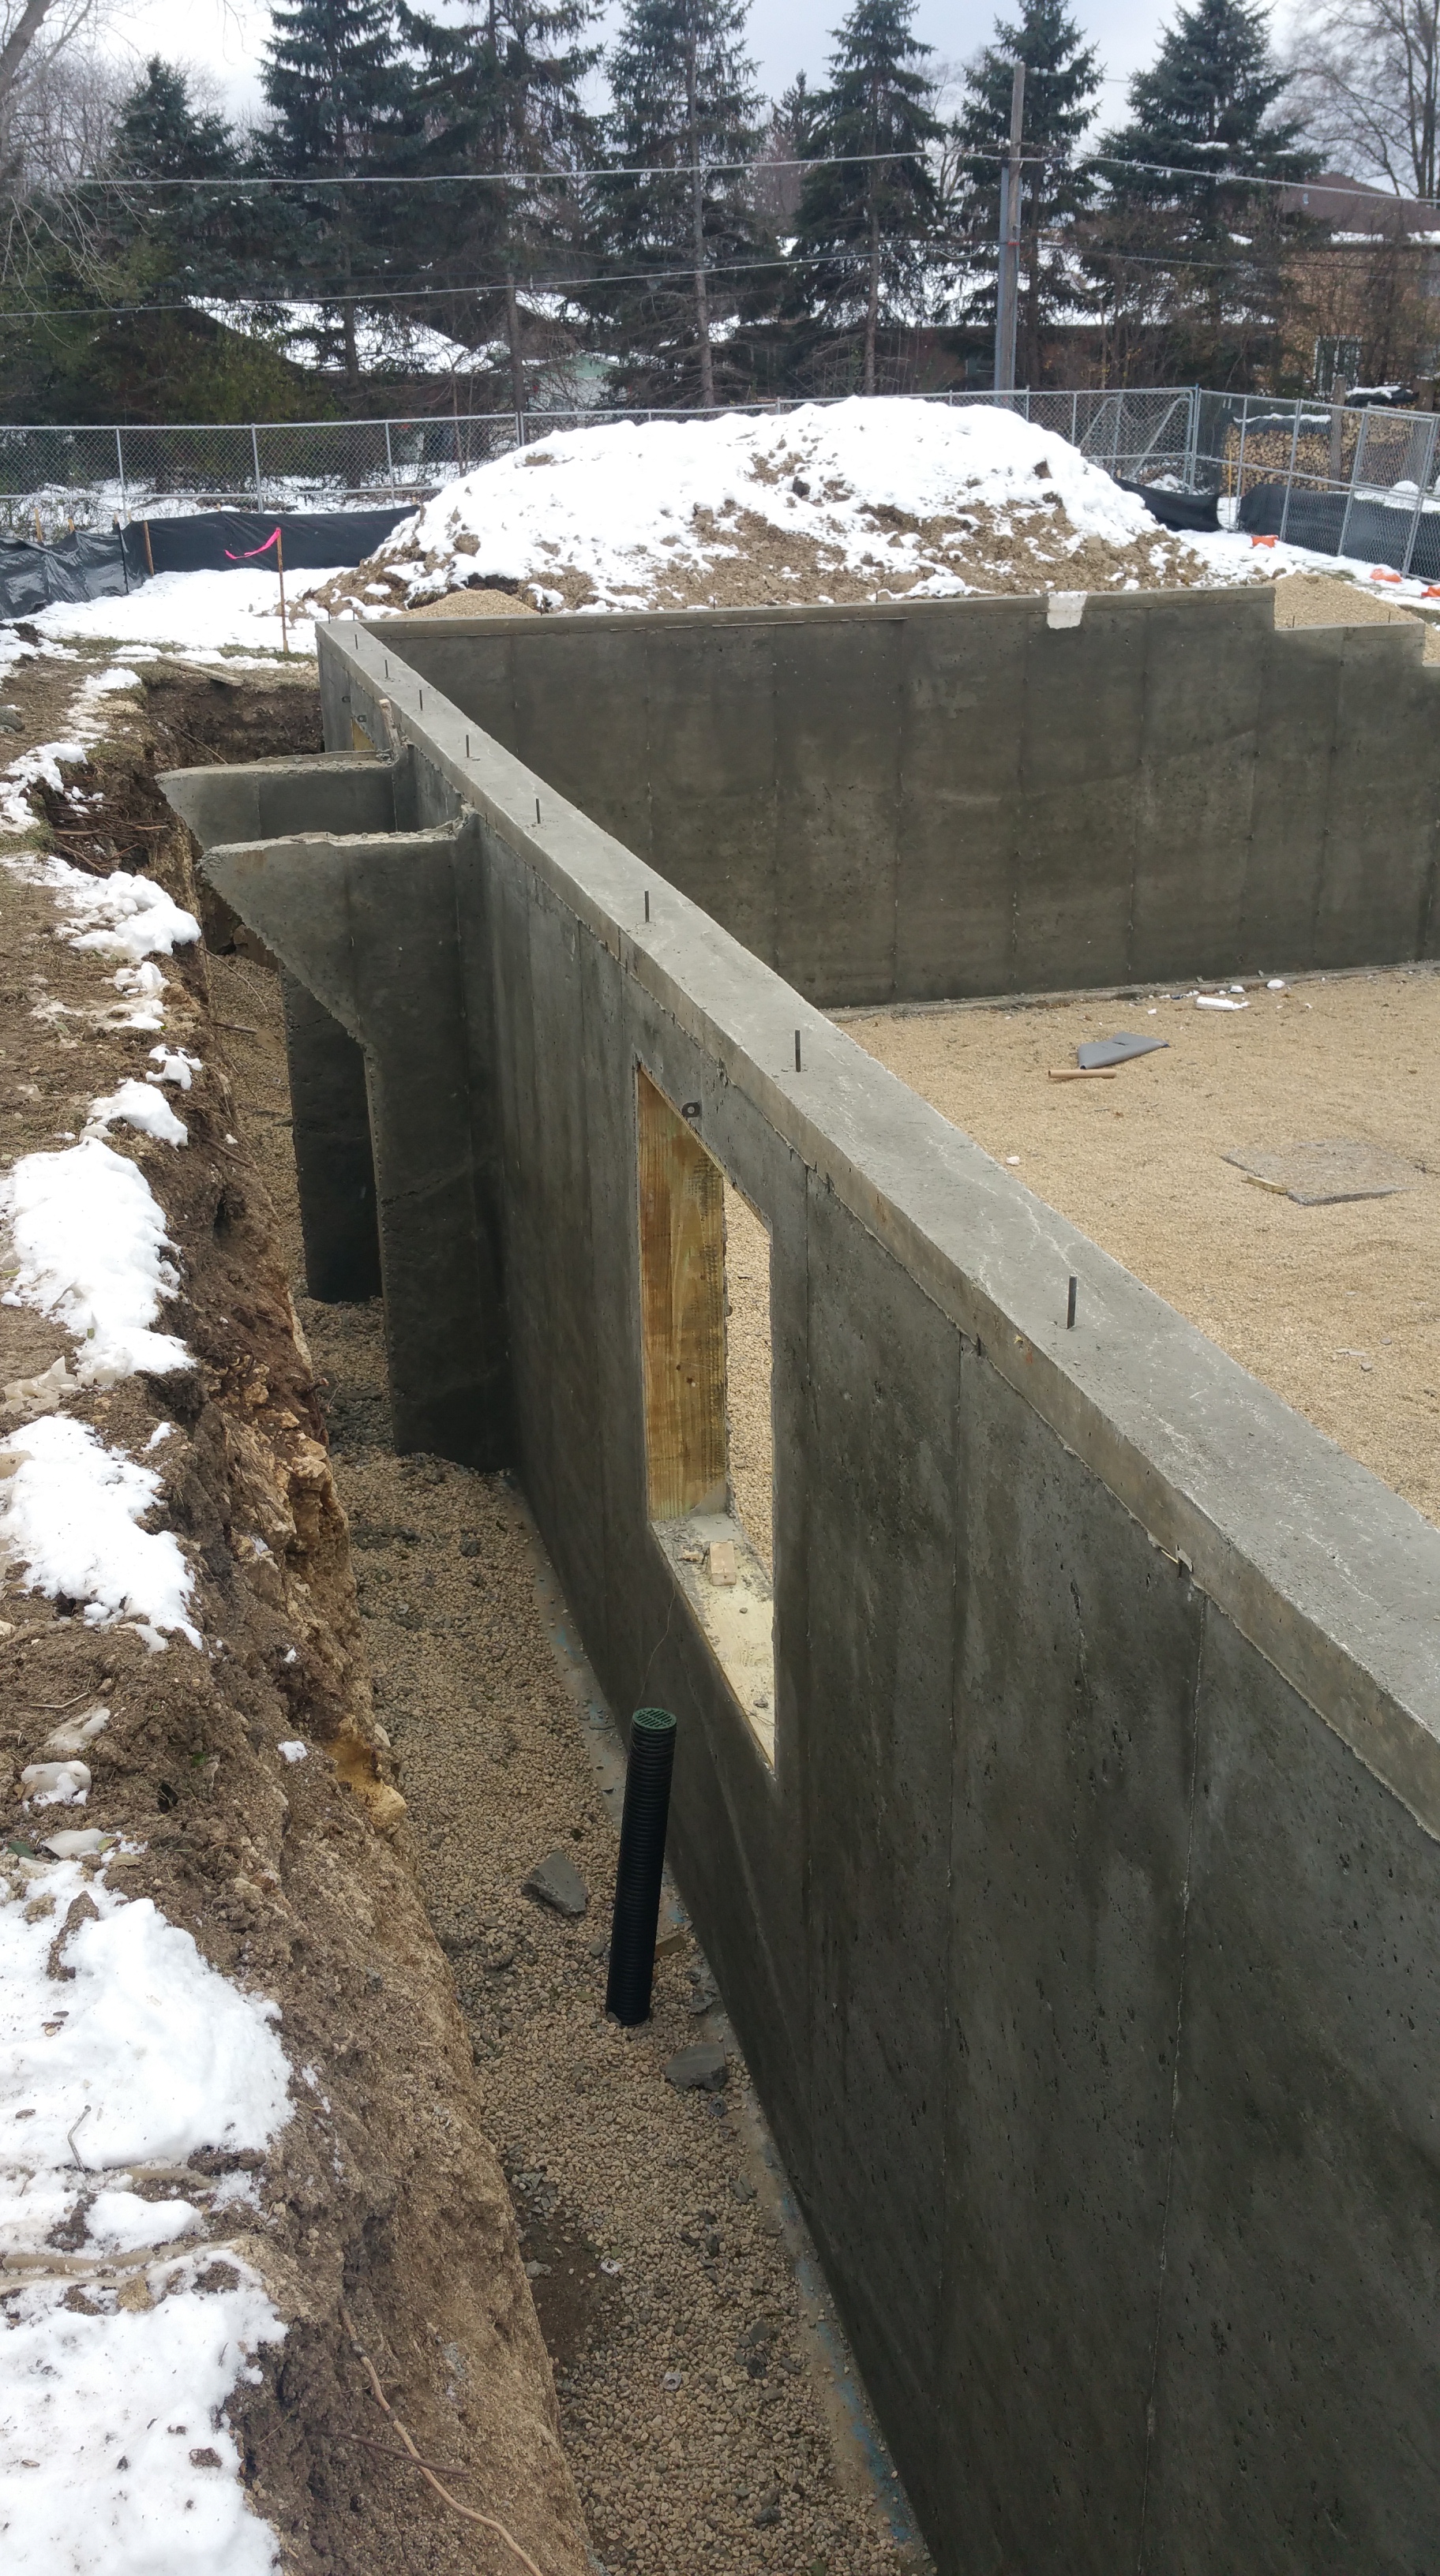
Unfortunately, there just doesn’t seem to be a lot of information available as to how to proceed. In the end, we decided to ignore these connections, hoping that the thermal bridging at these two points (garage-house, garage-front porch-house), in particular, won’t be all that significant (to our heating and AC costs, or, for example, cold getting into the foundation and then rising up and getting into the wall assembly above these two points where it could become interstitial condensation — unwanted, and potentially dangerous, moisture in the wall).
I assumed Passive House builders would incorporate rigid foam insulation into the concrete forms at these points, but I couldn’t find any pictures or descriptions showing or talking about this in books, magazines, or anywhere online. Either Passive House builders ignore these kind of connections, or I just missed the information somehow.
*** If anyone knows of good sources on this, let me know, and I will post links here to help others in the design stage of their own build ***
Update: David Goodyear is building a Passive House in Newfoundland, and he has successfully used rigid foam between the house and garage foundations. You can read about it on his blog here:
Flat Rock Passive House: A Tale of Two Foundations

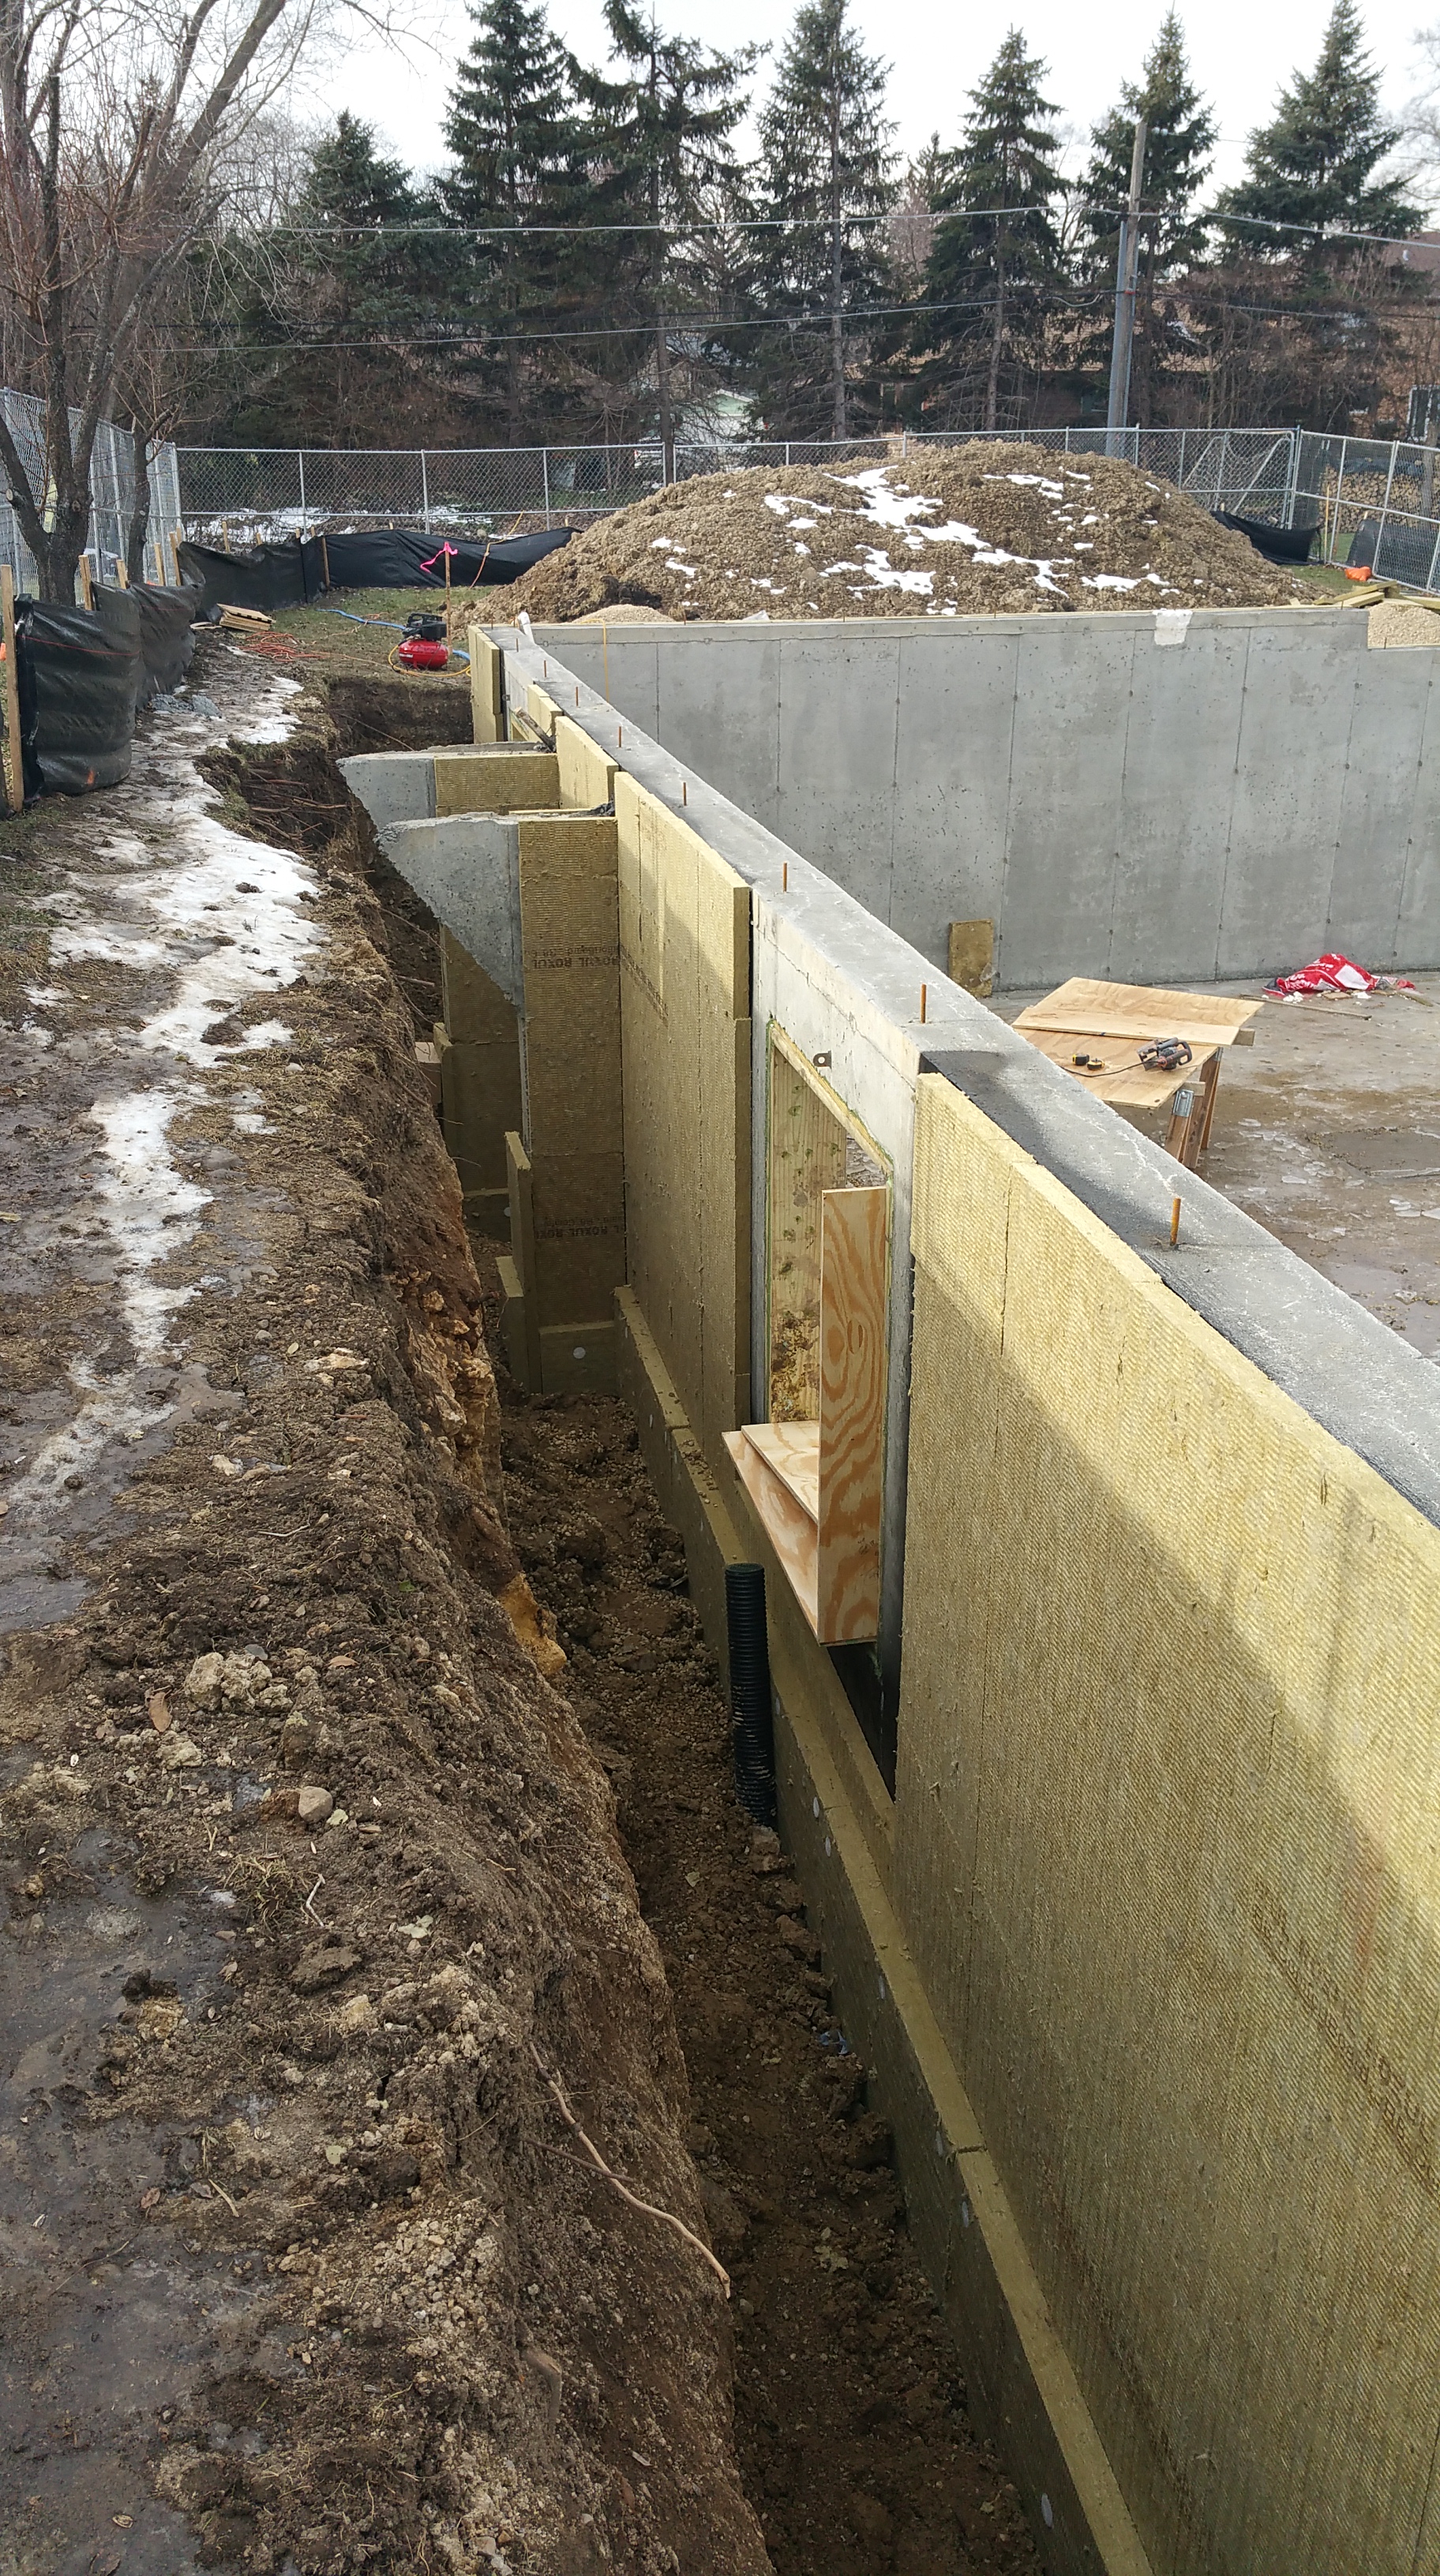
Below are the other points of thermal bridging in the foundations, now covered in Roxul:
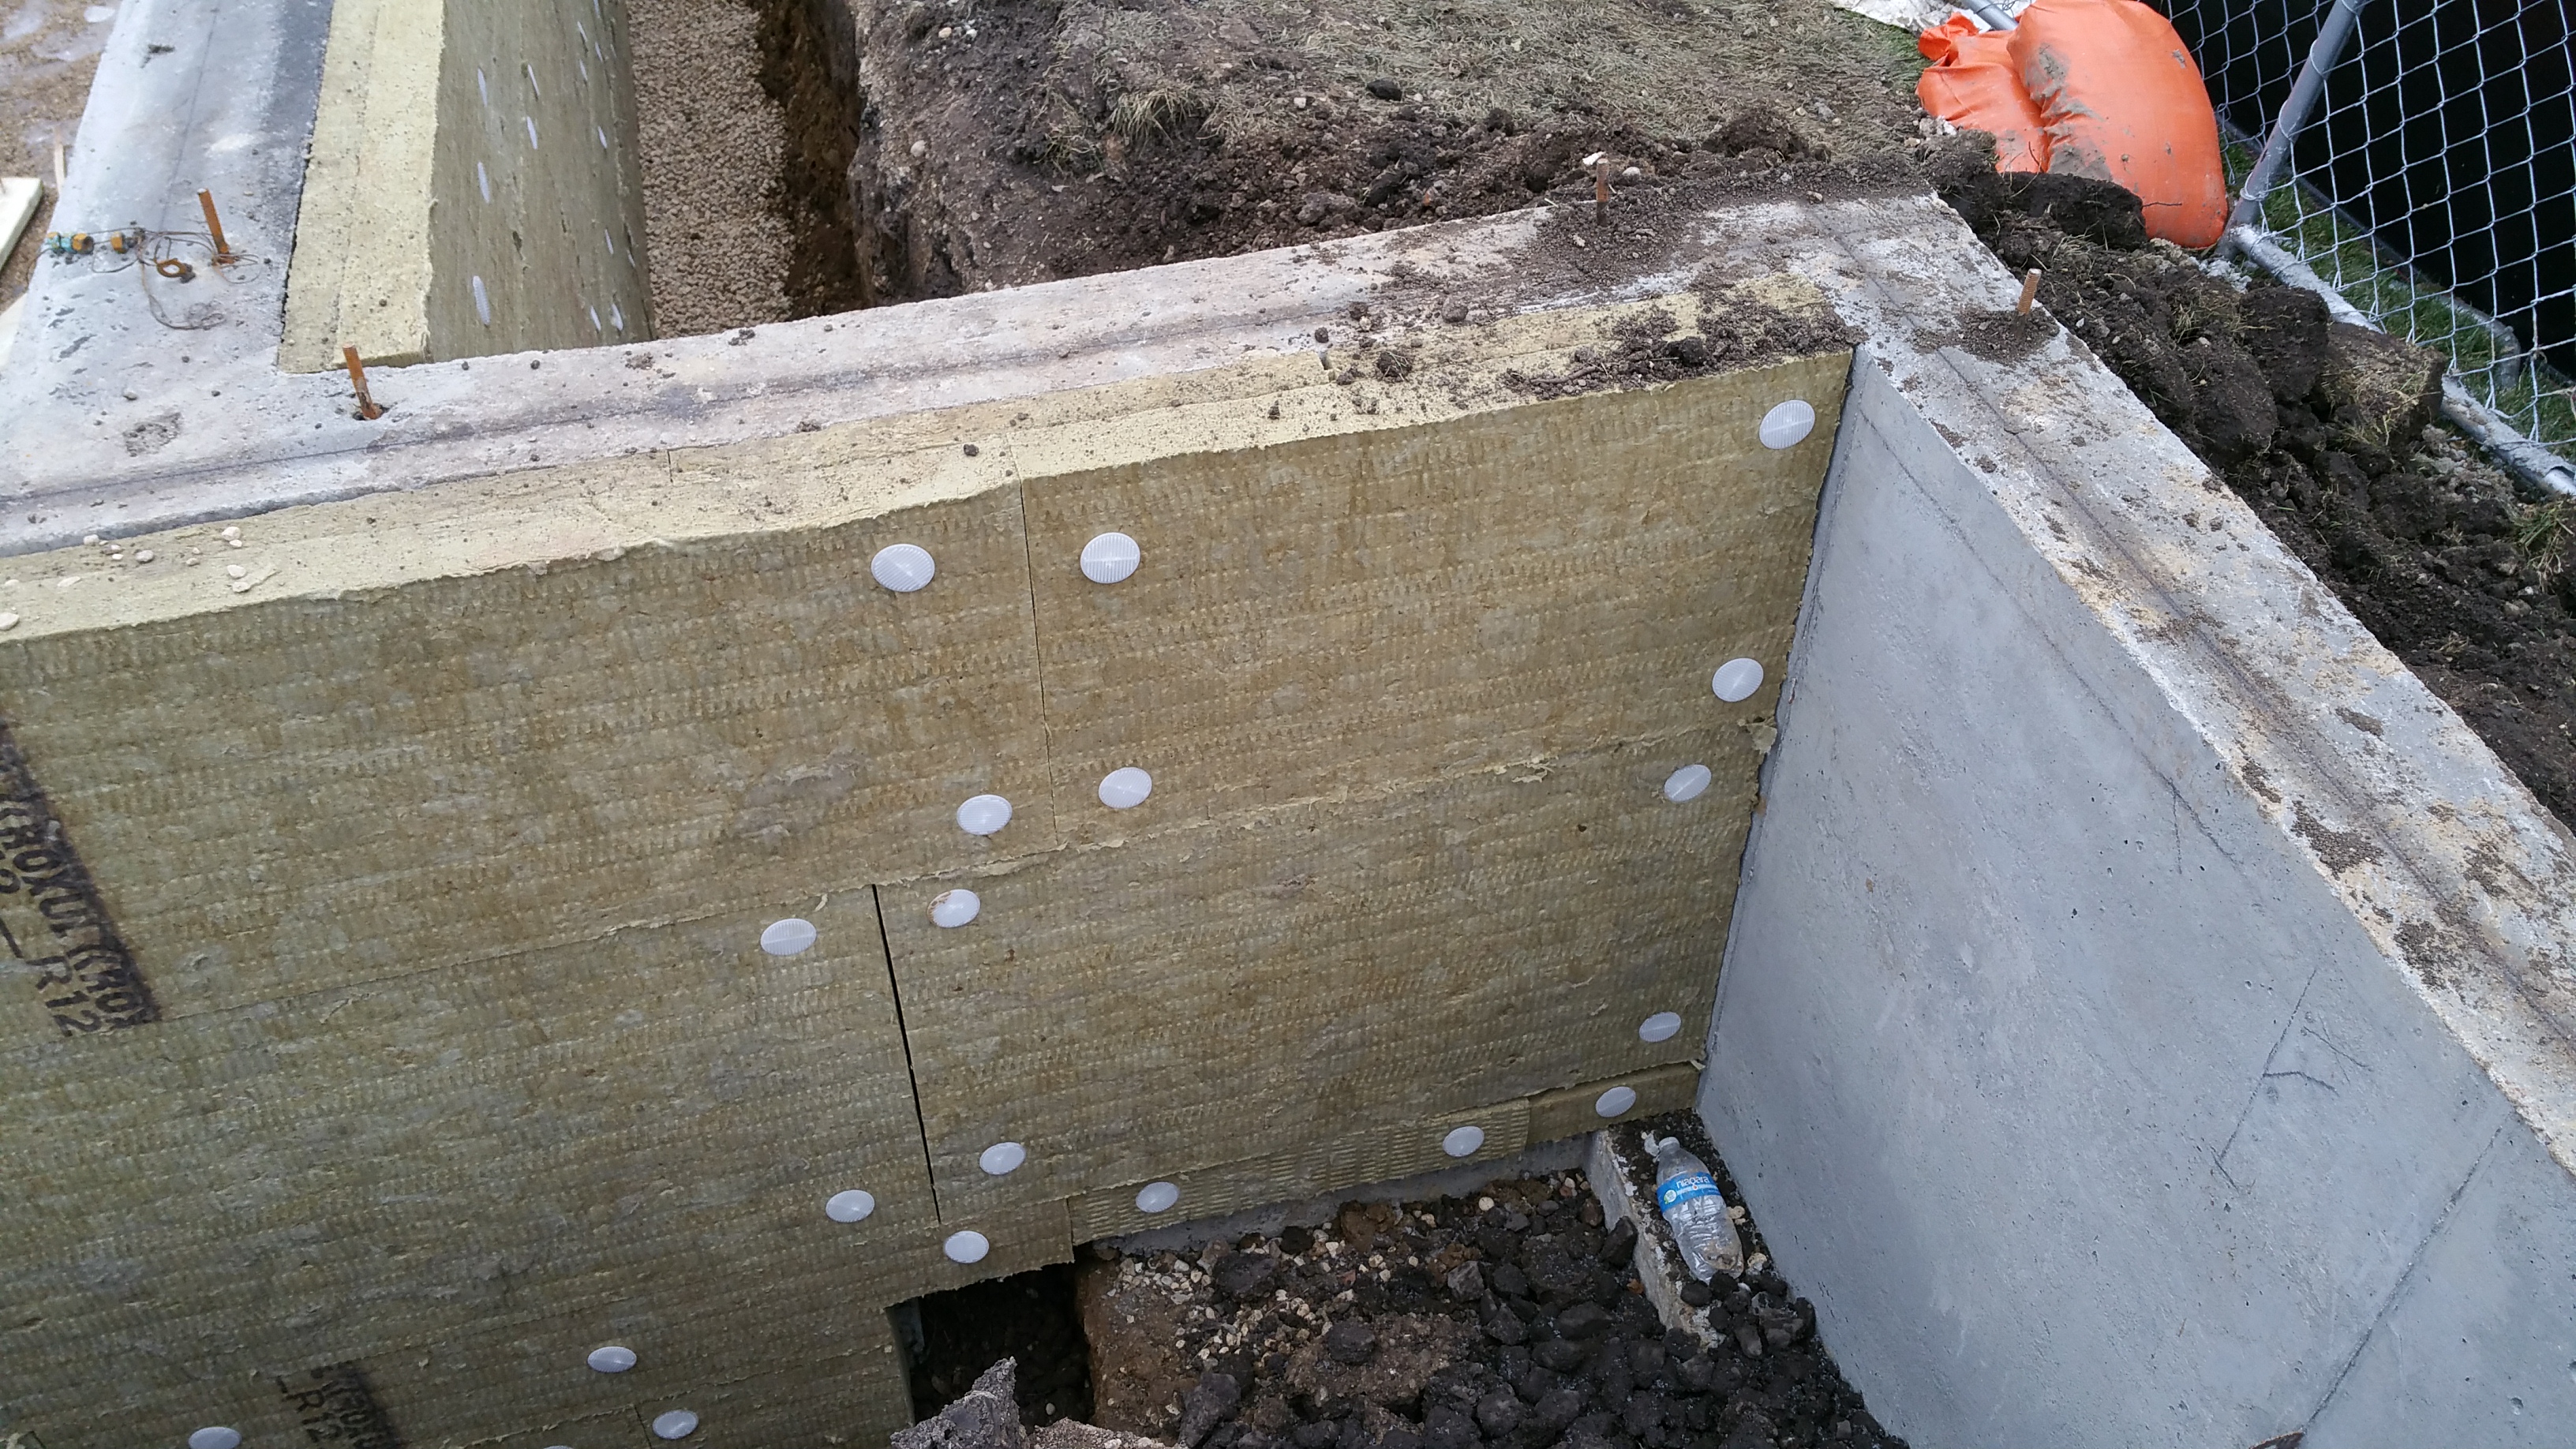
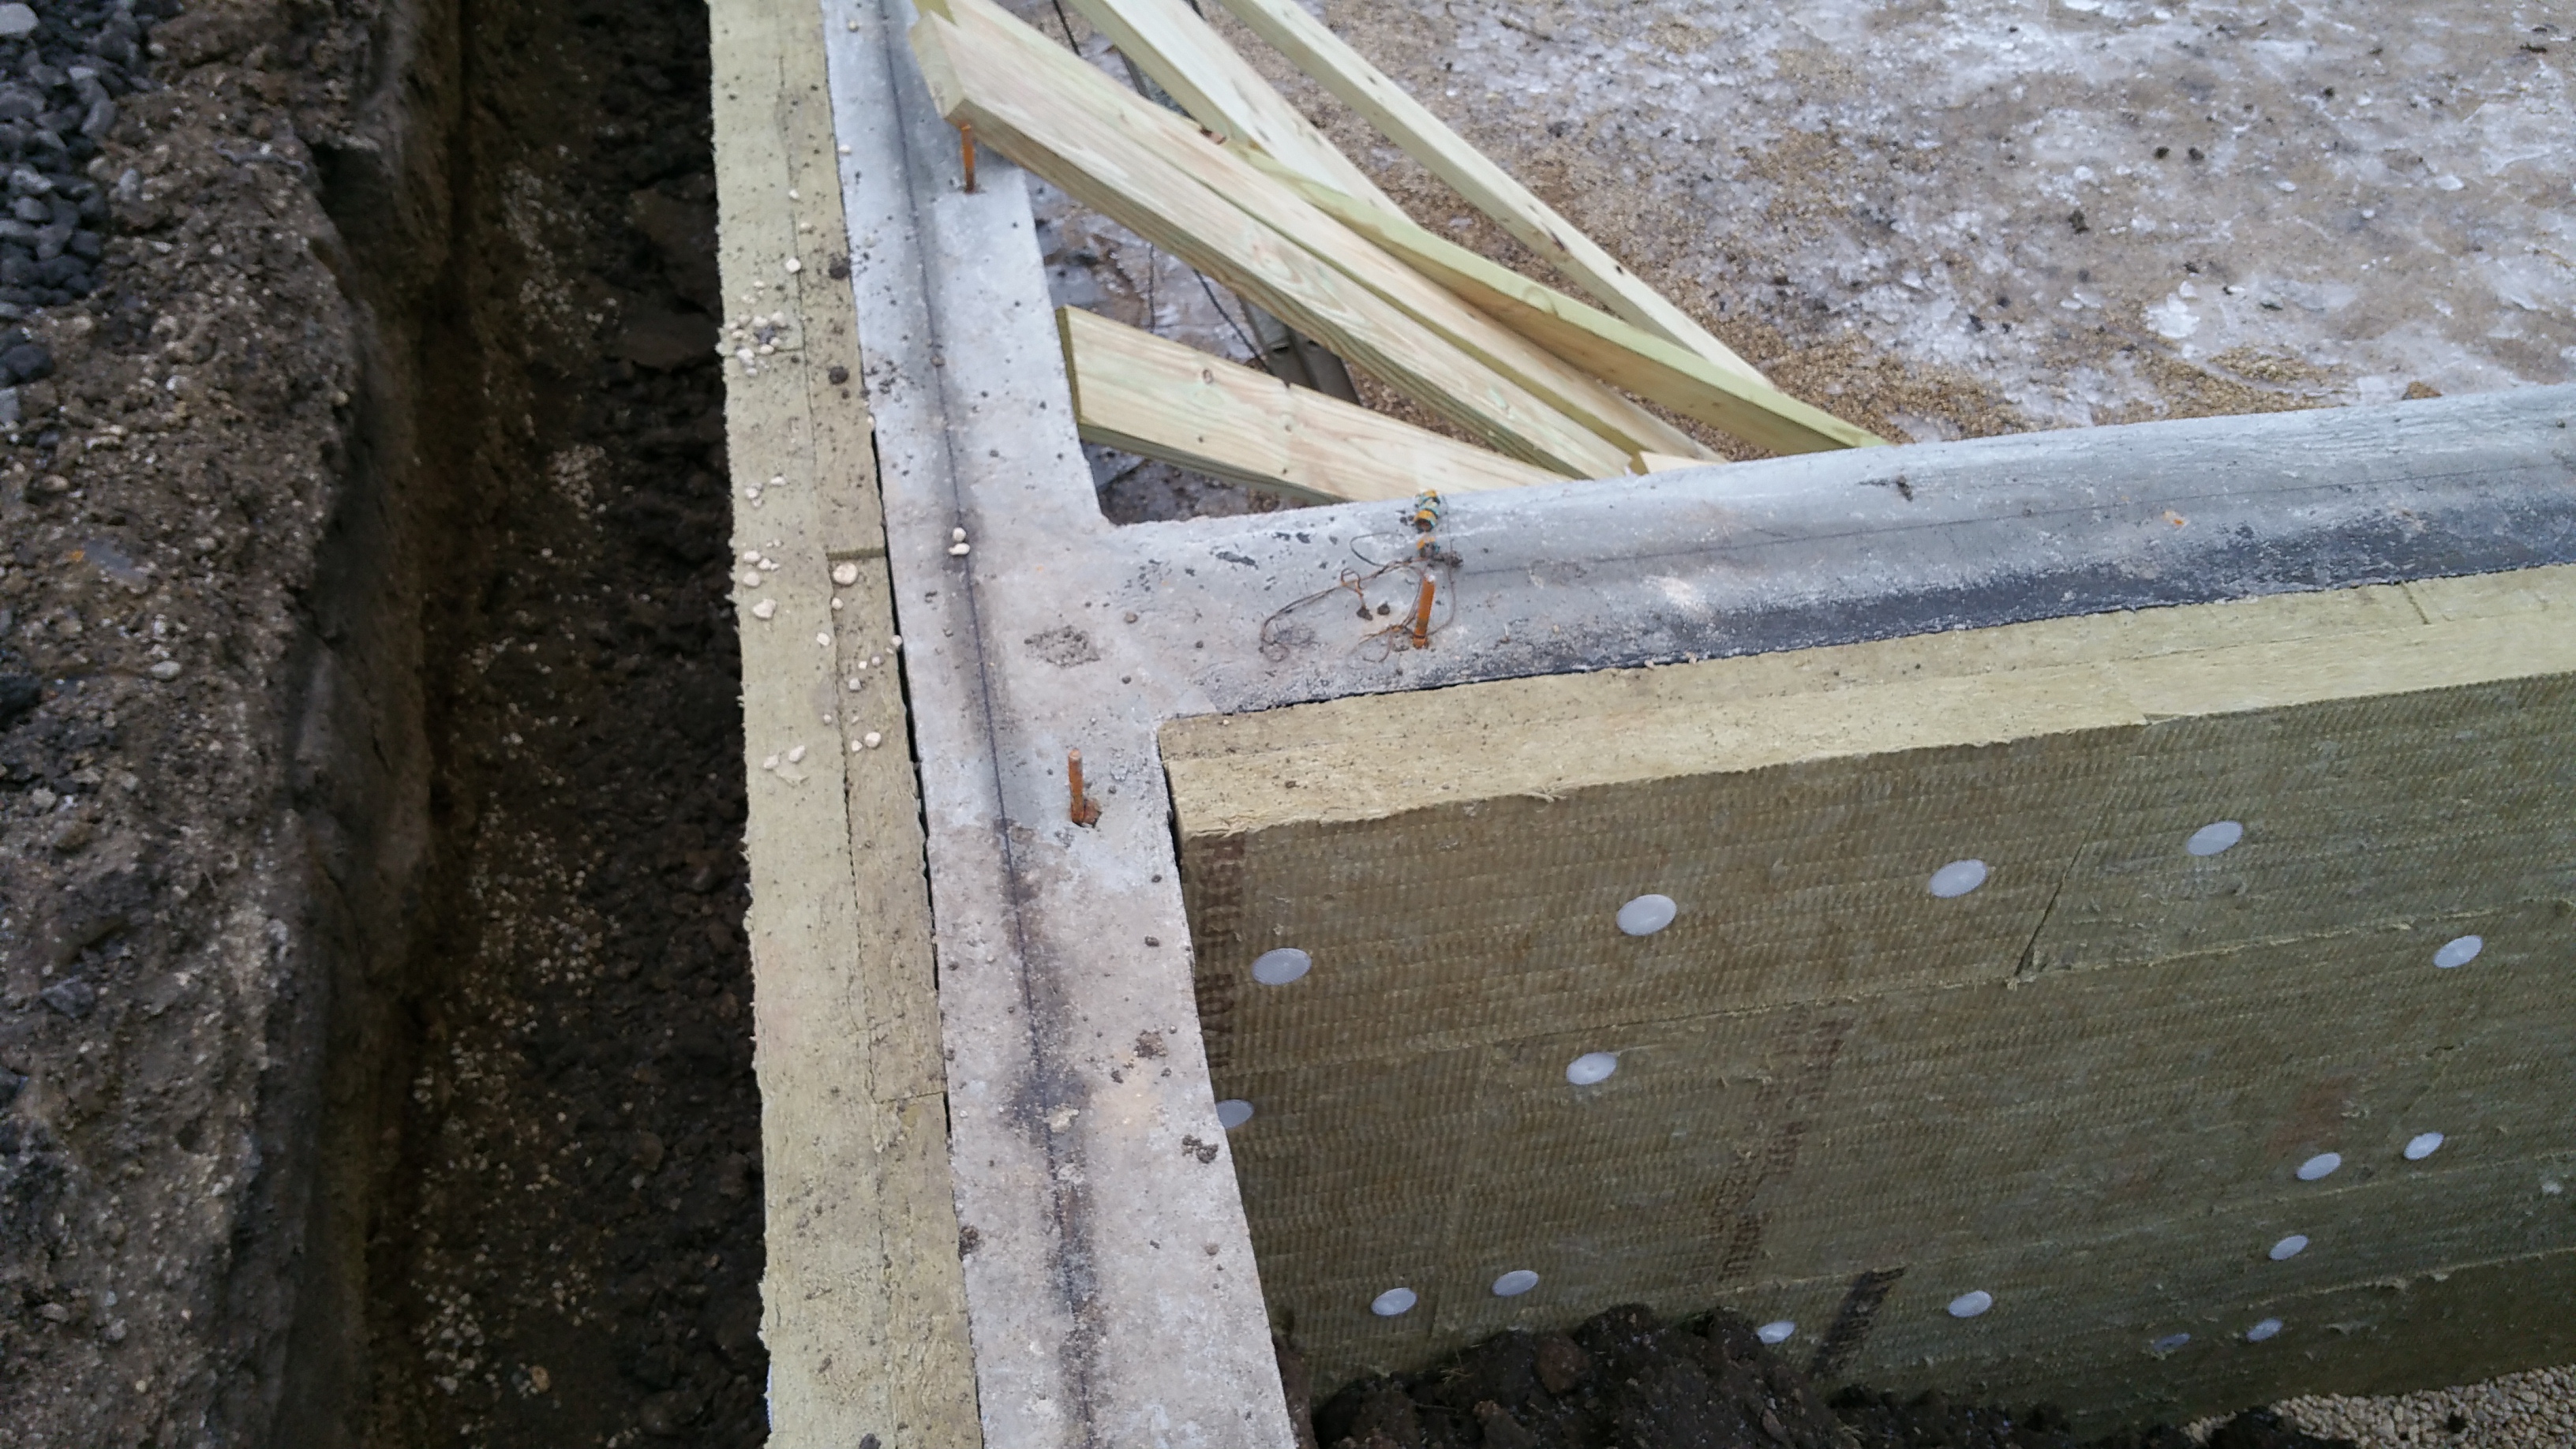
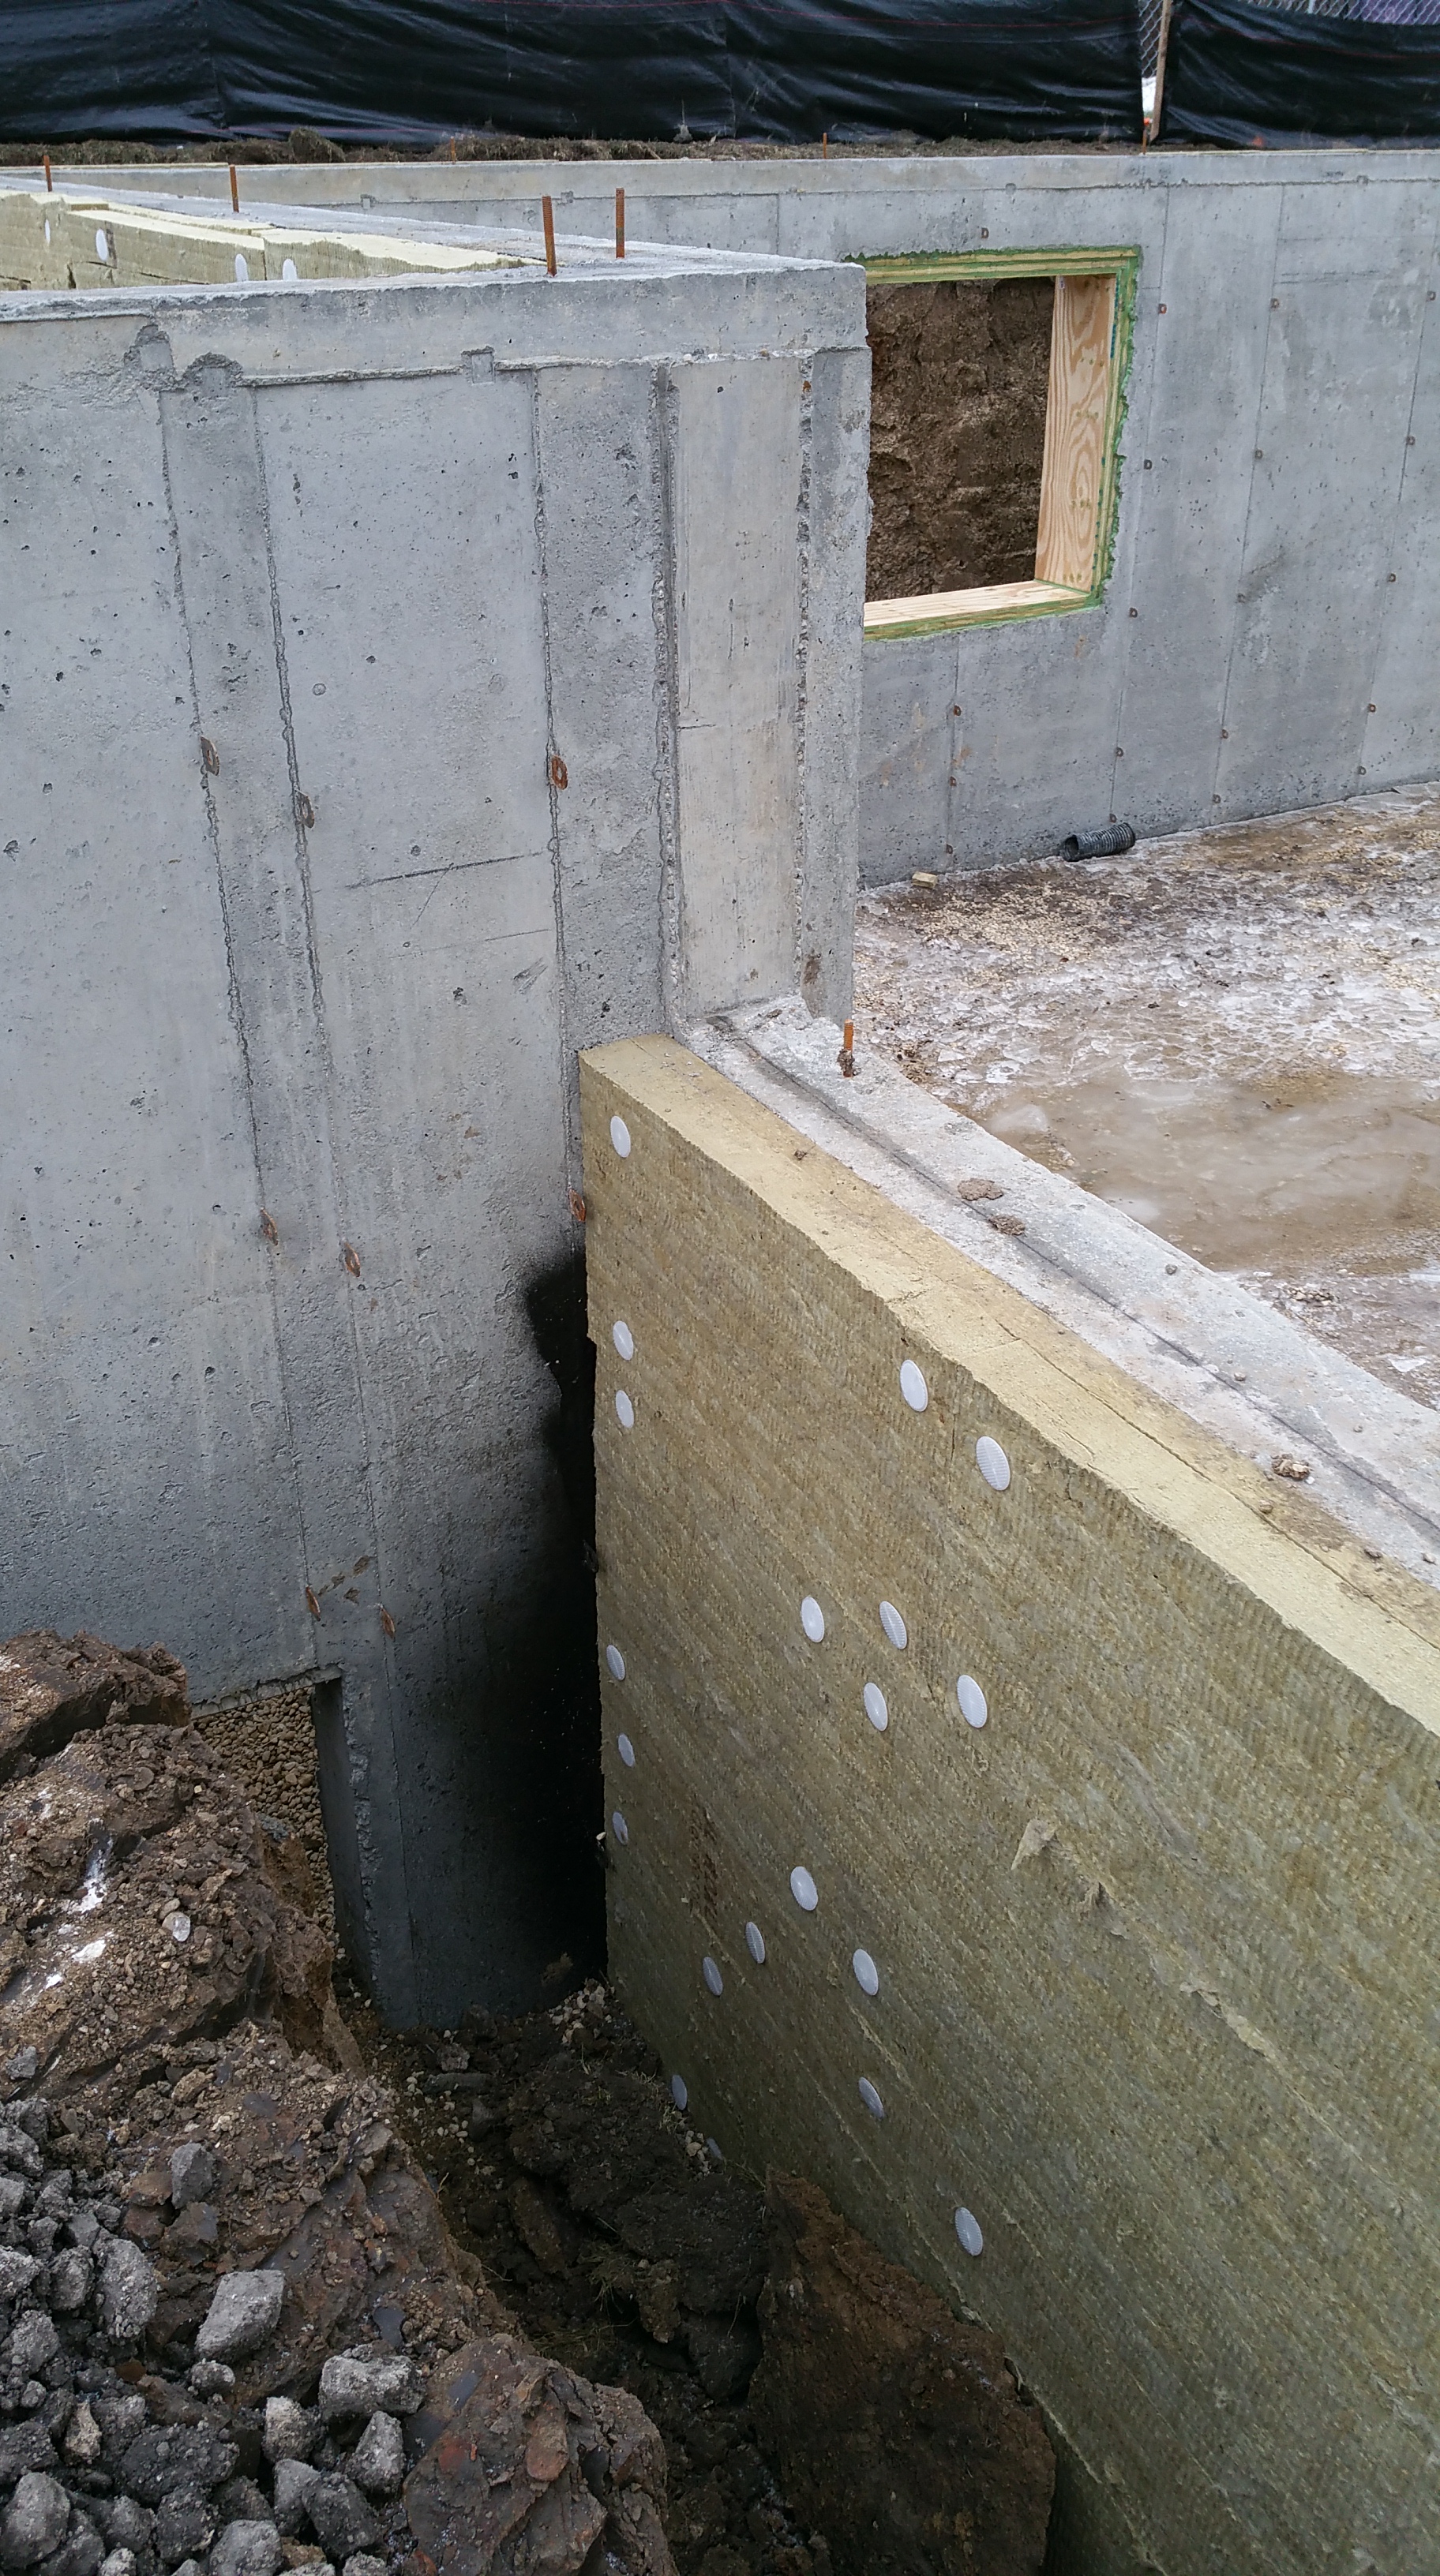

We did our best to cover these thermal bridges, but clearly it’s imperfect, so all we can do is hope there won’t be a significant energy penalty associated with these connections.
Basement Windows and Roxul
As the Roxul was going on the foundation, Phil and Nils installed window bucks for the two basement windows. The bucks were sized so they meet up flush with the two layers of Roxul. Eventually a layer of HardieBacker board and two coats of Tuff II (the product we’ll be using for the parge coat) will cover the window bucks, and also the transition between the top of the foundation walls and grade around the perimeter of the house.
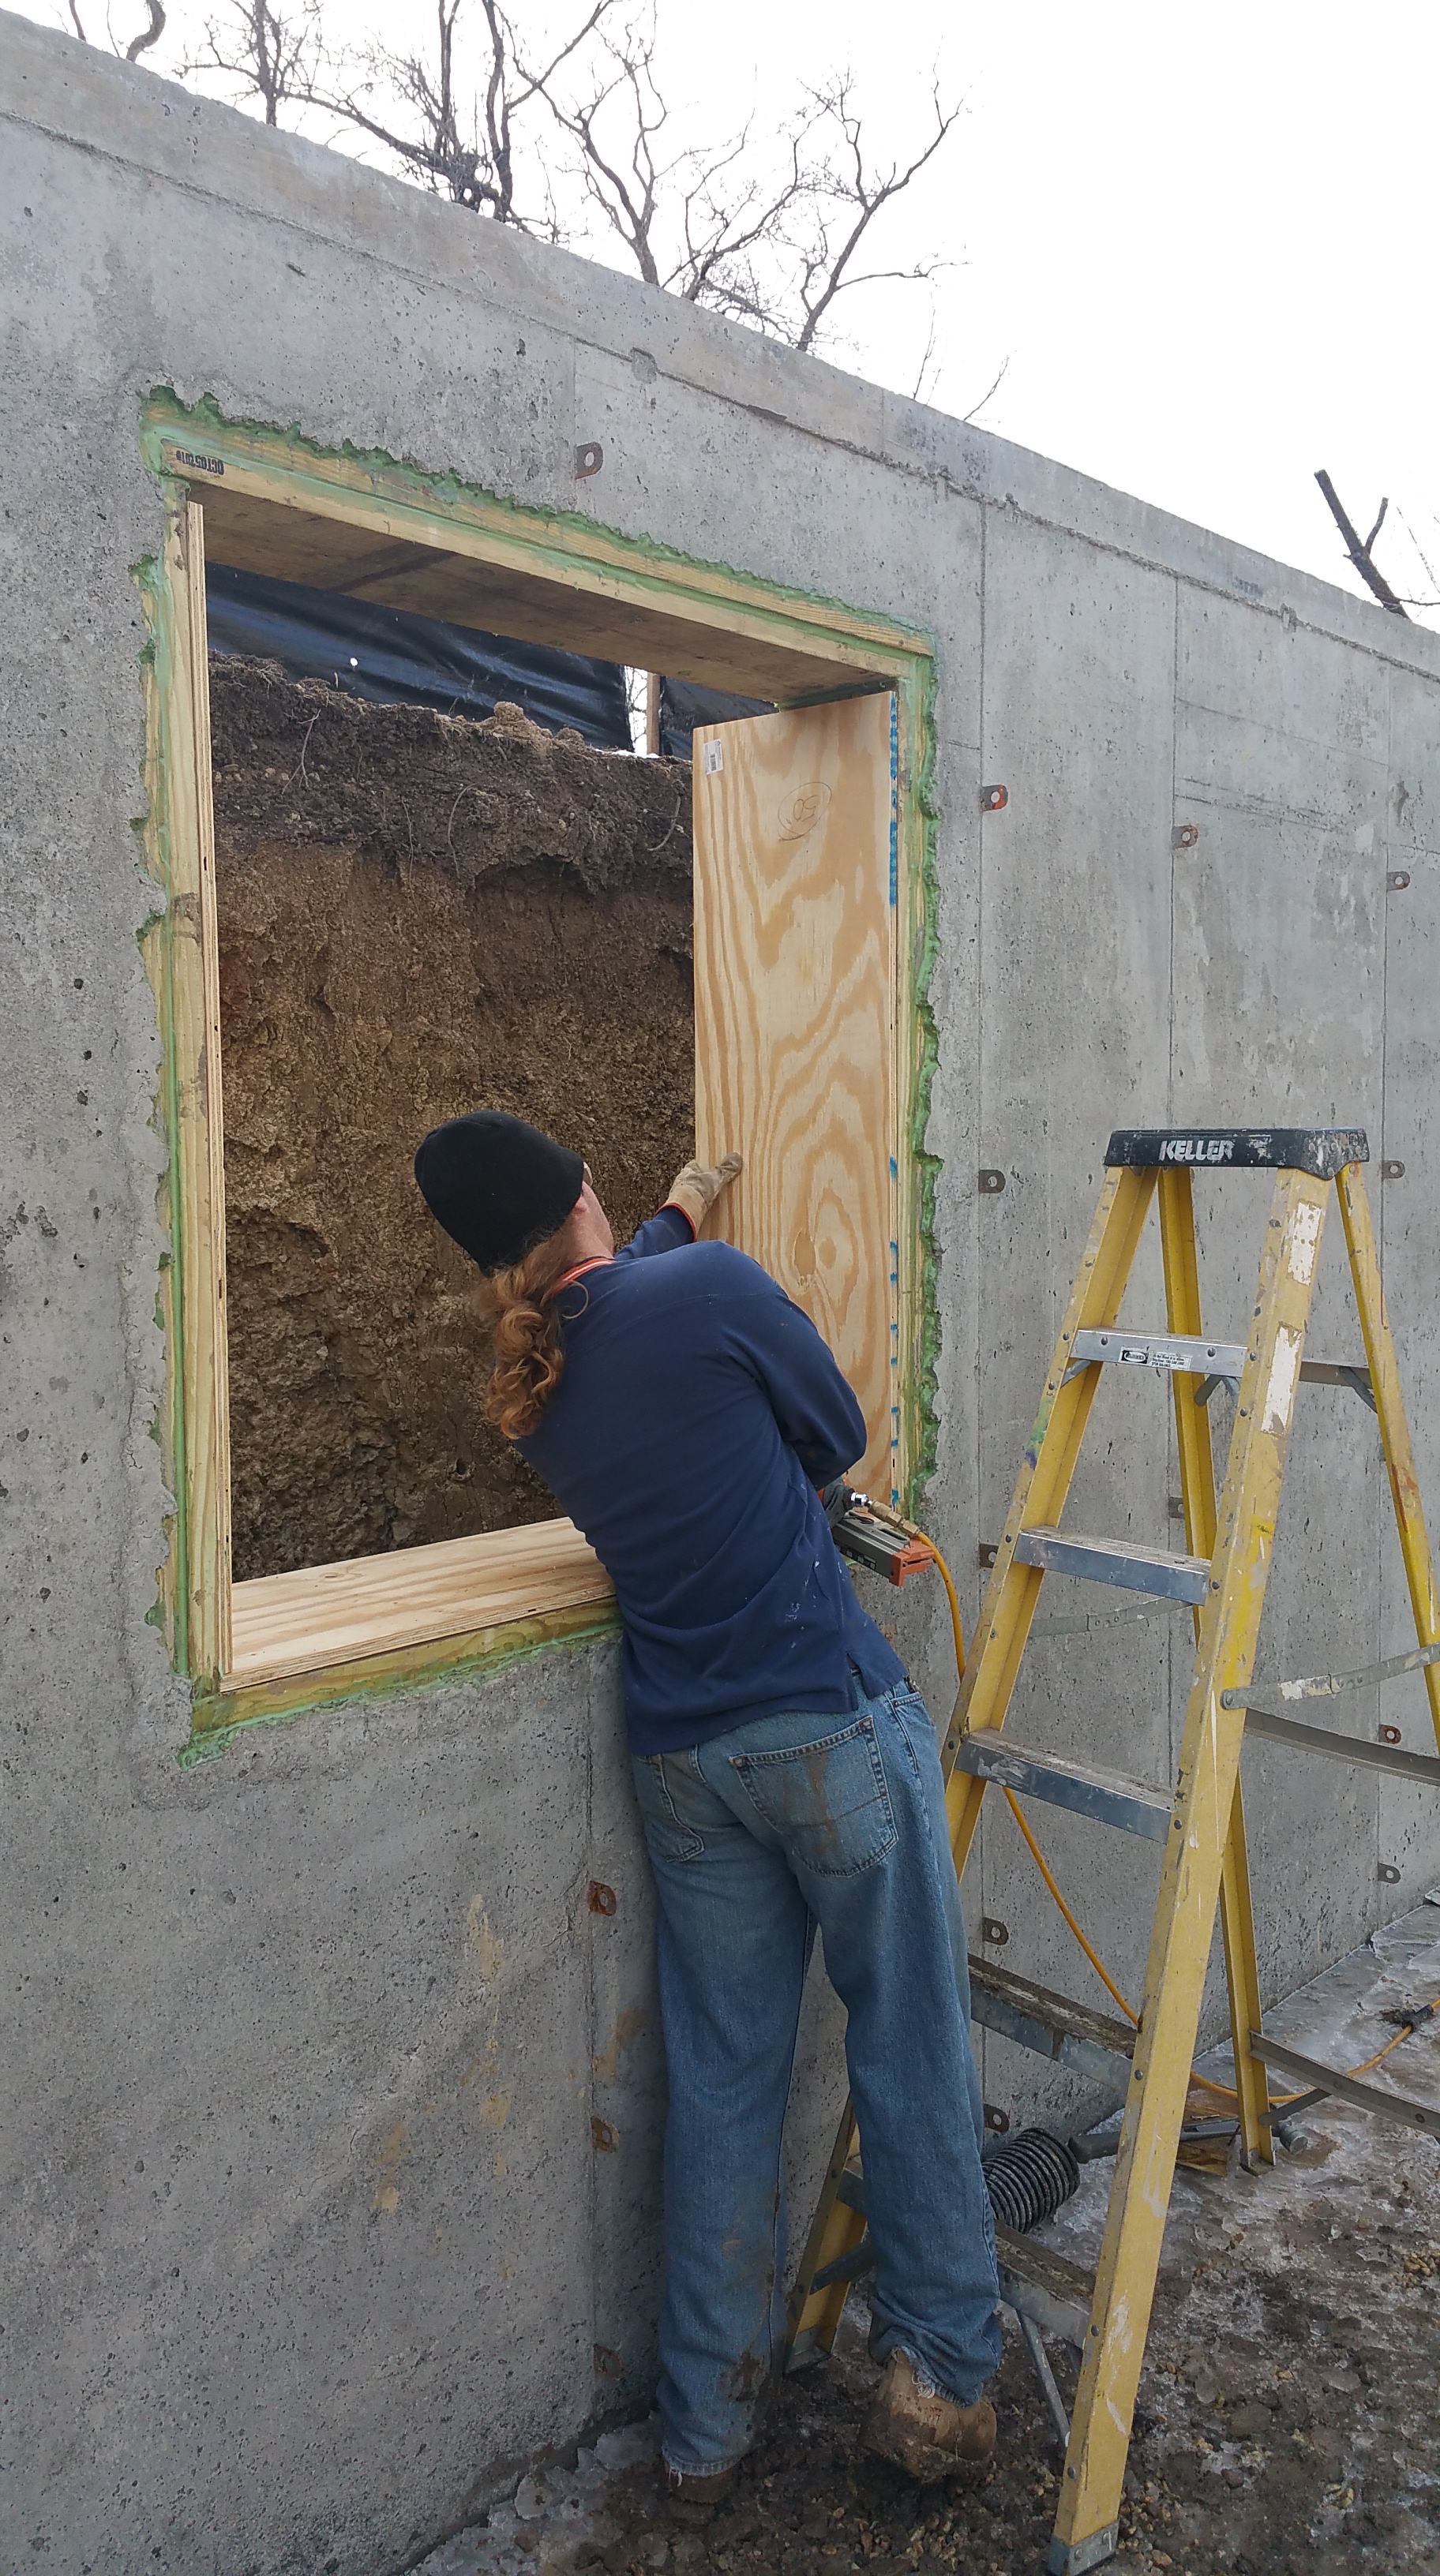
I initially intended to use the R-Guard line of liquid membranes by Prosoco for air sealing and waterproofing all seams and window/door openings, but cold temperatures made this impossible (they require 40° F and rising, which would be the exception rather than the rule here in Chicago for December and January). Maybe because of years house painting (caulking and drywall patching) the liquid membranes seem easier to use and less fussy to get right (the big issue with the tapes is avoiding wrinkles and properly shingle flashing to get water moving in the right direction).
Our Plan B was the series of Pro Clima products sold by 475 High Performance Building Supply. Most of them, including the sealant, can be used down to 14° F without issues.
Another option would’ve been the line of Siga tapes, another popular choice used in Europe, available from Small Planet Supply.
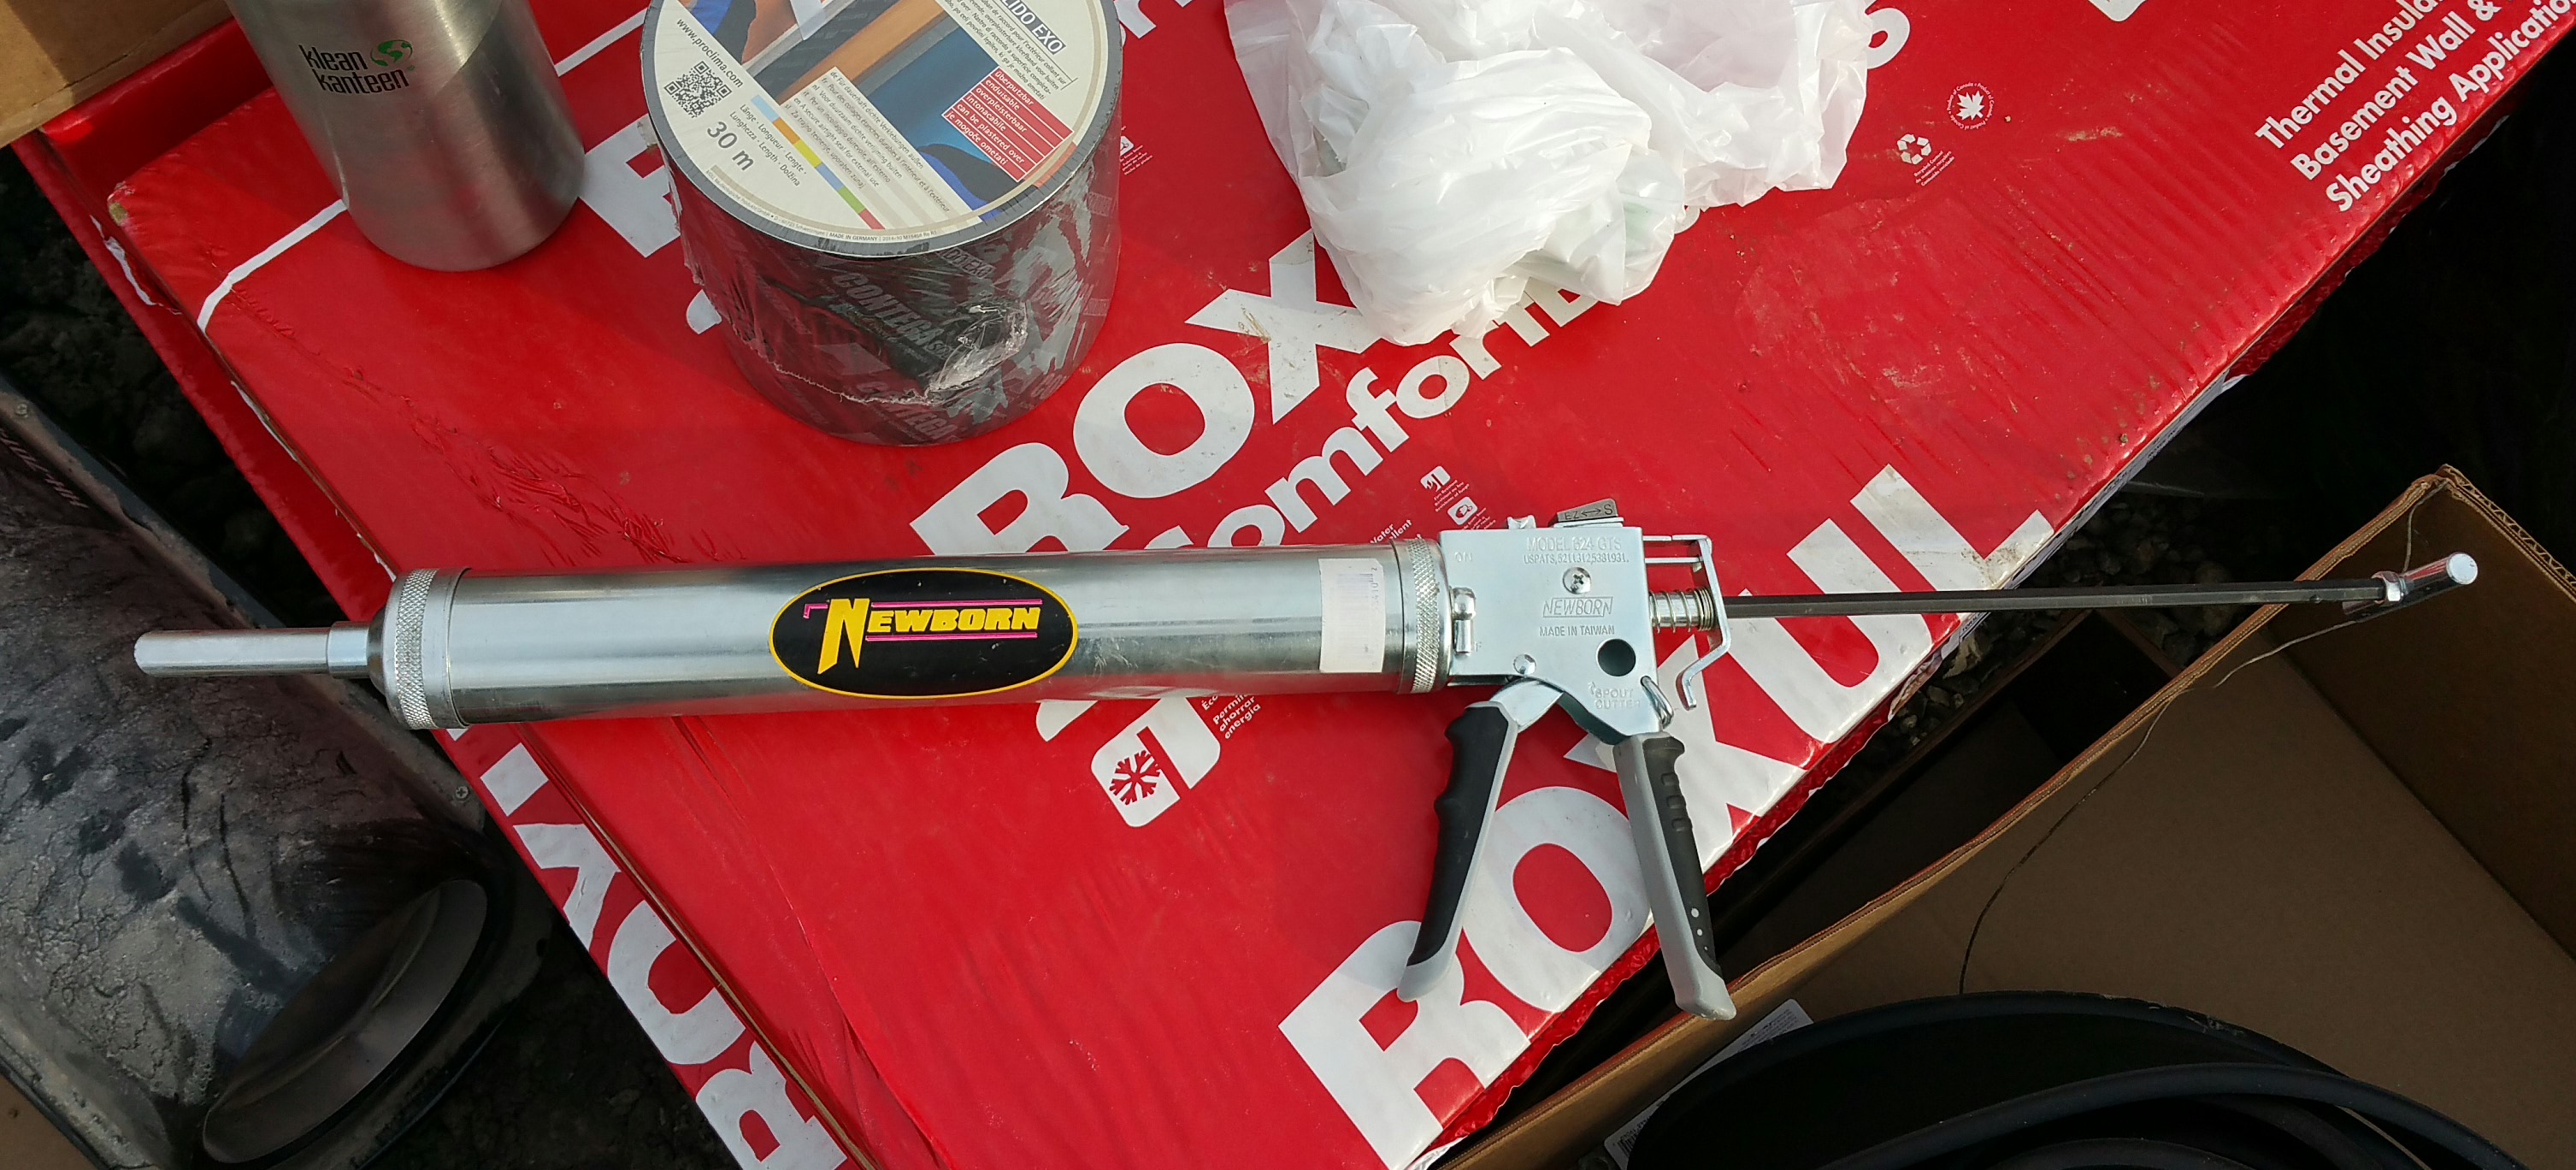
So as the window bucks went in, I followed, applying Contega HF sealant to all the seams and gaps. The sealant is acting as our first layer of air blockage. It’s super sticky, so I don’t doubt that it’s permanently flexible. I did a mock-up of our wall assembly months ago, and the HF on the seams is still tacky to the touch. It goes on light green, then slightly darkens as it dries.

A few suggestions for using the HF Sealant:
- I’ve found that completely snipping off the metal clip on the end of the sausage (as opposed to just cutting a couple of small slits around it) prevents it from getting jammed in the front end of the gun.
- If I have a half-finished sausage of HF at the end of the day, I put it in a tightly wrapped plastic bag overnight (see photo below), which allows me to use it within a day or two without any problems.
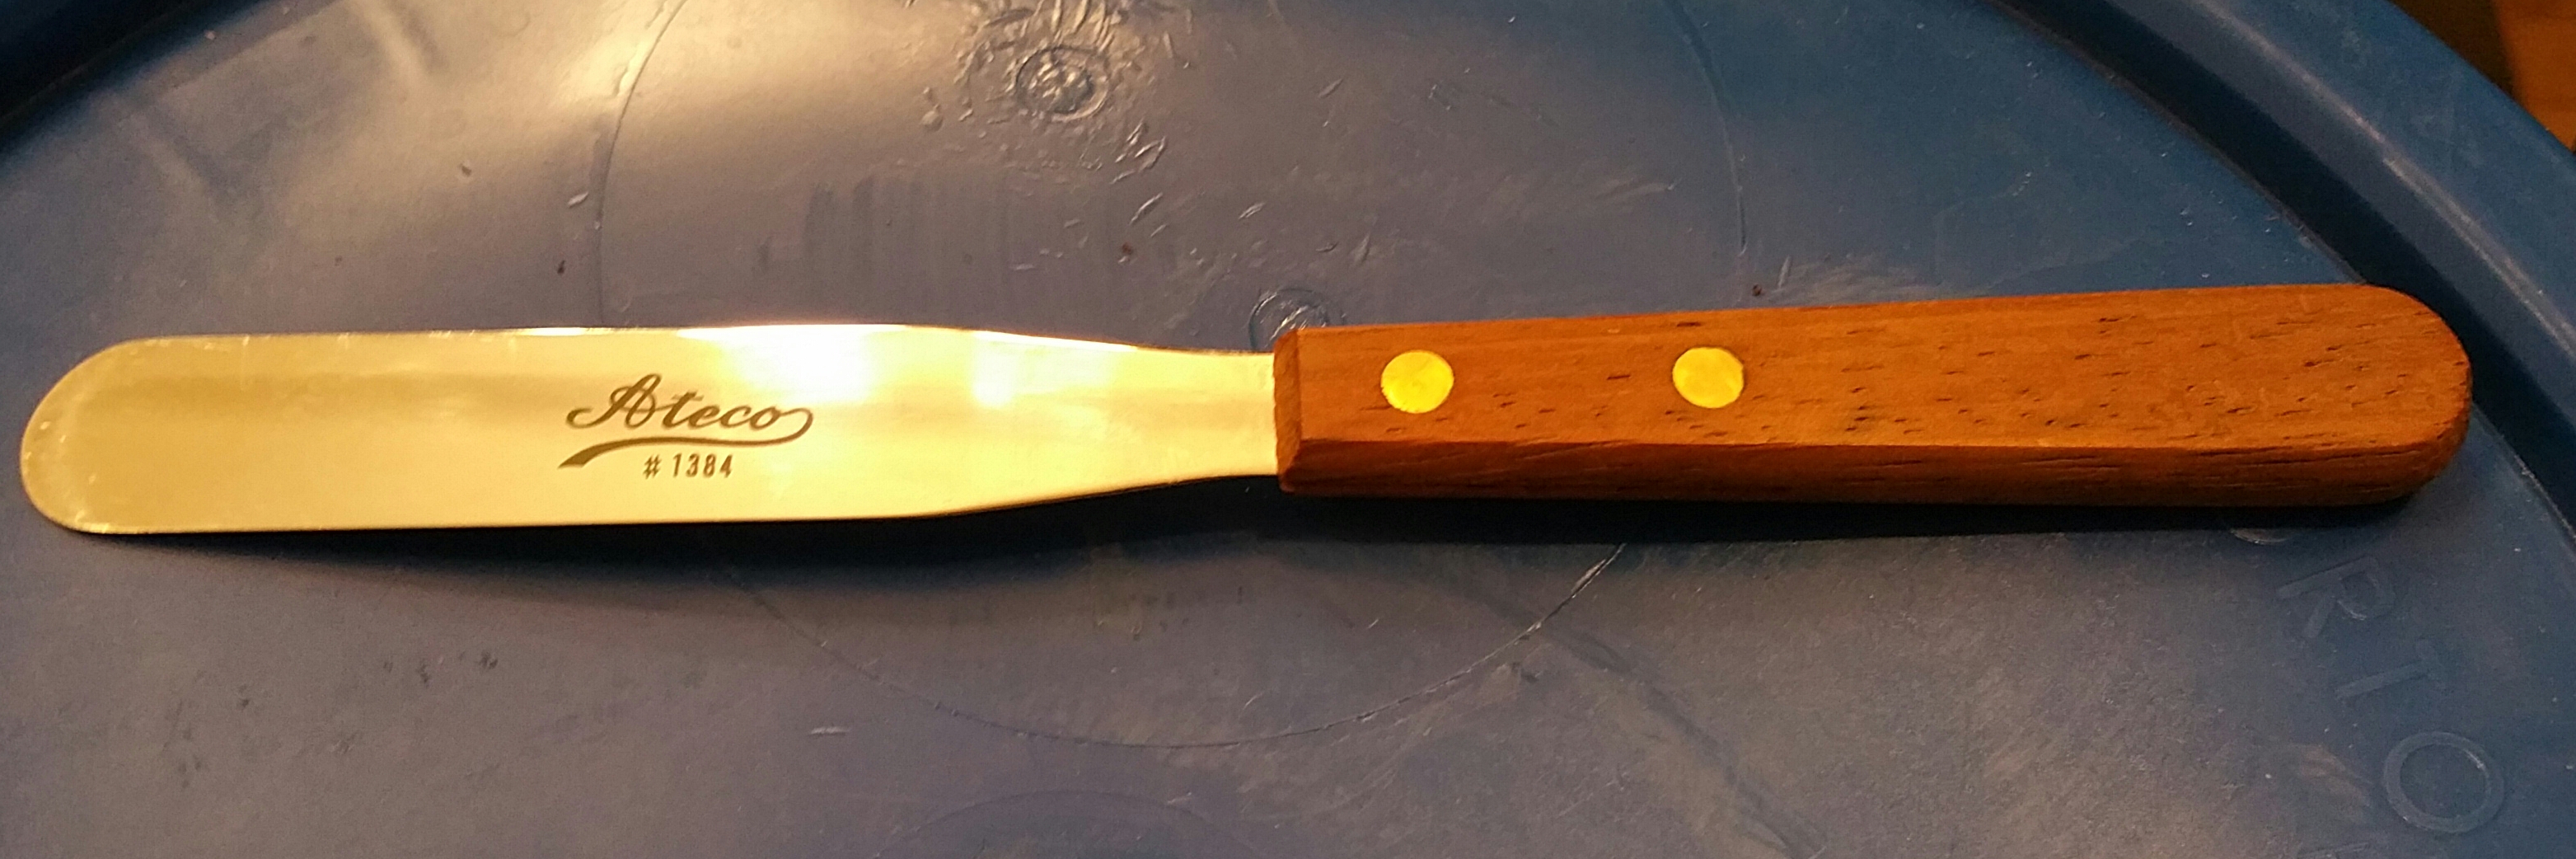
- Use a tiny spatula (see photo below) to tool the HF into place rather than your finger, as you normally would with a caulk — it’s just too sticky.
- Because the HF is so sticky, I wear Nitrile gloves, so when it starts to get everywhere — and it will get everywhere if you let it — I just simply change to a new pair.
- For clean up, the Citrus Solvent we’ve been using with the tung oil works great.
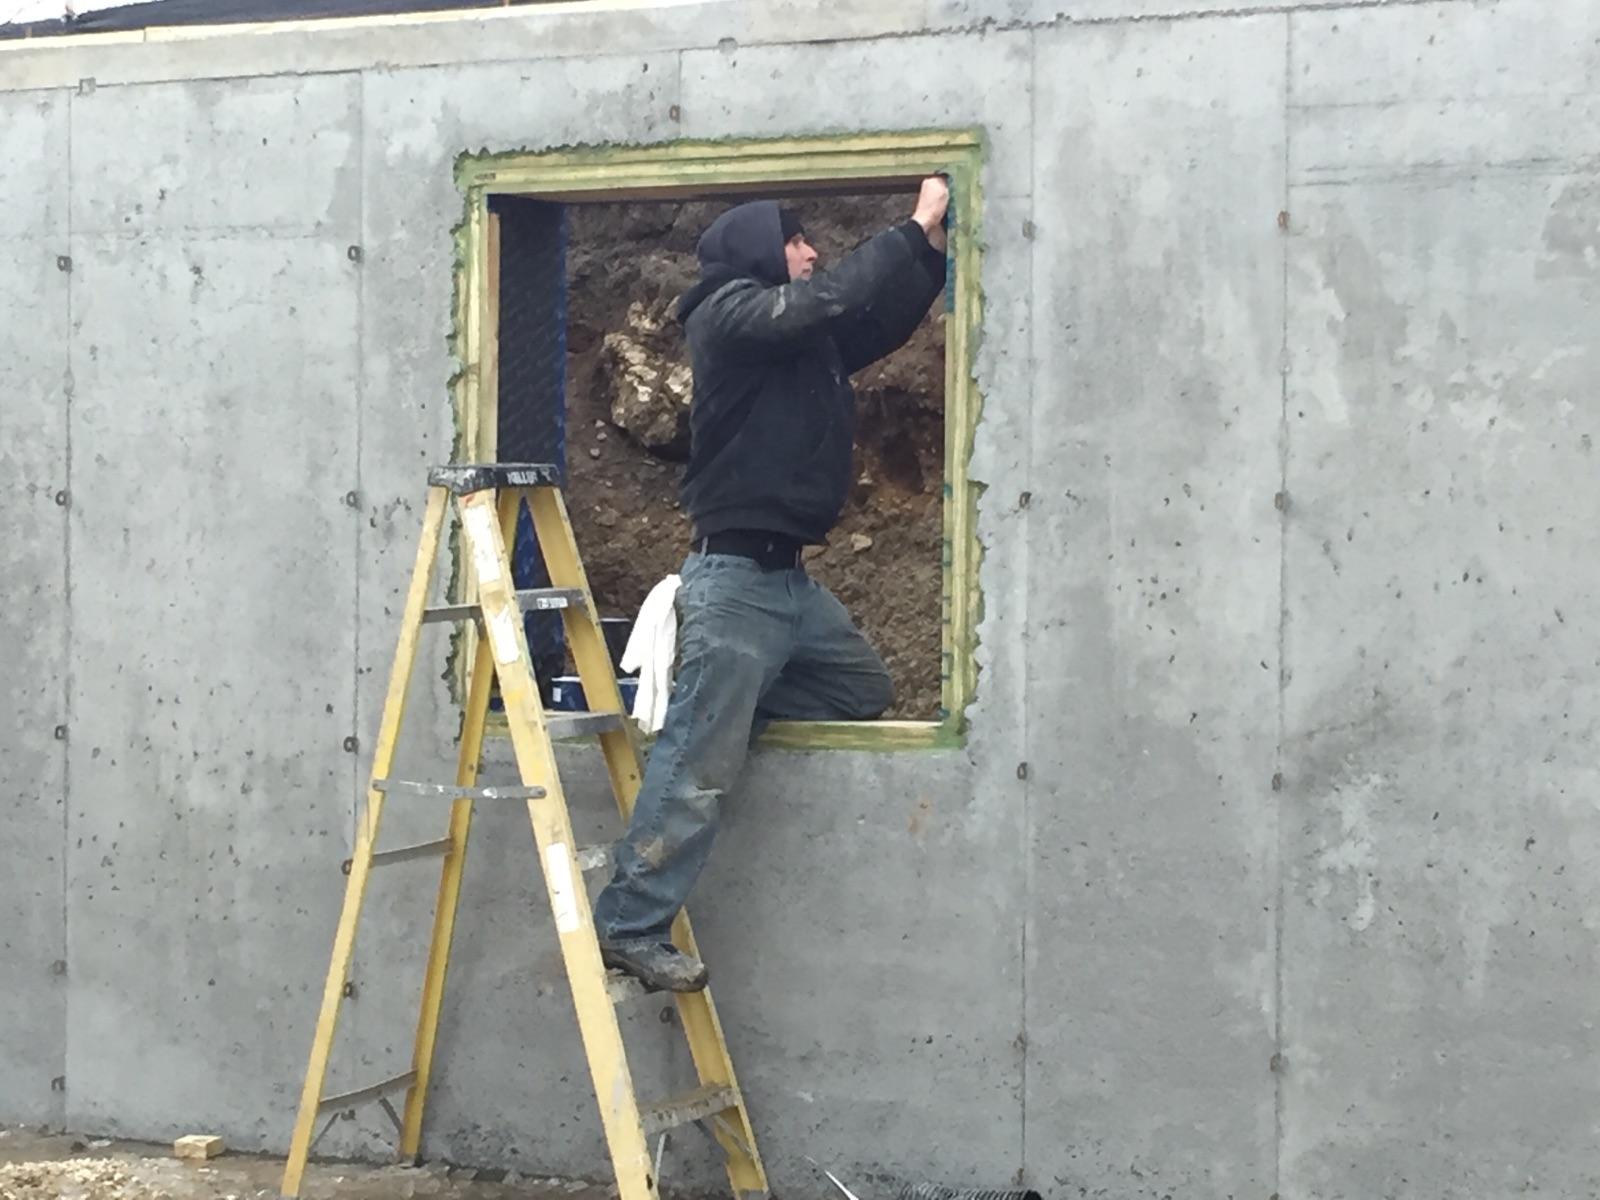
It’s easy to forget the realities of a construction site when planning details, like the use of the Pro Clima tapes. I pictured it being a pretty straightforward process, not a winter day in the 20’s, fingers numb, propped up on an unbalanced ladder in the hole, while the other guys are cutting wood and Roxul around me — a case of adapt or die, I guess, and a reminder not to be overconfident about the products you’ll be using, or the installation process that inevitably goes with them.

It was important that the connection between the window bucks and the concrete of the foundation be air sealed and made water tight before it gets completely covered by the two layers of Roxul.
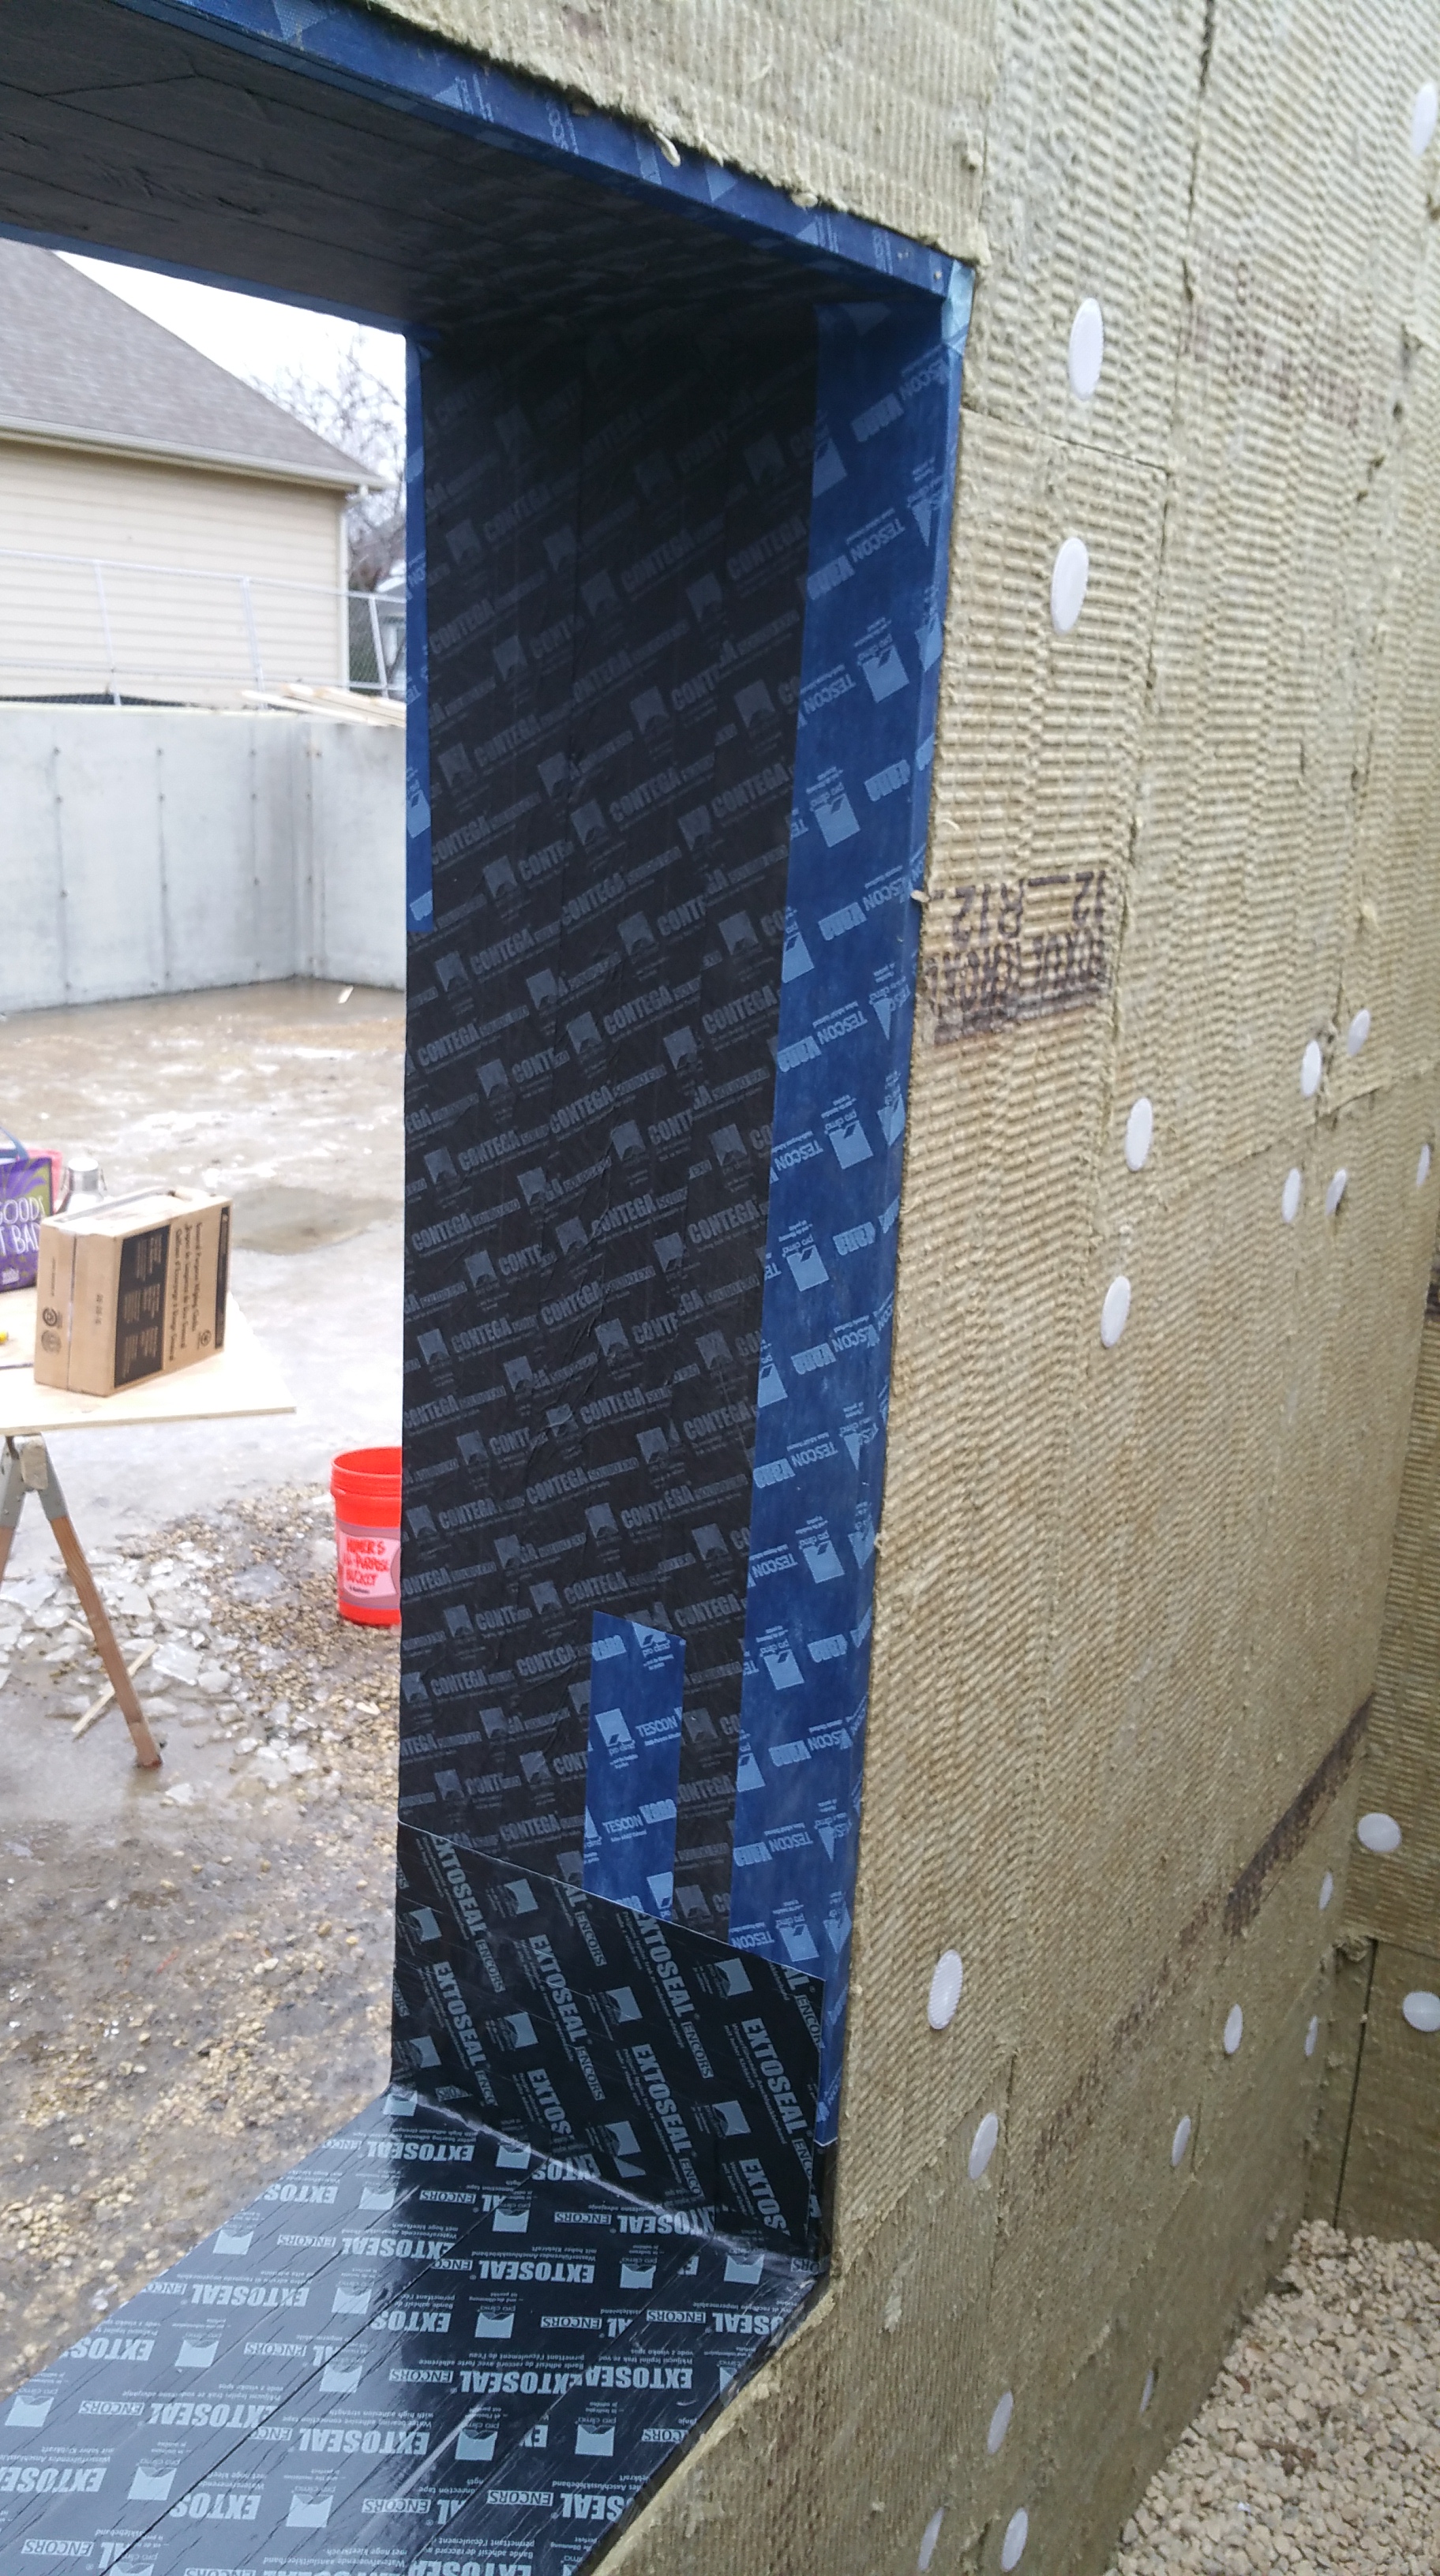
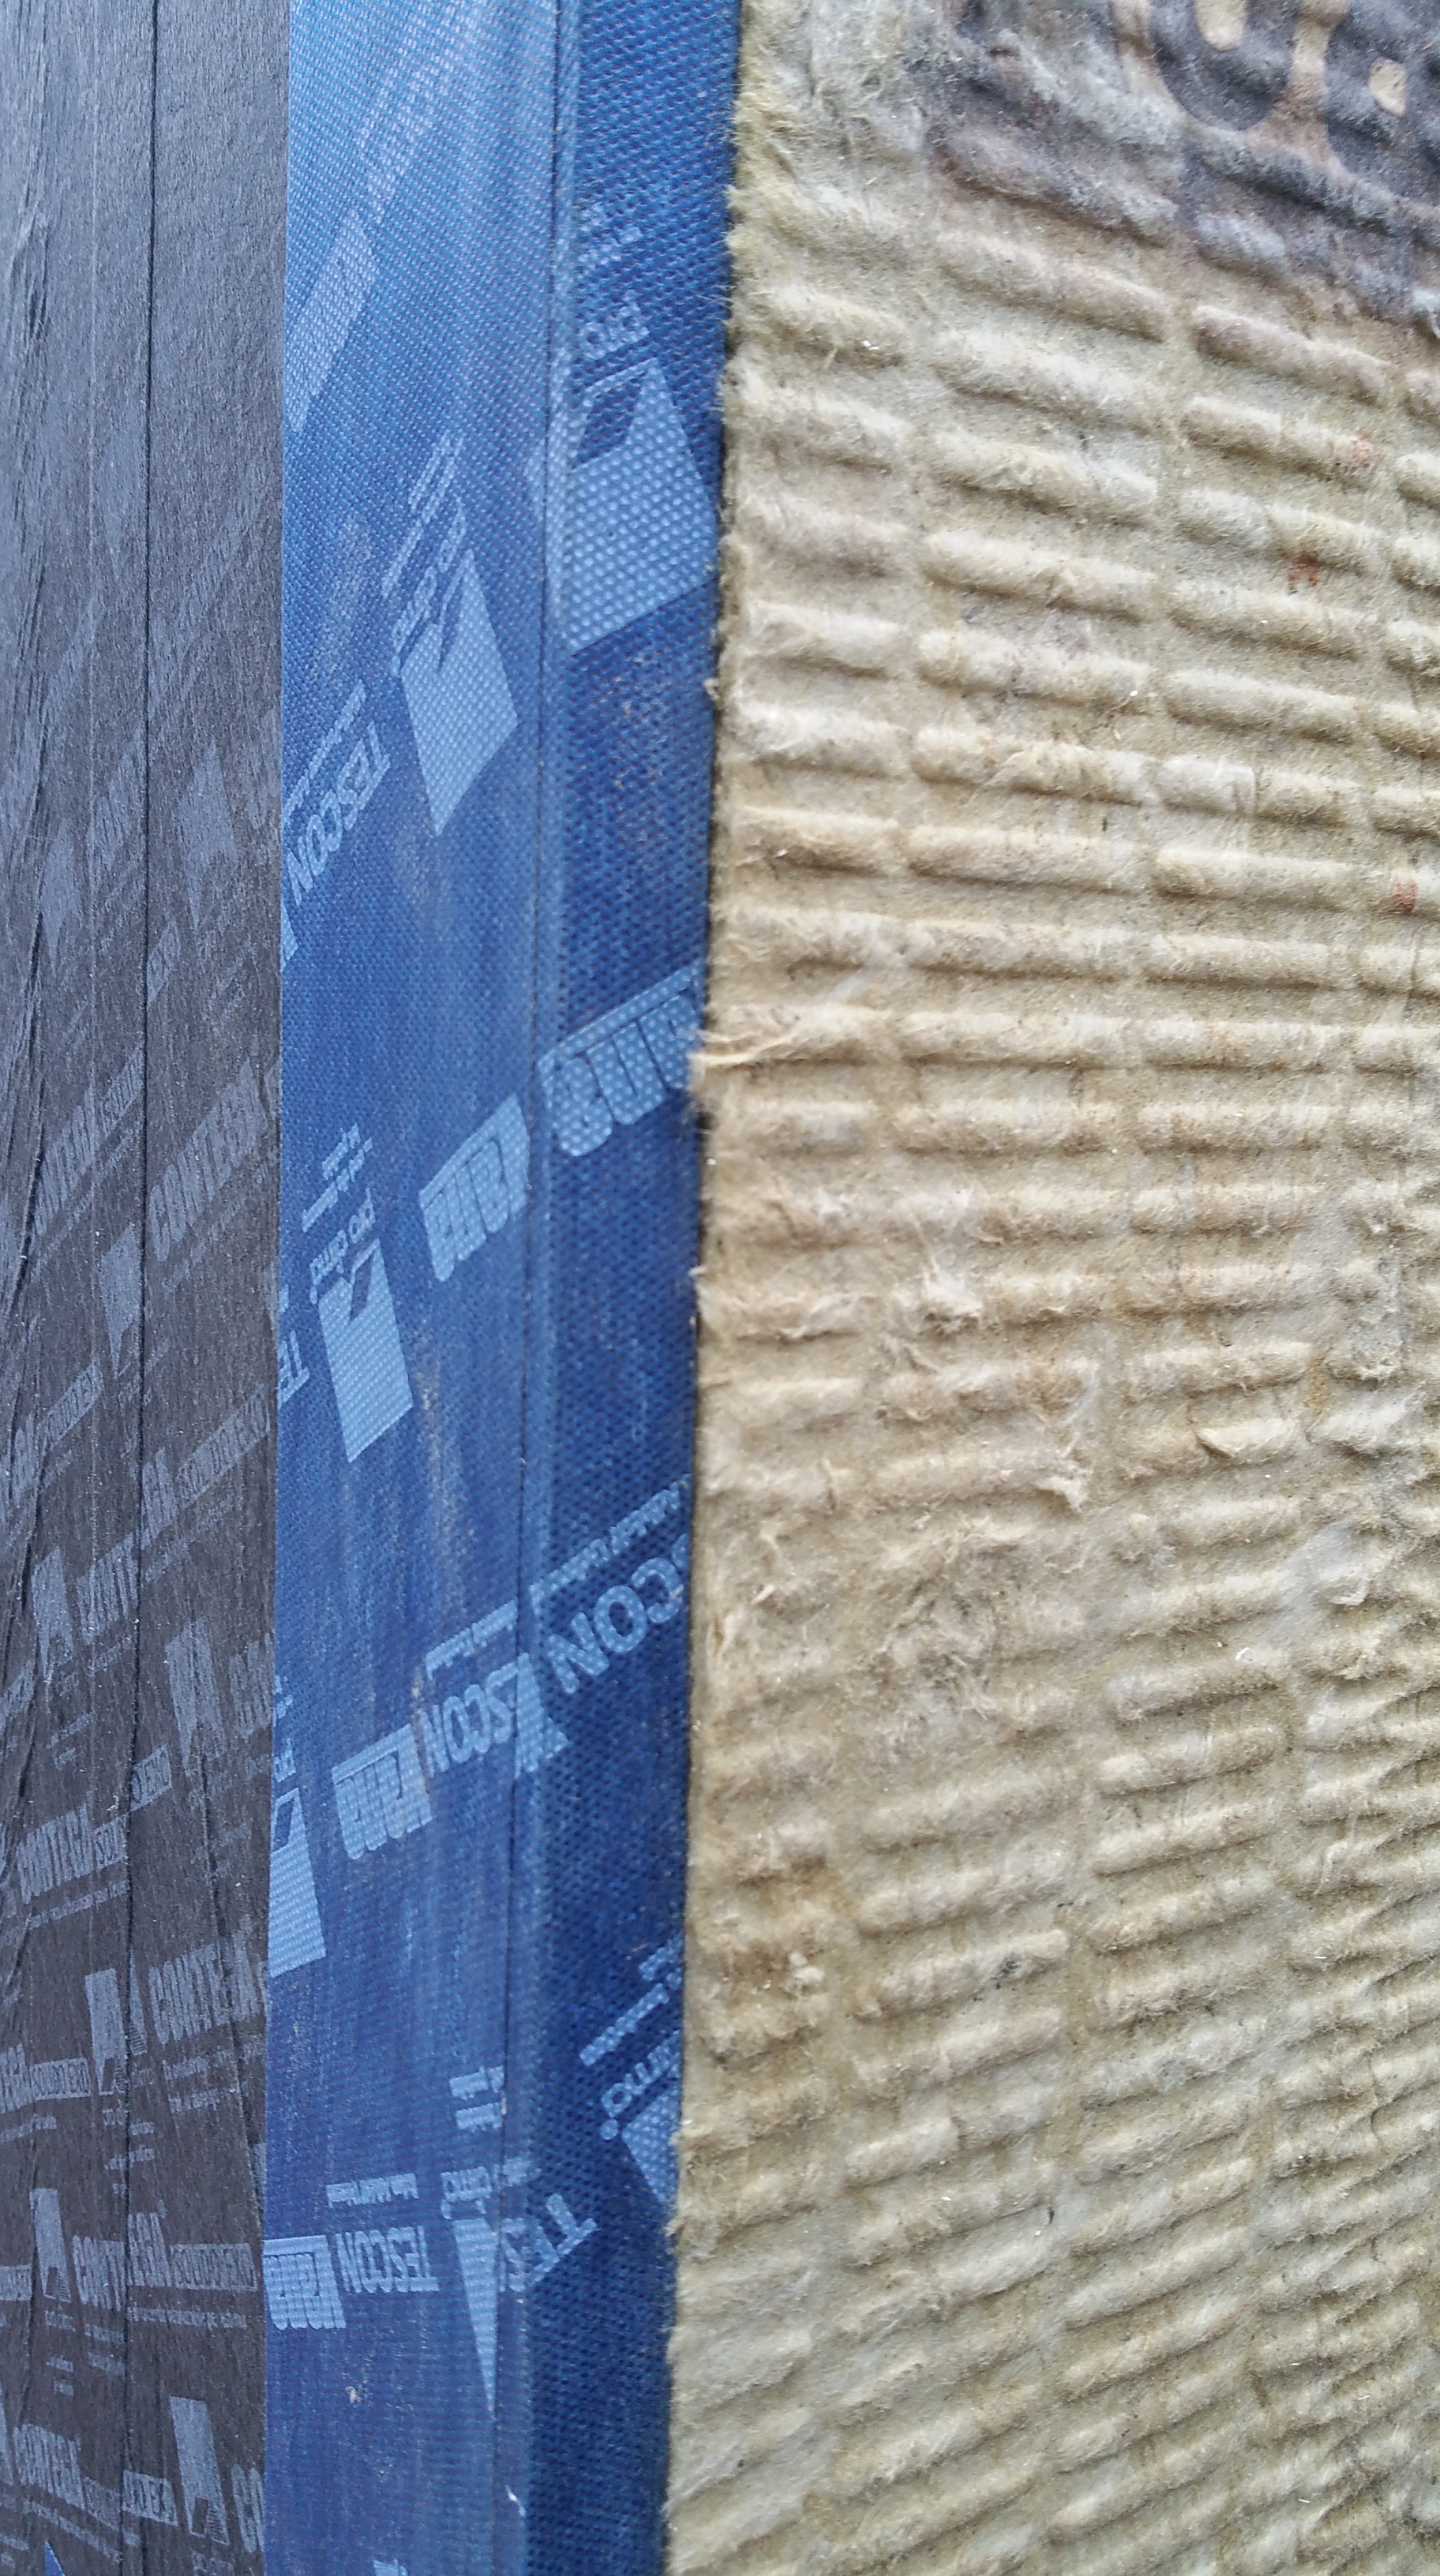
It’s been in the 20’s and 30’s, so the HF sealant took a couple of days to firm up before I could then apply the series of Pro Clima tapes. I’m using a combination of tapes, including the Tescon Vana (the bright blue), Profil (light blue — great for making inside and outside corners), Contega Solido Exo (black, 6″ wide), and the Extoseal Encors for our sills (475 HPBS has a great series of videos showing how to use each tape).
We knew the bucks would be sitting for some time, exposed to the elements, before the windows actually show up, so we decided to completely cover the openings just to be safe. This gave me extra practice using the tapes, which definitely helped, and it meant not stressing out every time the forecast called for rain or snow.
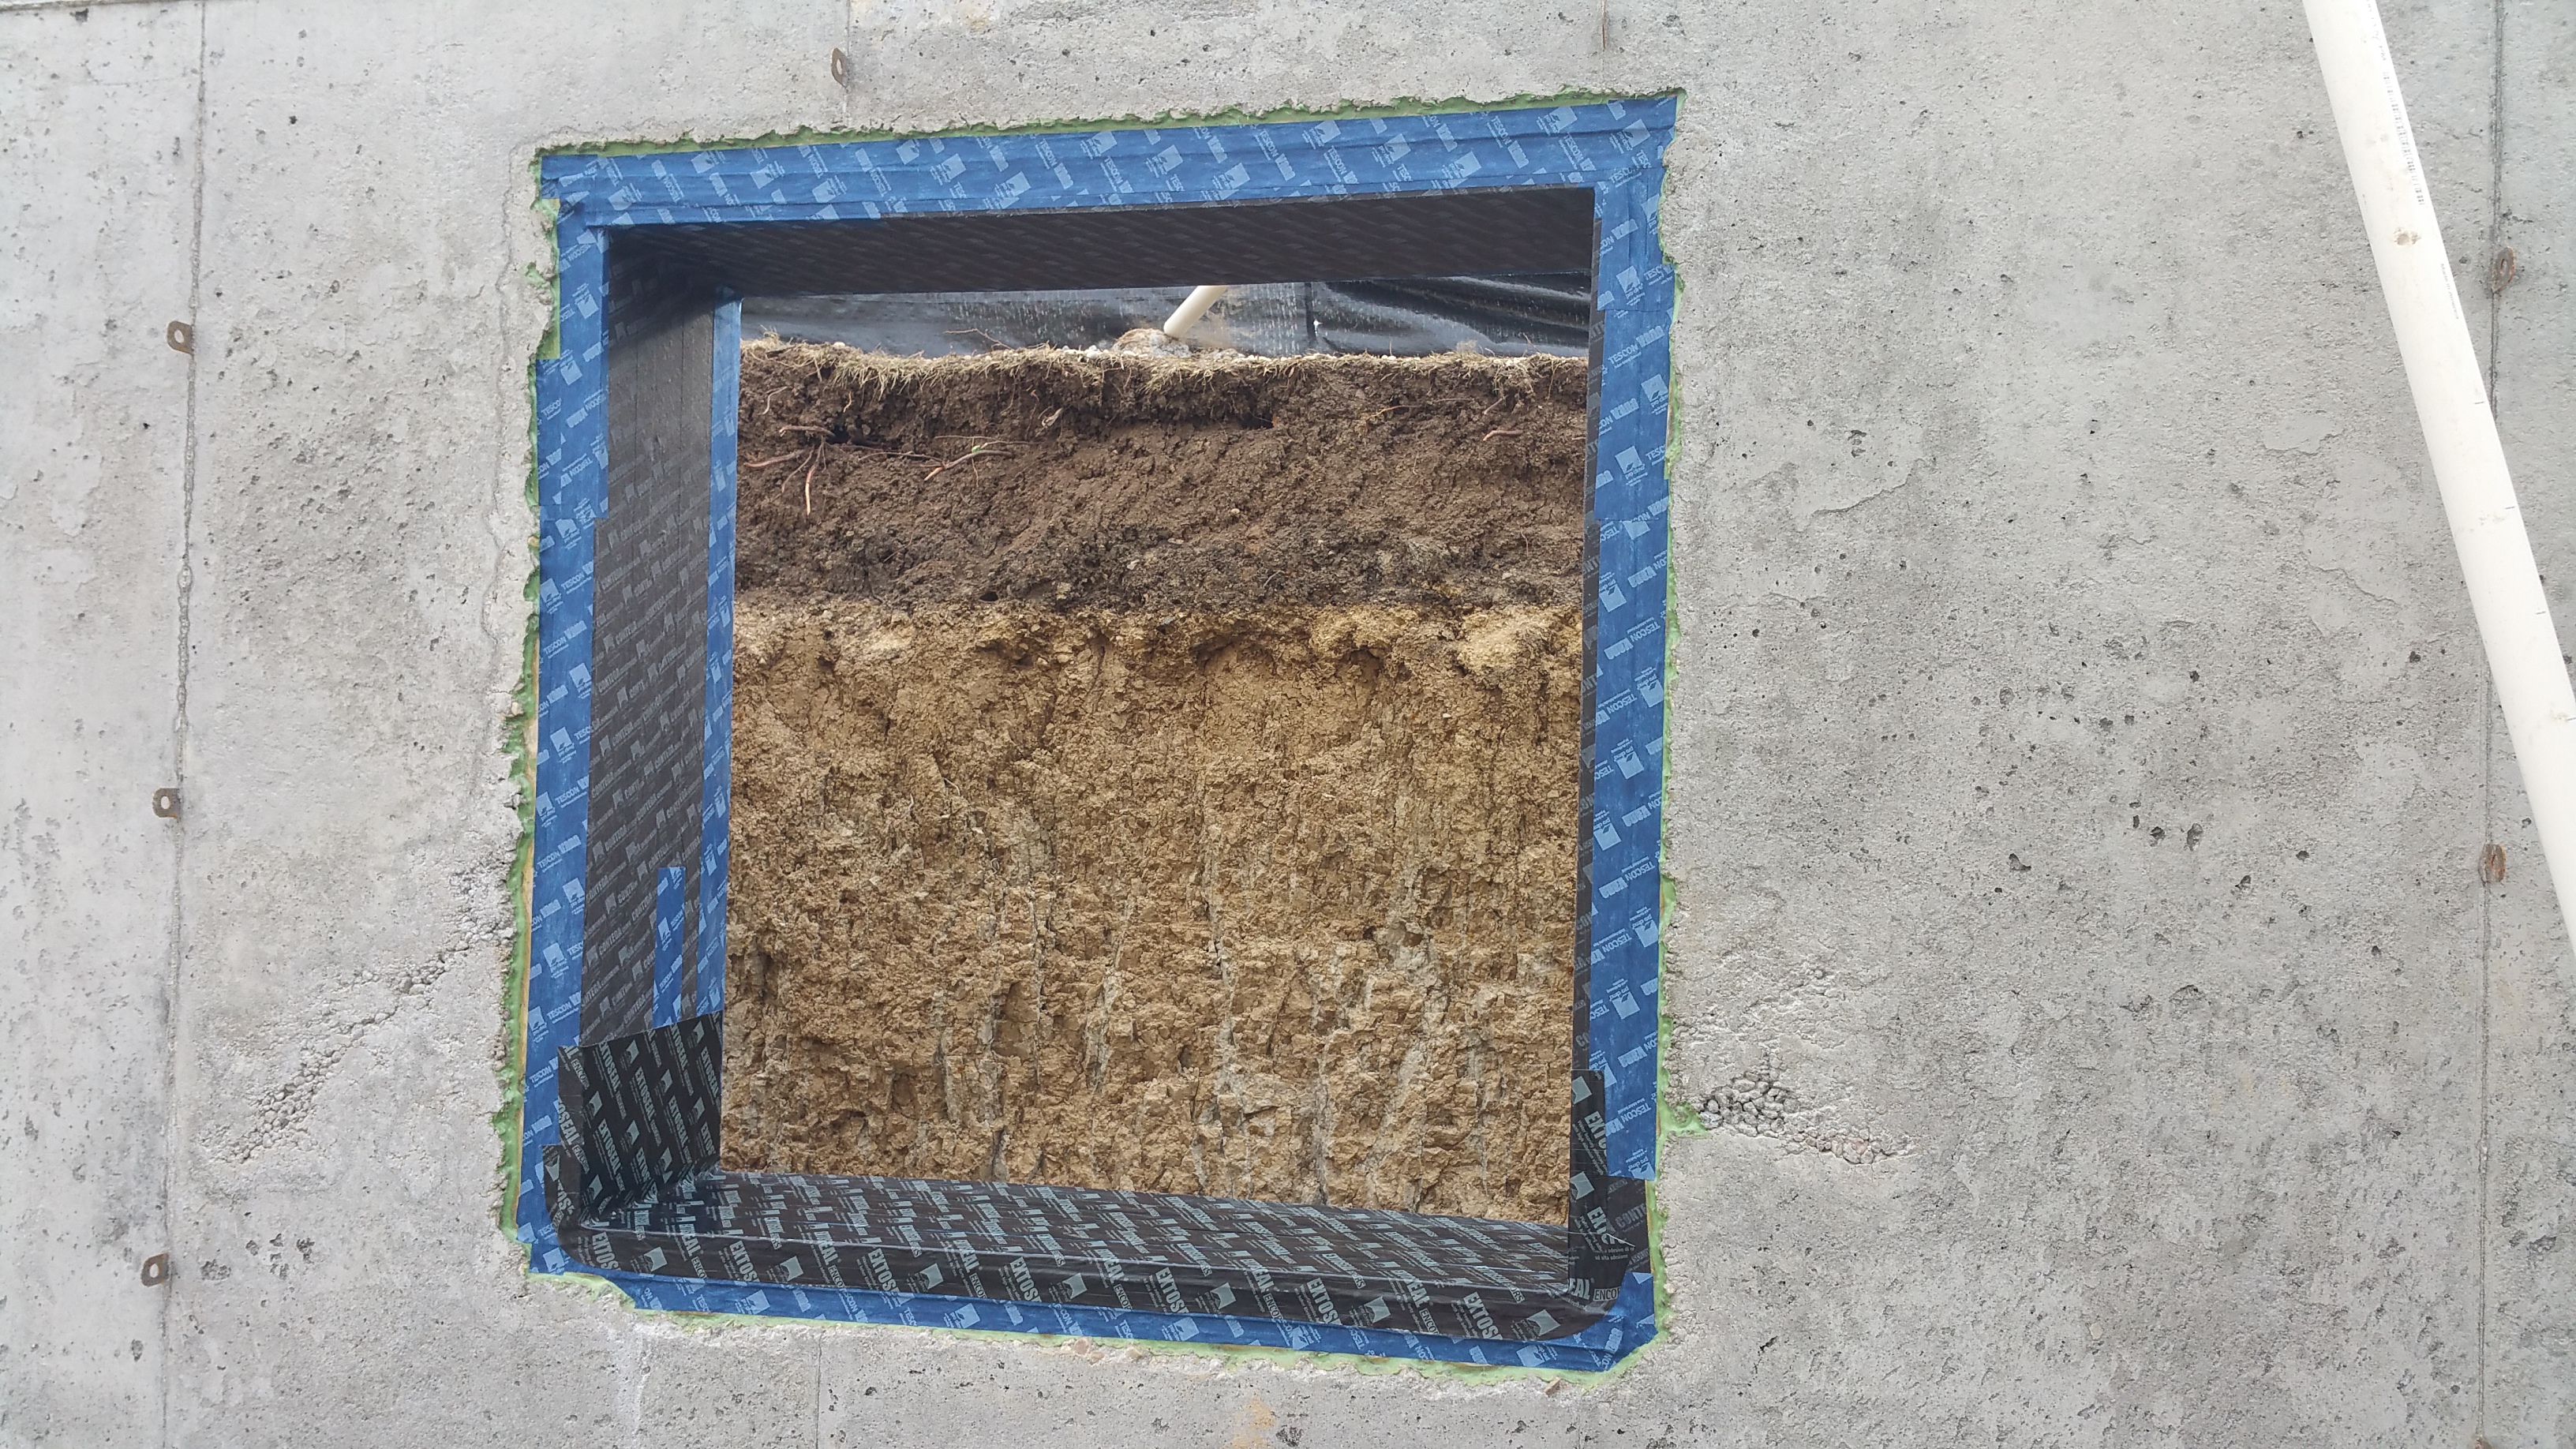
The only tape that’s giving me fits is the black Contega Solido Exo. It’s thinner than the other tapes, so it has a propensity to want to stick to itself (wrinkles are more difficult to avoid), and I find it much harder to pull it away from its peel-and-stick backing than the other tapes. I worried that the Extoseal Encors might be difficult to get right, but it — along with the Tescon Vana and Profil tapes — has been surprisingly easy to work with.
This video was my Bible for installing the Extoseal Encors:
In lieu of on-site training from someone who’s used a specific product consistently, videos like this one are invaluable when using new products and you want to get the details right. Without videos like this, you’d be in for a frustrating process of trial and error.
For instance, even with this excellent video, I noticed when I did our mock wall assembly that because the Extoseal Encors can stretch around corners it’s easy to stretch it too much, thereby inadvertently thinning it out. I’ve found that when I get to a corner it’s better to just fold it around the edge rather quickly, without overthinking it too much, which helps to maintain the thickness of the material at and around the corners (arguably the product’s strongest attribute in helping to avoid water damage).
I can’t recommend enough doing a mock wall assembly, or practicing on scraps, to get a feel for using these products, before you find yourself on-site doing it for real.

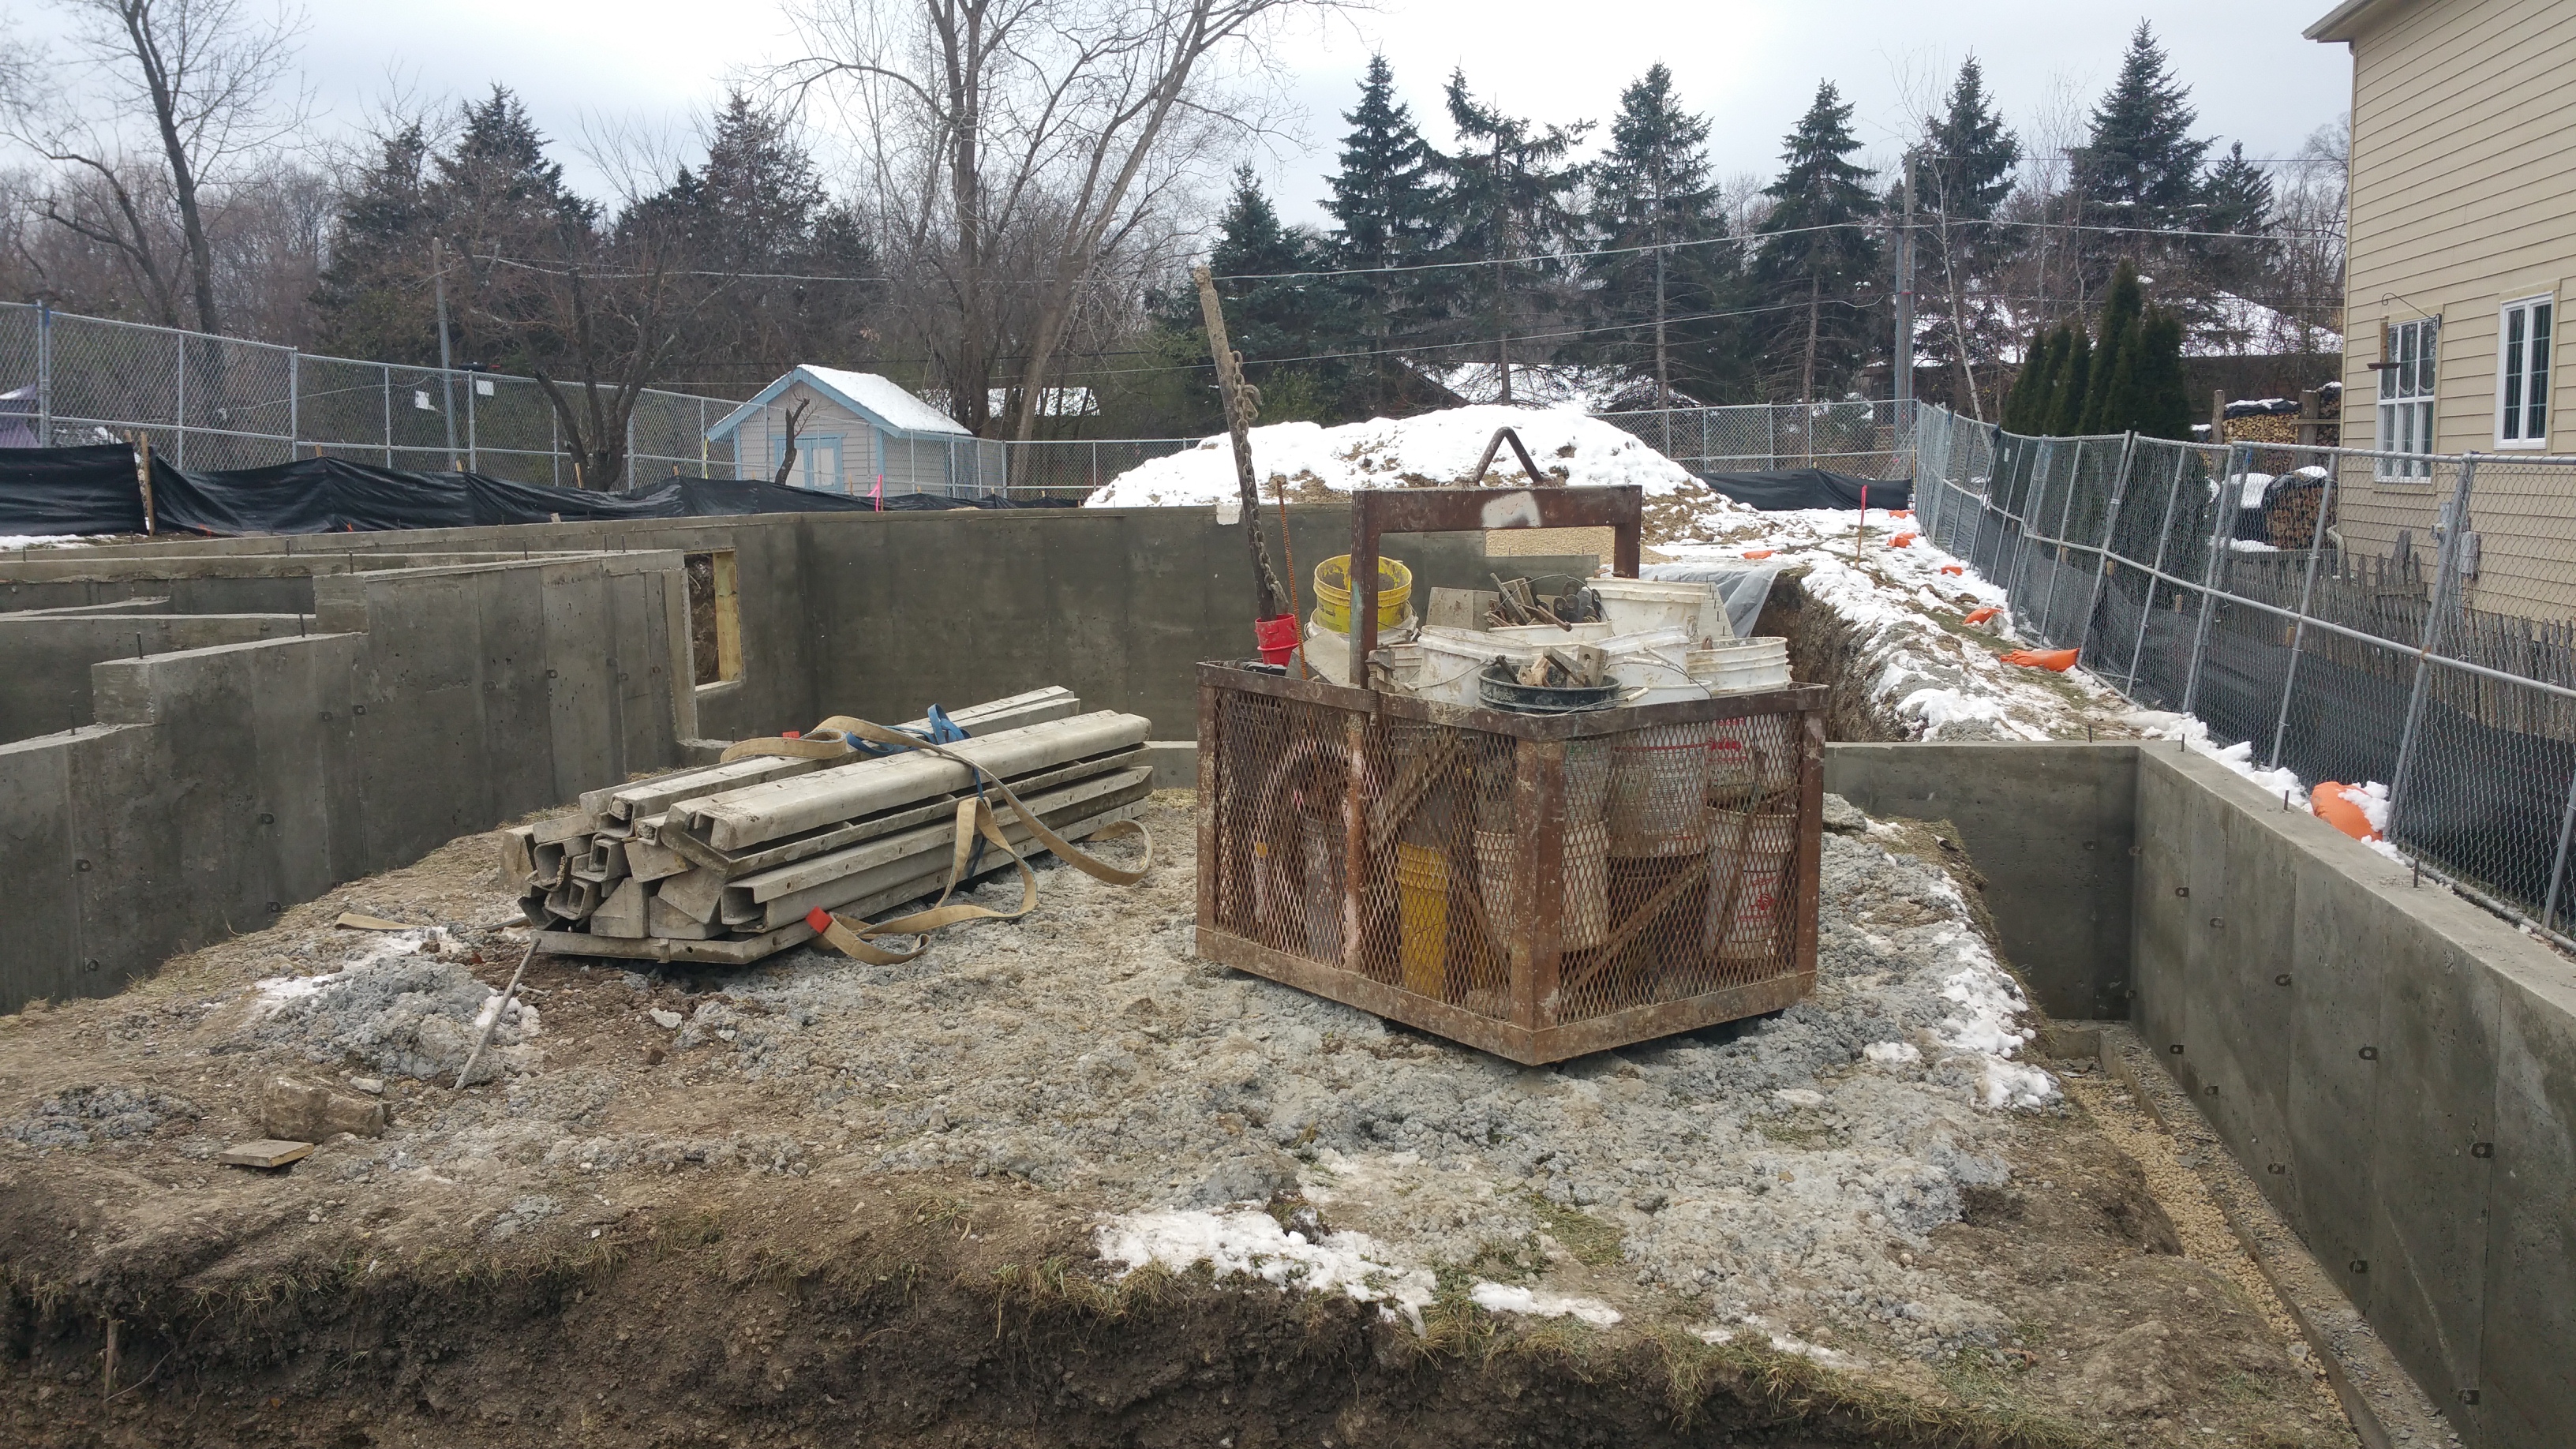
We’re almost ready to climb out of the hole. It will be exciting to watch the guys start framing so we can see the basic form of the house begin to take shape.


Did anybody ever provide any information about the connection between the foundations and whether or not they need to be thermally isolated. I am in the same situation……
LikeLike
Hi David,
When I posted the question on Green Building Advisor no one jumped in with any obvious, definitive solution. I’m hoping this means these connections won’t mean a significant energy penalty.
I still haven’t found any Passive House project where this issue is addressed.
Also, in my last house, which had no insulation to the exterior of the foundation or the wall sheathing, we experienced no condensation/moisture issues in the basement, so I’m also clinging to that as well.
If you find any resources that address this issue, please let me know and I will link to them to help others.
Let me know what you end up doing on your project.
Good luck! And thanks for posting a question!
LikeLike
As we are only days away from pouring the foundation it was necessary to come up with a solution. My foundation guys didn’t like that there was no connection. The also didn’t like my solution. The EPS foam spec’ed in the drawings is used to separate intersecting walls on a 4′ stem wall. One option is to wedge the foam down into he form with rebar through the foam every 12″. The structural engineer likes rebar for these connections however, keeping the foam in place will pretty much be impossible during the pour. So we have opted to pour the house wall first, remove the forms, place the foam between the intersection then form up the garage/porch foundation to intersect with the foam thermal break. We will drill holes every 12″, 6″ into the existing foundation and insert steel rebar with epoxy.
The difference in heat transfer between rebar through 2″ foam or concrete can be fairly easily estimated as long as you know the area, thickness, thermal conductivity. For 4 pieces of 3/4″ rebar penetrating through EPS foam at 2″ thick I have estimated the thermal conductance to be about 0.028 W/K. The junction of two concrete walls will give something around 0.4 W/K. So although steel conducts much better, the area of the rods is a huge factor to energy transmission. The difference in the two setups is 14x greater without the thermal break and without the rebar. So although the rebar does conduct, foam and rebar provides a much better thermal break then the concrete alone despite the fact that concrete is a much better insulator than steel. This is mainly because the cross sectional area of the steel is much smaller.
You can follow our construction at flatrockpassivehouse.blogspot.ca
LikeLike
If you get good pictures of this and have a blog posting about it, please let me know so I can link to it.
Although I thought the foam/rebar combination made the most sense as well, I like the solution you’ve come up with — can’t wait to see how it turns out.
Good luck!
LikeLike
Here is a link to how we connected our two foundations using foam and rebar. My estimates are pretty simplified but I think that using foam an rebar can decrease the rate of energy loss/gain by at least an order of magnitude
http://flatrockpassivehouse.blogspot.ca/2017/05/connecting-two-foundations.html
LikeLike
Nice solution!
Love the site of your new house — those trees in the background look great!
I linked to your blog post in the comments section of my question at GBA, so hopefully your solution can help others in the design stage of their own build.
Good luck with the rest of your project!
LikeLike
Eric,
I’m currently designing our “pretty good house”, and was happy to discover your throughly illustrated blog. I also intend to use Roxul Comfortboard on the exterior of the basement walls. The Rodenhouse fasteners definitely look like the way to go. I’m curious about how you will finish the above-grade areas of this system. I see recommendations for “cement board” over this area, but many cement bad products are not rated for ground contact. Is there a product you’ve found for this?
thanks.
Laurie
LikeLike
Hi Laurie,
Thanks for checking out the blog.
It’s a good question — a really good question as it turns out.
I always assumed, based on everything I’ve read about Passive House and “green” builds generally, that it would be fairly straightforward to cover the insulation on the exterior of a foundation with cement board (Durock or Hardie Backer), at and just below grade, and then cover it with a parge coating to make it look like a typical concrete foundation (there’s even an illustration in the Roxul technical info showing this exact set-up).
Unfortunately, if you’re using as much insulation as we are (5″ on the exterior of the foundation) it’s difficult to find flat-head concrete screws long enough to go through the insulation and into the foundation. If memory serves, the last time I looked it up TapCon screws only go to around 5″ for the flat-head variety.
The parge coating I was going to use is Tuff II (available here in the Chicago suburbs at big box stores like Home Depot and Mendards) from Styro Industries. It’s a two coat process that uses a self-adhering mesh sheeting as an initial base, with each coat of parge about 1/16″ thick, so not very thick at all.
I did a mock-up on a sample board with the Hardie Backer board and the Tuff II and it seemed pretty straightforward. The Tuff II is pretty forgiving, so multiple coats are ok.
In regards to “not rated for ground contact”, again, based on what I’ve read, that is true. To get around it, and to try and encourage the durability of the cement board at and just below grade, we were going to have a gravel border around the top of the foundation (16-20″ down, and about 20-24″ out from the foundation). The theory was this would encourage water to move away from the cement board and parge coating as quickly as possible, hopefully promoting its long-term durability.
Because I can’t find long enough flat-head concrete screws, we’ve moved on to Plan B: We’re going to experiment with charring and oiling 2×10 cedar boards, attaching them to the top of the foundation with concrete anchors (they’ll look like typical lag bolts), along with the stone border. Once finished, at grade you should only see part of the 2×10 before it transitions to the gravel border.
I’ll post pictures once it’s installed, and I’ll describe the process if it’s successful.
To my surprise, there isn’t a lot of detailed info available, either online or in Passive House related books, regarding how to actually do a parge coating over the cement board. It’s typically described in very vague terms, with no details regarding specific fasteners for attaching the cement board to the foundation, or even for the parge coating itself.
If you come across something that is detailed, please let me know, and I’ll gladly link to it to try and help others.
A couple of other options I saw listed in various spots on Green Building Advisor included using pressure treated lumber, or metal flashing. The consensus seemed to be that the pressure treated wouldn’t last, or be especially aesthetically pleasing, while the metal flashing would be prone to dents, scratches, or waviness (it might look good initially, but probably not age well).
Nevertheless, maybe someone has figured out how to make one of these ideas work and look good. If so, I’d again be happy to link to photos or sites that show how it can be done effectively.
If you’re going with less insulation than we are, then flat head concrete screws combined with the cement board and a parge coating could still work for you. You would still want someone with some technical expertise to advise you about how deep the fasteners should be embedded into the foundation in order to properly secure the cement board.
I would be reluctant to backfill soil directly over the cement board/parge coating, especially if you have clay soil like we do, where moisture might stick around for quite awhile depending on the season/weather.
Let me know what you decide to go with. I’m curious to see what you come up with and how it turns out (pictures would be great!).
LikeLike
Eric,
I’m about to install 2 layers of 2″ Comfortboard 80 on the foundation (9 foot pour). I also will not avoid the thermal bridging issues that are discussed above; the connections to the garage and front porch will not be broken.
I am trying estimate the cost of labor for the installation; may I ask, how long did it take to install the two layers
using the method above and for how much square footage / linear footage of the enclosed perimeter?
Thank You.
David
LikeLike
Hi David,
If I remember correctly, it took four of us about 3 days to completely install both layers of the Rockwool on the exterior of the foundation. Drilling holes for the Rodenhouse fasteners for the 2nd layer of Rockwool definitely eats up some time. And it was the first time any of us had worked with Rockwool, or installed insulation on the exterior of a foundation.
In terms of quantity of material, my foundation is 49′ x 34′ for a 9′ basement.
Let me know if you have any other questions. Hope this helps.
Thanks for checking out the blog, and good luck with your project!
LikeLike
That is very helpful information, thank you!
LikeLike
No problem — glad I could help!
LikeLike
Why did you need a connection between the garage foundation and the house foundation?
I have two walkouts into a fully below grade basement and I just separated the foundations by 8″ and had them designed as self supporting. The footings needed to be a little bit bigger on the walkouts (they were only 3 walls) but it wasn’t a crazy amount more.
LikeLike
Once our concrete contractor told us he wasn’t comfortable separating the house and garage foundations with a continuous layer of Rockwool (he was afraid the two foundations might settle differently over time, potentially wreaking havoc with the framing above), we felt like we had no choice but to use a single foundation to build the house and garage on.
If our lot had been slightly larger, we probably would’ve gone with a breezeway between the house and garage, thus eliminating this issue of thermal bridging between house and garage altogether.
LikeLike