
More Mulch
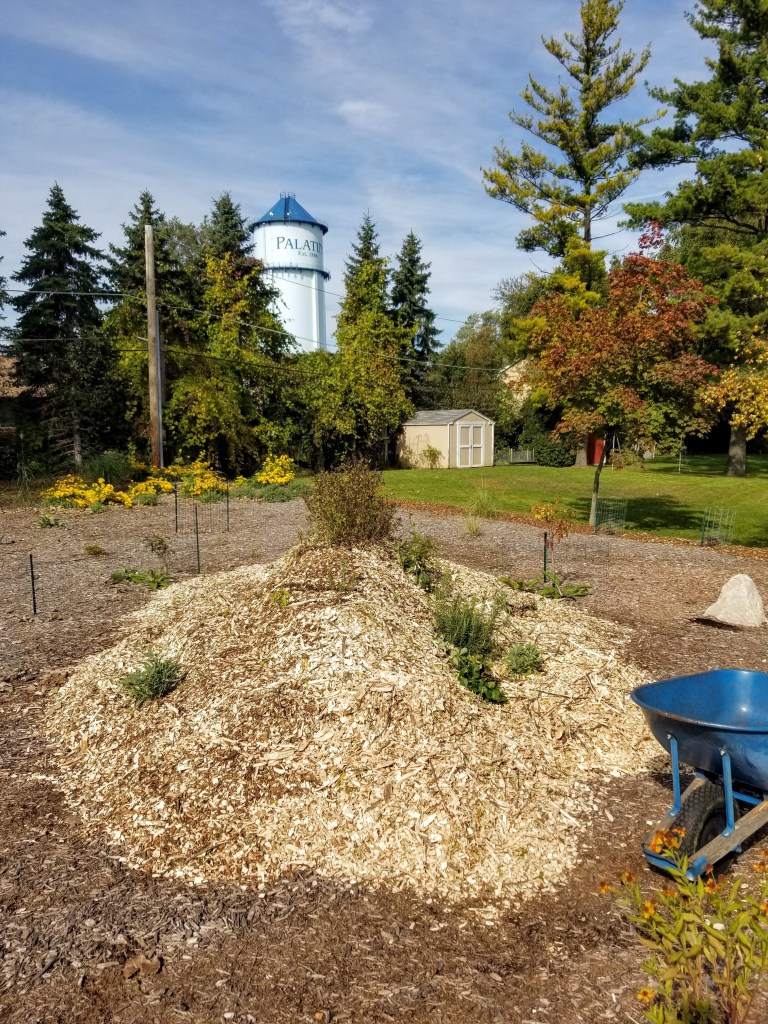
In October, 2019, we began to add more mulch to our backyard. The following spring, 2020, as the COVID-19 pandemic began to take hold, and schools and businesses went remote, we decided to move ahead and complete this additional layer of mulch.
As things turned out, it was an excellent way to get outdoors and get some exercise when most activities were off-limits due to the shut down.
Adding wood chips to the hügelkultur bed the previous October:
With weeks of online working and learning ahead of us, escaping into the yard at various times of the day proved to be a welcome source of respite, one that we were extremely thankful for. With so much uncertainty in the moment, the yard was a nice escape where there was always something new to see and learn, and genuine excitement around watching plants show new growth and development. Just quietly observing while walking through parts of the yard was an opportunity to register what’s different, what’s working, or noting details that may require a slight revision or even a radical change.
In terms of goals for the yard, after the new wood chip mulch layer was added the plan was to incorporate more ‘base’ plants such as ornamental grasses, additional fruit options (tree, shrub, and vine), along with more flowers beyond what we planted last year.
As noted in an earlier blog post, our experience getting wood chips (recently mulched trees and shrubs) from a local tree service has been hit-or-miss. After getting a couple of loads this way, the remainder was ordered from a local mulch supplier who offered wood chips supplied from various tree service companies. Even though the texture and particle size does vary quite a bit by the individual load (even within a single load), overall, we’ve been very happy with the quality of the material.
We were typically receiving about 10-15 yards with each delivery. Essentially the limit of what our driveway and staging area in the front yard could easily handle at one time.
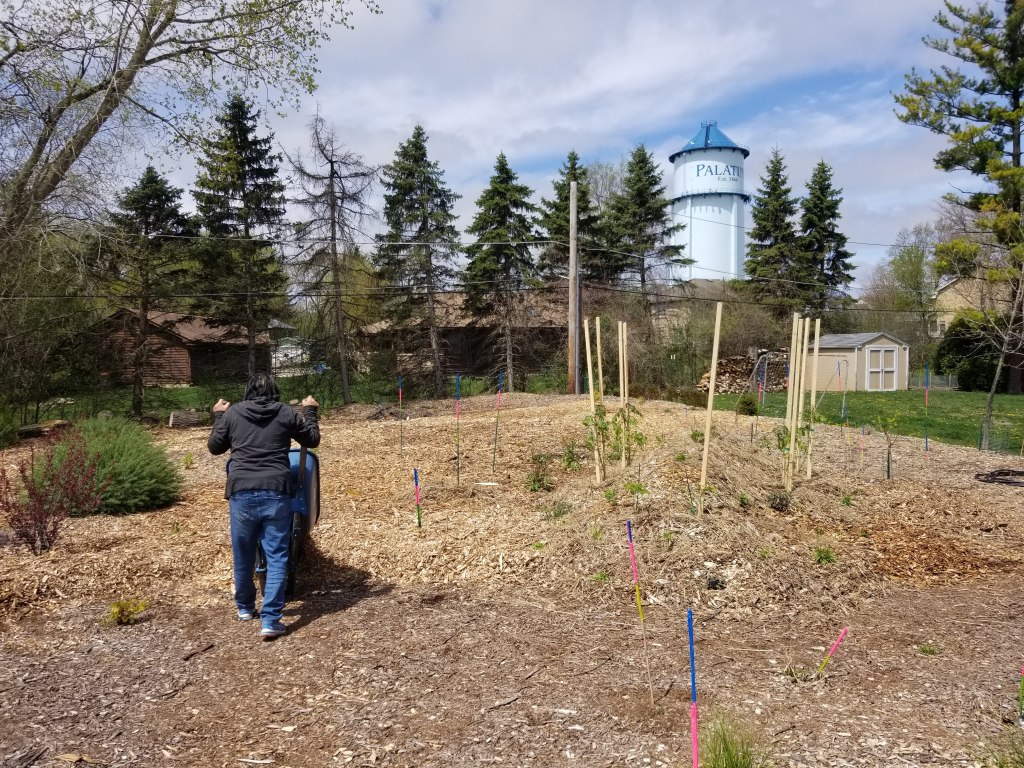
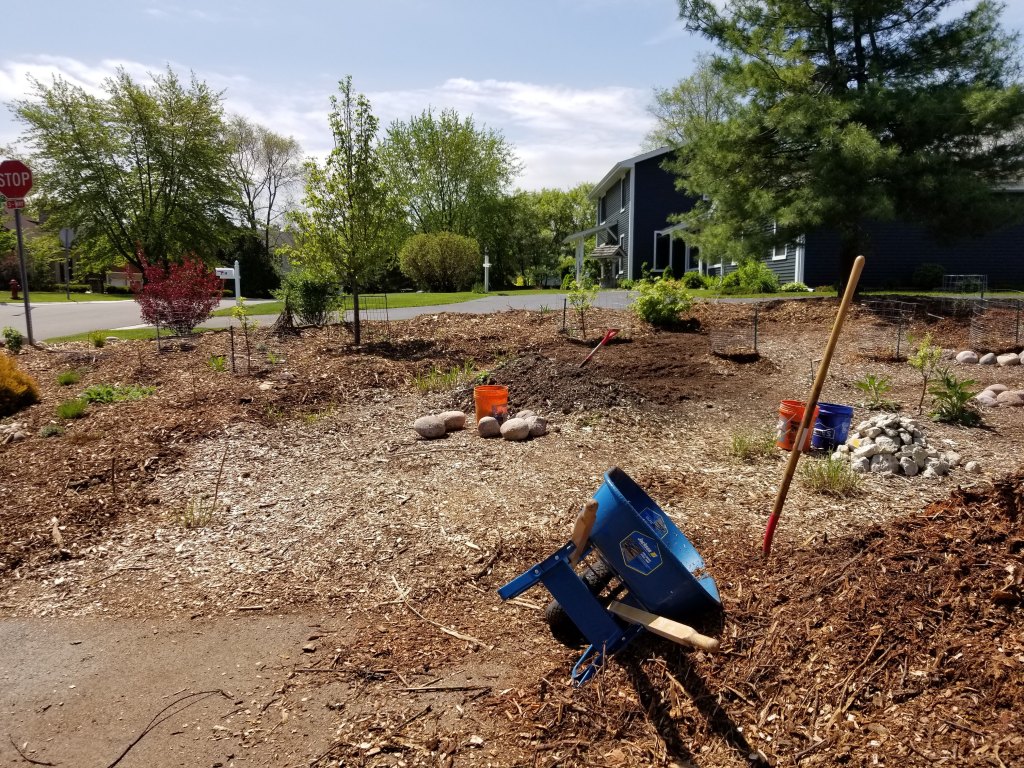
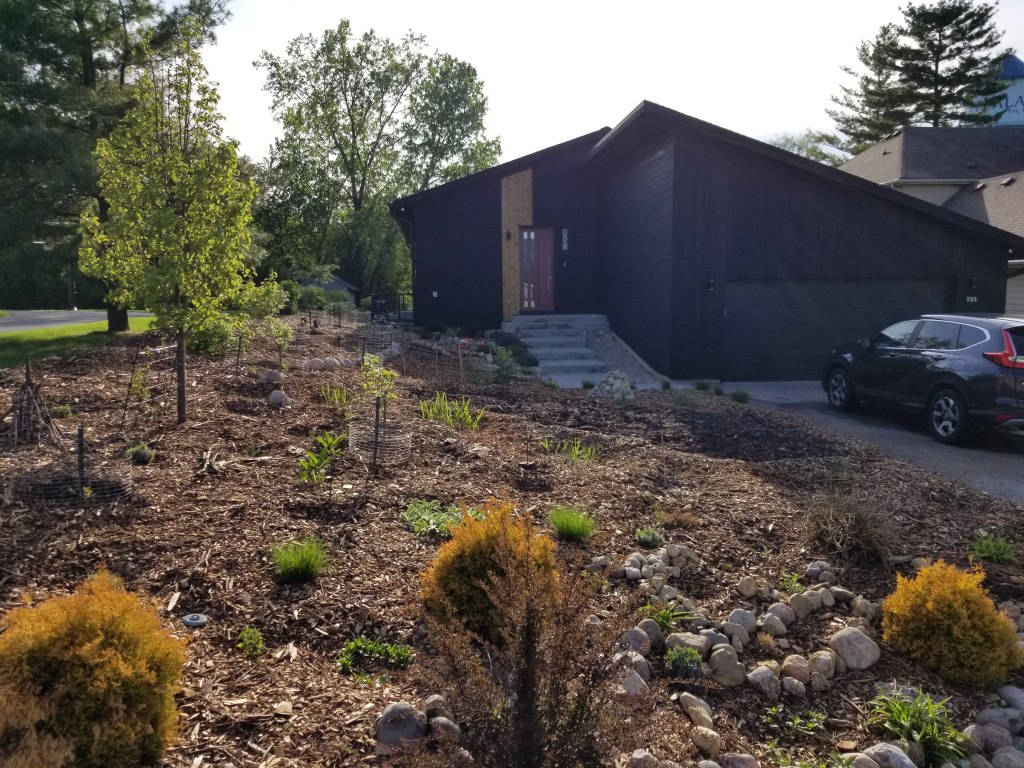
This early in the growing season the front yard was looking pretty grim, as most perennials had yet to reemerge from the cold:

Some sections of the wood chip pile were close to the size and texture of particles normally found in a typical double ground hardwood mulch. In many other parts there was significant variation in the size and look of the chips, varying from thoroughly chopped to chunky, including smaller branches that were mostly still intact. Even so, as noted in the earlier post, after a couple of months the pieces fade to a mostly uniform color while the individual pieces themselves slowly weave themselves together like they would in a more typical mulch. Having now gone through the process, the significant price savings associated with wood chip mulch makes this interim period well worth enduring.
Although there are any number of benefits associated with a thick mulch layer, one unanticipated benefit is how spongy and comfortable it is to walk on. I was looking forward to putting down some flagstone as part of a path, at least on the south side of the house, but once we realized how nice the mulch is to walk on, we’ve since dispensed with the idea. A big advantage the mulch has over any hardscape material is that, regardless of age, should someone take a fall, or even go down hard on a knee, the sponginess of the mulch is forgiving. It does harden up during the winter, but still nothing like asphalt or stone.
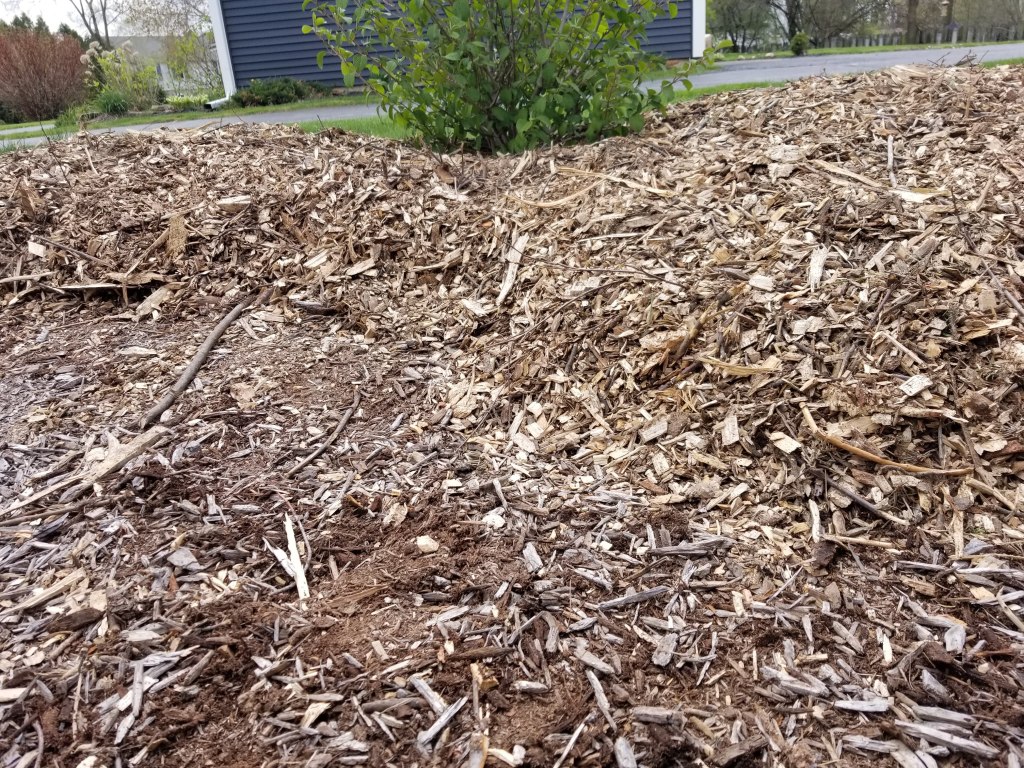
In addition, the mostly larger overall particle size of the wood chips means it will take longer to break down than a shredded aged hardwood mulch. In the photo below, the mixed, slightly random look of the material is evident:
Included in the mix of materials are larger chunks of wood (similar to chopped up 2×4’s), shrub foliage, smaller limbs, or even complete sections of conifer or willow branches, along with a range of stick sizes. Even so, by the end of the summer it looked pretty much like typical mulch, including the graying out in color that normally occurs from sun exposure.
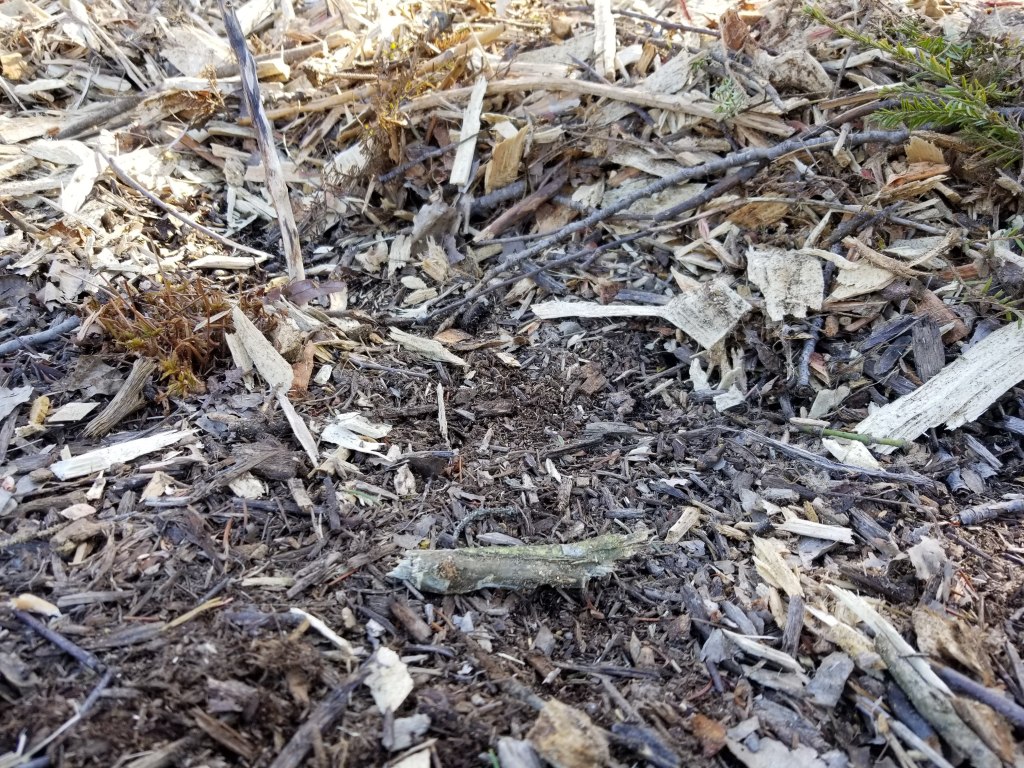
Out of curiosity, before putting down the new layer of wood chips, I pulled back the existing mulch in a few areas to examine the clay below. I did this in a variety of spots in the yard. In addition to obvious signs of life in the mulch layer — earthworms, spiders, and various insects — it was interesting to observe that in some areas the sheet mulching cardboard had completely disintegrated, while in other areas, where the clay was pretty solid, the cardboard had remained mostly intact.
“No scientist before Darwin had taken such an interest in the creatures living underfoot. Earthworms were still largely considered a garden pest that damaged plant roots and spoiled clean green lawns with their castings… Worms were simply overlooked, ignored, misunderstood — and their impact, their importance to the soil and to the ecosystem as a whole — was far greater than anyone could have guessed.”
— Amy Stewart, The Earth Moved
If this base layer of clay had even a small amount of black soil in it, the cardboard was mostly gone. In contrast, those areas where the clay seemed monolithic the cardboard didn’t appear degraded much at all.
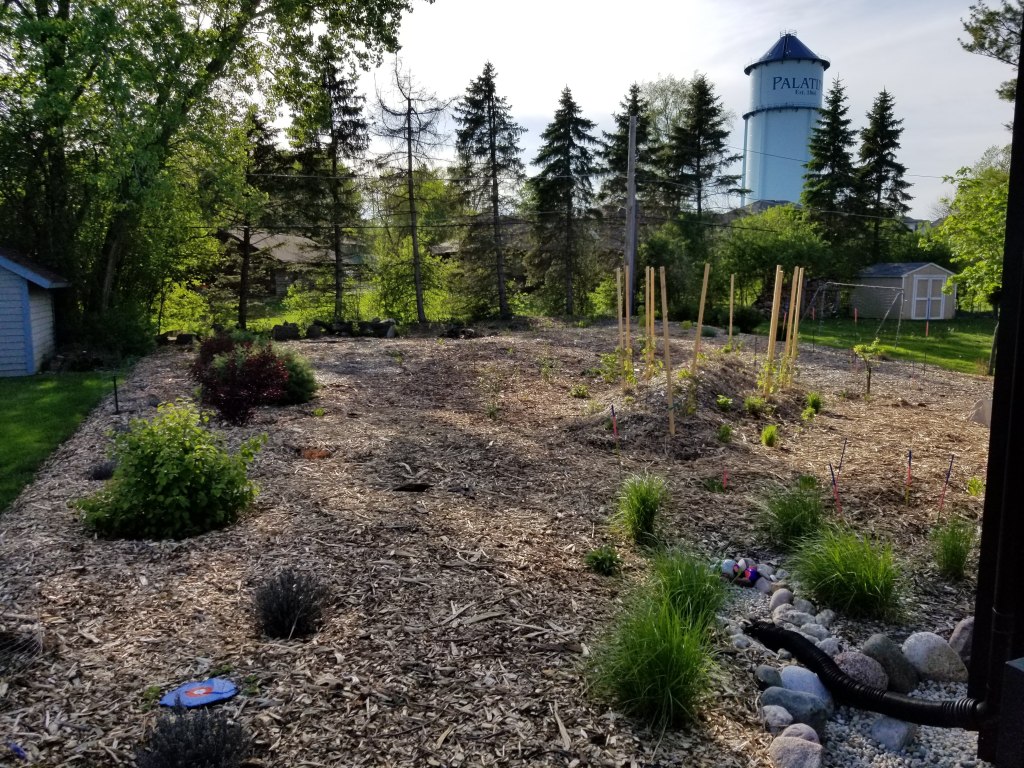
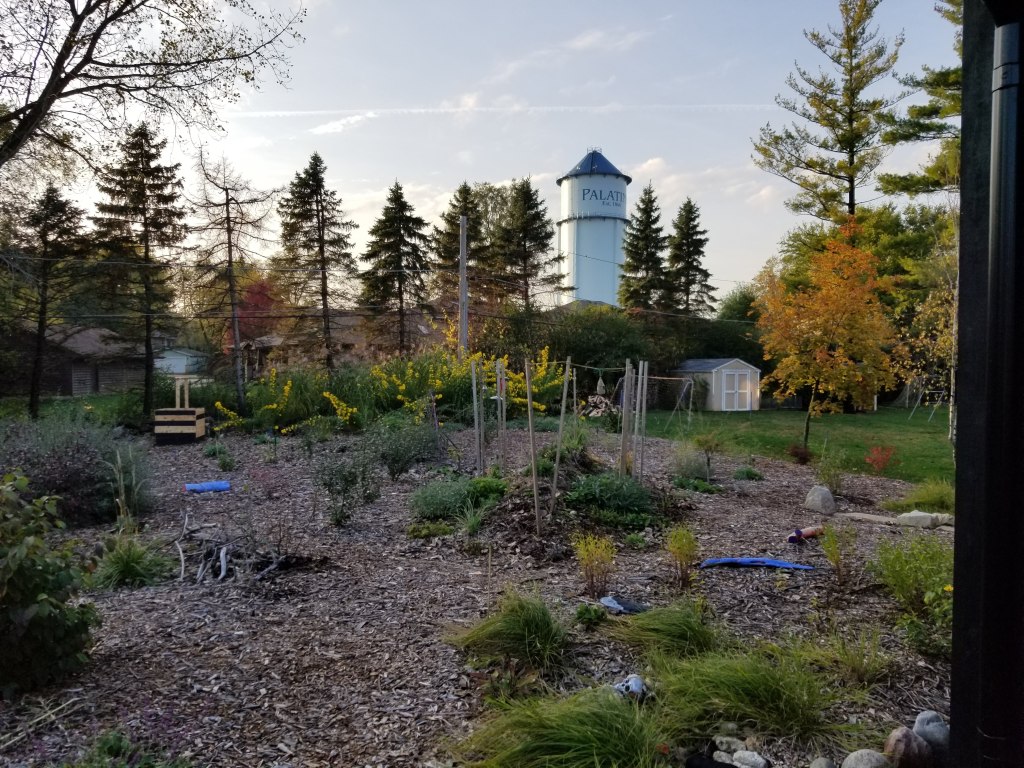
Backyard still looking mostly like a mulched moonscape at this point:
Even though our initial mulch layer was only about a year old, it was interesting to see the varying rates of decay. In most areas, even if it was a little thin, the original mulch material was mostly intact. In parts of the yard that retain more moisture, however, the process had accelerated, in some cases to the point where the material resembled aged compost more than it did the original, rough-textured mulch.
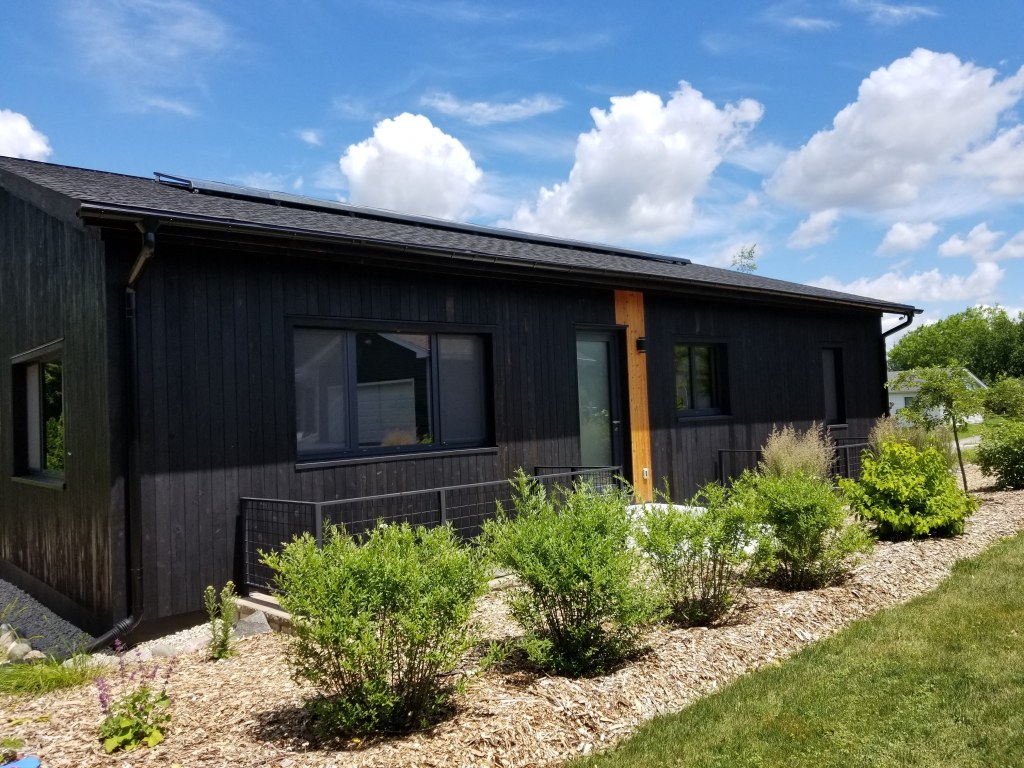
Below, around our side stoop off the kitchen, I pulled back the mulch at the edges to ensure as thick a layer of new wood chips as possible:

Getting the wood chips to the backyard required a lot of trips with the wheelbarrow, so we were excited to finally reach the south side of the house. From this point, we were able to get the wood chips in place at a much quicker pace. Thankfully the wood chips (or any wood-based mulch in general) is relatively light and easy to move around, especially when compared to top soil or gravel.
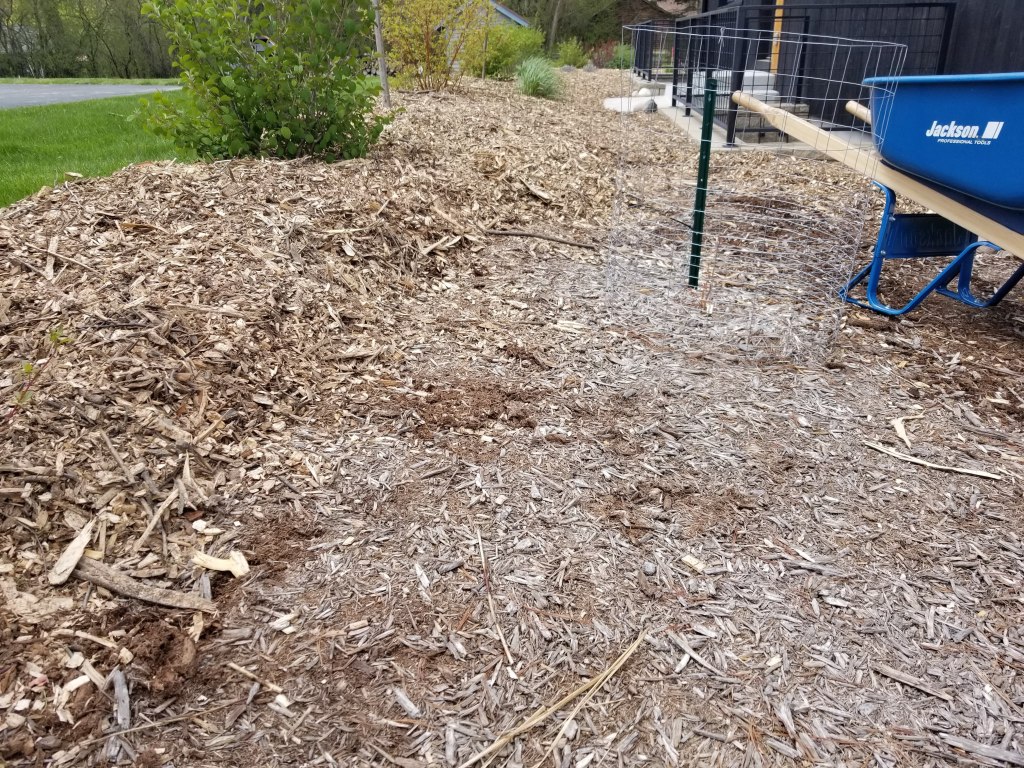
Probably the one area, besides uniform color and particle size, where hardwood mulch outshines the wood chips is at the edges of our property that meet with our neighbors’ lawn grass. Where the hardwood mulch can be compacted to form more tightly held together mounds (when necessary), the wood chips remain looser, tending not to hold their shape quite as well.
New layer of mulch on the south side once complete:

Here, below, we’re reaching the edge of the front yard. This gives the best sense of how deep we were going with this new layer of material. And, again, a variation in particle size is clearly present:
Below, in this photo of our front yard, various permaculture elements are in place even though there are still plenty of voids in which to explore options. For instance, off to the left, there are various strawberry plants (mostly second year), small blueberry bushes, an apple tree, a few lavender, and then the many perennials in the culvert just out of view. In the middle is another young apple tree, Miscanthus giganteus just starting to emerge, more blueberries, and then the staging/green manure area. To the right, mostly out of view, a third apple tree, Russian comfrey, more blueberries, and more lavender. Along the back, our still undersized assortment of shrubs that one day will be our ‘living fence’. Many of the basics are in place, it’s just early days in terms of their eventual development:
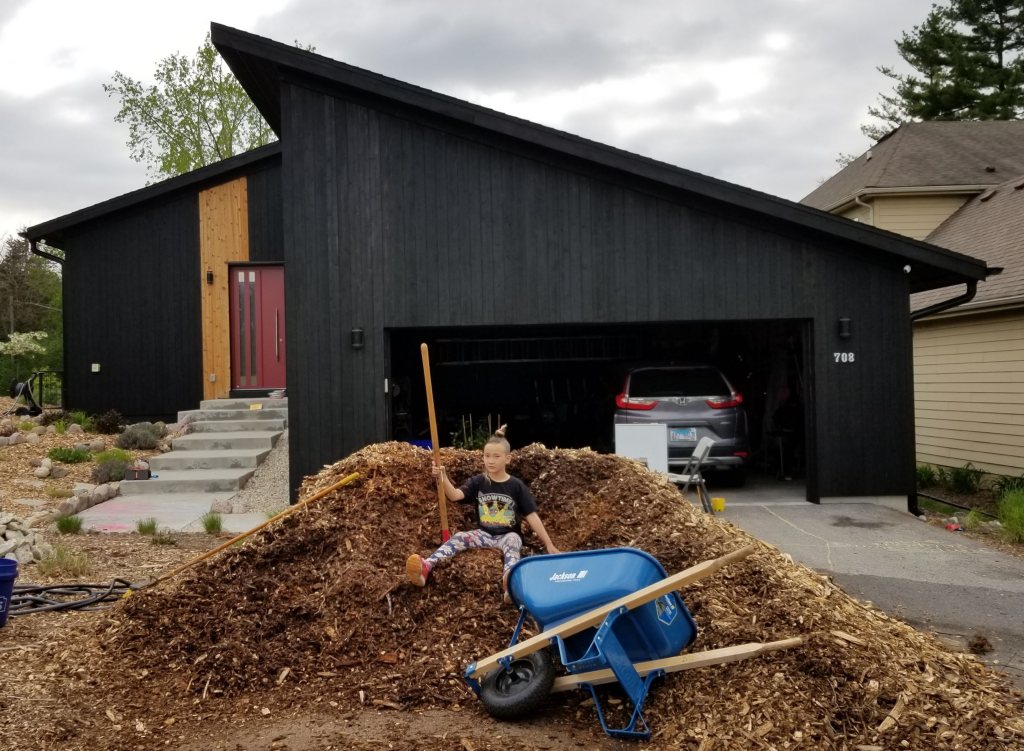
For many of the outdoor projects we’ve been able to get our daughter involved. In spite of the perceived monotony, moving wood chips around was a good mental break from countless hours of online learning indoors. Loading up the wheelbarrows is mostly enjoyable, messy fun:
The Beast on her throne of wood chips:
As we began to enter the front yard, rocks had been strategically placed to either mark a pathway, reduce erosion, act as a mini heat sink to extend the growing season of nearby plants, or else just act as a guide for the garden hose as we move it through the yard trying to avoid damage to any of the plants.
Below, off to the left, there are a series of small, second year blueberry plants, more Russian comfrey, and then the series of shrubs along the south edge of our property.
In the lower right, a mix of apple tree and more Russian comfrey in the foreground, with the series of perennials around the front entry behind.
The beginnings of a well-worn trail in the mulch from all the trips with the wheelbarrow will be covered by the new layer of wood chips. As plantings mature, this ‘path’ will continue to disappear:

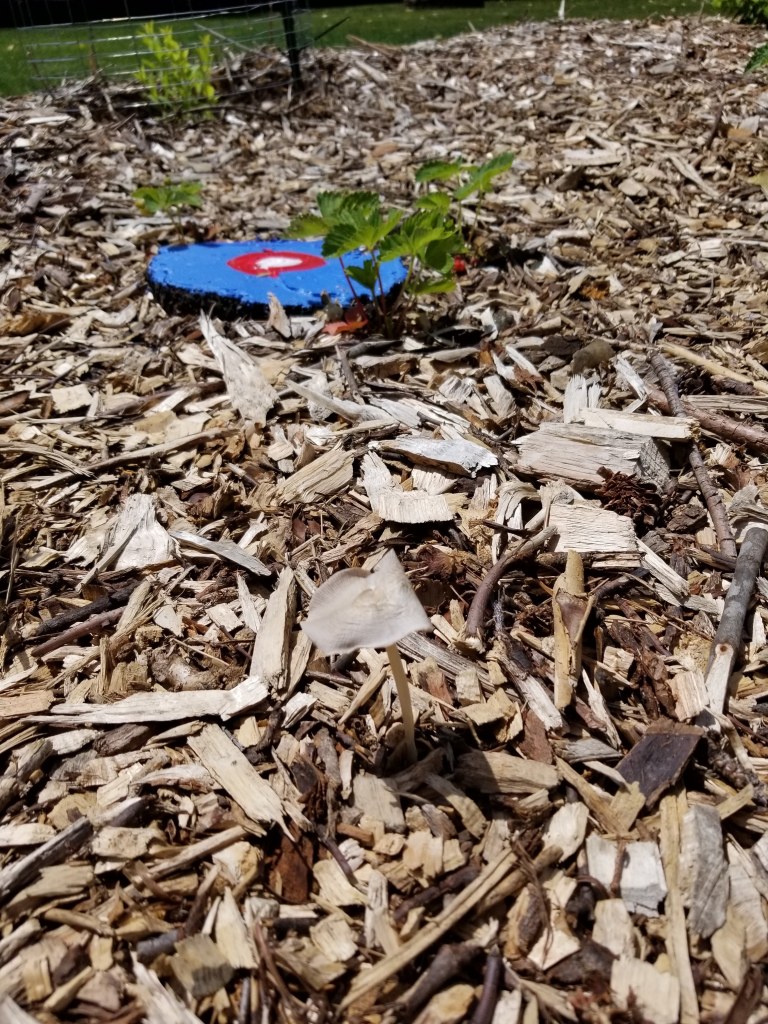
At first glance, not much is going on in the photo below. Nevertheless, some building blocks are in place. In the background, for instance, is a second year Illex Winterberry shrub, while the red-white-blue roundel is a stump from a former peach tree. The peach tree had clearly been struggling for some time, so I tried to coppice it our first spring, hoping to generate new and healthy growth, but I may have removed too much of the tree at one go, so it unfortunately never recovered.
Around the stump are newer strawberries, a deep layer of wood chips, along with a mushroom in the foreground. To the left and right, just out of the shot, are some of the shrubs for our eventual ‘living fence’:
Below, our front yard once the new layer of wood chips has been completed. At this point, the plants are just emerging from their long winter slumber.
Some of the young plants in the foreground: daylilies, lavender, peppermint, shasta daisies, sedum, aster, lamb’s ears, and bee balm.
Progress and New Plantings
As always, when we go to plant something new we first dig down to the soil under the mulch (in most areas of our yard this is some version of clay). After adding soil (usually a top soil/mushroom compost mix), we place the new plant into position before pushing the mulch back and watering it in.
Below, we’re getting ready to plant a series of flowers around one of our downspout rain gardens. With the palm sedge already in place and doing well, we added yarrow, Russian sage, stachys hummelo, and echinacea for their variation in size, texture, and color:
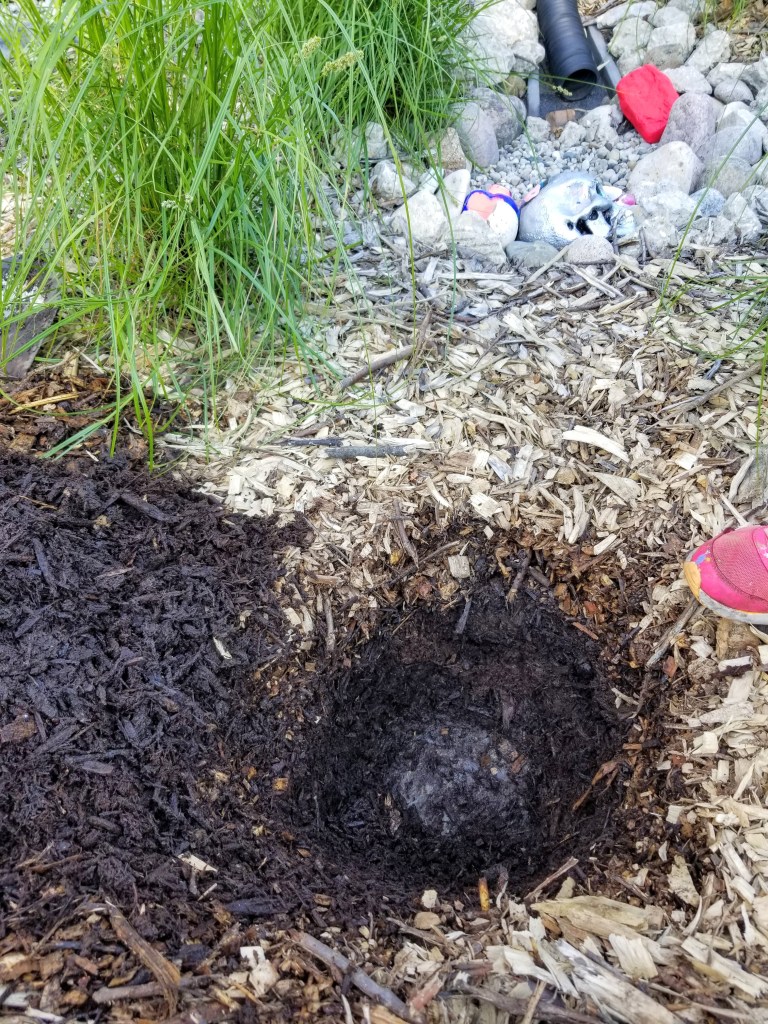
With soil in the hole, a new plant is ready to go in:

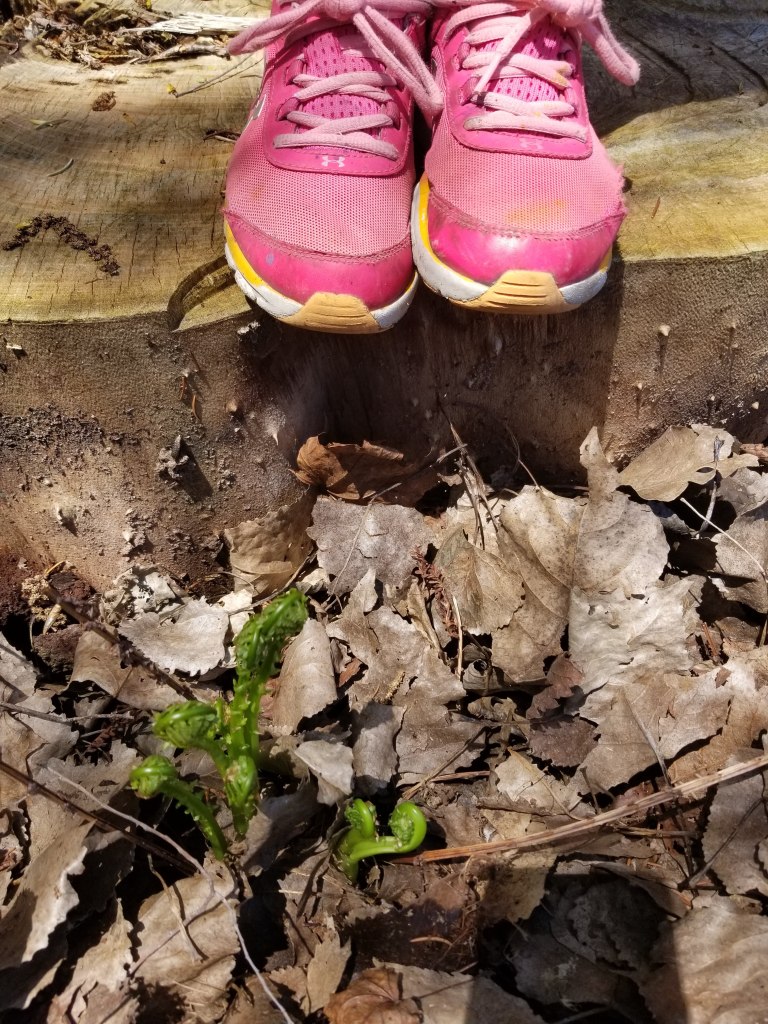
Ferns in the shady far south-west corner of our yard; one of the first perennials to emerge in spring:
More signs of spring:

First time we’ve seen flowers on our privets:
The privets are gaining some bushiness, but not a lot of height or width yet.
The flowers in the front yard are producing some significant color for the first time. Instead of our yard being just mulch and green foliage, the bright and varied colors of the blooms are bringing in the pollinators and the beneficial insects.
Sump discharge side of our culvert with some color this spring:
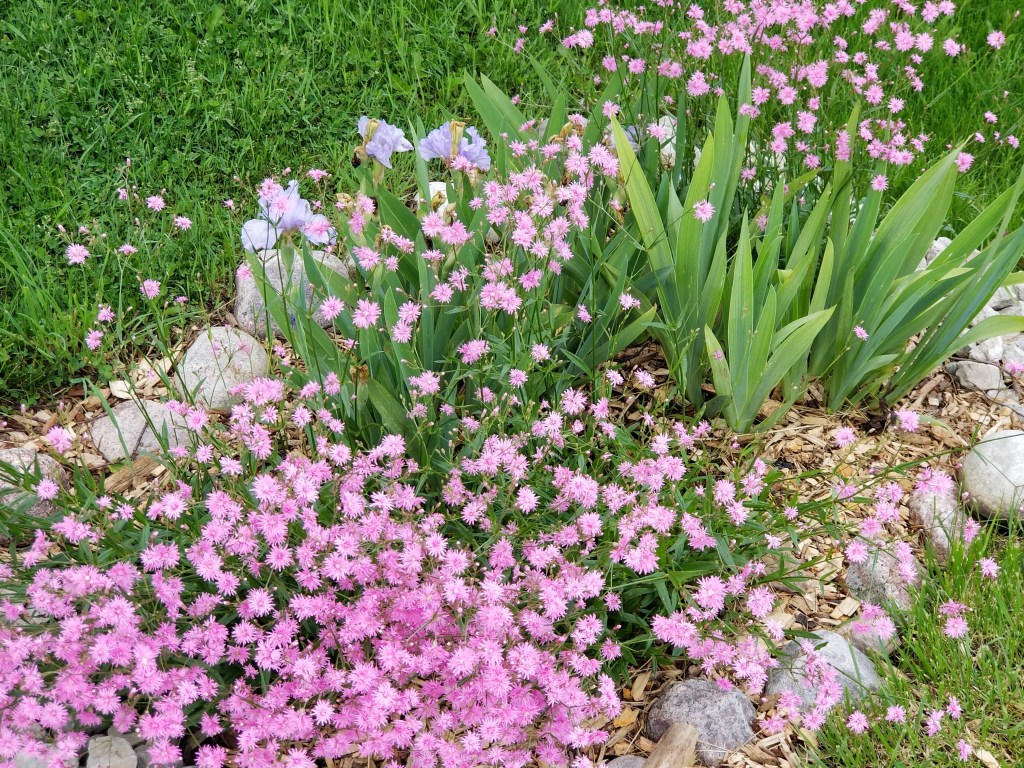
This is the first year that the irises have bloomed. Their light blue flowers complement the riot of pink displayed by the Lychnis ‘Petite Jenny‘. Even though the irises haven’t been strong bloomers so far, they are happily spreading out in the flowerbed. Hopefully this is a good sign for next year’s blooms.
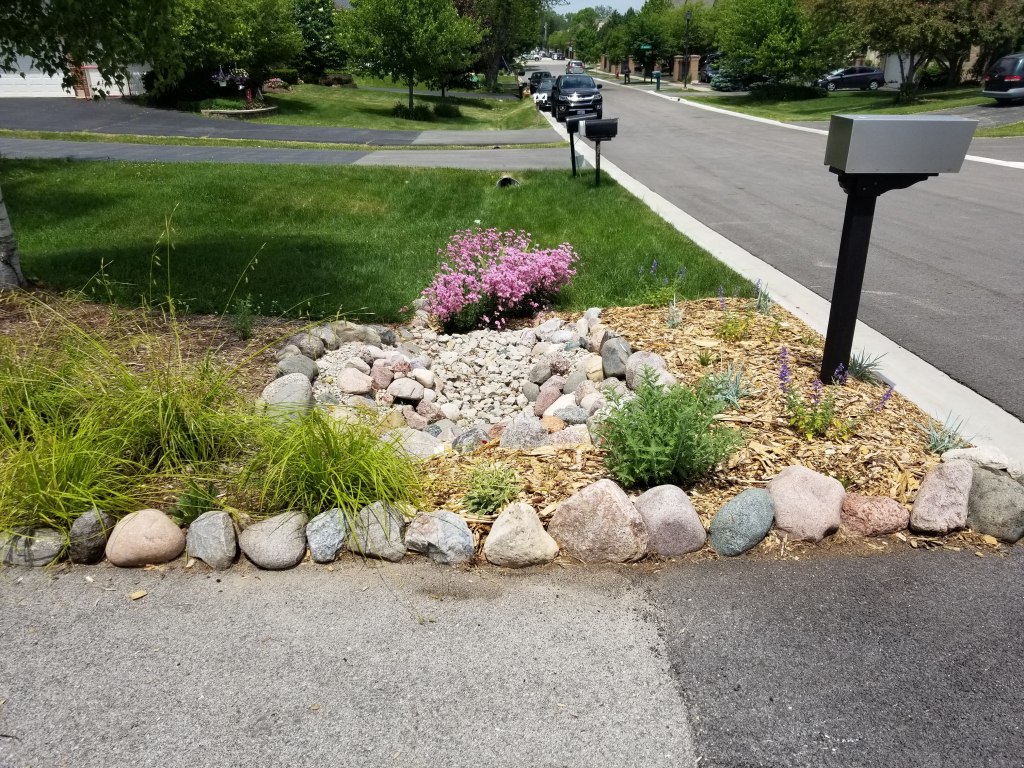
In addition to the new red scabiosa (pincushion flower), around the mailbox we’ve planted catmint, Tennessee ‘Rocky Top‘ Echinacea, and Blue Lyme grass (‘Blue Dune‘). In between the scabiosa and the flowerbed around the mailbox is a second year Russian sage.
The ‘Rocky Top’ is my favorite variety of Echinacea. When it’s happy, it produces an abundance of beautiful pink flowers, which also work well as dried flowers.
The Blue Lyme Grass is aggressive, spreading by rhizomes, so it can fill up a space quickly. We chose it for this small area to add texture and color. The stiff, upright habit, with sharp-edged leaves and wheat-like flower stalks contrasts nicely with the softer mounding habit of the catmint and the color and texture of the Rocky Top. Using the Blue Lyme Grass does require some discipline in order to prevent it from completely running through and taking over a flower bed or a nearby yard. Every couple of weeks I go looking through the bed for new stalks trying to pop up. Once found, they’re easily removed by pulling them up back to the main plant where they’re then cut. Apart from slightly disturbing the mulch, their color and texture is well worth this added bit of work to control them.
Even so, I would likely not plant them in a wide open growing area. Here, around the mailbox, their ability to spread is somewhat curtailed by the nearby road, driveway, and stone covered culvert. Used in this contained manner, they can be much easier to deal with. Growing in a hot, dry area with clay soil, as they are here, is also said to help better control their spread.
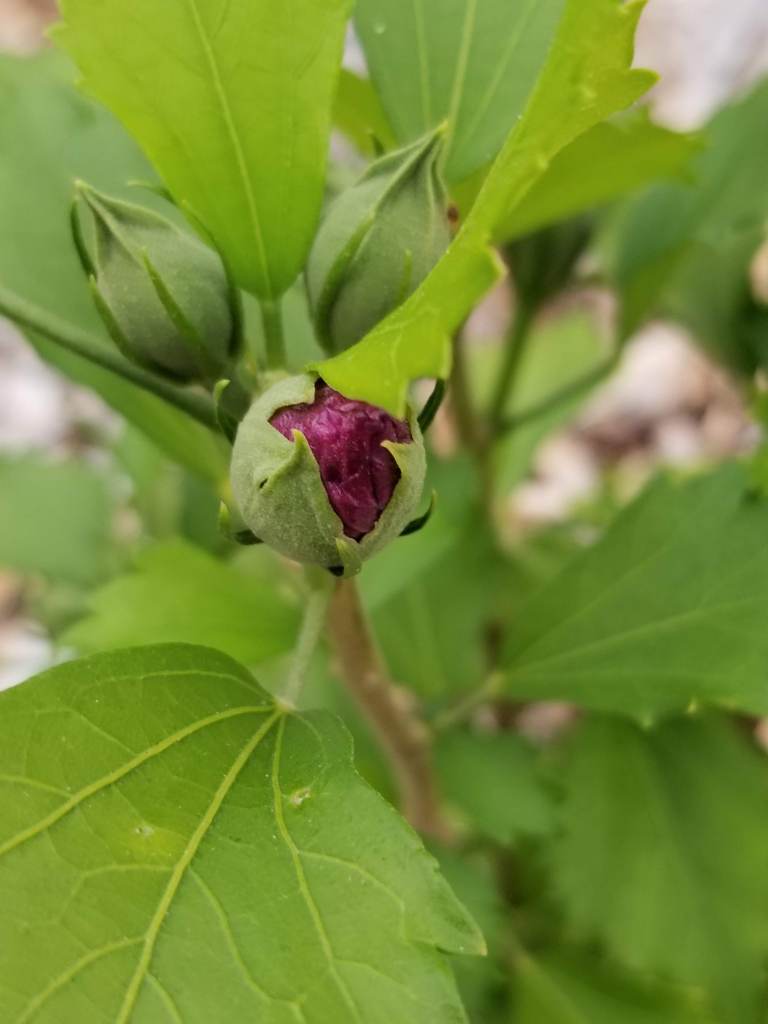
Last year we planted several small Rose of Sharon Hibiscus ‘Purple Pillar’ shrubs. They started out tiny, in 5″ pots, so their growth has been minimal to date. Even so, we did get to see some blooms this year, which better helps us understand their potential to deliver some stunning color for our garden in future summers.
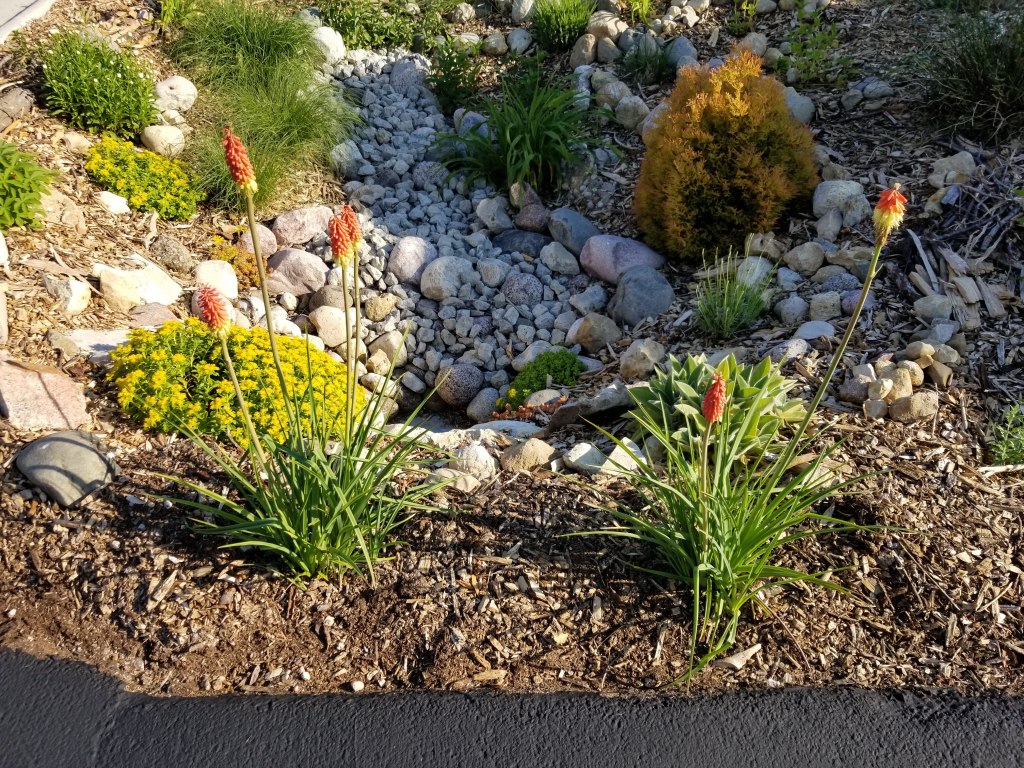
Out at the street, around the south end of our culvert, we’ve planted a series of plants that can deal with periods of hot, dry weather, while also enduring weeks covered by snow and road salt from plows in winter. In addition to the shrub base layer — Little Devil ninebark, three Fire Chief arborvitae — there are daylilies, shasta daisies, sedum, echinacea, Russian sage, asters, monarda ‘bee balm’, lavender, peppermint, and native grasses. An addition from last year, Kniphofia ‘Red Hot Poker’, is settling in and producing some vivid flower stalks. We have these on both sides of the driveway and mixed in along the southern edge of our property with the series of shrubs we’re setting up to be our living fence. Some of these shrubs are in the background. Most of them have taken on some bushiness this year, although their height remains undersized:

As with the Blue Lyme Grass, the peppermint will take over a flower bed if not kept in check. Every few weeks my daughter helps me go through and pull out the extensive runners that spread out from the main plant. Since the runners are near the surface this makes quick work of pulling them up. It’s the most enjoyable kind of weeding — easy to pull while delivering the fresh scent of real peppermint.
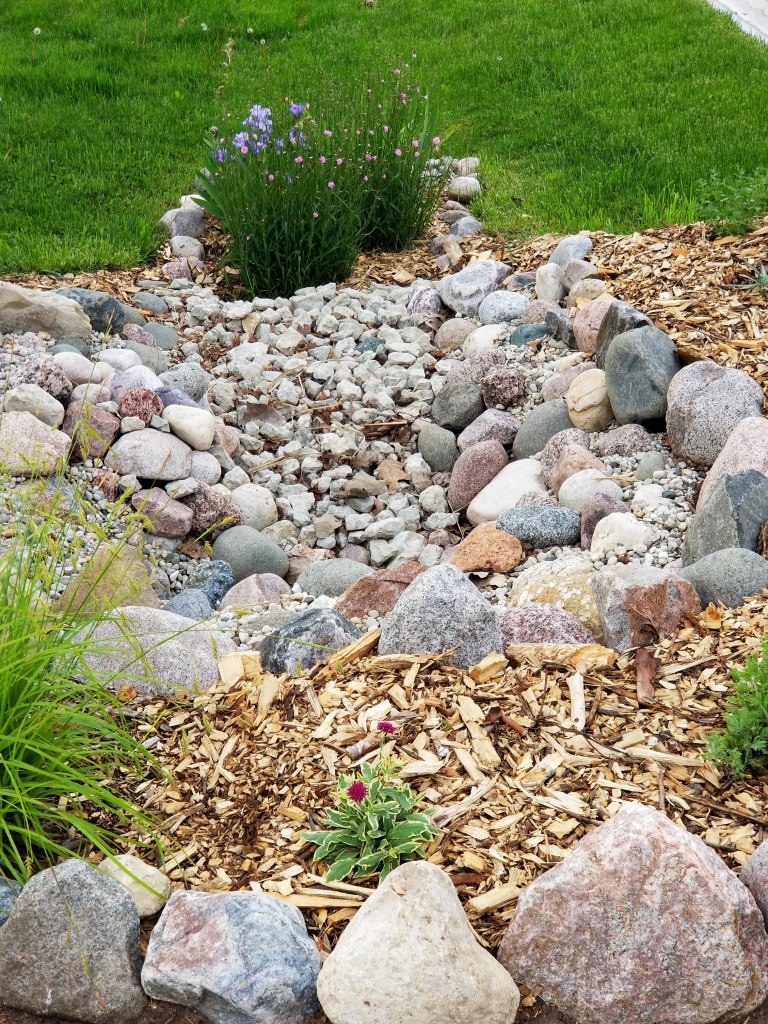
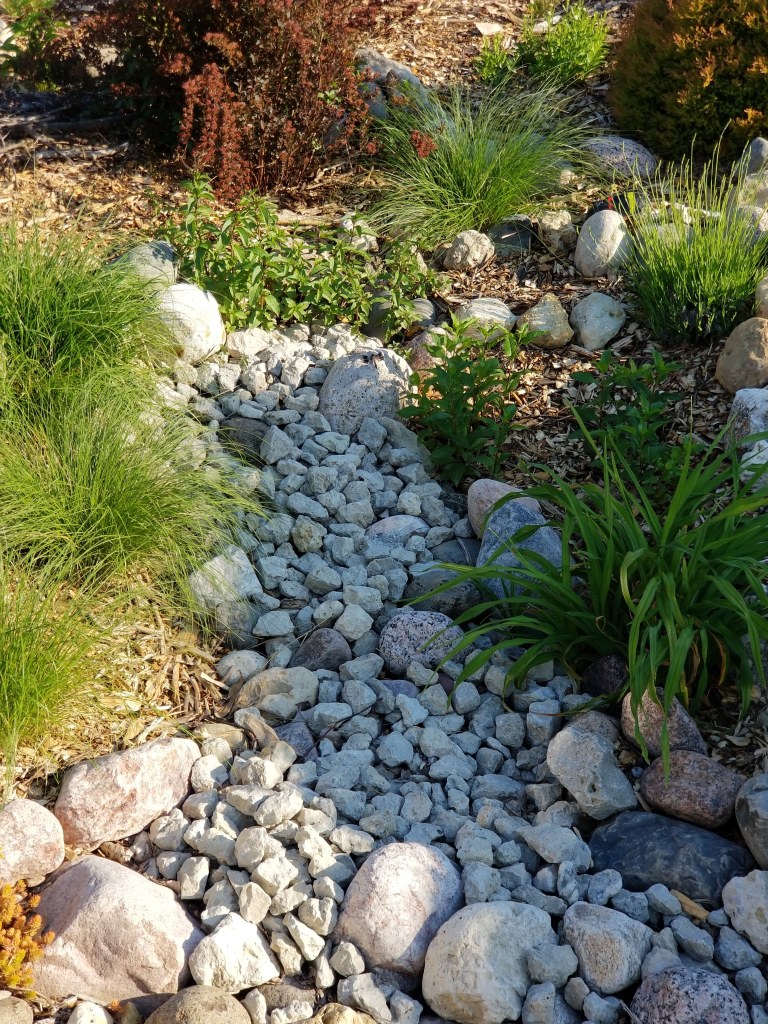
Last summer our street was resurfaced and, because of some poor execution of the details, we ended up with excessive water in this area that led to a stagnant pool of water at the bottom of our culvert (this quickly became a haven for mosquitoes). In the short term we addressed the problem by adding significantly more rocks and gravel to the area. Ultimately, it was only when the city came back to properly address the situation that the stagnant water problem was resolved. We’ve kept the rock in place since it adds a nice decorative dry river bed effect to this side of the culvert:
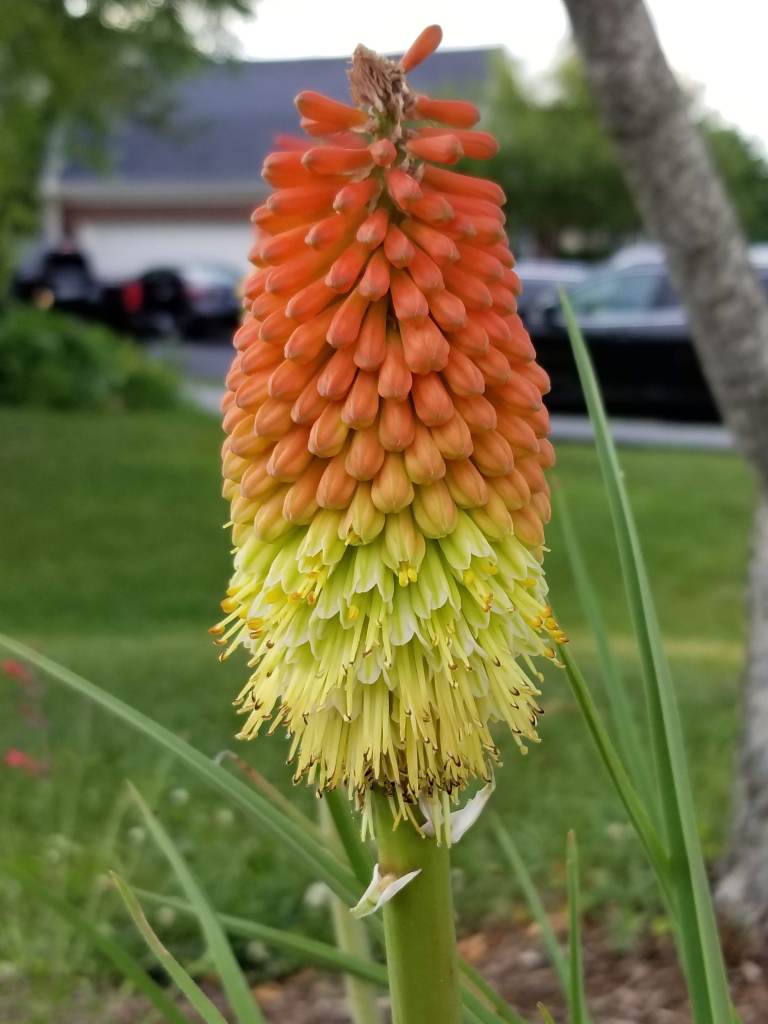
In our current garden, as well as our last one, we incorporate any number of native plant species, but we don’t worry too much about using non-native varieties, especially if they can offer a unique flavor, scent, texture, or flower color, so long as they don’t threaten to take over an entire area. The Kniphofia would be one example in this regard. Although native to South Africa, they do quite well in our climate zone 5, Chicago suburban site next to the driveway. Even when not in bloom, the foliage is a nice alternative (even though similar) to grasses or daylilies. Here are two in their first season:
Kniphofia flower in bloom, opening from the bottom up:
For the north side of our driveway we started with a series of native grasses (e.g., palm sedge, Long Beaked carex, pennisetum) and flowers (e.g., Rocky Top echinacea, agastache ‘Ava’, hyssopus officinalis, gaillardia, and Purple Poppy mallow), before adding sedum Angelina and more Kniphofia.
Along with the plants directly around our culvert out at the street, this side of the driveway has gotten very little supplemental water, even under drought conditions, yet it thankfully continues to thrive:
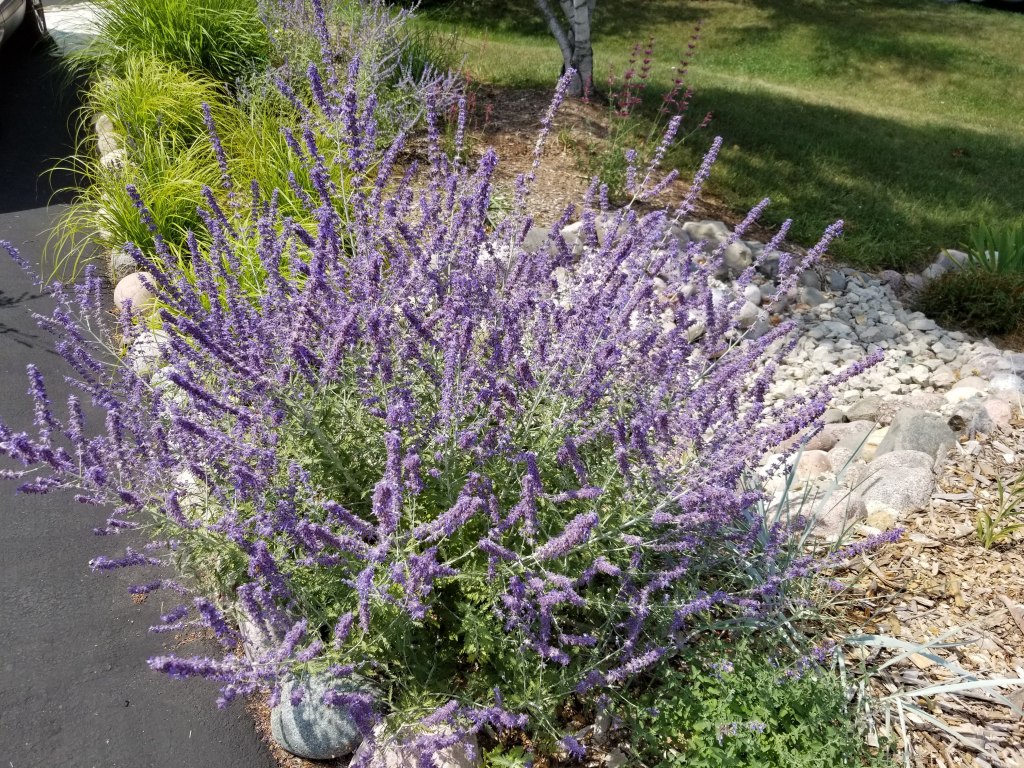
As the Russian sage reaches its full size, it’s covered in pollinators when in bloom. The sound of their work is clearly audible, making it enjoyable to just stand nearby and listen to the hum.
This is the first year that our green manure bed has finally taken off. With a base of hairy vetch, field peas and oats, we also added sunflowers, zinnias, dahlias, and a variety of other wildflower seeds. To see such thick, healthy looking vegetation in this once mostly bare site makes me believe we could eventually convert this spot to more fruit tree guilds, or just a wide variety of small shrubs and flowers:
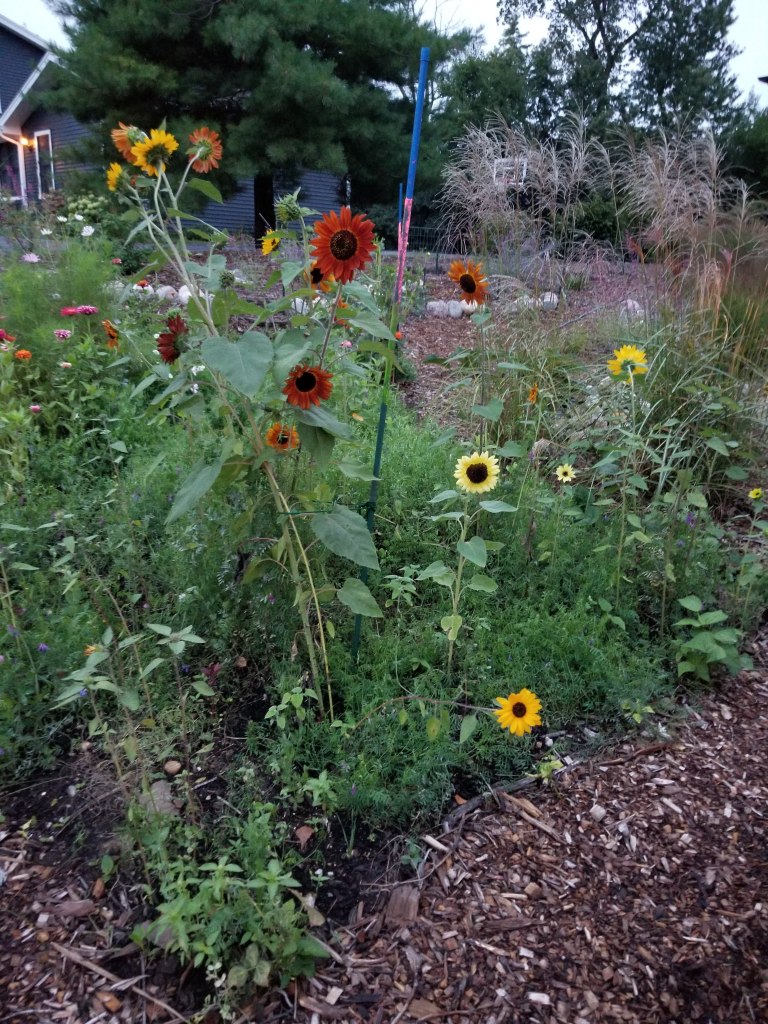
Sunflowers are easy to grow, and they’re a joy to have around for cut flowers as well as yet another haven for pollinators and beneficial insects. In addition, their substantial stalks and leaves make useful biomass for mulching:

Zinnias in amongst the hairy vetch:

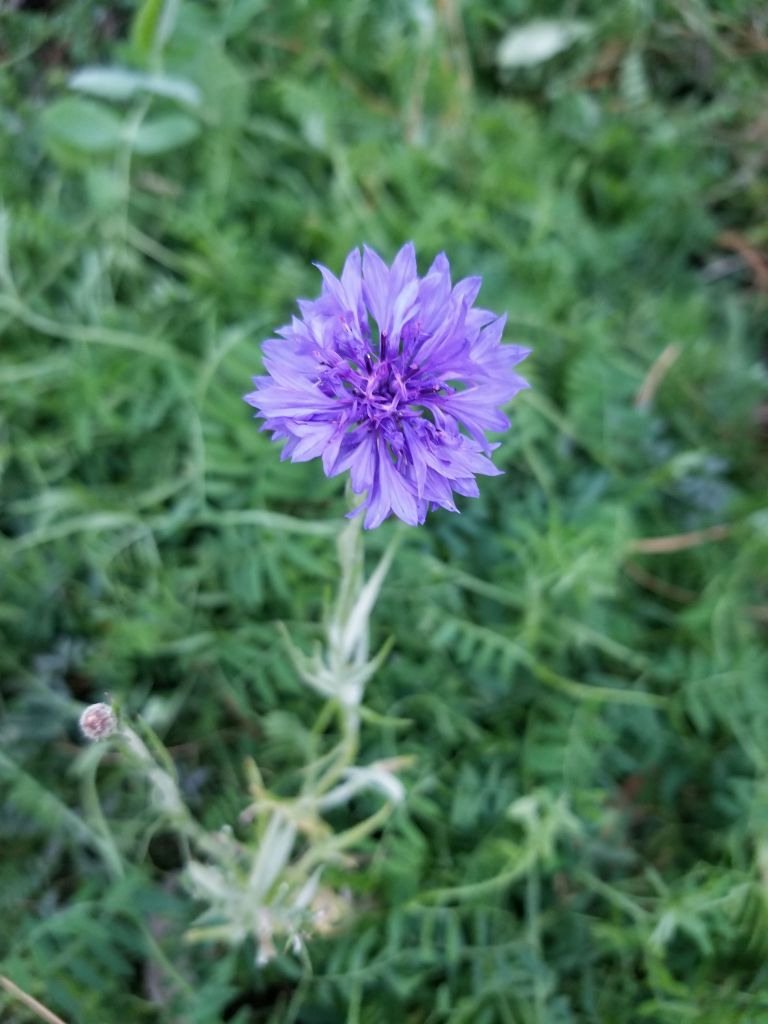
Blue cornflower fights its way up through the mat of green manure plants:
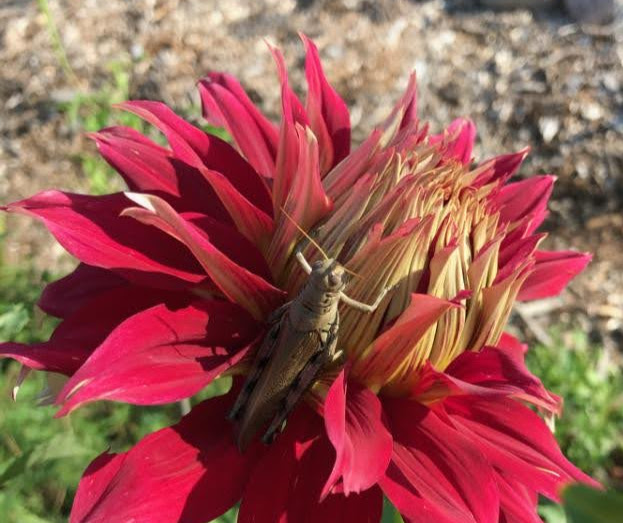
Dahlias are mostly a guilty pleasure. Unmatched as a cut flower, they do require more attention than anything else we grow. For the most part, this means consistent watering, so we plant them fairly close to the garden hose to make this chore easier. Although ‘chore’ may be a misnomer, since watering the dahlias allows me to observe the health and progress of the dahlias, while also keeping an eye on nearby plants as well:
Below, a view of our front entry in summer. Near the front door everything is growing and filling in nicely. Closer to the driveway, the perennial grasses (prairie dropseed and pennisetum), and the butterfly bush are struggling a bit; again, we believe because this area saw a lot of abuse and compaction during construction. Even the Miscanthus giganteus in the front yard are trailing behind the development of those in the backyard (i.e., fewer stalks and less height). In the background, the shrubs near the property line are beginning to show signs of filling in:

Thankfully, we haven’t experienced a lot of pests in the yard, either in the form of insects, small rodents, or harmful fungus. To date, we’ve only really had Japanese beetles (mostly on our ‘living fence’ shrubs), some aphids, and a few leafhoppers in late spring to early summer. We think this is due to the combination of no chemical treatments (even when we do see pests present), and a wide variety of plants that help maintain a natural balance between pests and their predators.
“The trick to maintaining populations of these natural pest-control agents is to provide food for them. Even predators and parasitoids have to eat…. all feed on pollen or nectar… In other words, a weed-free, wall-to-wall monoculture cannot support them… A diversity of plants supports a diversity of ‘beneficial’ insects… When plants are attacked by herbivorous insects, the leaves release volatile compounds into the air, which waft out from their tissues like distress signals. Predatory and parasitic insects can pick up these chemical messages (or smells) and interpret them, perhaps even to the extent of identifying the species of plant-eating insect that is present. If the predator or parasitoid catches the scent of an edible insect or a prospective host, it will home in on the signal and attack, thereby protecting the plant from extensive damage.”
— Candace Savage, Prairie: A Natural History
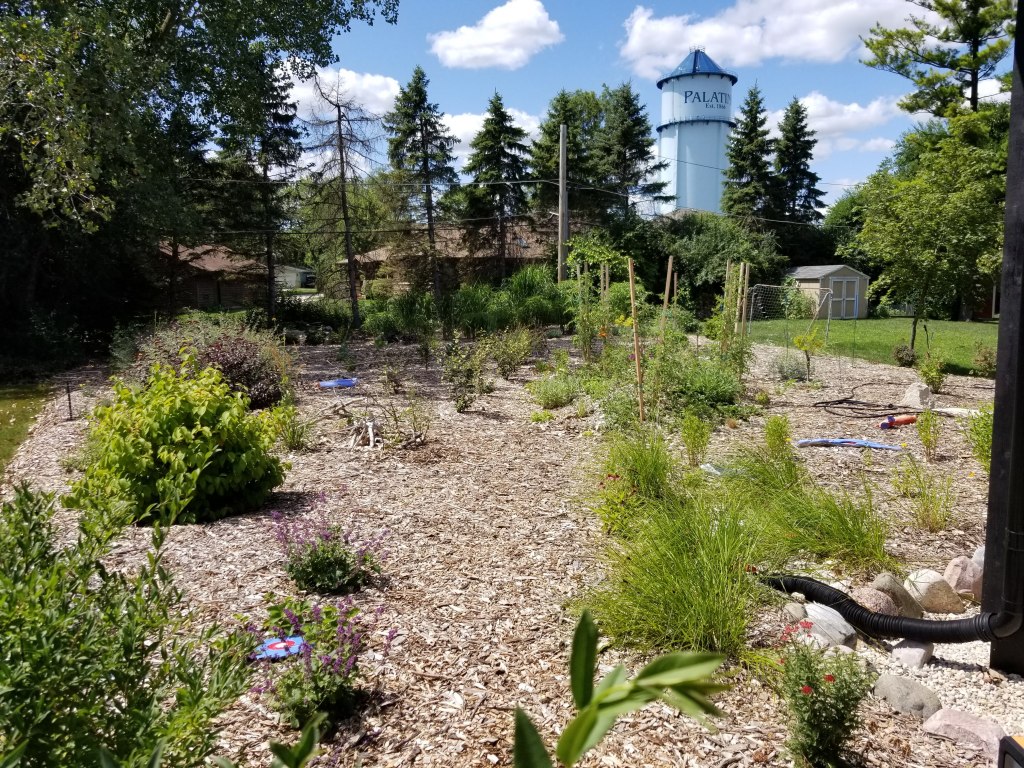
Below, another view of the culvert, this time looking north. The yard is beginning to take on some of the characteristics of a cottage garden, even a native habitat sanctuary or prairie. We’re looking forward to seeing it mature over the next several years:
Some new additions in this area included more native grasses, for instance, ‘Blackhawks‘ big bluestem and ‘Shenandoah‘ switch grass, along with flowers, including bee balm and several more agastache ‘Ava’ (another long-blooming flower favorite for us):

First flowers on the hibiscus:

View from our front door just after a rainstorm. The rain and heavy cloud cover help bring out the many shades of green in the neighborhood vegetation:

Below, our front entry with lavender in bloom and the surrounding grasses at their full height. We’ve always enjoyed the happy look of shasta daisies mixed in amongst grasses and more vividly festooned flowers:
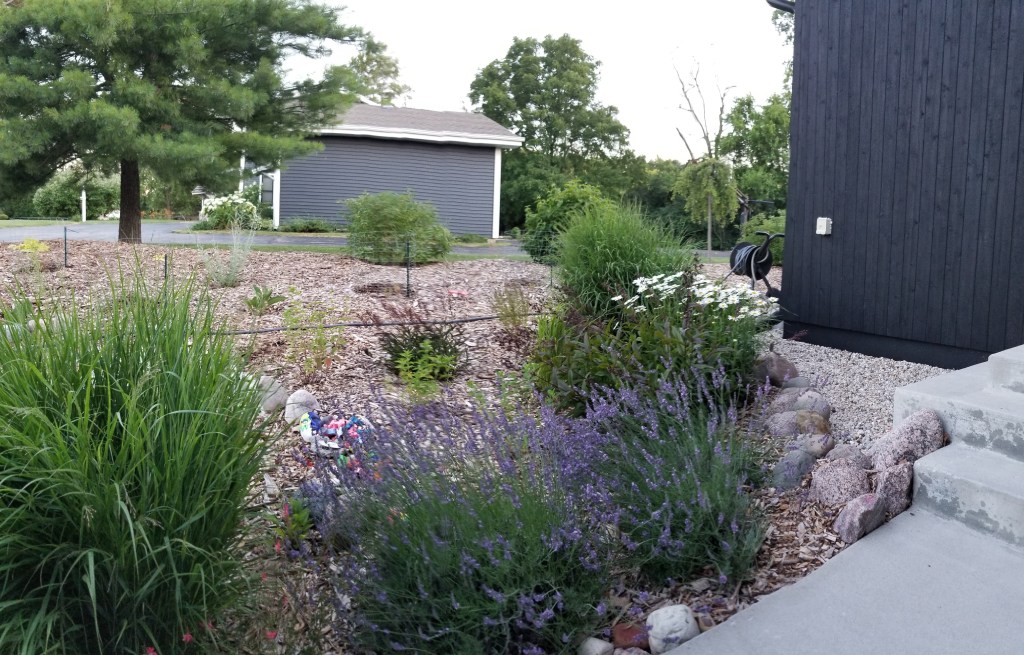
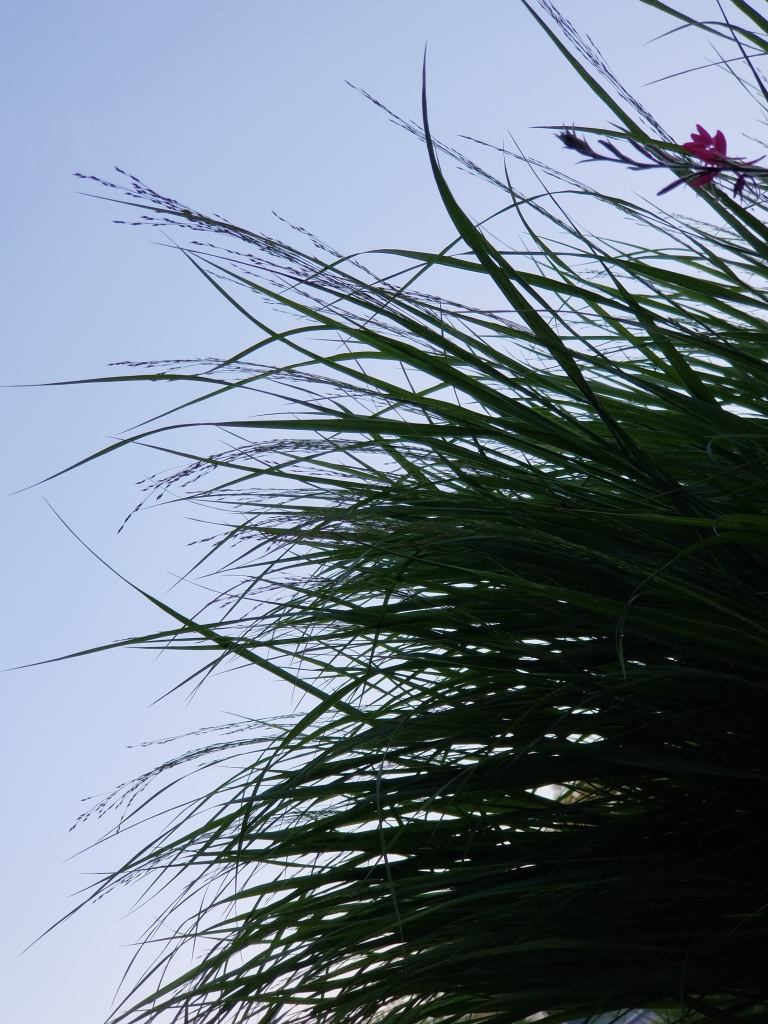
View from our front walkway looking up at an ornamental grass and a gaura as it leans over the concrete. The gaura, much like the agastache, looks fragile but is a surprisingly durable perennial — another favorite from our last house that we’ve carried over into our current garden design:
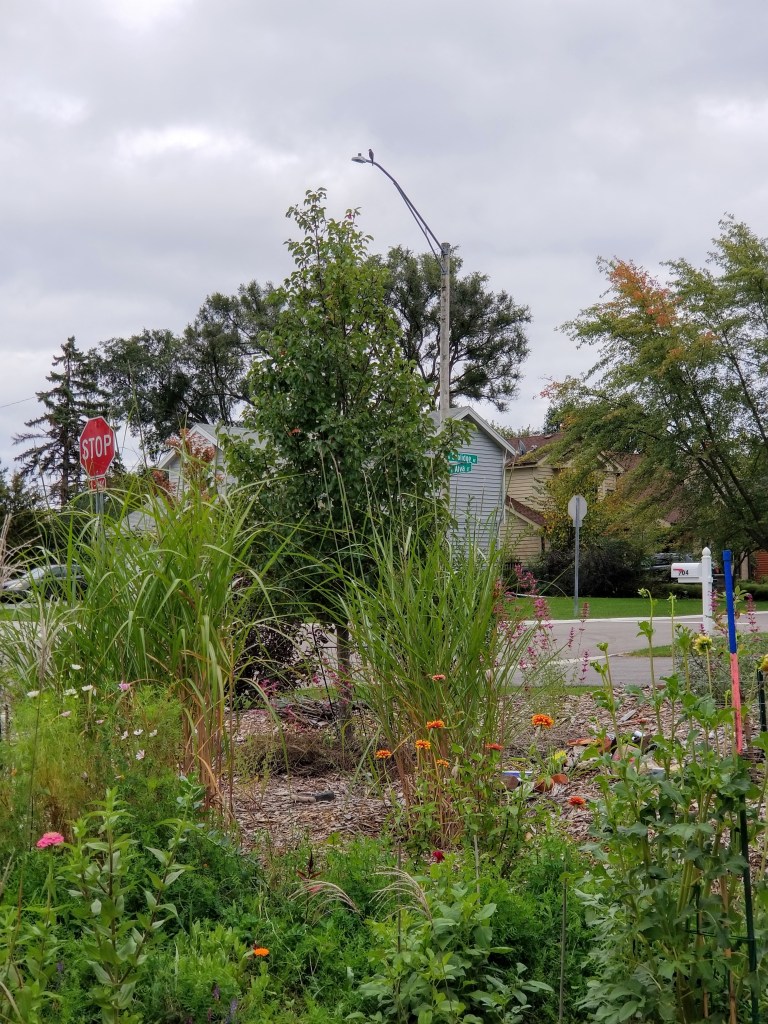
A hawk sits atop a nearby lightpost, overlooking our front yard. As the yard continues to come alive, we get more and more visitors like this:
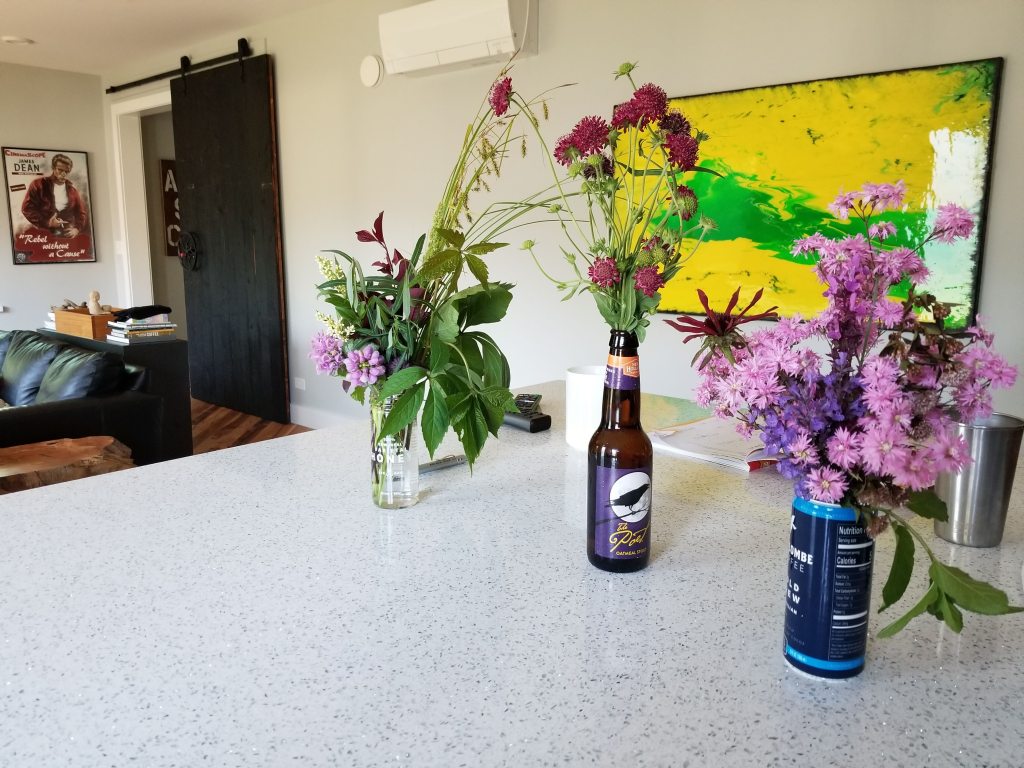
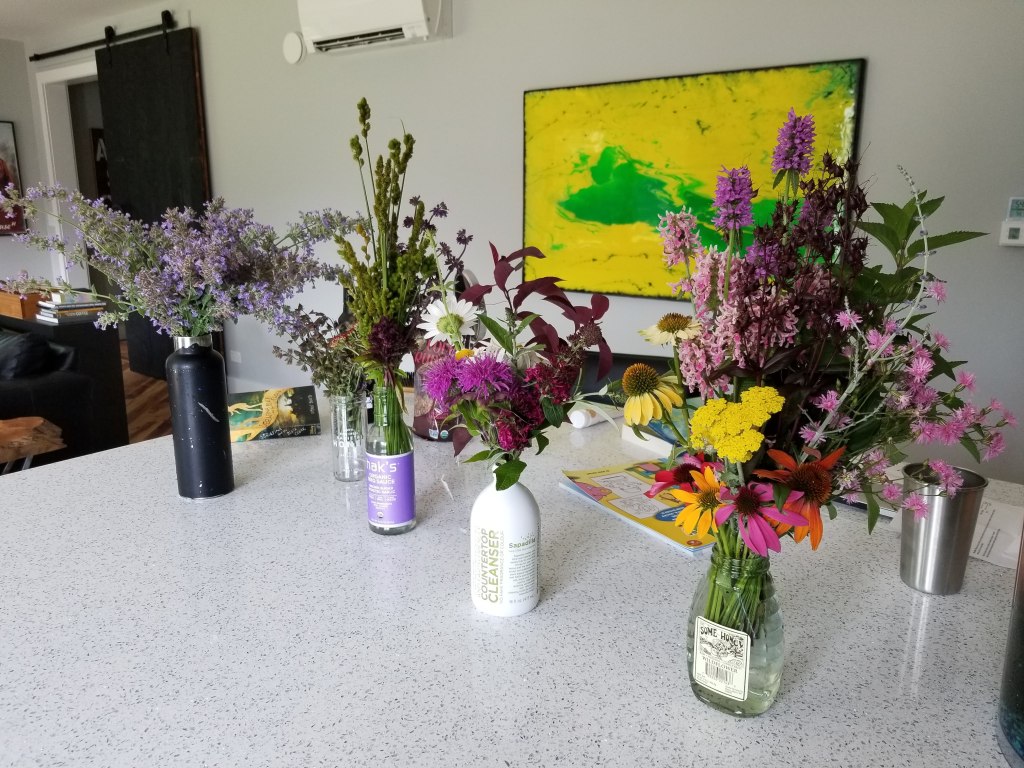
Beyond biological diversity, a secondary benefit to a wide range of plants in the garden is more colorful bouquets for our kitchen island:
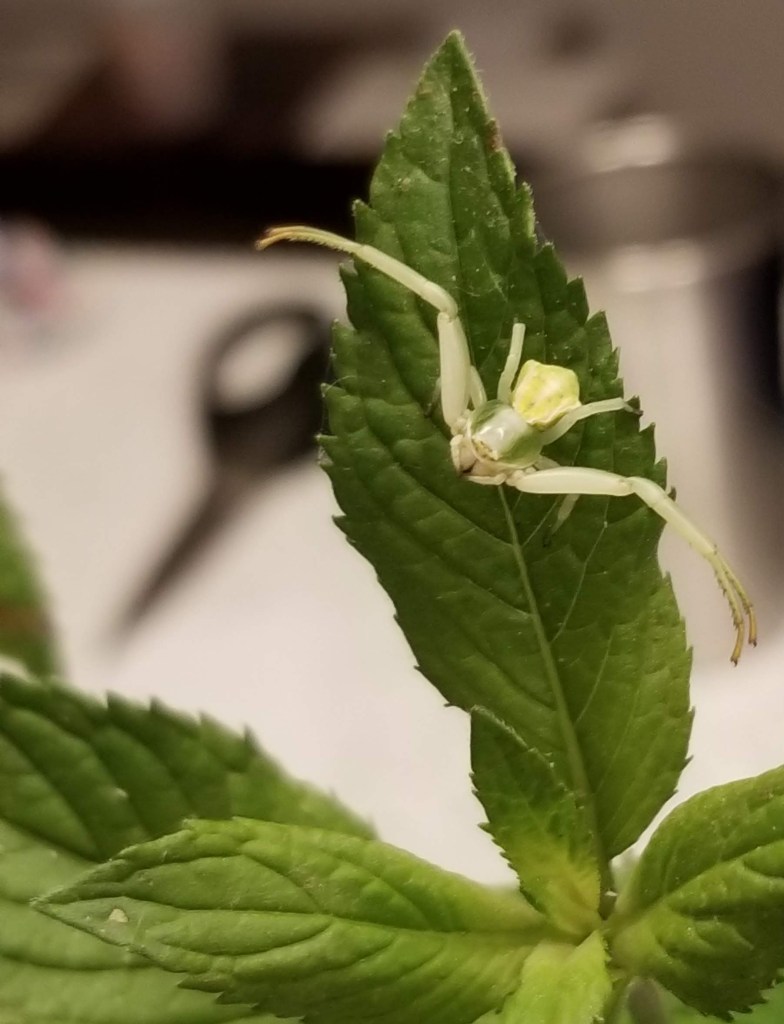
One of the more common insect predators in our yard is the crab spider. Here, he’s managed to catch a ride into the house on a basil leaf. They especially enjoy hanging out on our shasta daisy blooms, hiding on the white petals in wait for a pollinating insect:
Later in the summer, with an even wider variety of flowers in our endless bouquet:
From the right perspective, the front yard is looking much fuller than it actually is. Hopefully a preview of future summers when the yard grows thick with an abundance of vegetation:
Below, from the corner of the garage looking east, the strip between the driveway and our neighbor’s lawn is beginning to noticeably fill in. We’ve only just started planting around the downspout, in this case with palm sedge and some lamium as a future groundcover. The overhang of the garage has proven to be a hard drip line, meaning nothing grows directly below it since this area sees such little rain. In the future we’ll keep plants on the outside face of the hump that drops down to our neighbor’s lawn. Directly under the overhang we’ll maintain a mulched walkway, perhaps even adding some decorative flagstone.
One of the many benefits of having so many ornamental grasses in the garden is the cuttings from spring cutback, which can be used for self-mulching in the immediate area or taken elsewhere (in most cases, to the hügel bed) for some free mulch.
As the yard fills up, we’re hoping in the future to only need additional mulch or wood chips for edge and border areas around the perimeter of the house and out at our property lines.

Looking west from the second garage downspout, we’ve put down quite a bit of stone, in addition to more grasses and lamium. The remainder of the north side will have to wait until next year.
In the background, you can see three smoke trees that we planted earlier this year. Although small at the moment, we look forward to when these will be part of a second section of ‘living fence’; in this case, helping to close in our north side.

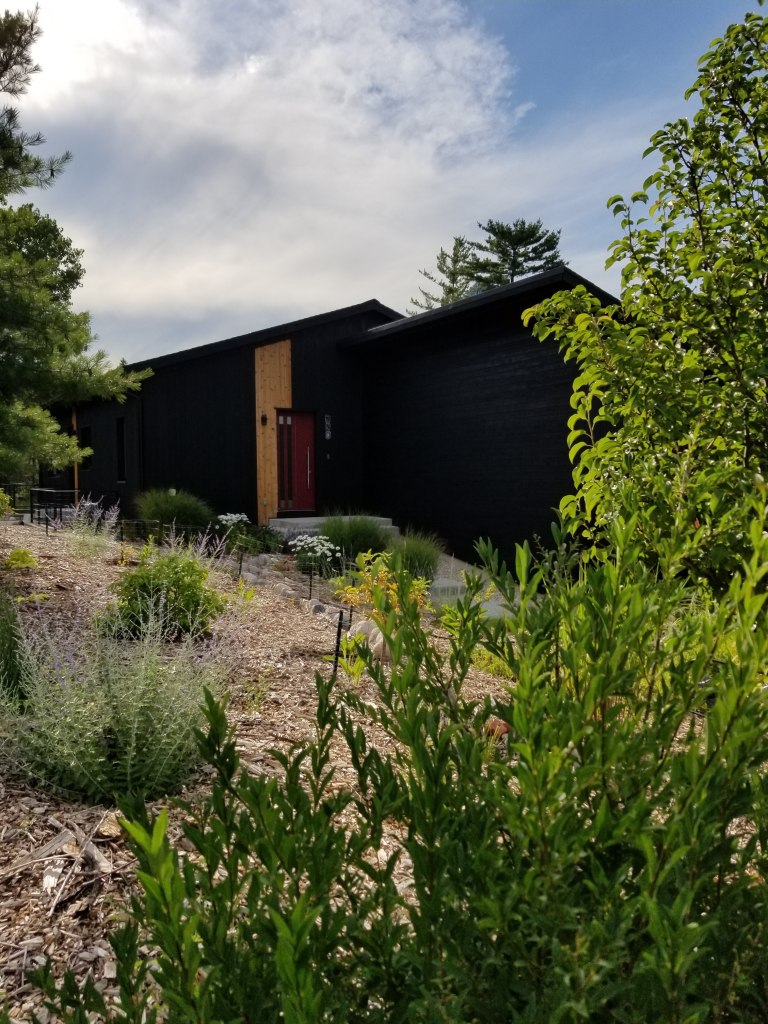
Spring from the south-west corner of our house. It’s still early in the season, so the perennials are just getting started. This view also shows the dappled afternoon shade enjoyed by the backyard plantings, especially in the heat of June and July:
The view from the same corner, this time looking back to the east, towards our series of ‘living fence’ shrubs:
Same spot, later in the season, after the perennials have had a chance to fully leaf out and, in some cases, experience new growth. We planted five goumis to the left of the hügel bed, in an offset pattern of male and female plants. Off to the far right, in the distance, two of the three young smoke trees are visible:

Same view again, this time in the heat of summer. The perennials and annual veggies around the hügel have had a chance to take hold and spread, and our ‘living fence’ of Miscanthus giganteus and Maximilian sunflower in the far back corner is filling in nicely. In addition, we’re seeing the strawberries spread out this year, although there still hasn’t been many flowers or fruit. Shade is just beginning to fill the backyard at this point in the day. And the downspout rain garden finally has some vegetation to better absorb excess water:
A view from the far west back of our garden, looking towards the house. This was late spring, so things were just getting started. Note the small teepee structure off to the left, made from cuttings from the Miscanthus giganteus, which closely resemble thin sections of bamboo, excellent for staking or more decorative projects like this.
This is another example of the late afternoon – early evening, dappled shade in the backyard. Once it’s a little lower, the sun will reenter the backyard for one final blast of light before fading into sunset:

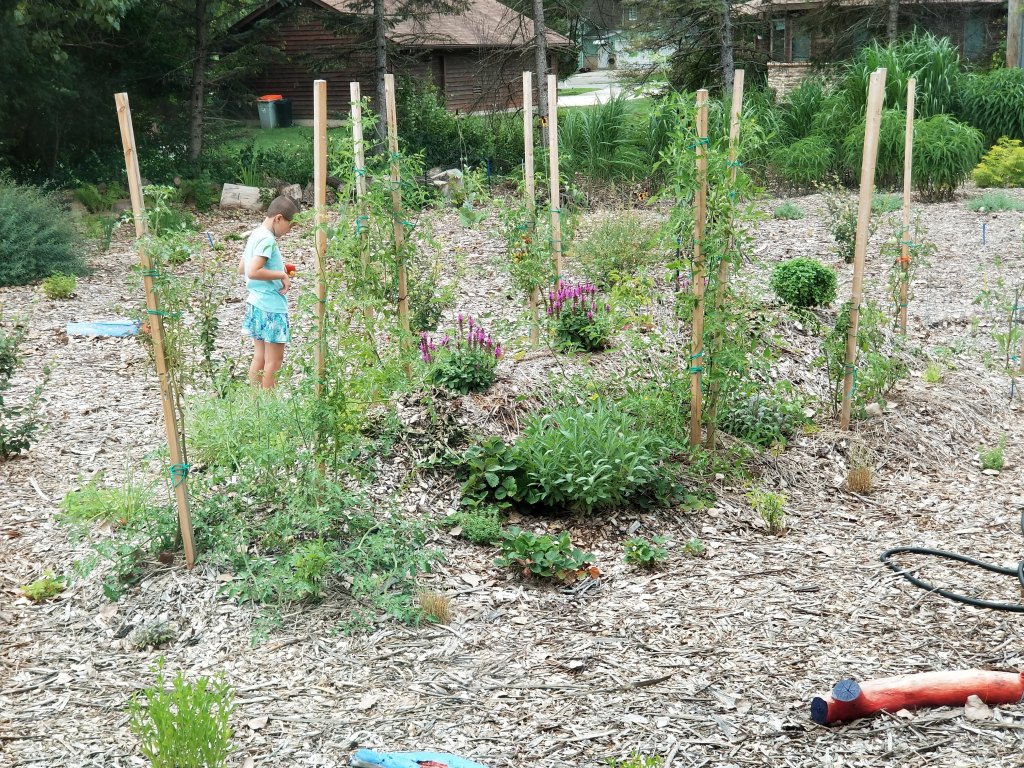
We enjoyed our first significant harvest from the hügel bed this summer. In addition to tomatoes and peppers, we also tried ground cherries and a new variety of basil. Because of all of our basil, chicken pesto has become a summer favorite for lunch or dinner.
Our daughter has taken to harvesting whatever she can find around the hügel. It’s been fun to watch her evaluate the ripeness of tomatoes and peppers as she makes her way around the hügel bed. Here, she’s waiting for some bees to move on before picking a tomato. We keep preaching all the benefits bees afford us, but she’s not entirely convinced it’s enough to offset the risk of being stung:
Since we’ve tried to involve her in all stages of the yard’s development, I’m hoping it leads to a lifetime interest in plants and nature more generally. For me, gardening came into my life in a roundabout way. Hopefully she can take an interest more immediately than I did since her exposure has been more direct and wide ranging. Whether that means a small collection of garden herbs in her kitchen, a more elaborate fruit and vegetable garden, or just an assemblage of house plants that she dotes on — we’d love to see her engage in the caring of plant life in some form.
“…If children have the chance to grow up around nature, then they will be able to learn from it. It is incredible how much there is to discover. Intensive observation will inspire them with ideas that they will want to implement straightaway. Learning begins and success will follow. Children do not give up easily, they are curious and they have special access to nature. Their urge to discover motivates them to try again and again if they do not succeed the first time — that is the most important thing: to never give up and to learn from your mistakes.”
—Sepp Holzer, Permaculture: A Practical Guide to Small-Scale, Integrative Farming and Gardening
In terms of perennial food sources, this year we’ve had the chance to add more blueberries, red currants, raspberries, and our first blackberry bush:
Our first blackberry flowers:

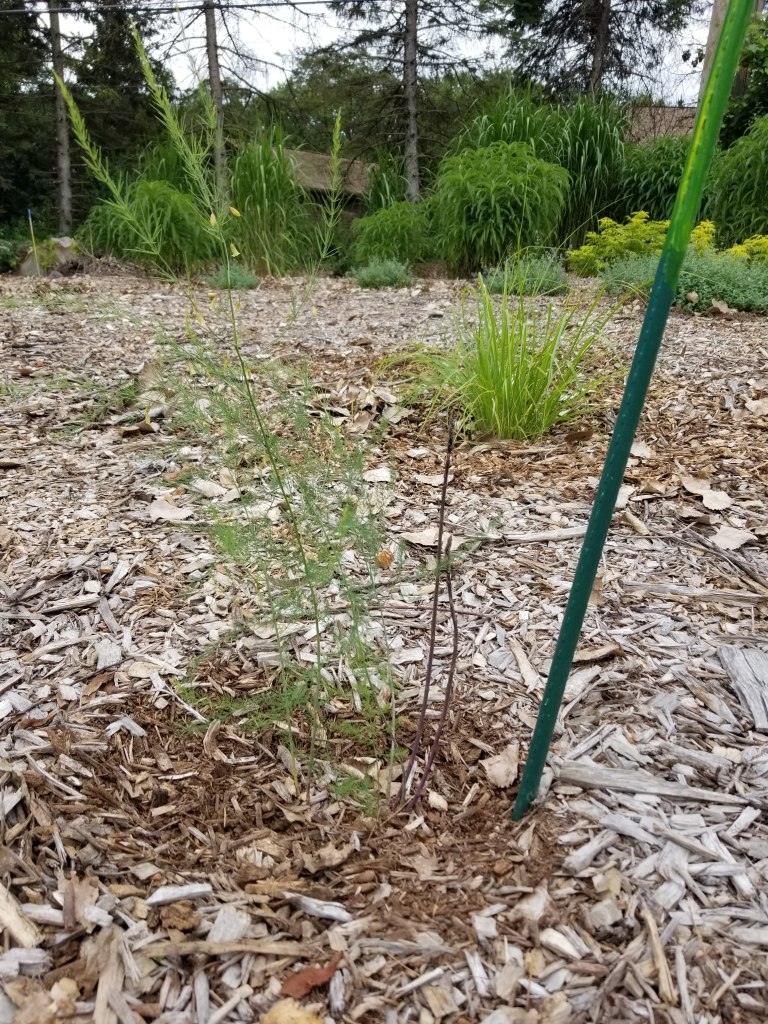
We also set up a handful of asparagus crowns. We didn’t get much growth out of them this first year, but we’re hoping we can grill a few in a couple of years:
Some of the new flowers added this year included: ‘Moonshine‘ yarrow, meadow sage, some salvia, and several kinds of gaillardias (another flower we’ve continued to enjoy from our last house).
In terms of shrubs, in addition to the goumis, we also added three types of willow to the backyard: one with variegated leaves, another with herbal-looking leaves, and traditional willow at the back of our lot to add to the ‘living fence’ look we’re beginning to establish with our tall grasses and perennial sunflowers:
We had another good year for lavender, which we dried and gave away in small cotton satchels to family and friends.
There was also sage to be collected, which we used all winter, especially in homemade chicken soup:

Another view of the backyard in late summer: the back of the yard and the south end, to the left, is filling in nicely, while the hügel thrives and the goumis (down the center) take on some first year growth:

More Structure, Function, and Accents
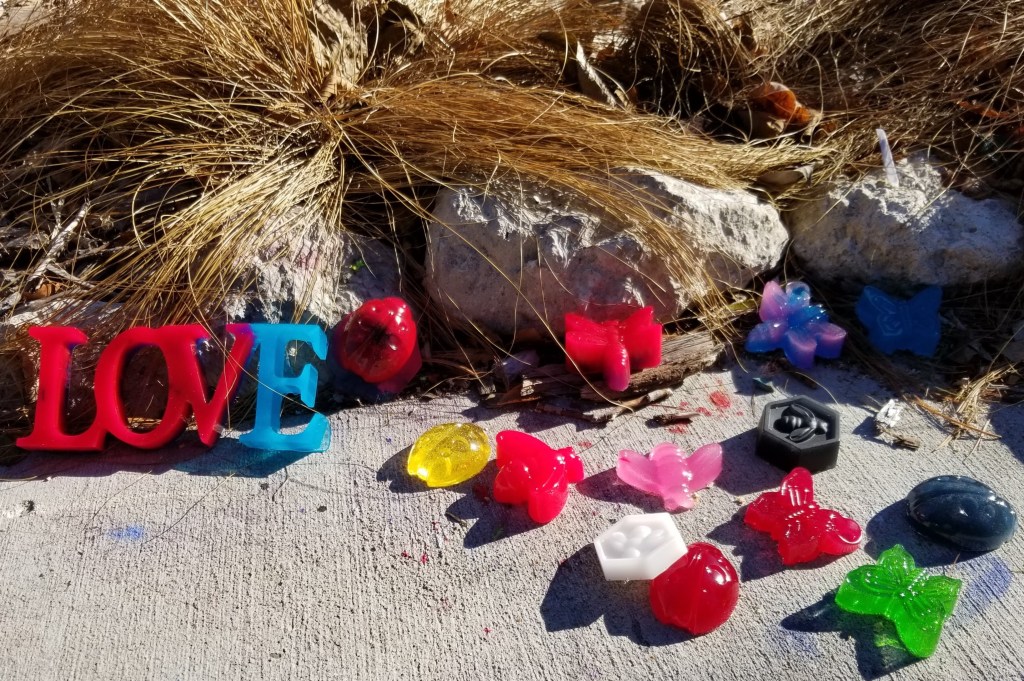
Along the way, we’ve been adding decorative accents (sometimes they’re functional too, for example, preventing erosion or retaining heat), such as rocks, boulders, bricks, pieces of metal — a variety of detritus picked up from the Chicago lakefront, cast-offs from arts and crafts projects, and otherwise ‘found’ items we’ve come across in the last couple of years:

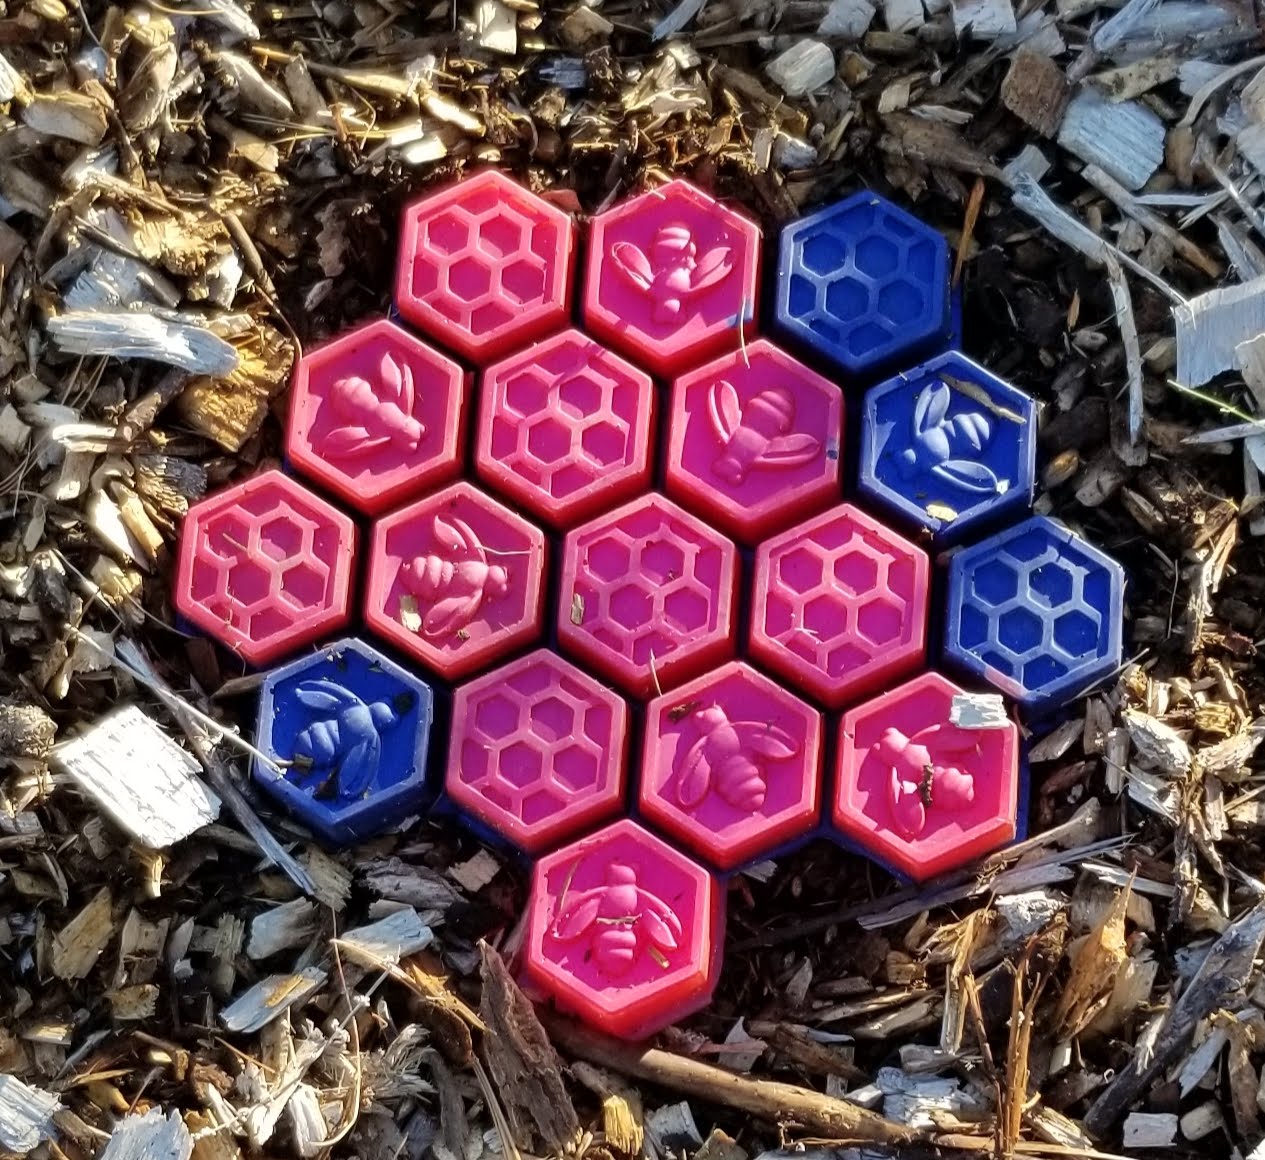
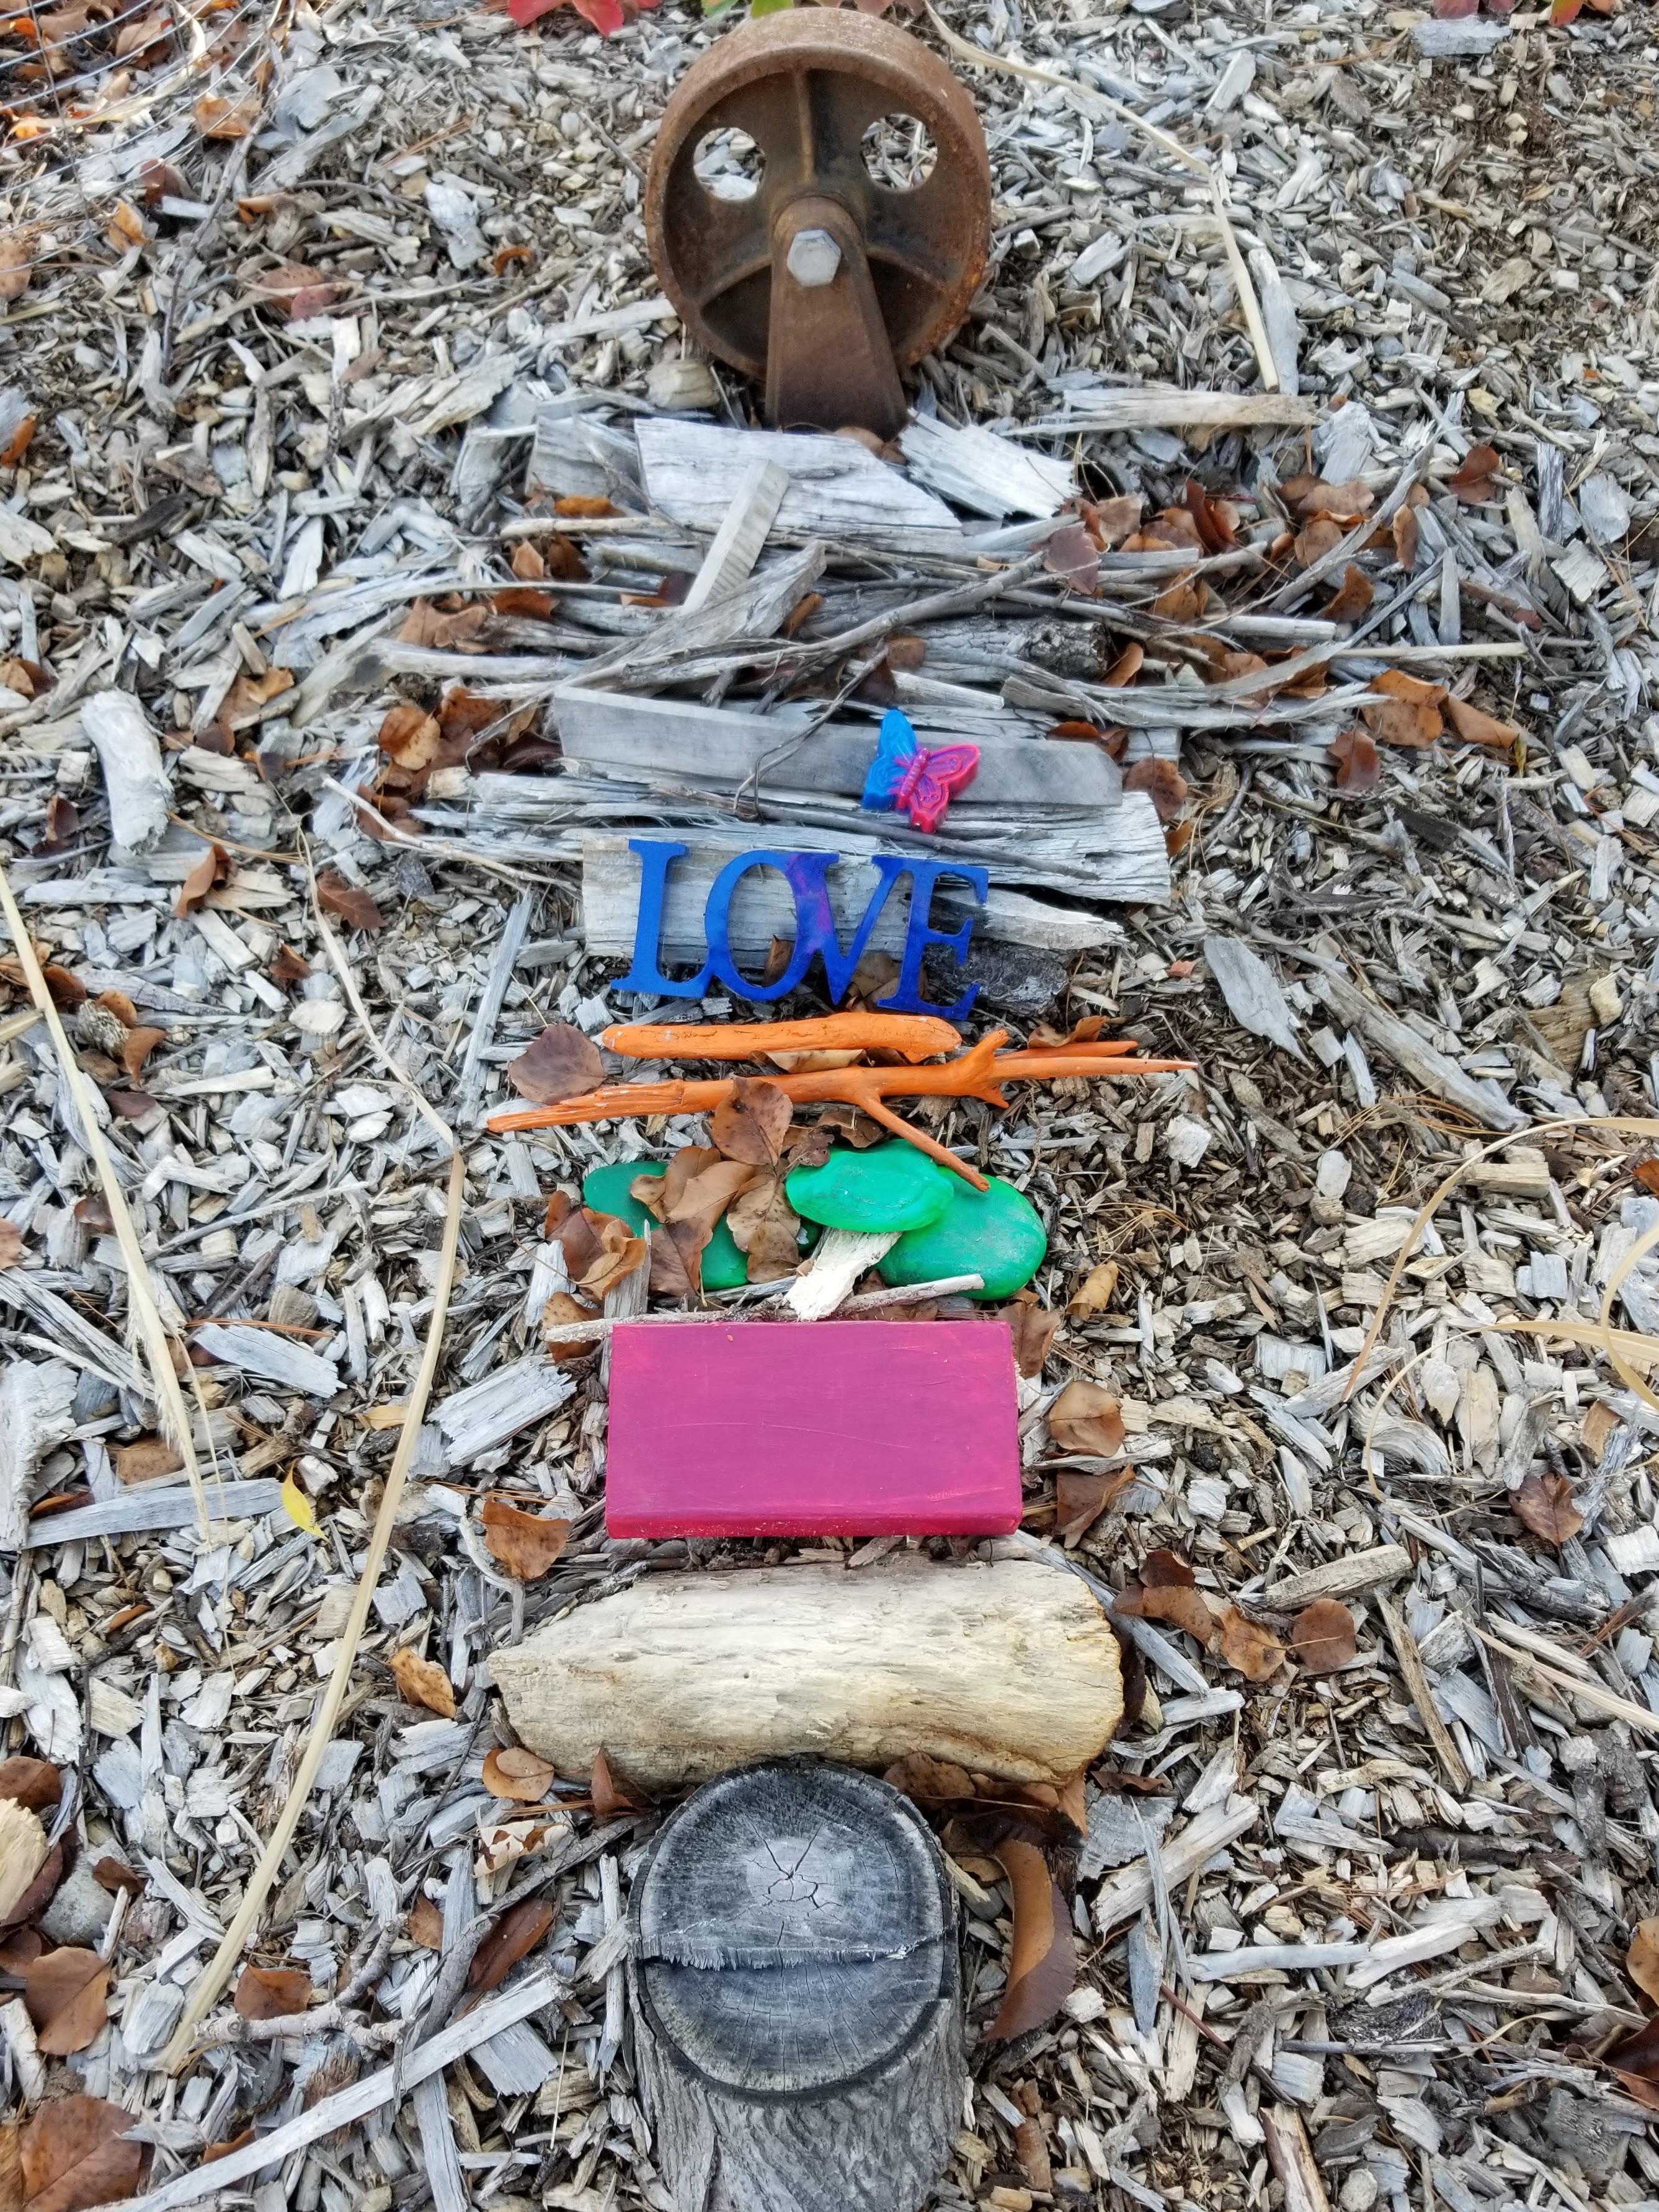
In addition to the cuttings from our Miscanthus giganteus, propped up in teepee form, these collections of items should, over time, offer areas of shelter for smaller forms of wildlife that wish to take up residence in our garden.
This year we also noticed the birds starting to use the various shrubs as landing sites, or even shelter when a hawk dive bombs the yard looking for prey around our bird feeders.
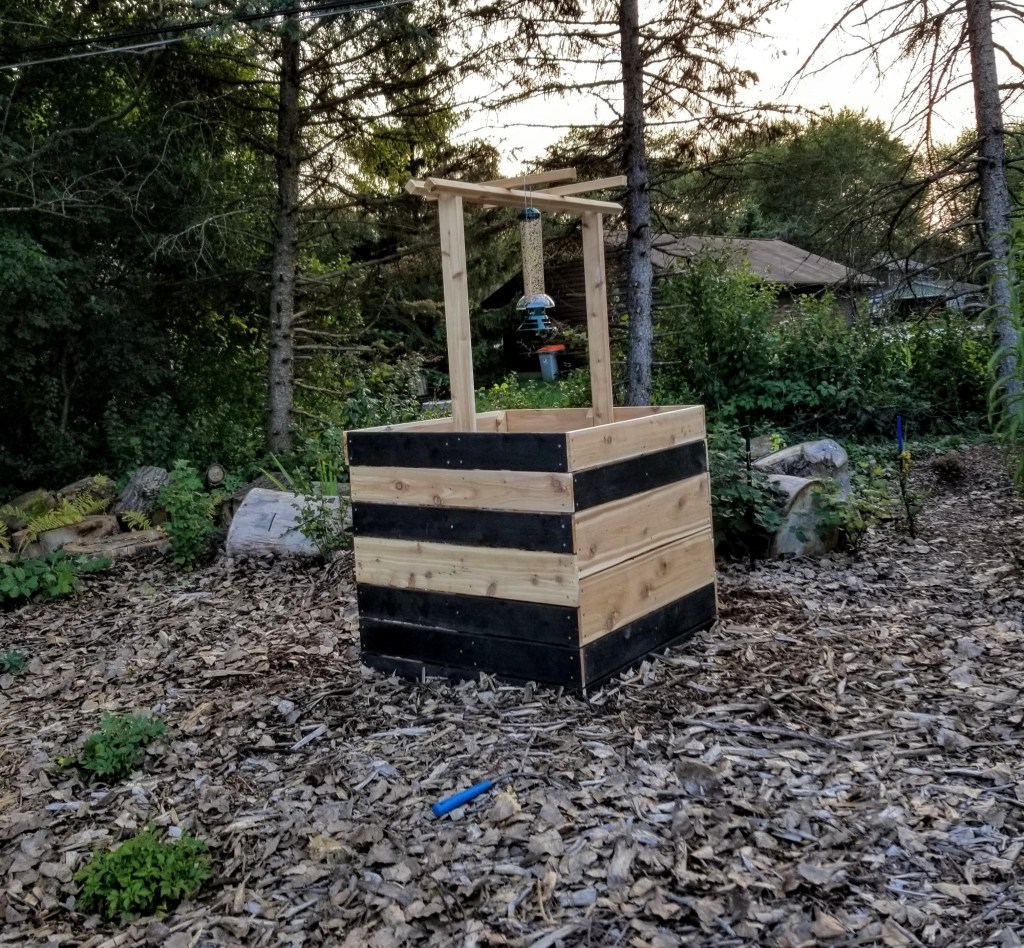
Another project was creating a structure to contain our compost pile. Utilizing leftover pieces of cedar and shou sugi ban, my daughter helped me put it together and position it in the backyard:
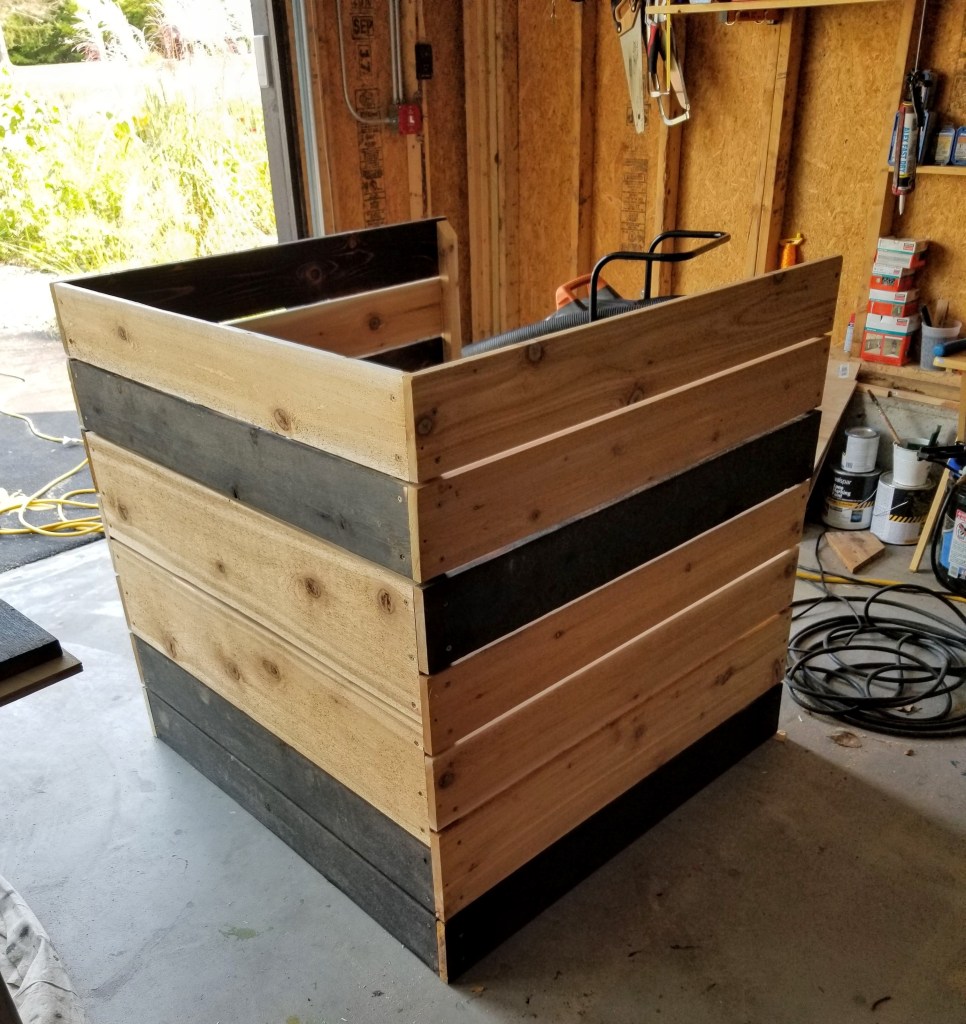
With a little bit of added structure, it took on the look of a wishing well while also creating more space for additional bird feeders:
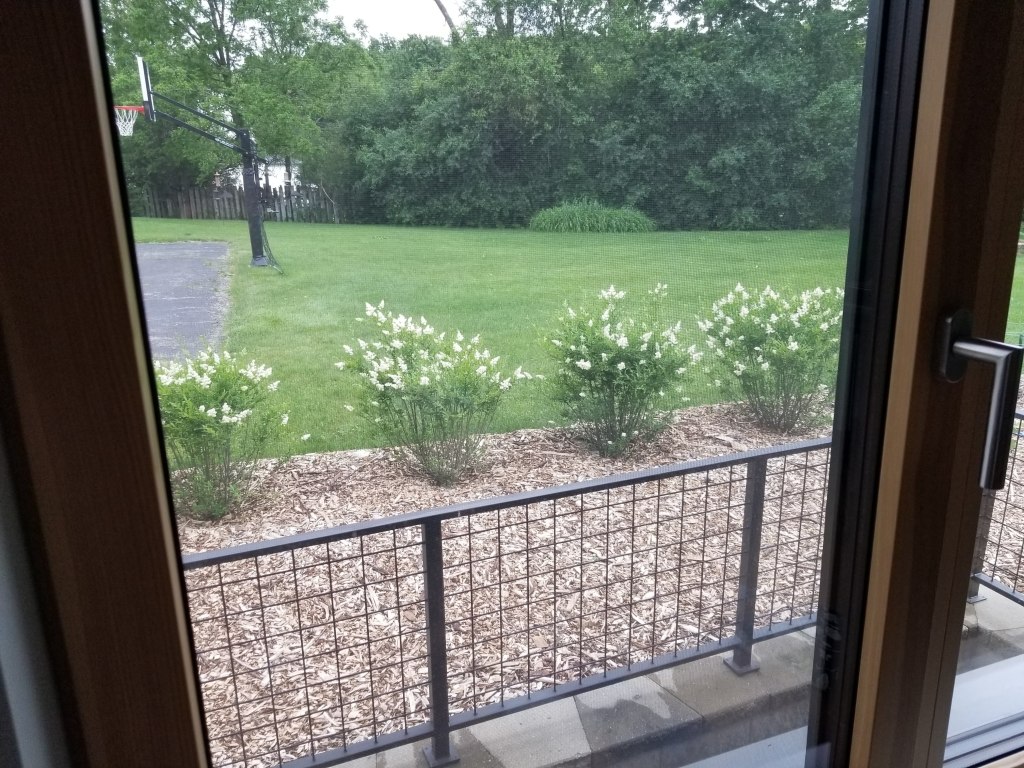
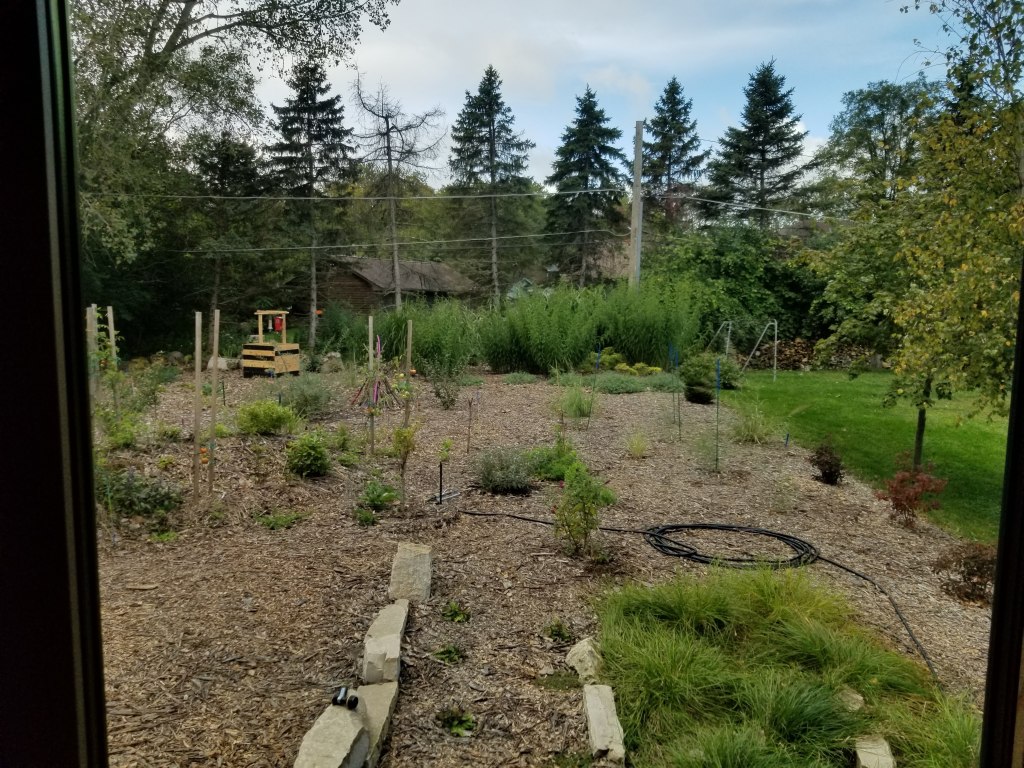
A view from our bedroom window as the summer progressed. While some areas are lush with growth, many others are just settling into their sparse, first year acclimation period:
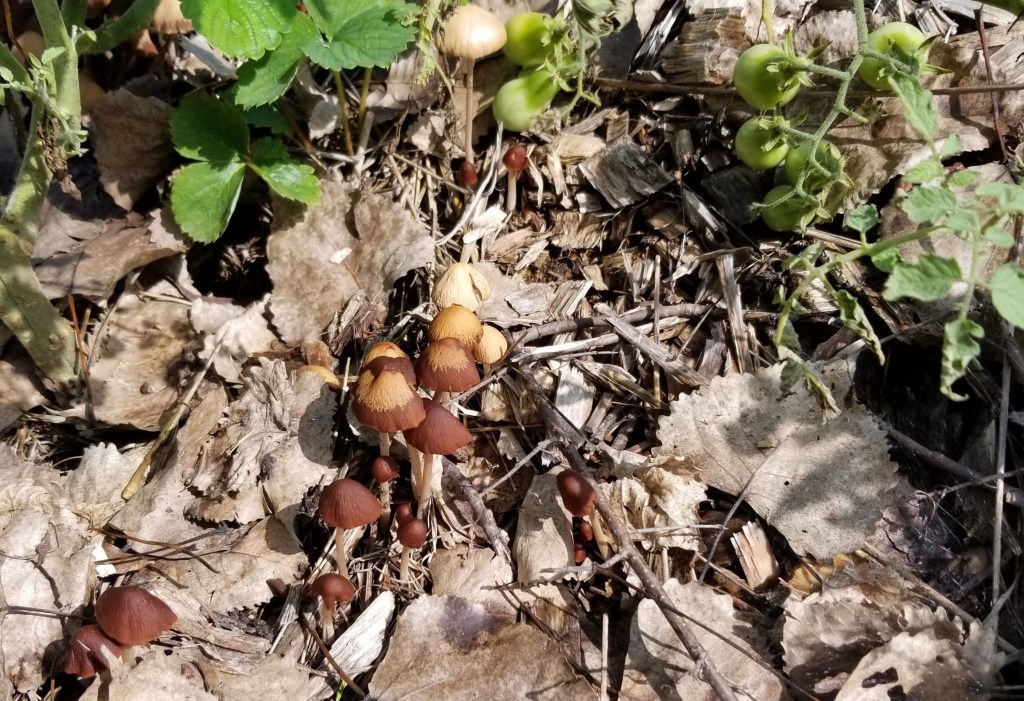
Mushrooms
We had an exciting year in terms of mushroom varieties. In addition to the wide selection, they popped up in nearly every corner of our yard, regardless of sun exposure or moisture levels.
As the mulch and wood chips continue to break down, the network of mycelium should be branching itself out across our entire garden, upping our overall soil fertility while increasing the ability of our plants to fend off pests and disease.
Mushrooms popping up around our veggies on the hügel:
They continue their slow work, breaking down the large logs from our neighbor’s fallen tree:
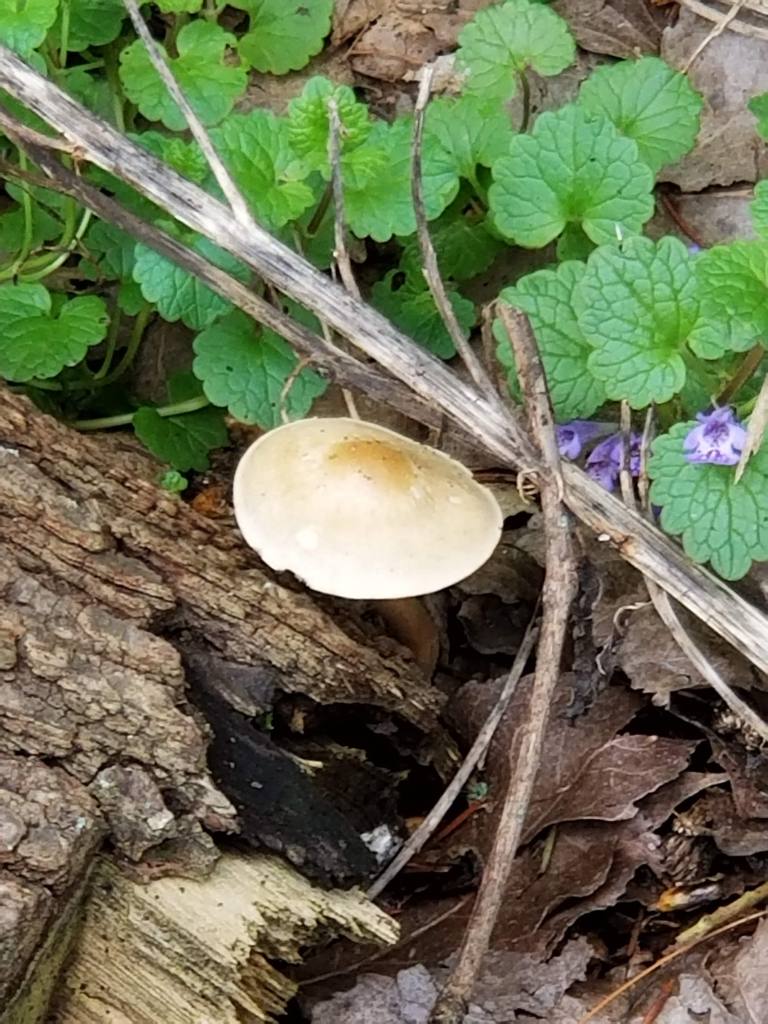
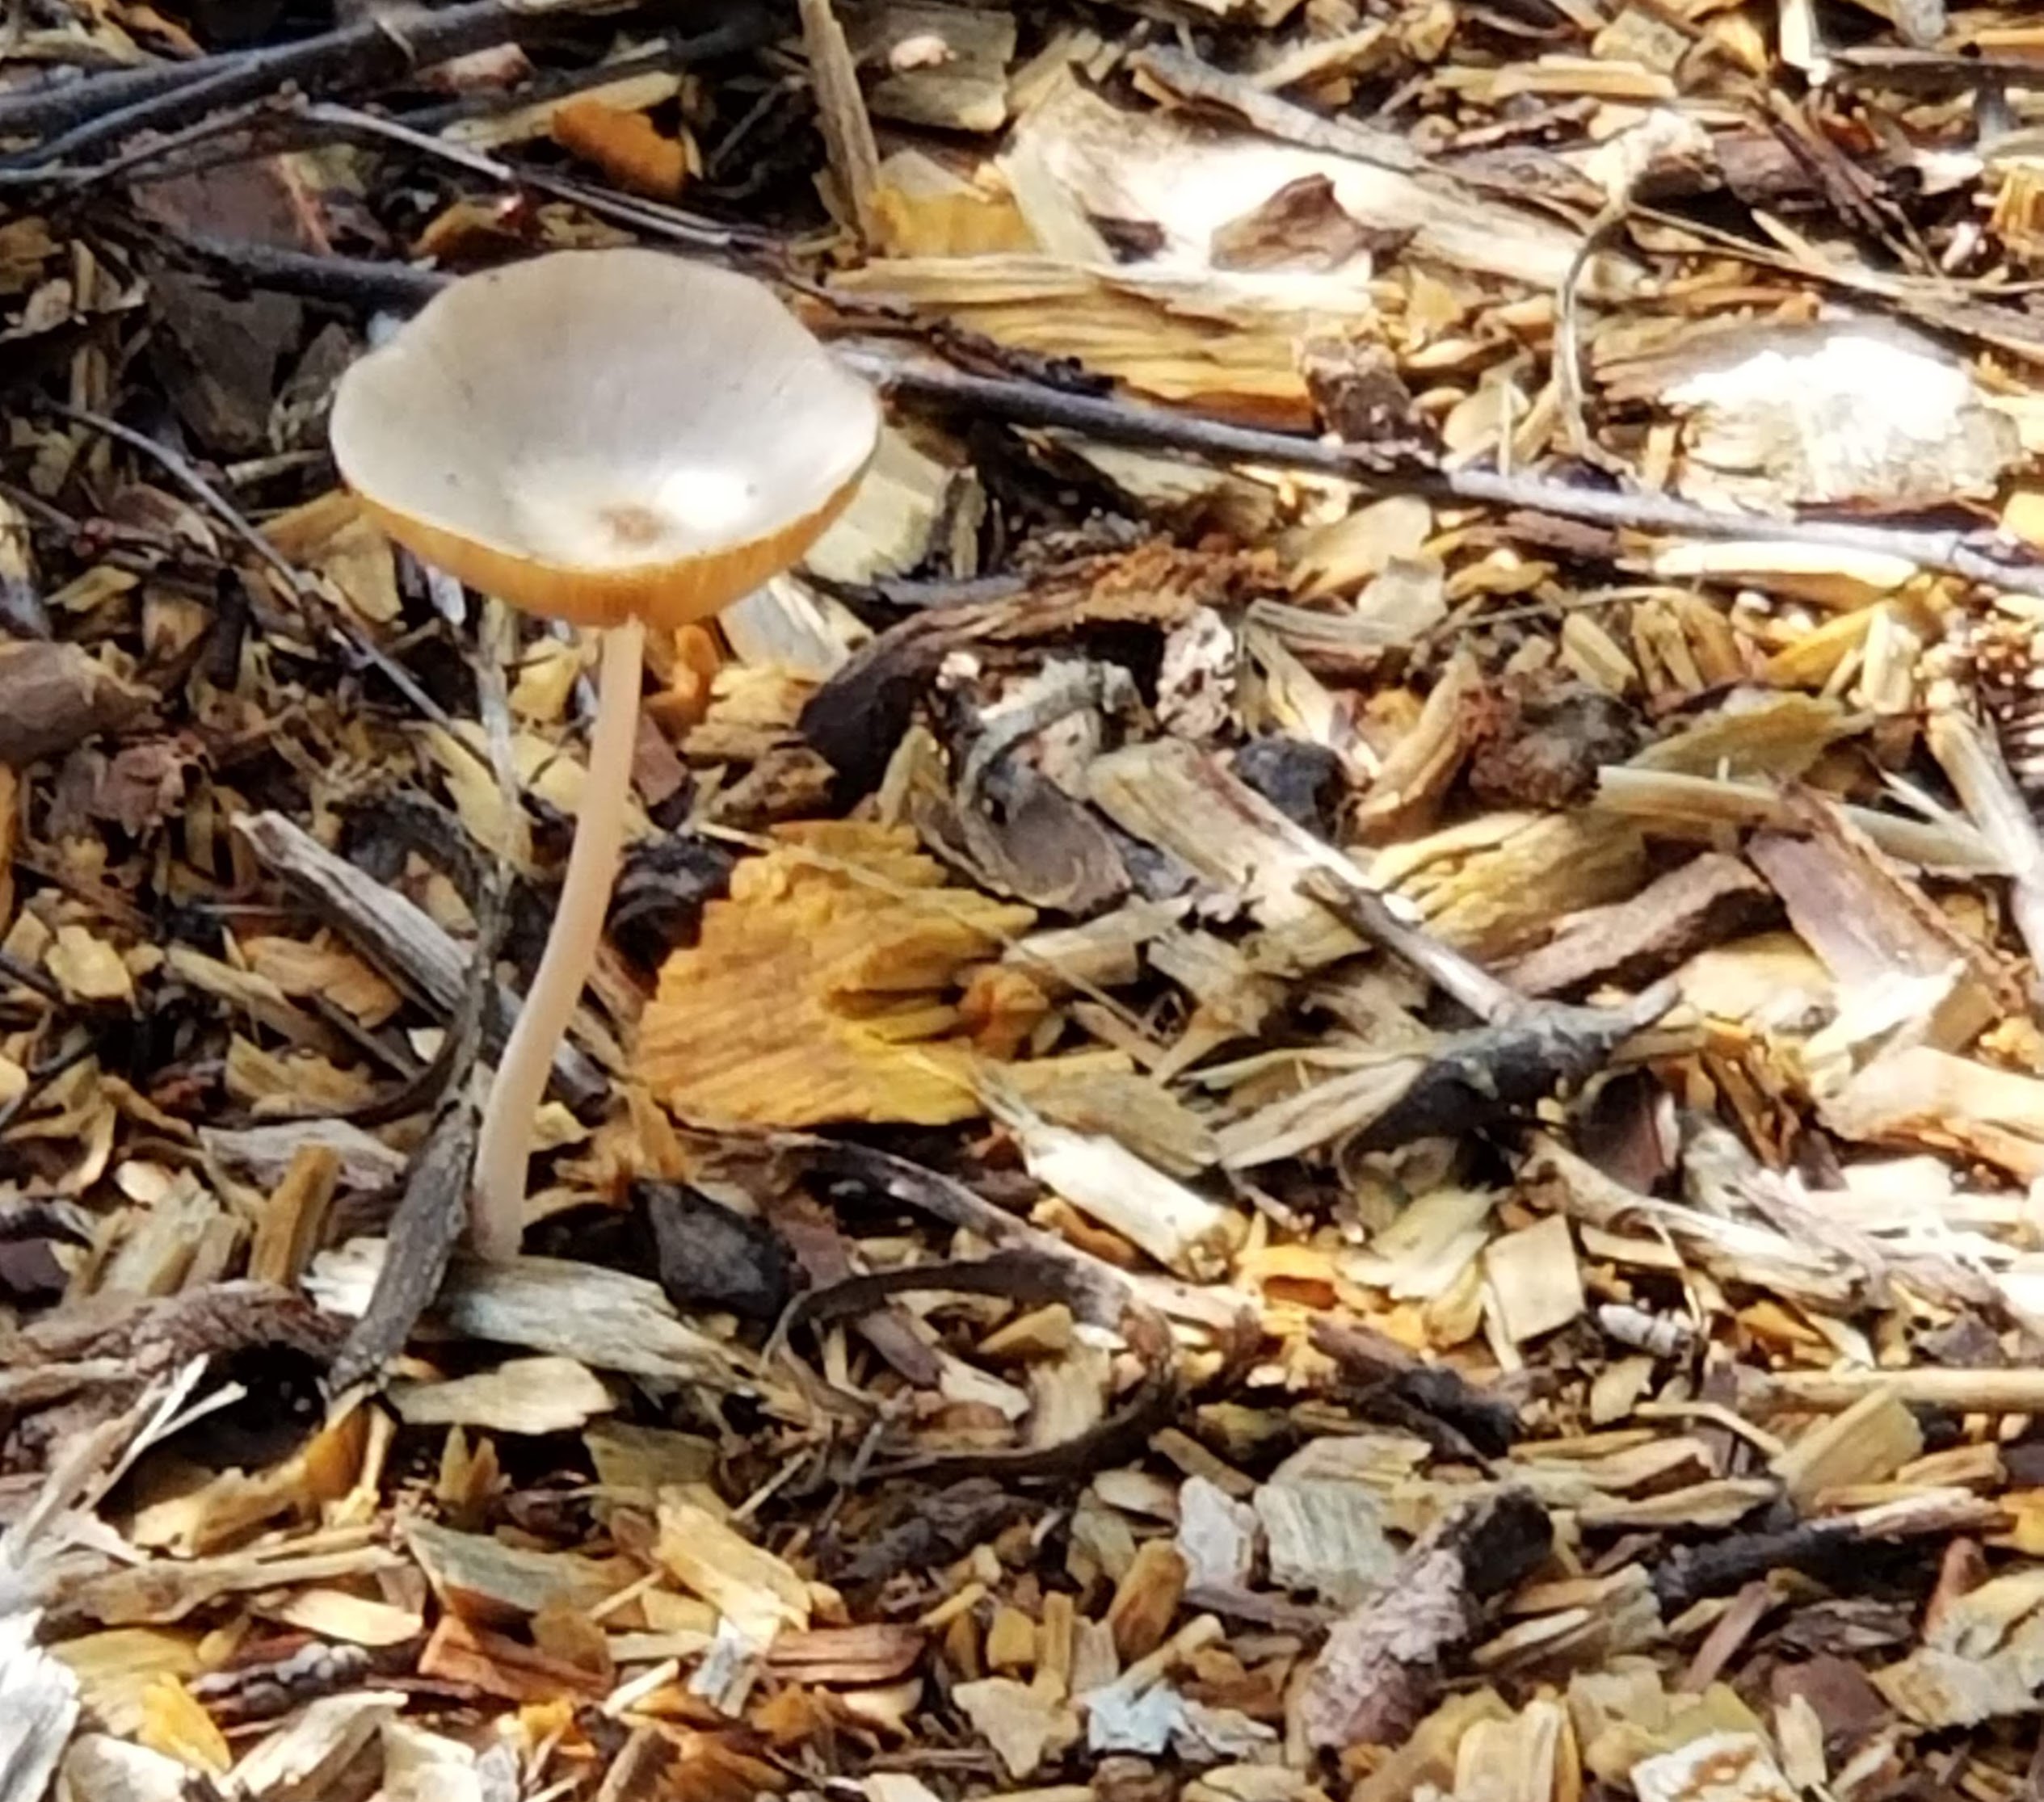
In some instances, they blend in so well with the mulch that they are easy to miss if you’re not actively looking for them:

Right after a good rain is the ideal time to go looking for new upstarts:
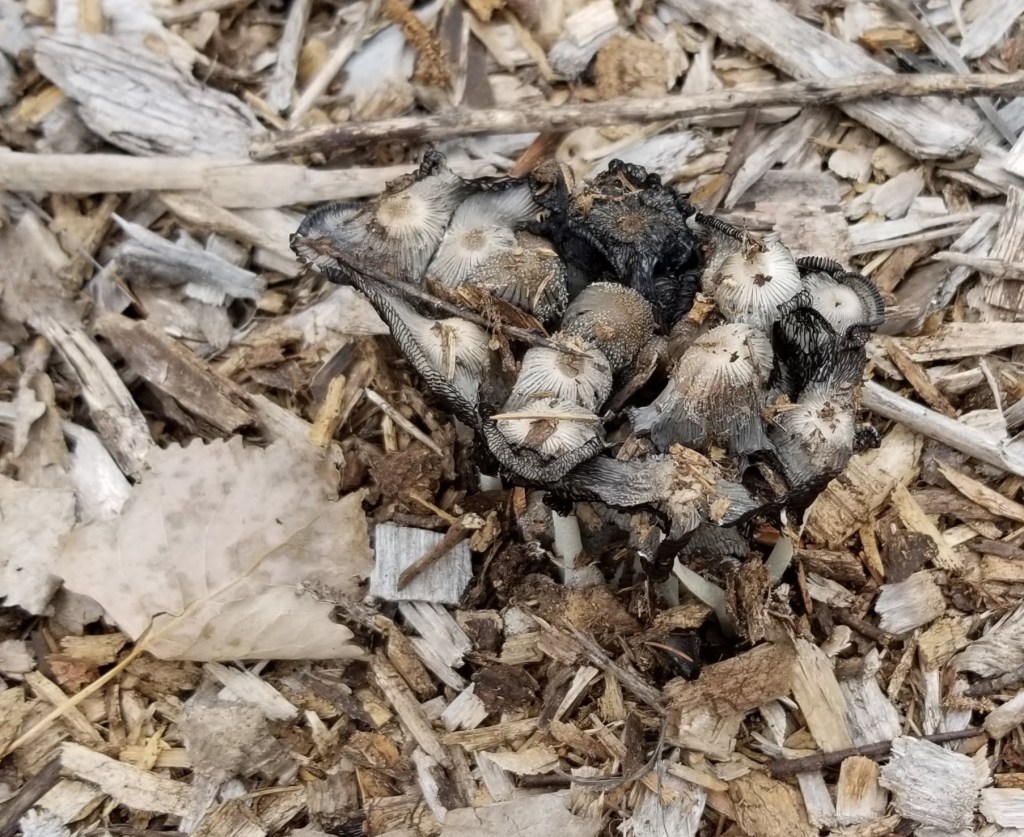
Below, the stinkhorns that showed up around one of our downspout rain gardens made themselves known with a strong visual, as well as olfactory, presence:

The sheer number of varieties that we’ve seen pop up in the yard, just in our first two years, has been exciting to watch:


It will be interesting to see if the fruiting continues, or tapers off, as our existing mulch layers breakdown over time.
“Wabi-sabi is not about gorgeous flowers, majestic trees, or bold landscapes. Wabi-sabi is about the minor and the hidden, the tentative and the ephemeral: things so subtle and evanescent they are invisible to vulgar eyes… to experience wabi-sabi means you have to slow way down, be patient, and look very closely.”
— Leonard Koren, Wabi-sabi
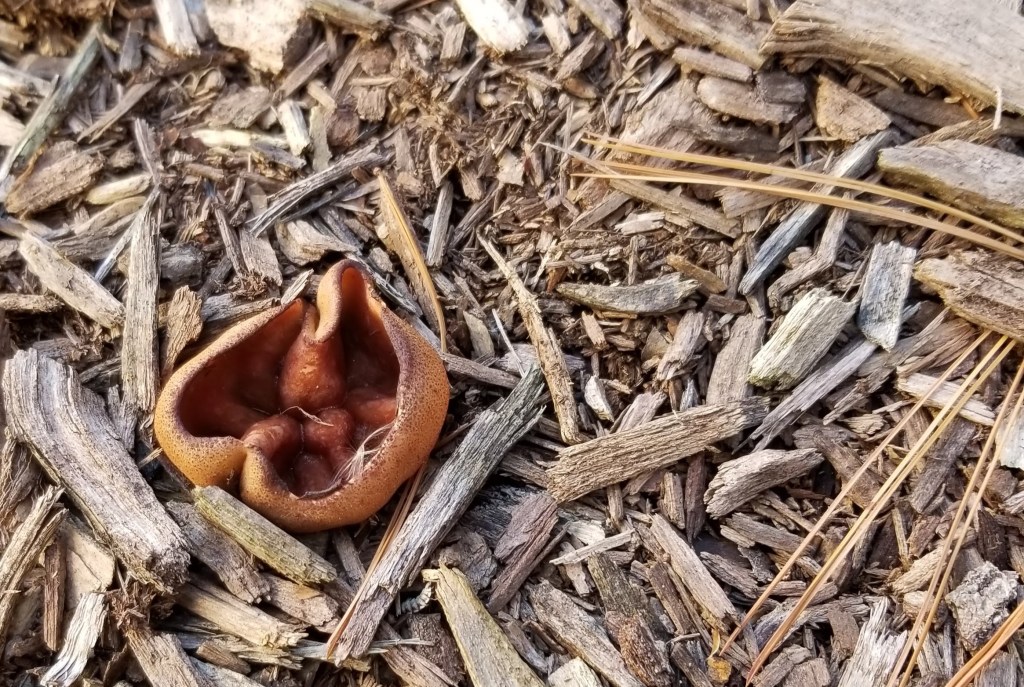
This one, below, was particularly easy to miss, as it hugs the ground with a fibrous-looking body reminiscent of a cracked open peach pit:
Wildlife
As our garden develops, we’ve been able to observe an increasing number of creatures paying a visit, both in quantity and kind:
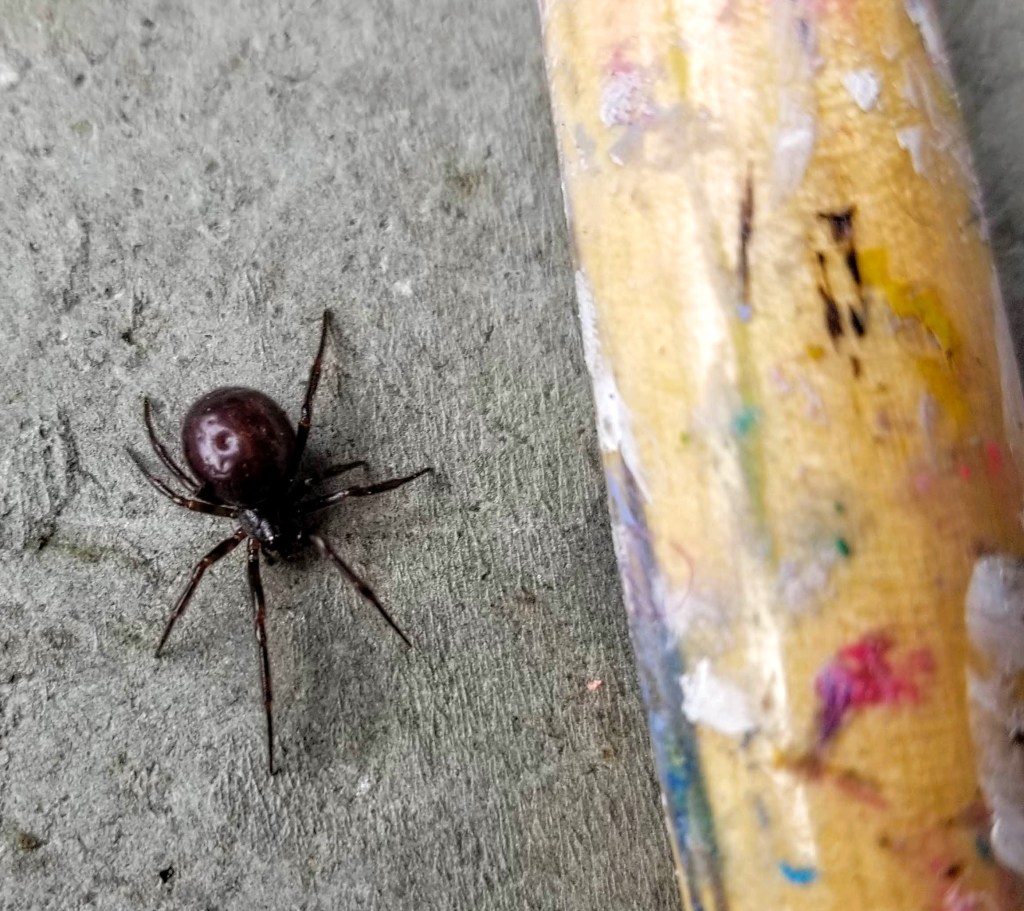
Rabbit hutch spider stops by while we’re painting in the garage:
Our last house was near large ponds, so every spring and summer our backyard and basement window wells saw dozens of frogs and toads. In our current home, there have only been a handful of visitors who have managed to fall into our stone basement window wells.
Below, a large bullfrog has managed to fall in. We gently collected him and placed him at the base of one of our arctic blue willow shrubs, allowing him to hide out at the base of the dense foliage:

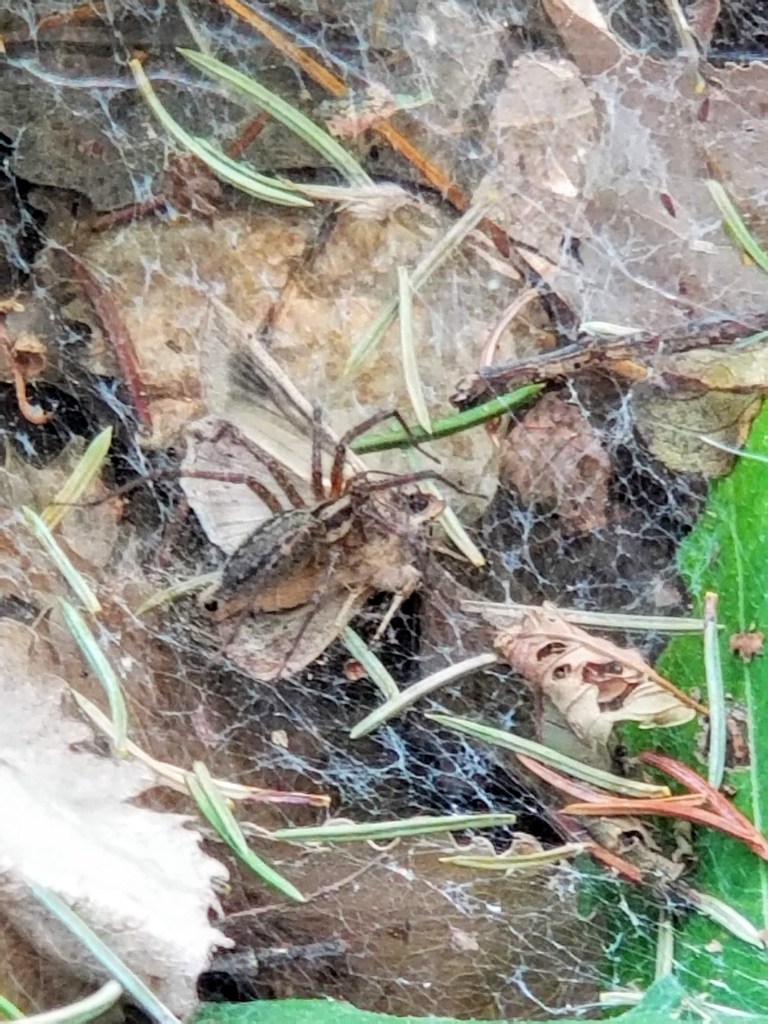
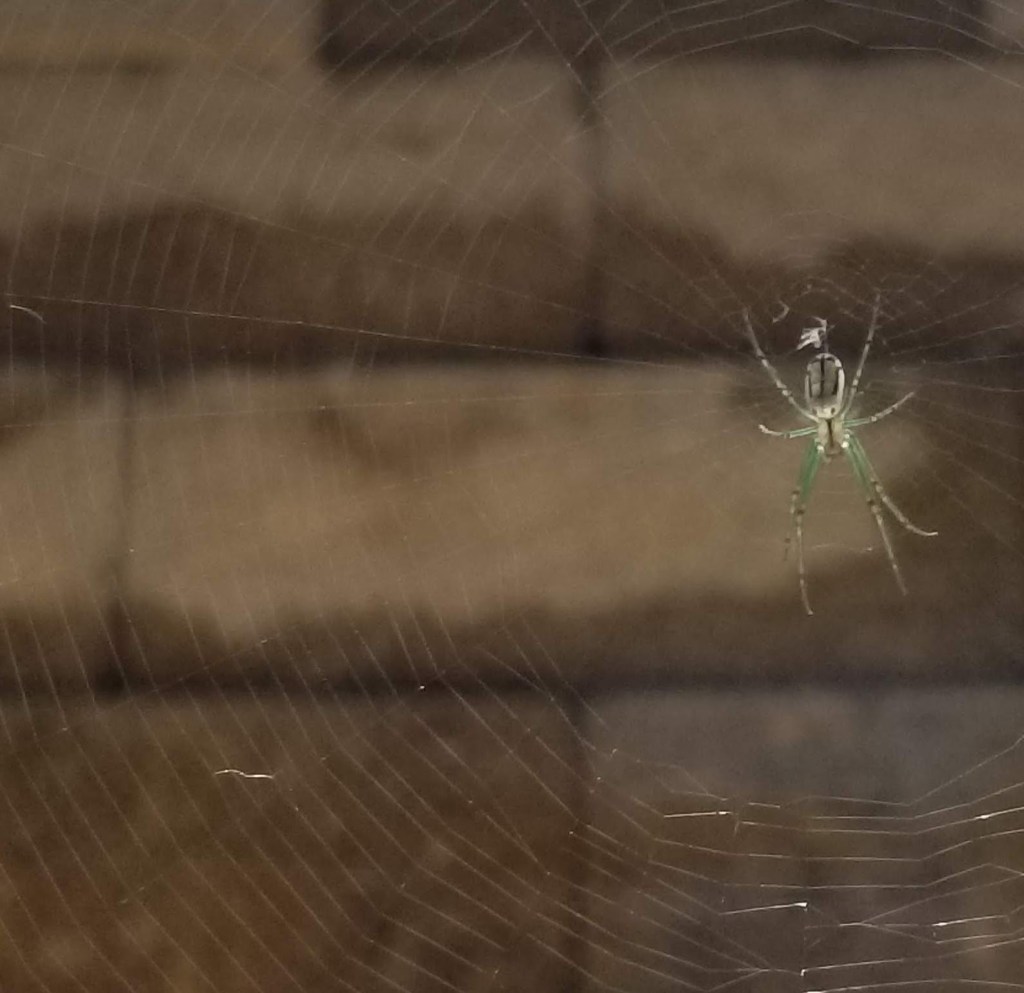
In addition to earthworms around the base of plants and above ground after heavy rains, spiders are the most common creatures we see in the yard — on plants, on the mulch, and in the leaf litter:
Funnel web spider:
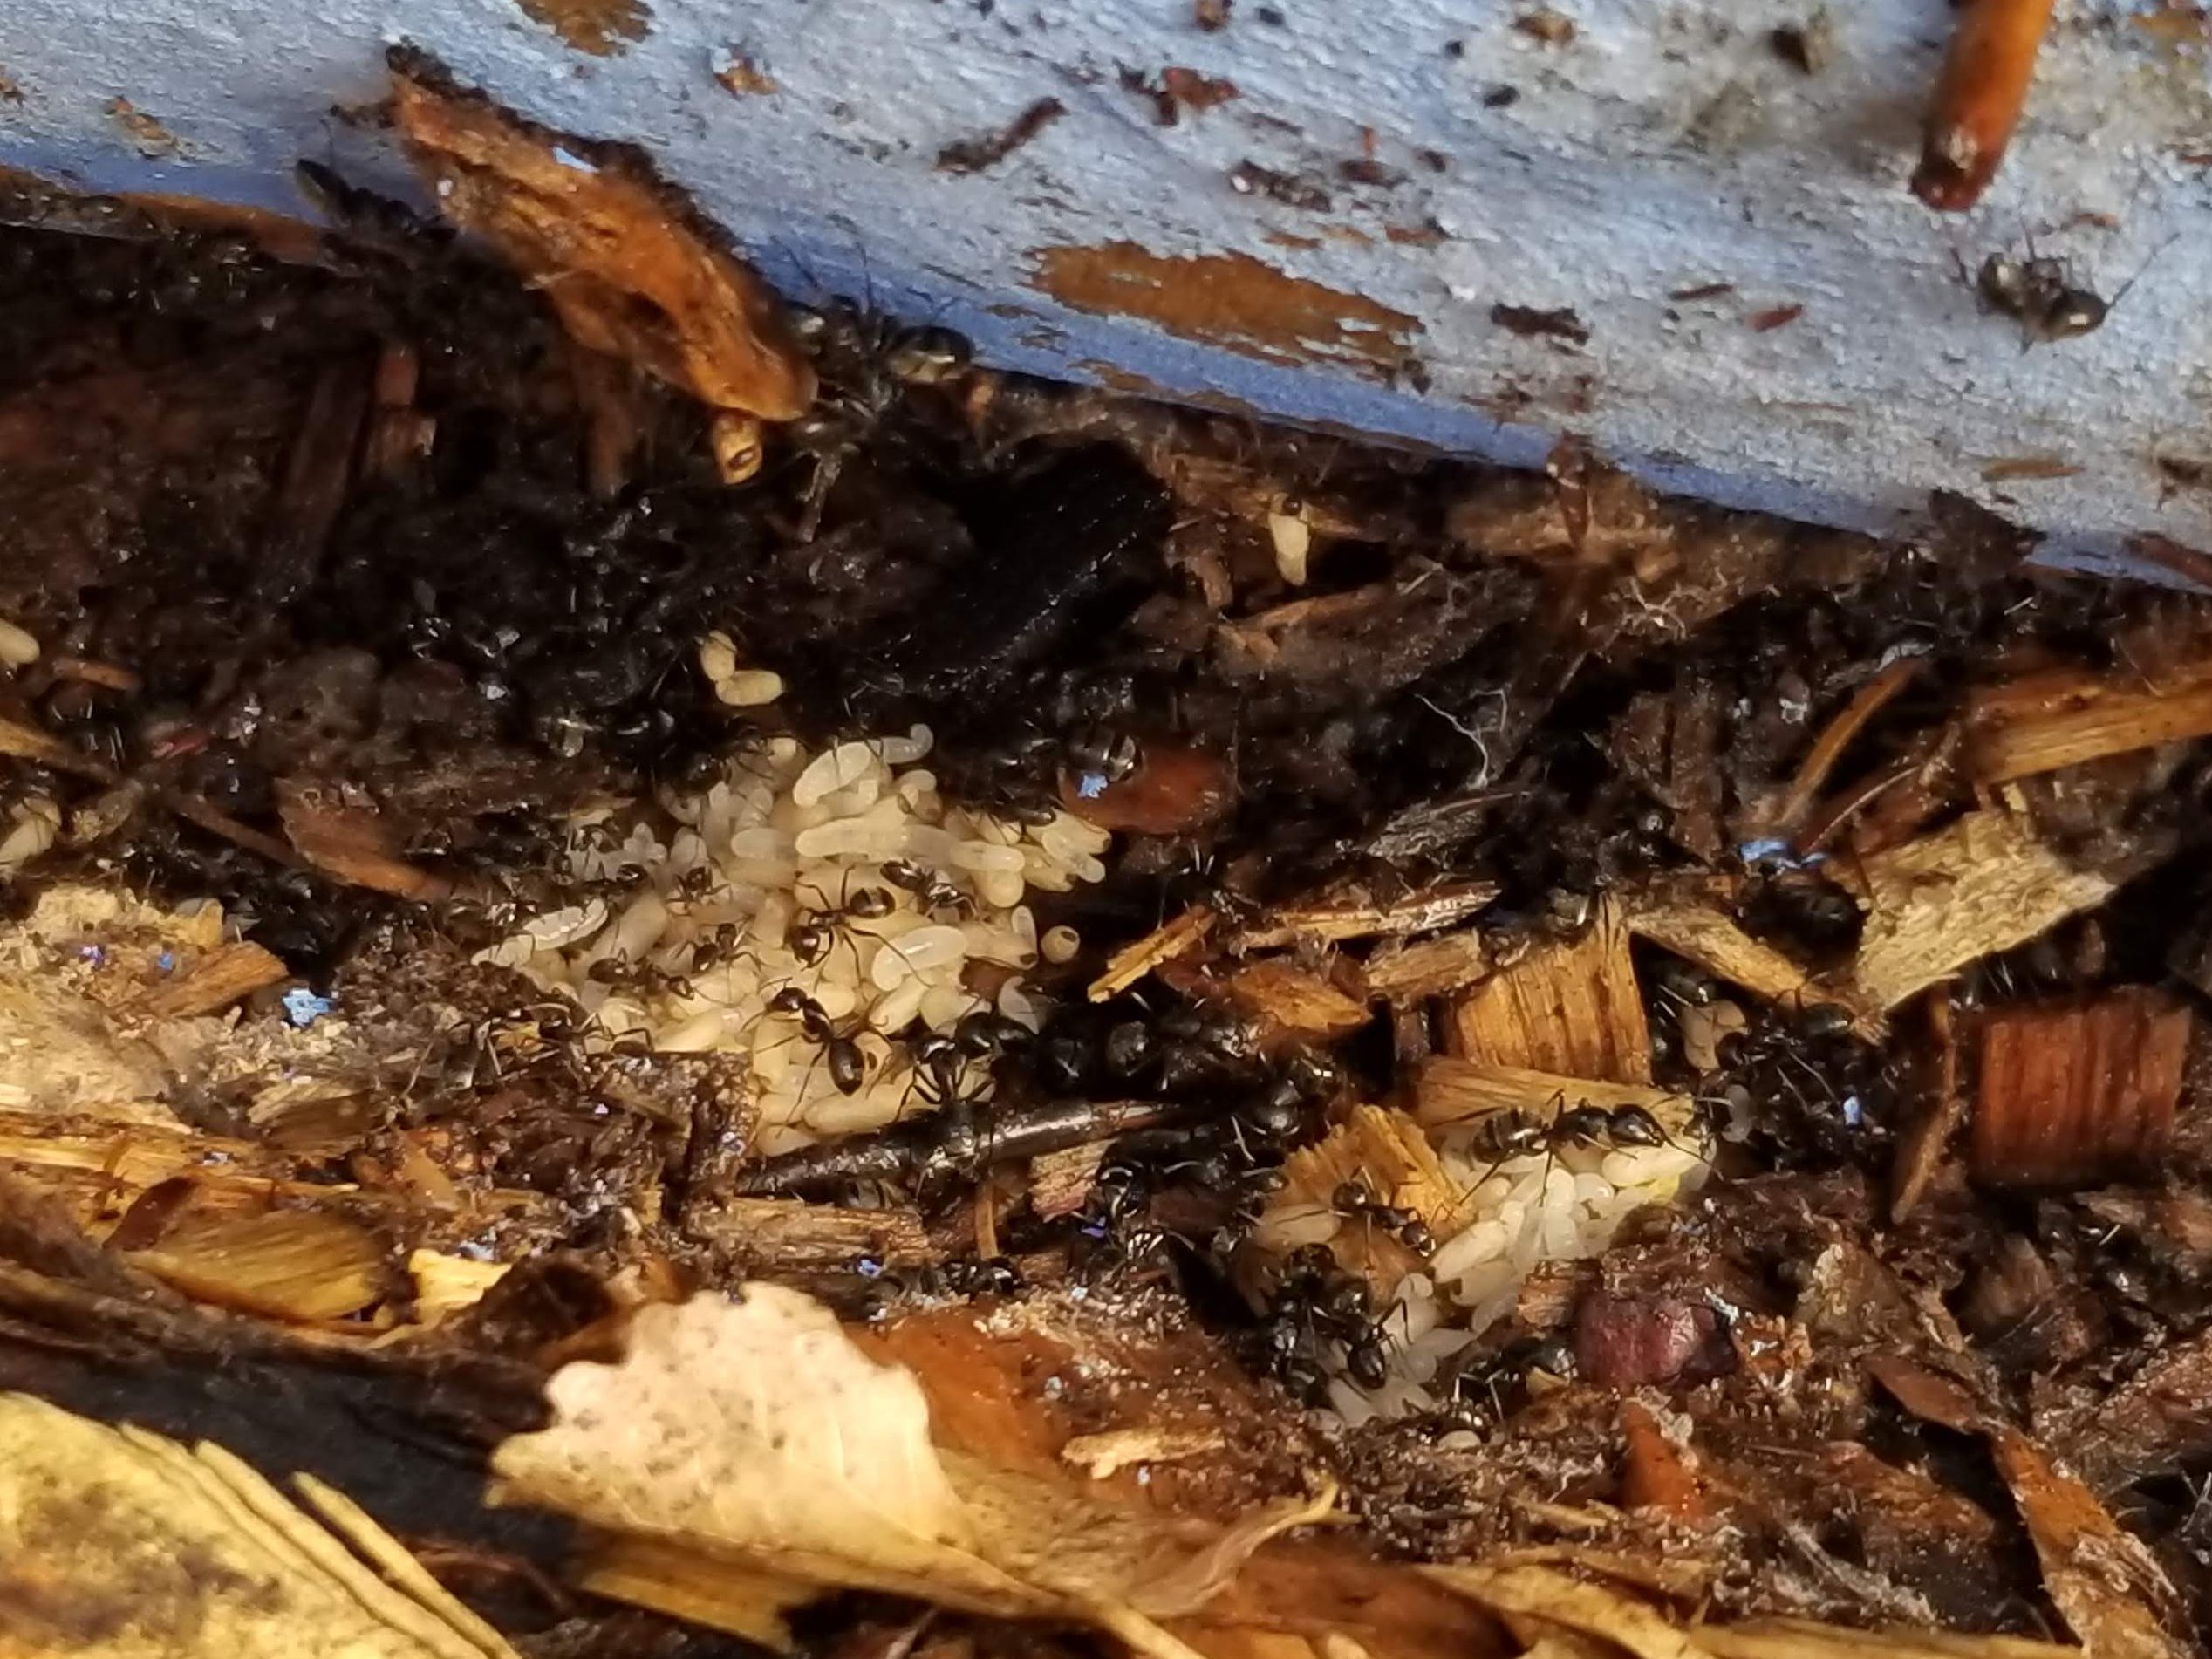
A few weeks after painting and helping me place a series of decorative logs in our backyard, my daughter realized there was an active carpenter ant nest underneath one of them:

Once discovered, she returned each day to monitor the nest’s progress by gently rolling up the log to expose the constant activity below:
Below, a toad explores our tomato patch on the hügel:
Initially registering as a random flying insect inside the garage, the following day this large stag beetle showed up on the garage floor, expired:

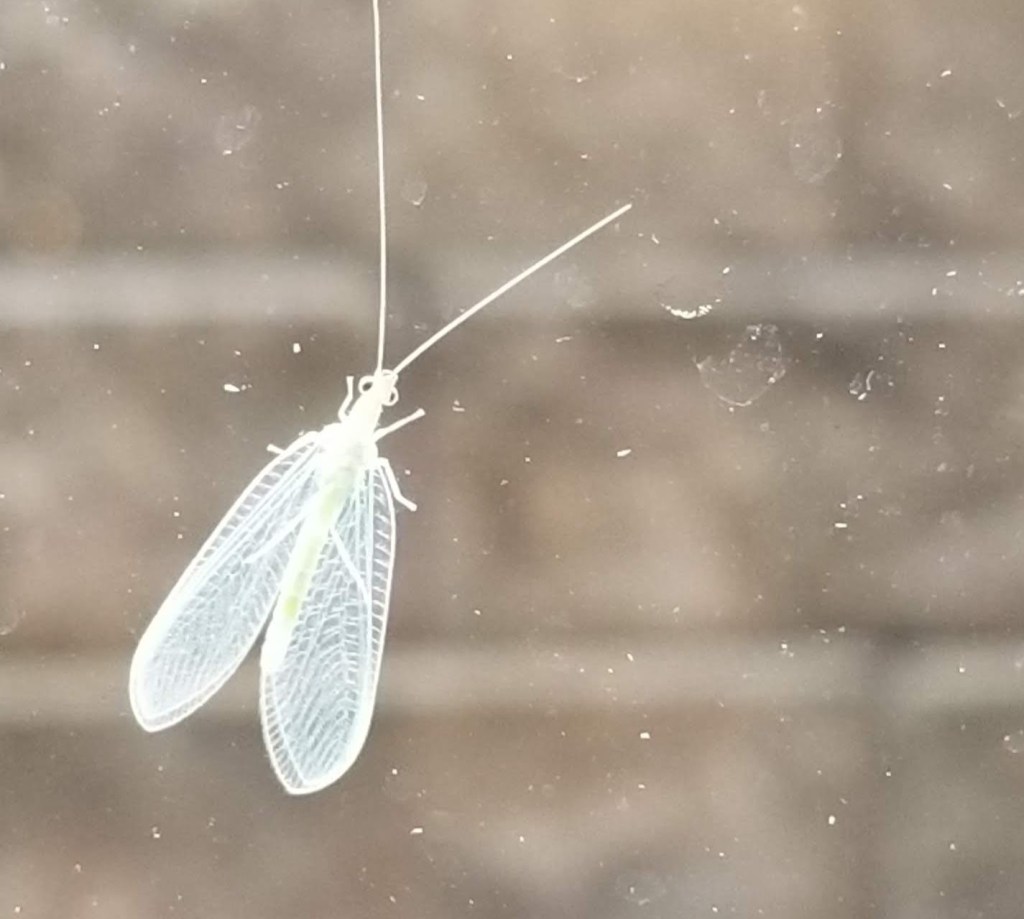
We’ve seen any number of beneficial insects in our garden, including many lacewings. Their stick-like eggs show up occasionally on our black siding to vivid effect:
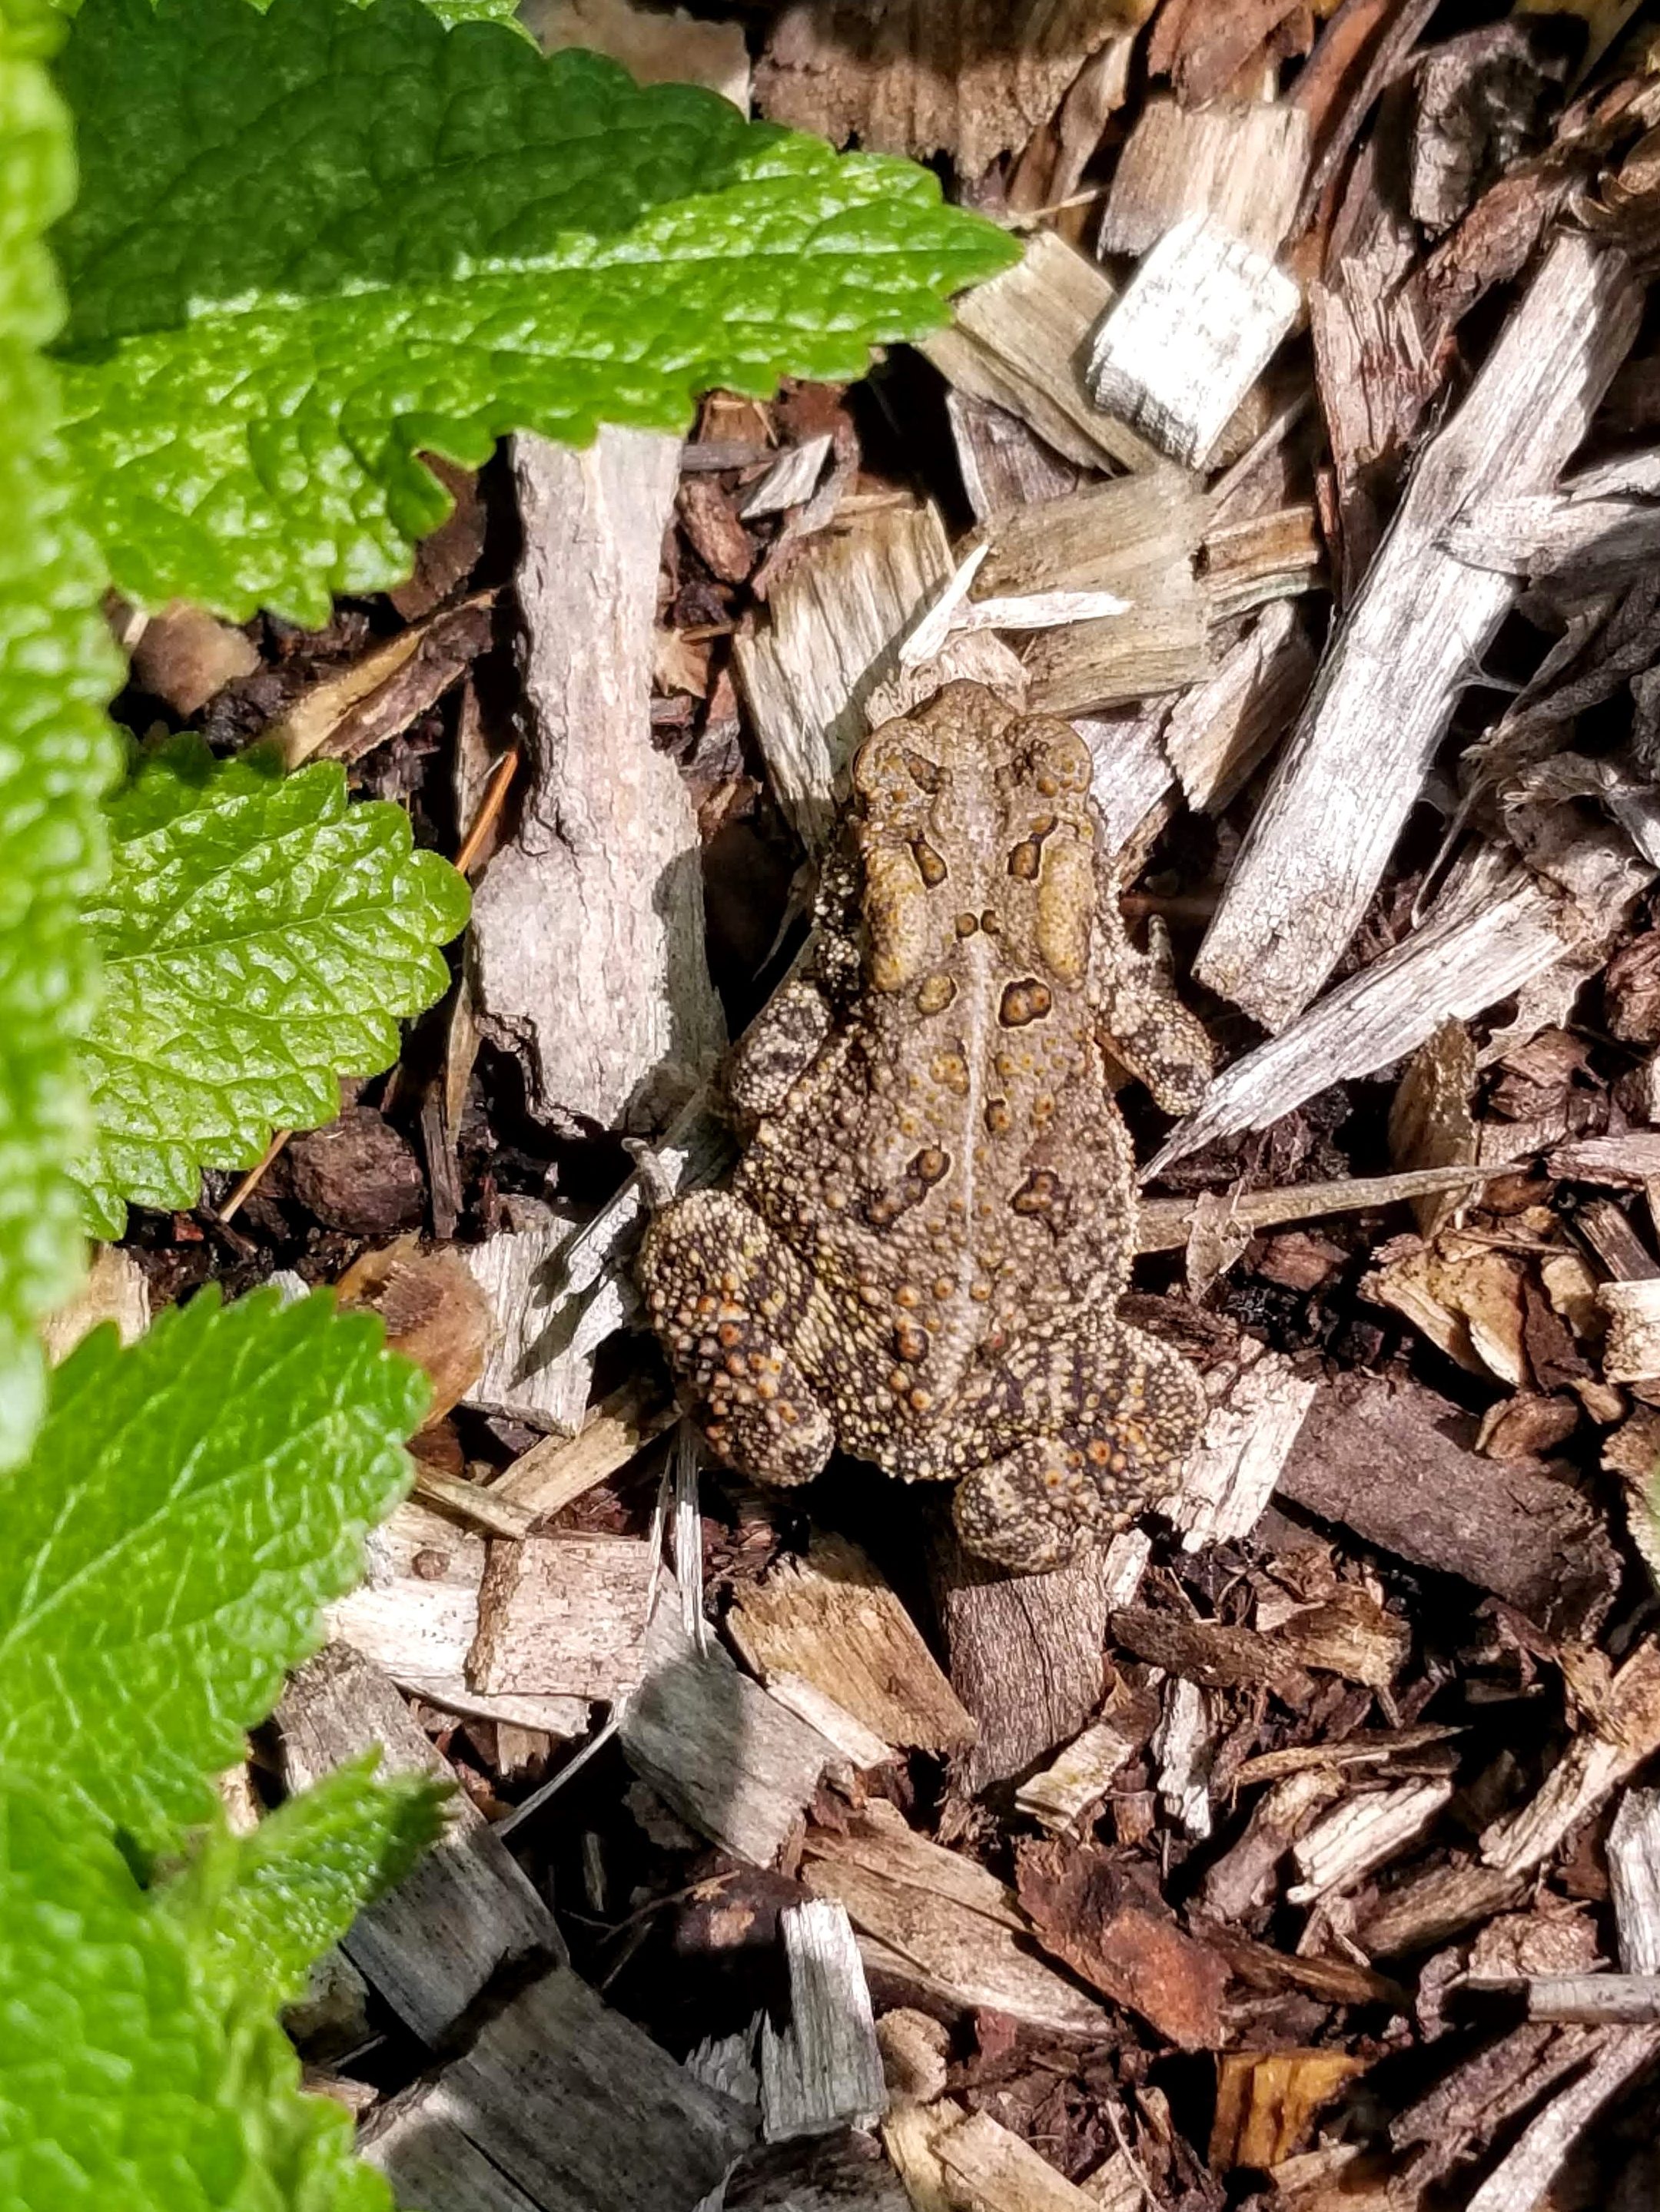
A Fowler’s toad on the move around our lemon balm and vegetables:
We’ve had any number of paper wasp nests around the house. Each one has been relatively small and out of the way, so we’ve been able to leave them alone as they go about their business in the garden:
Paper wasp on our basement window:

There’s been no shortage of spider varieties around the house. With all the Passive House air sealing we did for the shell of our house, few insects have managed to gain entry into our home. Typically, only a handful of small spiders each year manage to get through the gaskets on our basement windows.
Frogs and toads showed up throughout the summer to enjoy easy pickings around our exterior lights:
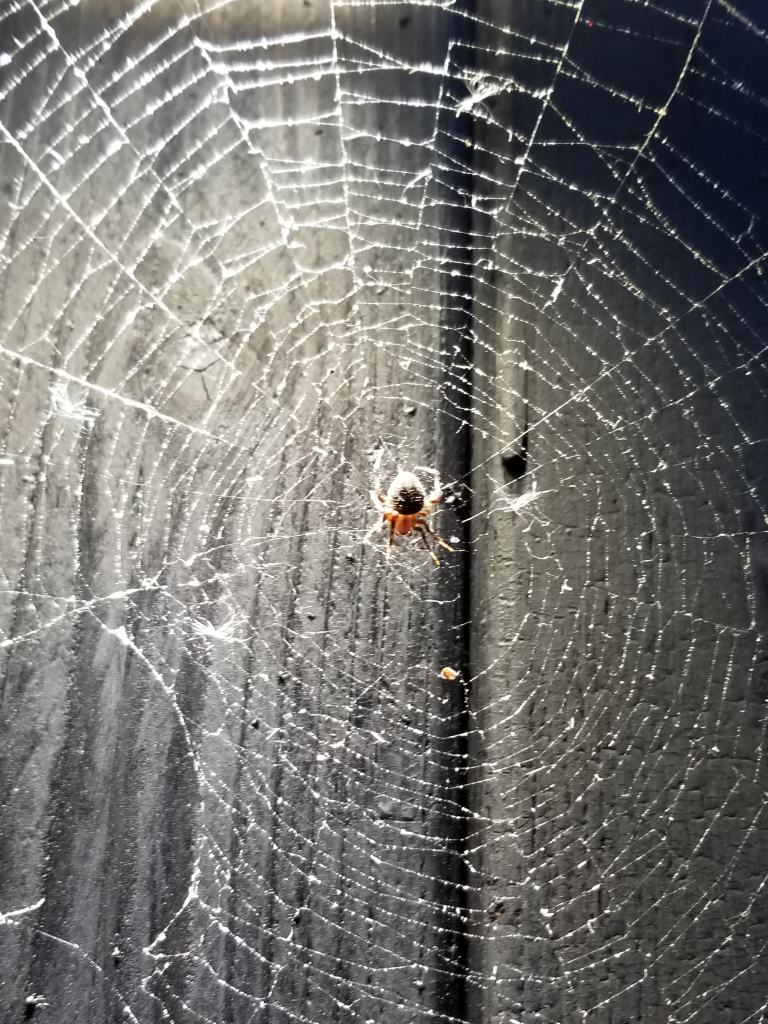
Spiders, too, took advantage of all the insects congregating at our exterior lights. The spider webs on black siding proved to be ideal, if unplanned for, Halloween decorations:
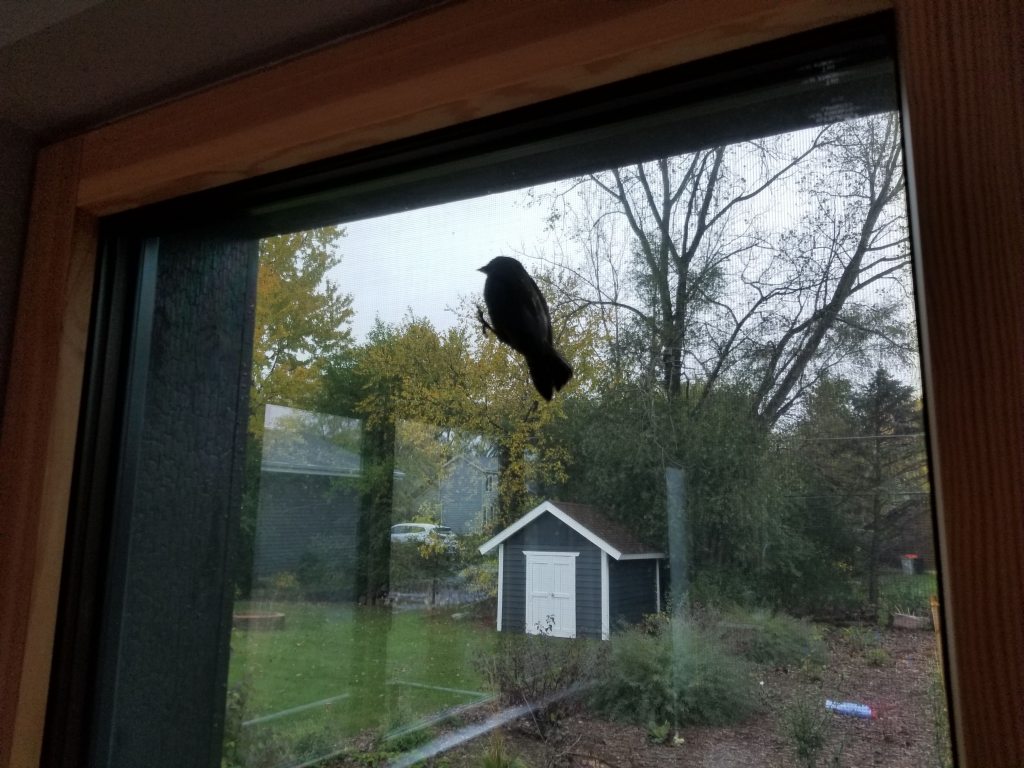
Below, just before I took this picture there were three other sparrows on the window screen (unfortunately, before I could get to my camera). We’ve seen sparrows more than once take advantage of the shelter provided by our ‘innie’ window placement during rainstorms. Even in the heaviest wind-driven rainstorms, the top third of our window glass remains dry, offering added protection to this portion of the windows from water intrusion:
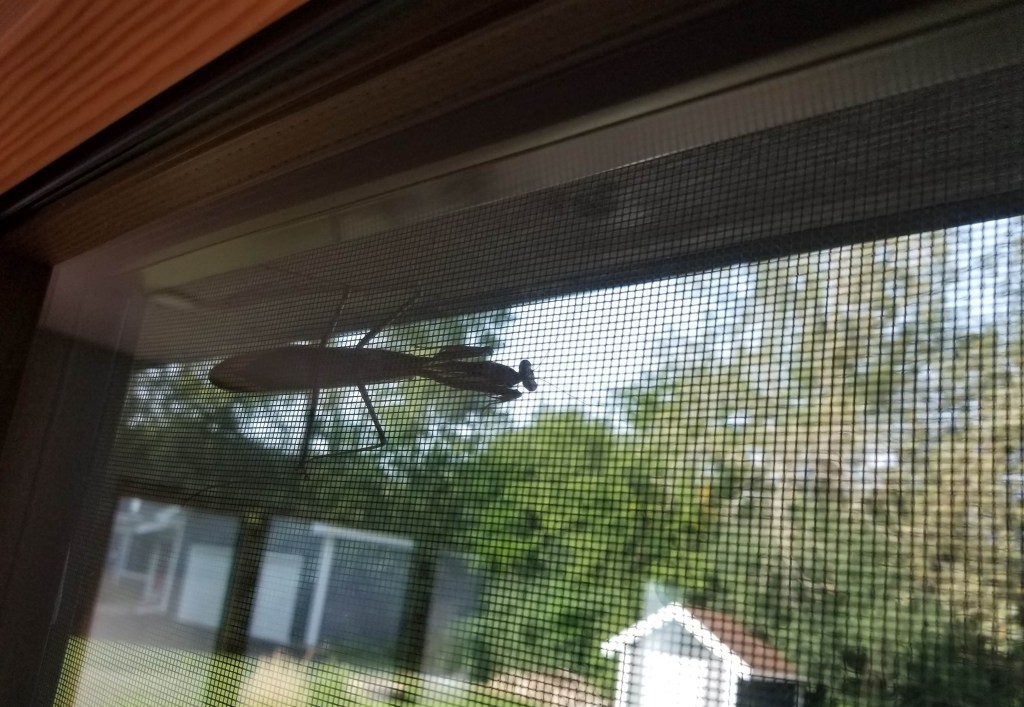
Even a Praying mantis has enjoyed the view from our window screen:
Orb spider with beautiful markings on our siding:

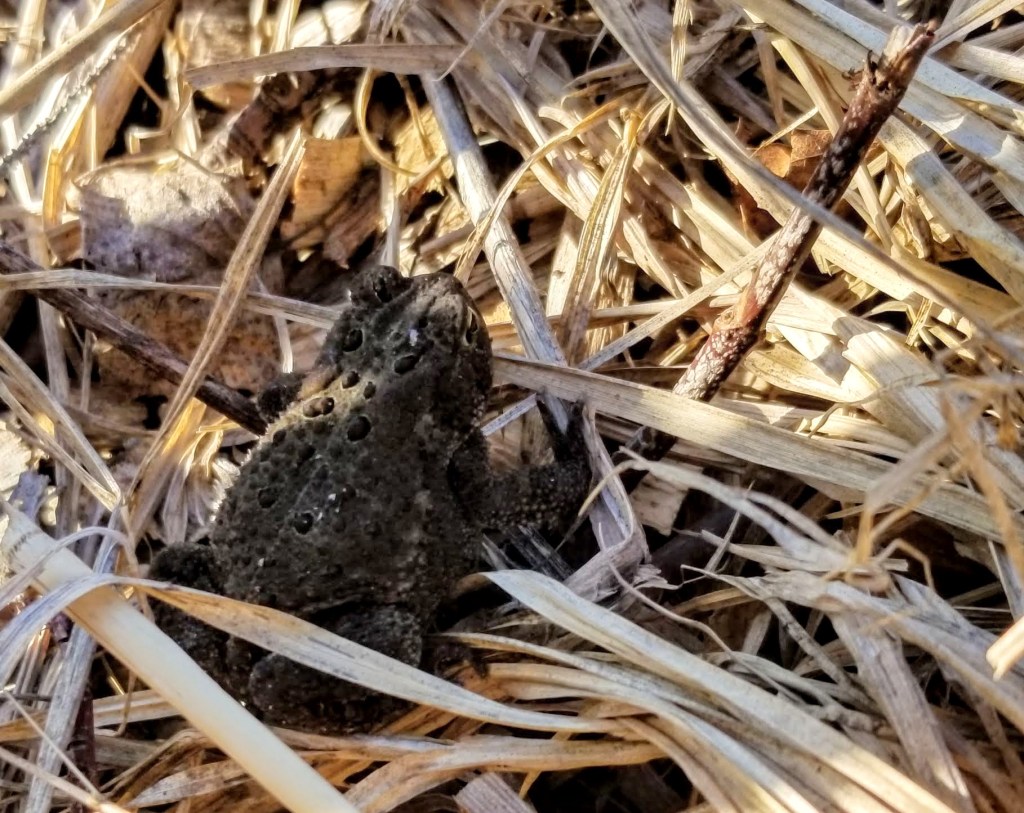
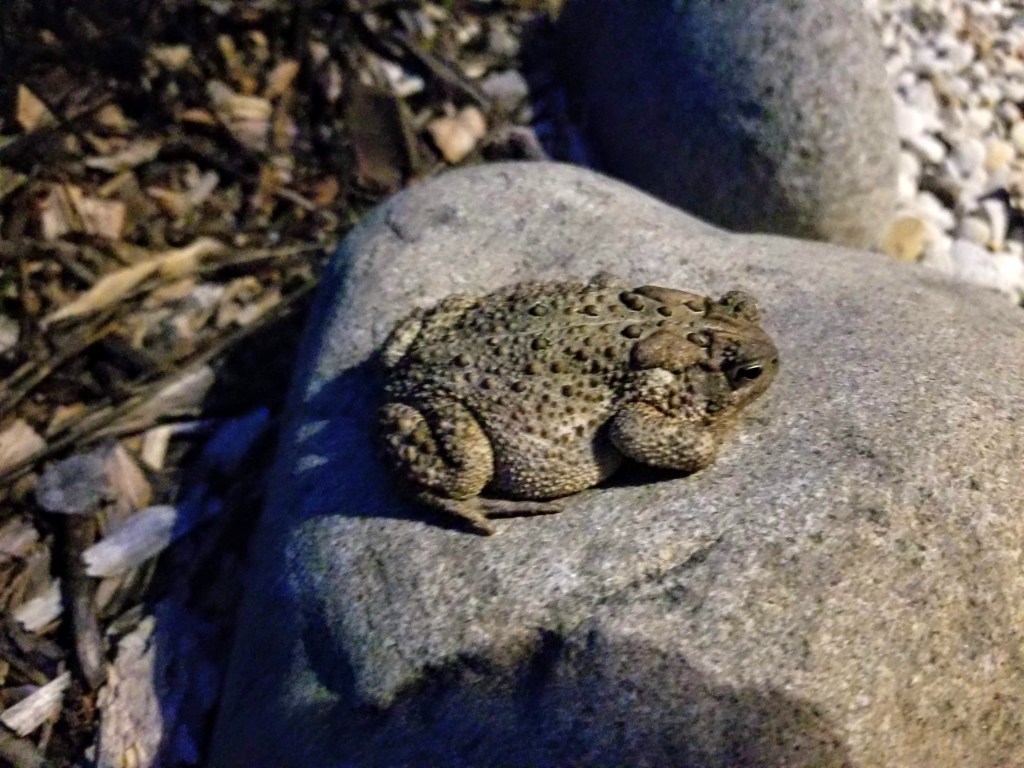
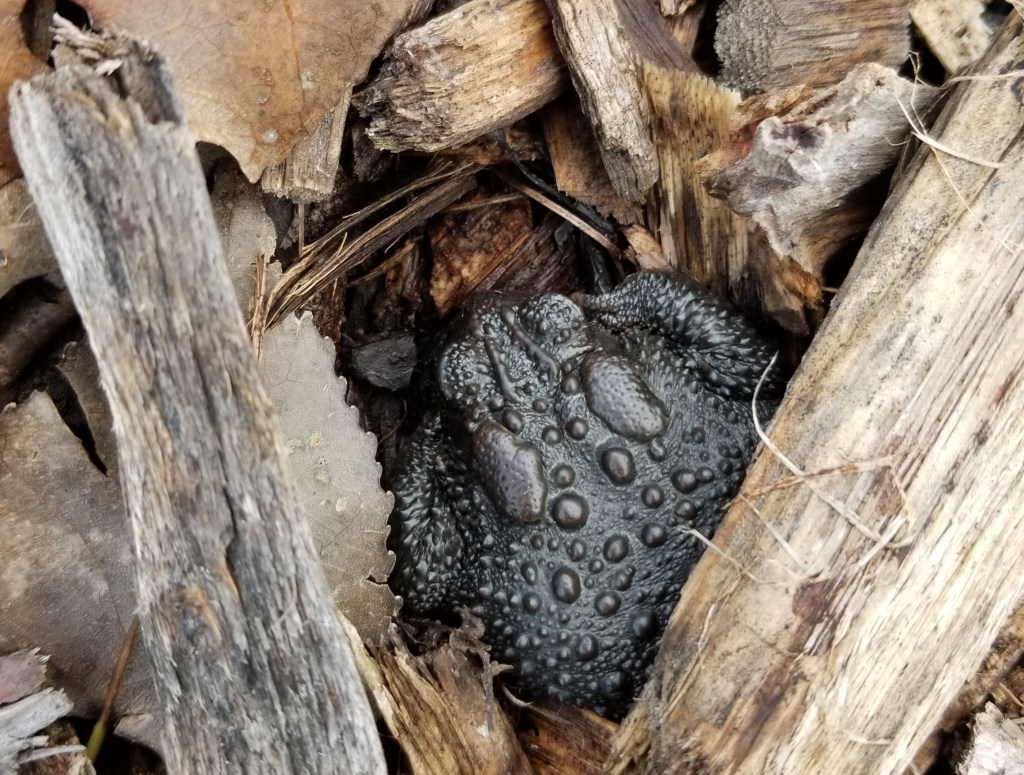
We almost stepped on this silver-gray metallic toad as it hid in the mulch and leaf litter under our cherry tree next to some Russian comfrey. It was quite the year for frog and toad sightings in our garden. As our vegetation spreads out, growing together, knitting itself into an undulating blanket of foliage and flowers, it should make it easier for more visitors to explore and find refuge in our yard. Eventually we hope to see even some snakes and salamanders:
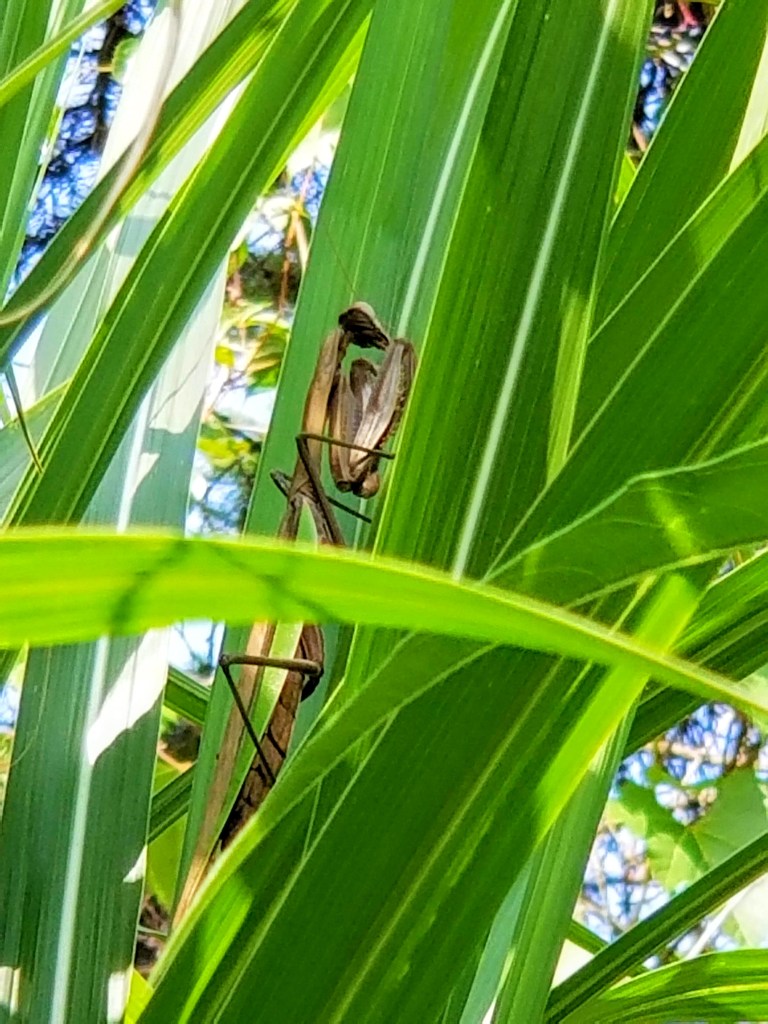
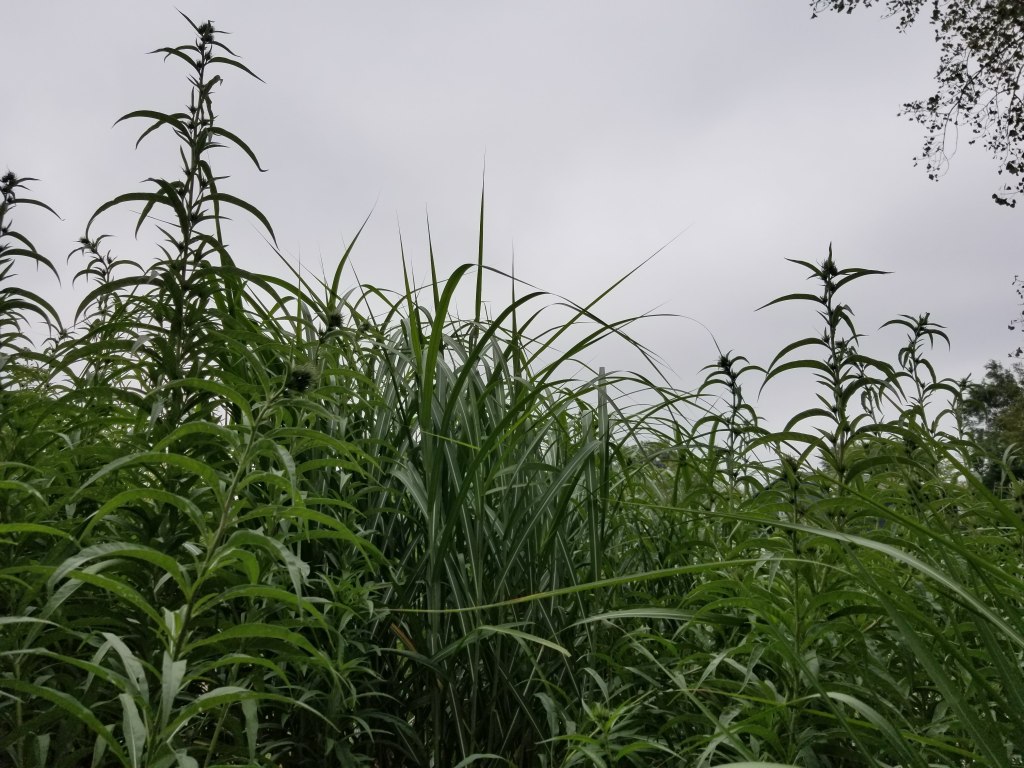
Wandering through our Maximilian sunflowers and Miscanthus giganteus, we came across a large Praying mantis (nearly a foot in length), hanging out on the towering blades of grass:
Fall Color
Heading into our second fall, we were excited to see how the Maximilian sunflowers would perform. Both the Miscanthus giganteus and sunflowers were reaching something close to their mature height in their second year. Much taller and fuller than what they achieved in their first full year.
Most of the ornamental grasses have reached their full development, but almost everything else in the yard was at least a year or two away from full maturity.
During spring and summer, my daughter enjoys monitoring the progress of the fast growing Miscanthus giganteus and the sunflowers.
Apart from the privacy screening they provide from mid-summer through most of the winter, both plants will produce a substantial amount of biomass for self-mulching around the base of these plants, or for elsewhere in the yard:
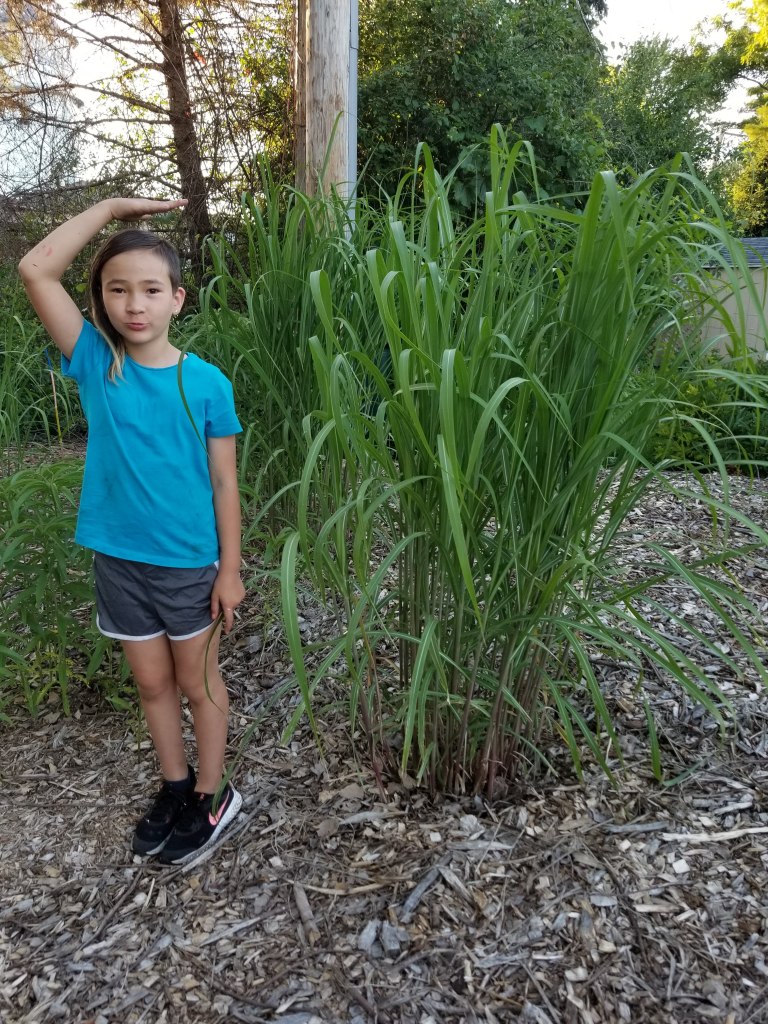
As they gained height over the course of the summer, both the grass and the sunflowers took on the lush tropical look of bamboo, making for a nice visual complement in terms of their distinct growth habit and texture:

It’s only in late summer that the sunflowers really begin to stretch out in preparation for their massive show of blooms.
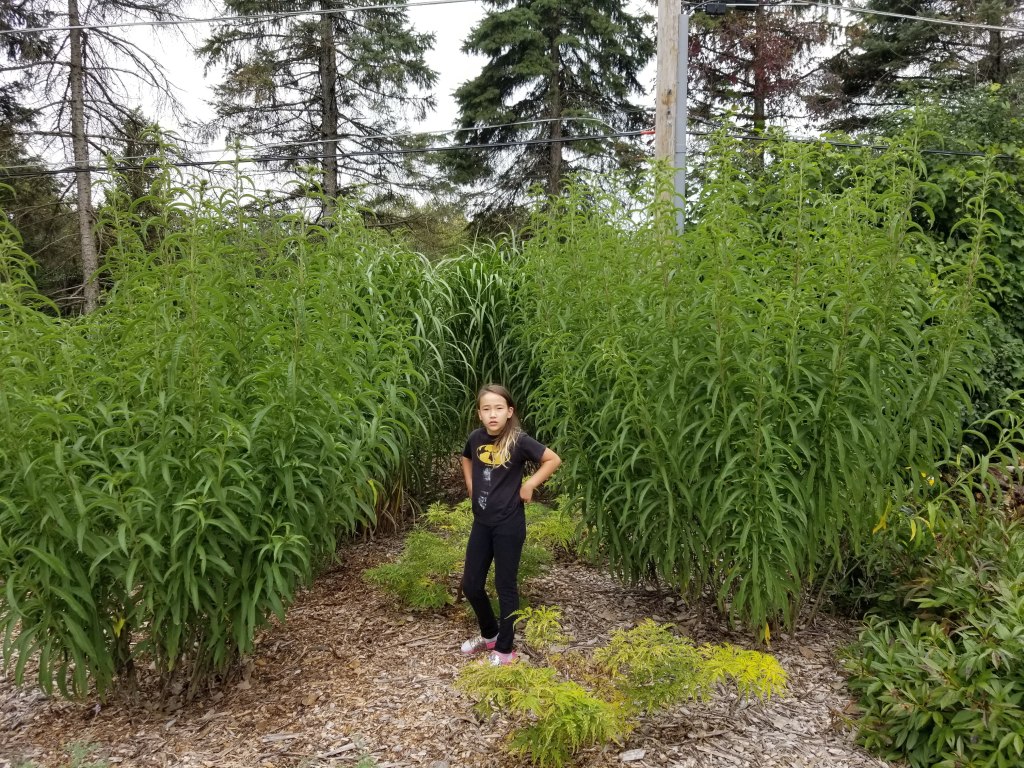
Standing at the back corner of our yard, they begin to block out the view to our house:

By late summer, they’ve woven themselves together into a sea of green, making for a thick privacy screen.
The Tiger’s Eye Sumac in front of the grasses and sunflowers always start strong in the spring but struggles, even dying back some, under the heat of summer. We hope it’s nothing serious, and only just a symptom of getting acclimated to site conditions. Next summer we may try some supplemental watering during periods of hot drought. If we can get them to their full height, their chartreuse color combined with the blue of the catmint in front of them should make for a nice combination with the grasses and sunflowers:
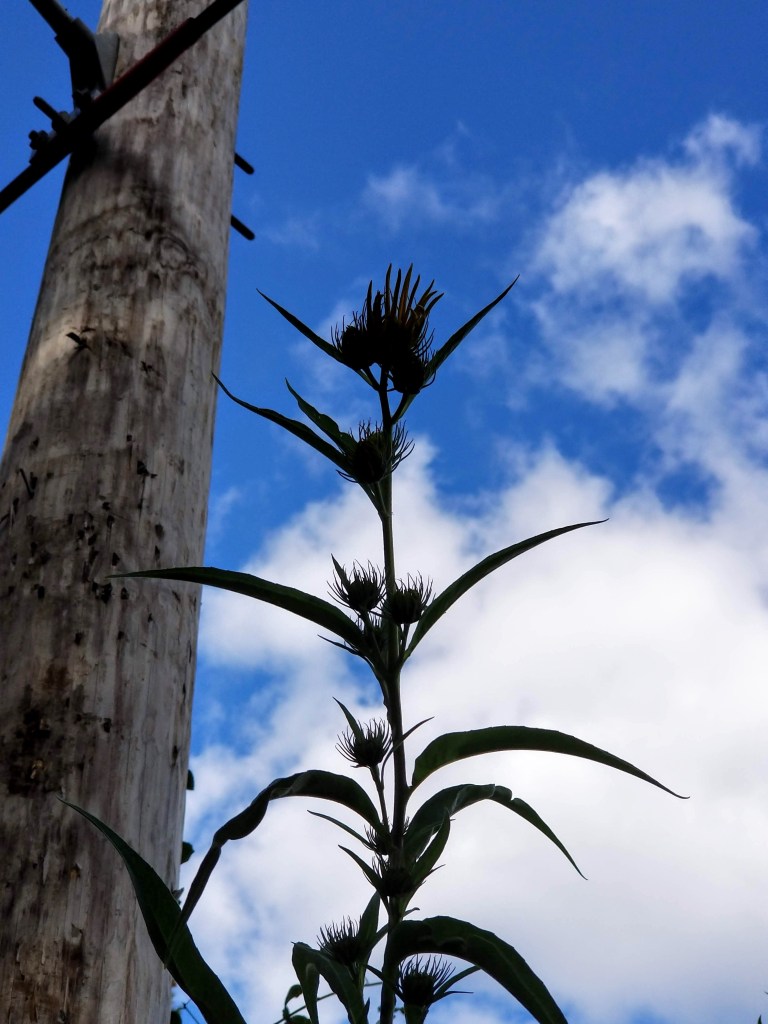
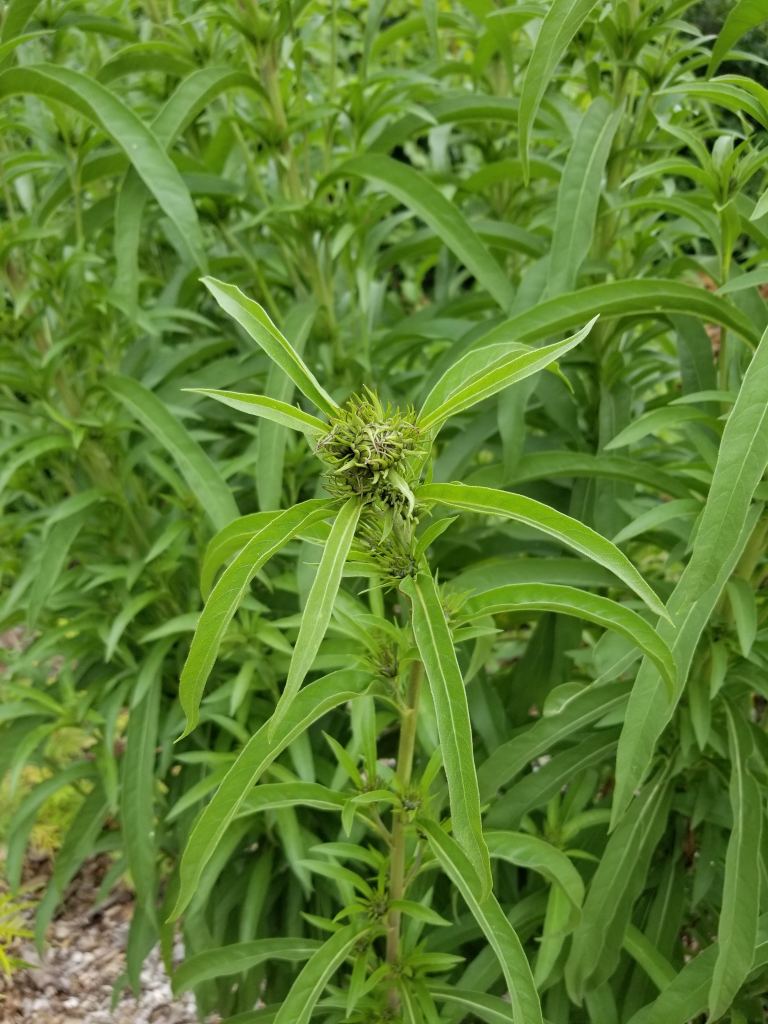
Once they’ve stretched out, the Maximilian flower buds create a strong silhouette with blue sky behind them:
In the photo below, late summer at this point, the grass-sunflower combination has realized its full potential, with the jungle-like appearance a stand of bamboo can produce. At this point, the combination has entirely occluded the view of the house:
As the flower blooms develop, they take on a spidery look:
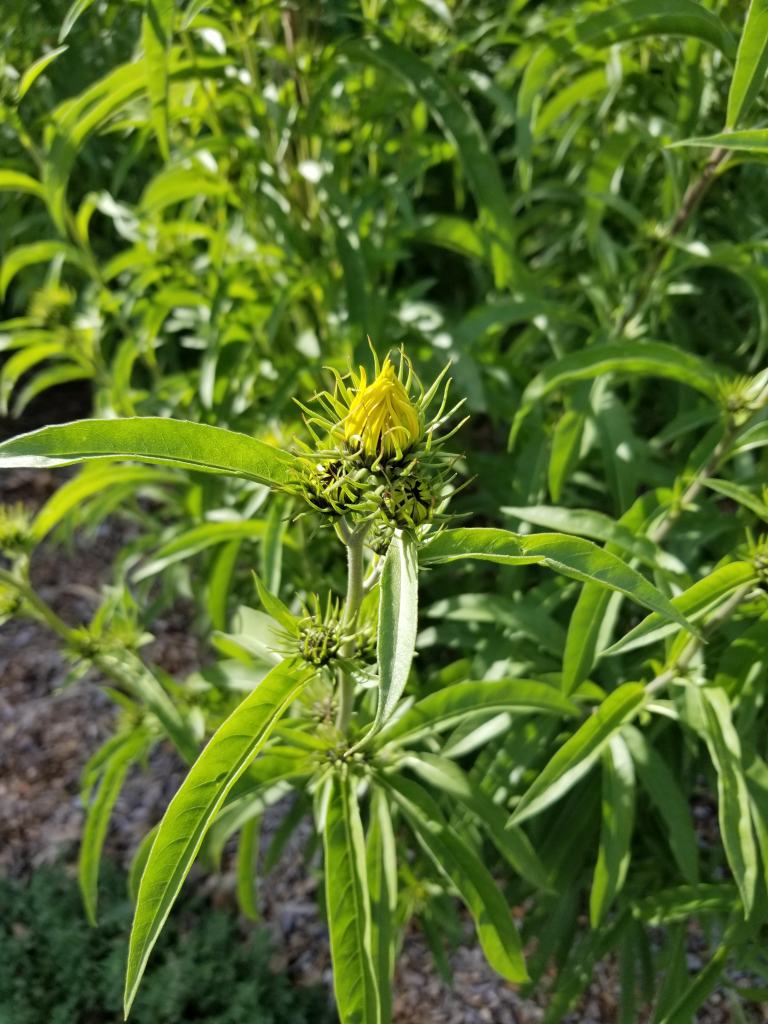
It’s a touch bittersweet to see the blooms coming on. A sure sign that fall is in full swing and winter is close at hand:
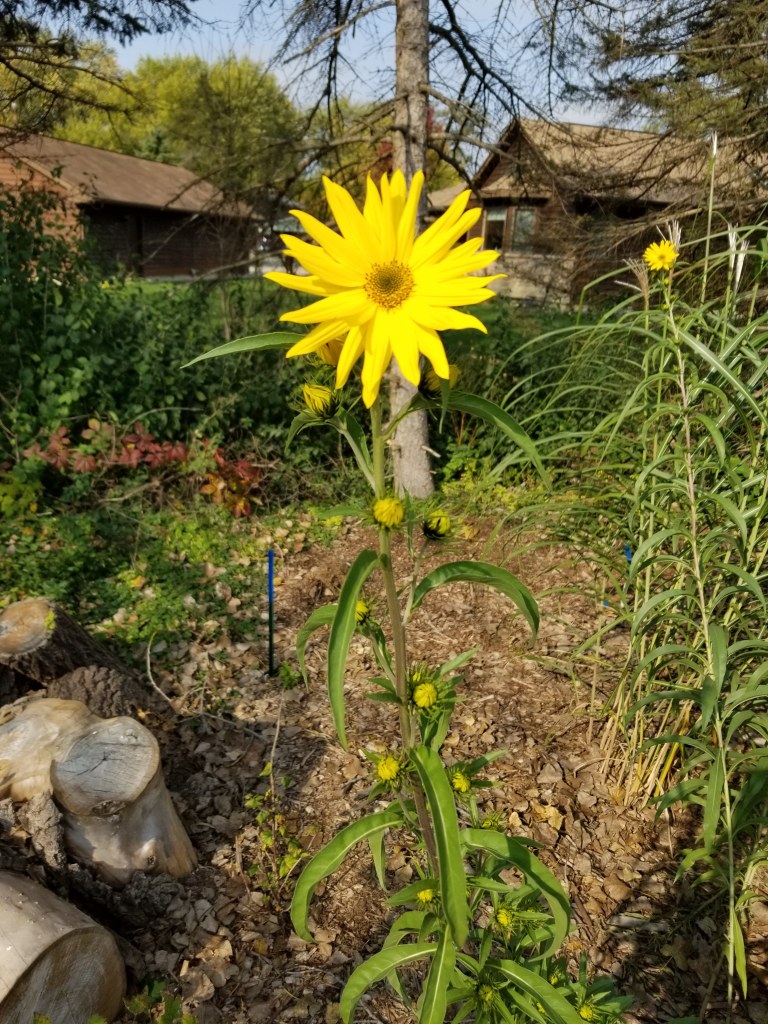
The Maximilian blooms also make excellent cut flowers for full, overflowing bouquets. Opening from top to bottom, it’s easy to slowly trim them down the stem as buds fade and the ones lower down start to open up:

As good as they look indoors, the real show remains outside when they reach their peak:
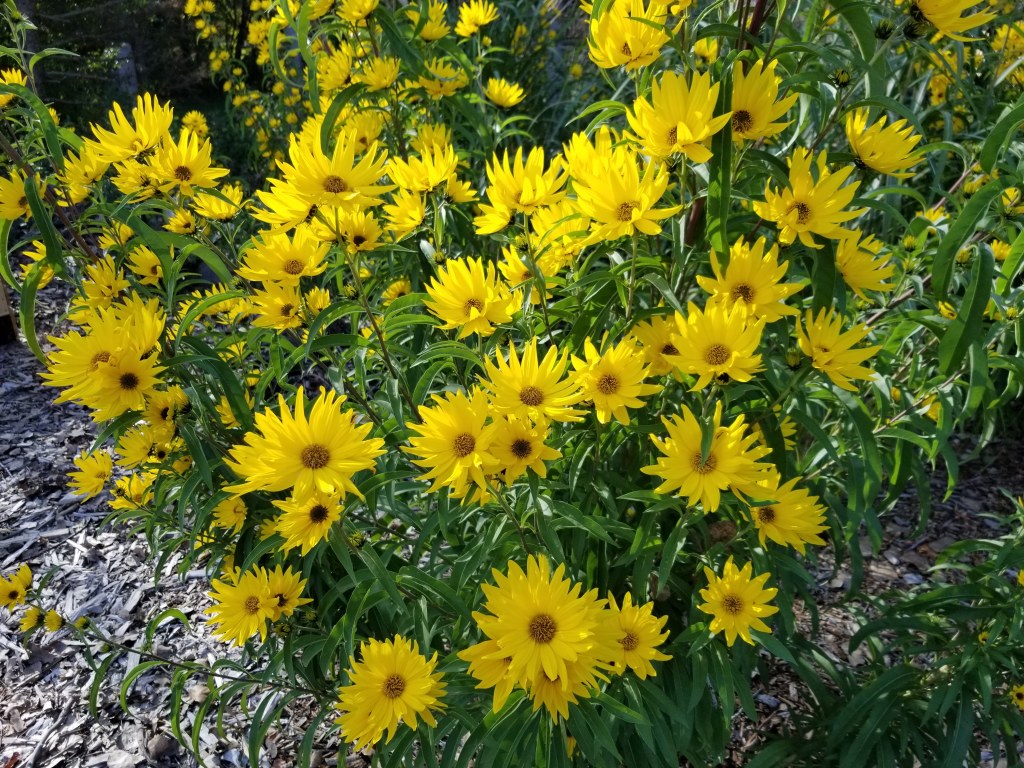
In the photo below, the yellow fireworks are just beginning their show:

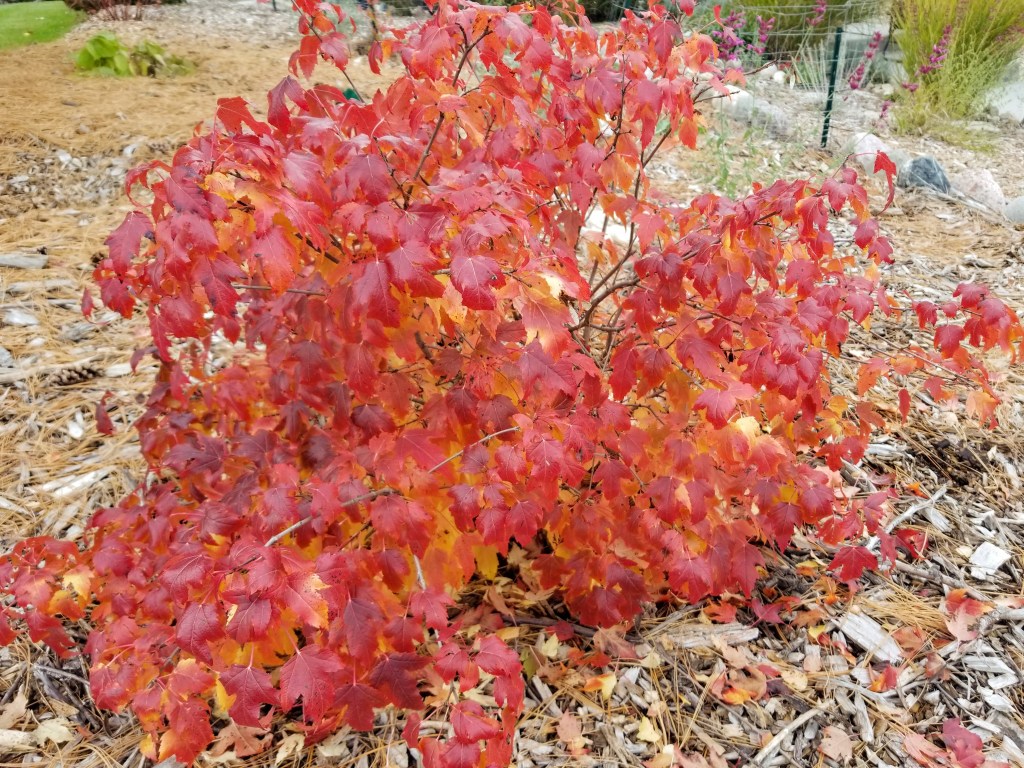
Currently, the only other plant in our garden that can compete with this burst of color in the fall is a small, undersized maple shrub (Bailey Compact Amur Maple), located in our front yard. In contrast to the Miscanthus and Maximilian, the maple shrub has struggled during its first two years. This was the first season it spread out a little, and the first year it was able to produce bold fall colors. A good sign that it, along with many other plants in the yard, may take a big leap in growth and production next year.
In addition to the compost bin that we installed in the backyard, we also added a few bird feeders using some gas pipe for the structure. Inviting the birds into our yard was one of our main goals in terms of Permaculture design.
“It is a general rule that, when the bird fauna stays intact, so does the rest of the fauna and flora.”
— Edward O. Wilson, Biophilia
Although our ‘living fence’ series of shrubs on the south end of our property line are not substantial enough yet for nesting sites, this is the first year where the birds have taken any interest in them, using them for temporary landing sites before taking their turn at the feeders. They also appear to be looking for insects on the shrubs, which is another hopeful sign.

Driveway Stencils
The bulk of the heavy work in the yard was finished before summer even began. With most of these garden ‘chores’ completed, we turned our attention to any number of arts and crafts projects (e.g., furniture pieces and artwork for the interior walls) and sealing our driveway. After its first couple of years, the surface of the driveway was already noticeably faded, so it clearly would benefit from a fresh coat of sealer:

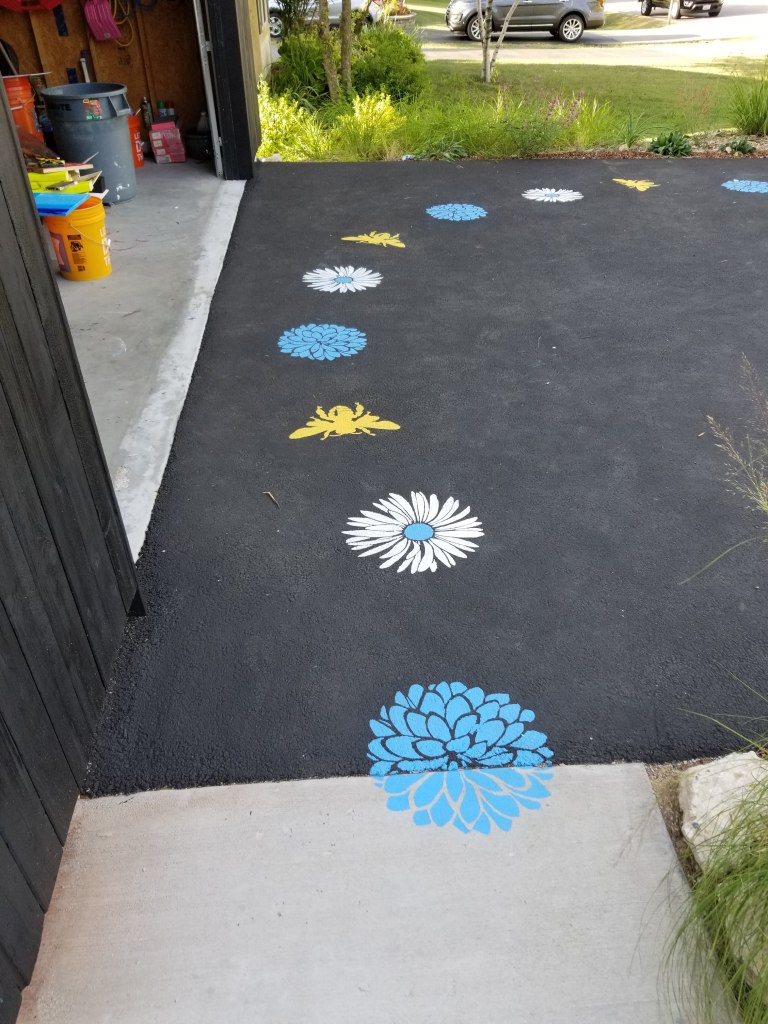
Instead of just sealing the surface, we decided to add some color to the driveway with stencils and paint.
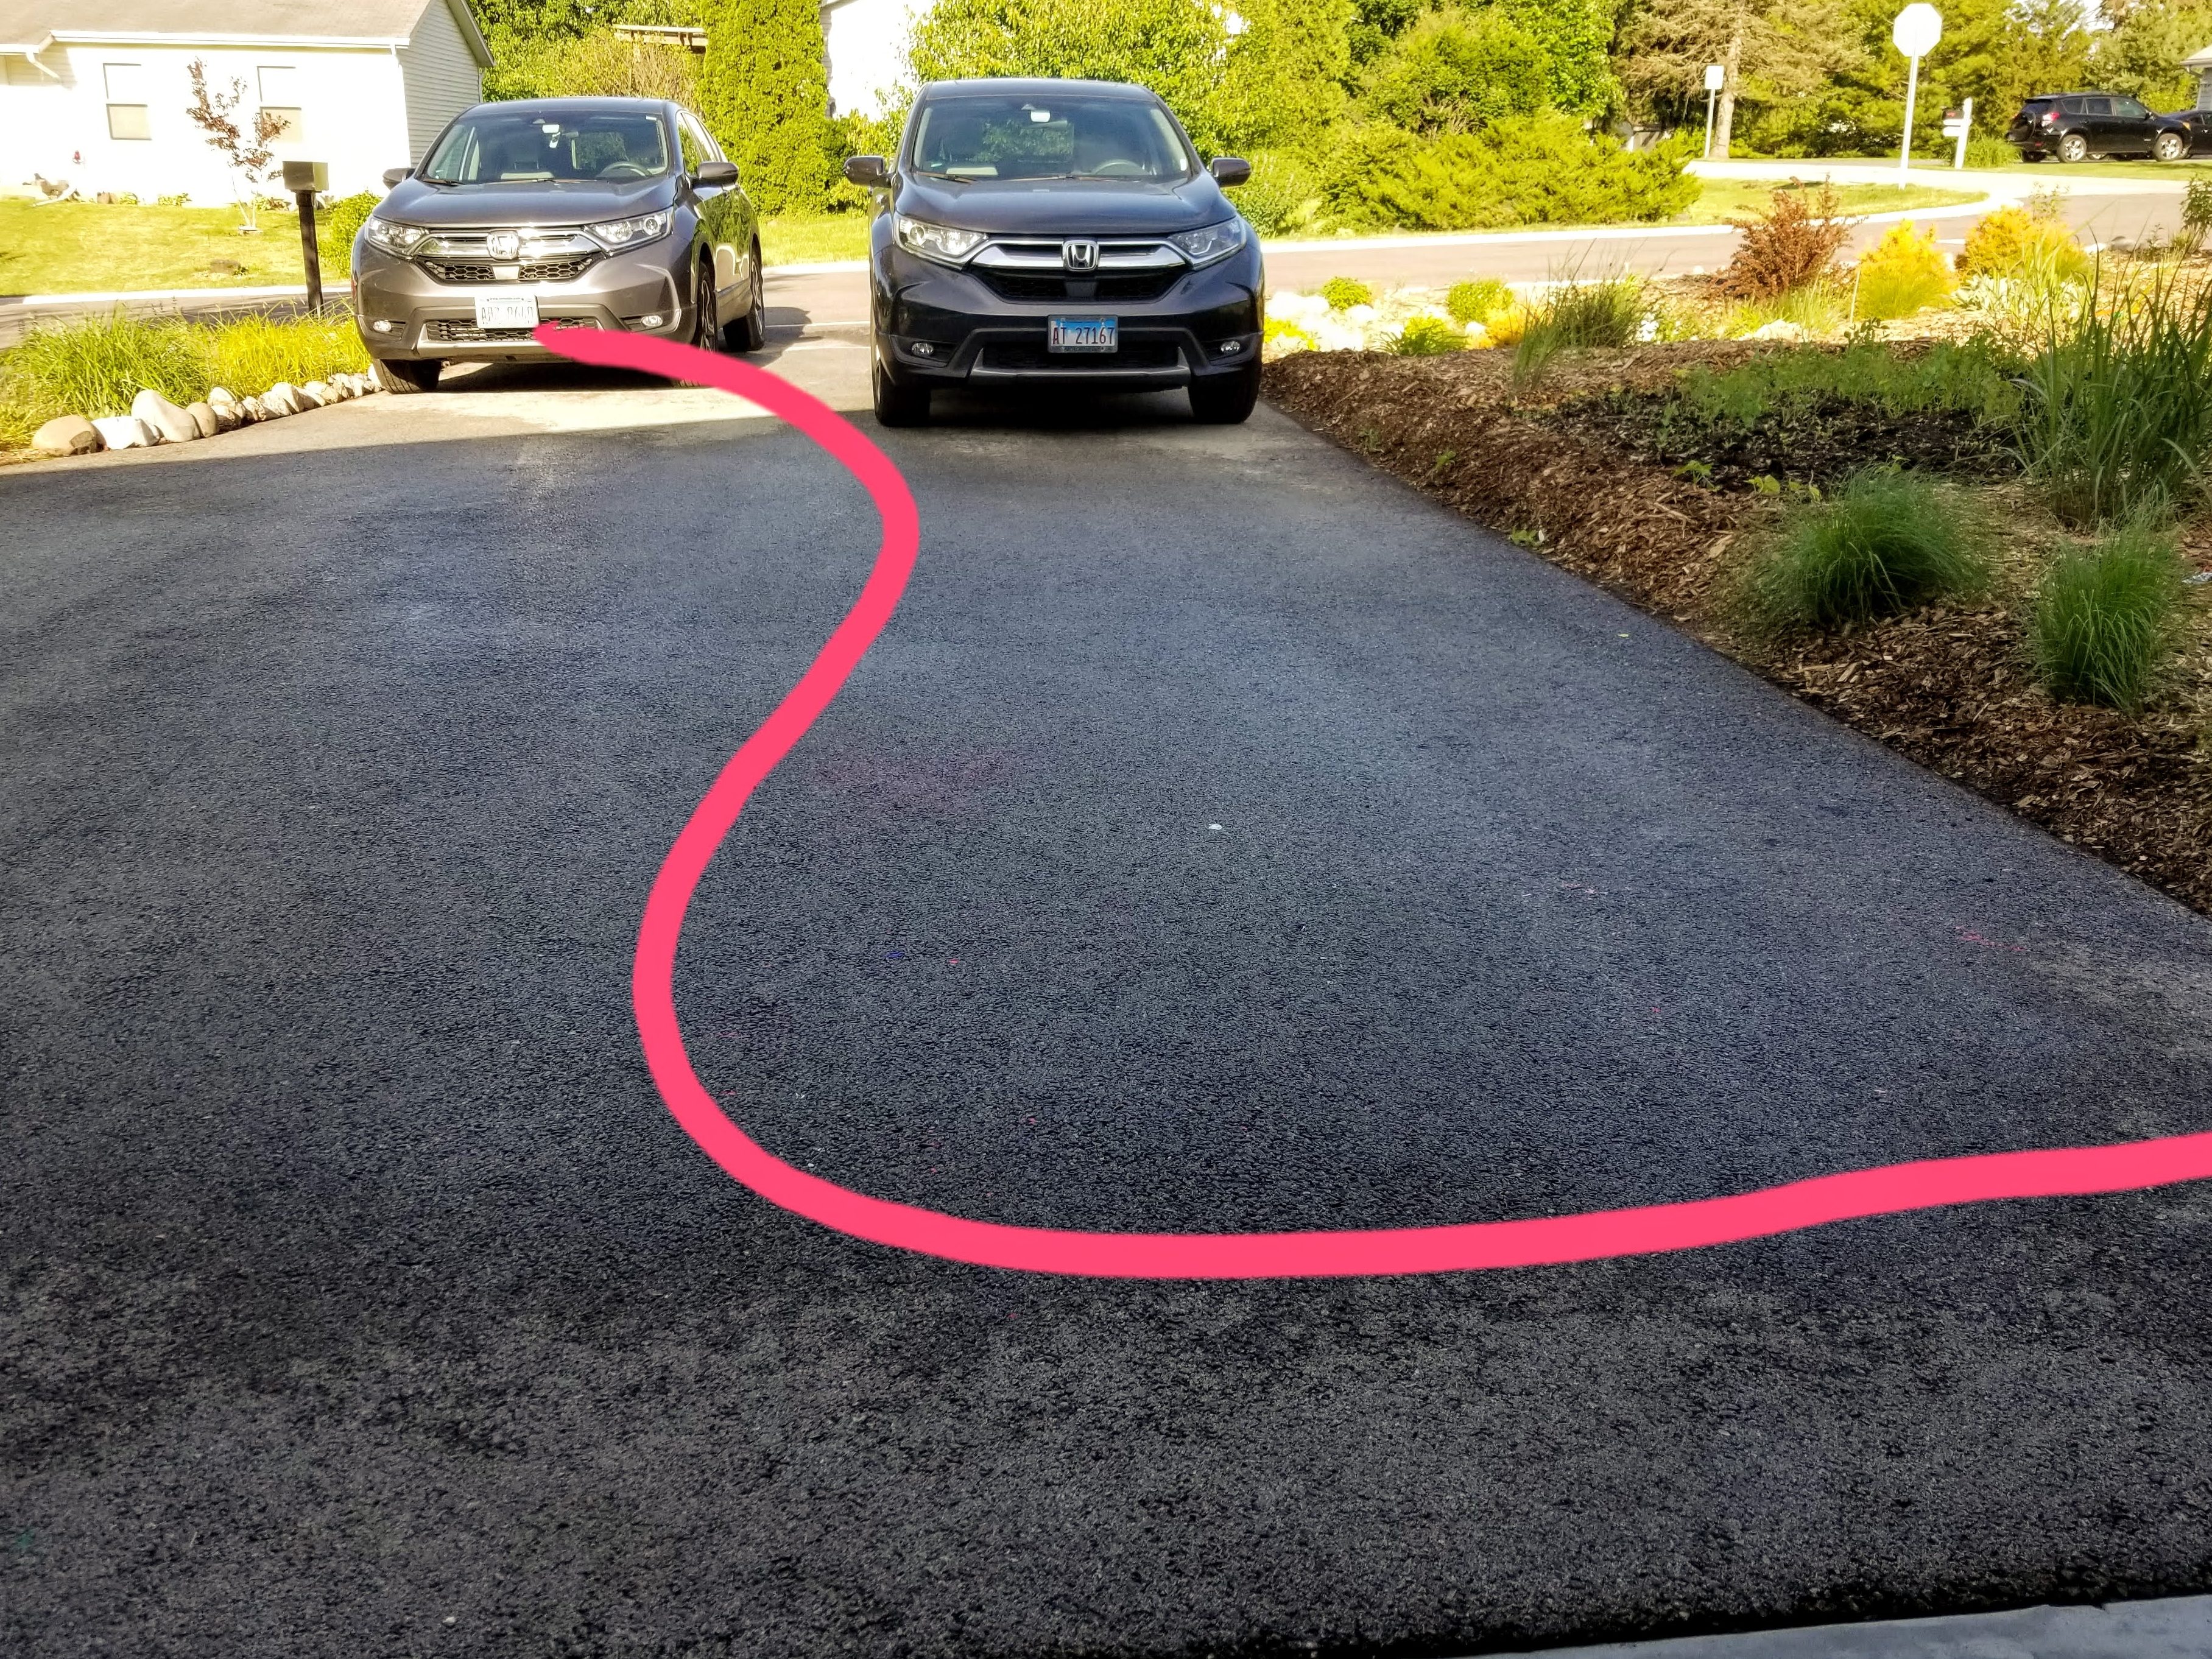
The first design hurdle was settling on an attractive pattern. Since so much of our house utilizes asymmetry and curves (this is especially true in the yard), we decided to maintain this more natural theme by utilizing a curvy line out by the mailbox to our front sidewalk:
The next question was what color(s) should we use. We wanted a mix of colors, so we thought a good option would be to use parking lot paint, which typically uses white, yellow, and blue. Also a nice metaphor for the occupants of the home — one unique stencil per person.
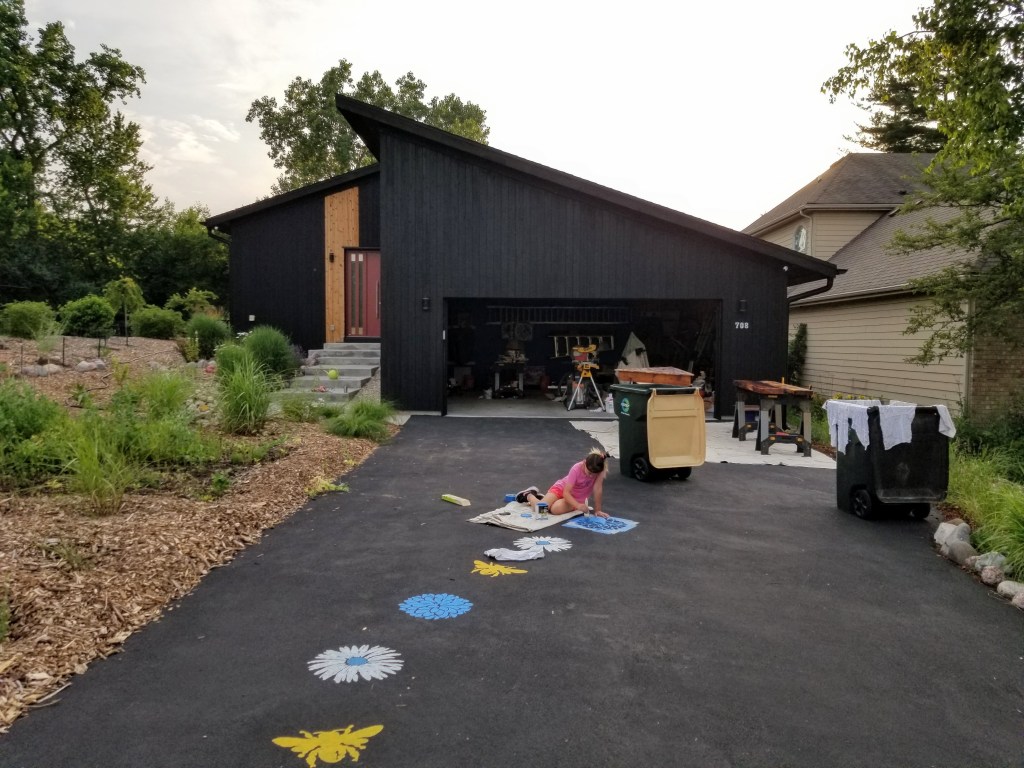
With the driveway sealed, we proceeded with the first few stencils, starting out by the mailbox:

To avoid things getting messy, we decided to do just one stencil a day, which allowed each stencil to completely dry before moving on to the next one. It also meant that we only had to monitor a small area of wet paint as it dried. This was helpful since we were simultaneously working on several different projects at once, both inside the garage and on the driveway.
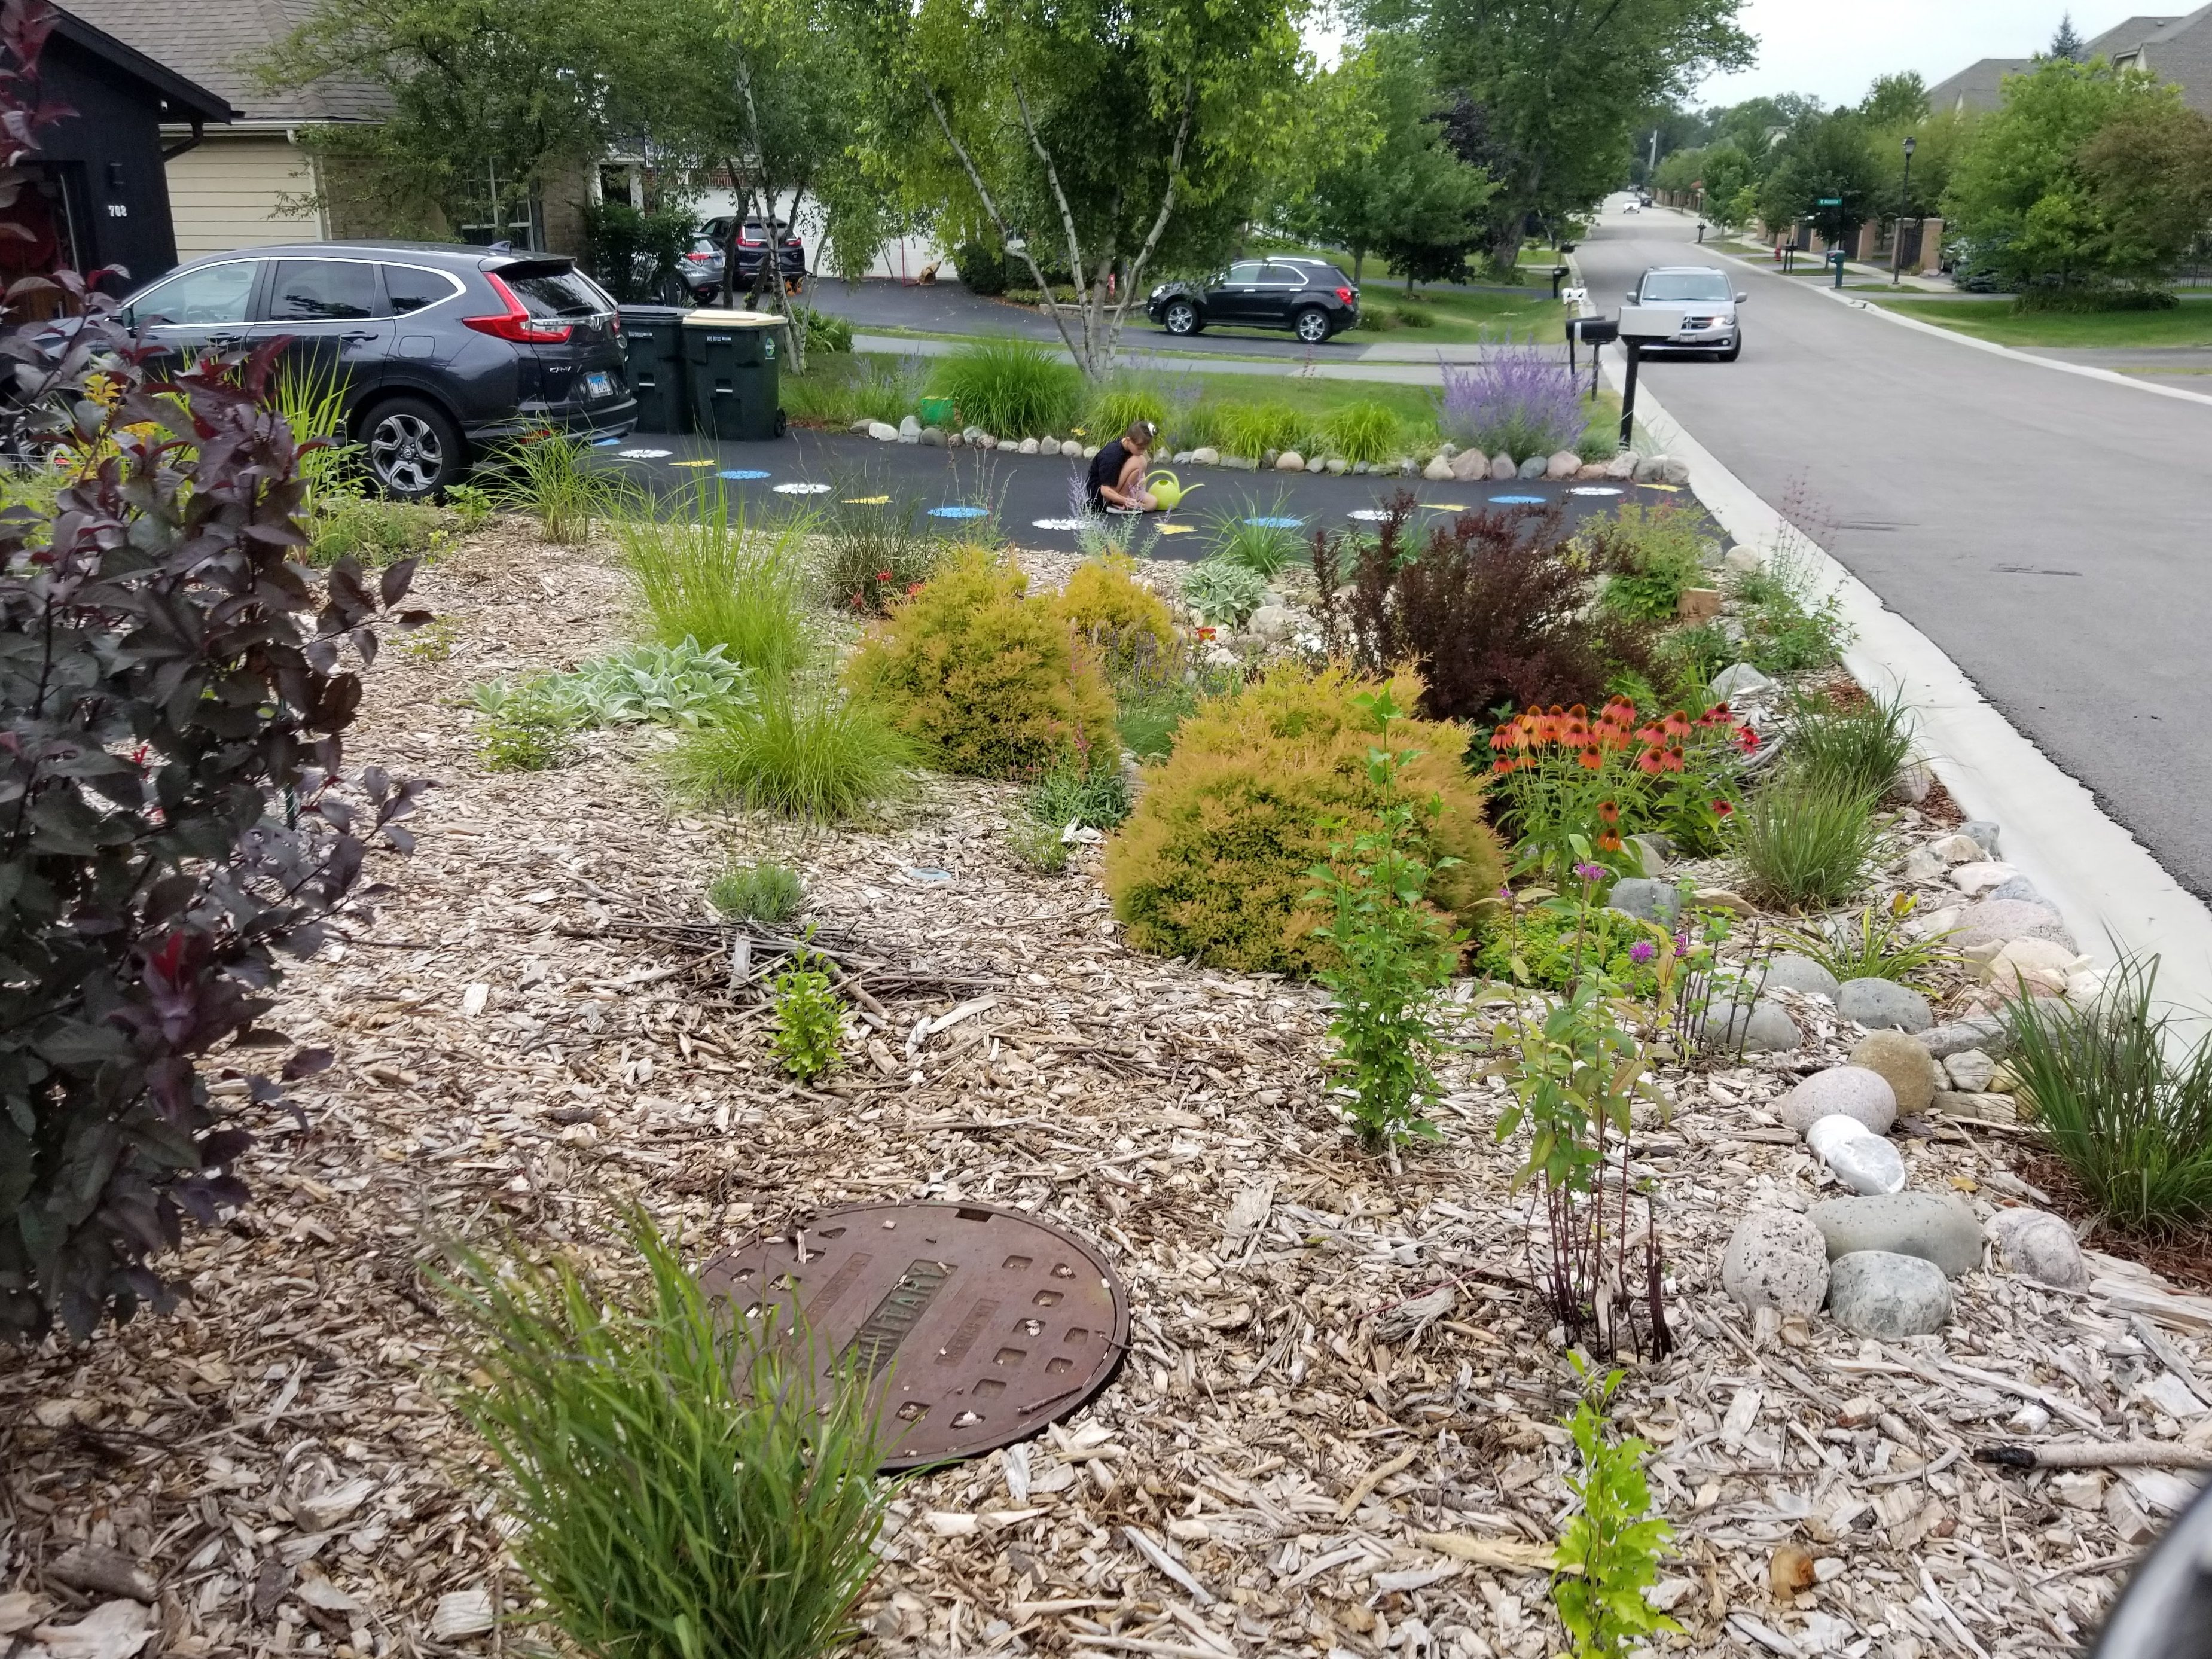
Below, my daughter is almost at the halfway point for the driveway:
The big curvy line of the pattern definitely tries to maximize the visual interest, regardless of one’s point of view of the driveway. It was also intended to playfully mimic the flight pattern of a busy pollinator:

The paint for the stencils has proven surprisingly durable. So far, no fading or peeling has occurred (even after two full seasons of weather).

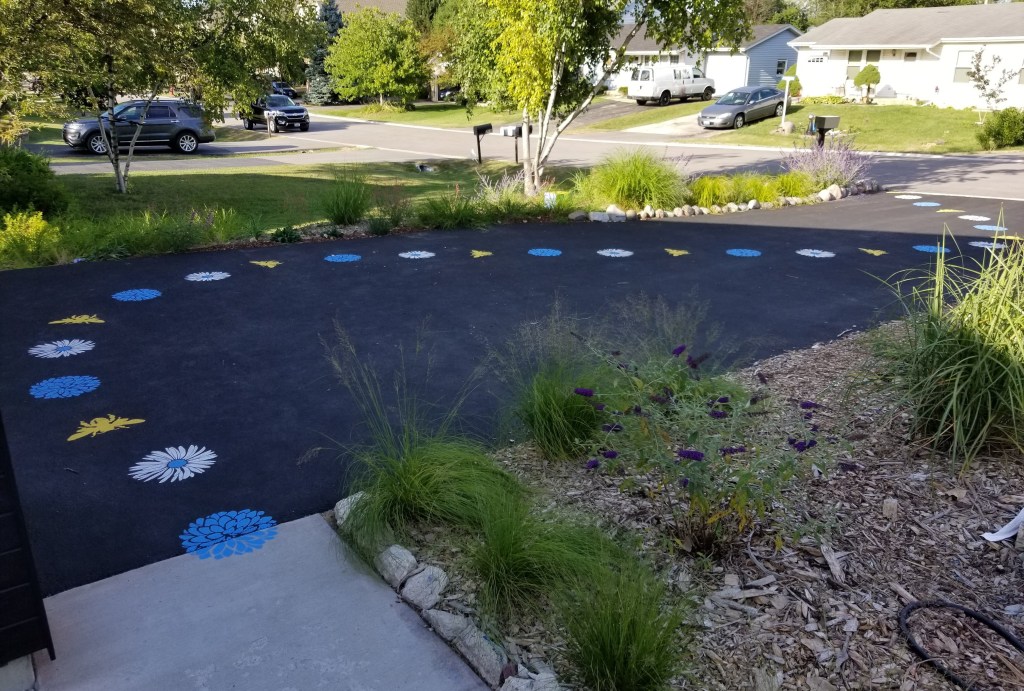
Below, note the plants in the background, on the north side of the driveway. The grasses are in their second summer, so they’ve mostly reached their full size. Around them are any number of groundcovers and flowers that are only getting started:
Below, a wider, fuller view of the pattern from our front walkway:
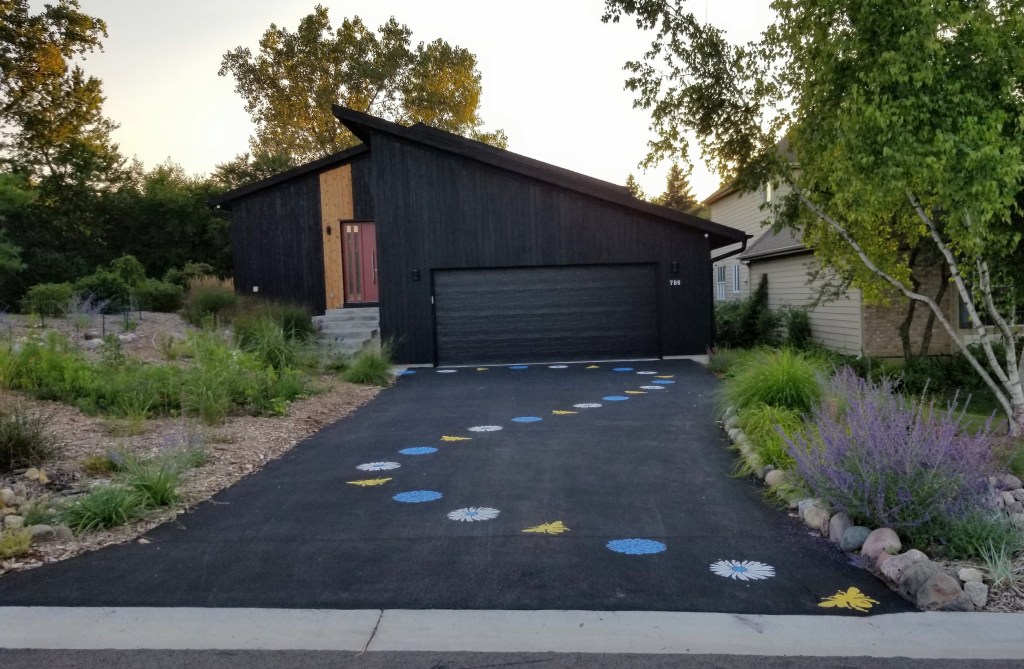
Below, one final view of the pattern from the street:
Even though the right side (north) of the driveway is filling in, most of the plants in this area are still young and undersized. Note, too, halfway up the driveway on the left, the green manure bed that’s finally looking full and vibrant for the first time.
Below, a panoramic look at the front yard. Most of the hard work is complete. In the coming years we can play around with how we’d like to address the remaining gaps:
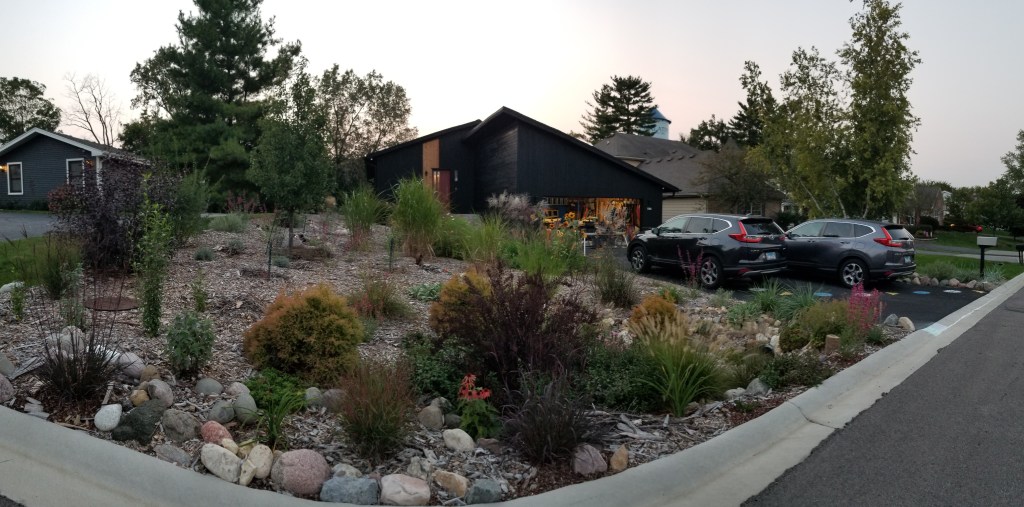
In addition to utilizing divisions of existing plants, we can also add new plant varieties or even decorative accents in the form of art pieces, or more functional components such as seating areas to take in specific views of the garden. There frankly hasn’t been much time to just sit and enjoy the garden yet.
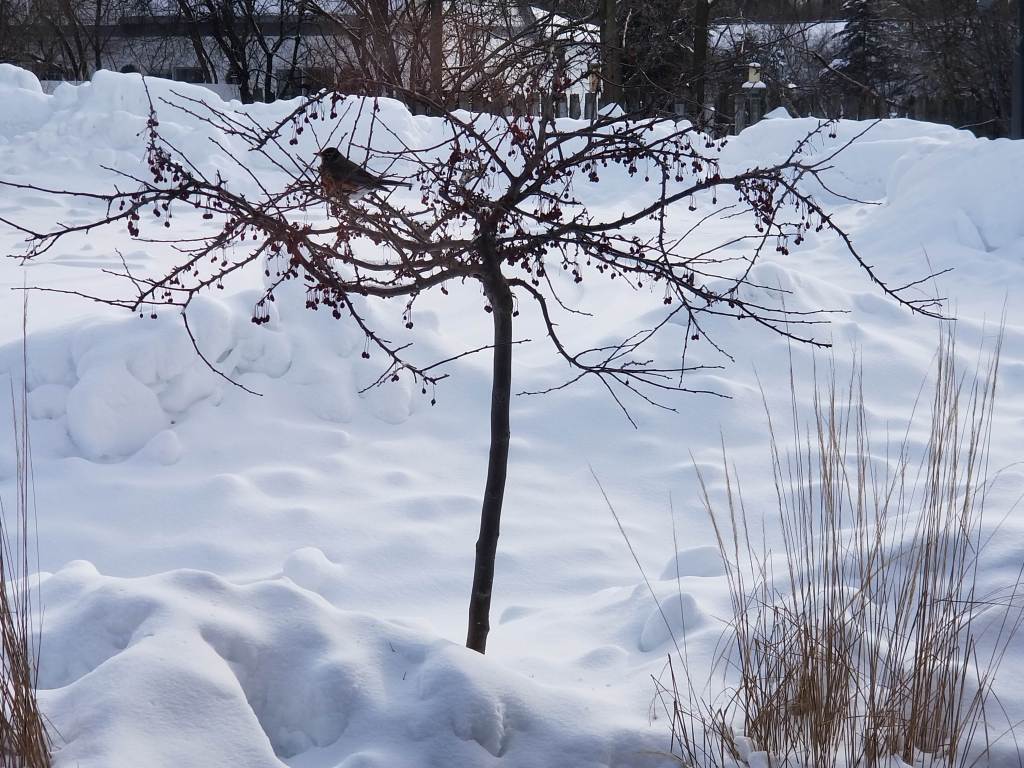
Robins still enjoy the crabapple outside our kitchen window:
Going into our fourth growing season, the main goal will be adding color to the garden. After the first year of sheet mulching, creating our hügelkultur bed, and establishing our ‘living fence’ shrubs, we’ve been busy ever since with adding a base layer of fruit tree guilds, our alternative bamboo stand in the backyard, a wide variety of ornamental grasses, groundcovers, smaller shrubs, and fruiting vines.

With most of the main structural elements in place (both in terms of permaculture design and visual interest), for the next couple of years we look forward to playing with color in the yard to complete our garden quilt.


Great post Eric! Your home is really beautiful and great to see all the fantastic exterior work you’re doing. Hope you and your family are doing well!
LikeLike
Thanks so much for your kind words — and thanks again for stopping by to check out the blog!
LikeLike