
Shou Sugi Ban with Tung Oil
The oil I see used most often on charred wood is Penefin, which is available in many of the big box stores. Another one I’ve used in the past is Sikkens. Cabot is yet another brand I’ve used (mostly for decks).
Any semi-transparent wood stain should work. If you go with a brushed char finish, you may want to experiment with color options to see what kind of effect it may have on the final finish (the semi-transparent stains typically come in a range of subtle color choices).
In our case, we decided to use Tung Oil mixed with Citrus Solvent (available from: realmilkpaint.com). Having used it previously on arts-and-crafts projects with good results, and because it’s considered No VOC, we felt it was a good choice (although not the cheapest option). We’ll also be using the same combination of products for our hardwood flooring.
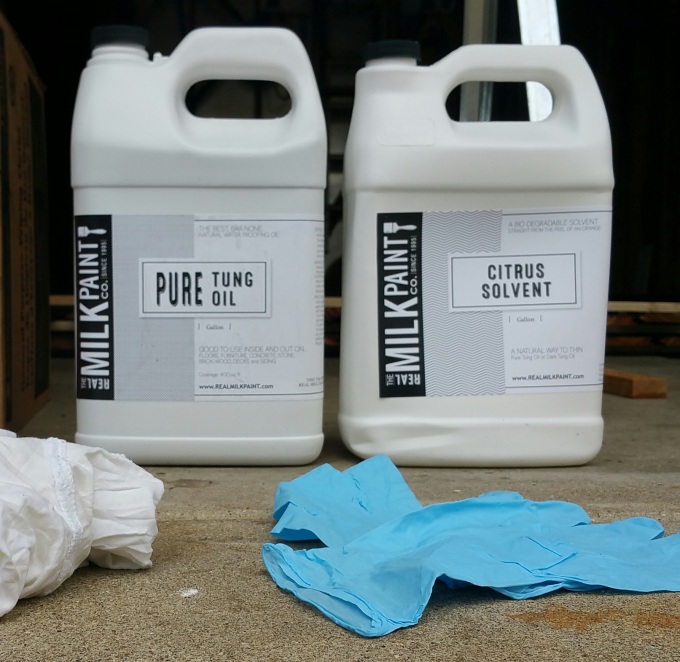
We used a 1:1 mixture of Tung Oil and Citrus Solvent (they even sell it this way, pre-mixed, if you don’t want to deal with combining individual batches together). The Citrus Solvent acts like a traditional paint thinner (without the VOC’s or strong chemical smell), diluting the Tung Oil so it can more easily soak into the wood (it also smells great since it’s made from orange peels). The Citrus Solvent is also used for cleaning up tools, equipment, and any spills of the tung oil (also works great as a general purpose degreaser — especially above and around a stovetop).
USE CAUTION! — Although natural and safe, the Citrus Solvent can irritate bare skin. I always use either Latex or Nitrile gloves (readily available at any hardware store).
If you try using the Tung Oil alone, the difference in performance is obvious (the oil will mostly just sit on the surface, with little of it soaking in — a frustrating waste of time and money).
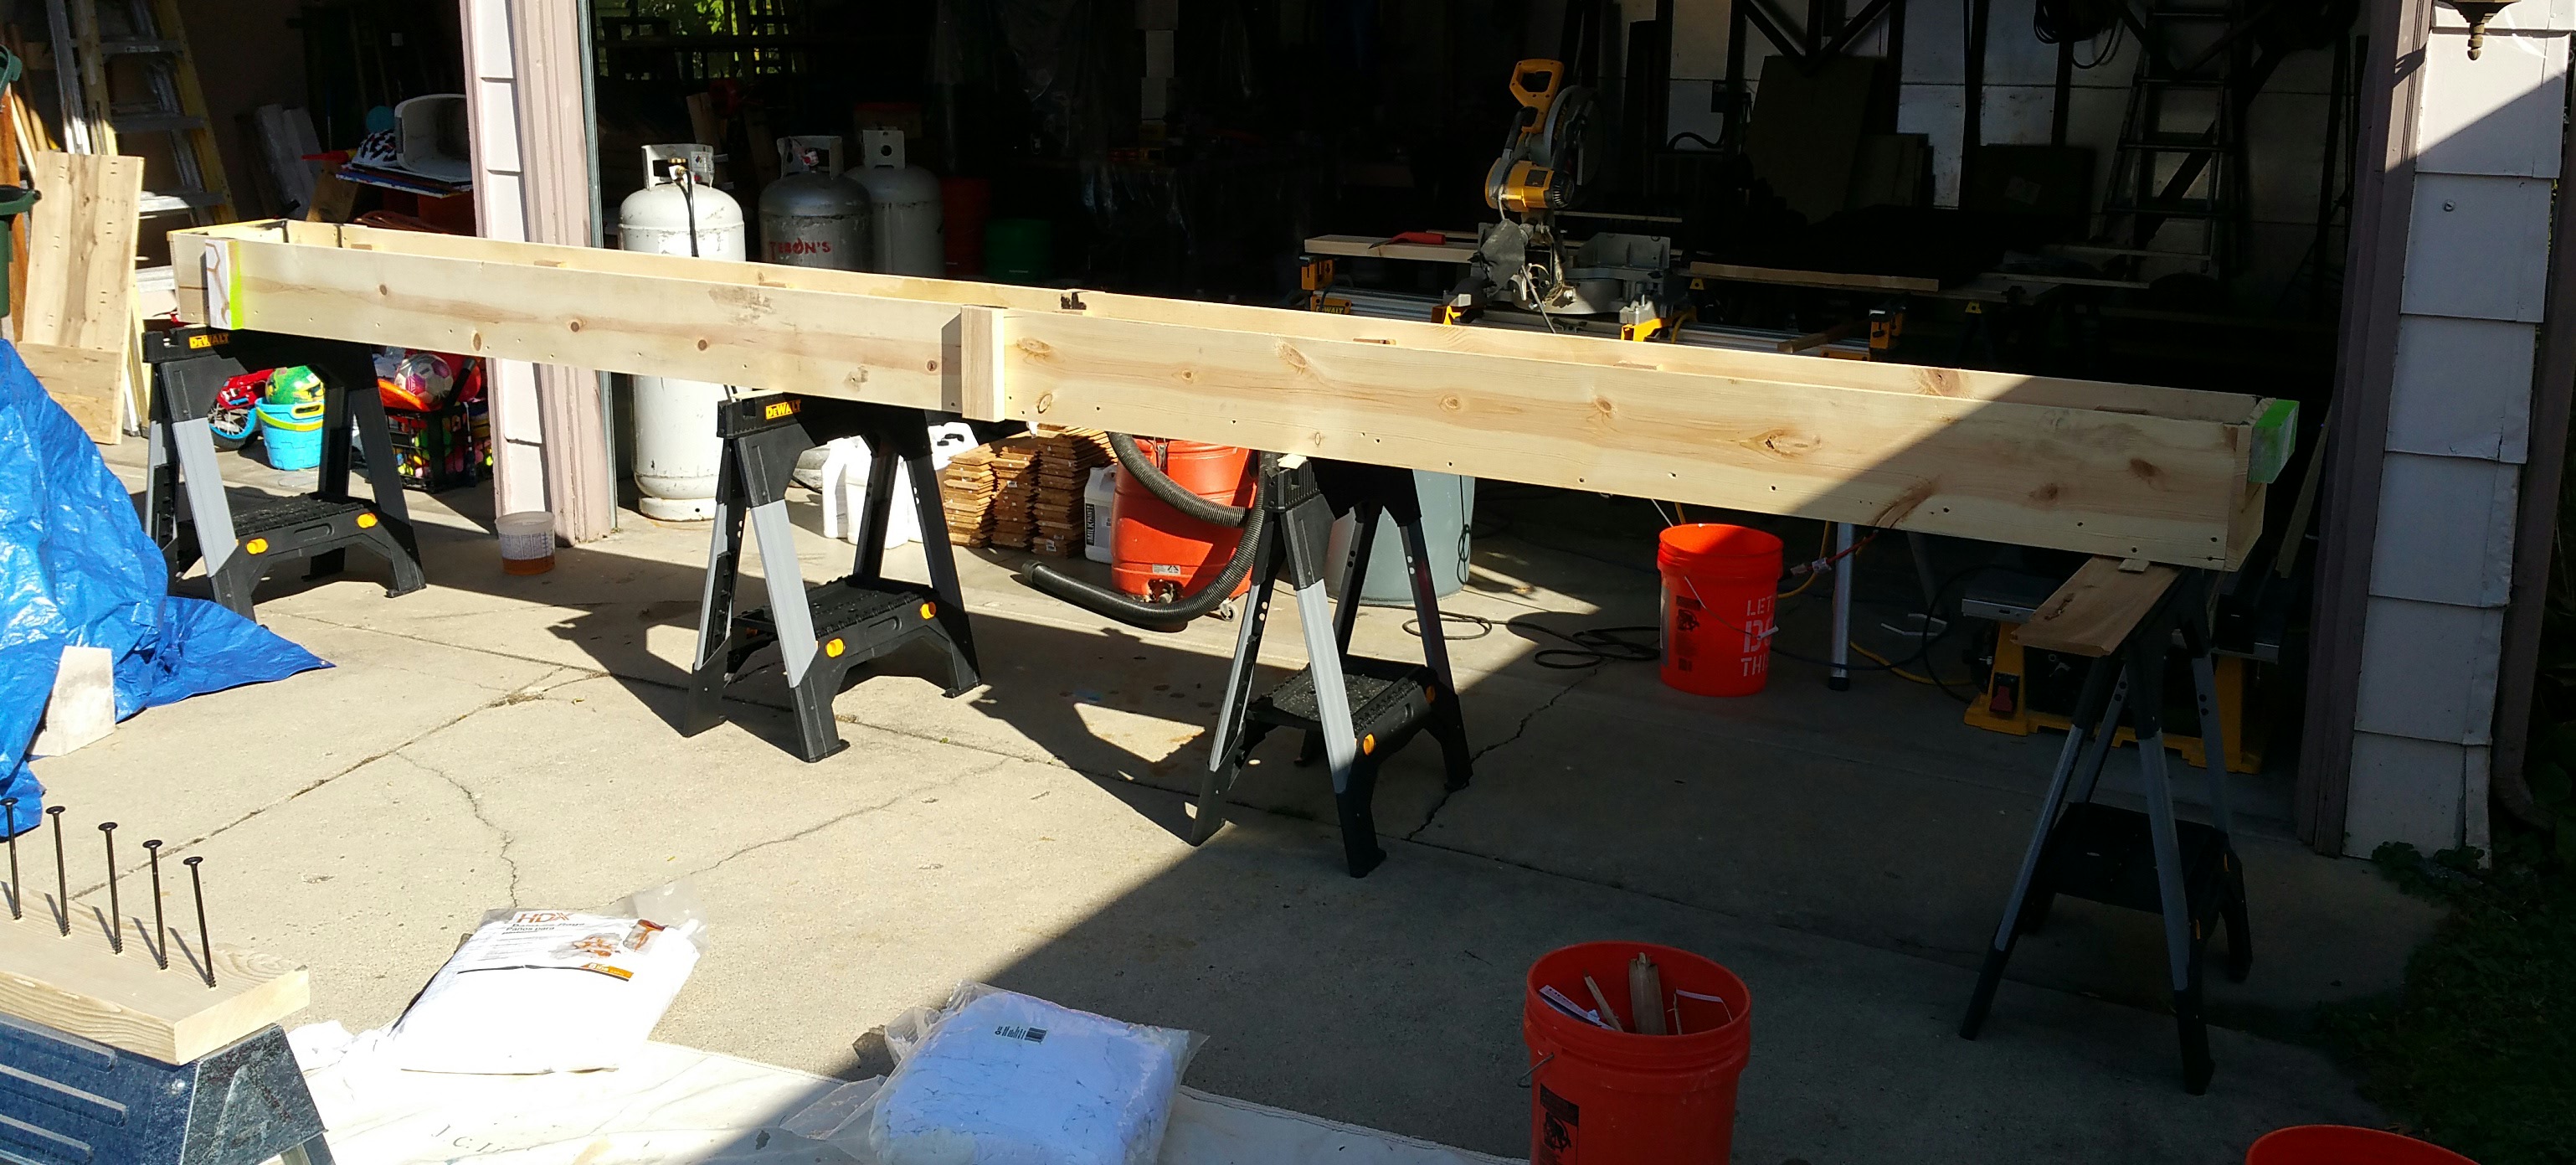
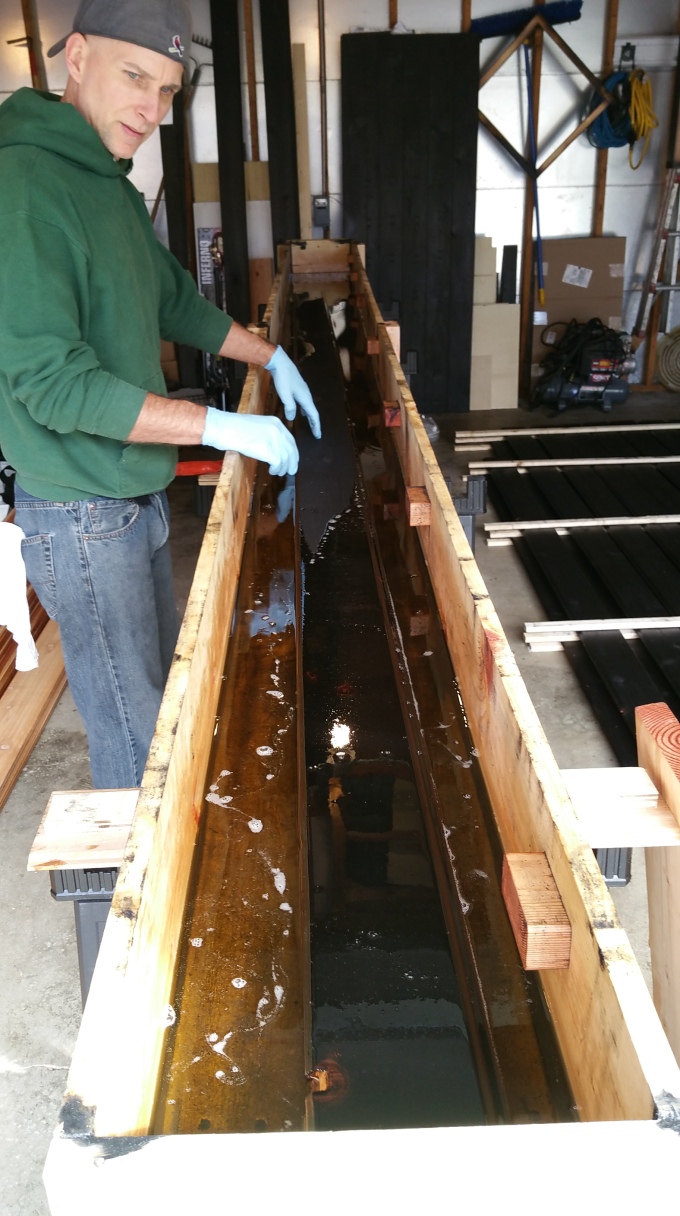
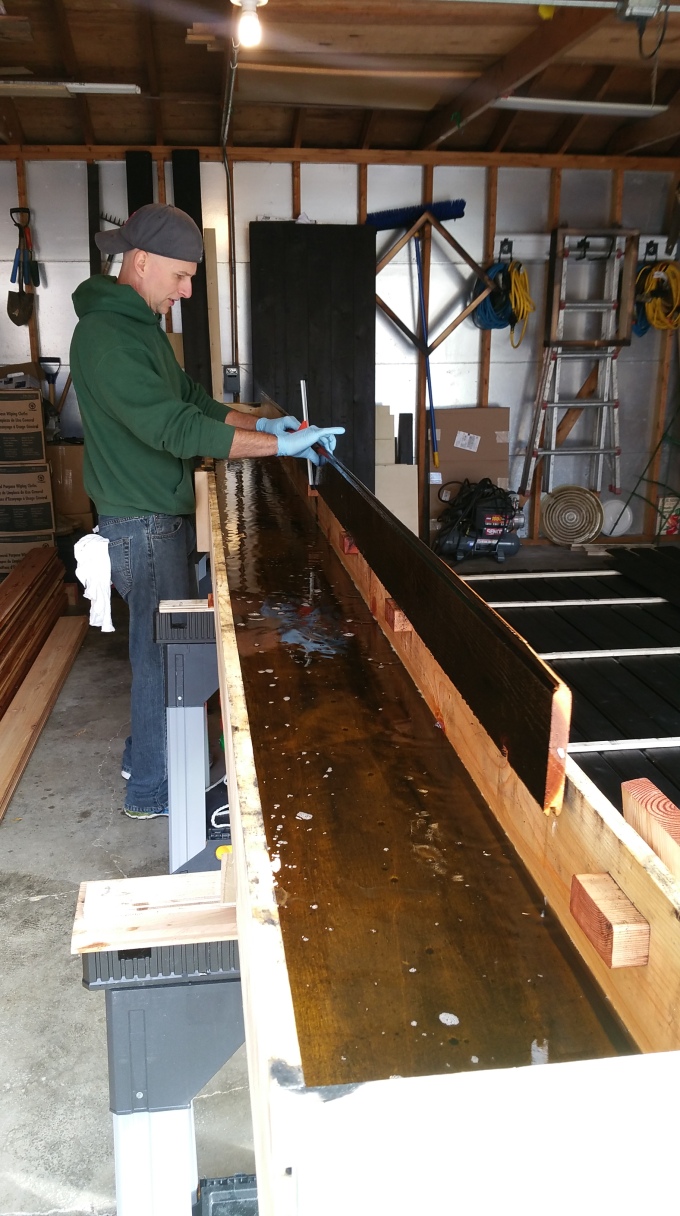
I decided to use a trough for dipping each board based on a project I saw online:
Their house and blog caught my attention early on, when we were just beginning to think about building new. Their project, along with several others, really got me excited about the possibility of building “green”.
Here’s a couple more:
Four Thick Walls (blog)
GO Logic (Red House project; featured in the video below)
Spartan and Hannah’s home (zeroandbeyond.com) is an excellent example of the Pretty Good House concept, and it’s definitely worth checking out, especially under the heading of Presentations: How to Build an Affordable Net Zero / Super Energy-efficient Home (pdf).
A lot of great information to get you thinking about exactly what it is you may want to build, and how to financially pull it off. They also have a lot of thoughtful and inventive design elements (love their granite floor built with cut waste from various countertop jobs — a very creative idea with a unique look).
Anyway, back to the trough: It’s much faster than trying to use a brush or roller, and it guarantees full coverage (many thanks to Spartan & Hannah for posting this simple, but time saving idea).
Below is my version of the same thing:
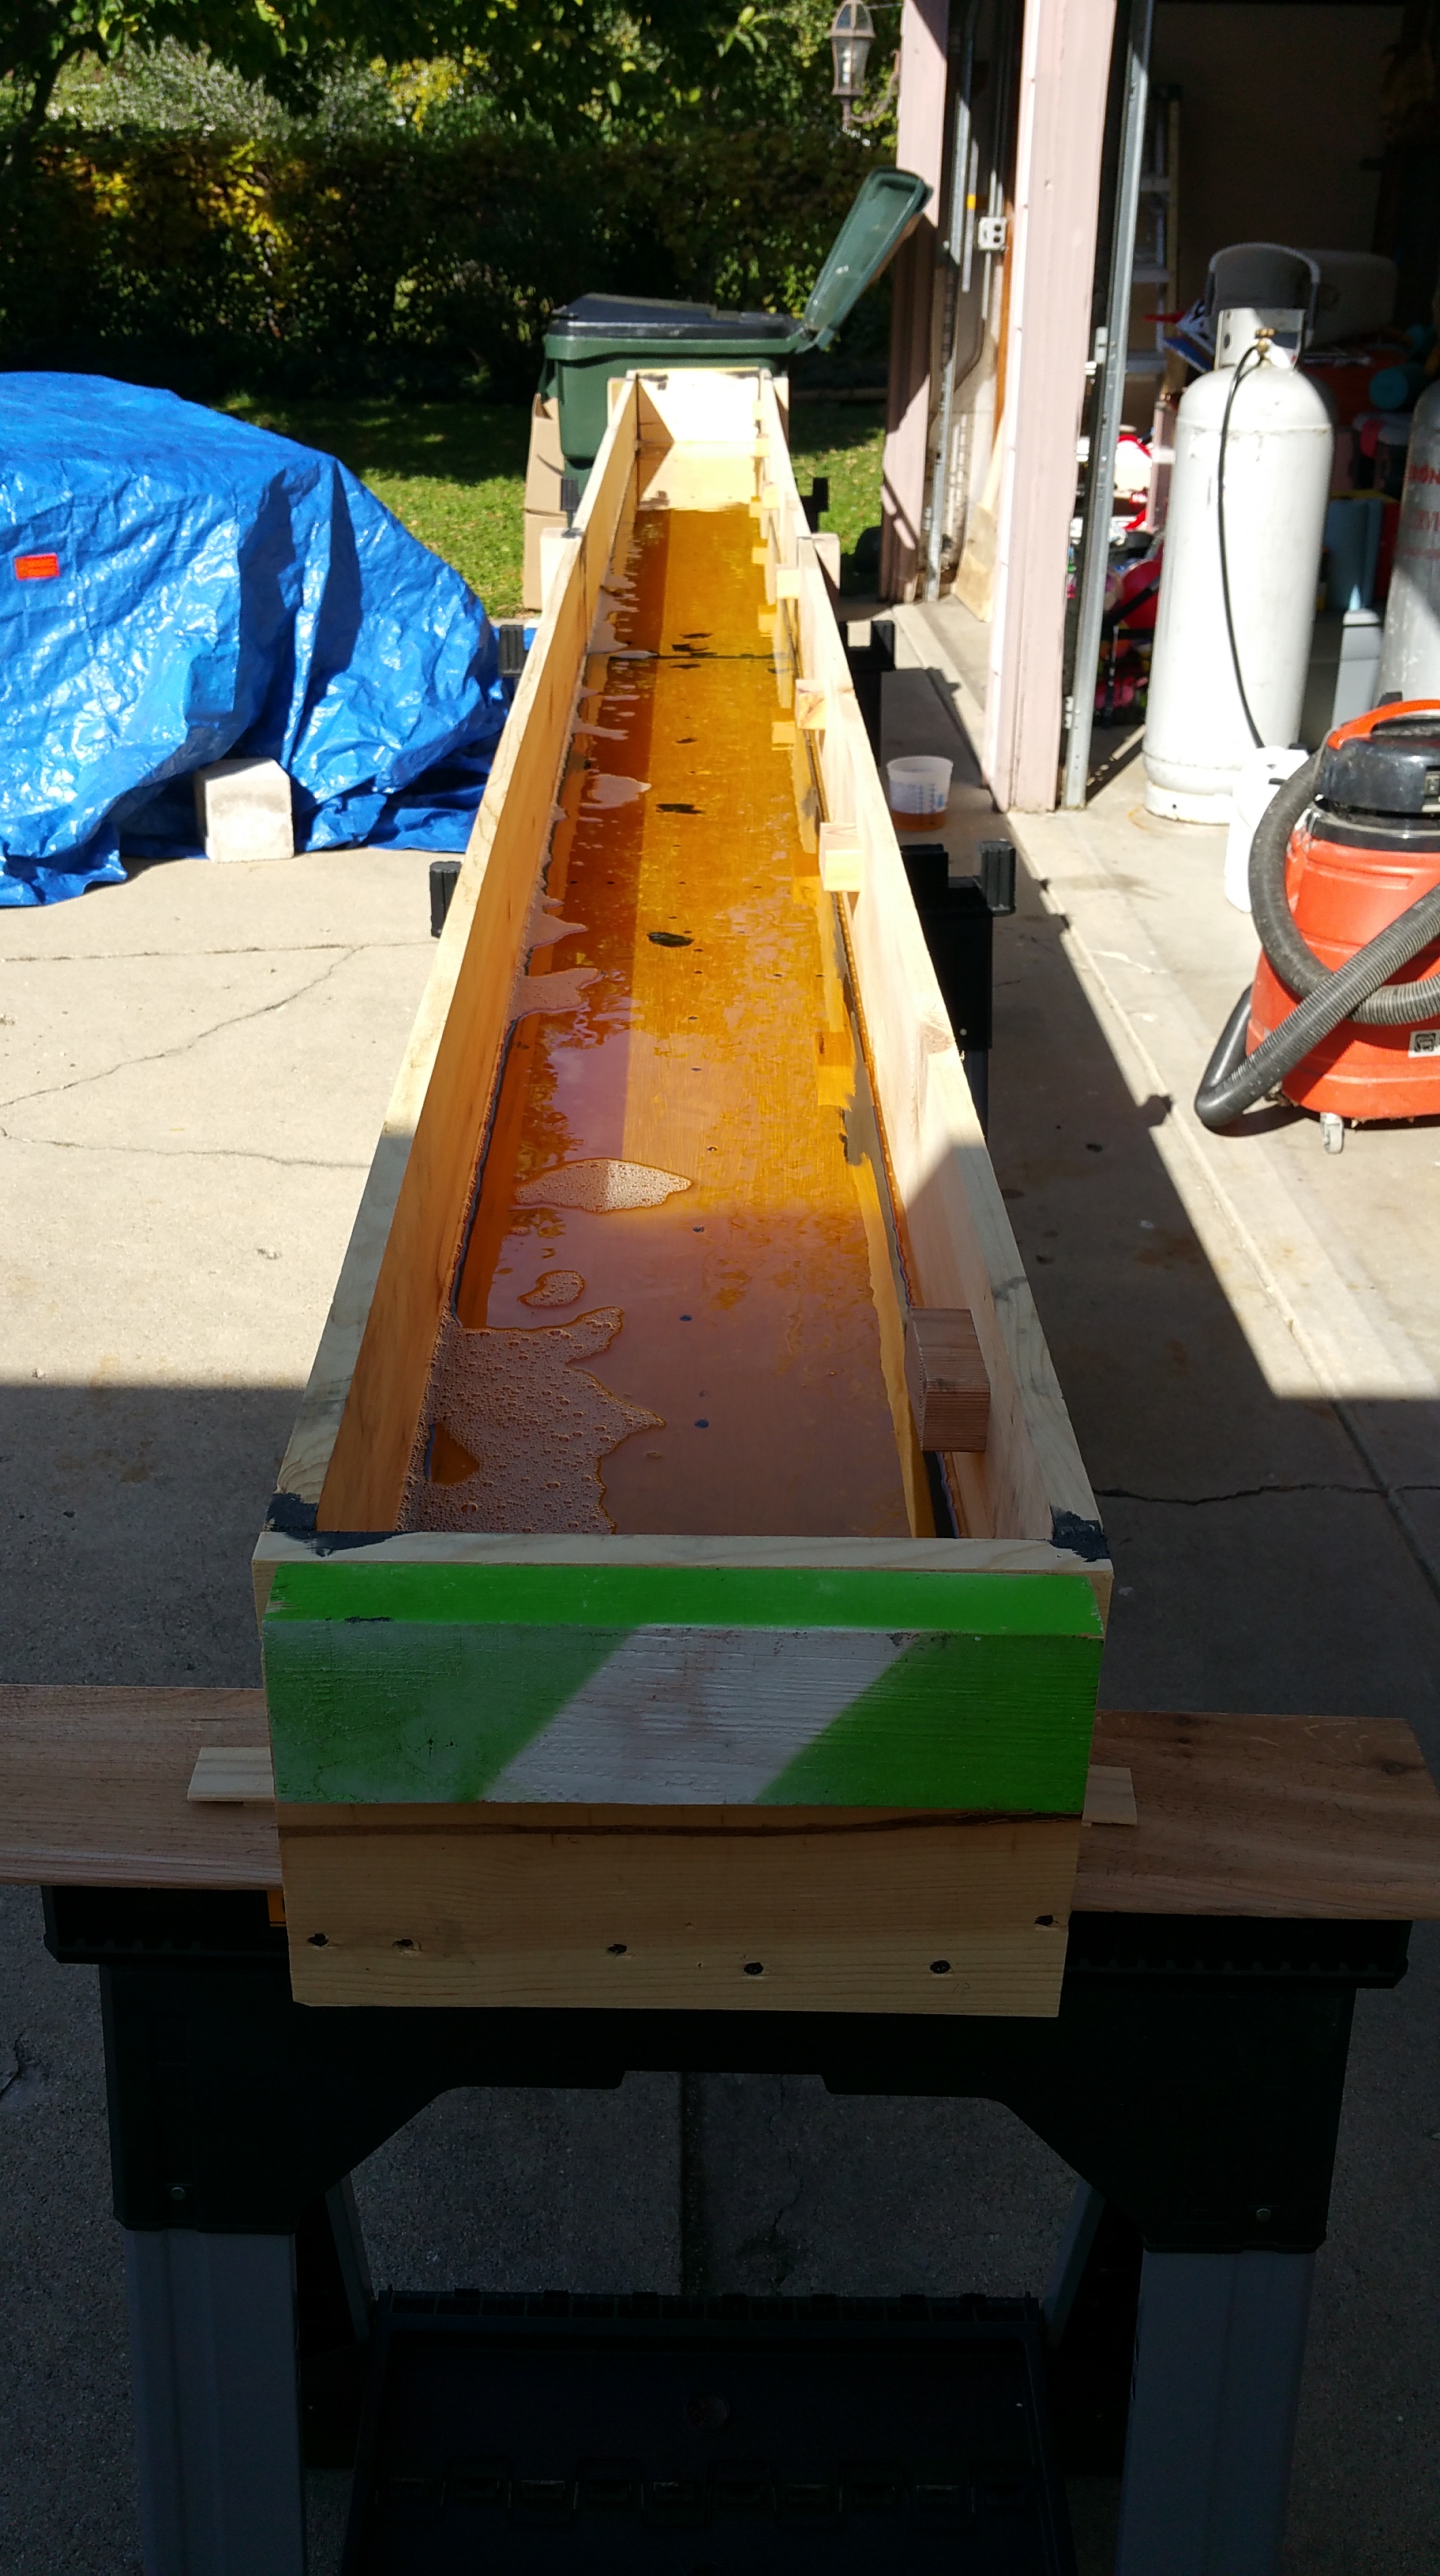
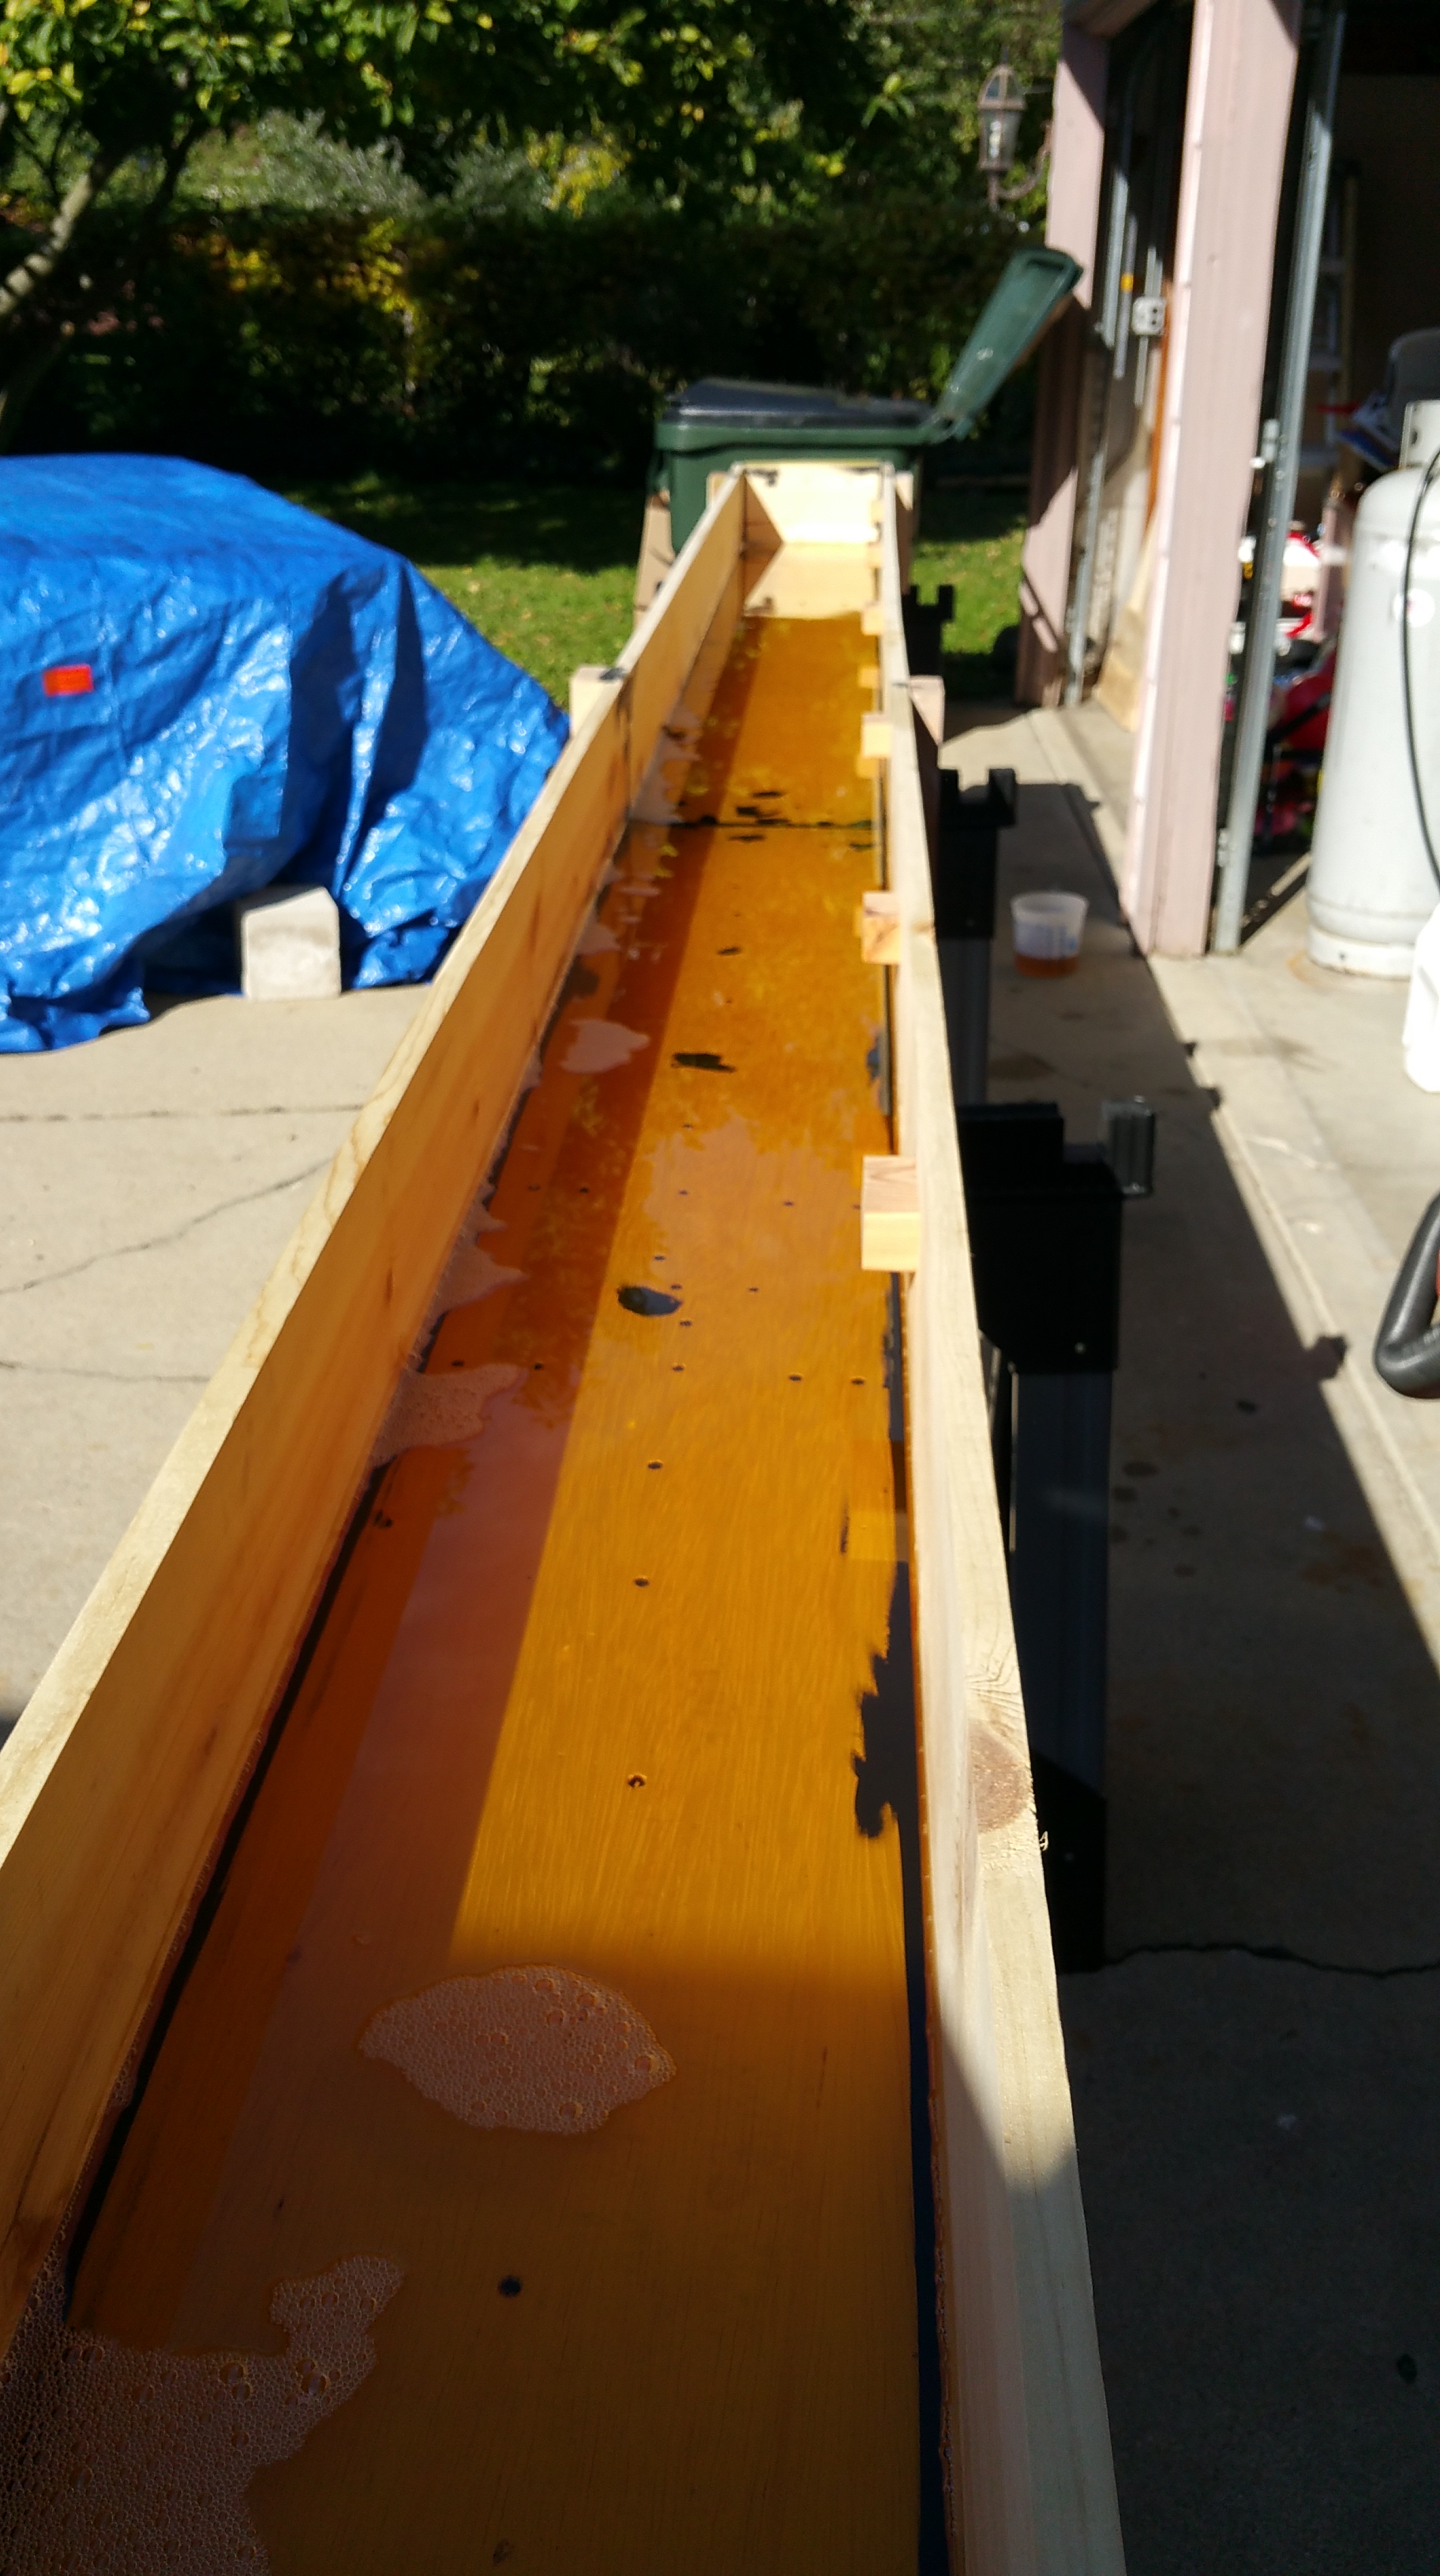
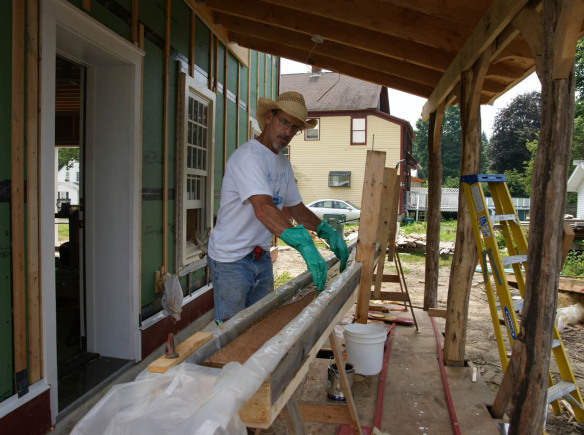
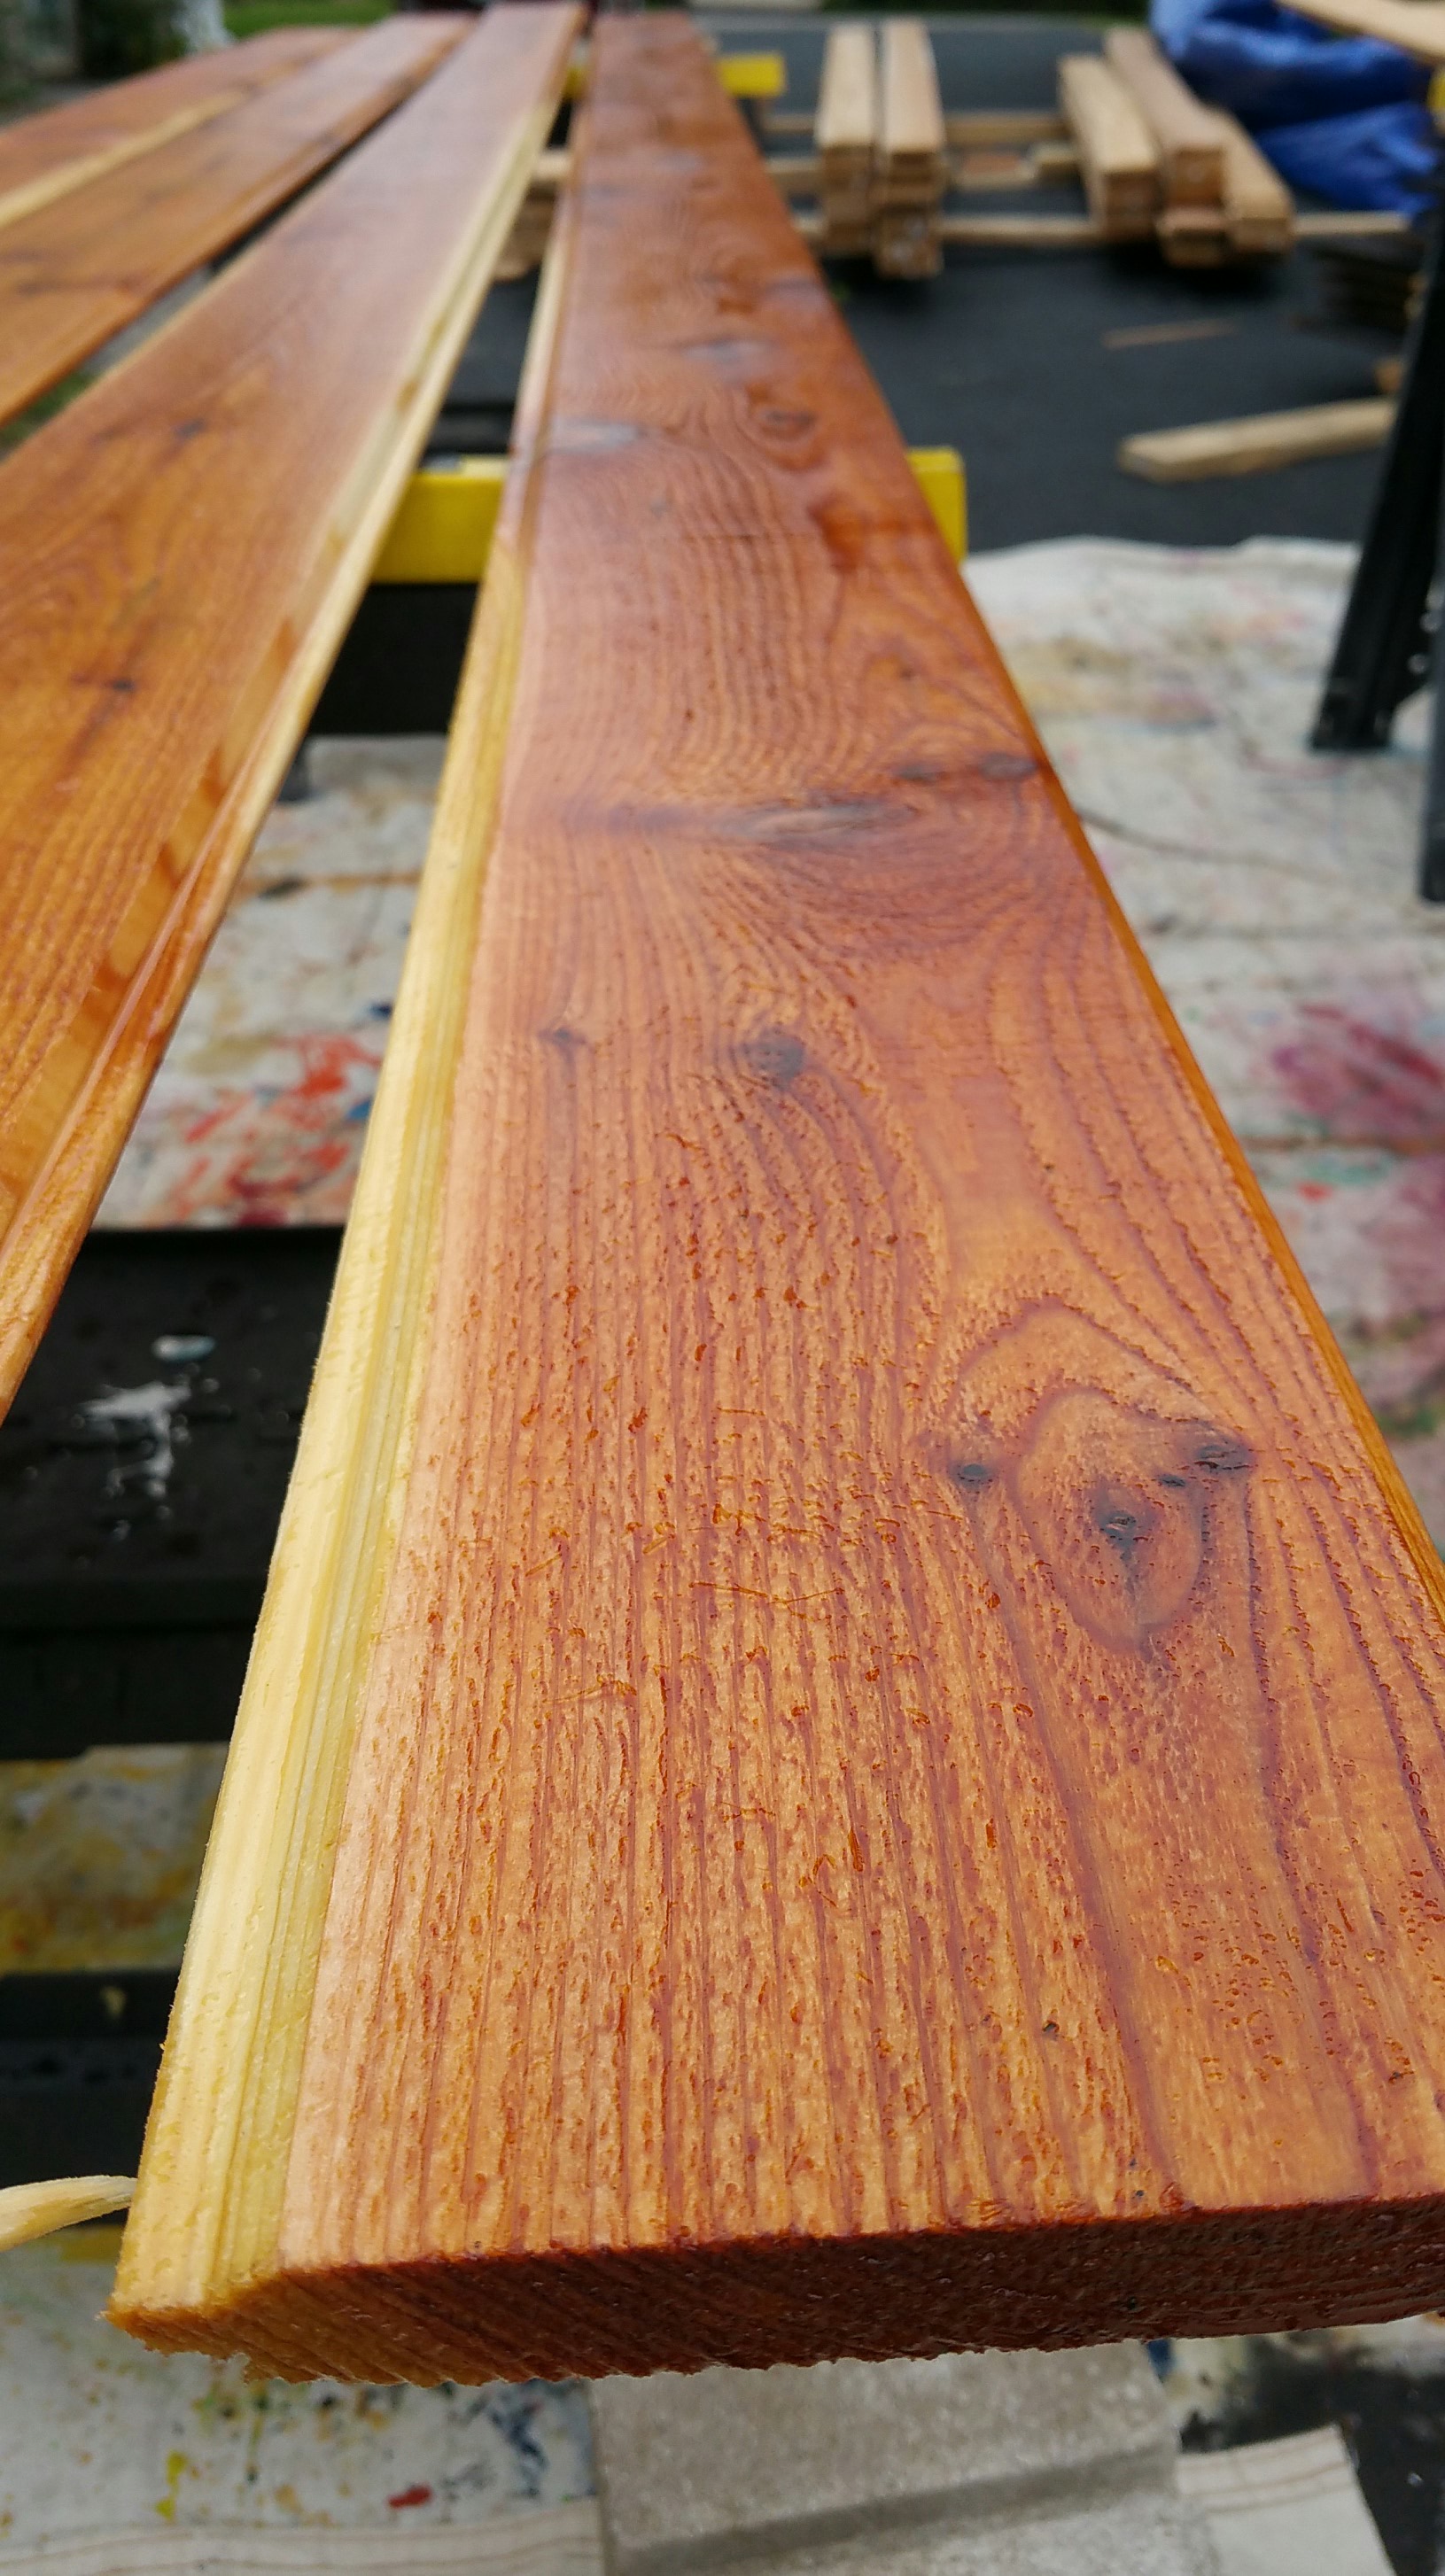
Once in the trough, we would let each board sit for about 30 seconds in the Tung Oil and Citrus Solvent bath, before pulling it up and resting it on the 2×4 ledge. Seated on its perch, the board would get wiped down initially with just a squeegee.
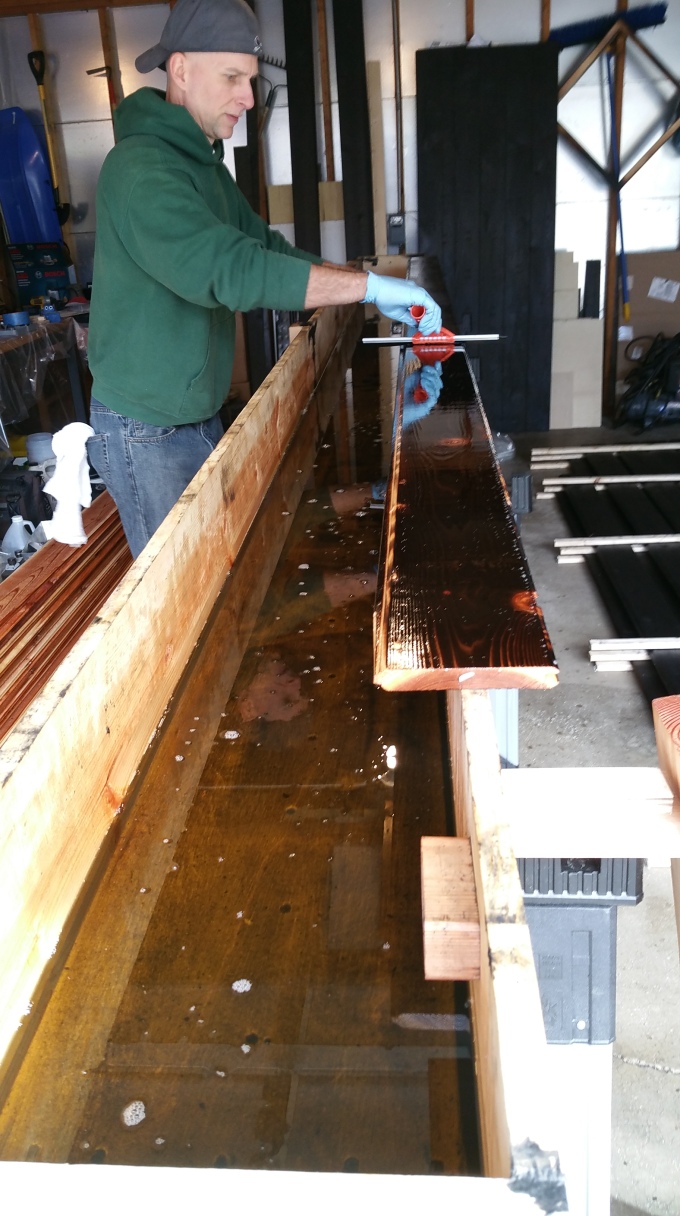
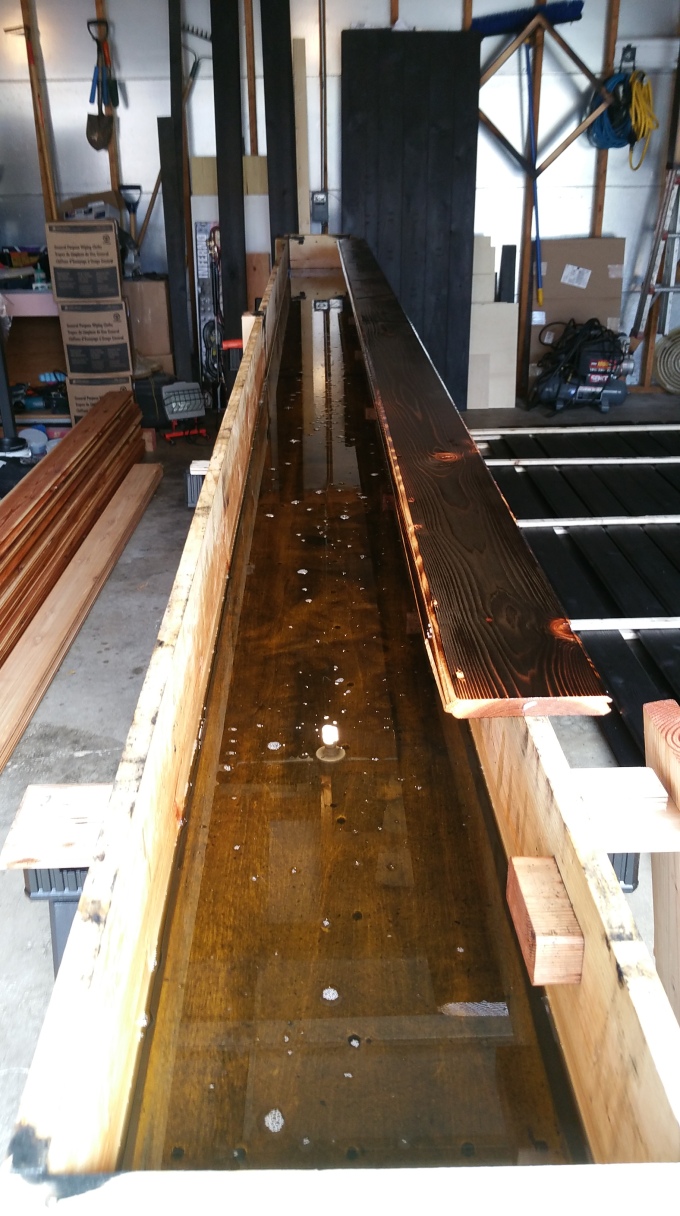
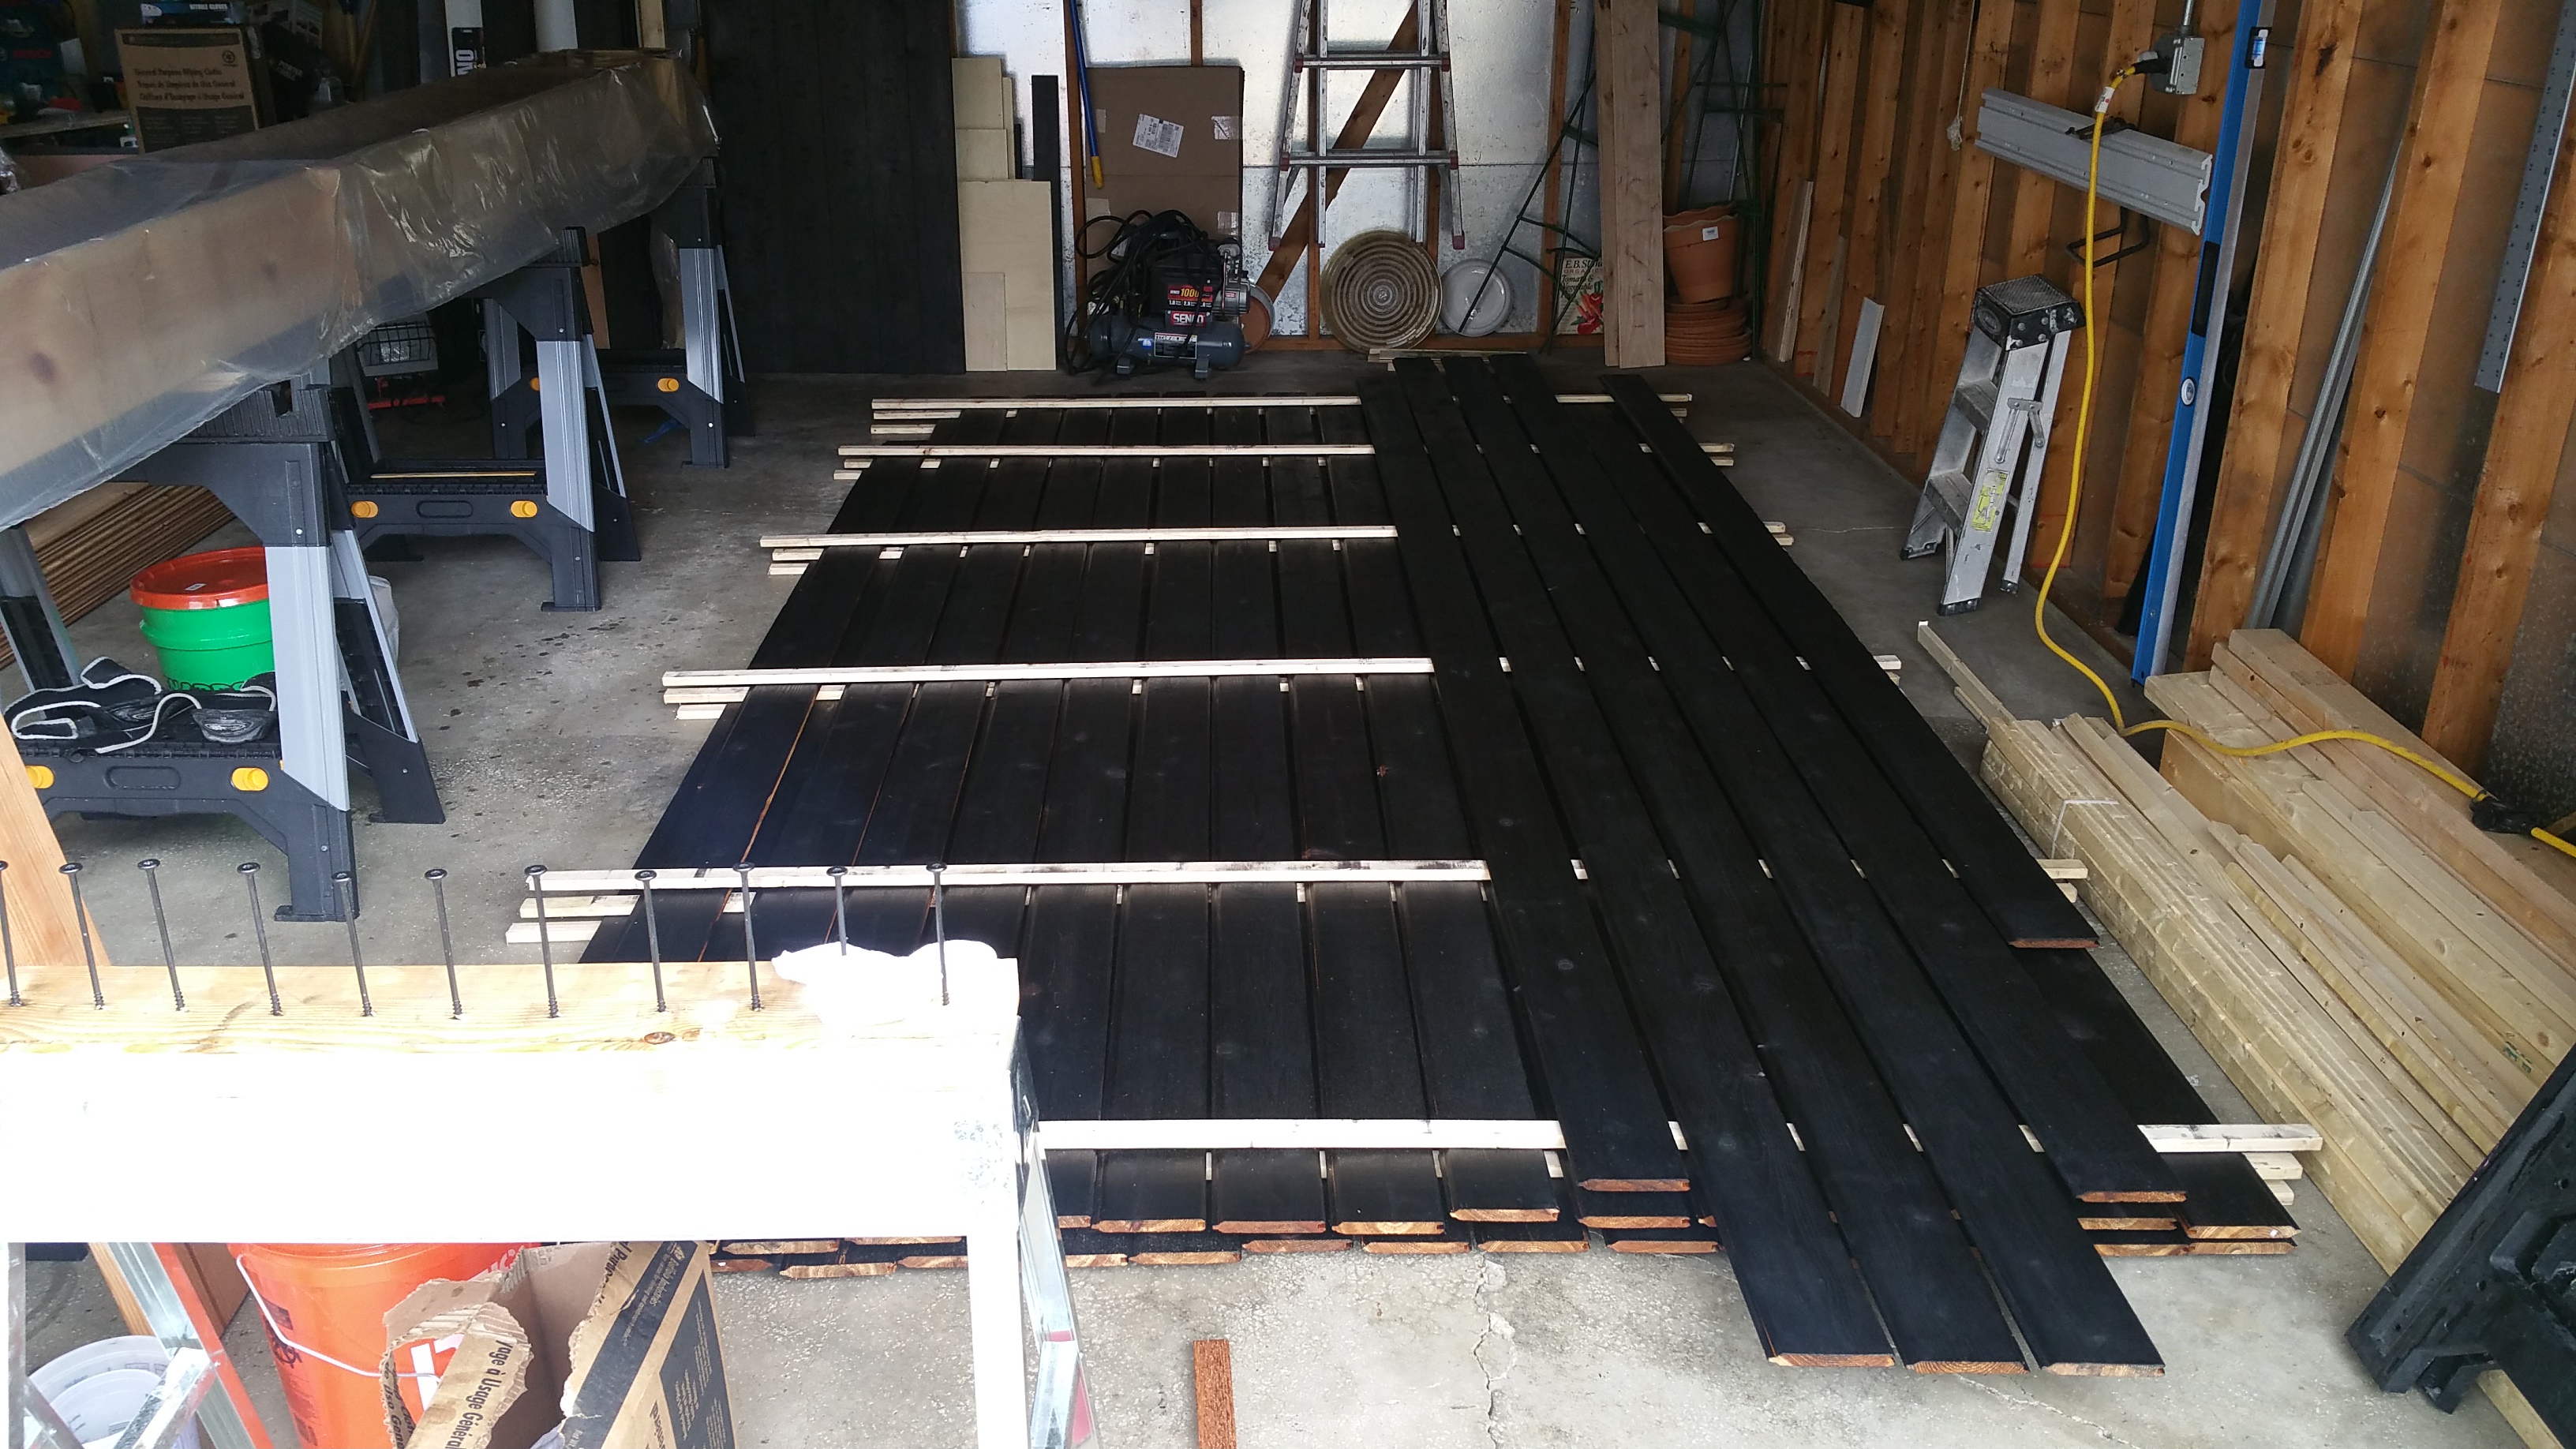
At this point, we would walk it over to the drying rack.
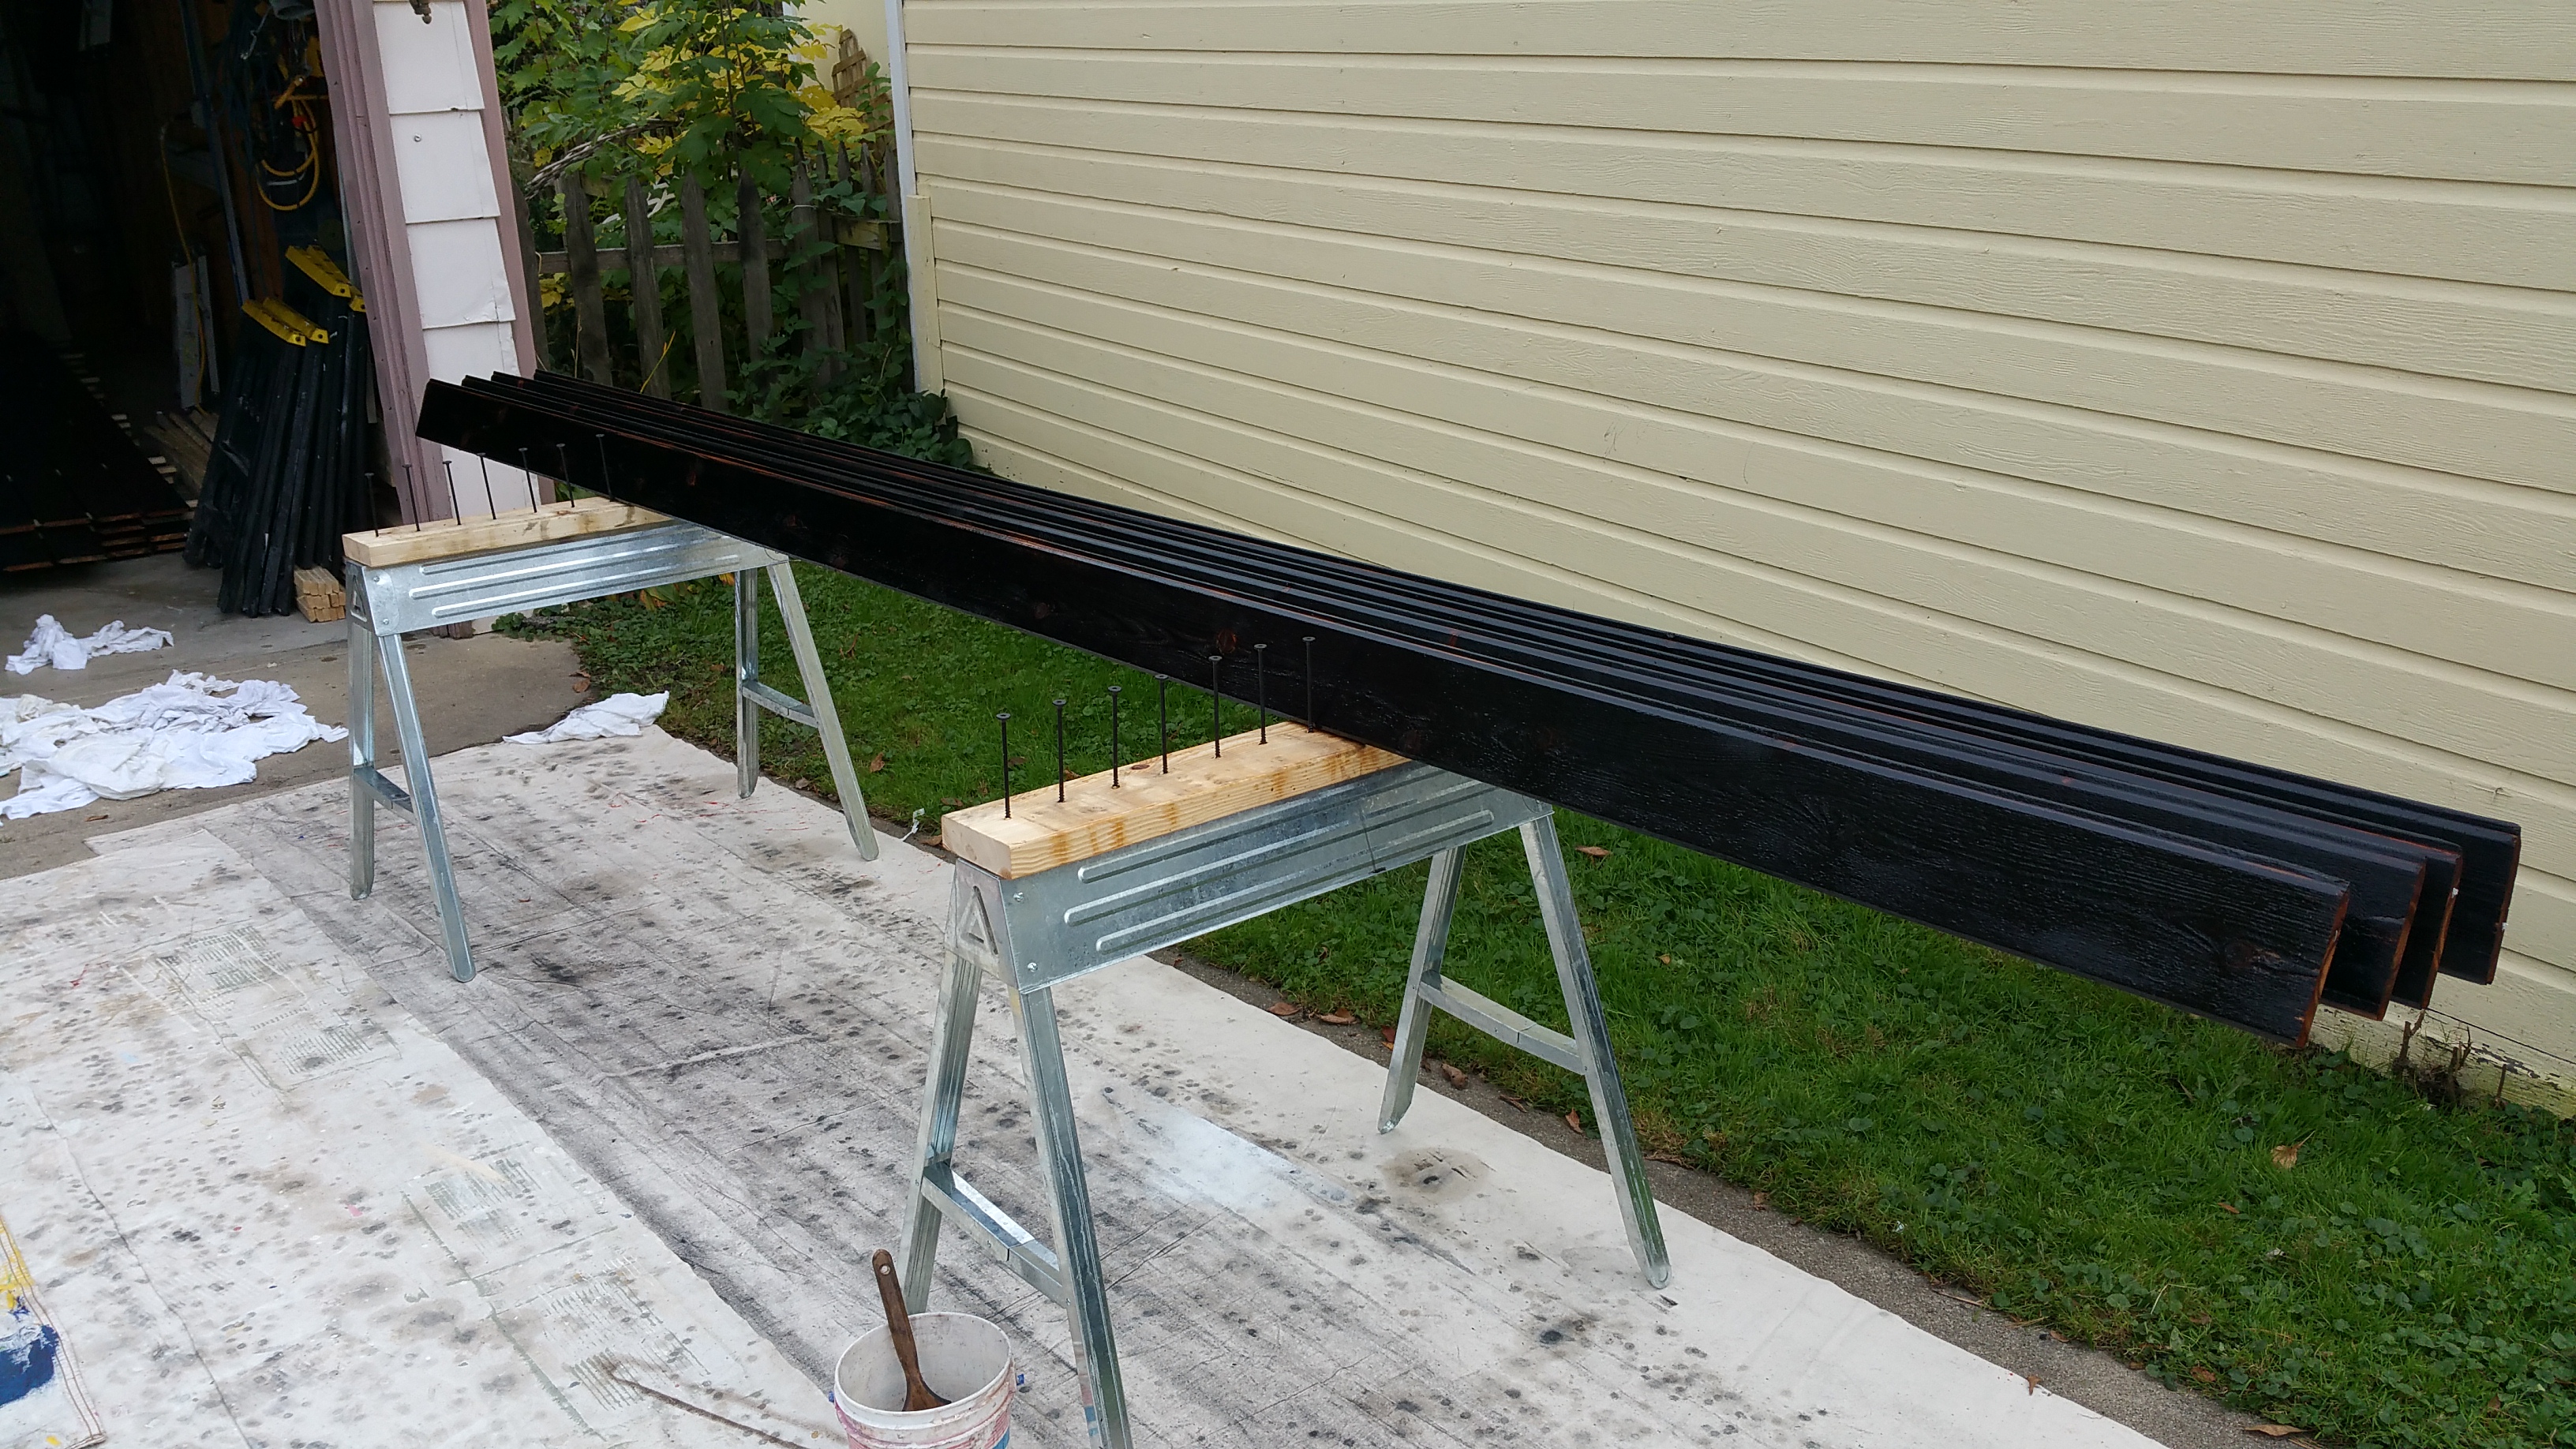
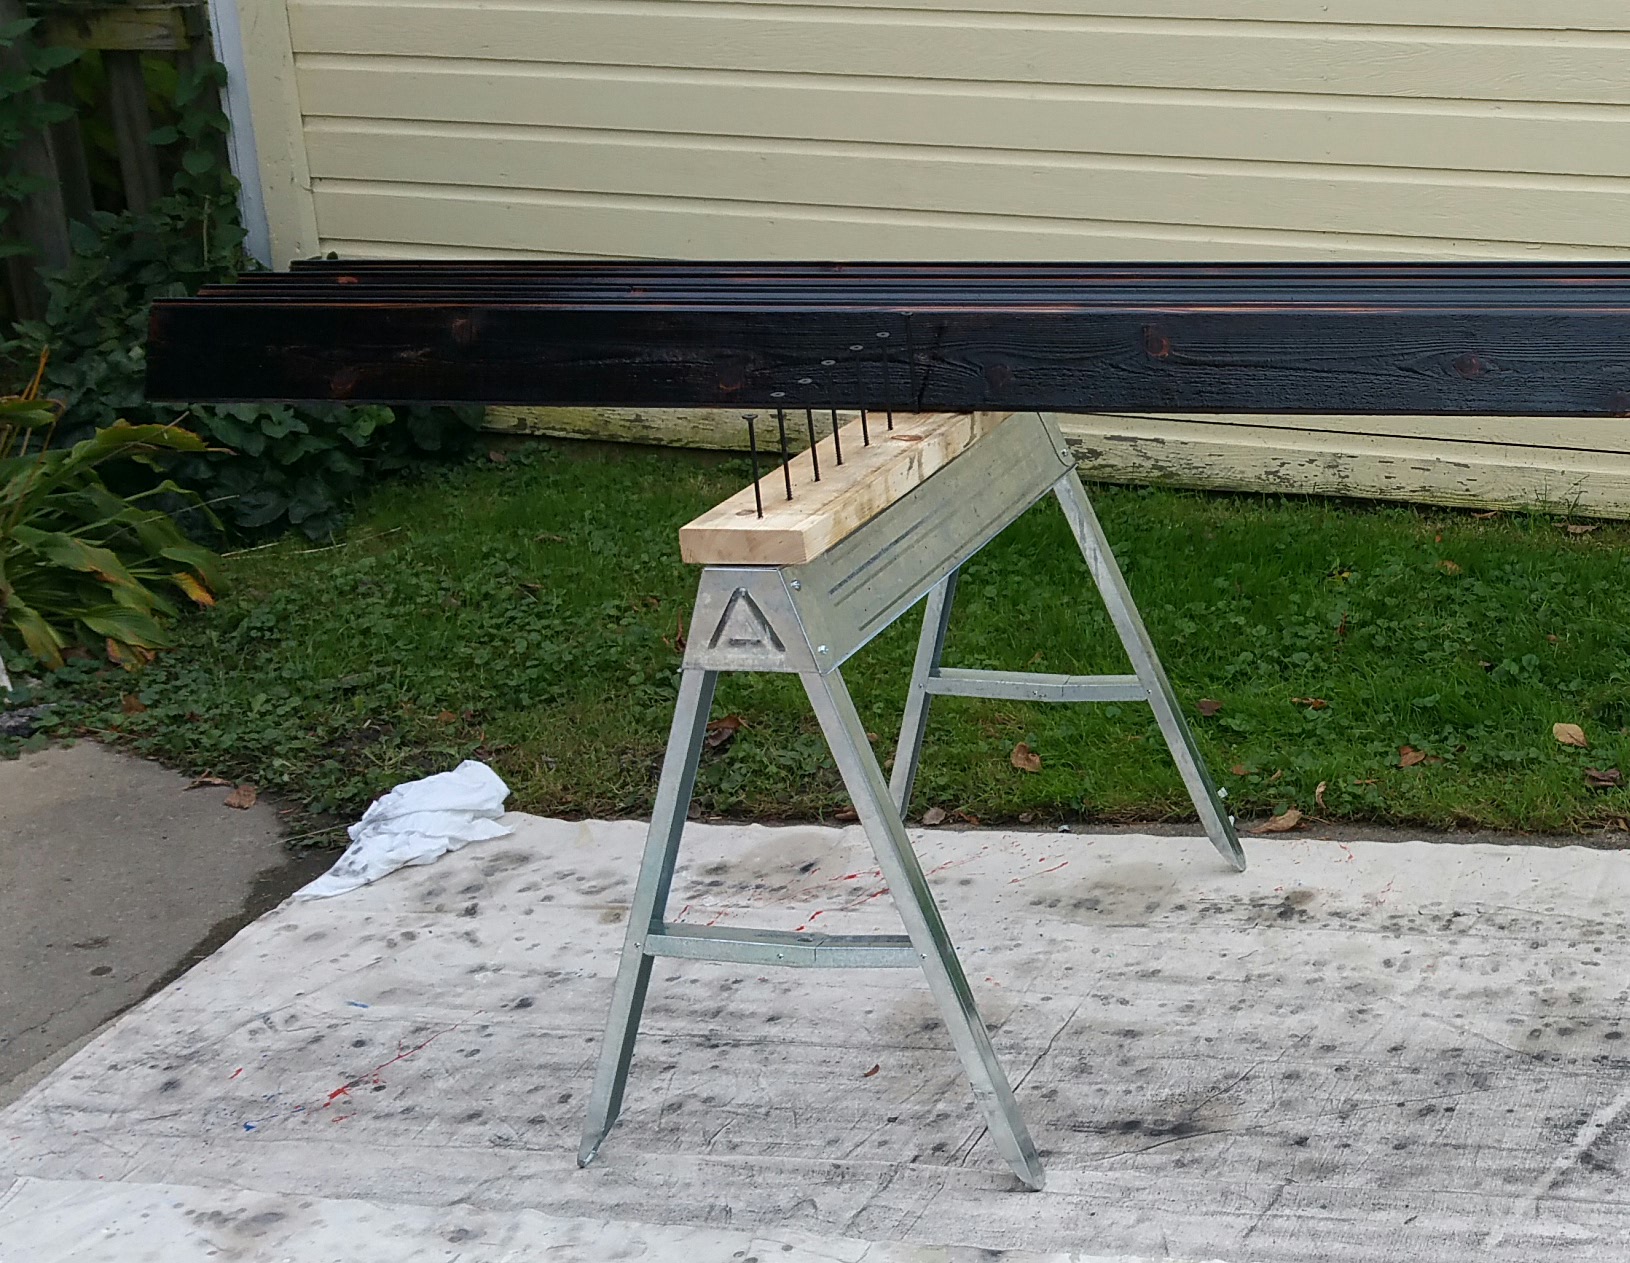
Once on the rack, we would use a brush to apply an additional coat of Tung Oil and Citrus Solvent, but only to the rough side, since it will be exposed directly to the elements.
After about 20 minutes on the drying rack, we would wipe down both sides of each board (the most laborious part of the job). Usually by the time you’ve placed the tenth board and brushed it, the first board is ready to be wiped down. We found that dust free cotton rags are the best option for this.
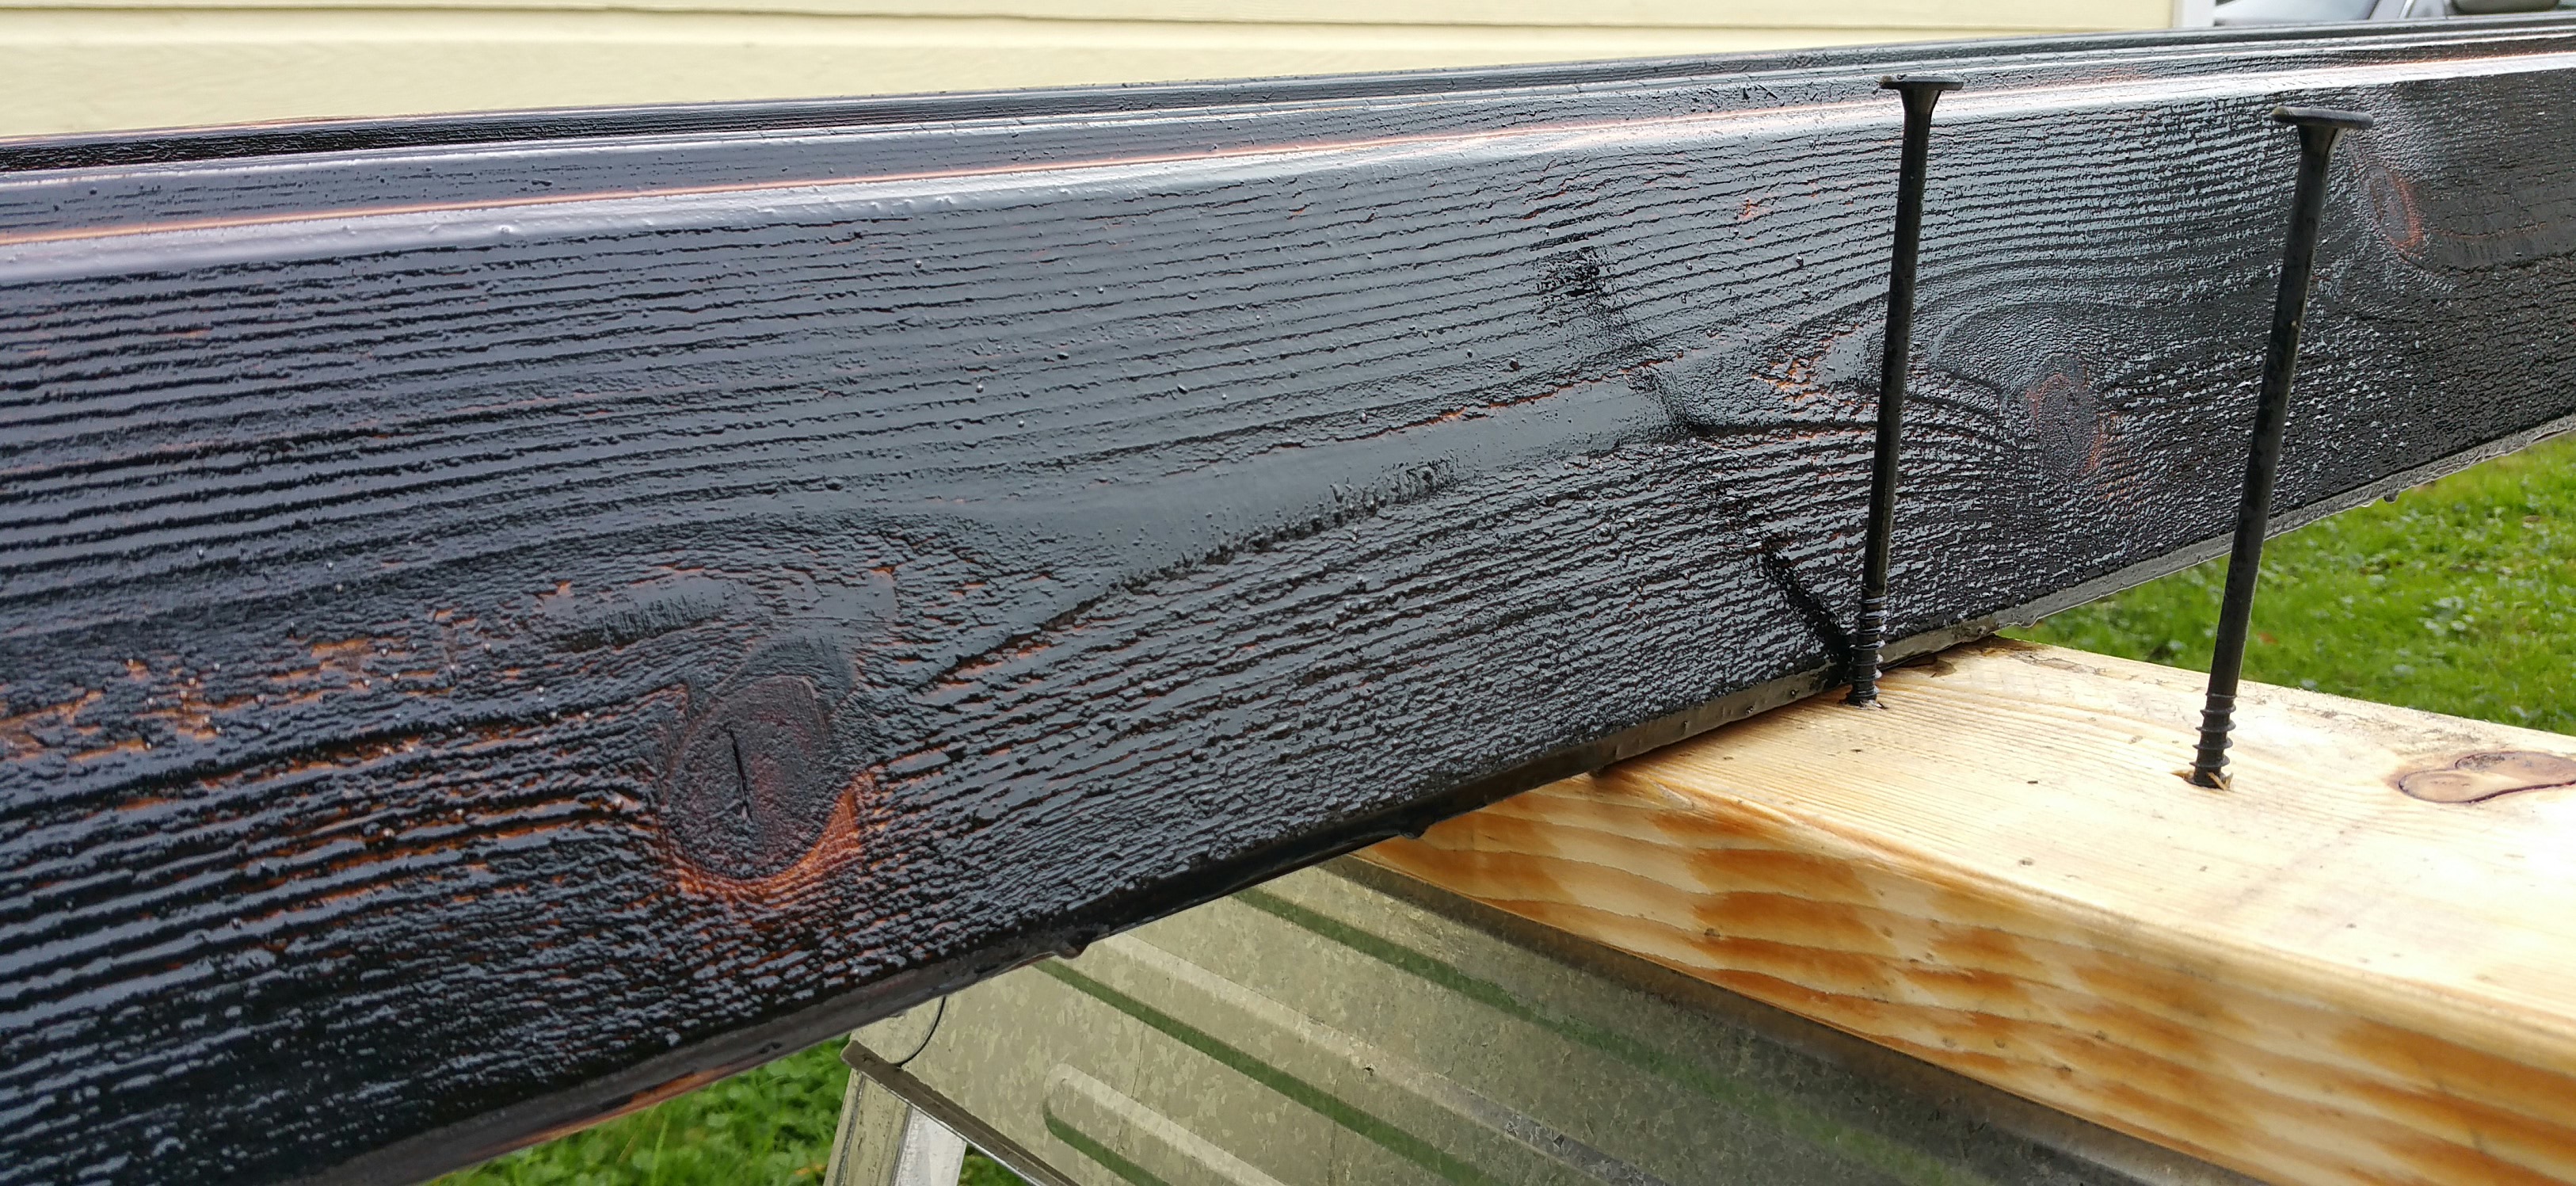
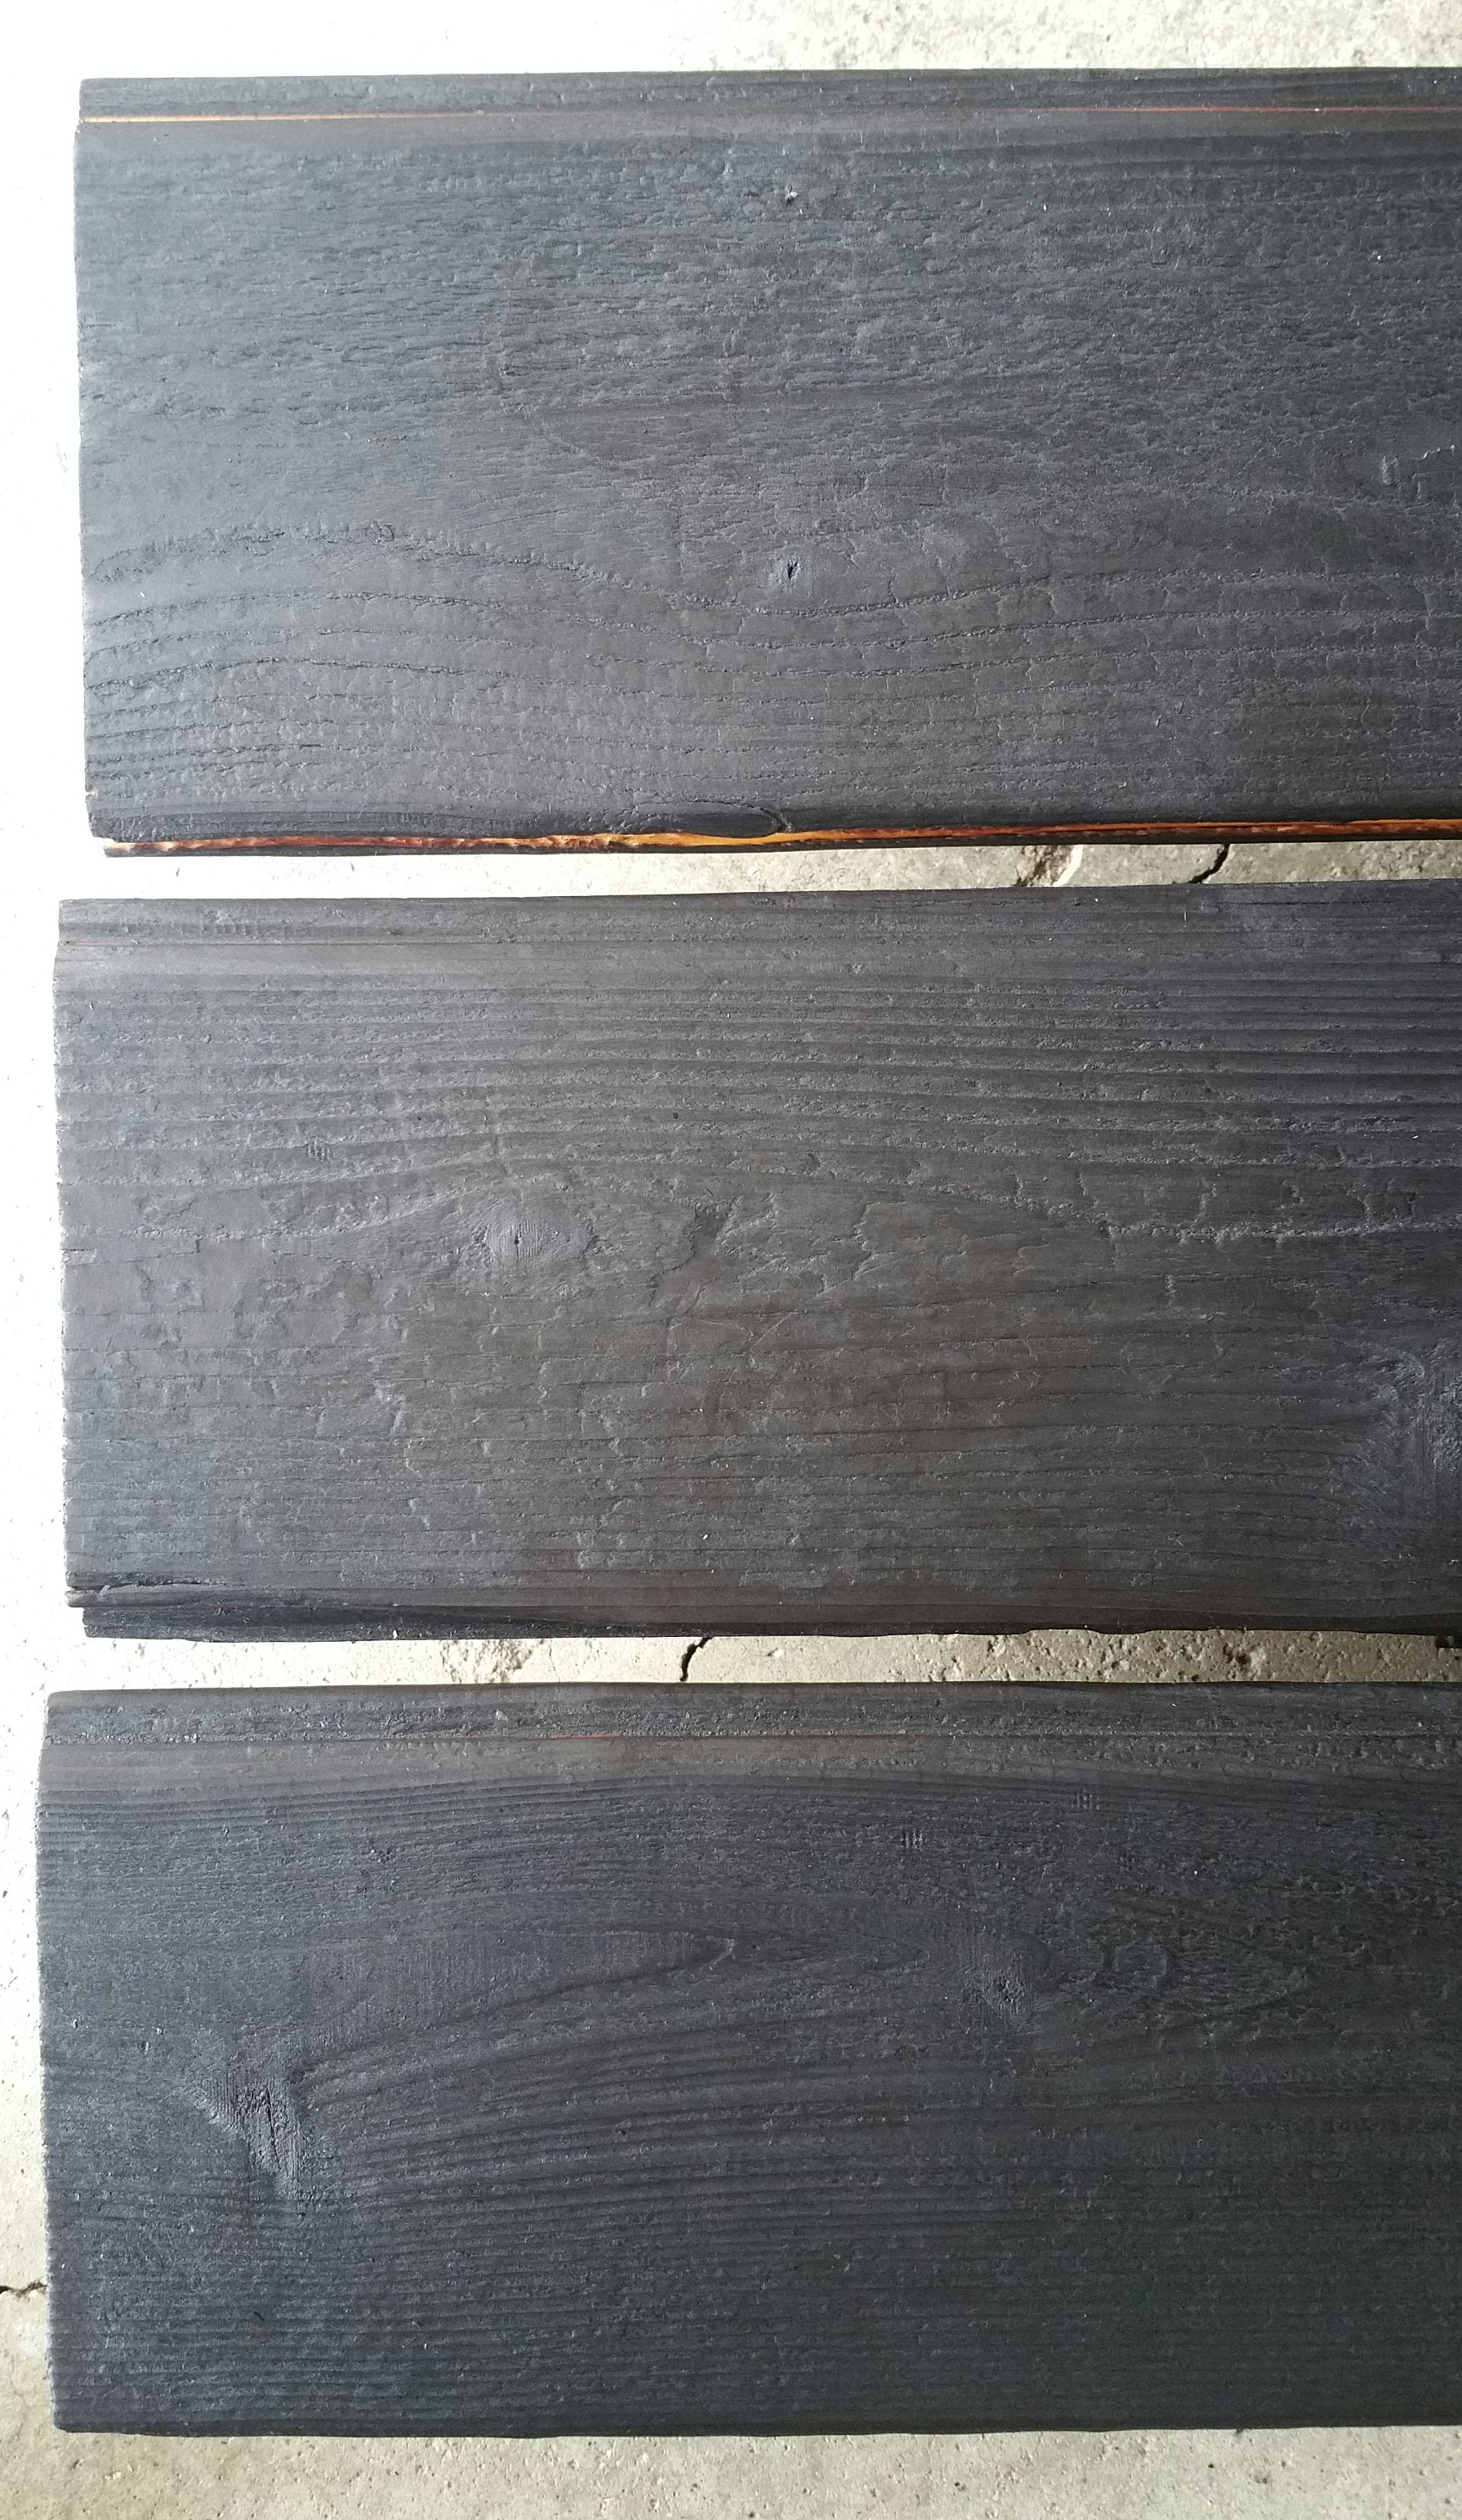
Typically, there’s not much oil left on the surface, as most of it has soaked in. The wiping just removes any excess that could cause an unwanted film to form on the surface of the wood (not attractive).
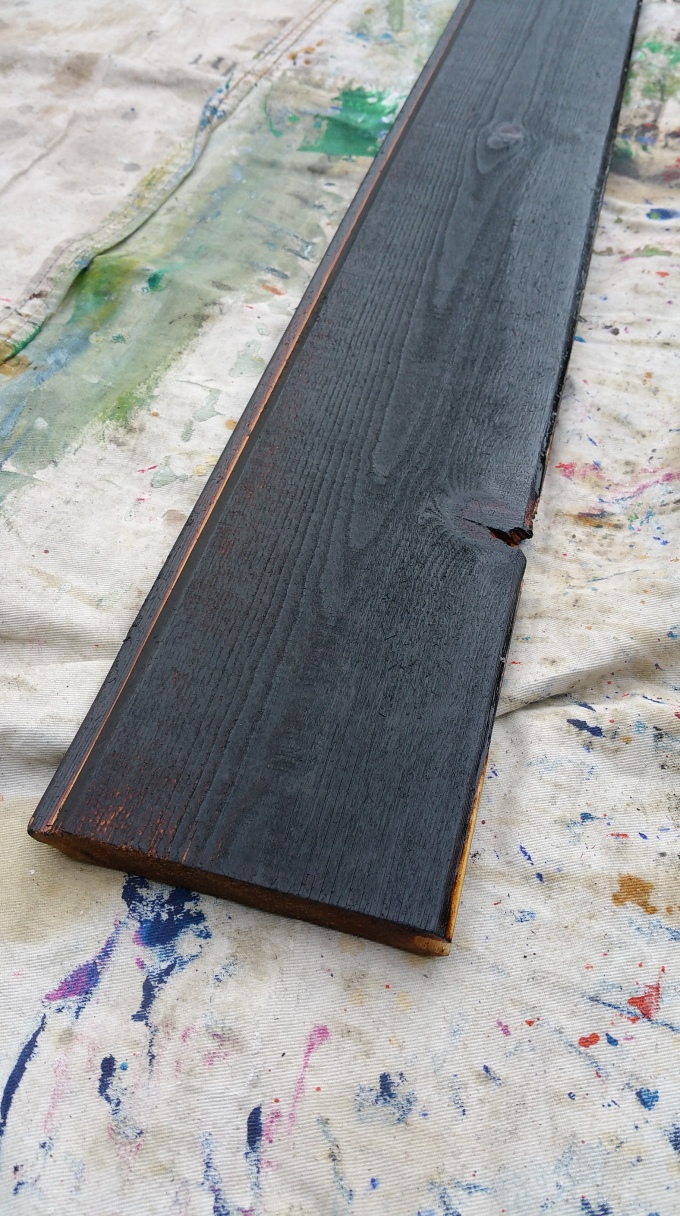
The only real down side to the wiping (apart from the time, energy, and the cost of the rags) is that it makes the boards more uniform in appearance — in other words, some of the texture in the gator look is lost due to the wiping. Nevertheless, this comes with an added benefit, namely, removing any char that might otherwise flake off in the first couple of rainstorms.
When the boards are finished and completely dry, the finish looks very durable (and sleek).
Depending on temperature and humidity, it takes roughly a week for the boards to be dry to the touch.
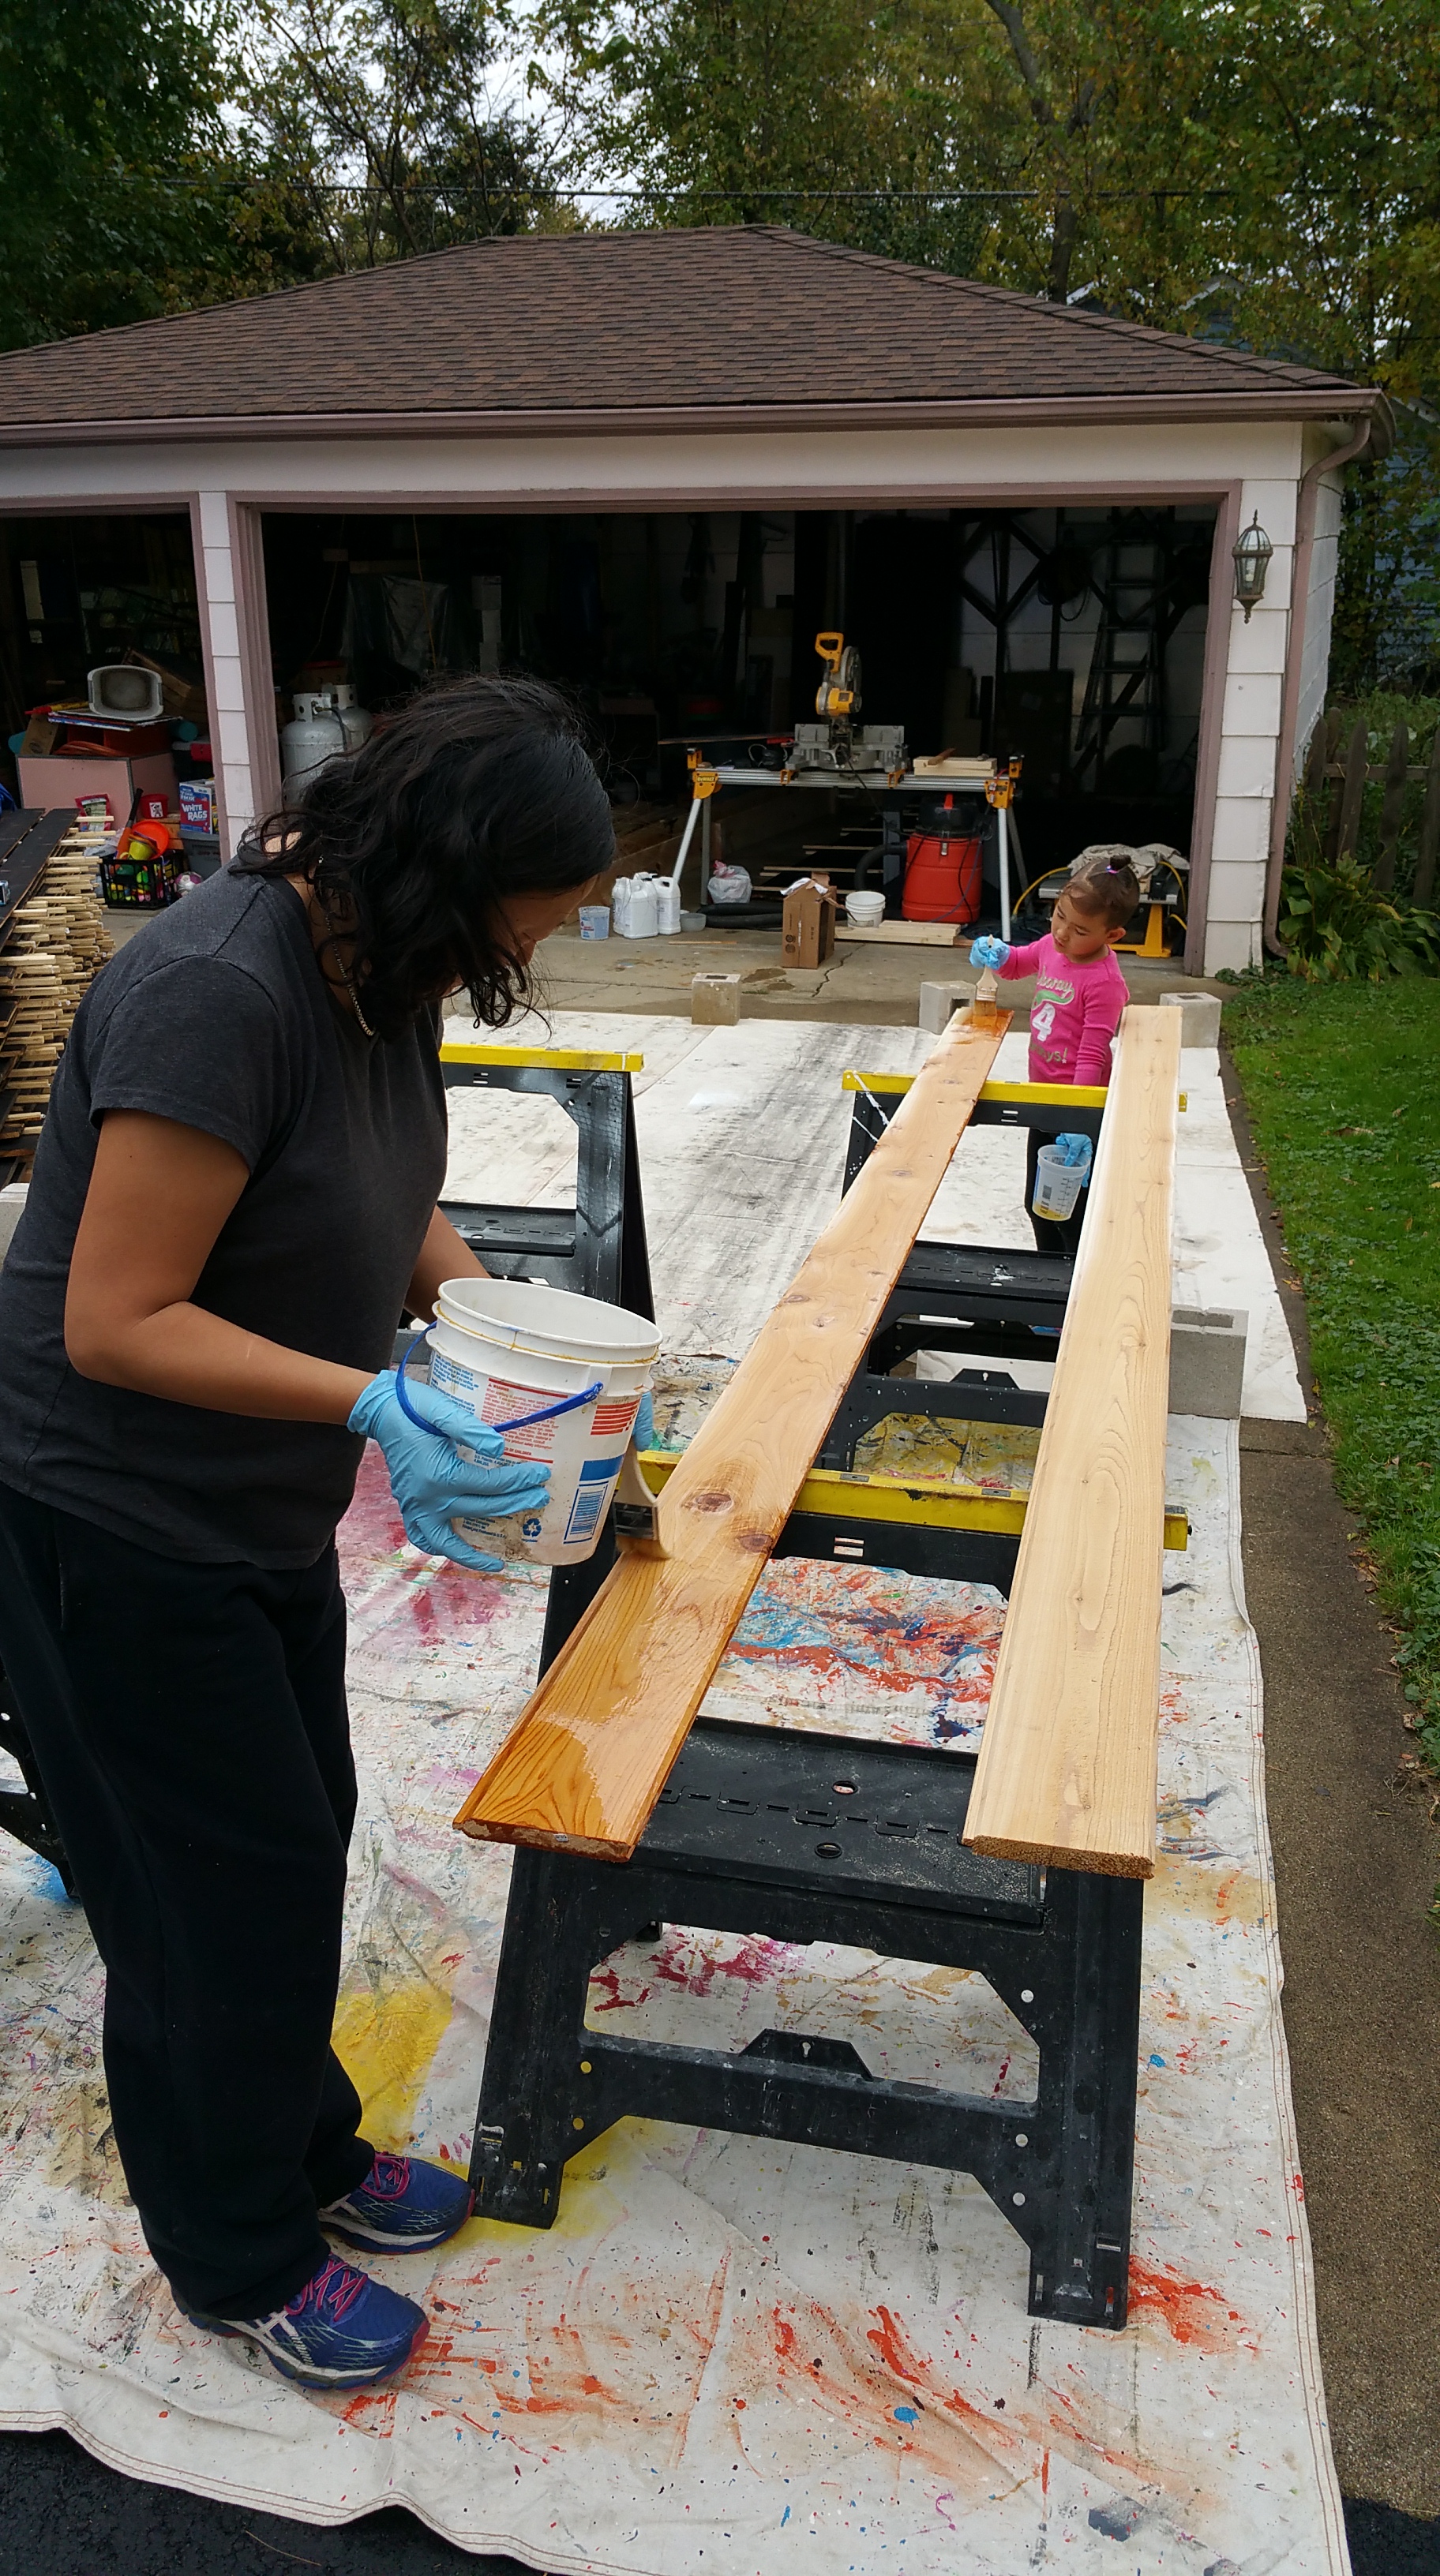

It’s the wiping down of each board that requires some real elbow grease – no surprise my daughter disappeared at that point in the process (can’t blame her, it’s tedious work).
As long as you have at least two people working together — pulling boards, dipping, transferring to the drying rack, and then wiping down — the process isn’t too bad. Going solo would get old very quickly. It’s even better if you have a couple of people just setting up the drying rack and wiping down while a third person pulls boards and dips.
There’s no question the process takes time and effort, but the results are unique and, we think, very beautiful.

September, 2019 Update: To see how the charred cedar turned out on the house, go here:


You must be logged in to post a comment.