
Sealing the Seams and Penetrations in Zip Sheathing
Note: This post will concentrate on the Zip sheathing itself, as it relates to seams and penetrations. I’ll address how I sealed around openings for windows and doors, along with our attic access hatch through the Intello on the ceiling in separate, future blog posts.
We used Zip sheathing as our WRB (weather resistant barrier — sometimes it’s referred to as a water-resistant barrier) based largely on Hammer and Hand projects:
Also, for years I’d seen it used on various jobs featured in Fine Homebuilding Magazine.
As the 7/16″ Zip sheathing went up, I taped most of the seams with Pro Clima’s 3″ Tescon Vana tape (available at 475 HPBS), but also their Contega tape (6″ wide), which I used mainly for outside corners and larger seams in the Zip (mainly where the horizontal seam in the Zip transitioned from the exterior walls of 2×6 framing to the roof trusses — shown in a photo later in this post).
My wife and daughter also cut up the Tescon Vana tape into small pieces in order to cover all the nail and screw holes in the Zip sheathing.
The nail holes were initially sealed with HF Sealant, also available from 475 HPBS, thus giving them double coverage — this was discussed earlier, here:
Framing (Air Sealing #2)

Our decision to use the Zip sheathing was also discussed earlier, here:
Wall Assembly
And here’s a good video discussing the Zip sheathing and its benefits (and its place in the evolution of building science):
If I had it to do over, I think I might be tempted to use 1/2″ exterior grade plywood as my sheathing (there are any number of WRB options these days). This would be sealed on the exterior side with either a liquid membrane, like Prosoco’s Cat 5, or a peel-n-stick tape like Henry’s Blue Skin, or even another 475 HPBS product Solitex Mento 1000.
The Zip sheathing works, and the exterior green skin held up nicely during construction, even as it sat exposed for nearly 10 months after we fired our GC’s and struggled to keep the project moving forward. Nevertheless, it is little more than glorified OSB, which comes with certain inherent weaknesses.
Matt Risinger does an excellent job of delineating the cost/benefits of using either OSB or CDX plywood as a sheathing material:

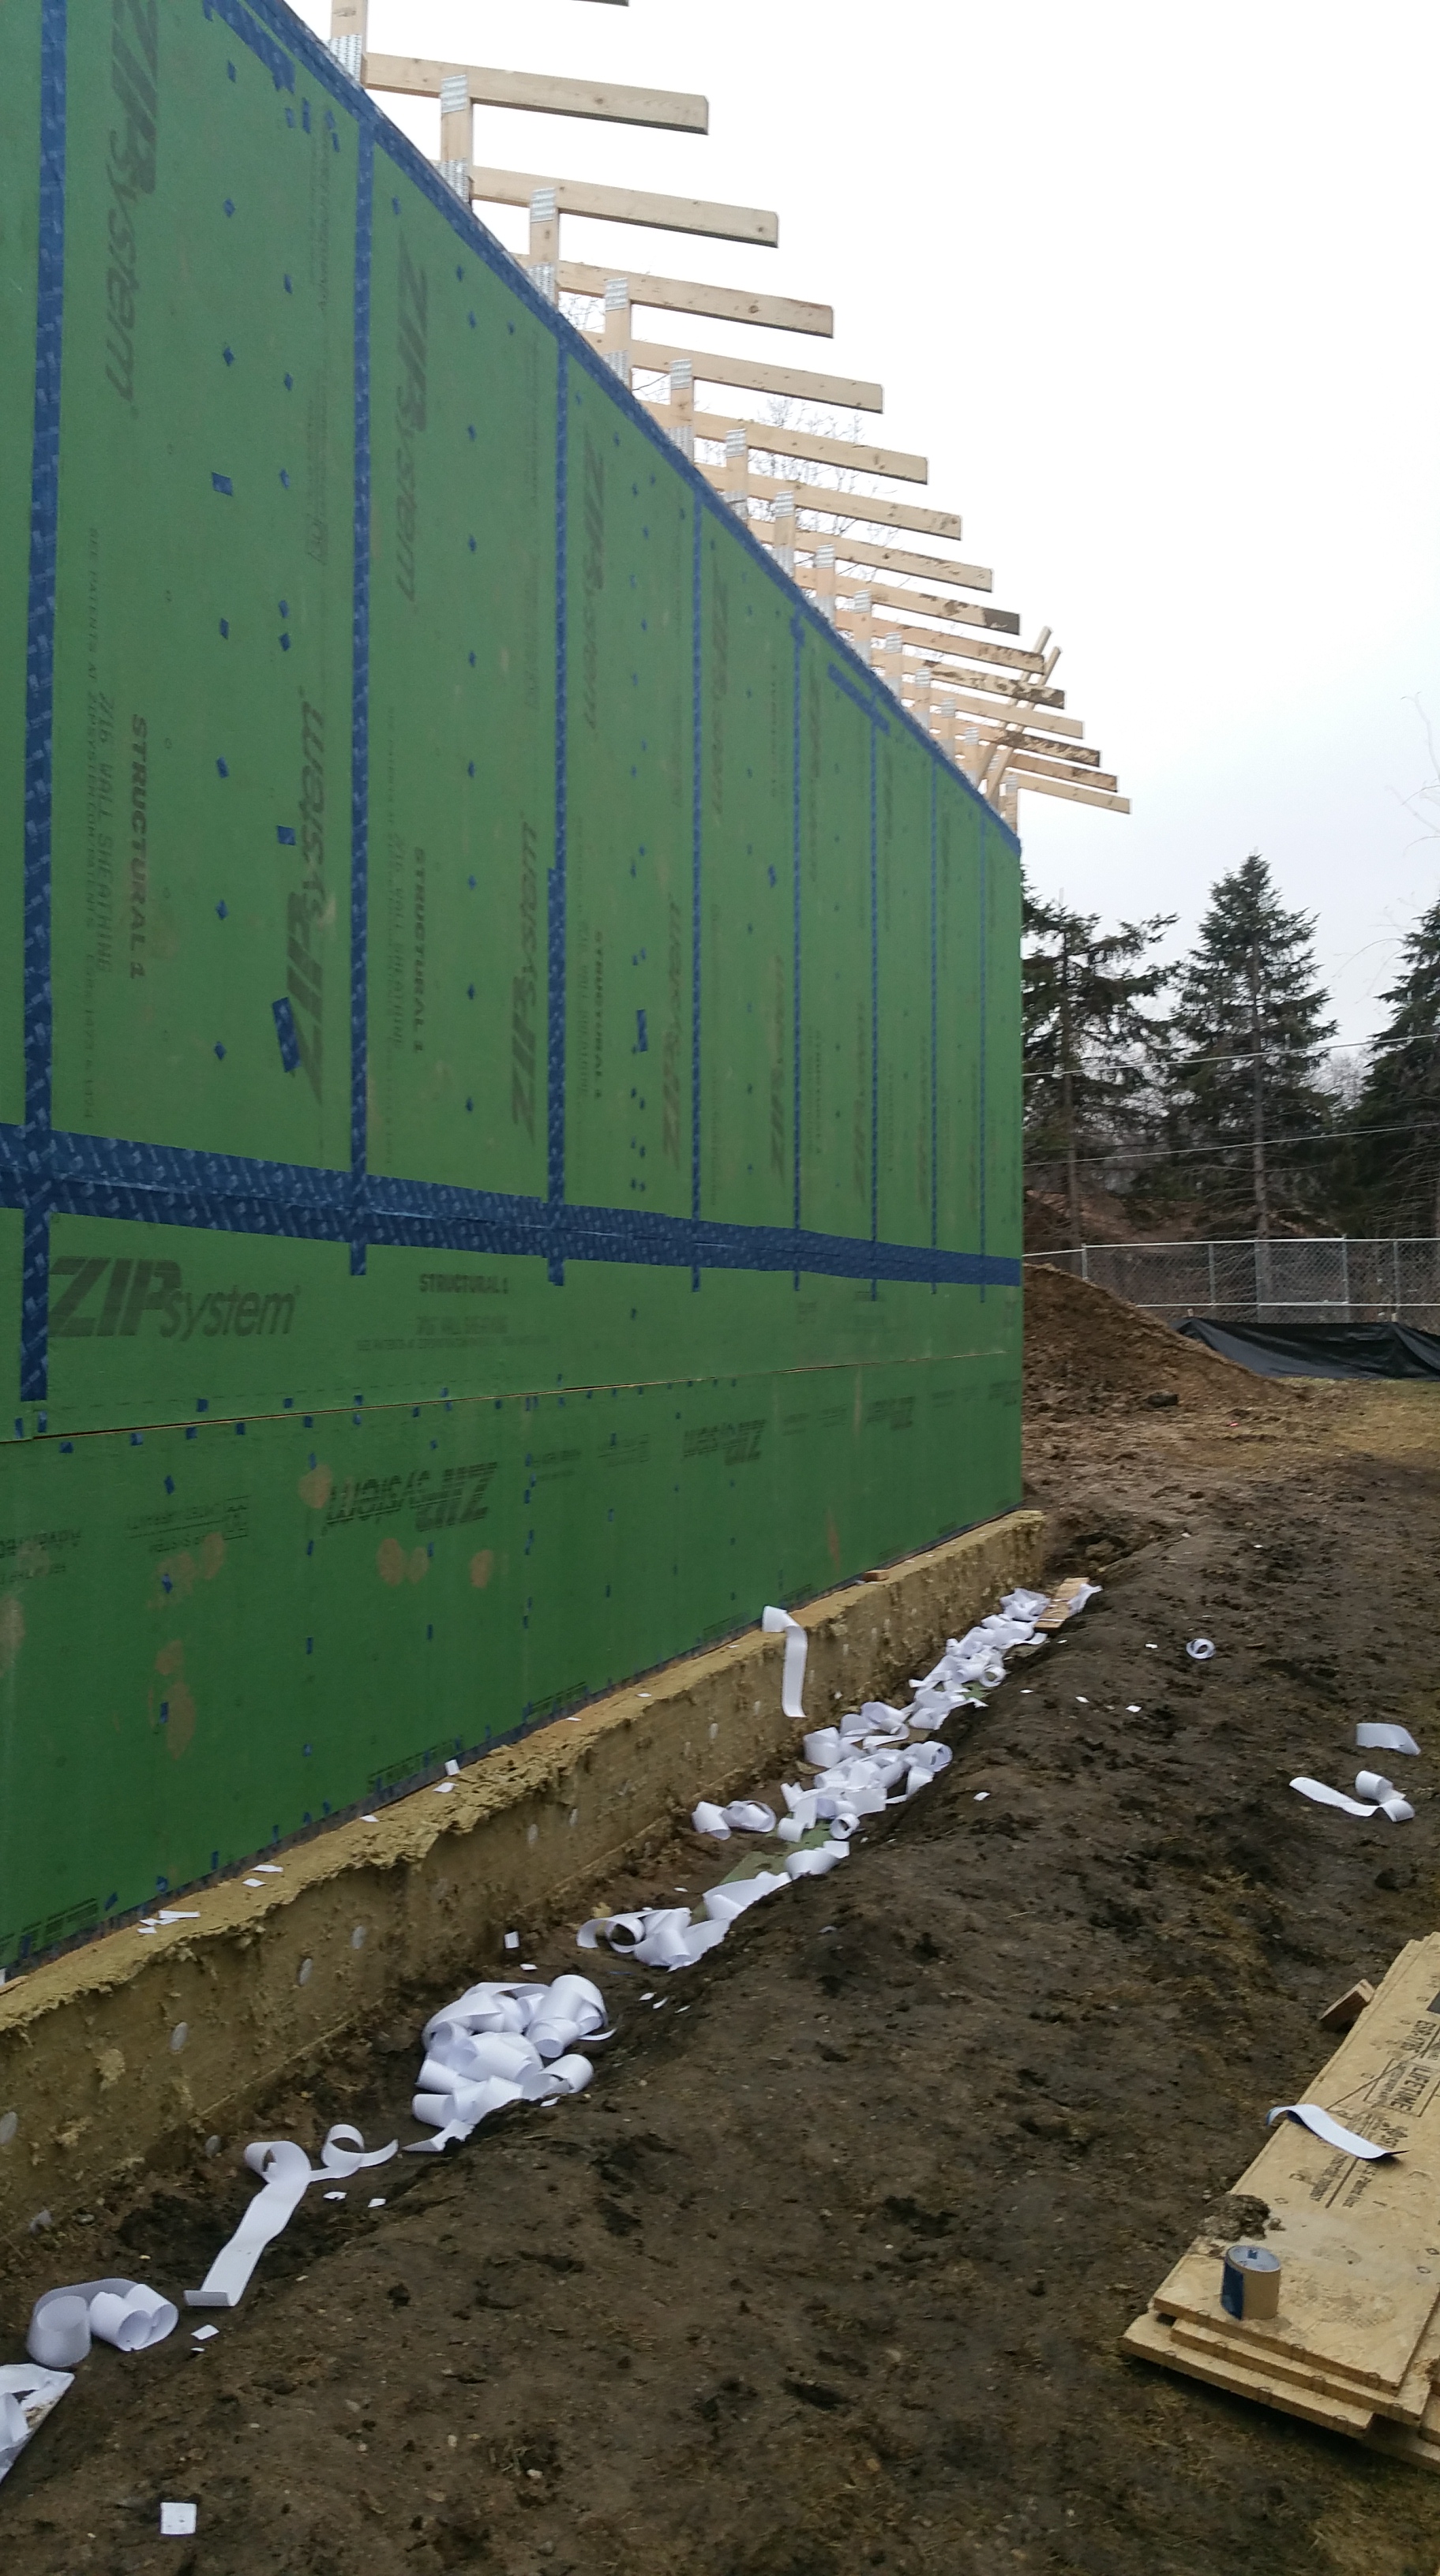
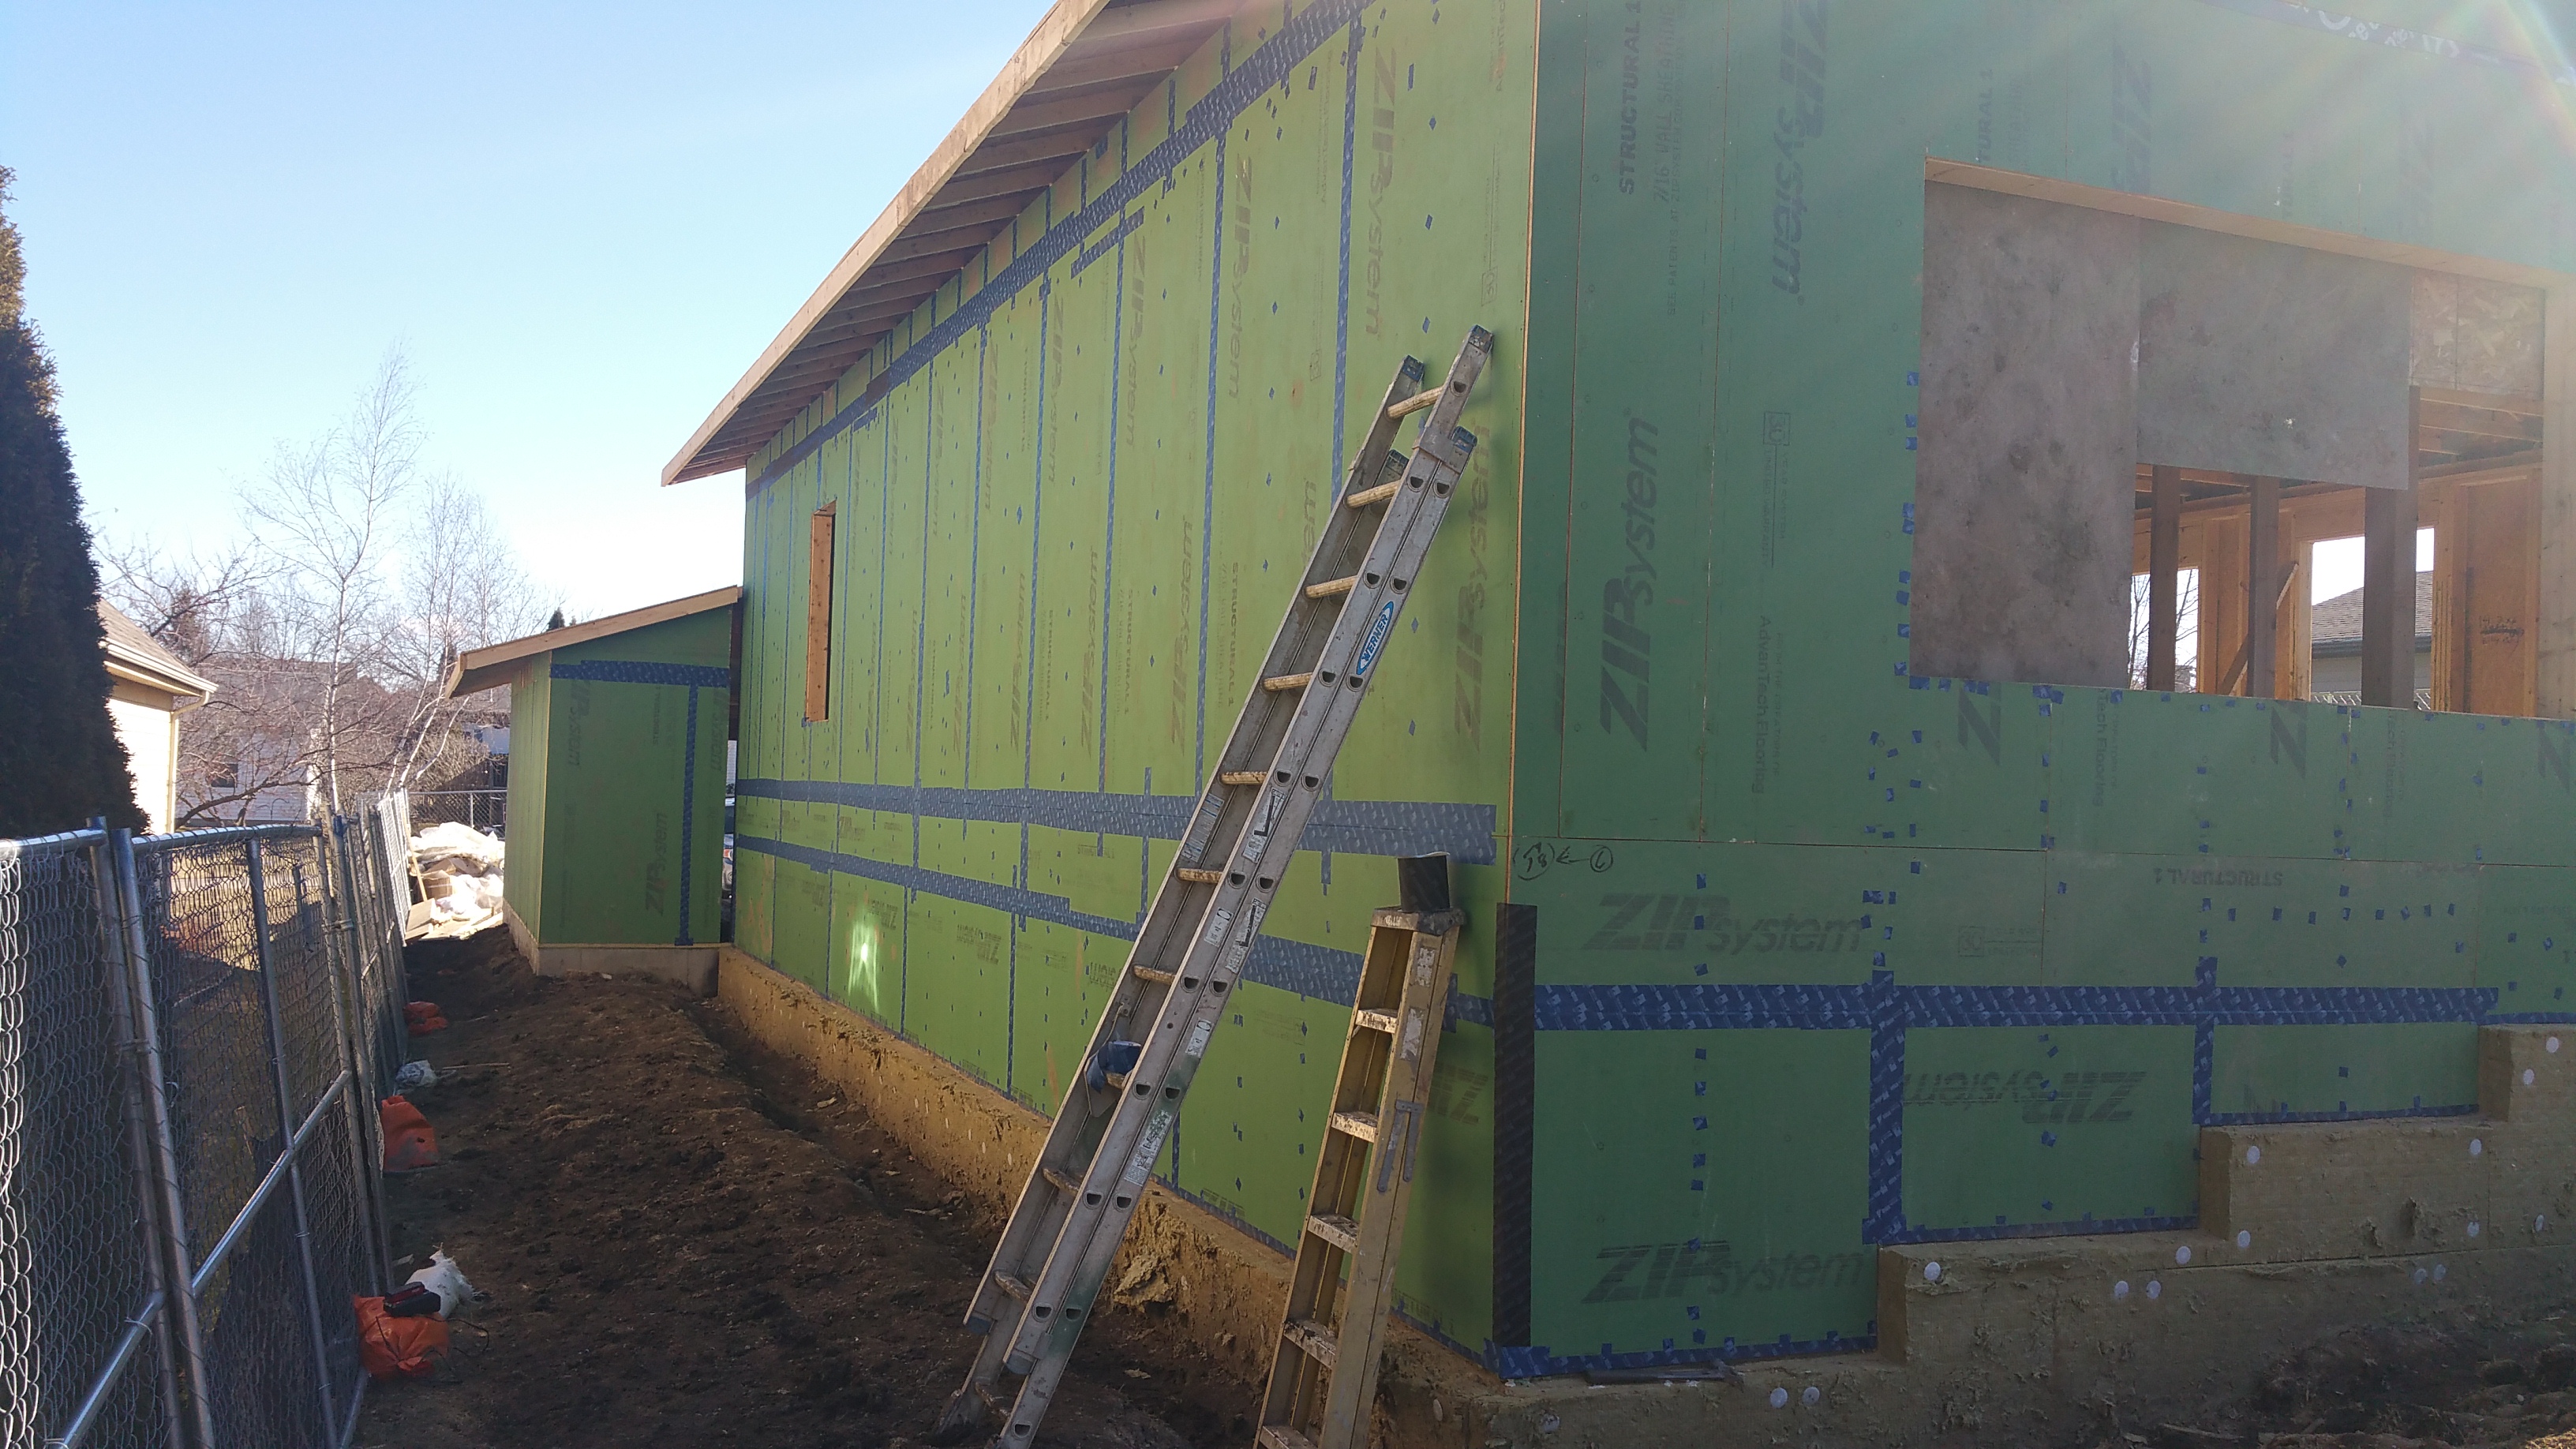
View of the West facade with Tescon Vana tape, along with the black Contega tape at larger seams (e.g. where the walls meet the roof trusses) and outside corners.

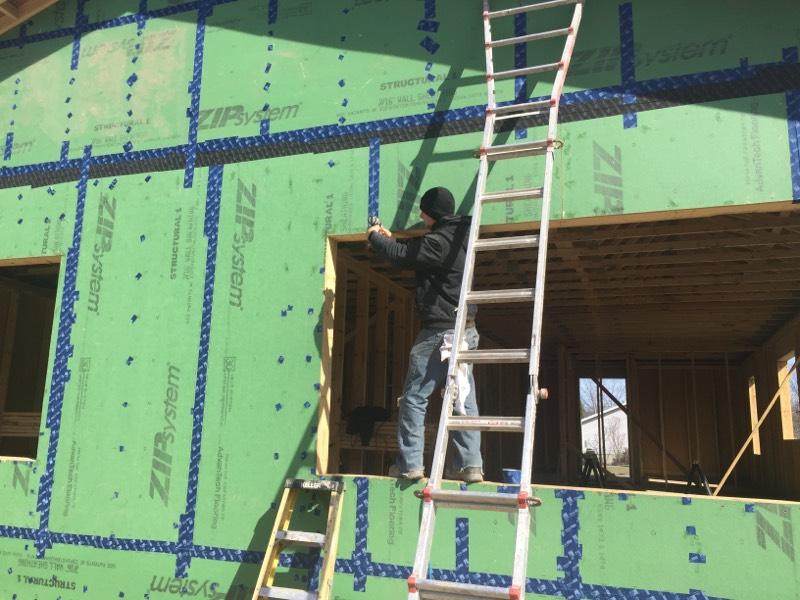
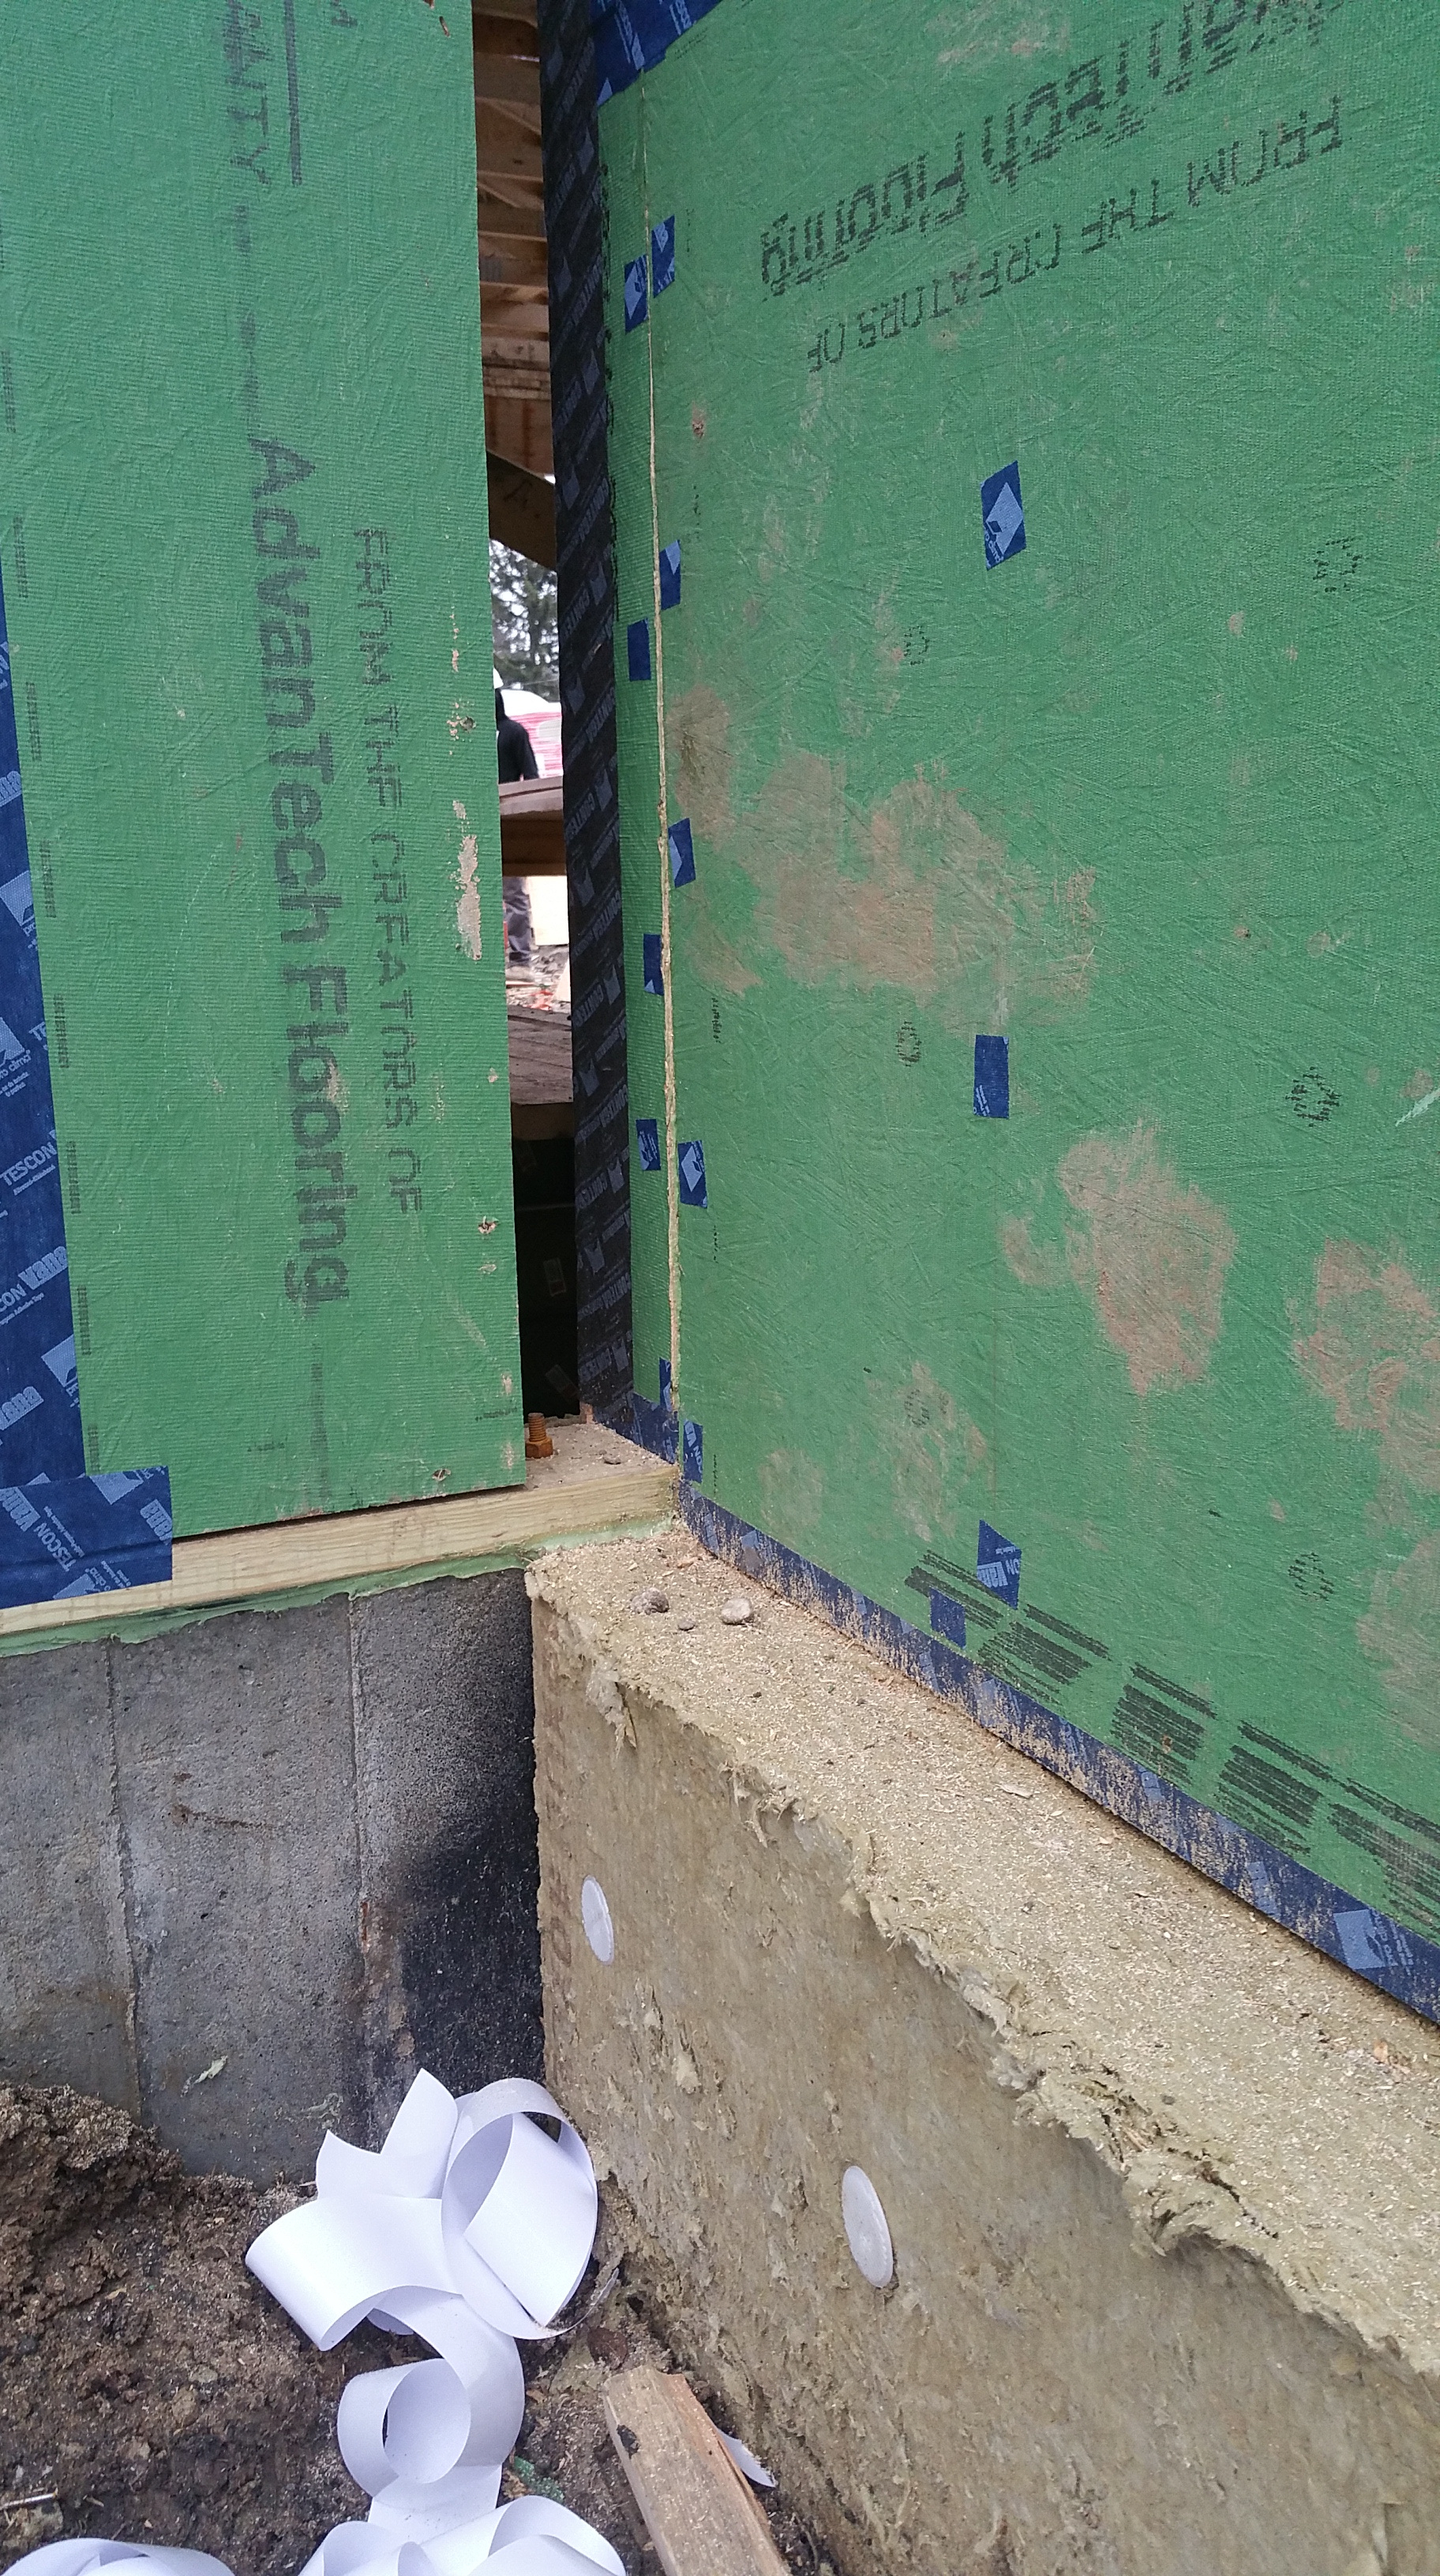
Once the Zip was fully installed, it was readily apparent that some of the seams, especially near the base of the first floor where a horizontal seam ran around the entire structure, would need to be tightened up.
Here’s a view looking down on one of these areas where the Zip sheathing did not sit flat against the framing members:
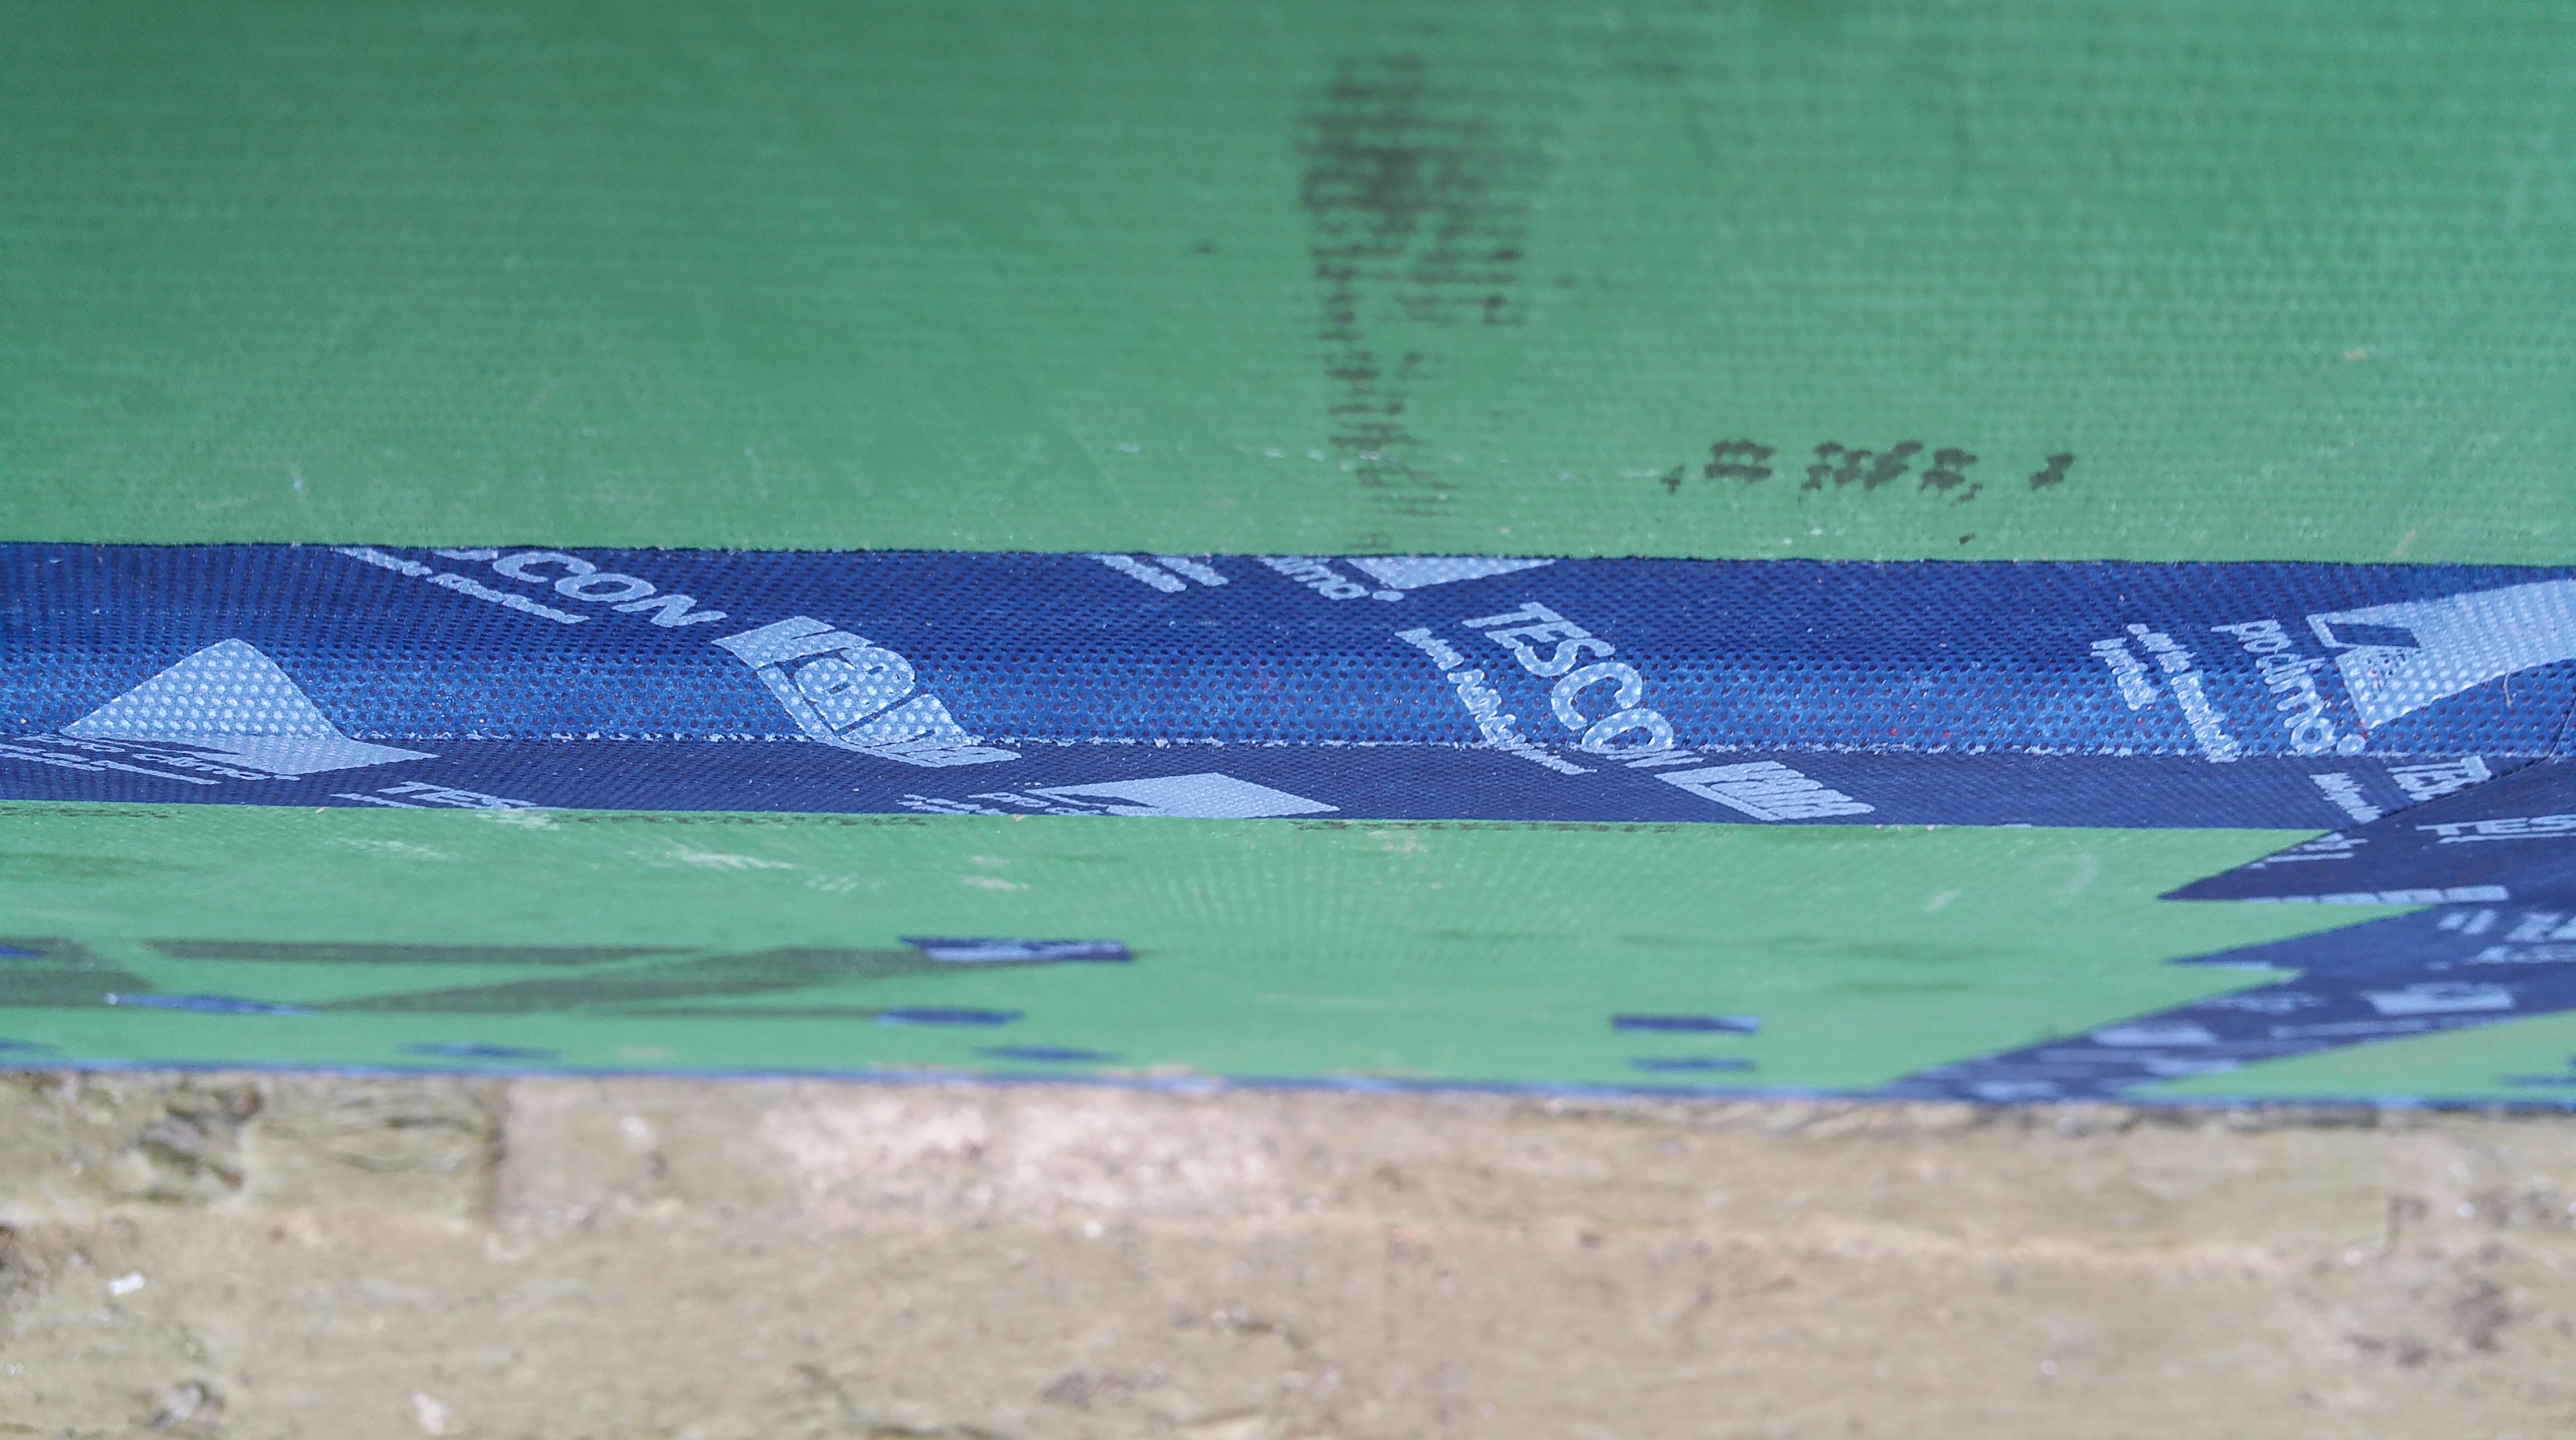
Using a 1×4 in each stud bay, I was able to pull the seam in the Zip sheathing together. It wasn’t always perfect, but the difference was visibly significant and in most areas well worth the effort.
Placing a 1×4 into position over the seam in the Zip, I would drive a couple of screws towards the exterior.
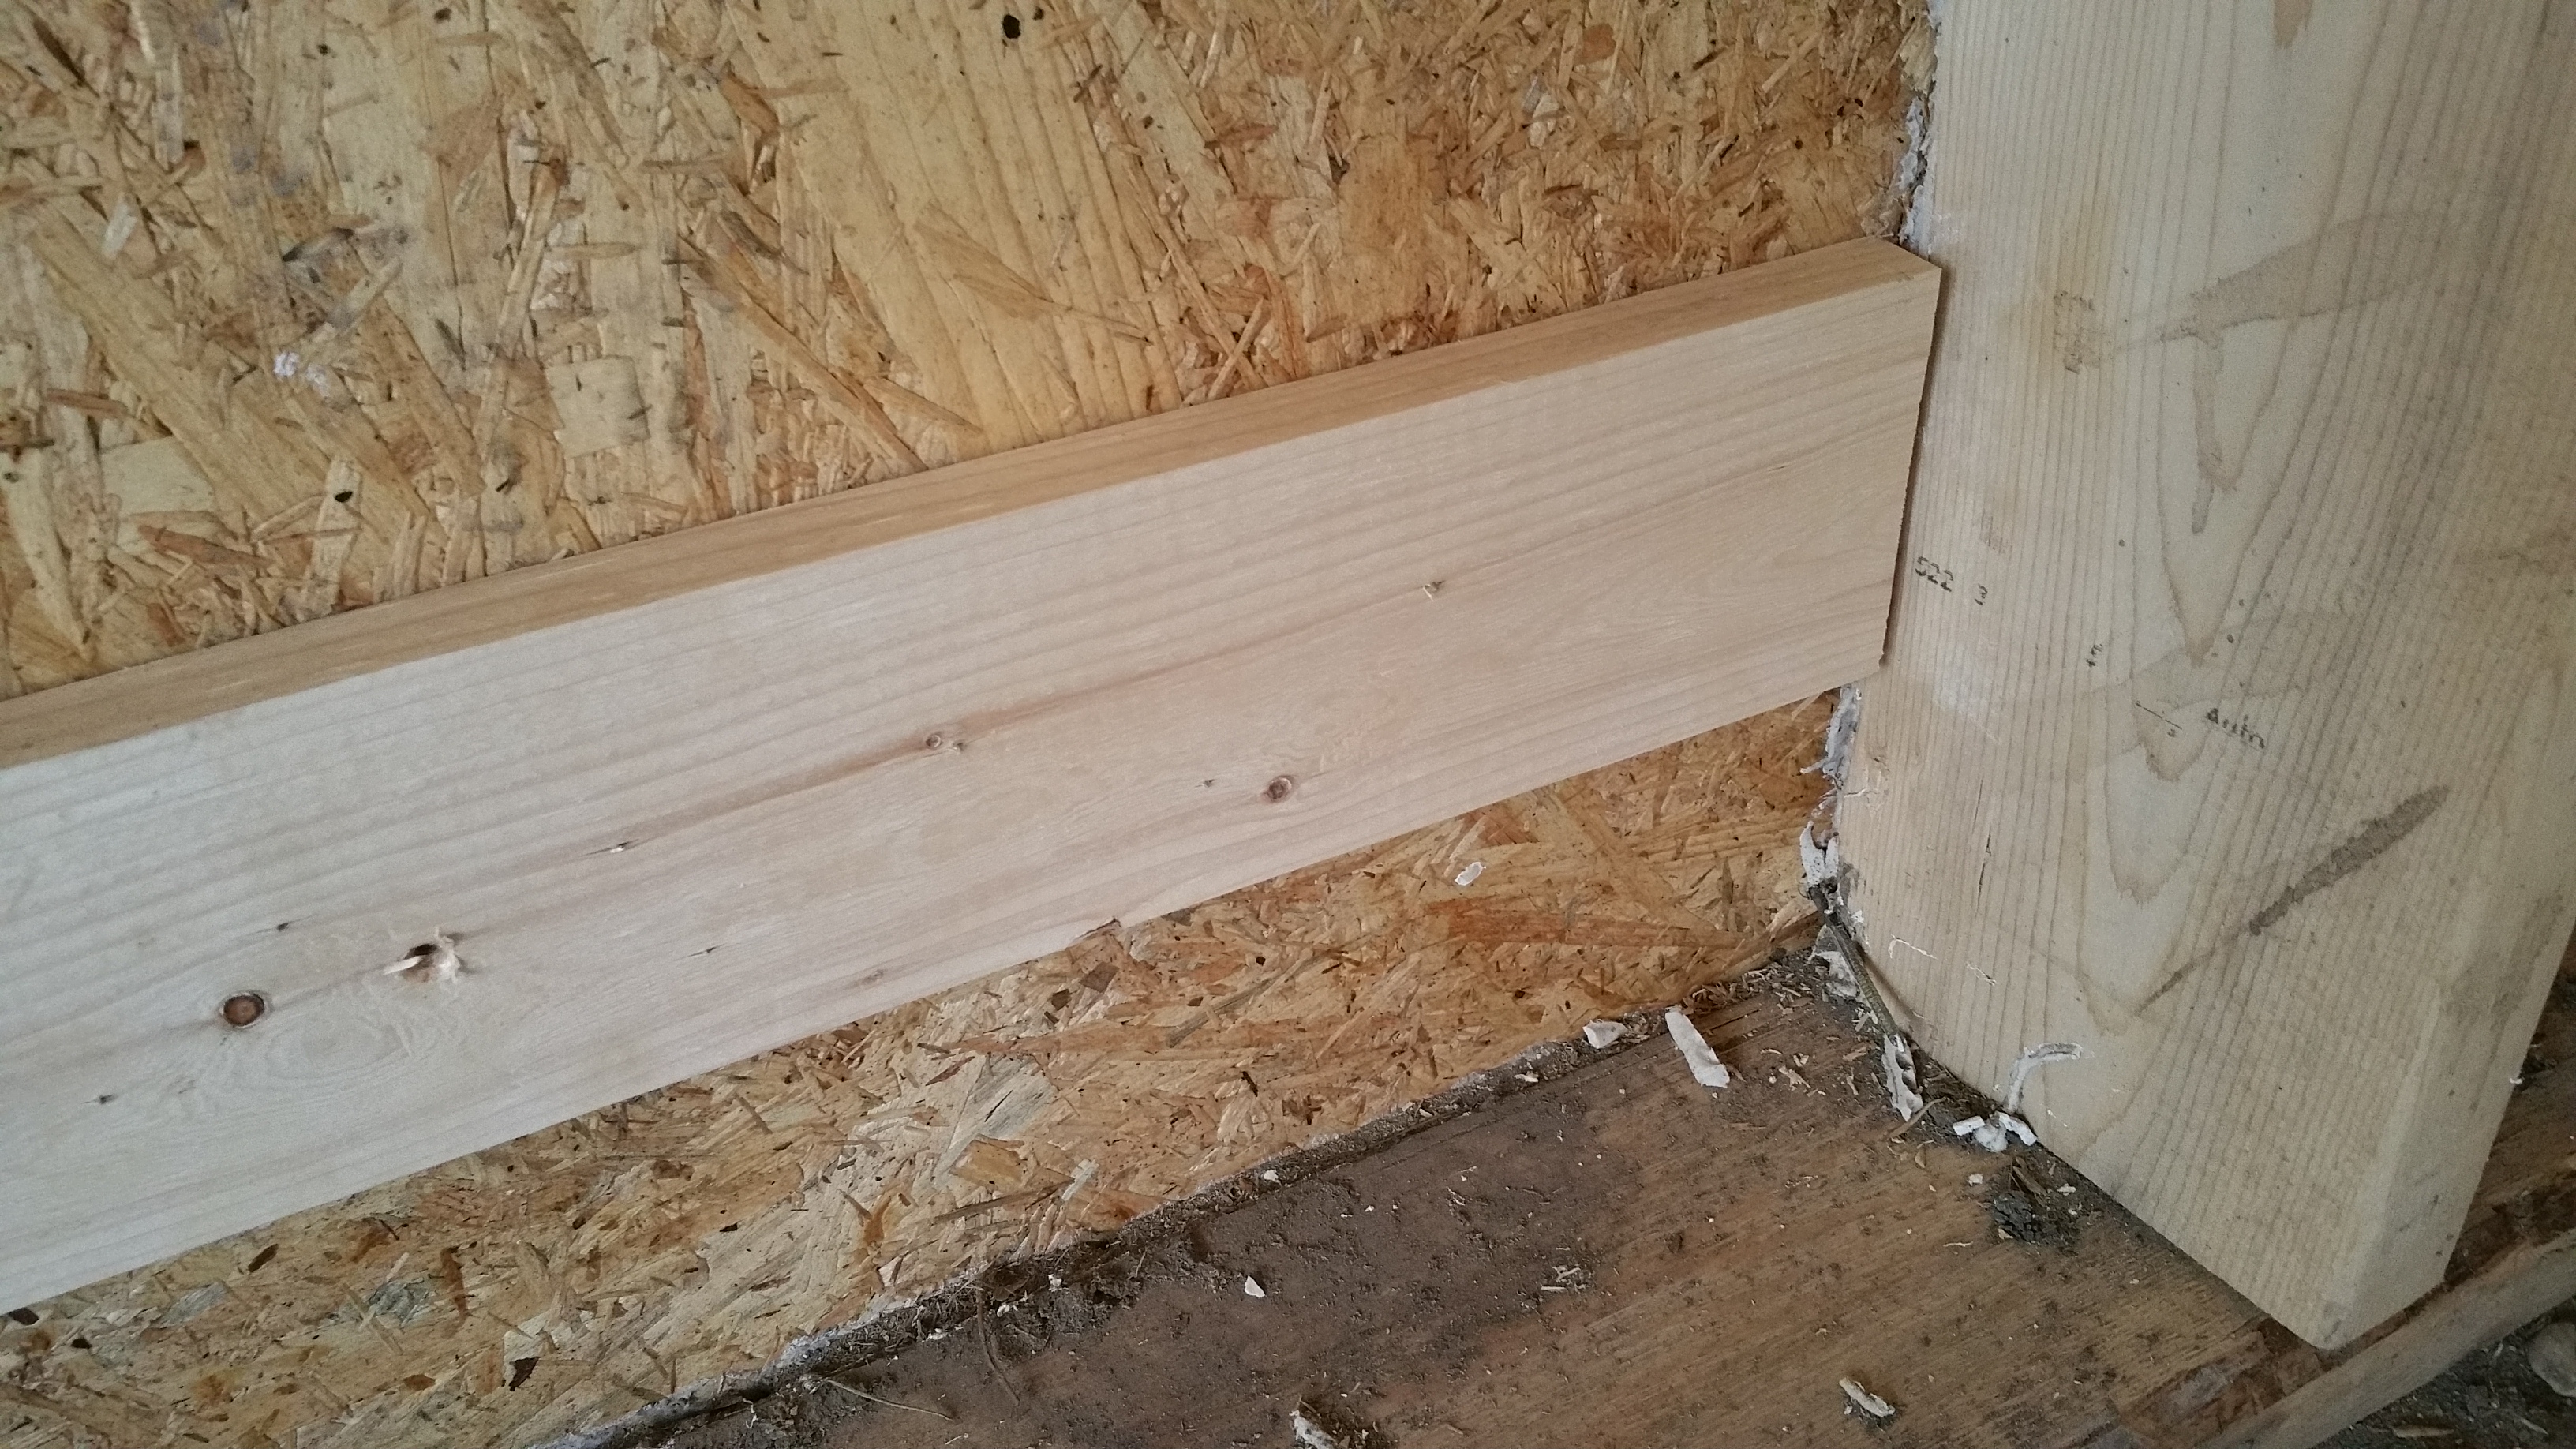

Once securely attached from the interior, I went outside and drove several screws into the Zip, both above and below the seam in the Zip, to pull the seam tight to the 1×4. At that point, I could go back inside and remove the two screws that were driven towards the exterior.
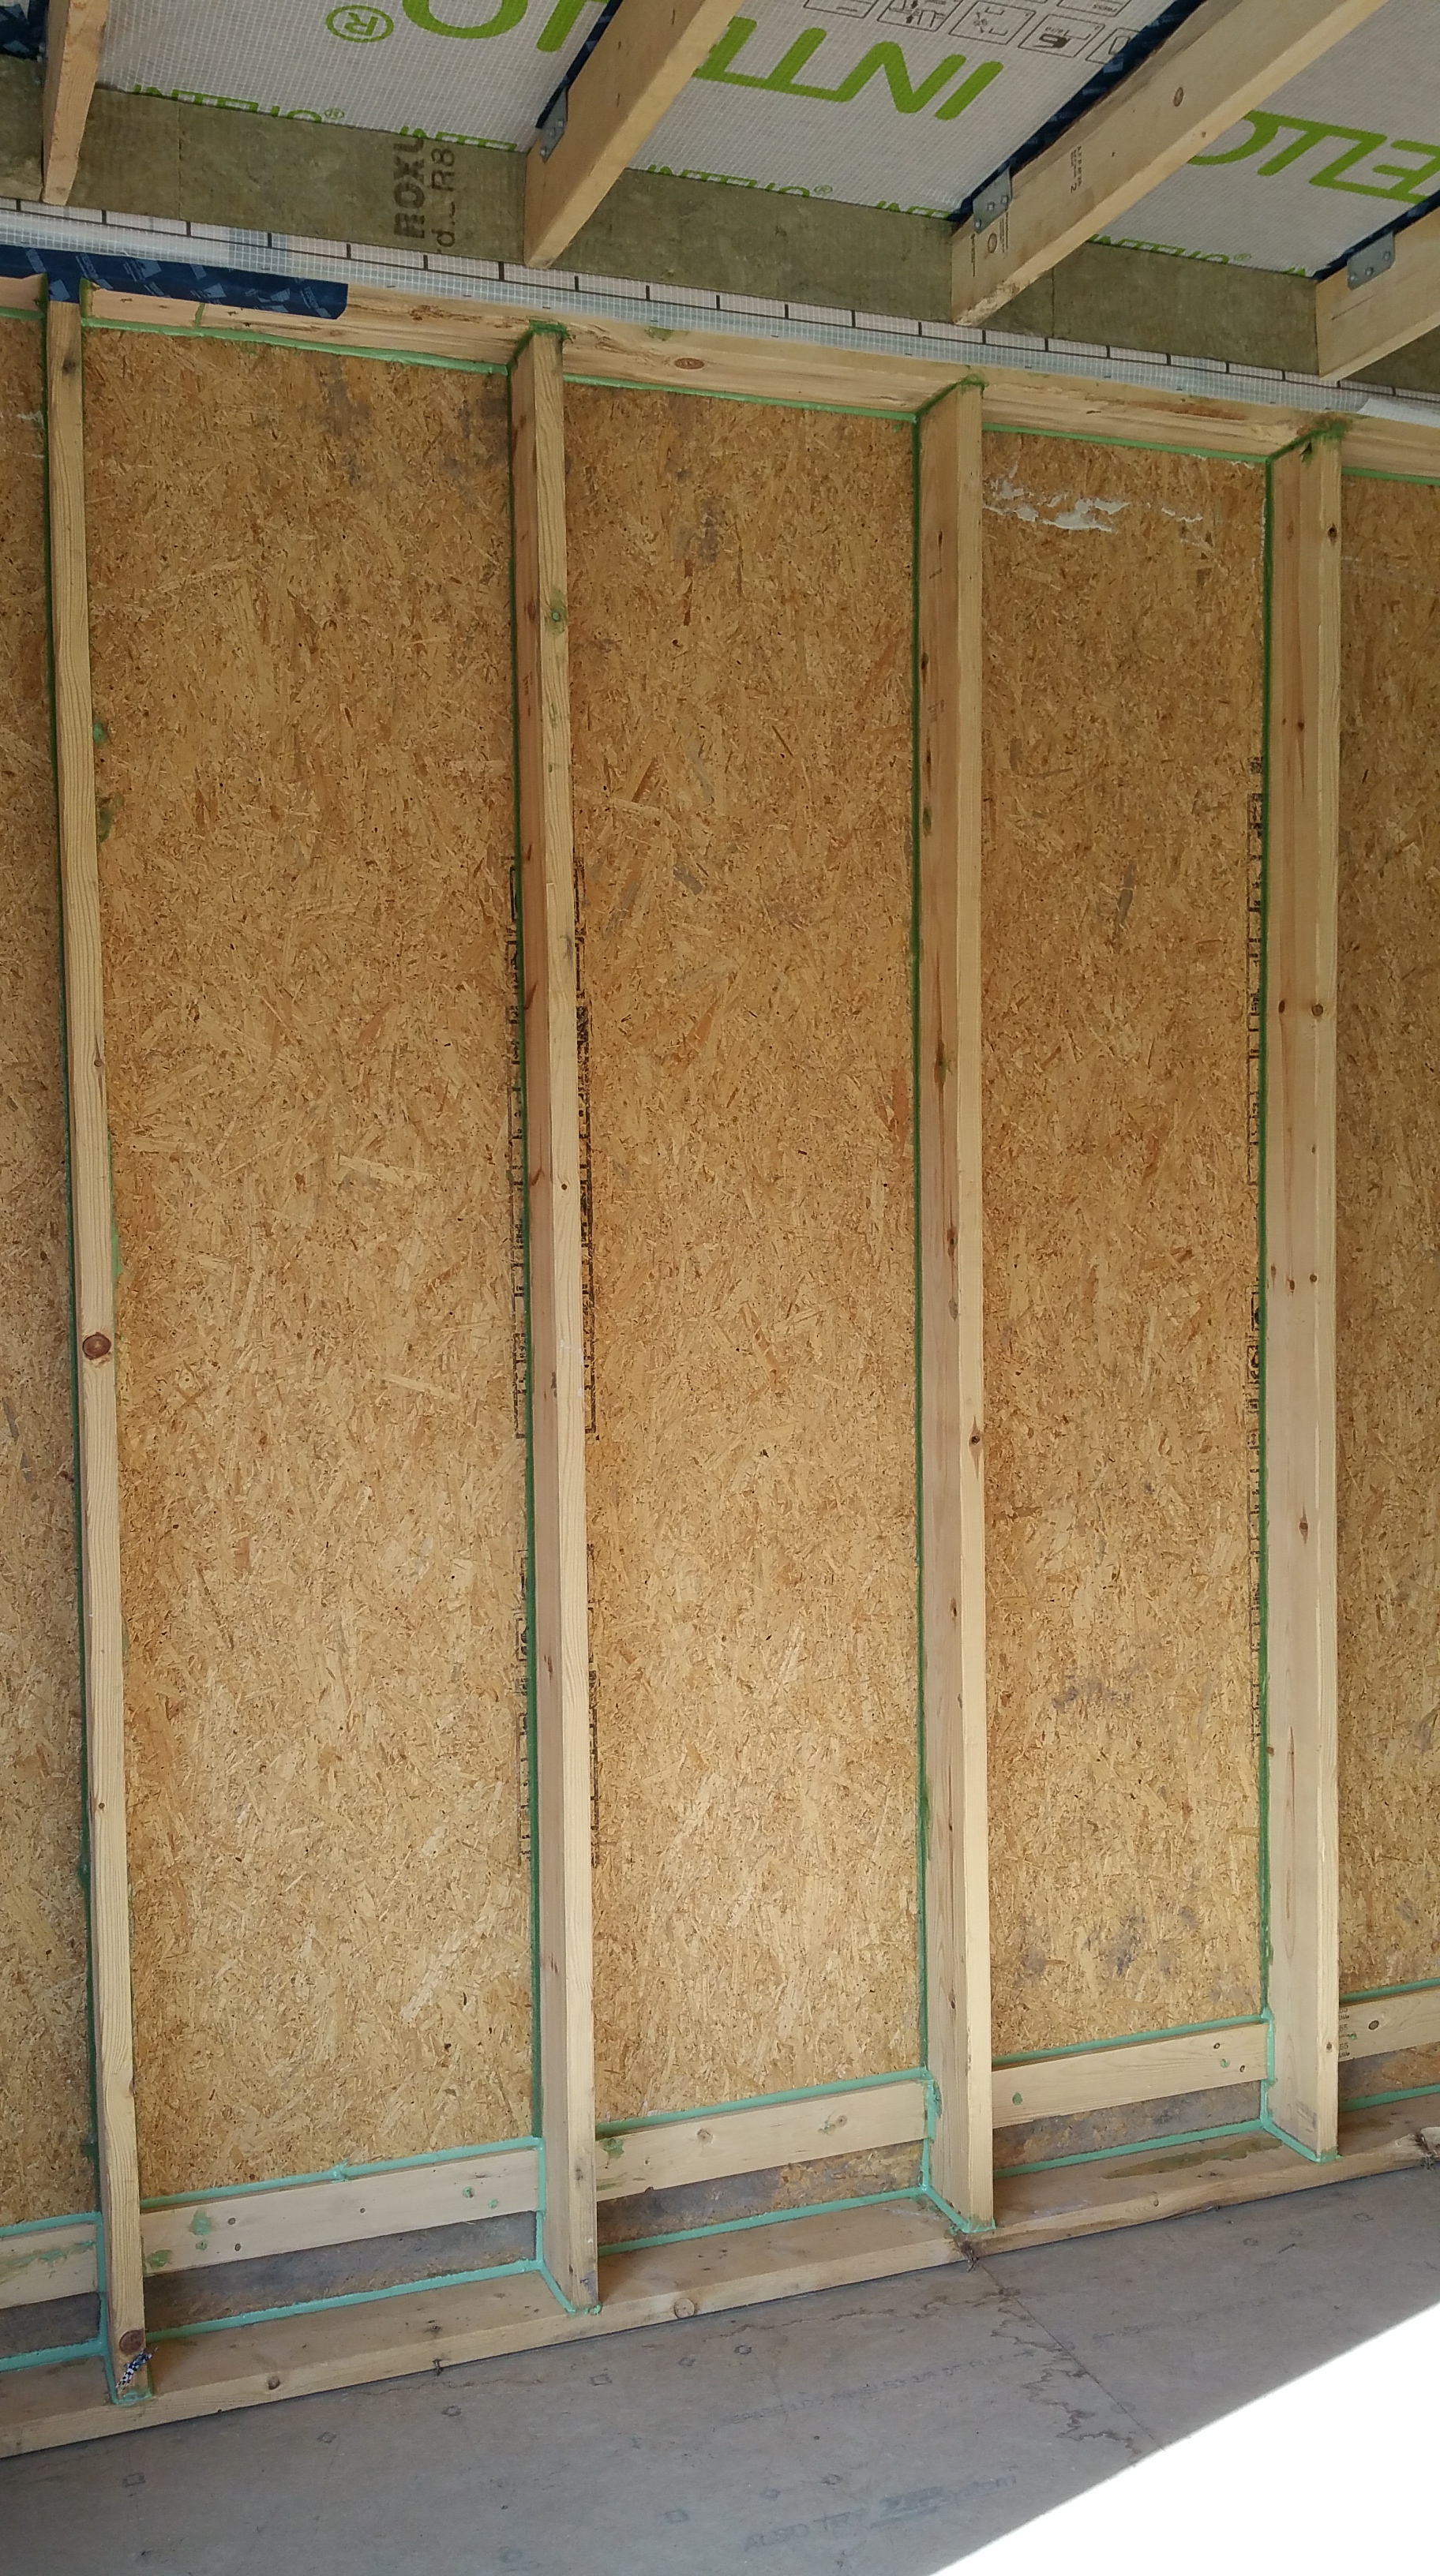
In addition to air sealing the exterior side of the Zip sheathing, I also invested some time in air sealing the interior side of the Zip as well. Below is a long view of several stud bays with 1×4’s installed, but before air sealing gaps around the 1×4’s and lower areas of the stud bays with HF Sealant.
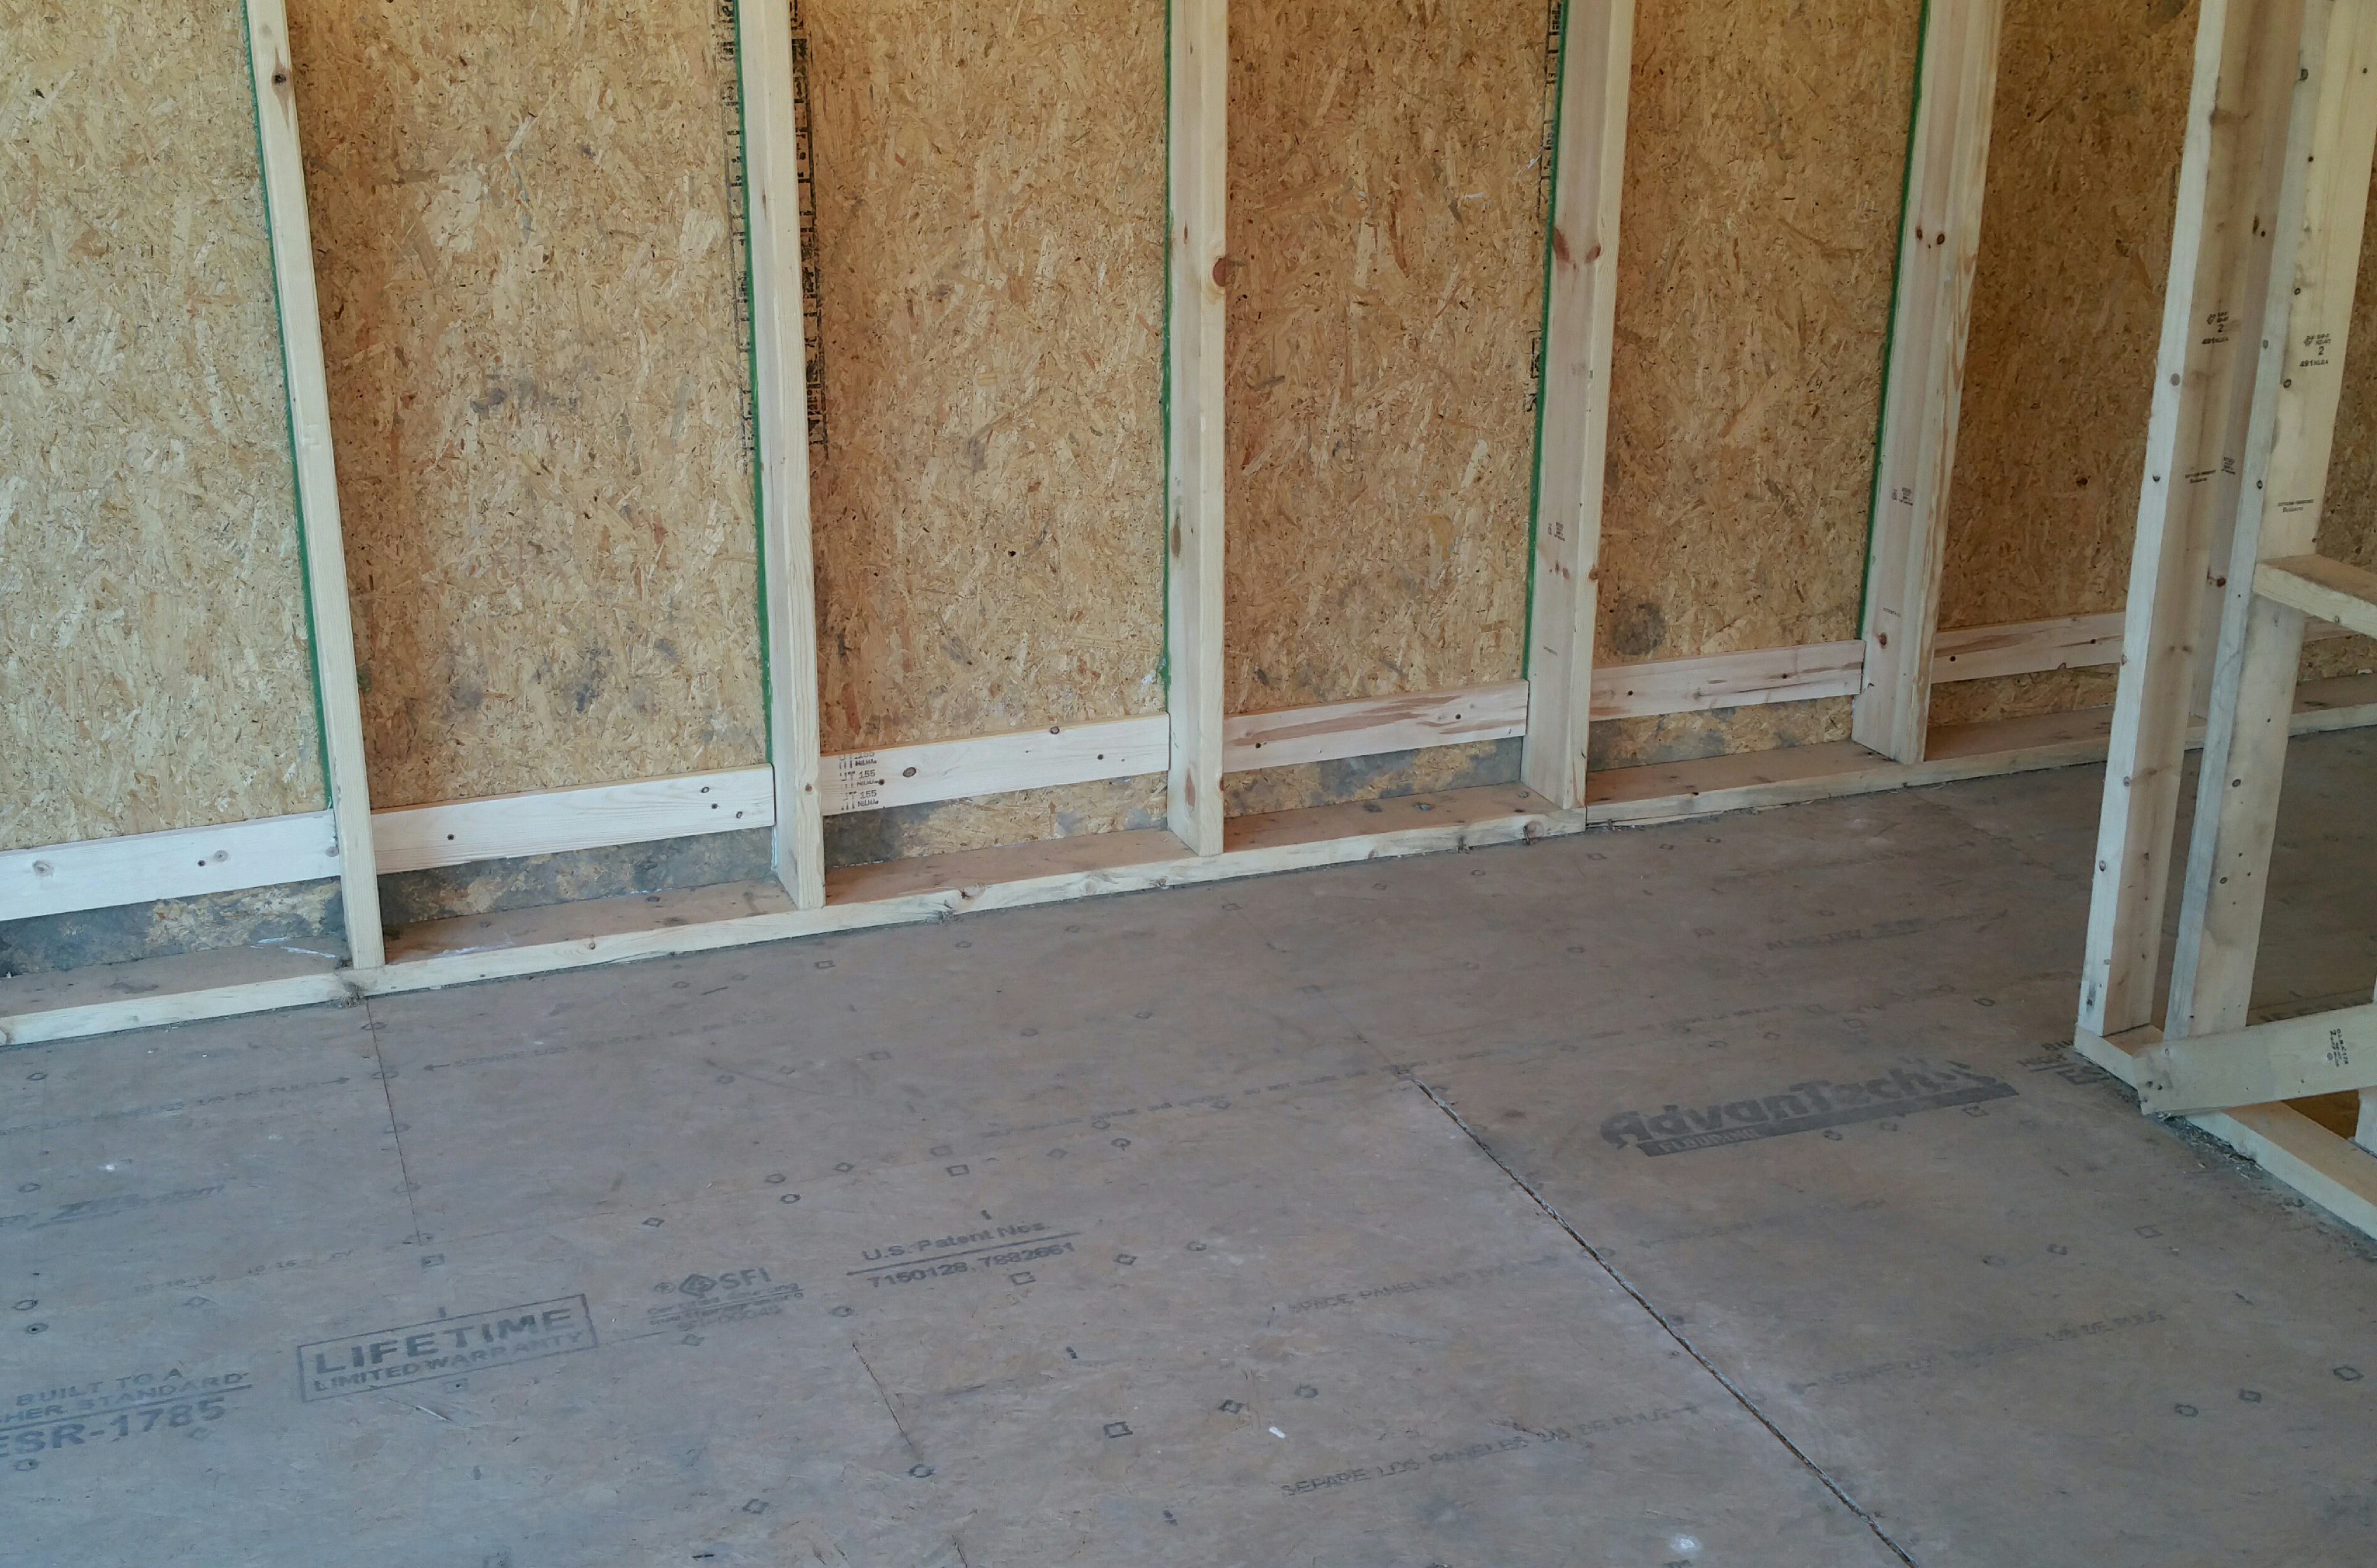
Long view after applying the HF Sealant:
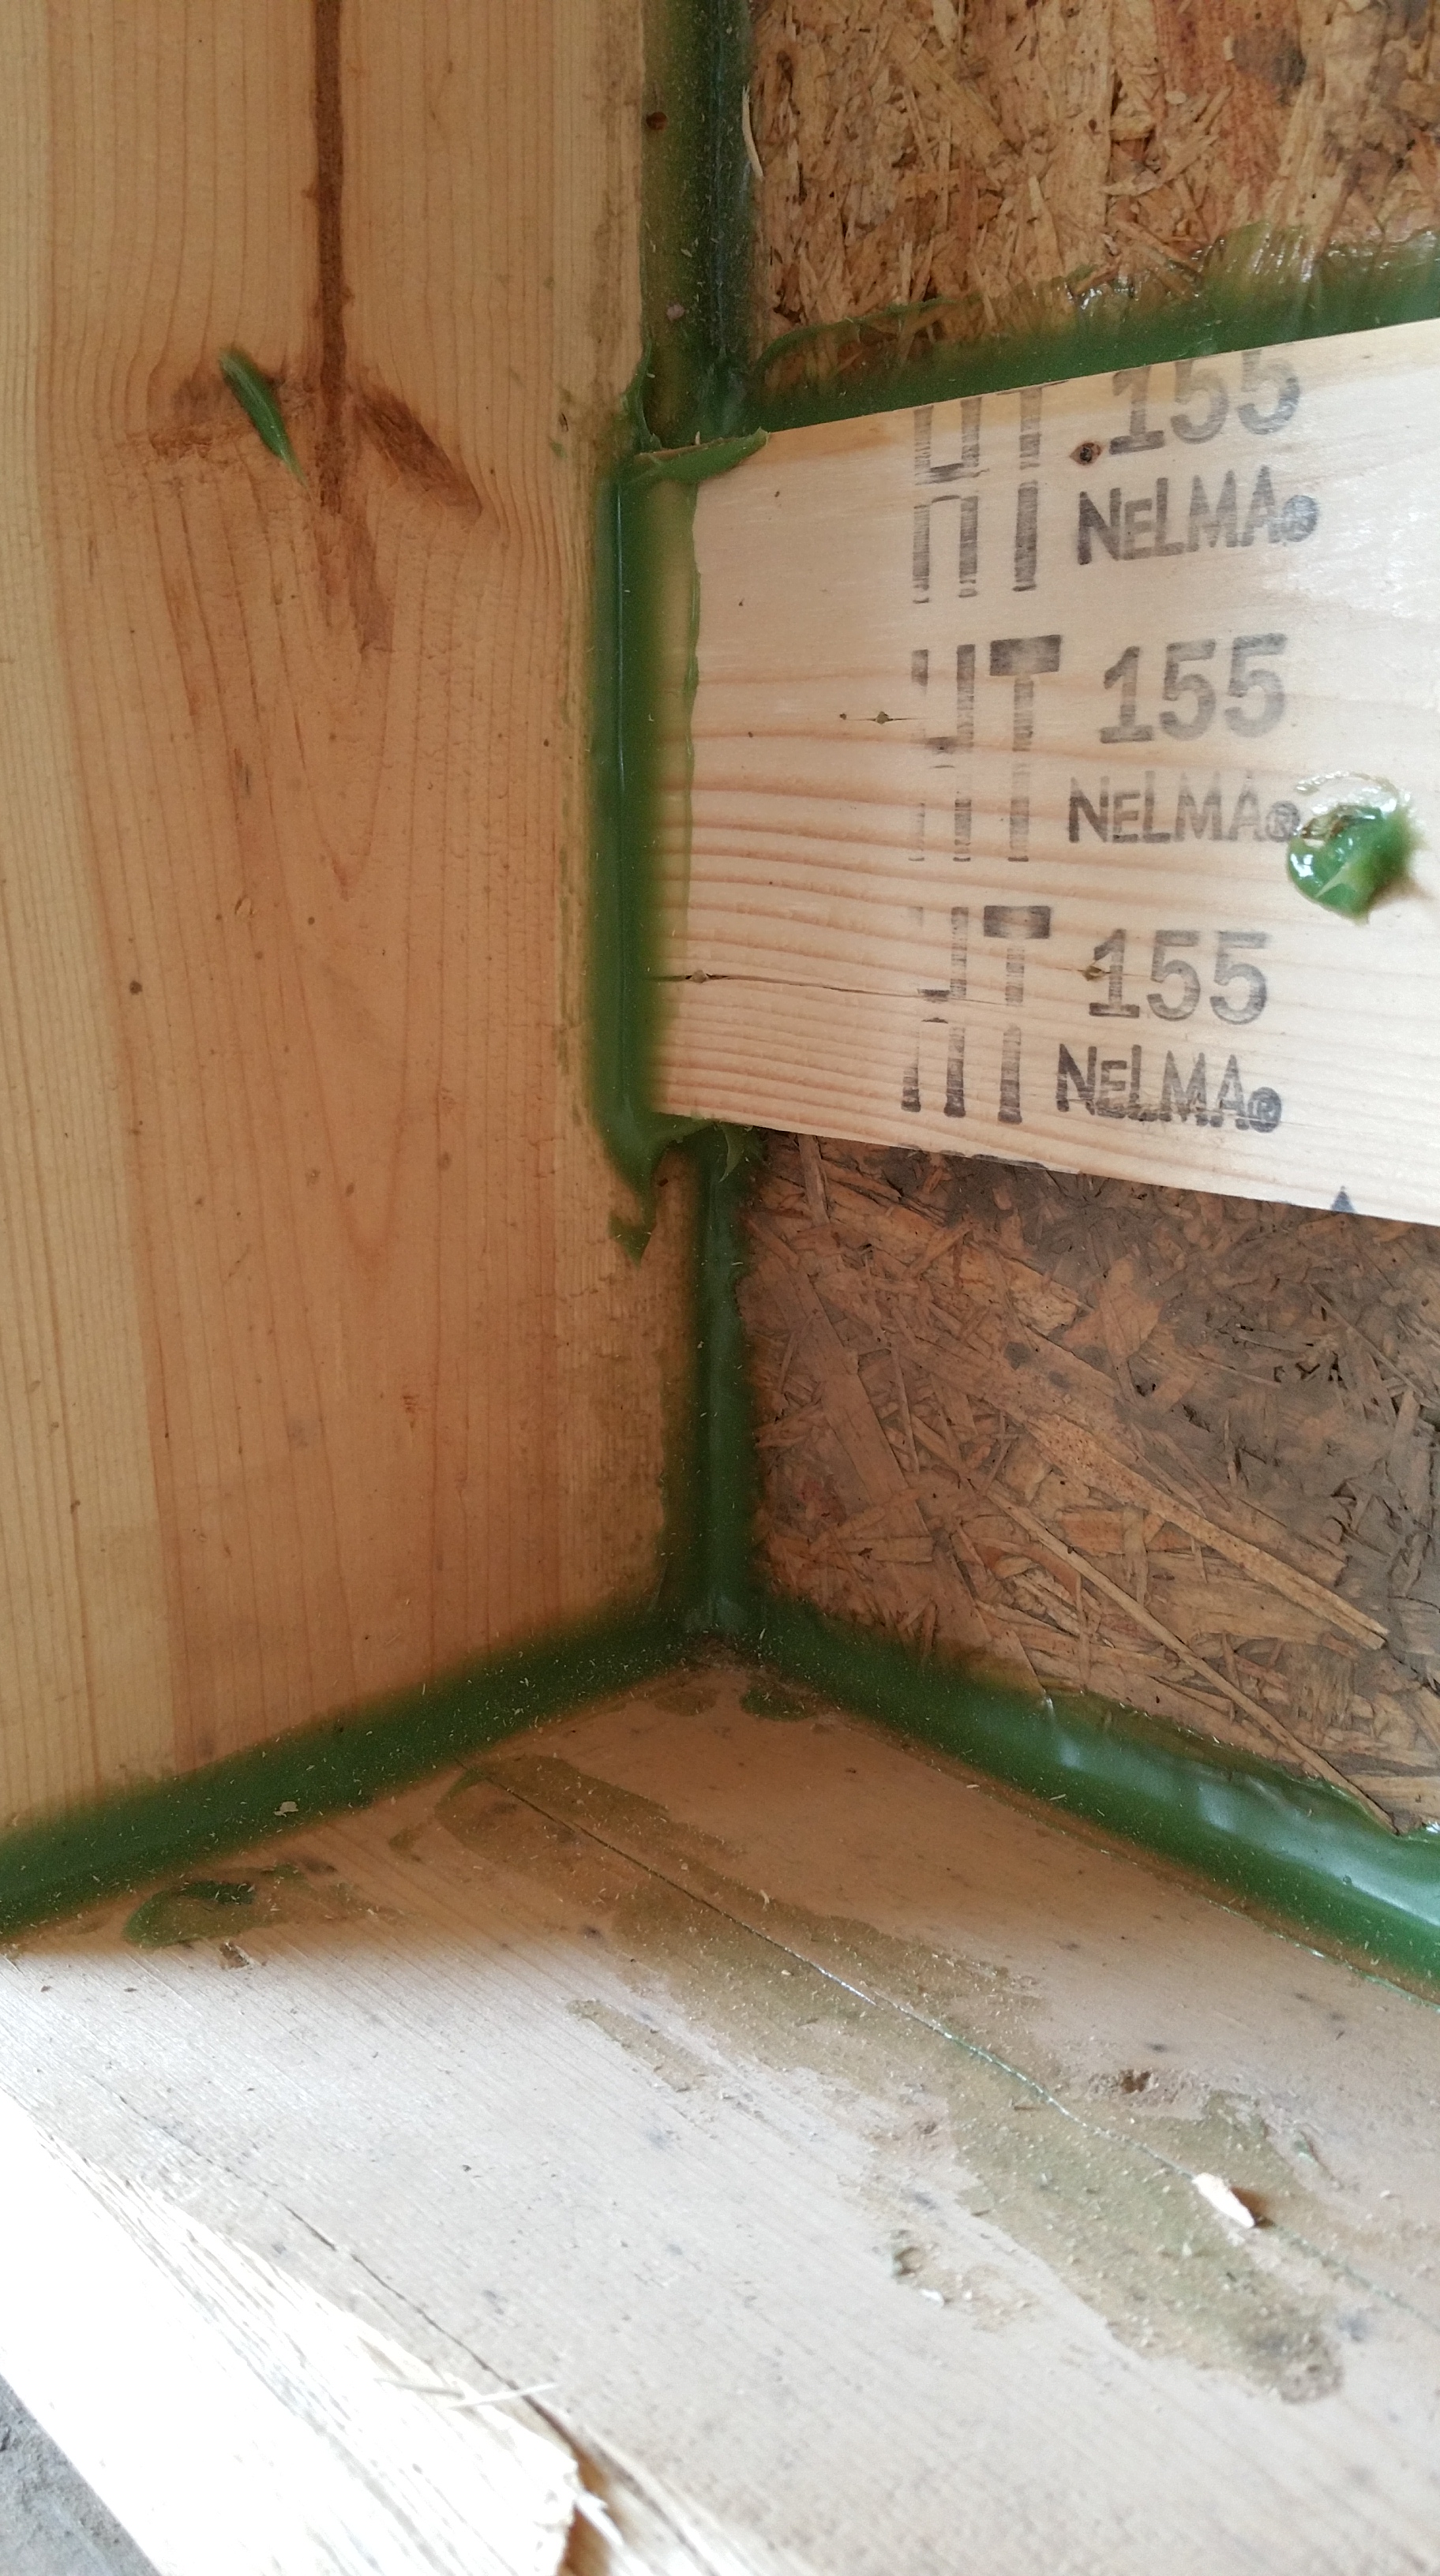
Close-up of the interior side of the Zip sheathing meeting a 2×6 framing member in a stud bay after applying a thick bead of HF Sealant:

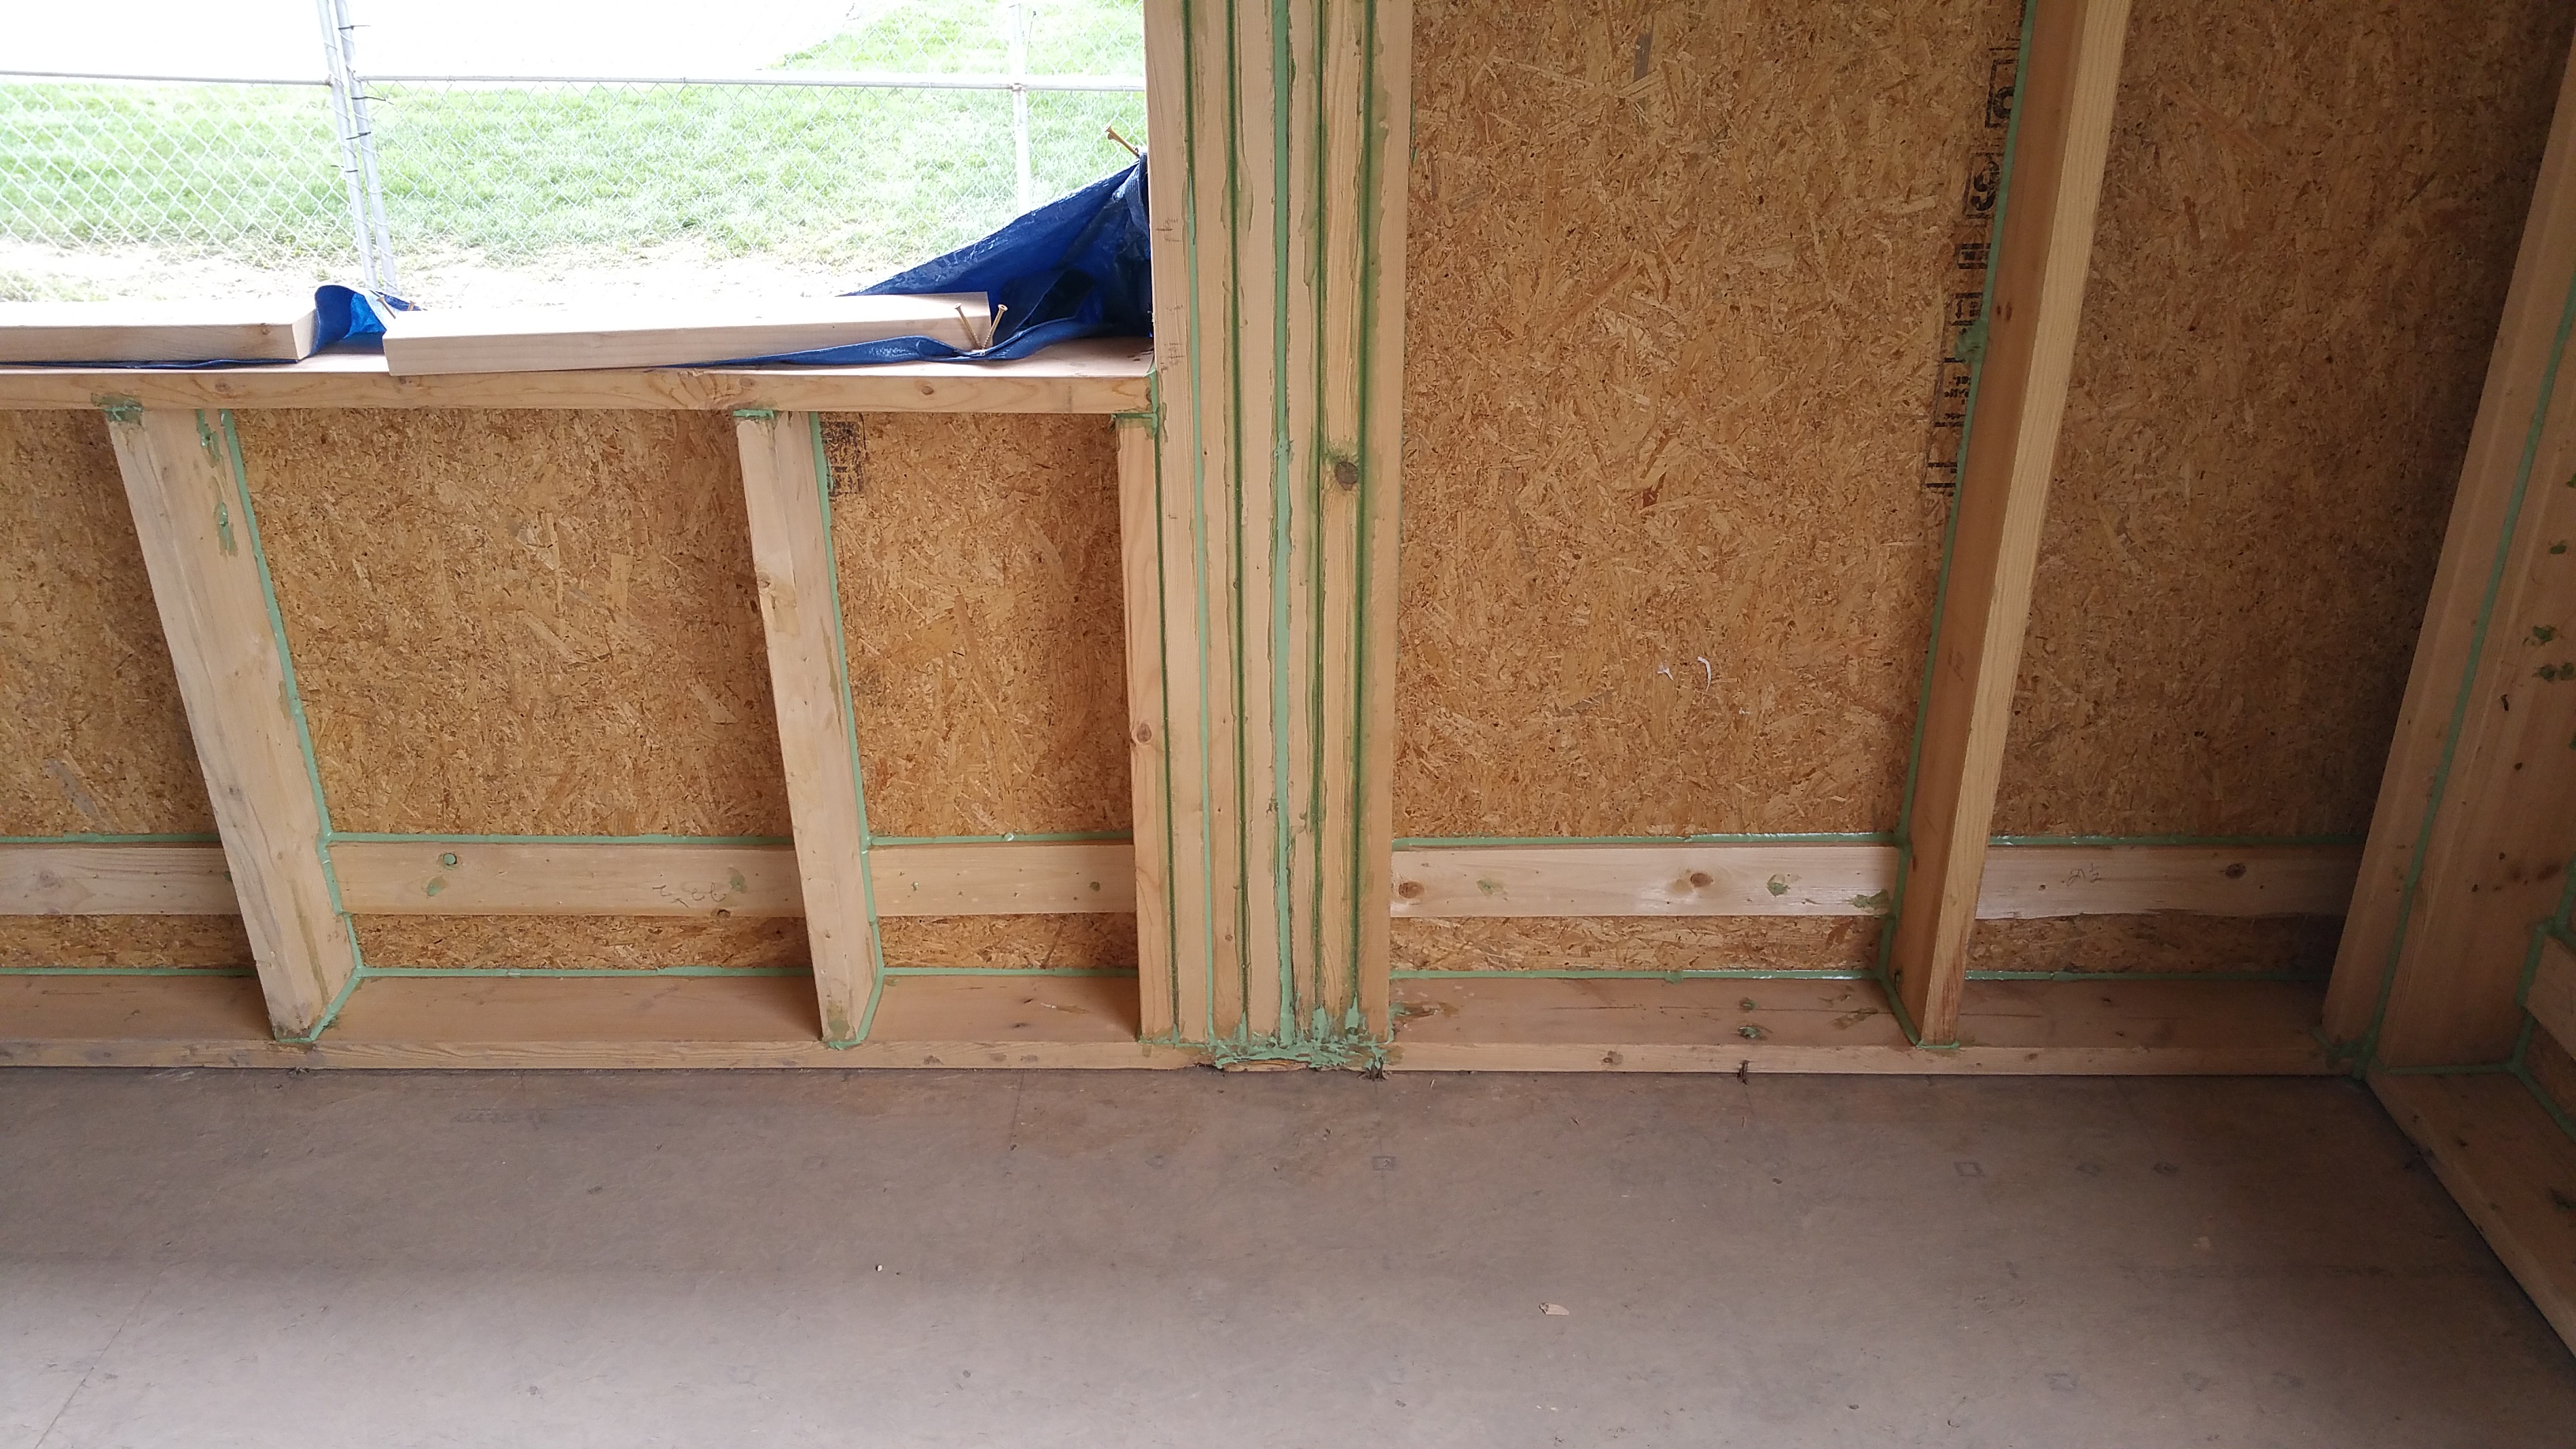
Close-up of lower area of a stud bay after air sealing with the HF Sealant (it transitions from a light to darker green as it dries):
I held off on using the HF Sealant at the wall sill plate/subfloor connection until just prior to installing the Intello on the walls since this area constantly attracts dirt and debris.
Sealing on the interior side with HF Sealant, even between vertical framing members, means that even if there are any weaknesses in either the Zip sheathing or the Tescon Vana tape at these points, air won’t find an easy way in, since it will be blocked from the interior side as well (there won’t be a difference in air pressure to help the outdoor air make its way indoors).
This kind of redundancy in air sealing should give the house long-term protection against air leaks, thereby aiding the long-term durability of the structure, as well as making it a much more comfortable environment to live in.
I also spent some time on the roof trusses, sealing around nails, the top plates of the exterior walls, and the many Zip-framing member connections in what will eventually be the attic.

This had less to do with air sealing and more to do with preventing any potential water intrusion since this area is technically above our ceiling air barrier (the Intello), which is detailed here:
Ceiling Details (Air Sealing #4)
Inventory of Penetrations through the Zip Air Barrier
I made a mock wall assembly before construction began, which I discussed here:
Wall Assembly
This proved helpful when explaining to the various subs how to help me protect the air barrier — especially when it came time to drill holes through the Zip sheathing. Of particular importance was making holes closer to the center of a stud bay, as opposed to hugging a corner or side of one of the 2×6 framing members. A hole cut too close to a stud or a roof truss is much harder to properly air seal.

In effect, any time a sub had to make a penetration through the air barrier we discussed the details, and once the cut was made I immediately air sealed the penetration both on the exterior and interior side.
By sealing each hole in the Zip on both sides, again I hope it ensures the long-term durability of the overall structure. The main argument for this strategy assumes the exterior side of the sheathing will face more extreme temperatures, and fluctuations in humidity, and presumably even wind-drive rain if/when it gets past the siding and 4″ of Roxul insulation, putting it at greater risk of failure (especially in the long term). By taking the time to air seal the interior side, it just gives the overall air barrier, and therefore the structure, a better chance at avoiding air and water intrusion (that’s the goal anyway).
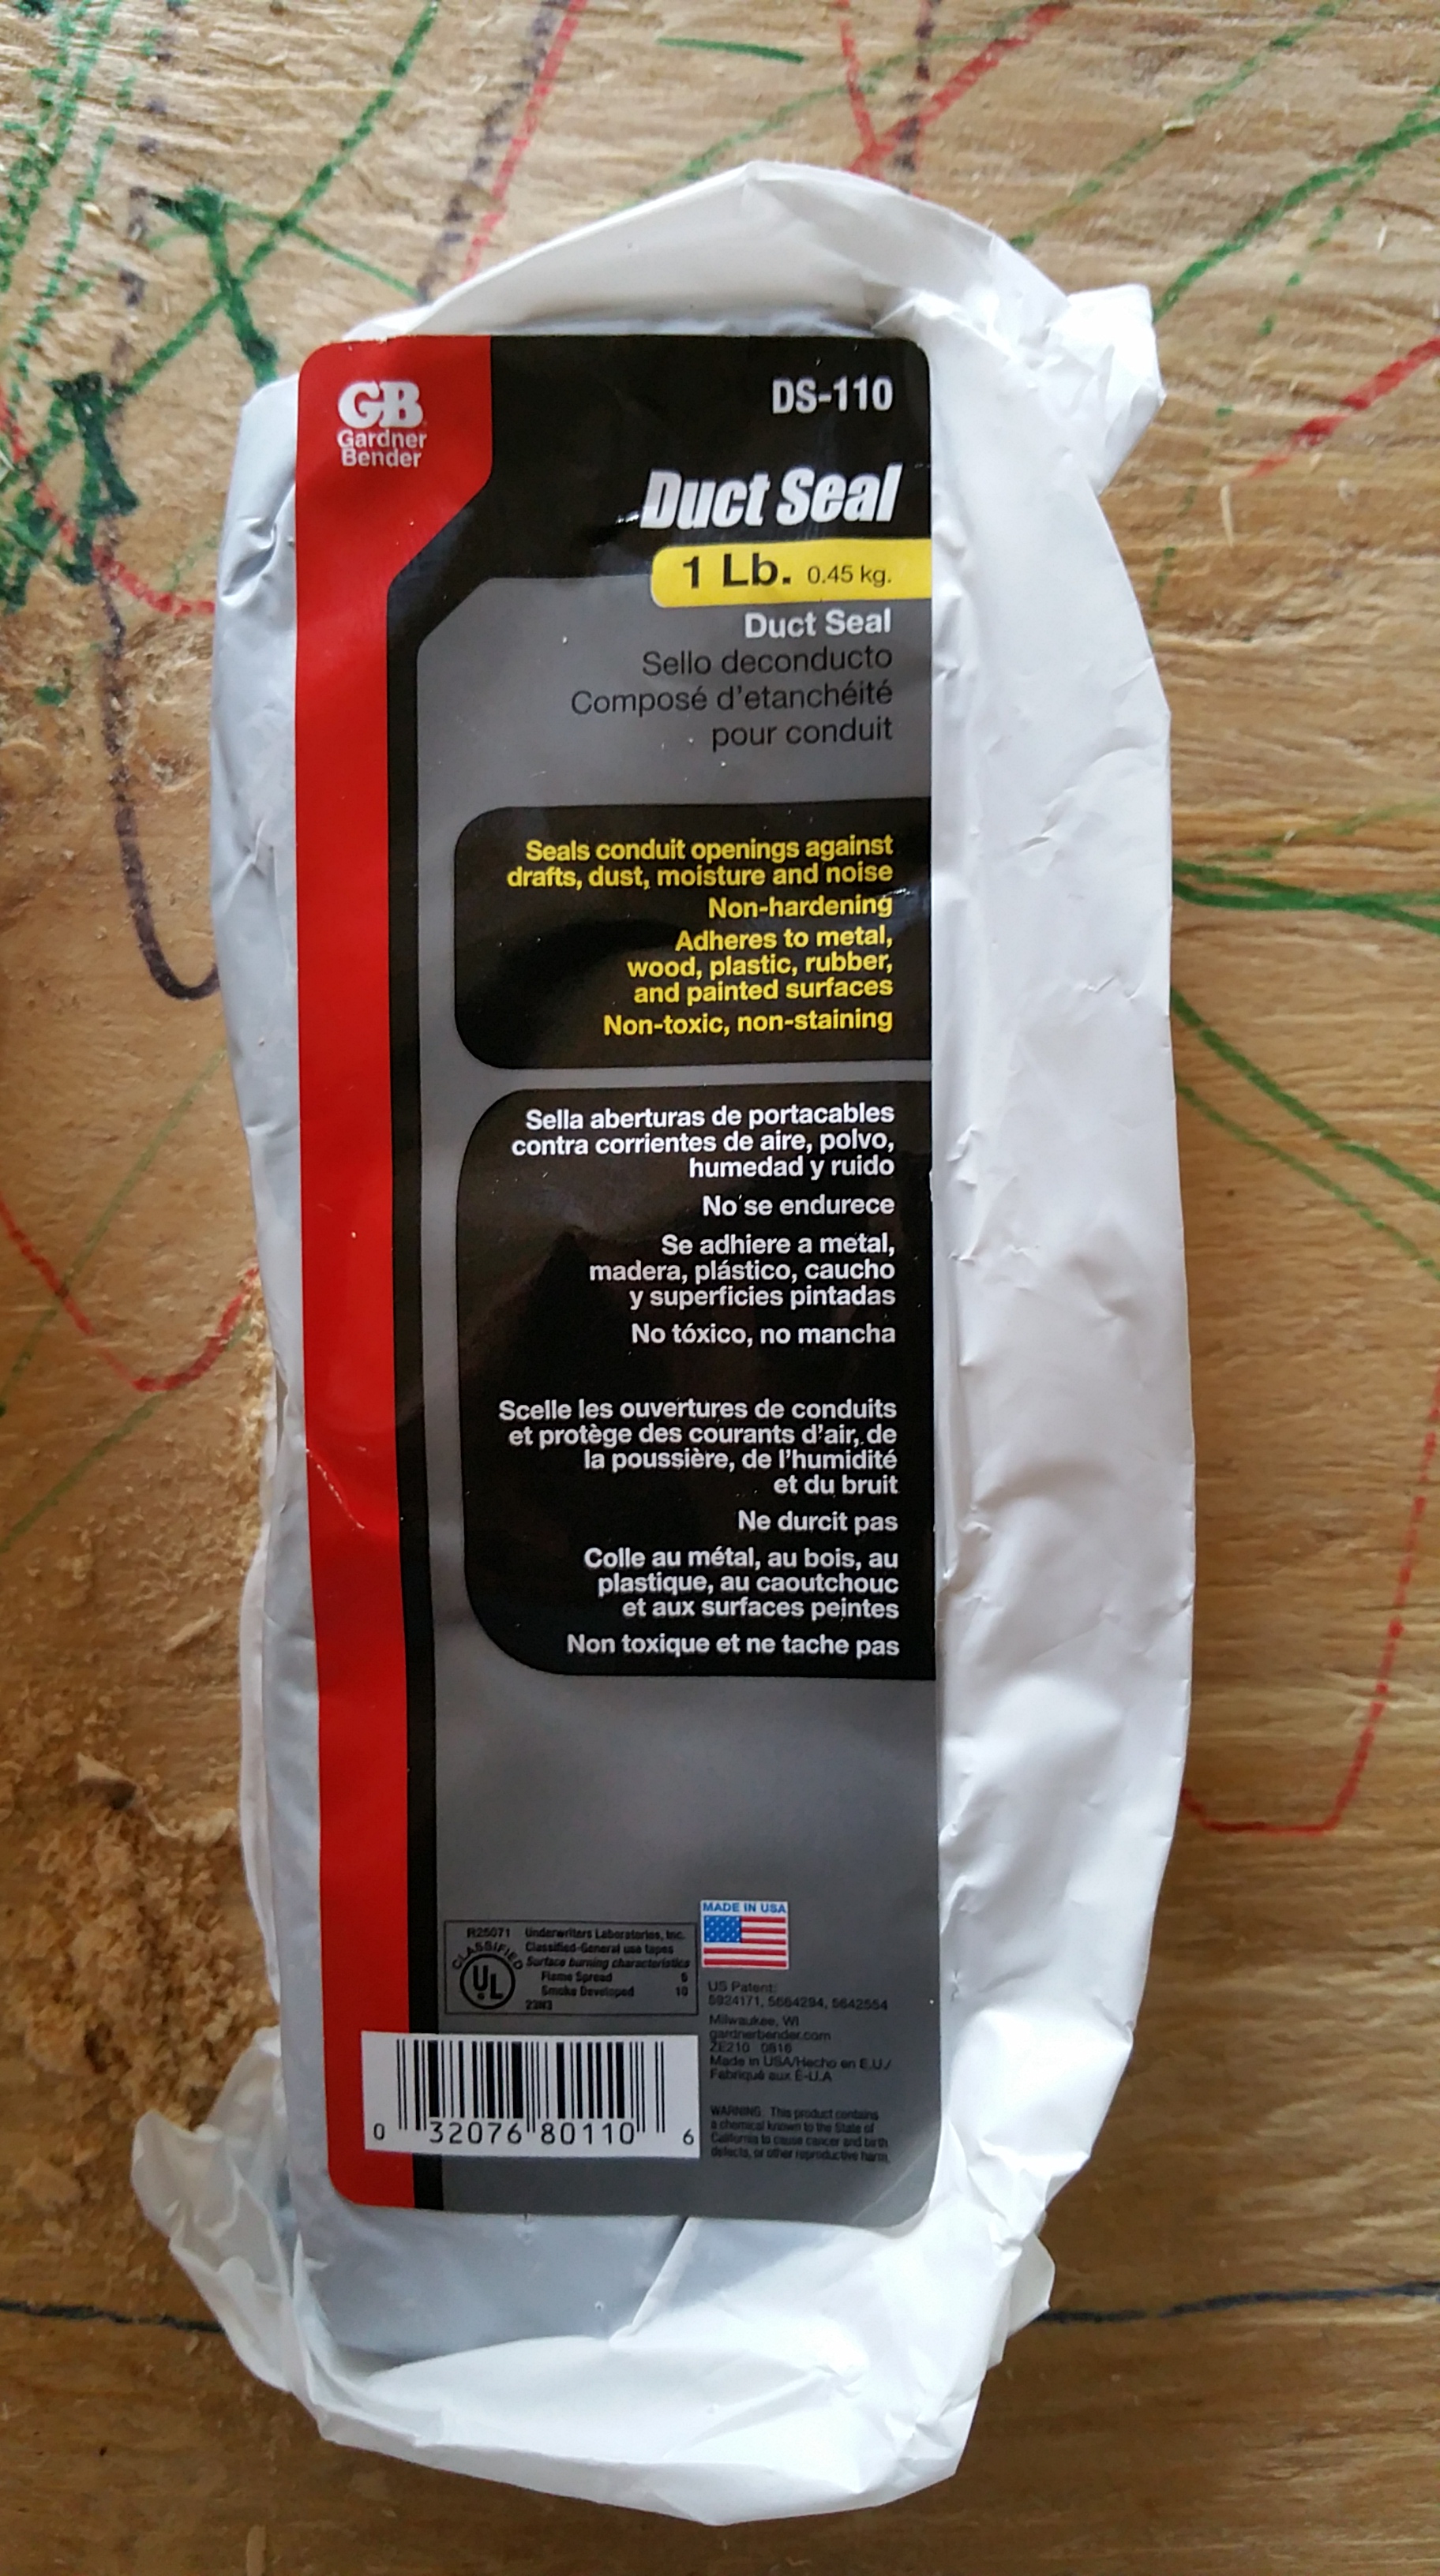
For air sealing I used a mix of tapes, HF sealant (later even some Prosoco products), EPDM Roflex gaskets, and duct seal.
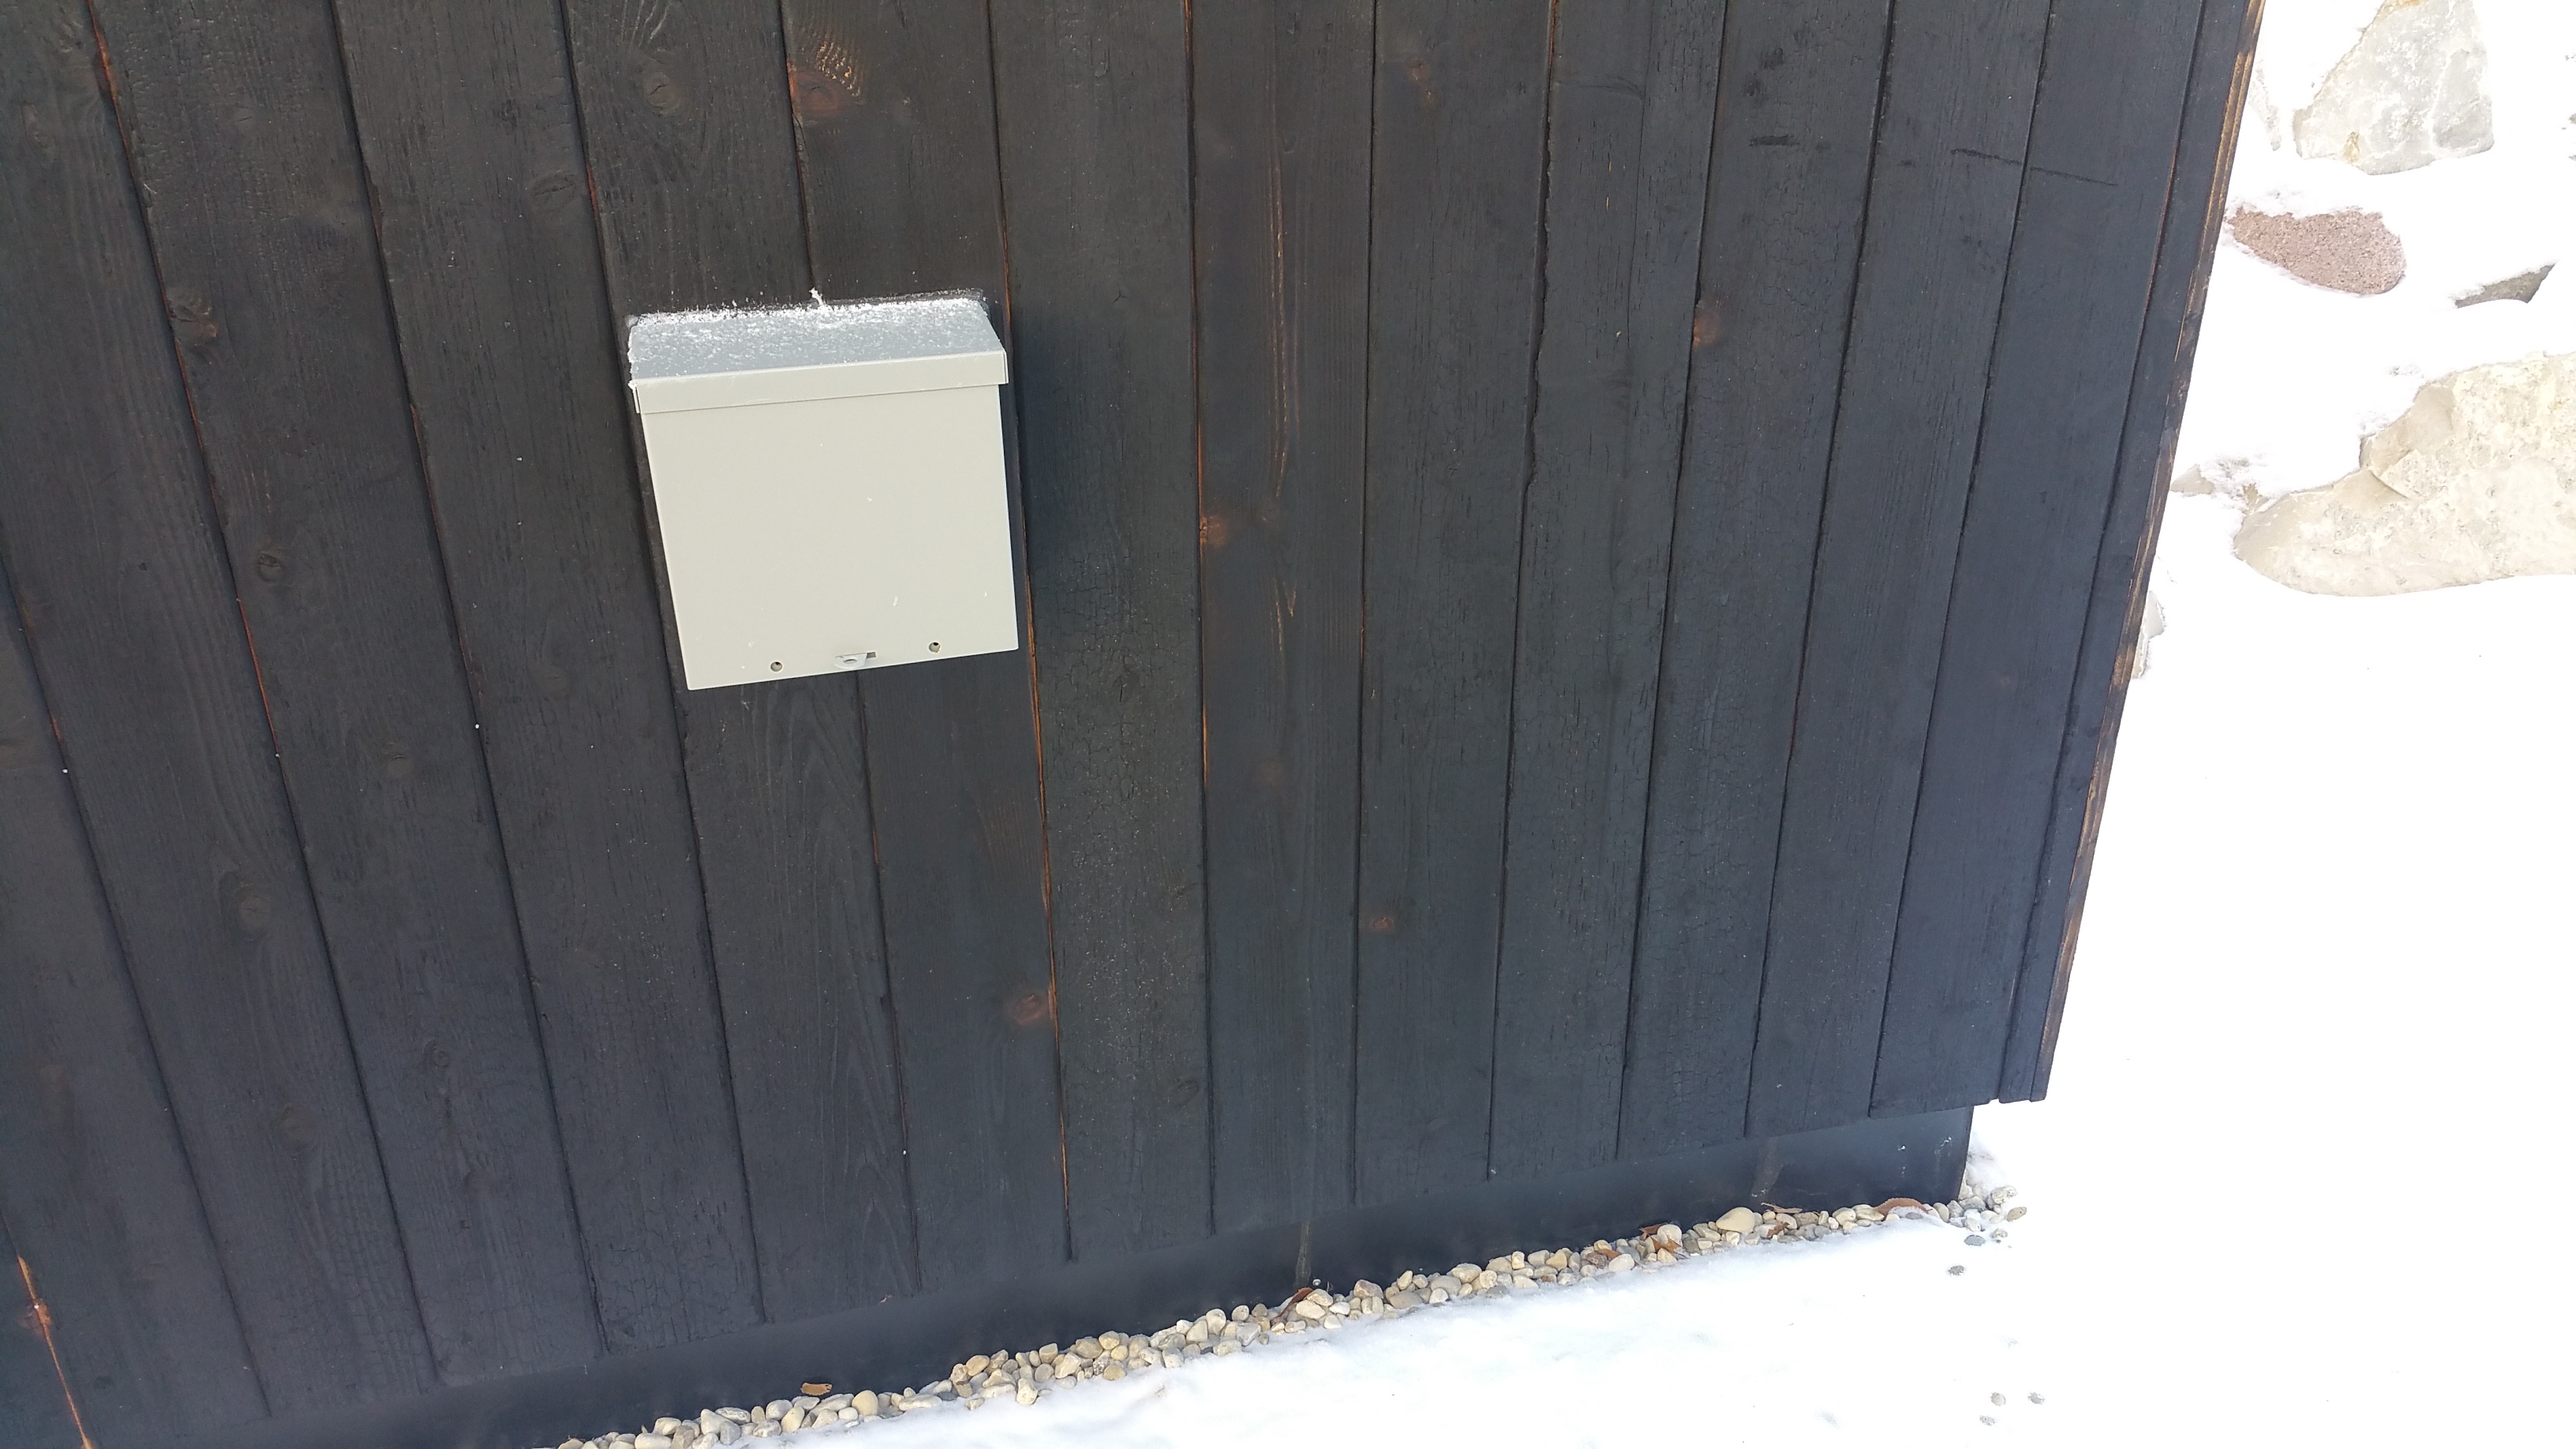
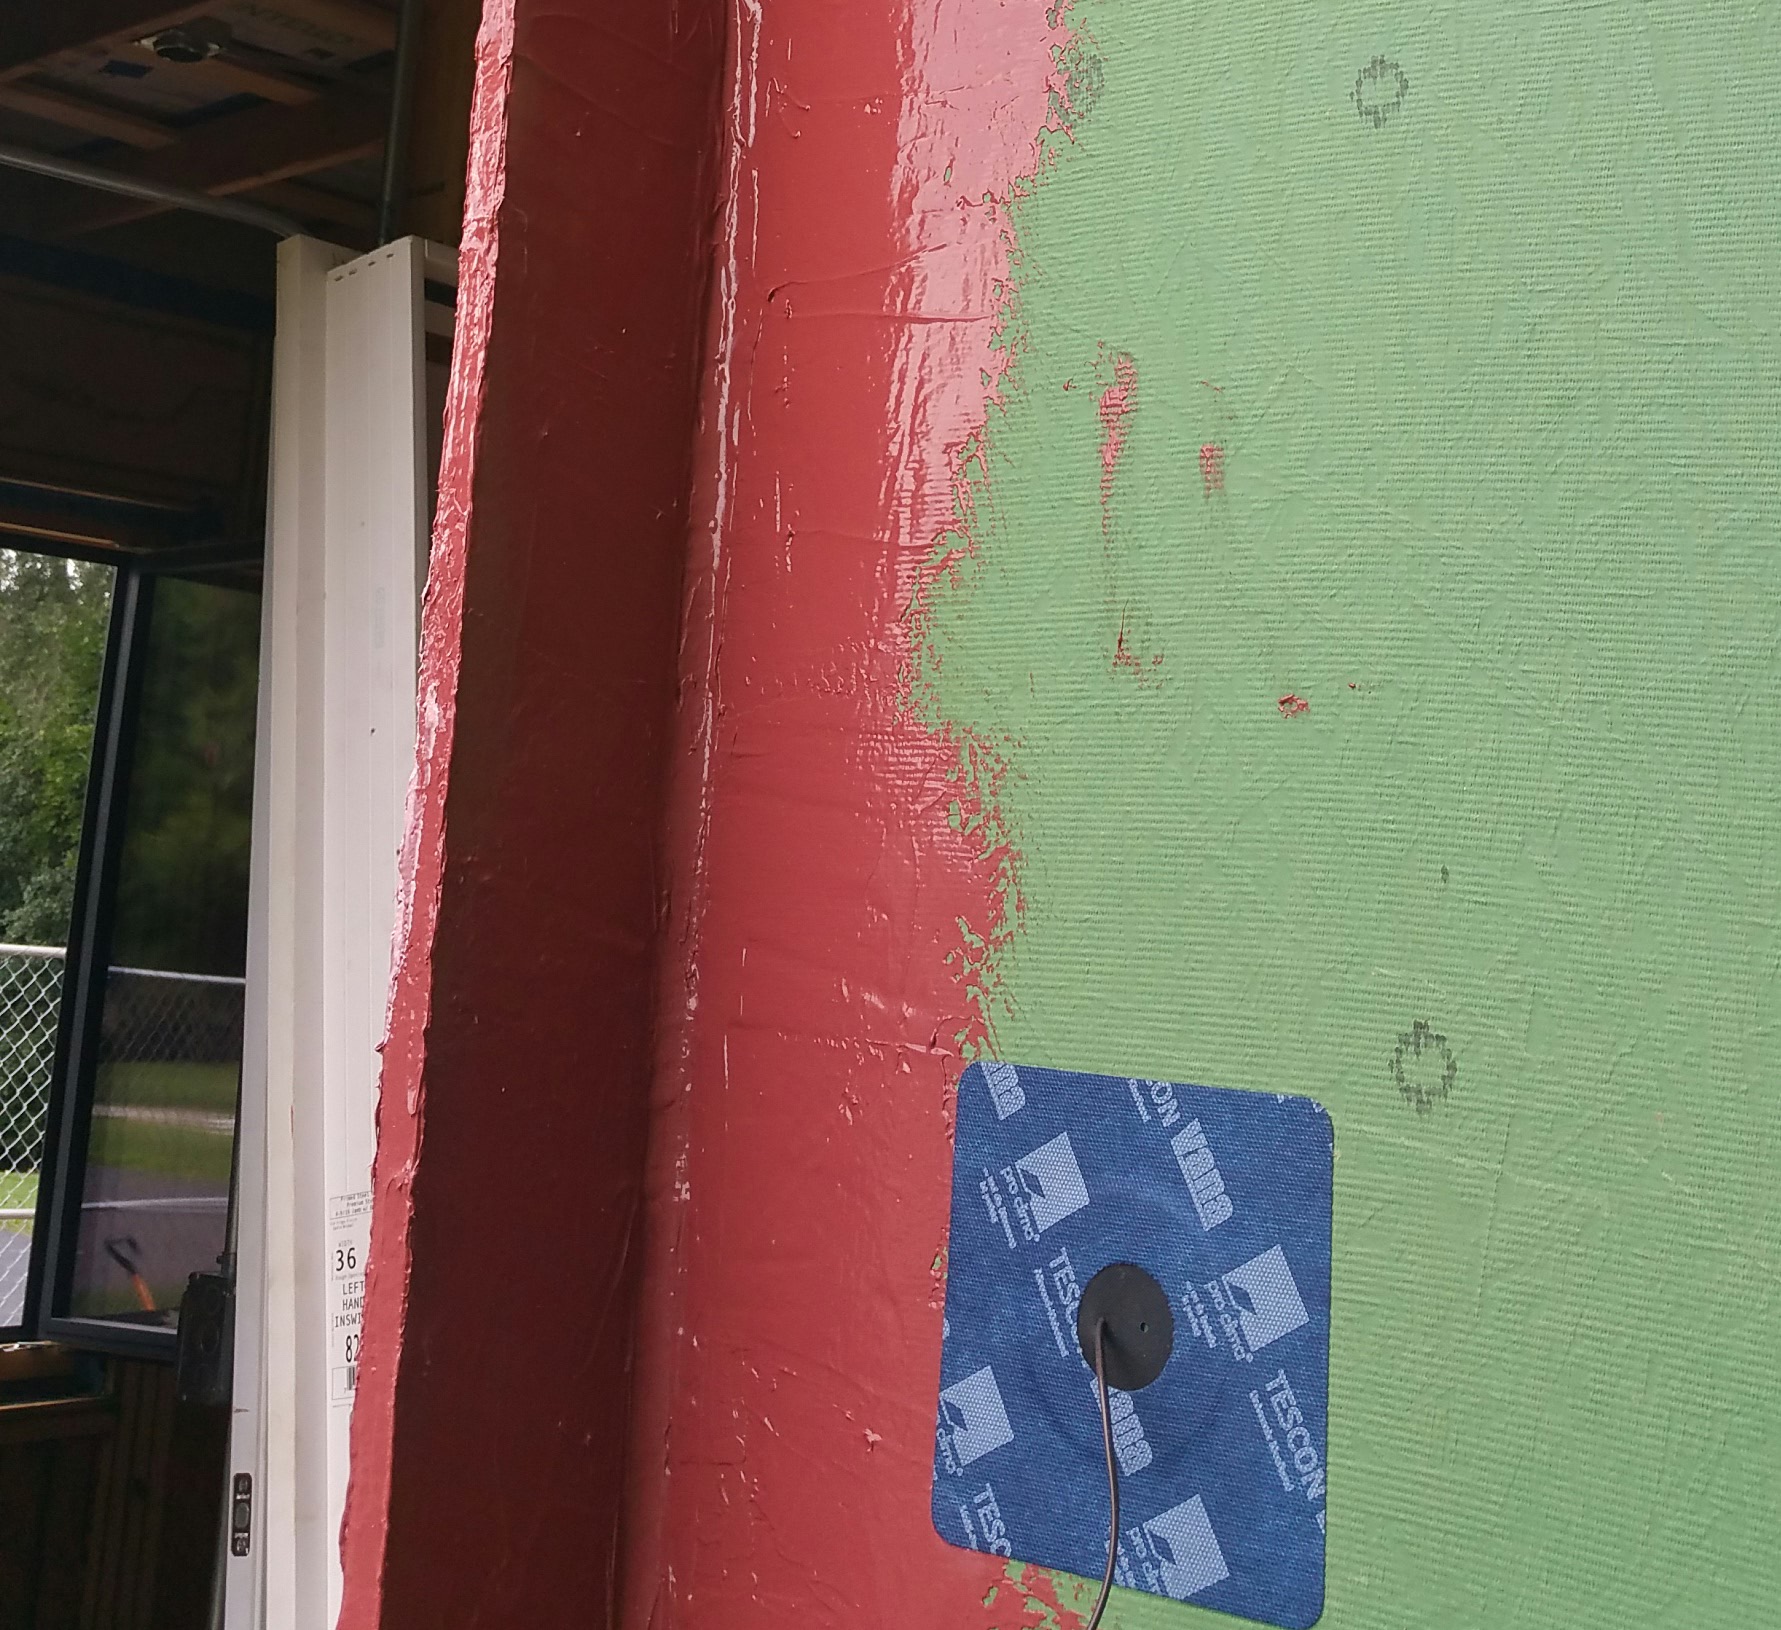
The penetrations for electric service were my first go at using the Roflex gaskets:
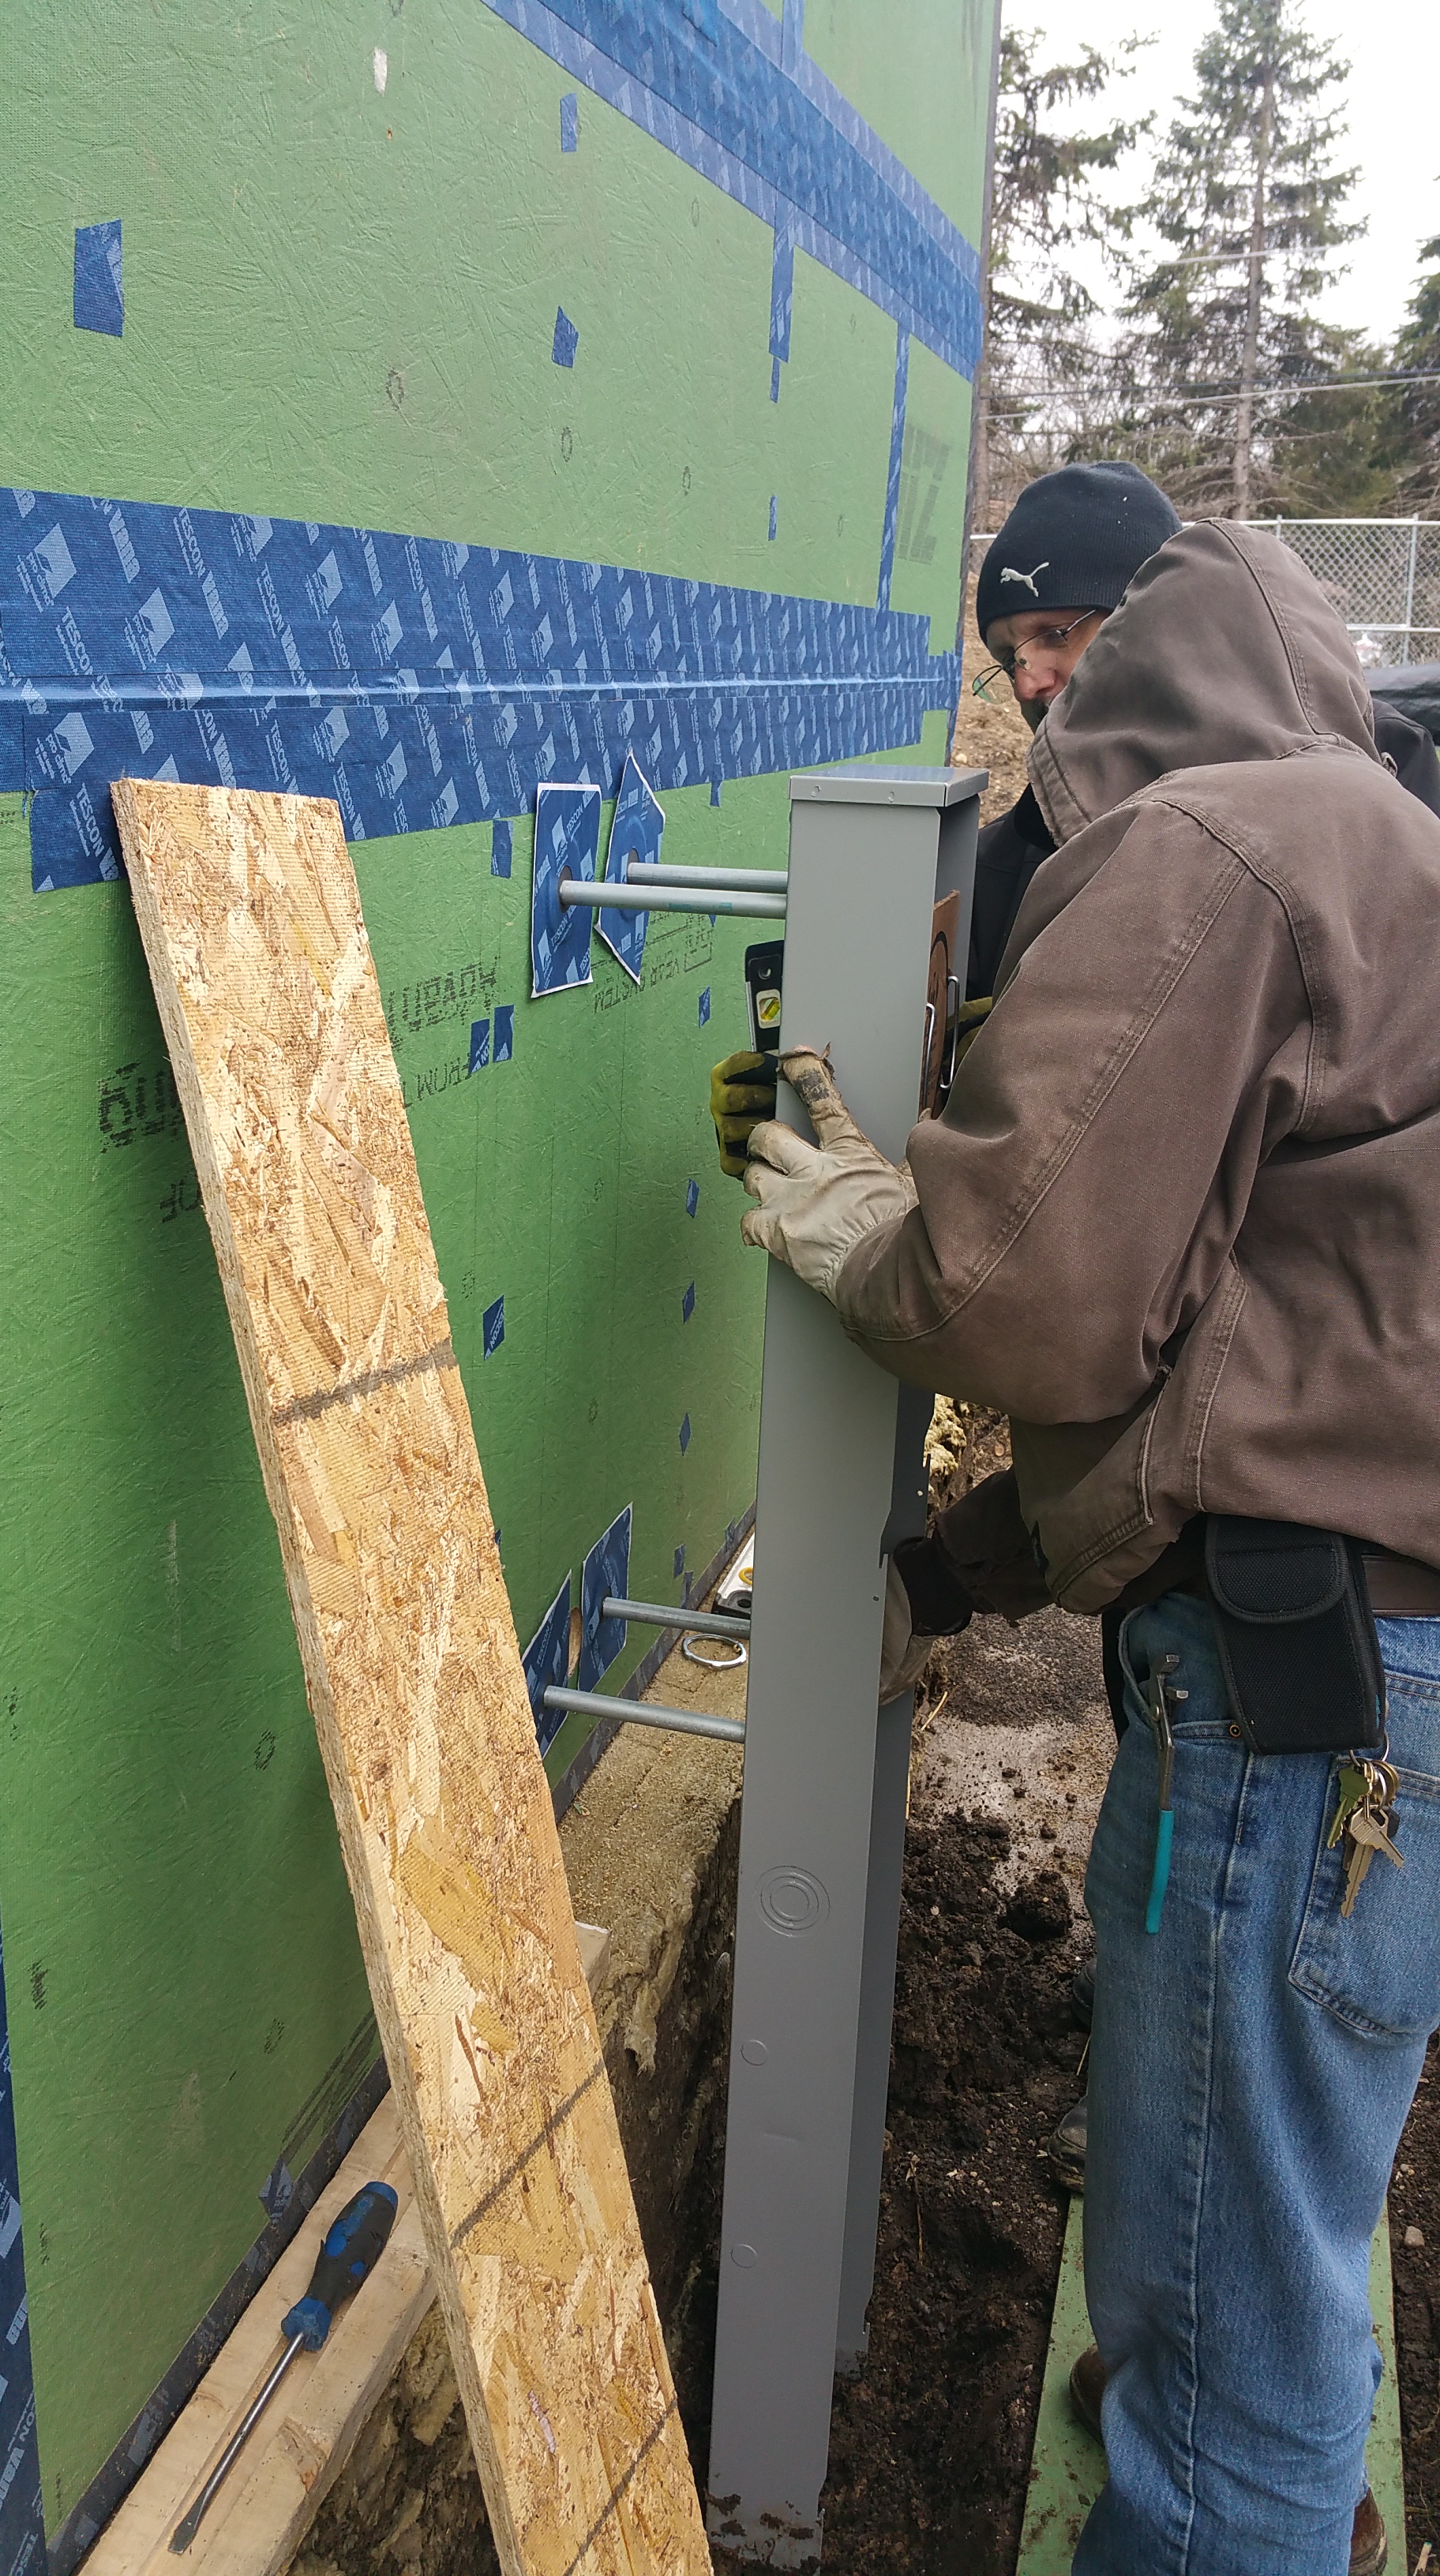
The smaller diameter Roflex gasket comes with its own Tescon Vana tape, which makes installation straightforward.
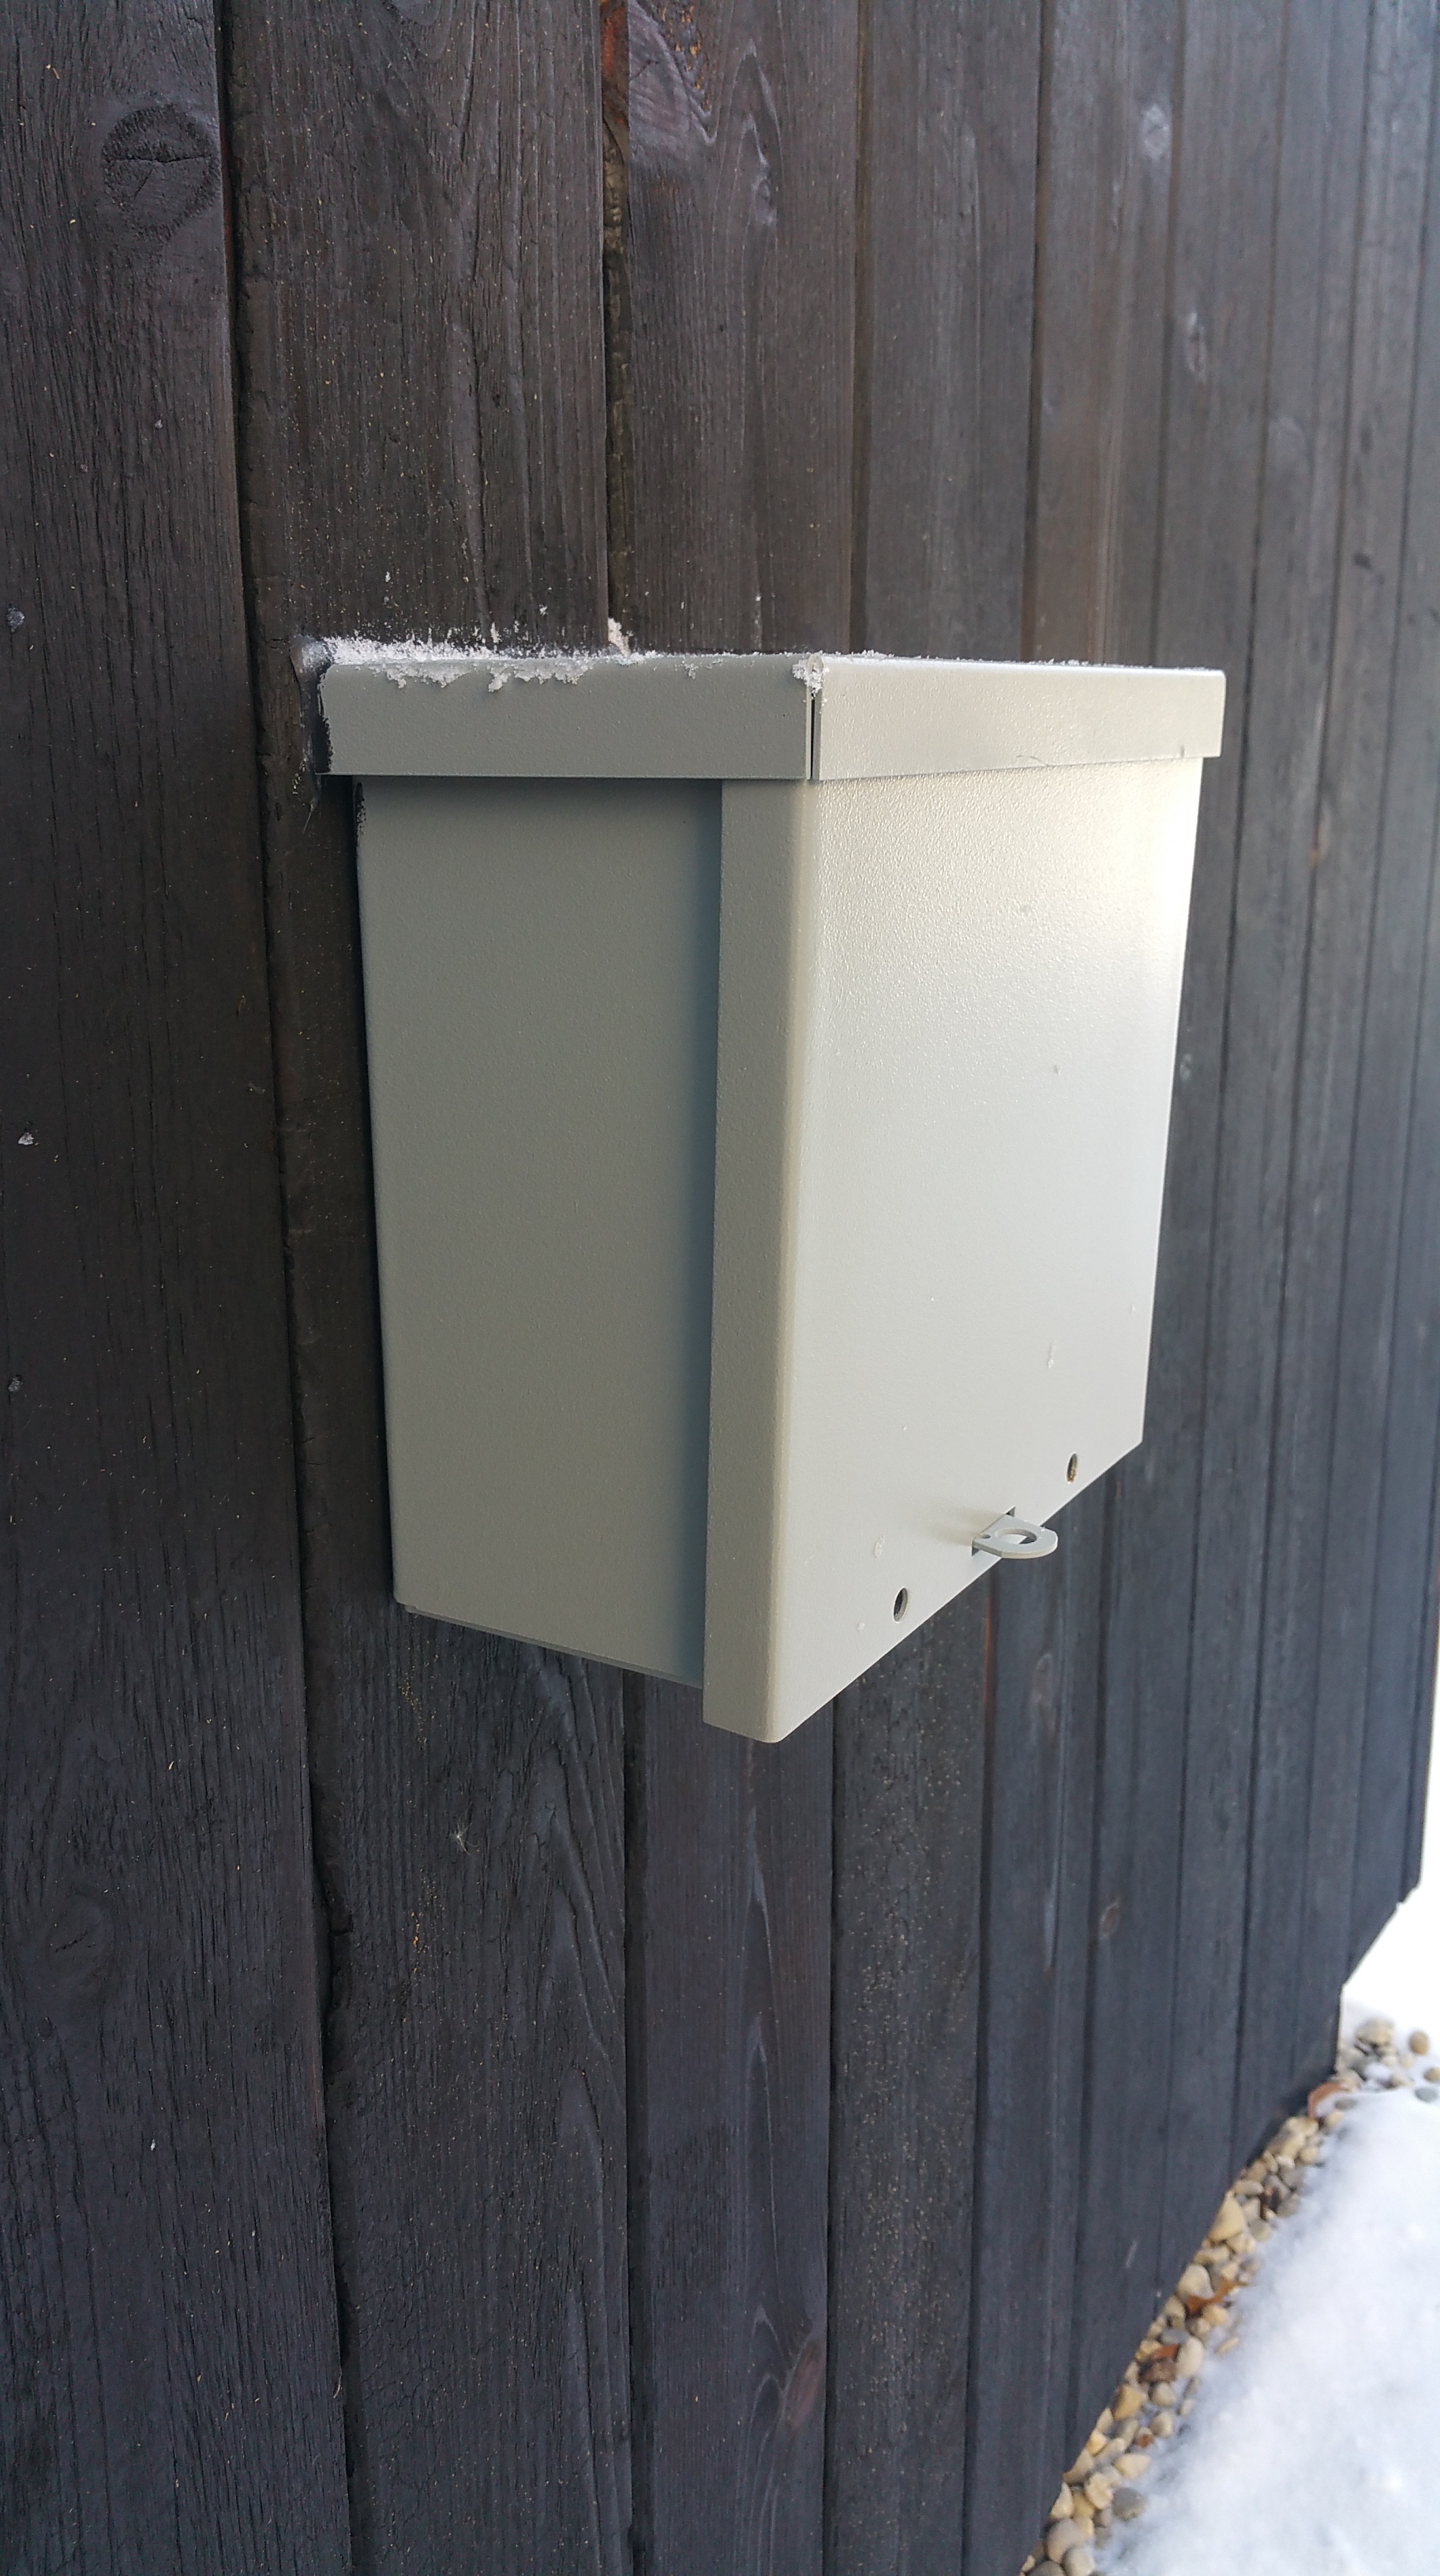
Exterior view of electric Meter air sealed with gaskets and Tescon Vana tape:
Once sealed on the exterior side, I went inside to seal the penetrations for a second time:
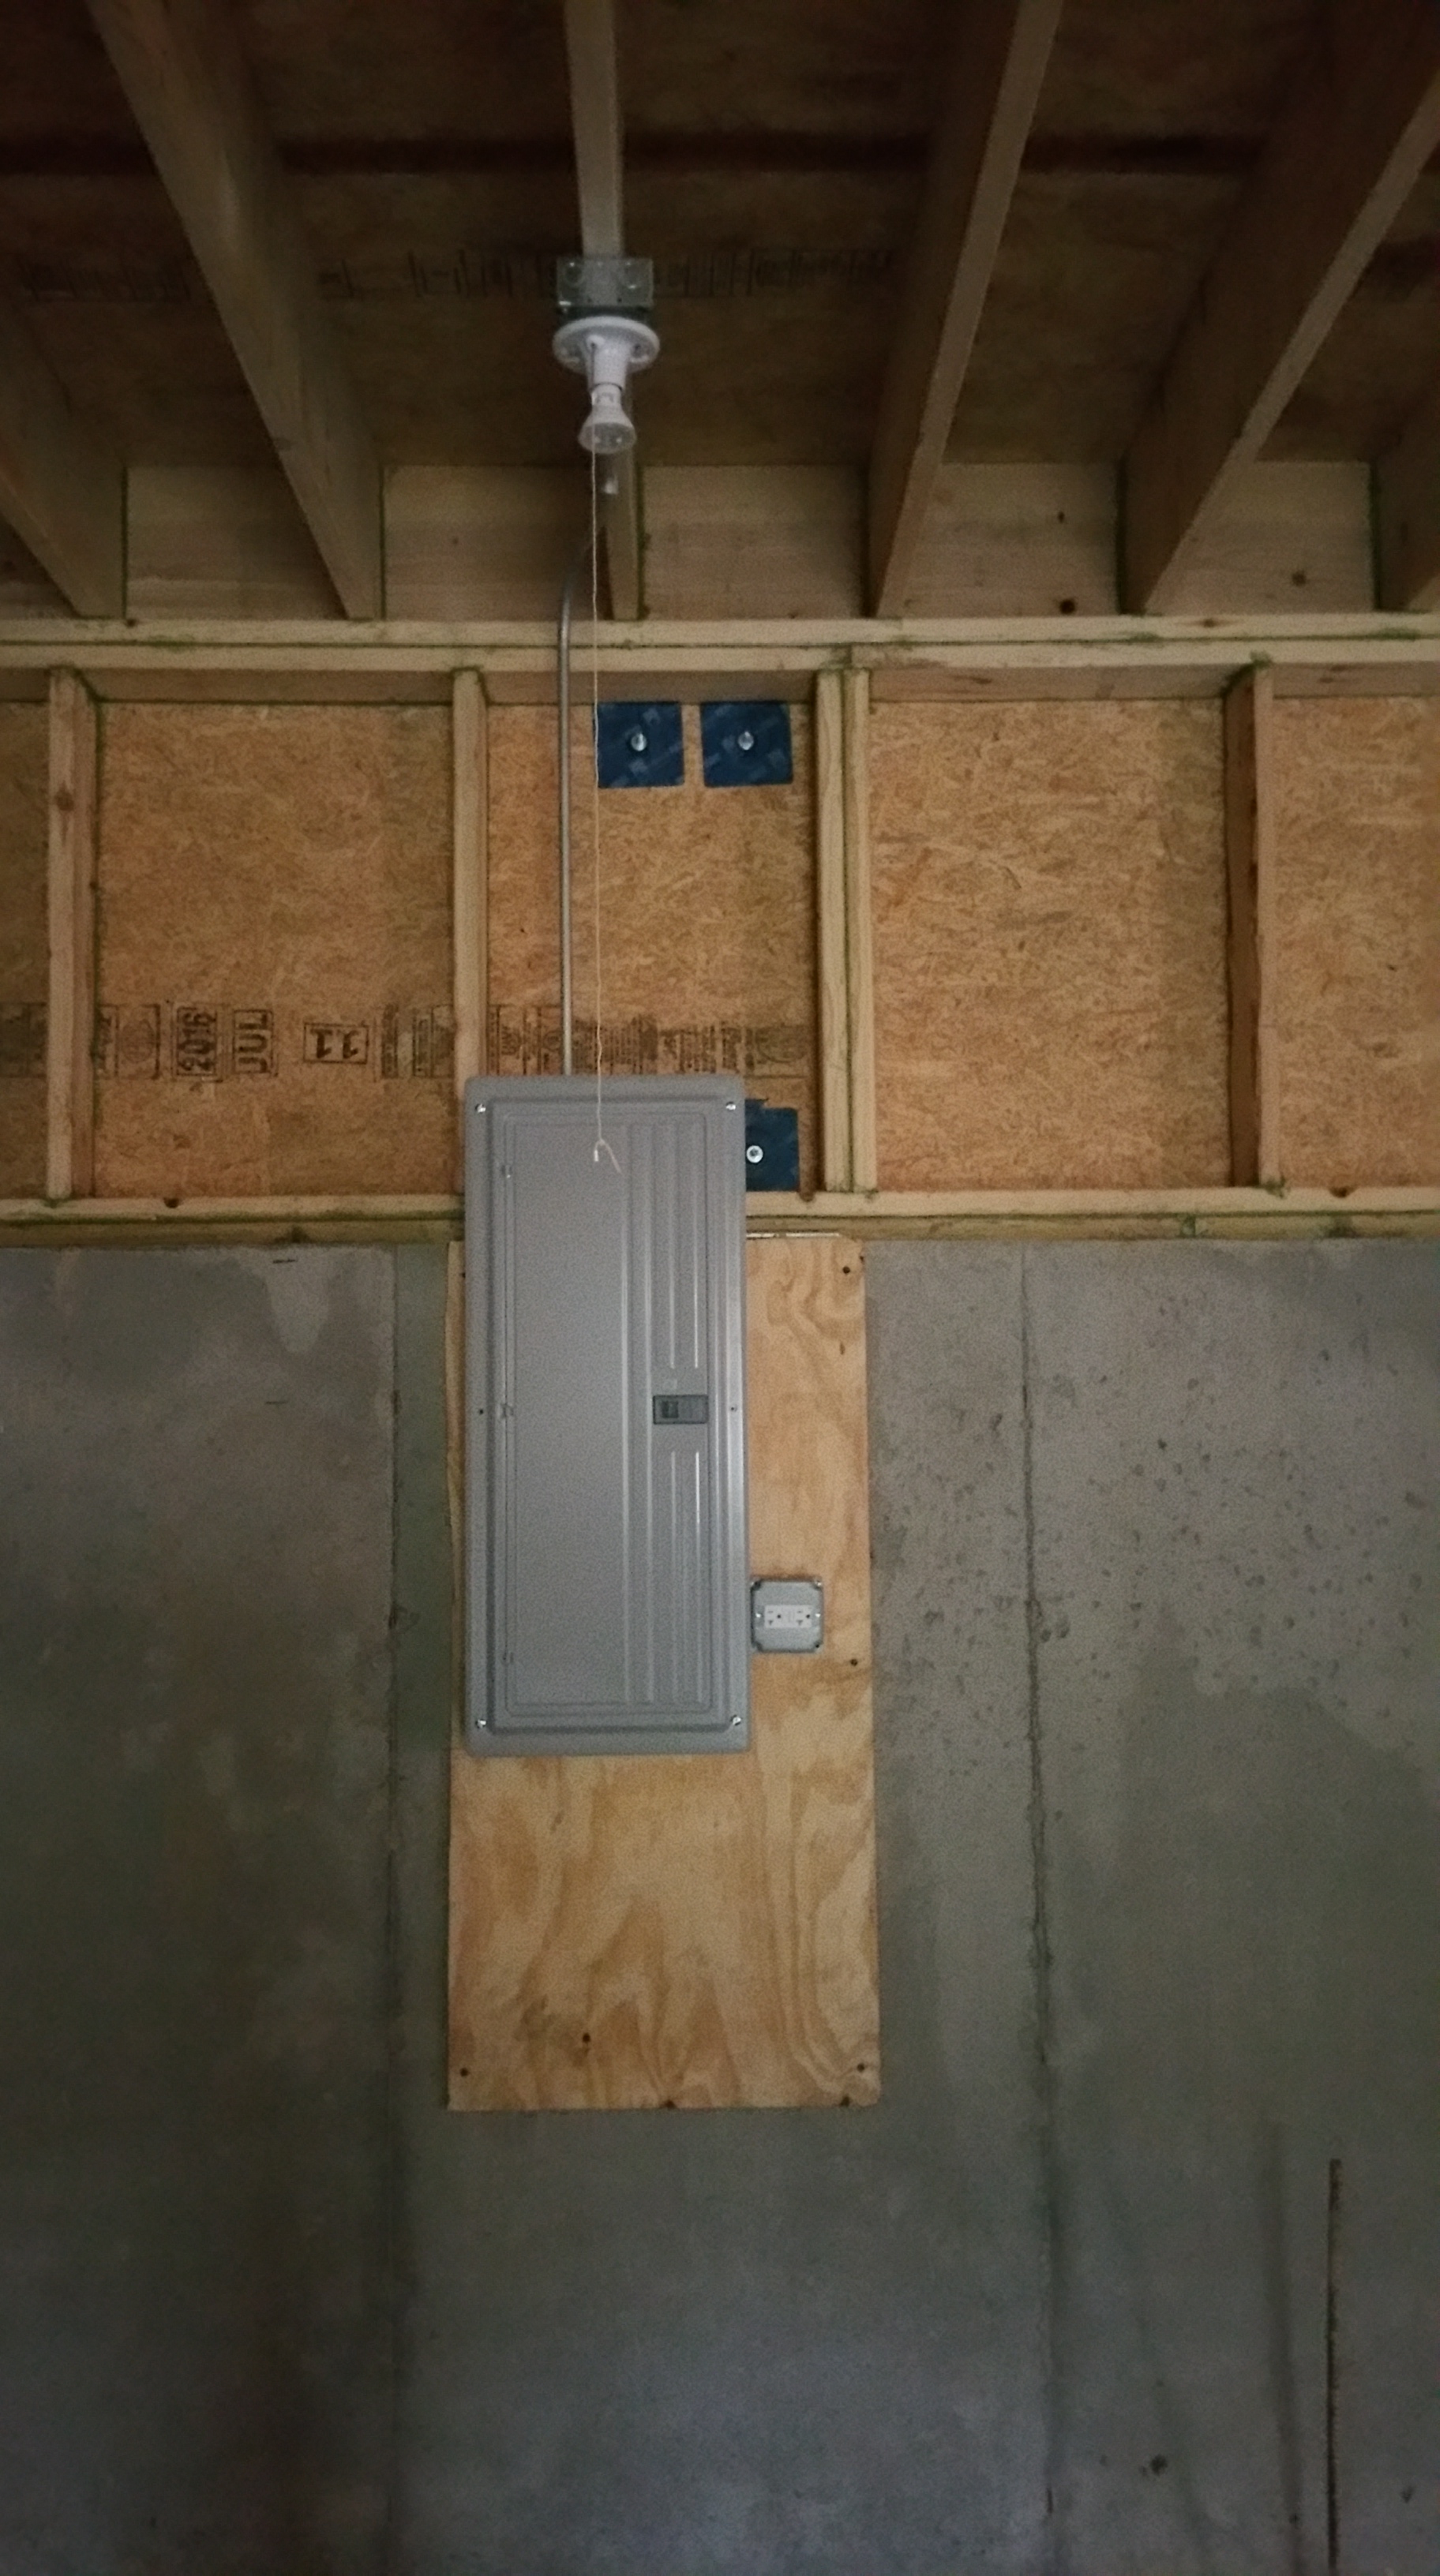
It was a big moment when the electric panel went in:
The installation of our solar panels required air sealing two penetrations — one through the Intello on the ceiling on the inside of the structure, along with one exterior penetration through the Zip:


Details regarding the installation of our Solar array can be found here:
Solar on the Roof

We also had two frost-free hose bibs, or sill cocks, installed, which also required gaskets on the exterior and interior sides of the Zip sheathing.
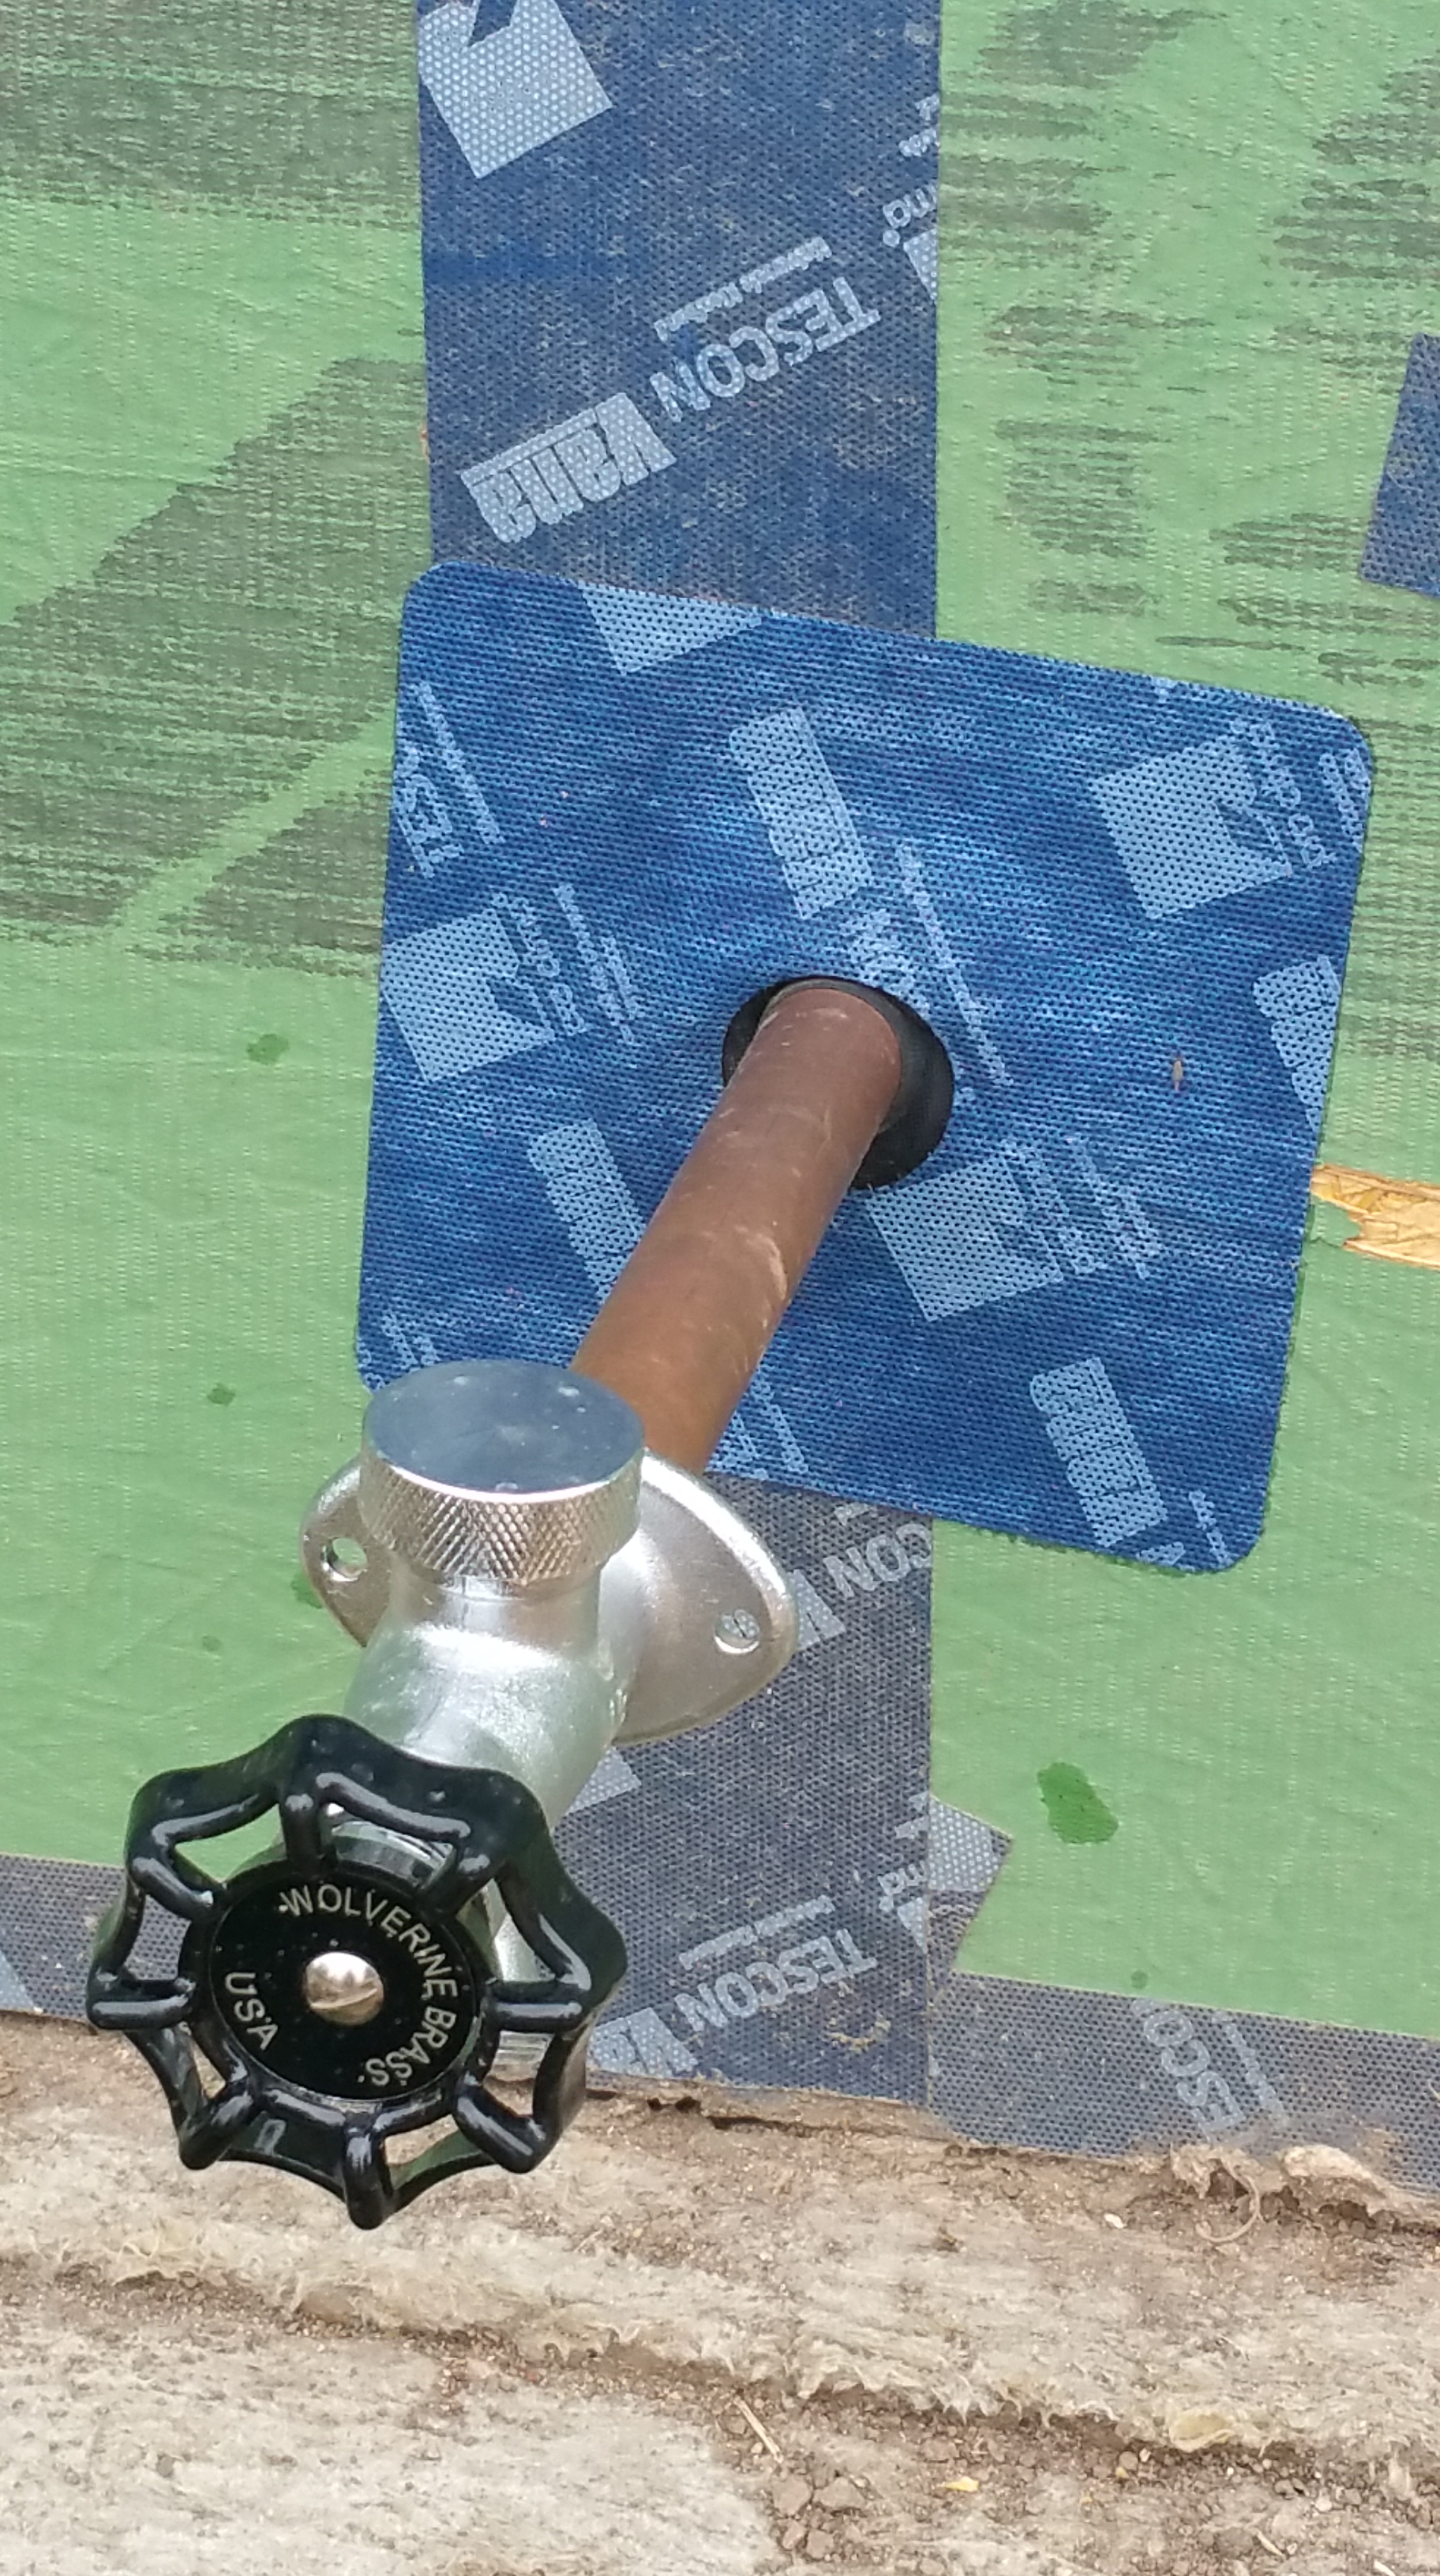
One of the big advantages a Roflex gasket has over using a sealant like the green HF Sealant, or Prosoco’s Joint and Seam, is the pipe can be moved in and out even after air sealing, which is especially helpful for installing siding later.
We left the sill cocks loose (unconnected to water supply line inside the house), allowing the siding guys to adjust in and out for a more precise fit of the charred cedar siding.
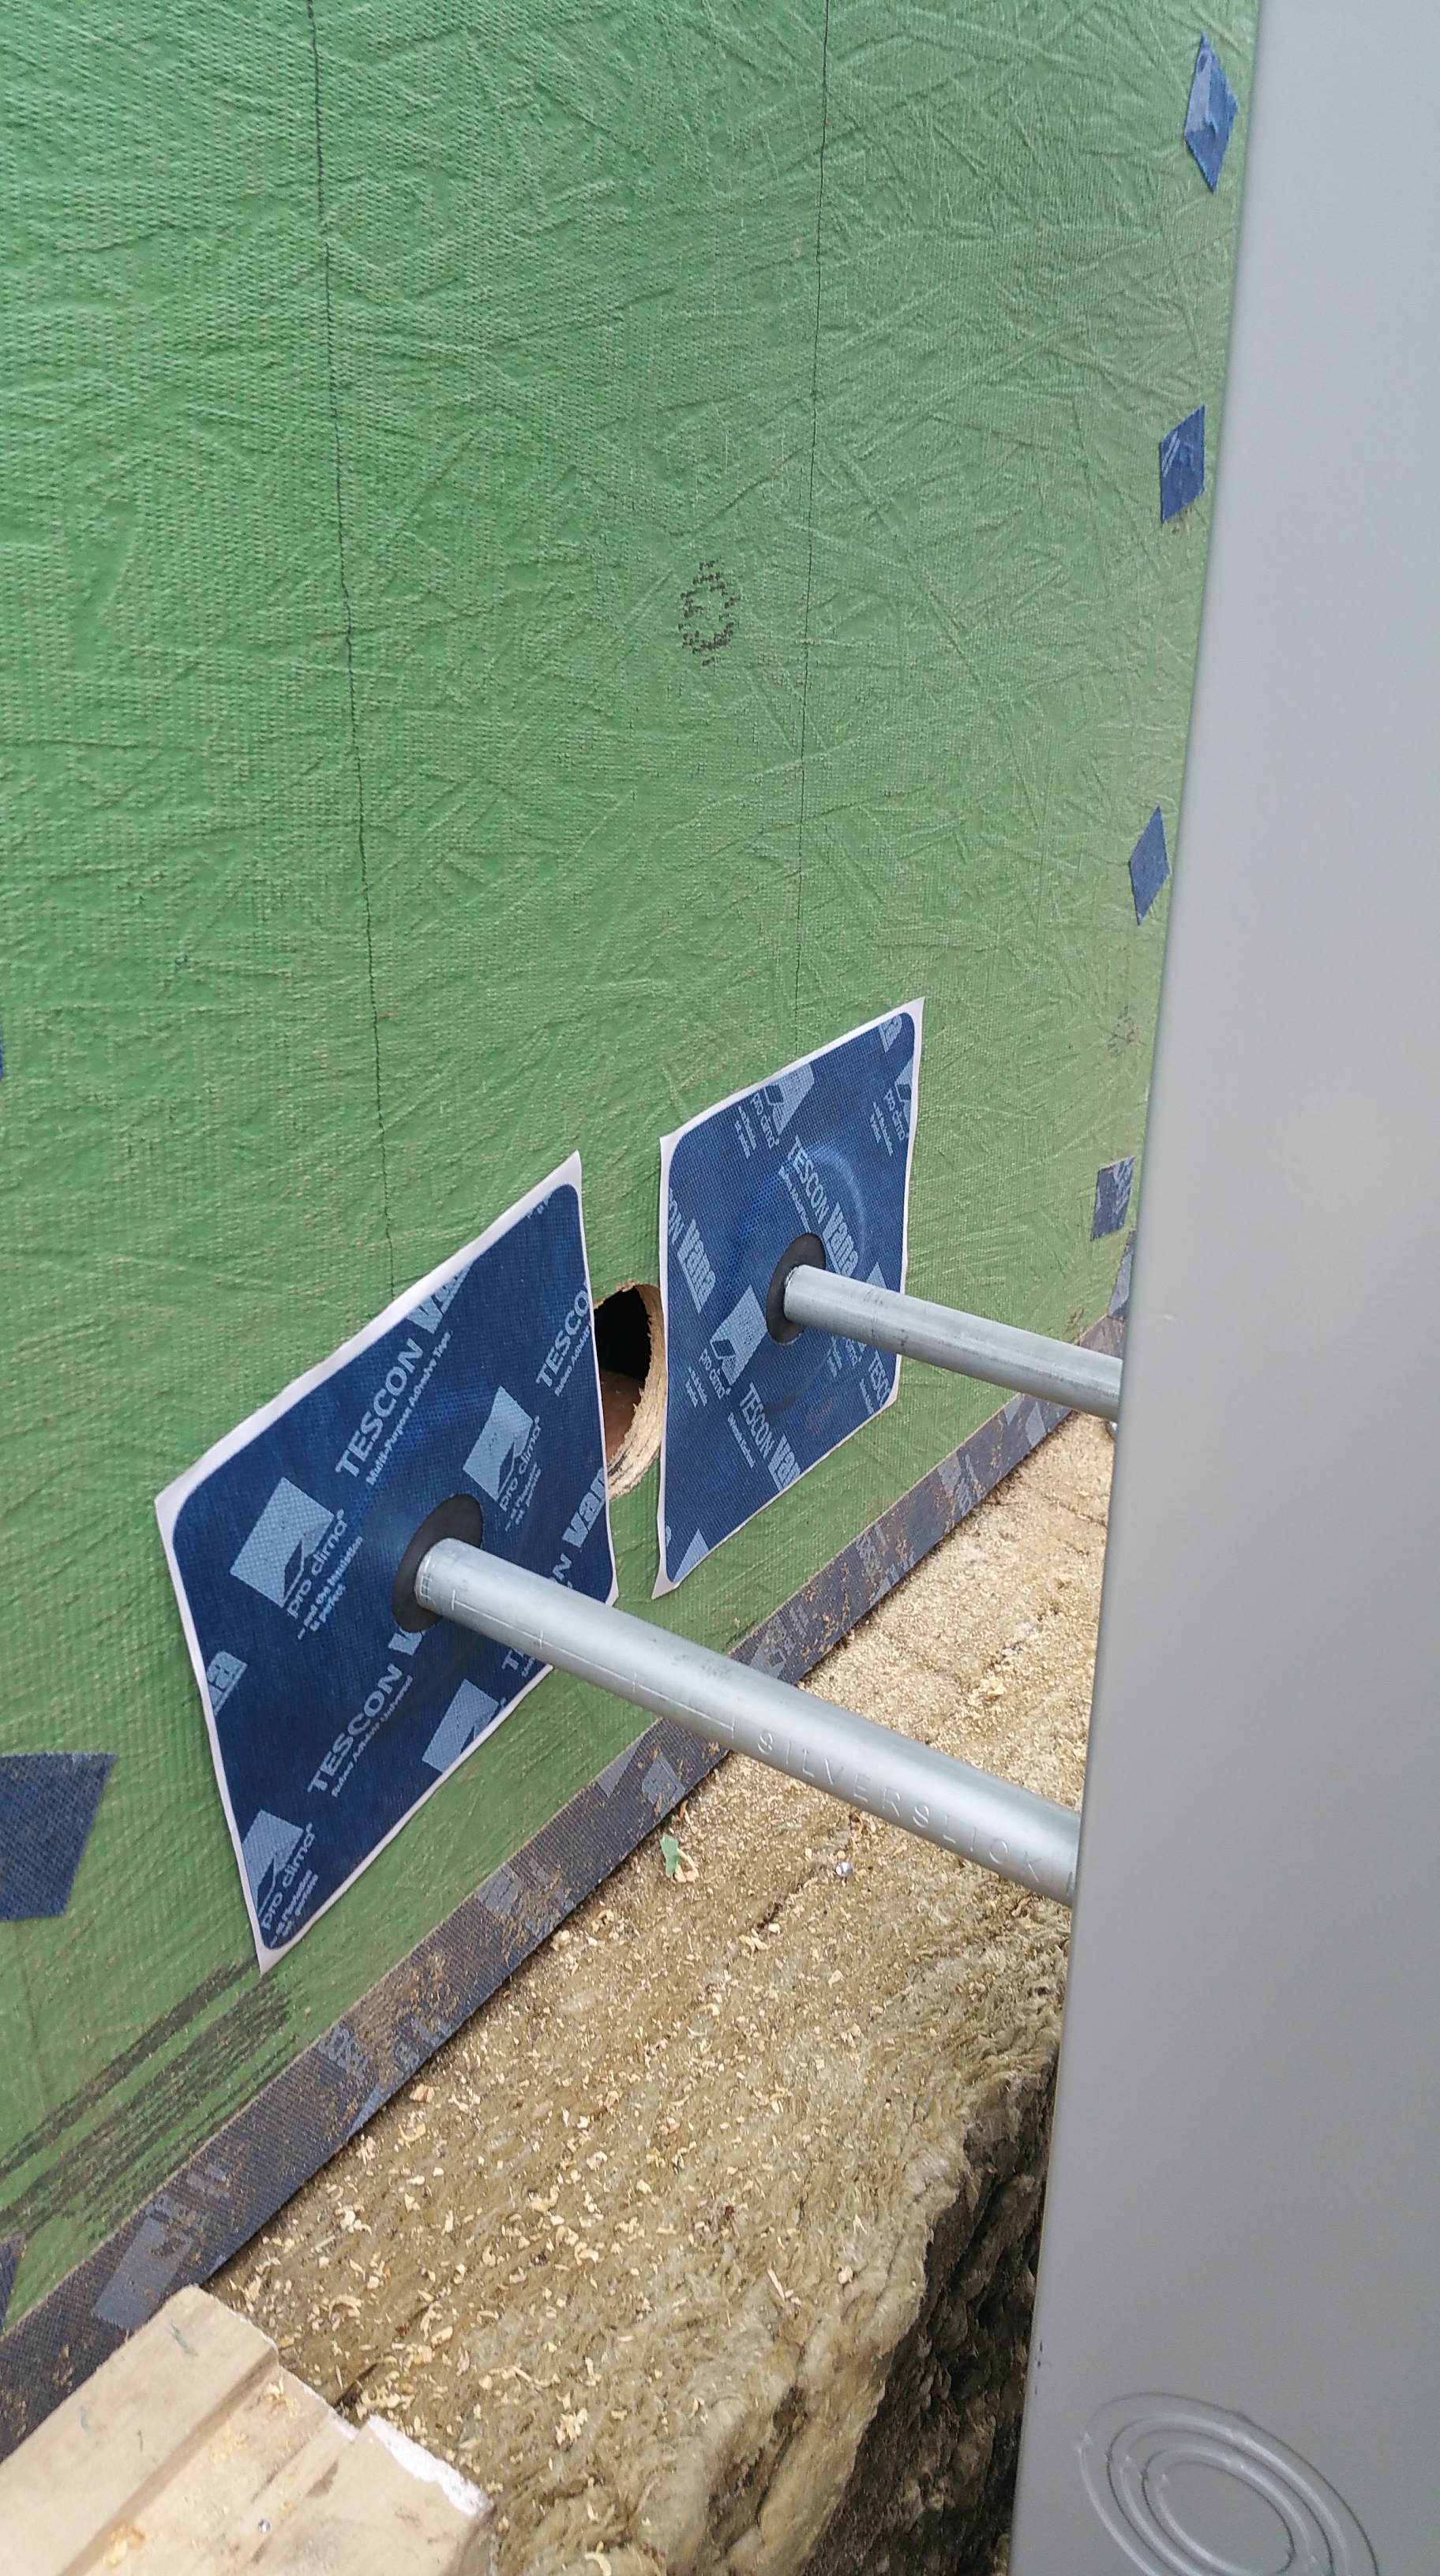
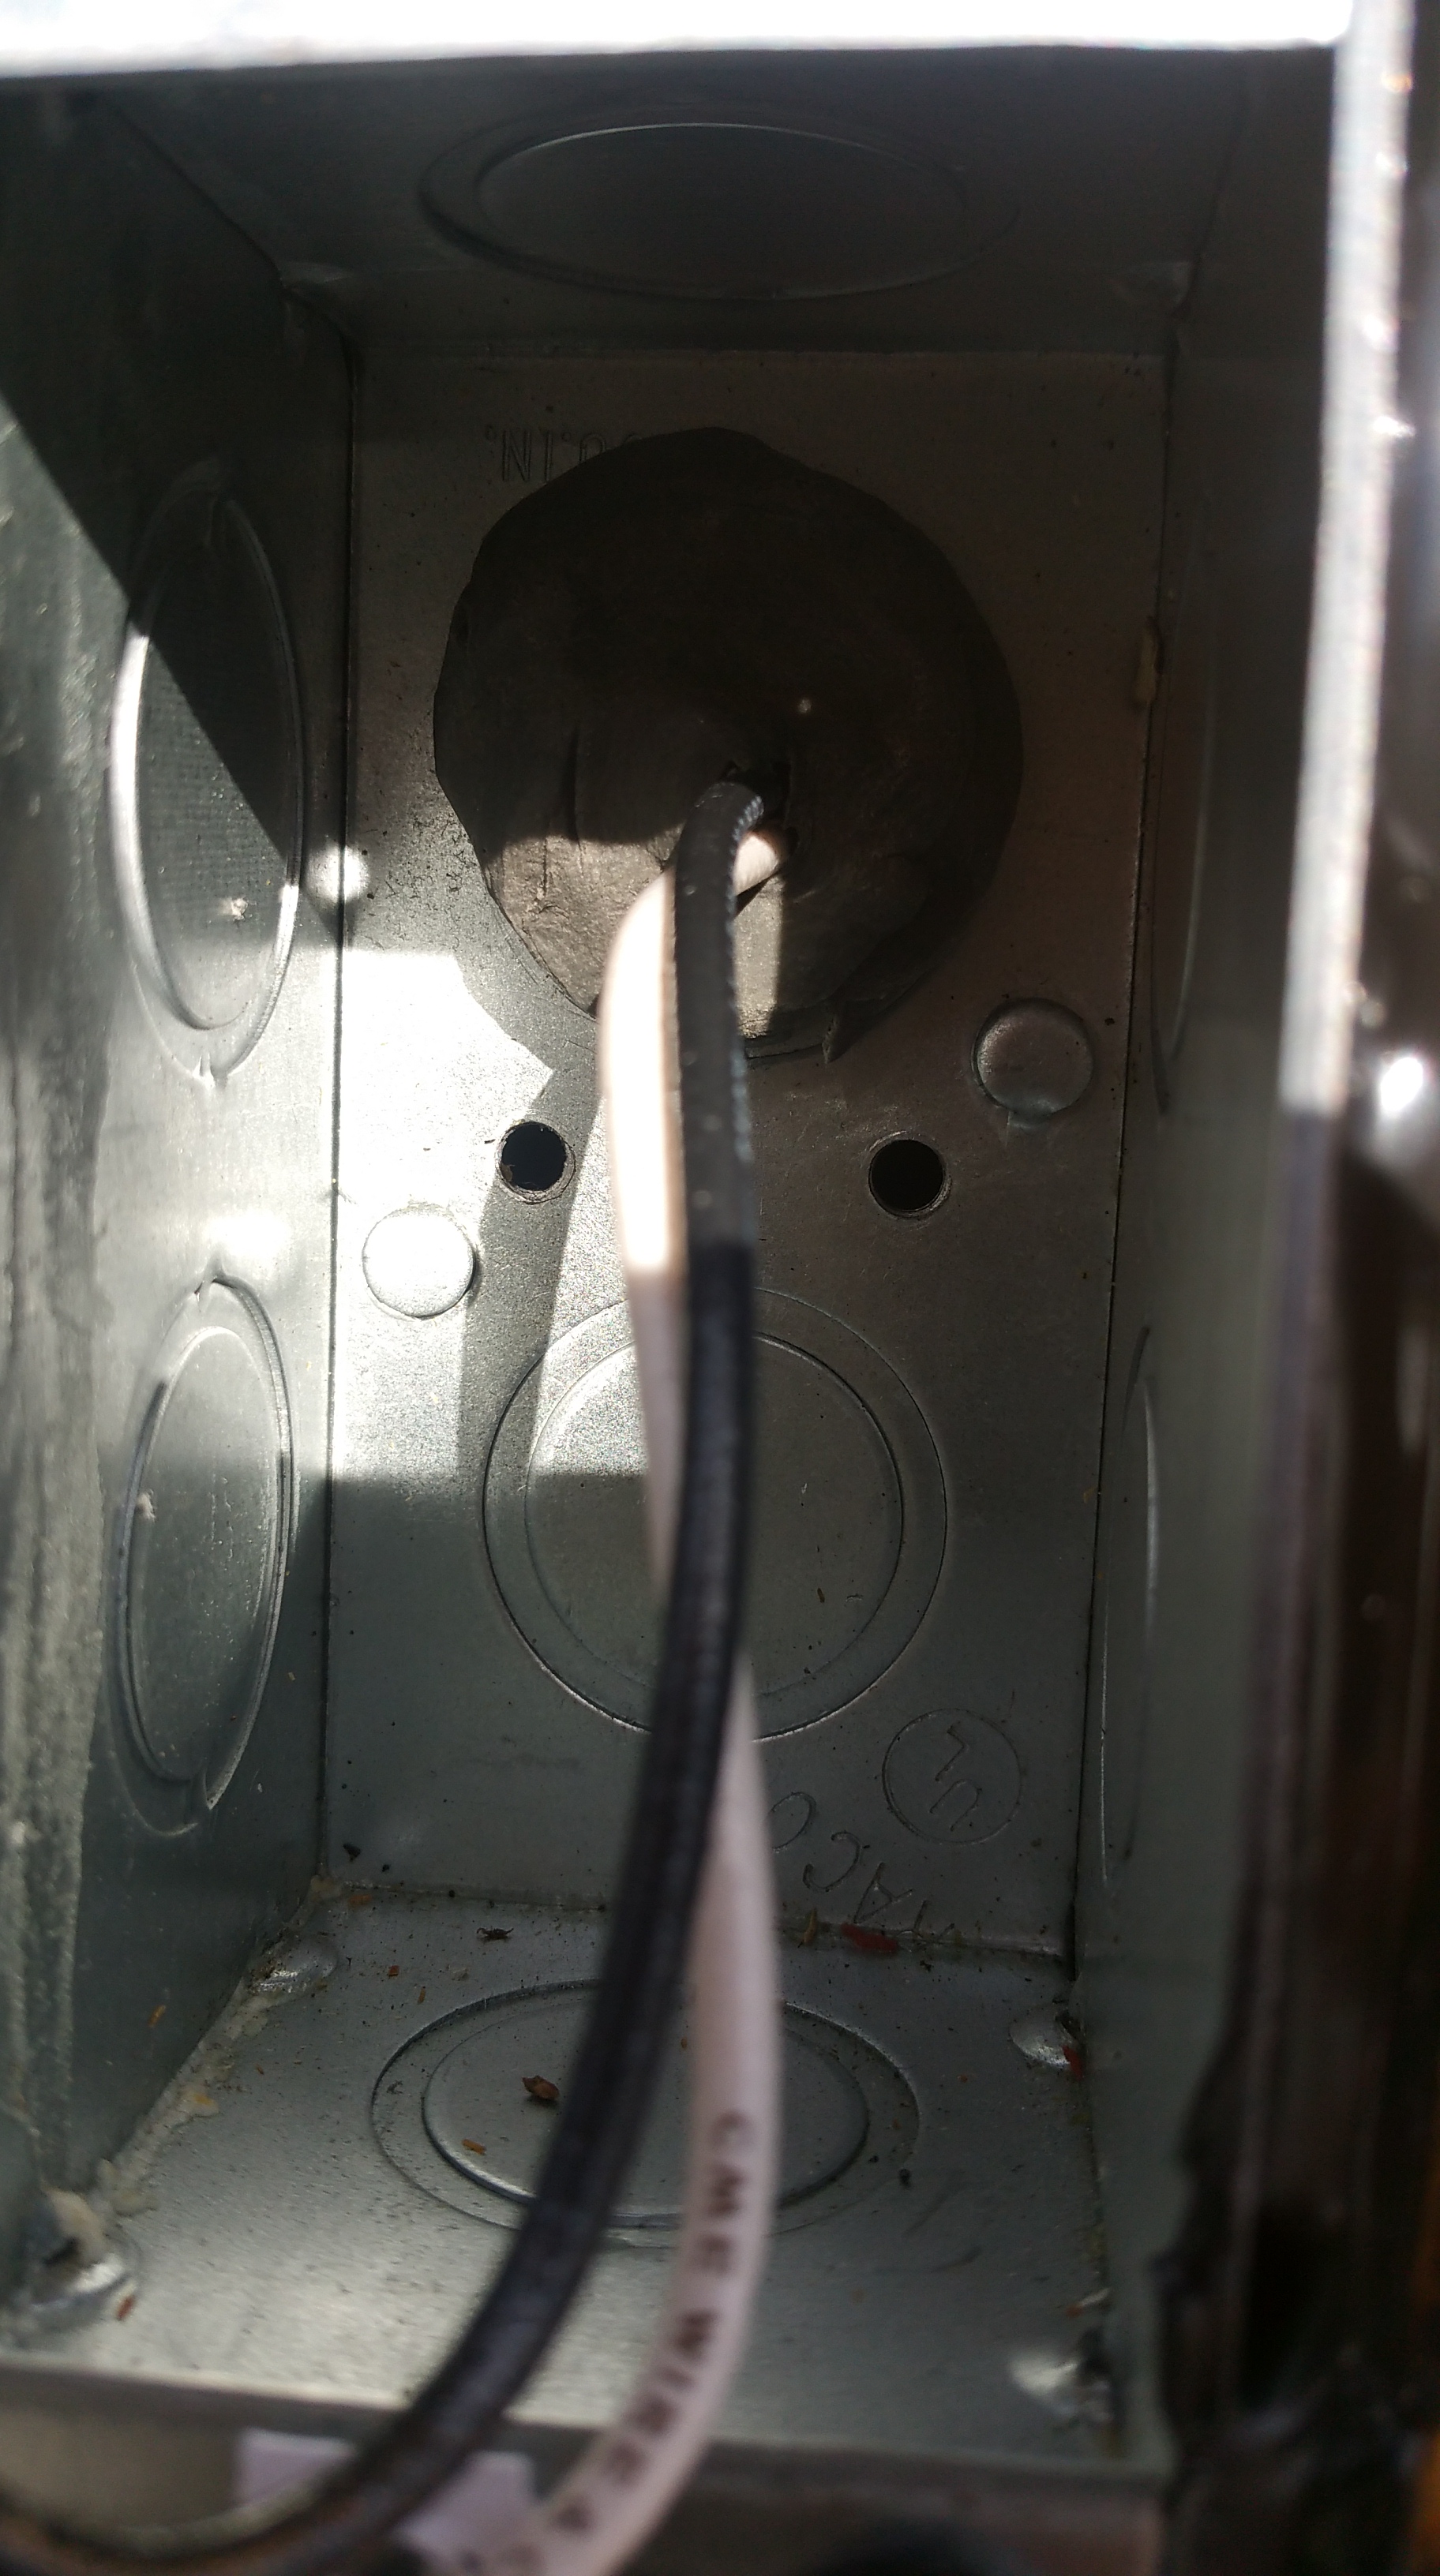
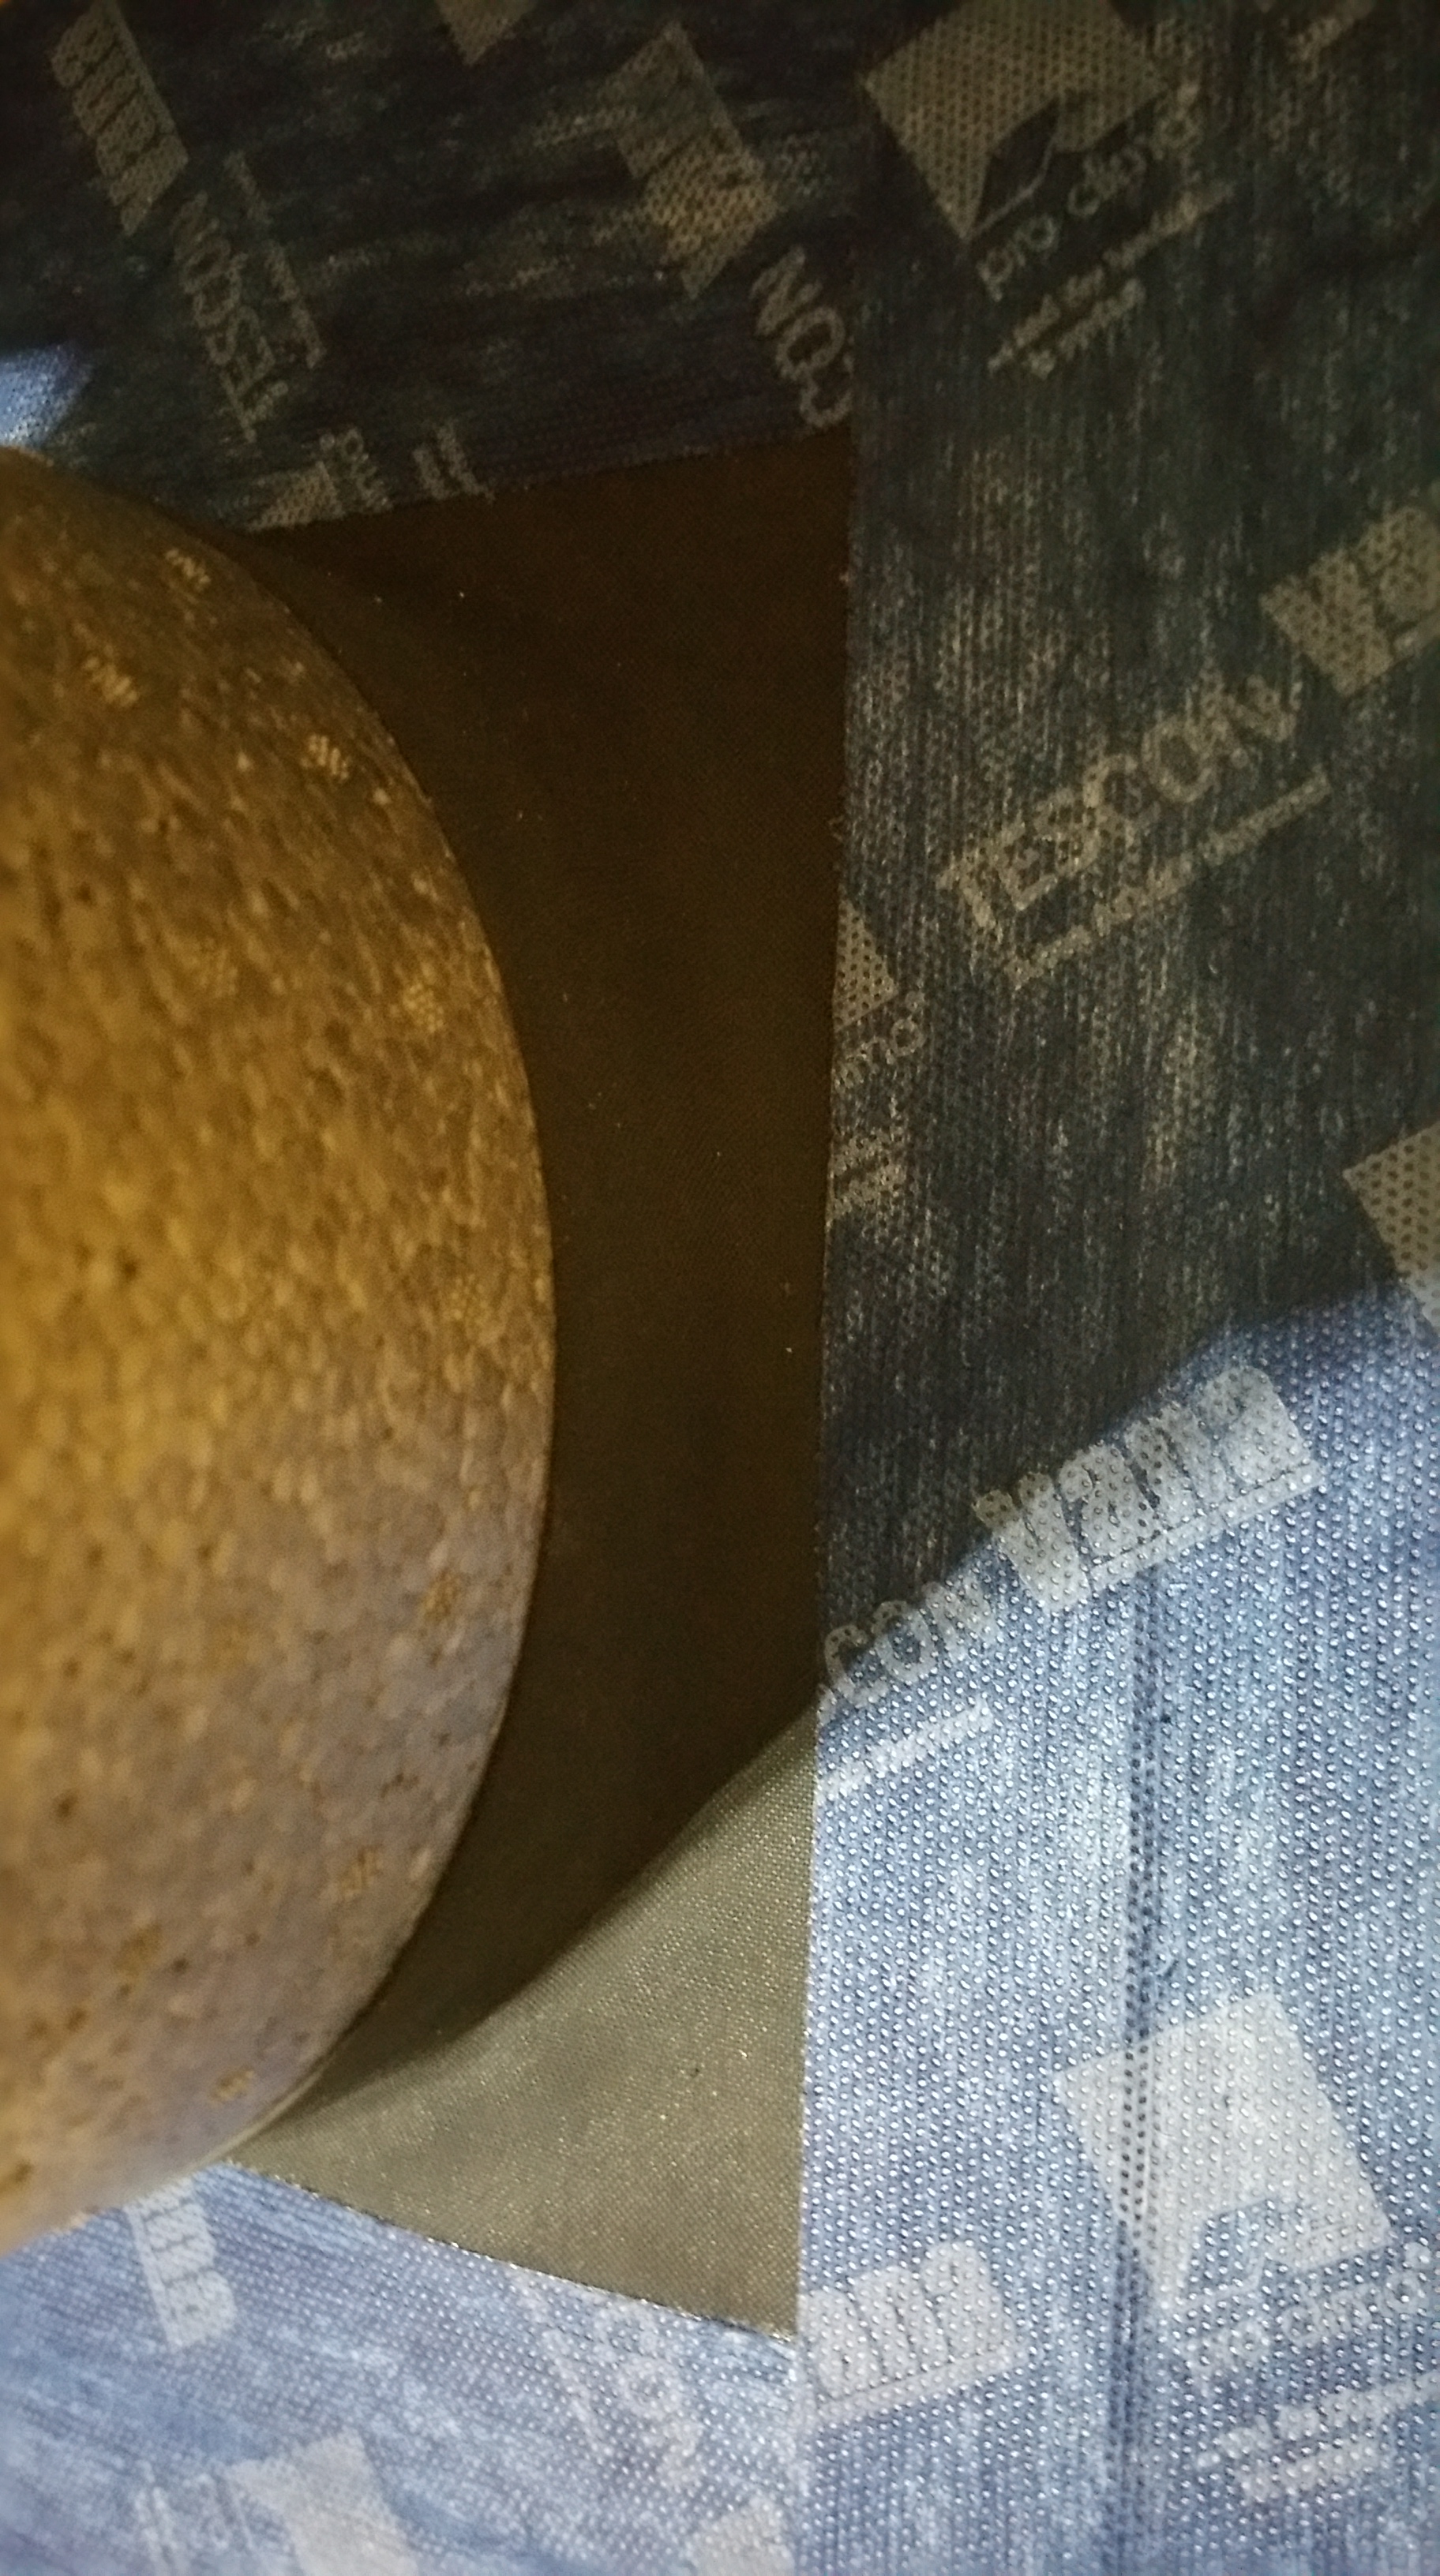
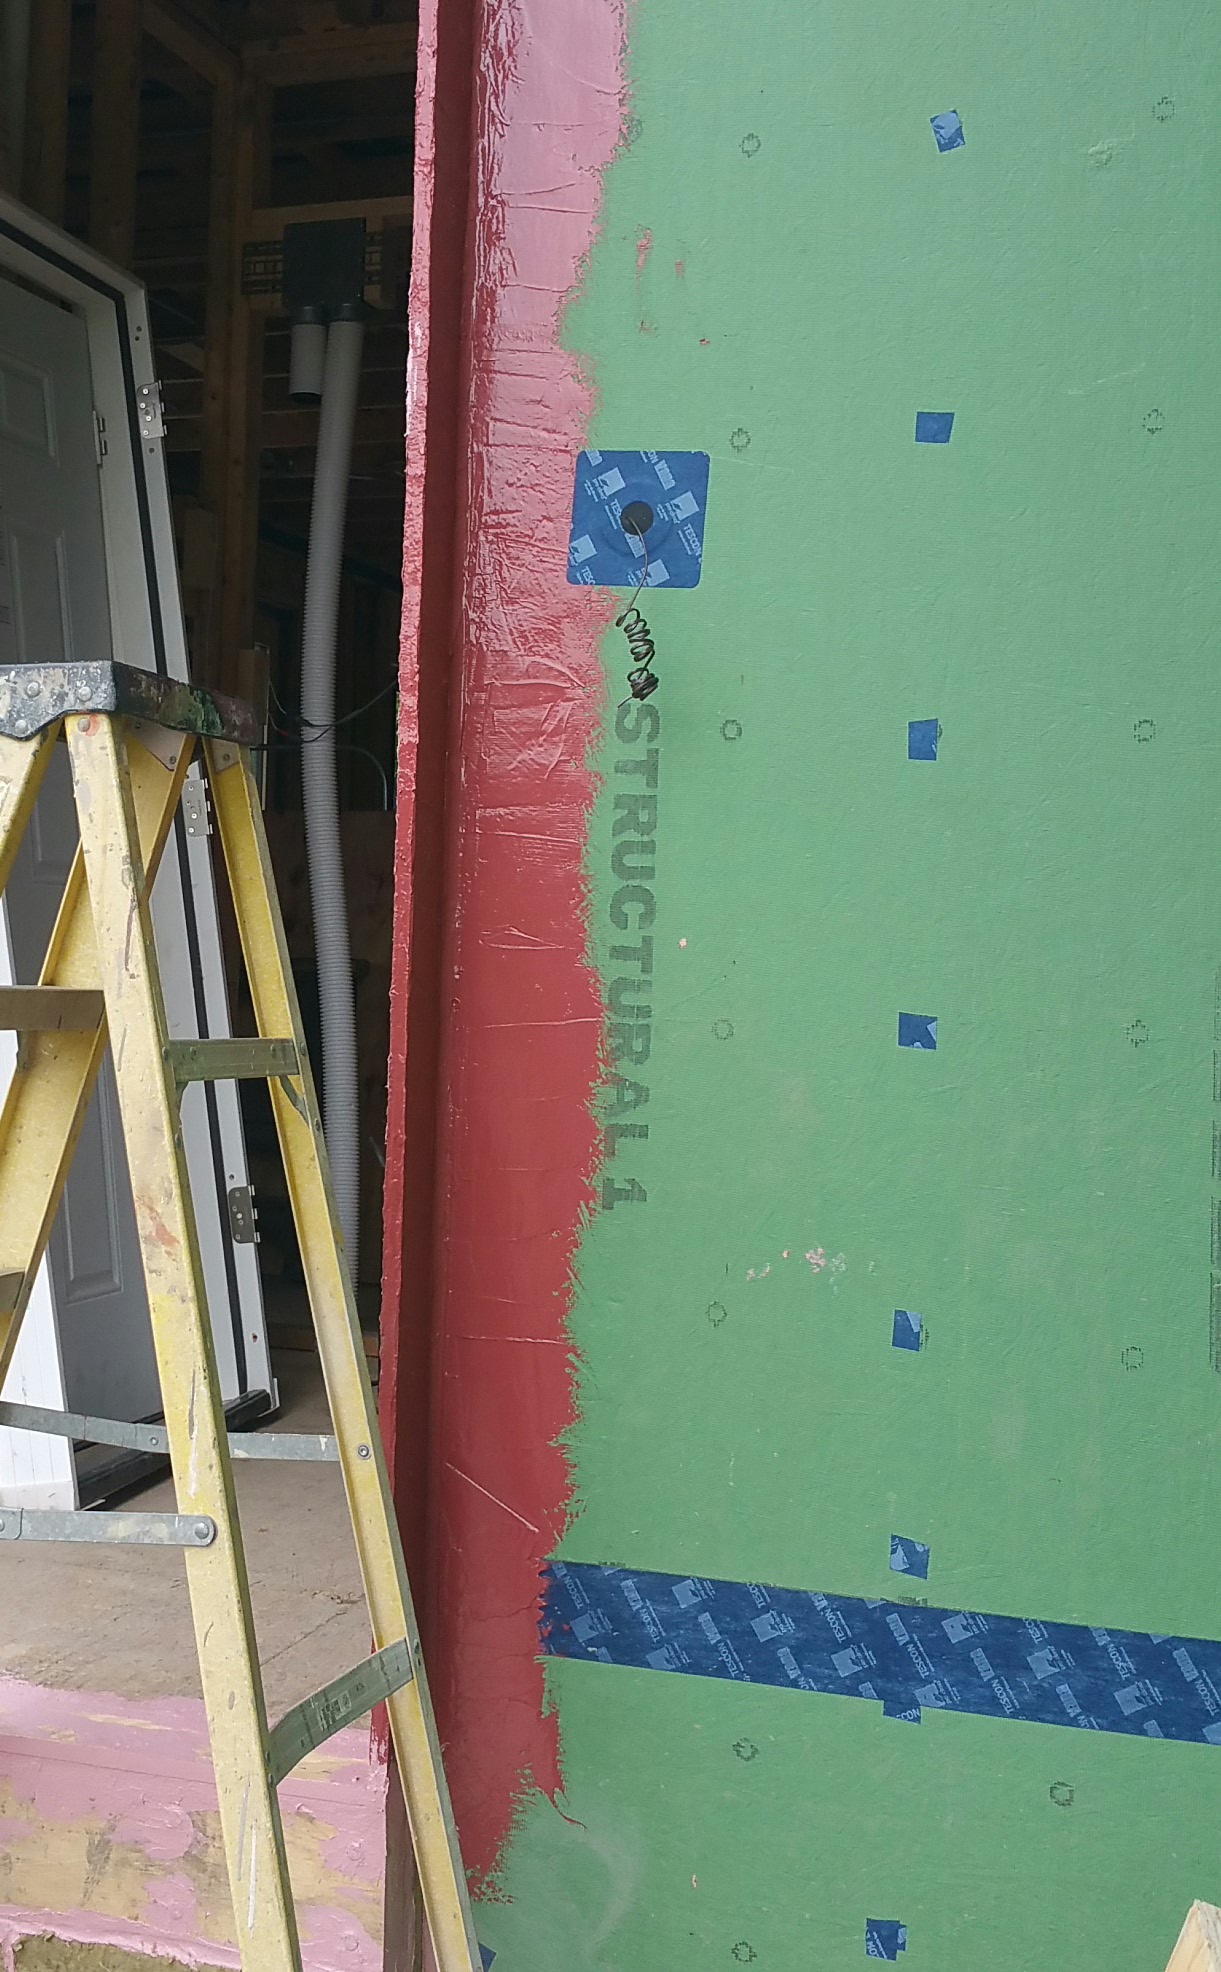
Below is an example of what conduit through the Zip sheathing looks like before it gets a gasket and some tape:
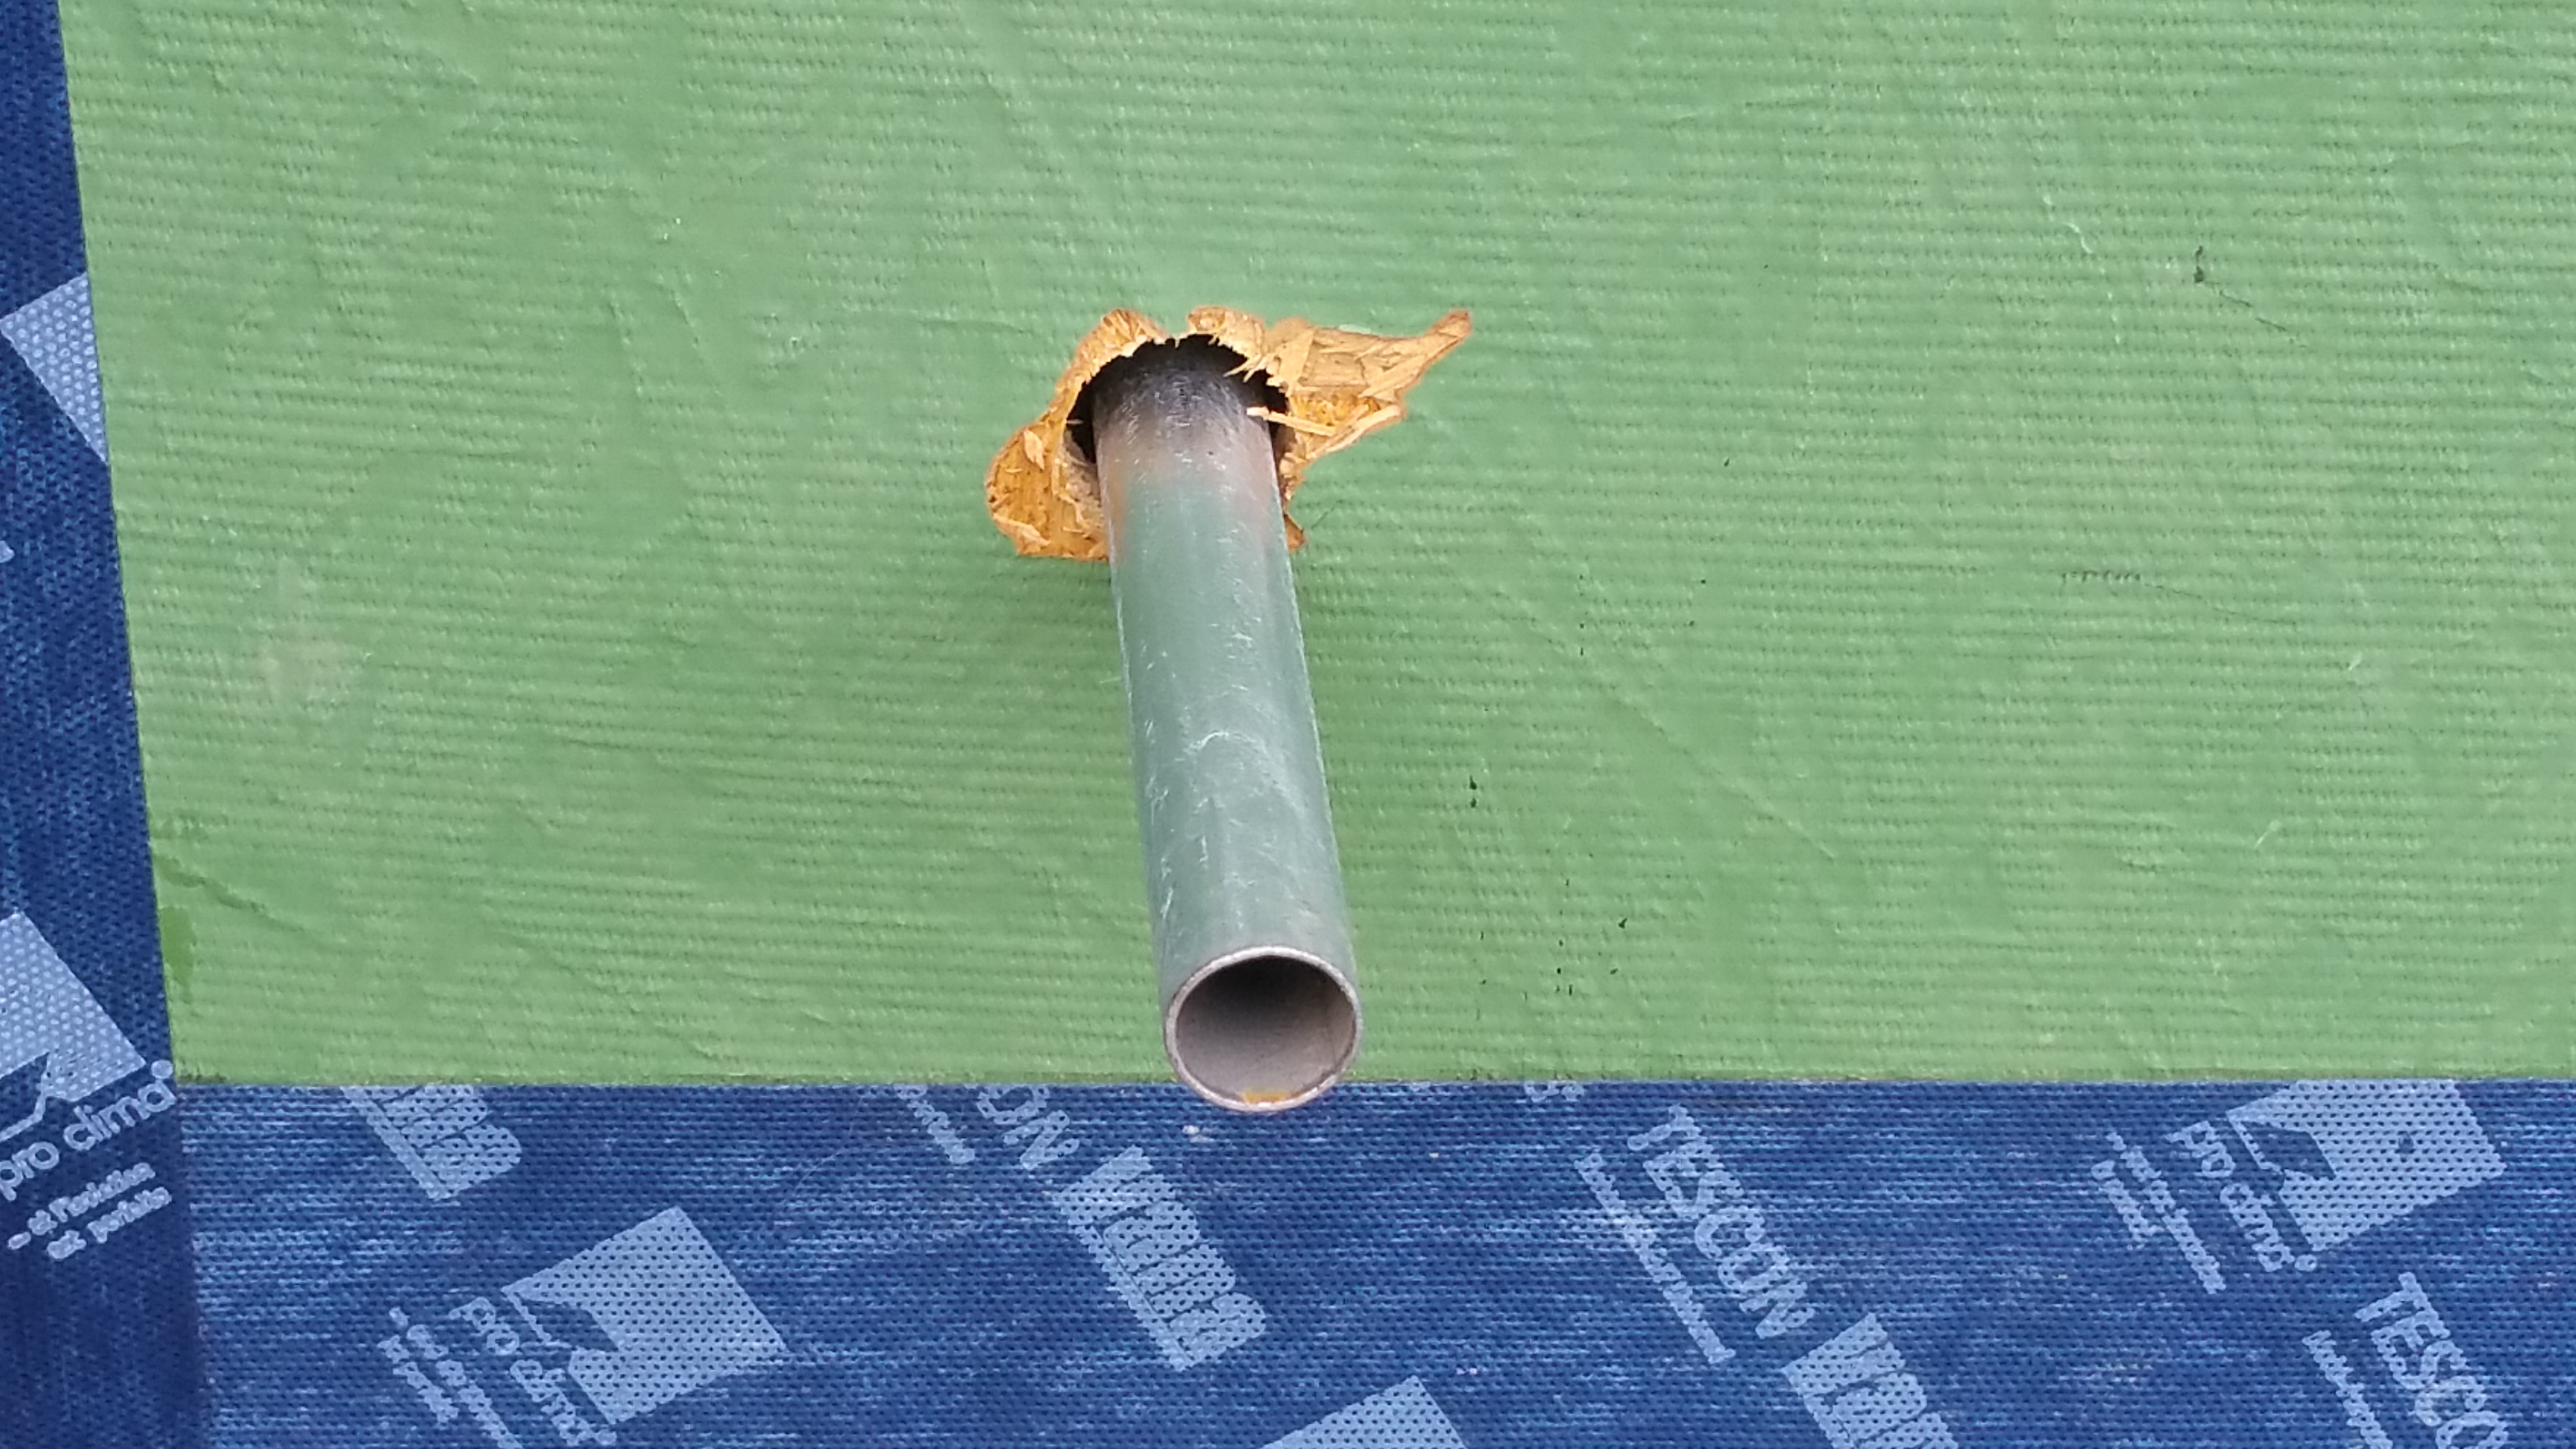
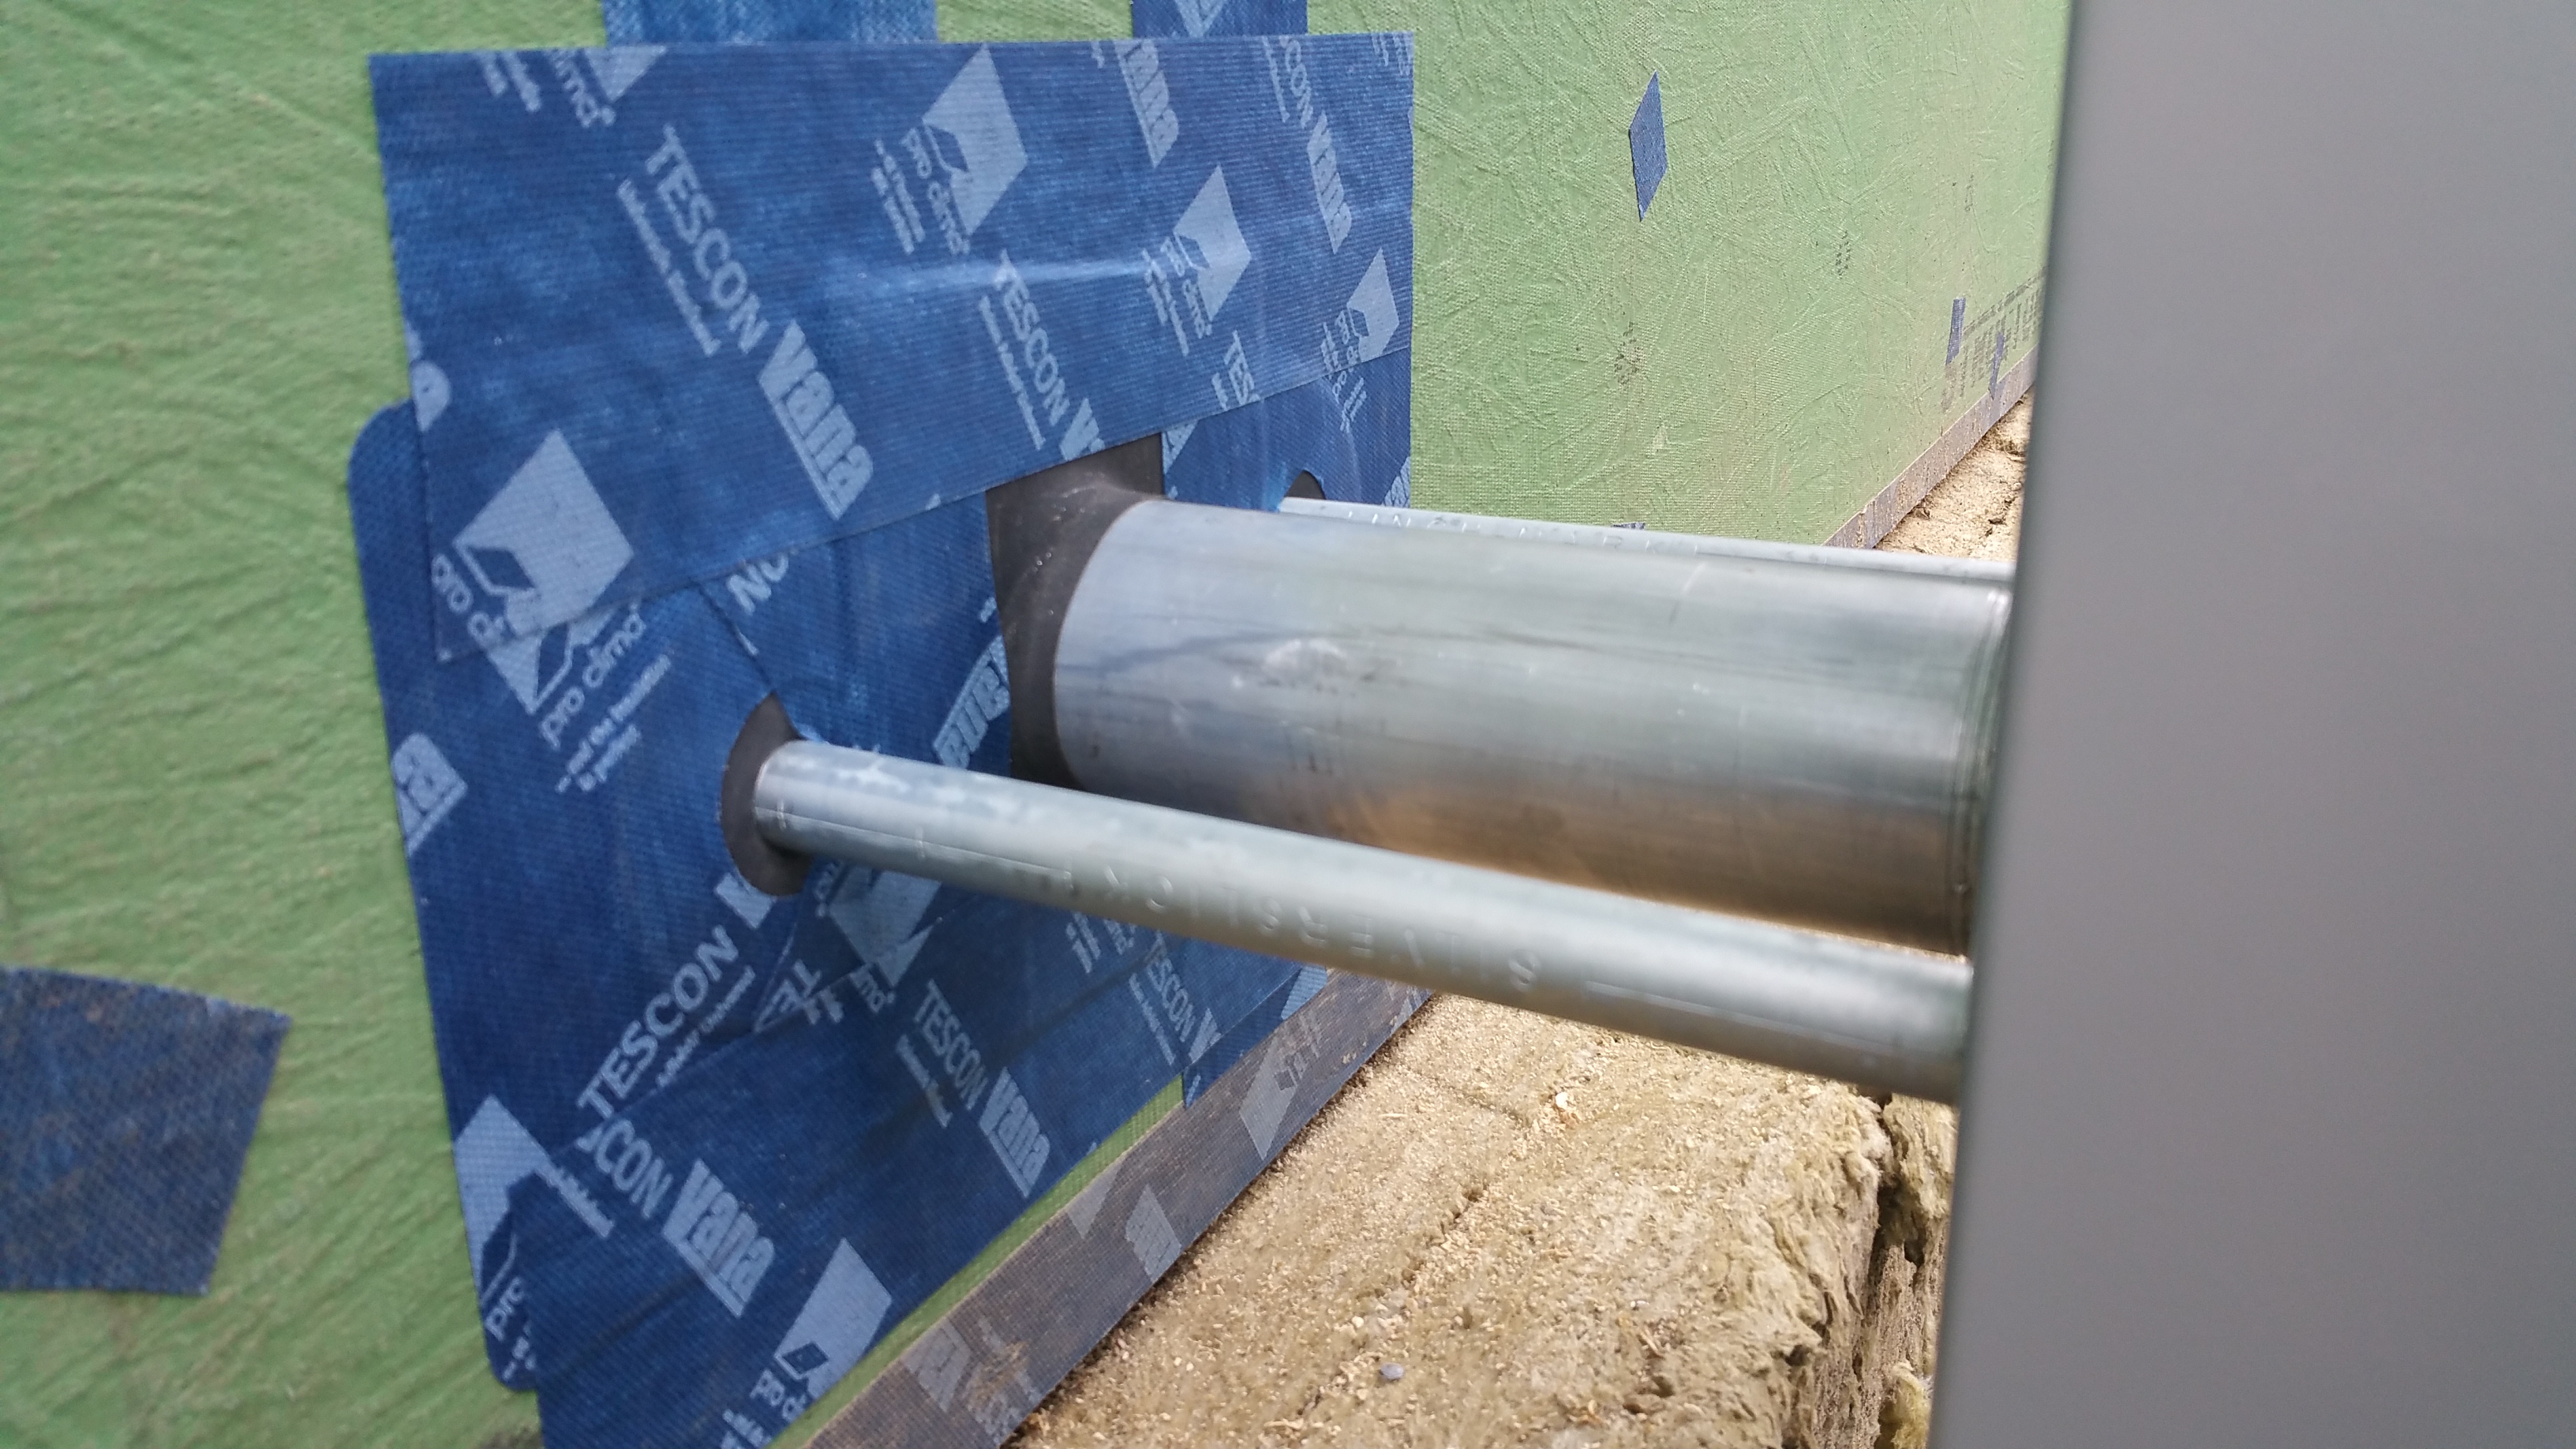
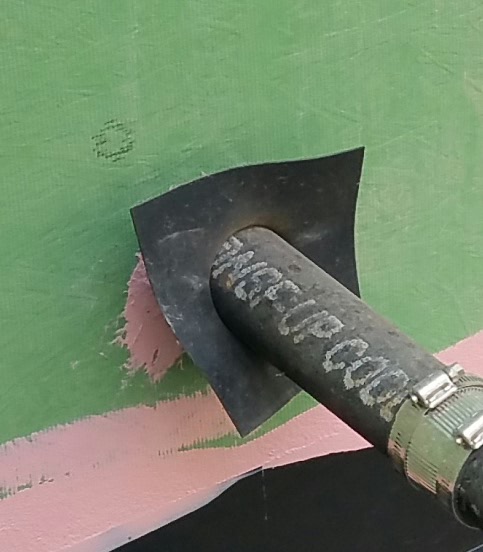
And here’s the conduit after the gasket and some tape:

Note the extended length of the conduit, anticipating our 4″ of Roxul covering the Zip, 2-layers of furring strips (vertical then horizontal — for vertically oriented siding), and the eventual charred cedar siding.
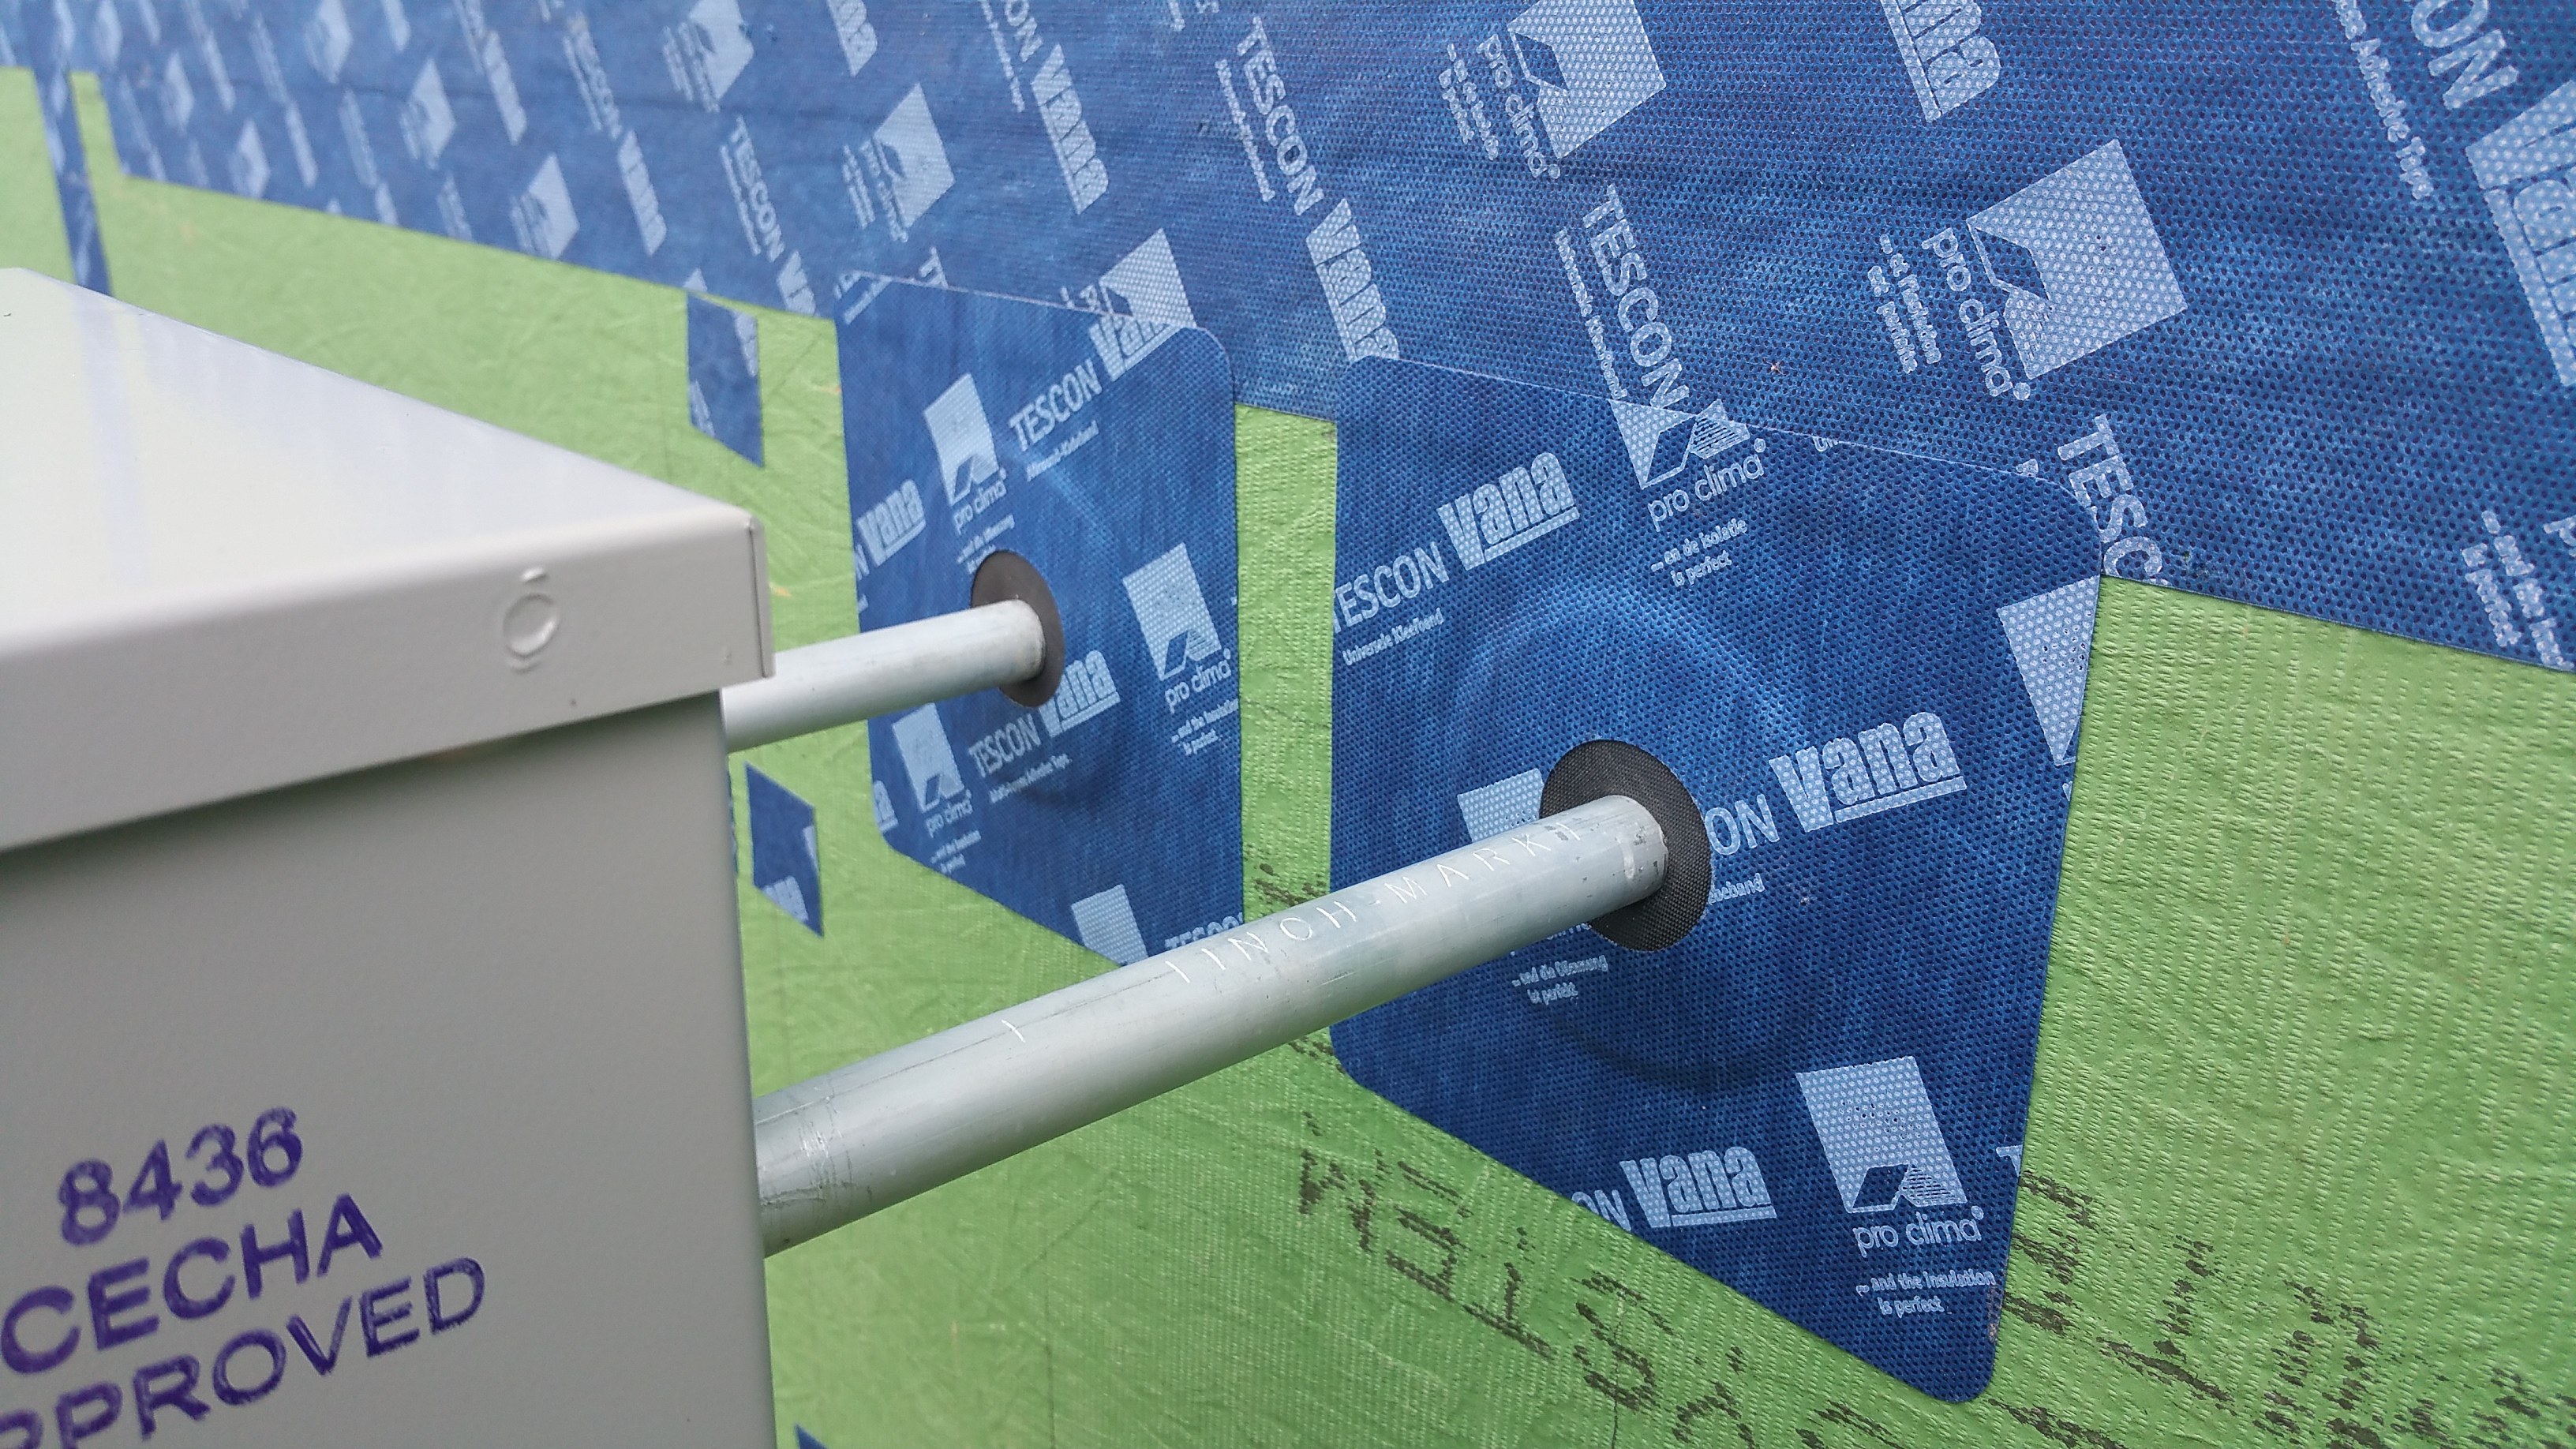
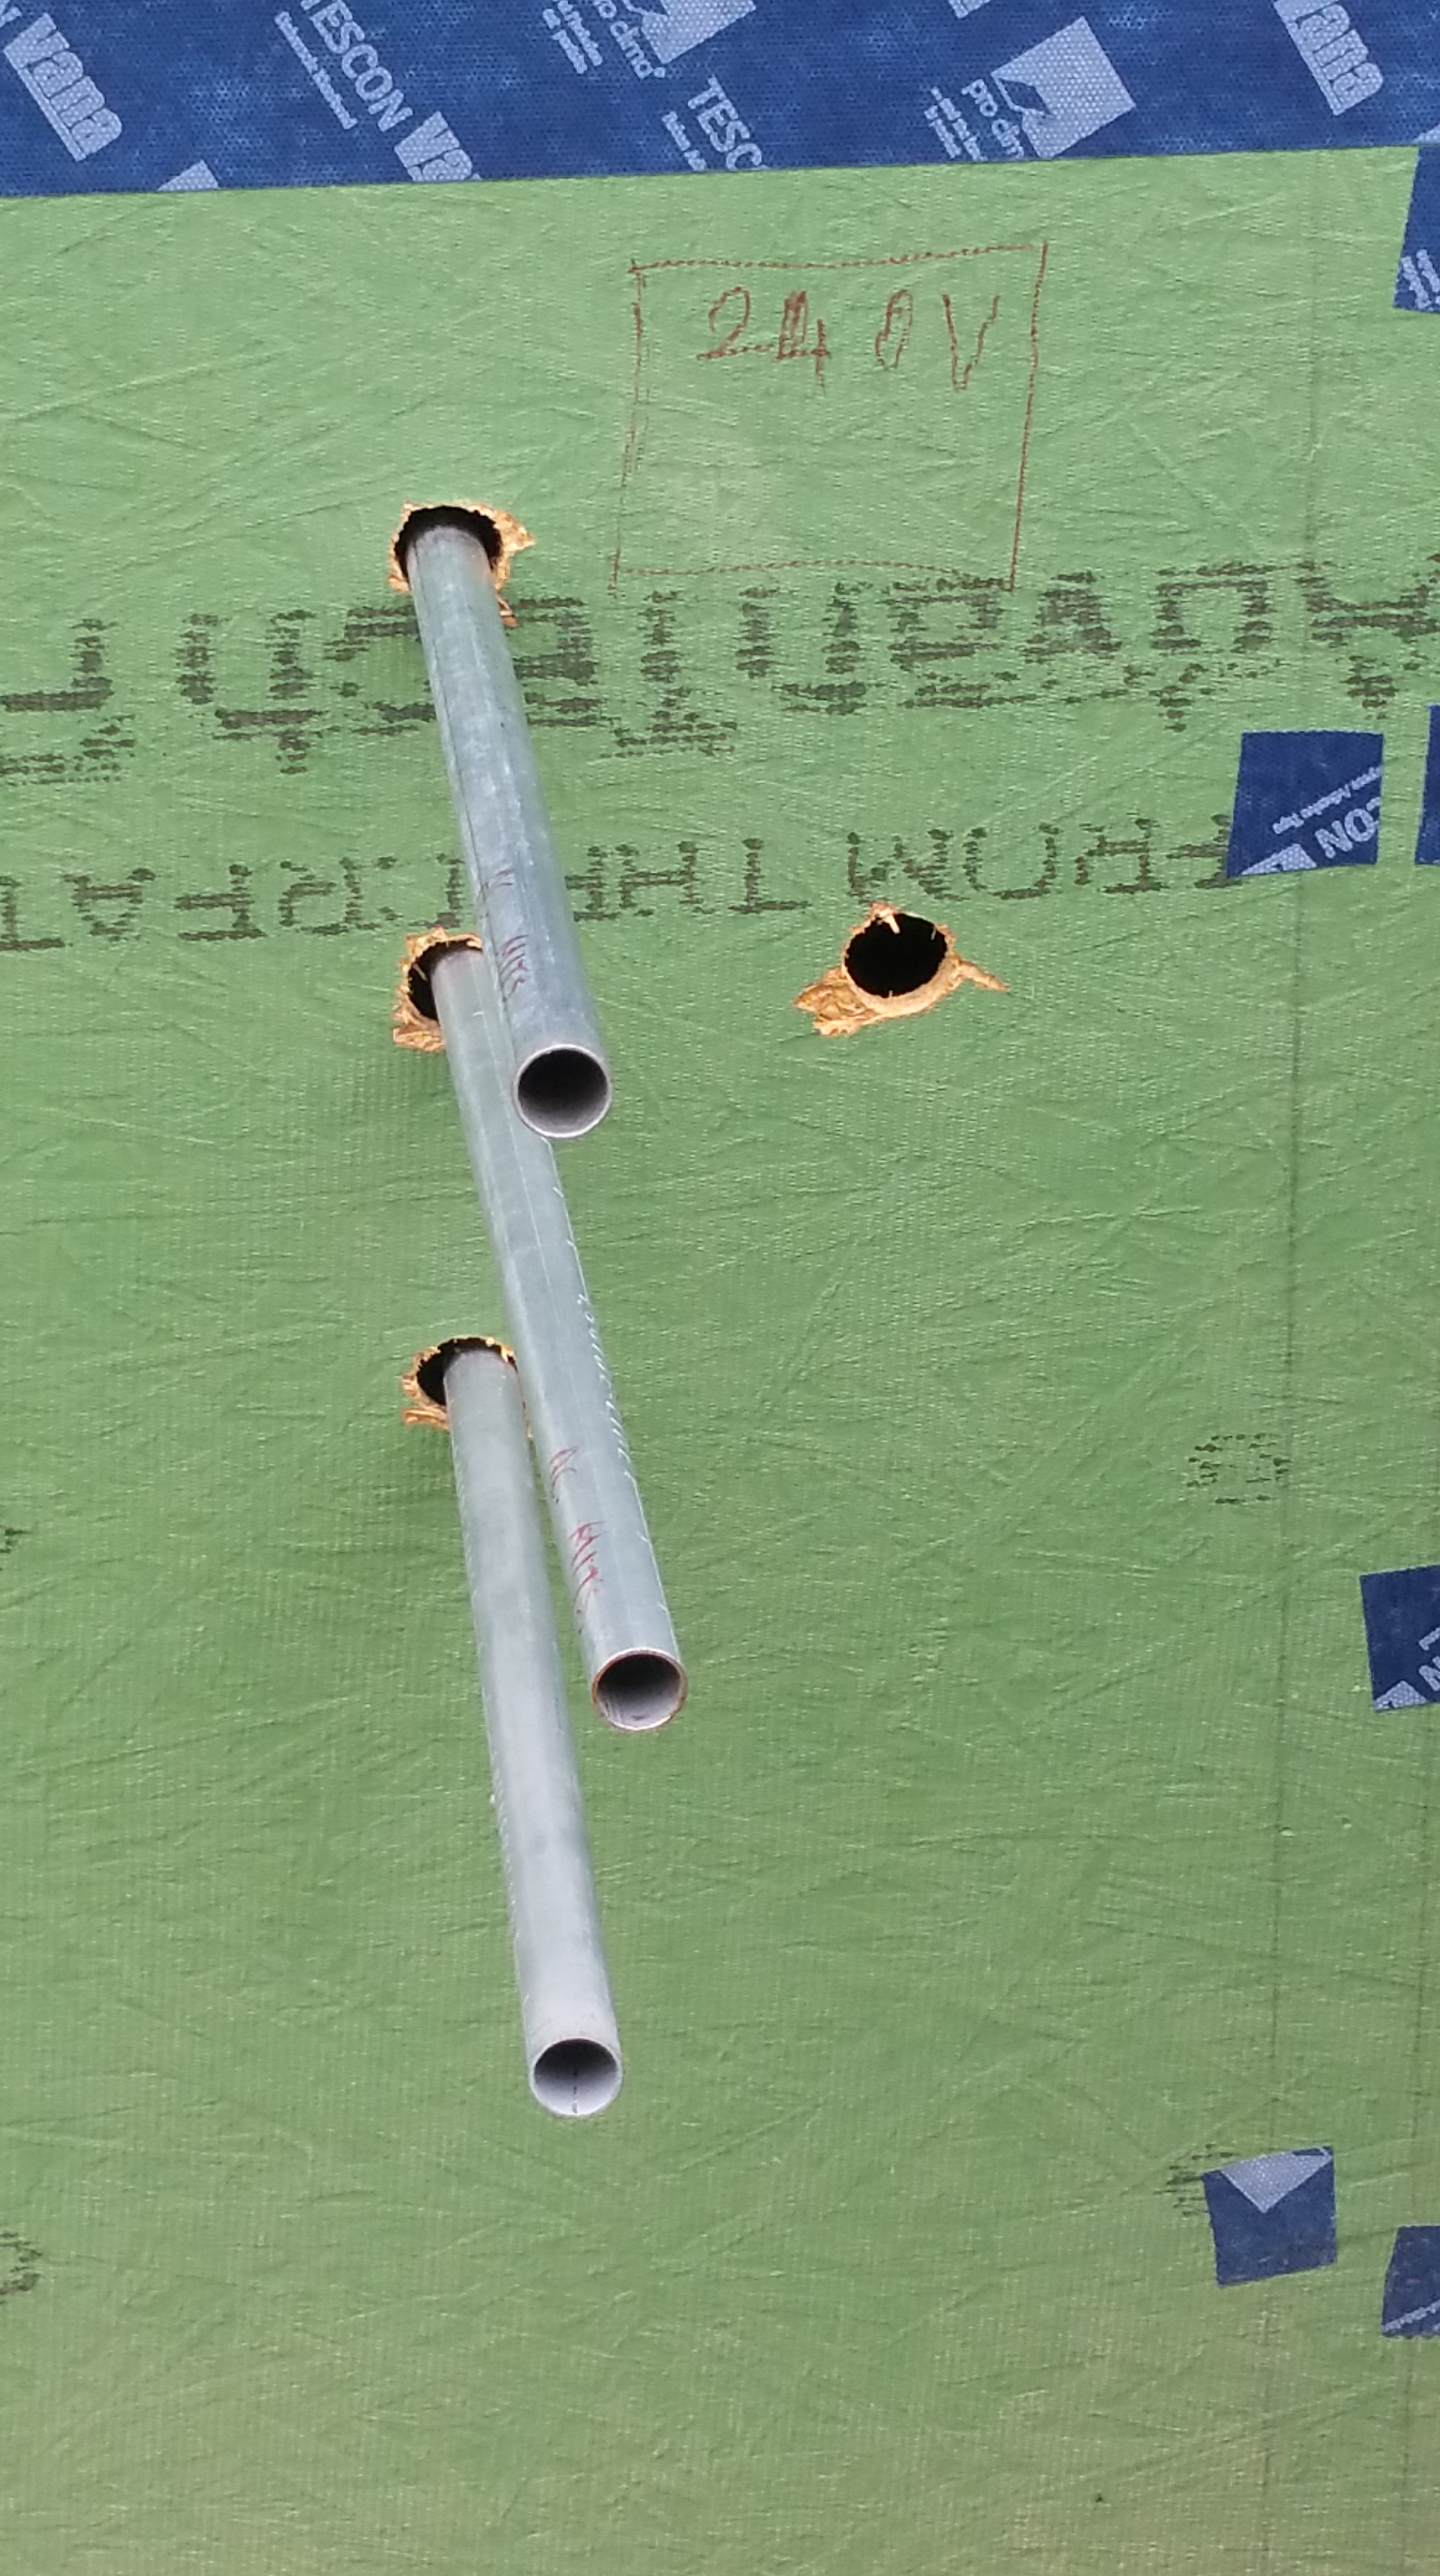
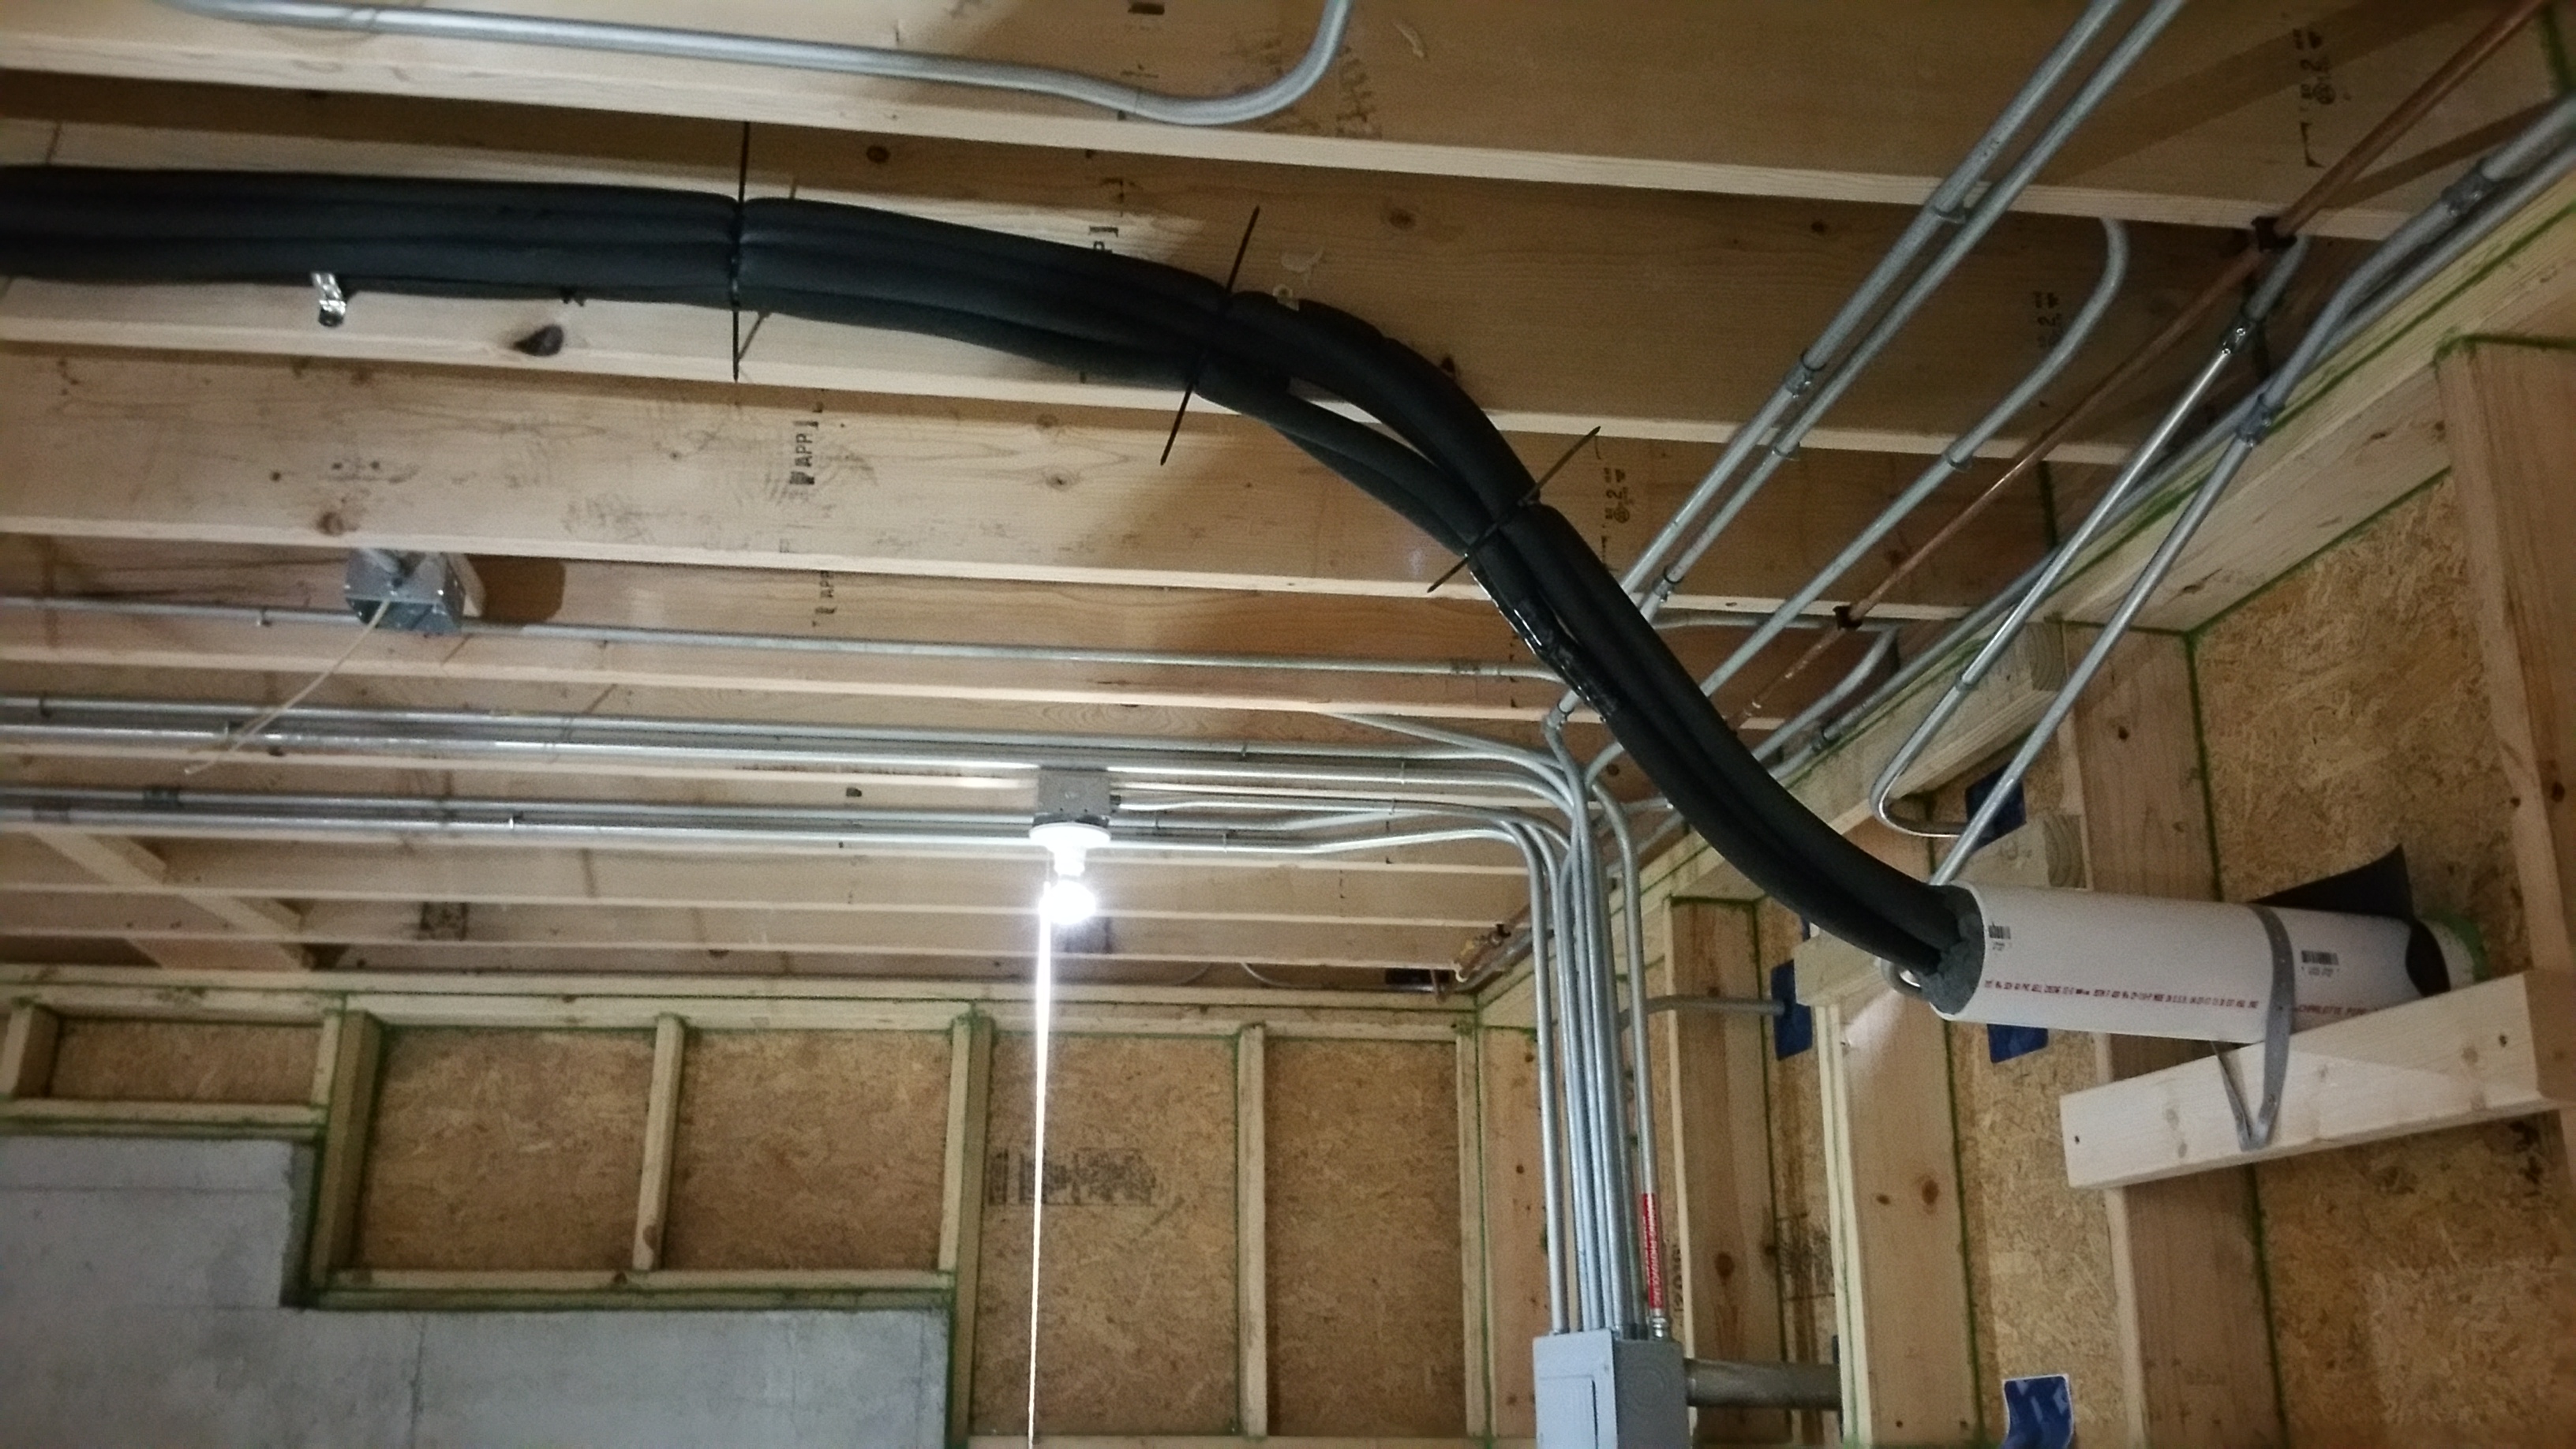
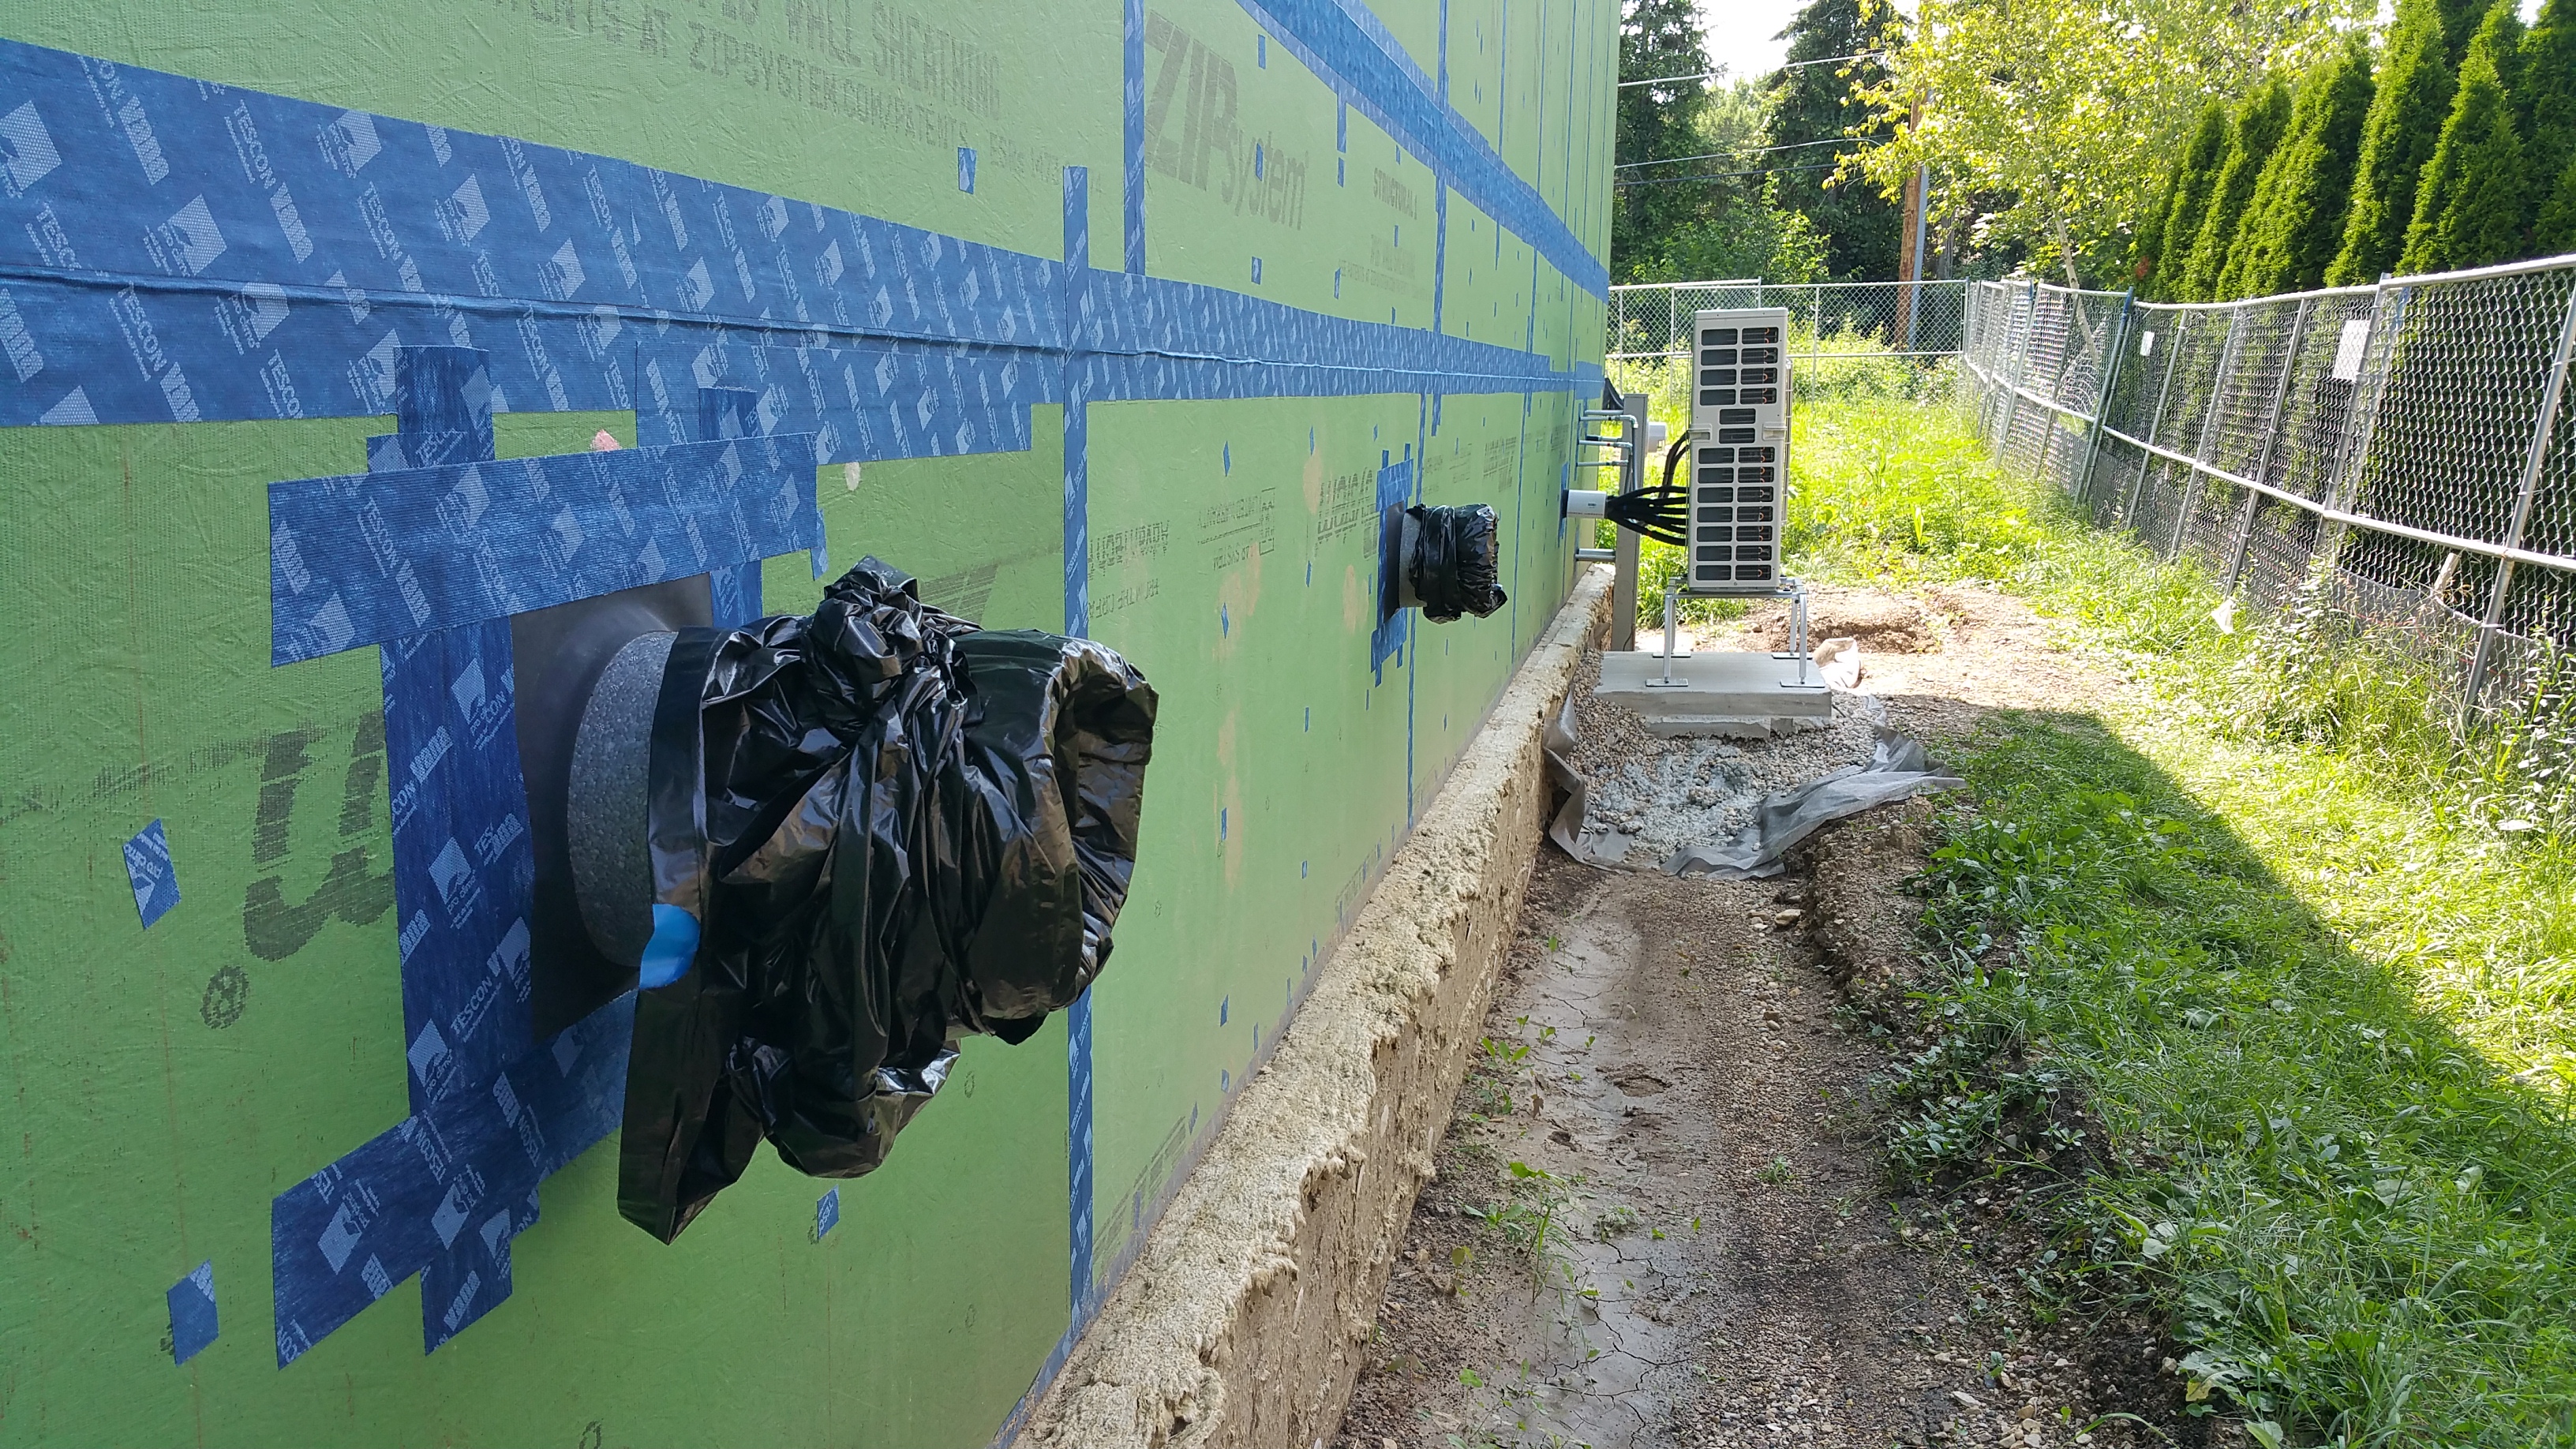
The photo below shows the penetrations, along with multiple lines of conduit, for our eventual ductless mini-split Mitsubishi heat pump system. The empty hole will be our disconnect for the heat pump. I’ll go into the details of our ductless mini-split system in a future post.
Same series of conduit pipes after gaskets and being connected to the compressor outside:

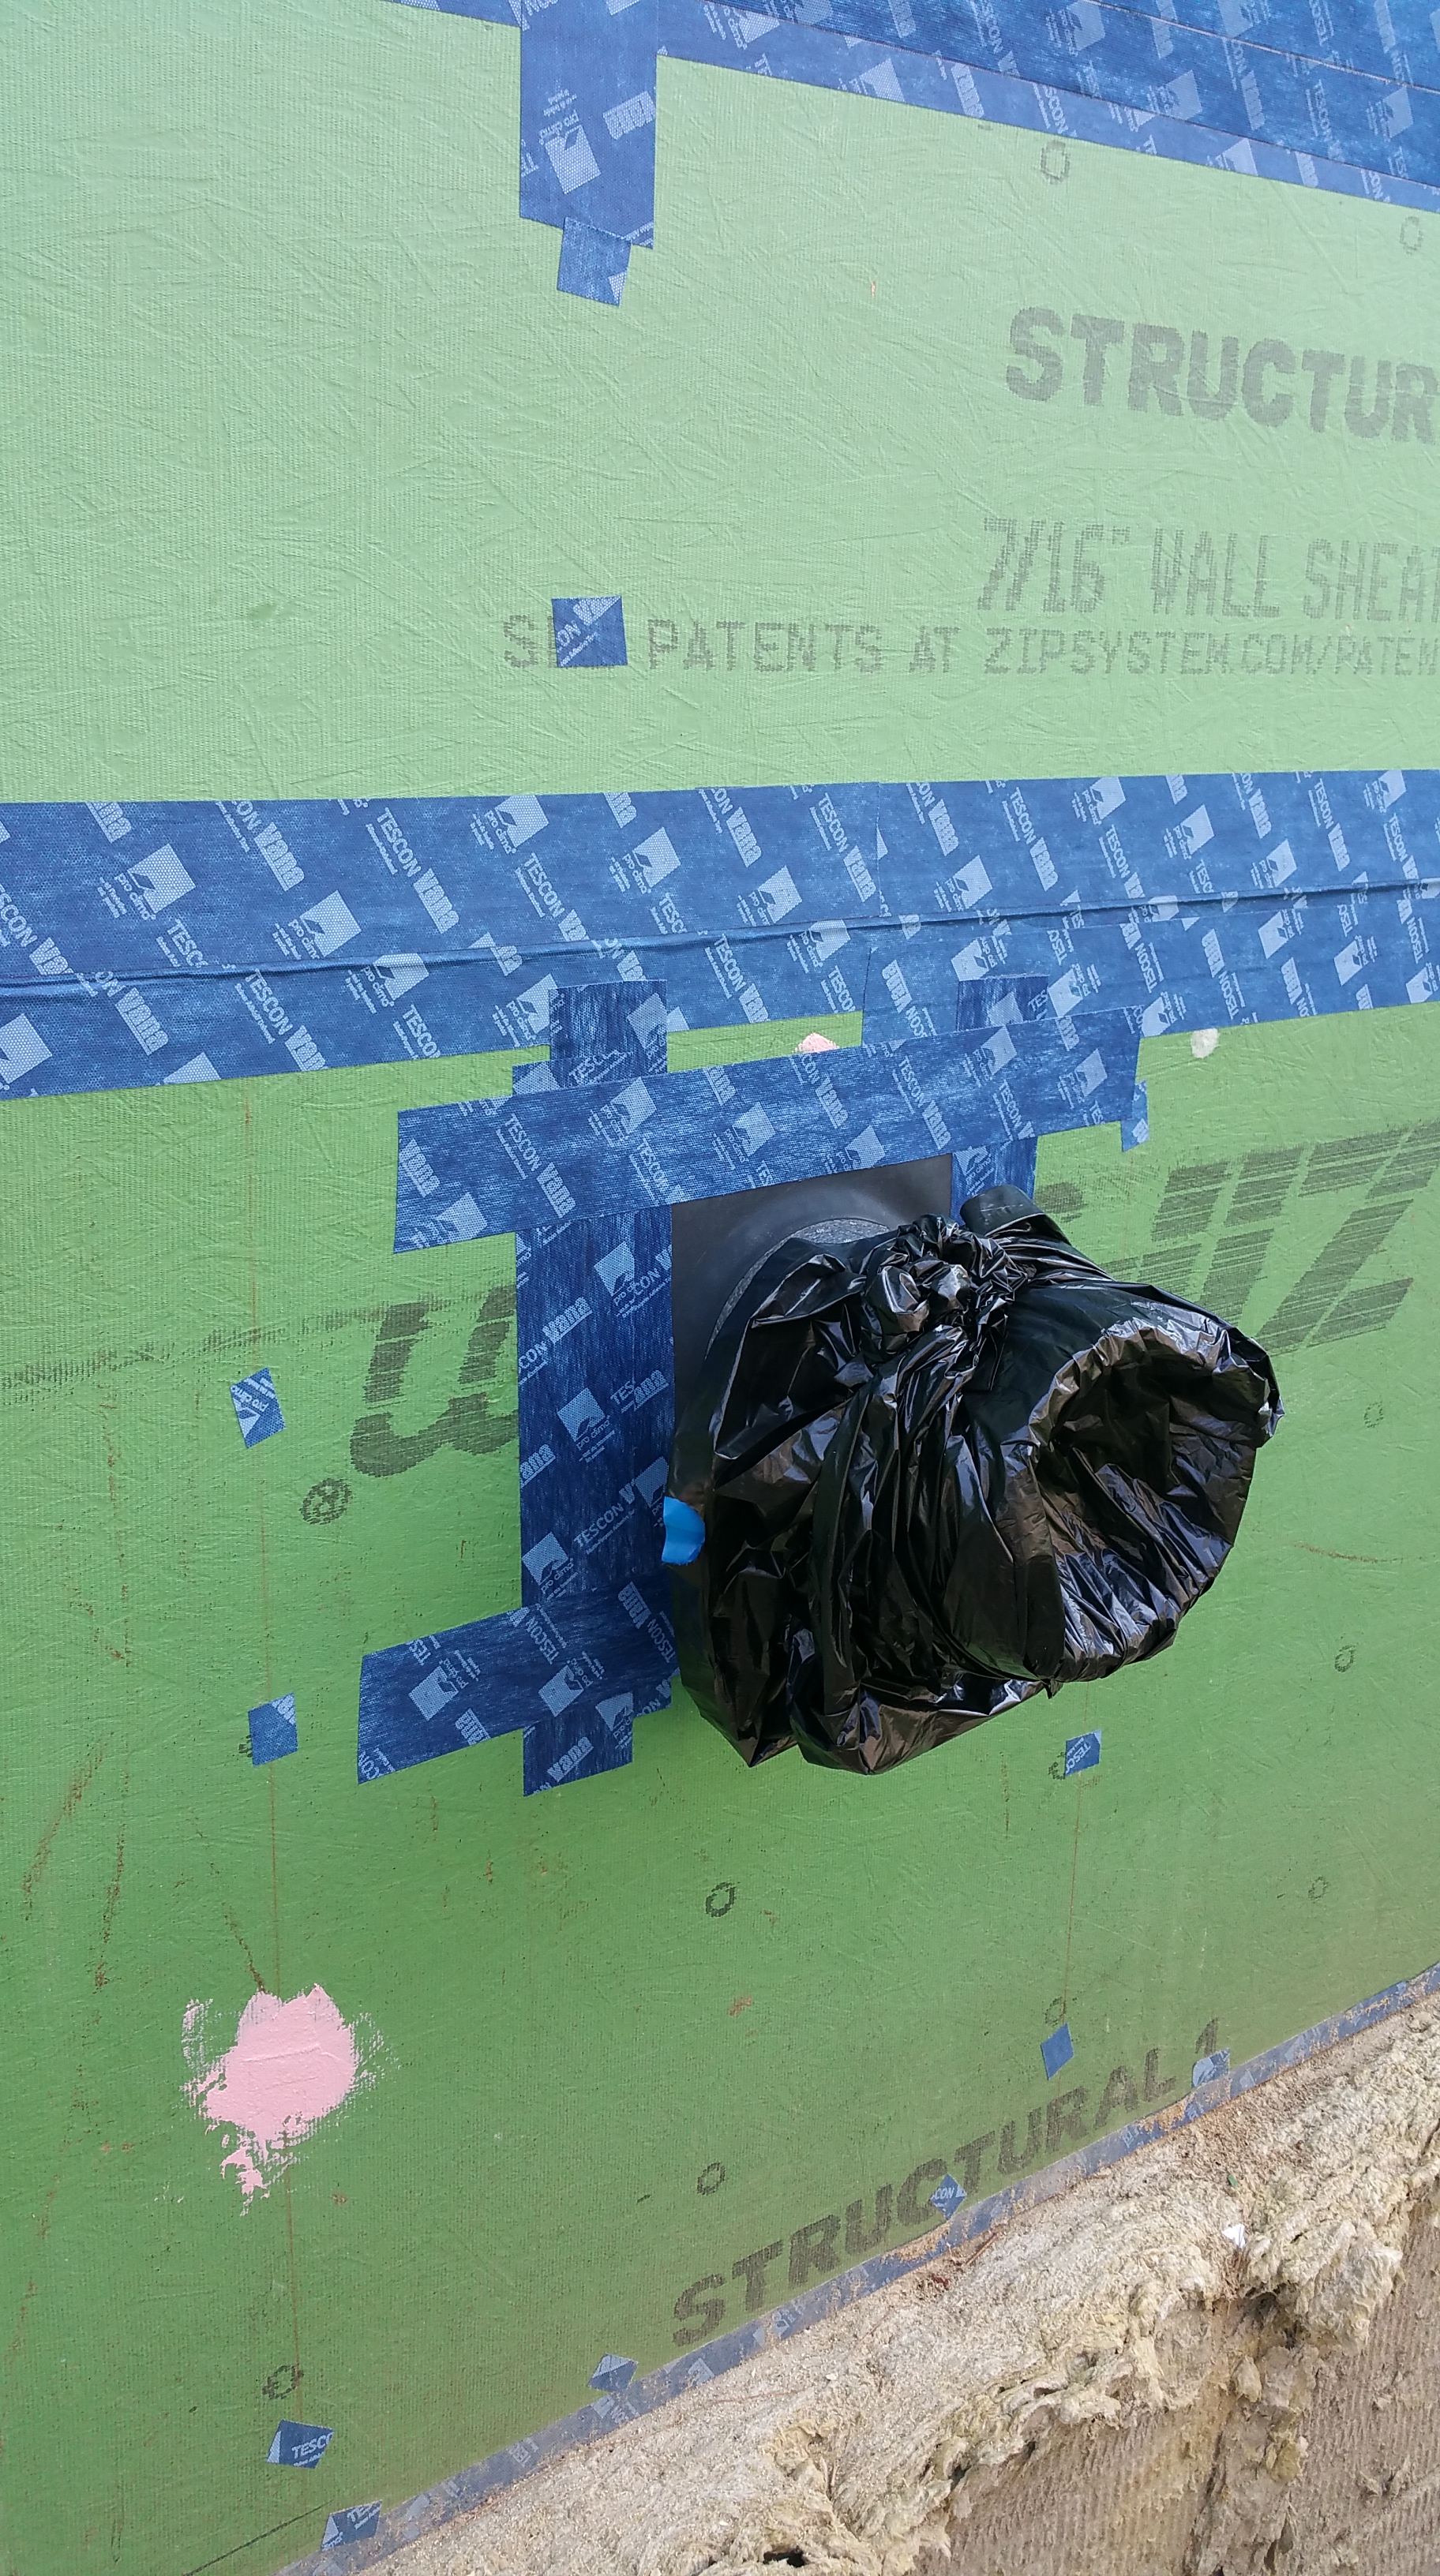
In addition to the conduit for electrical hook-up, the Mitsubishi heat pump system required a separate penetration for running the refrigerant lines to the compressor:

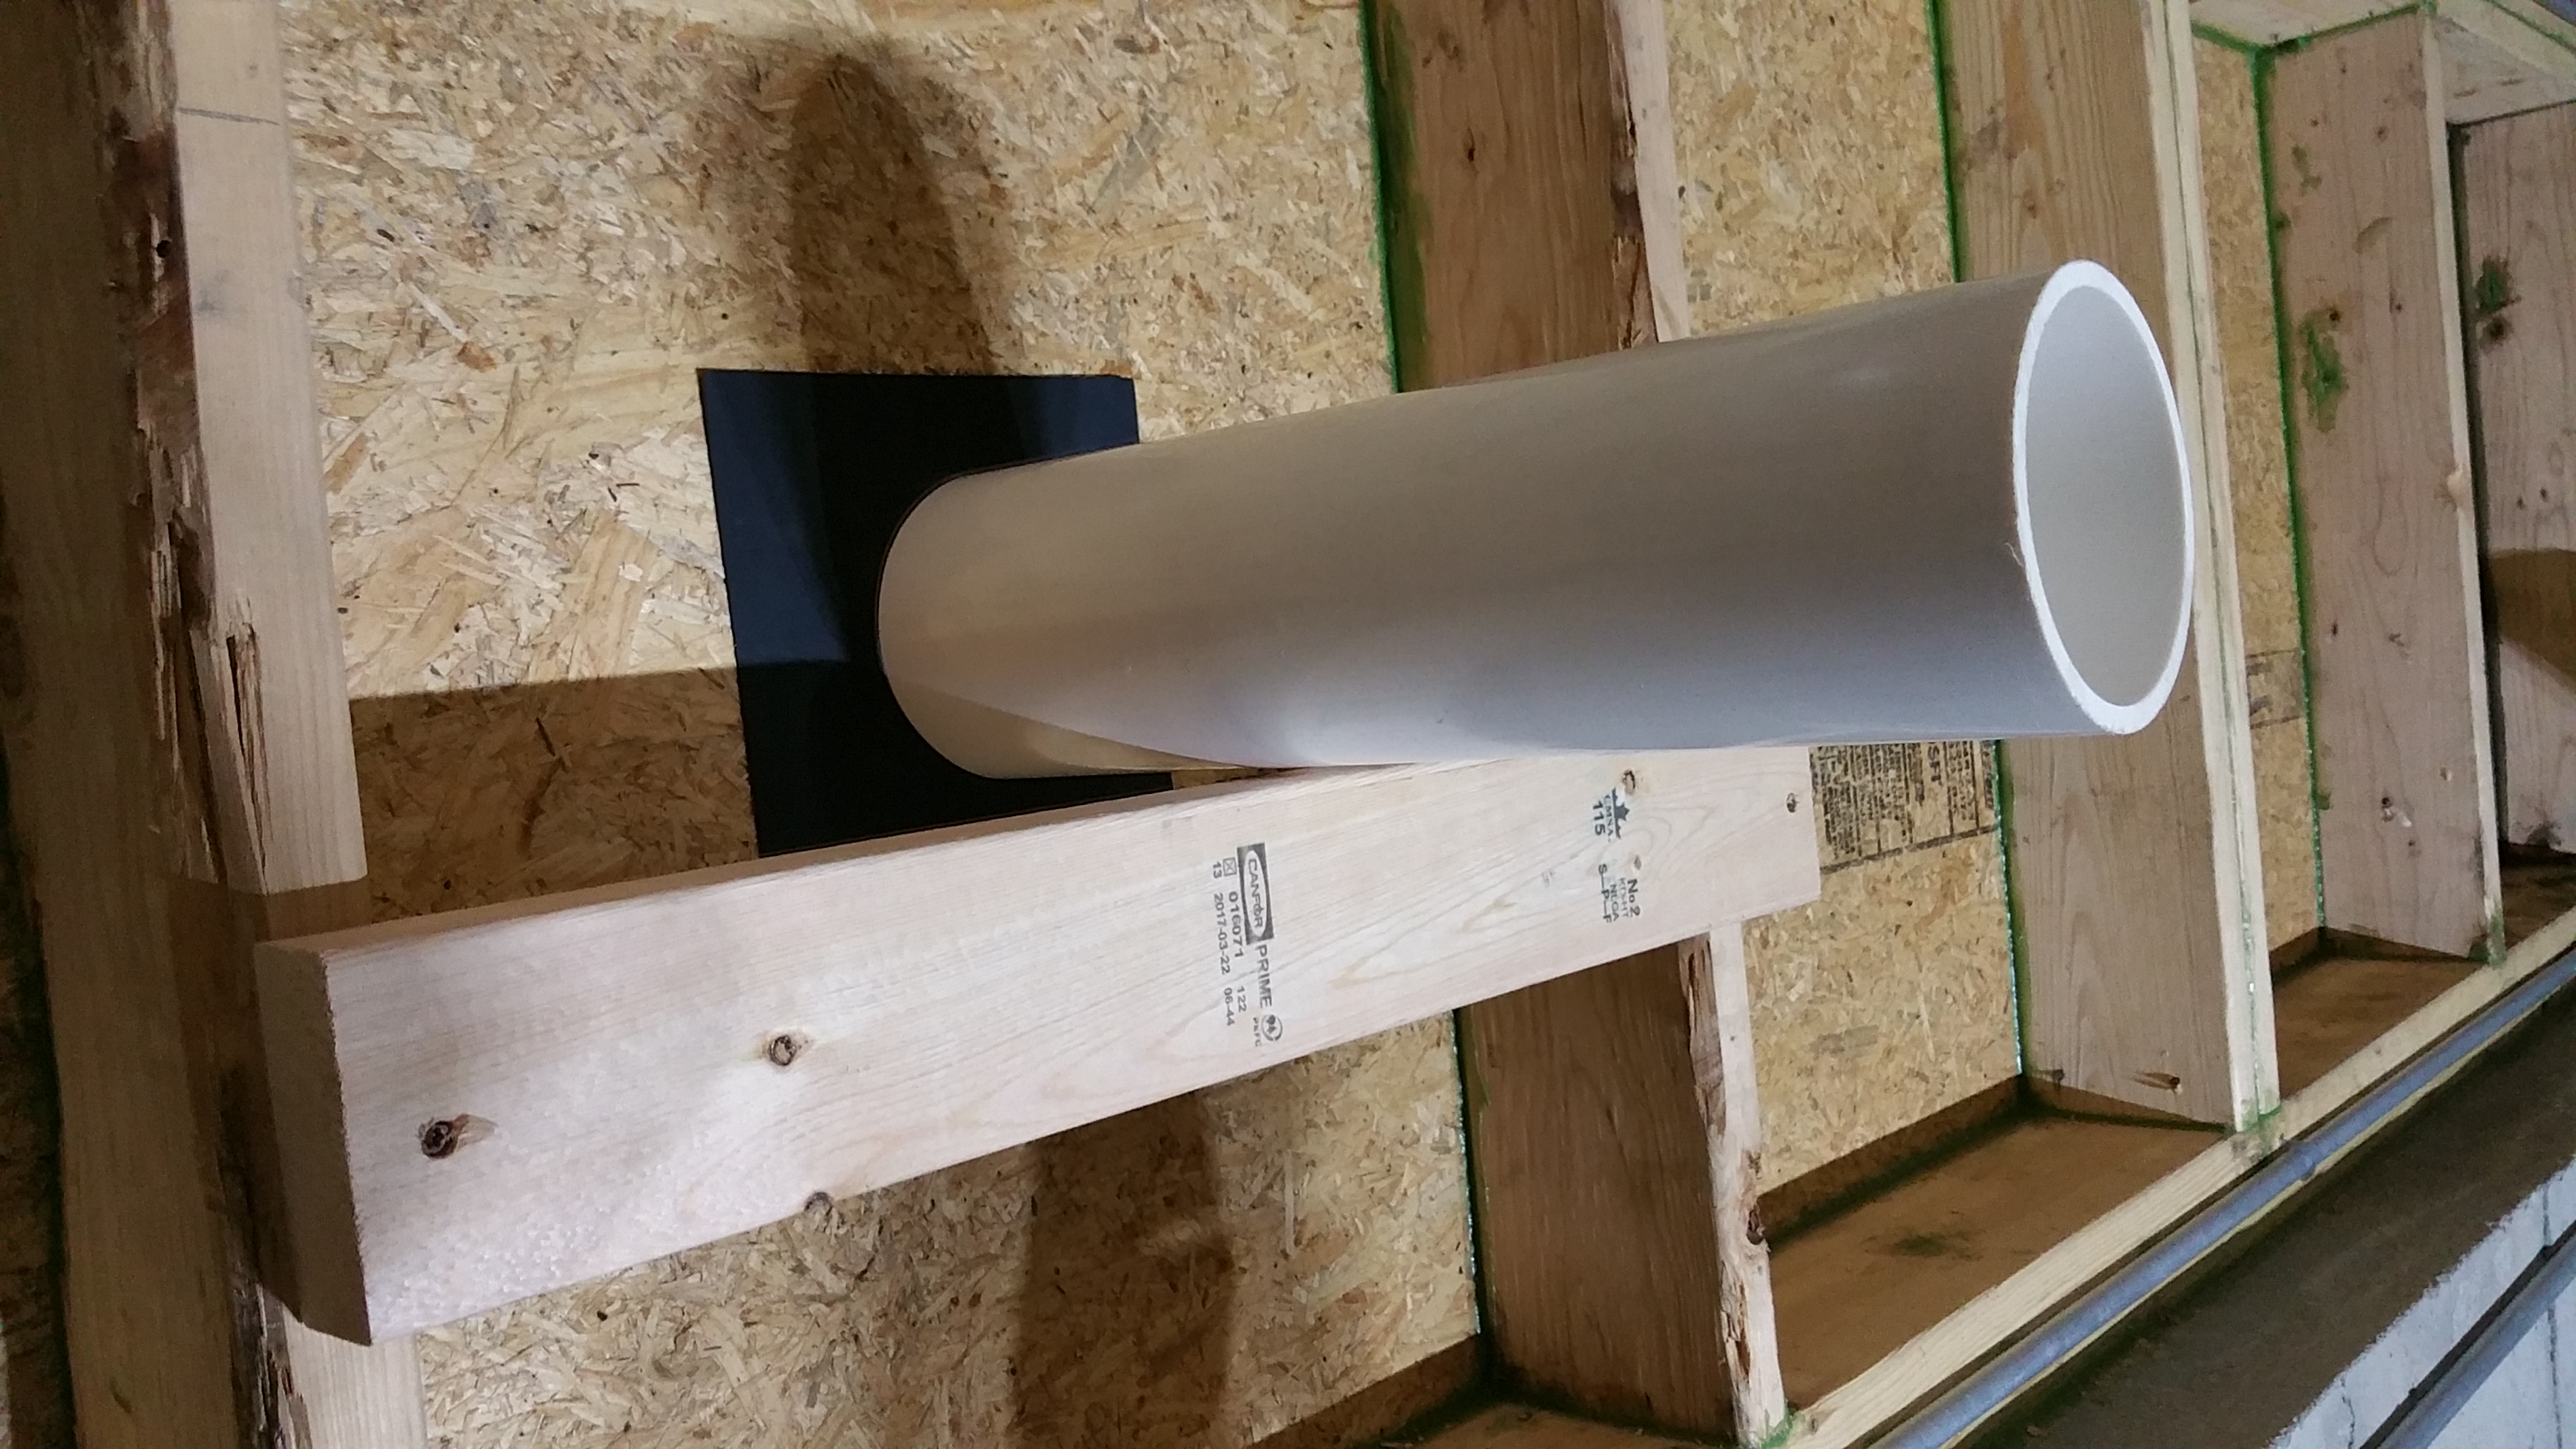
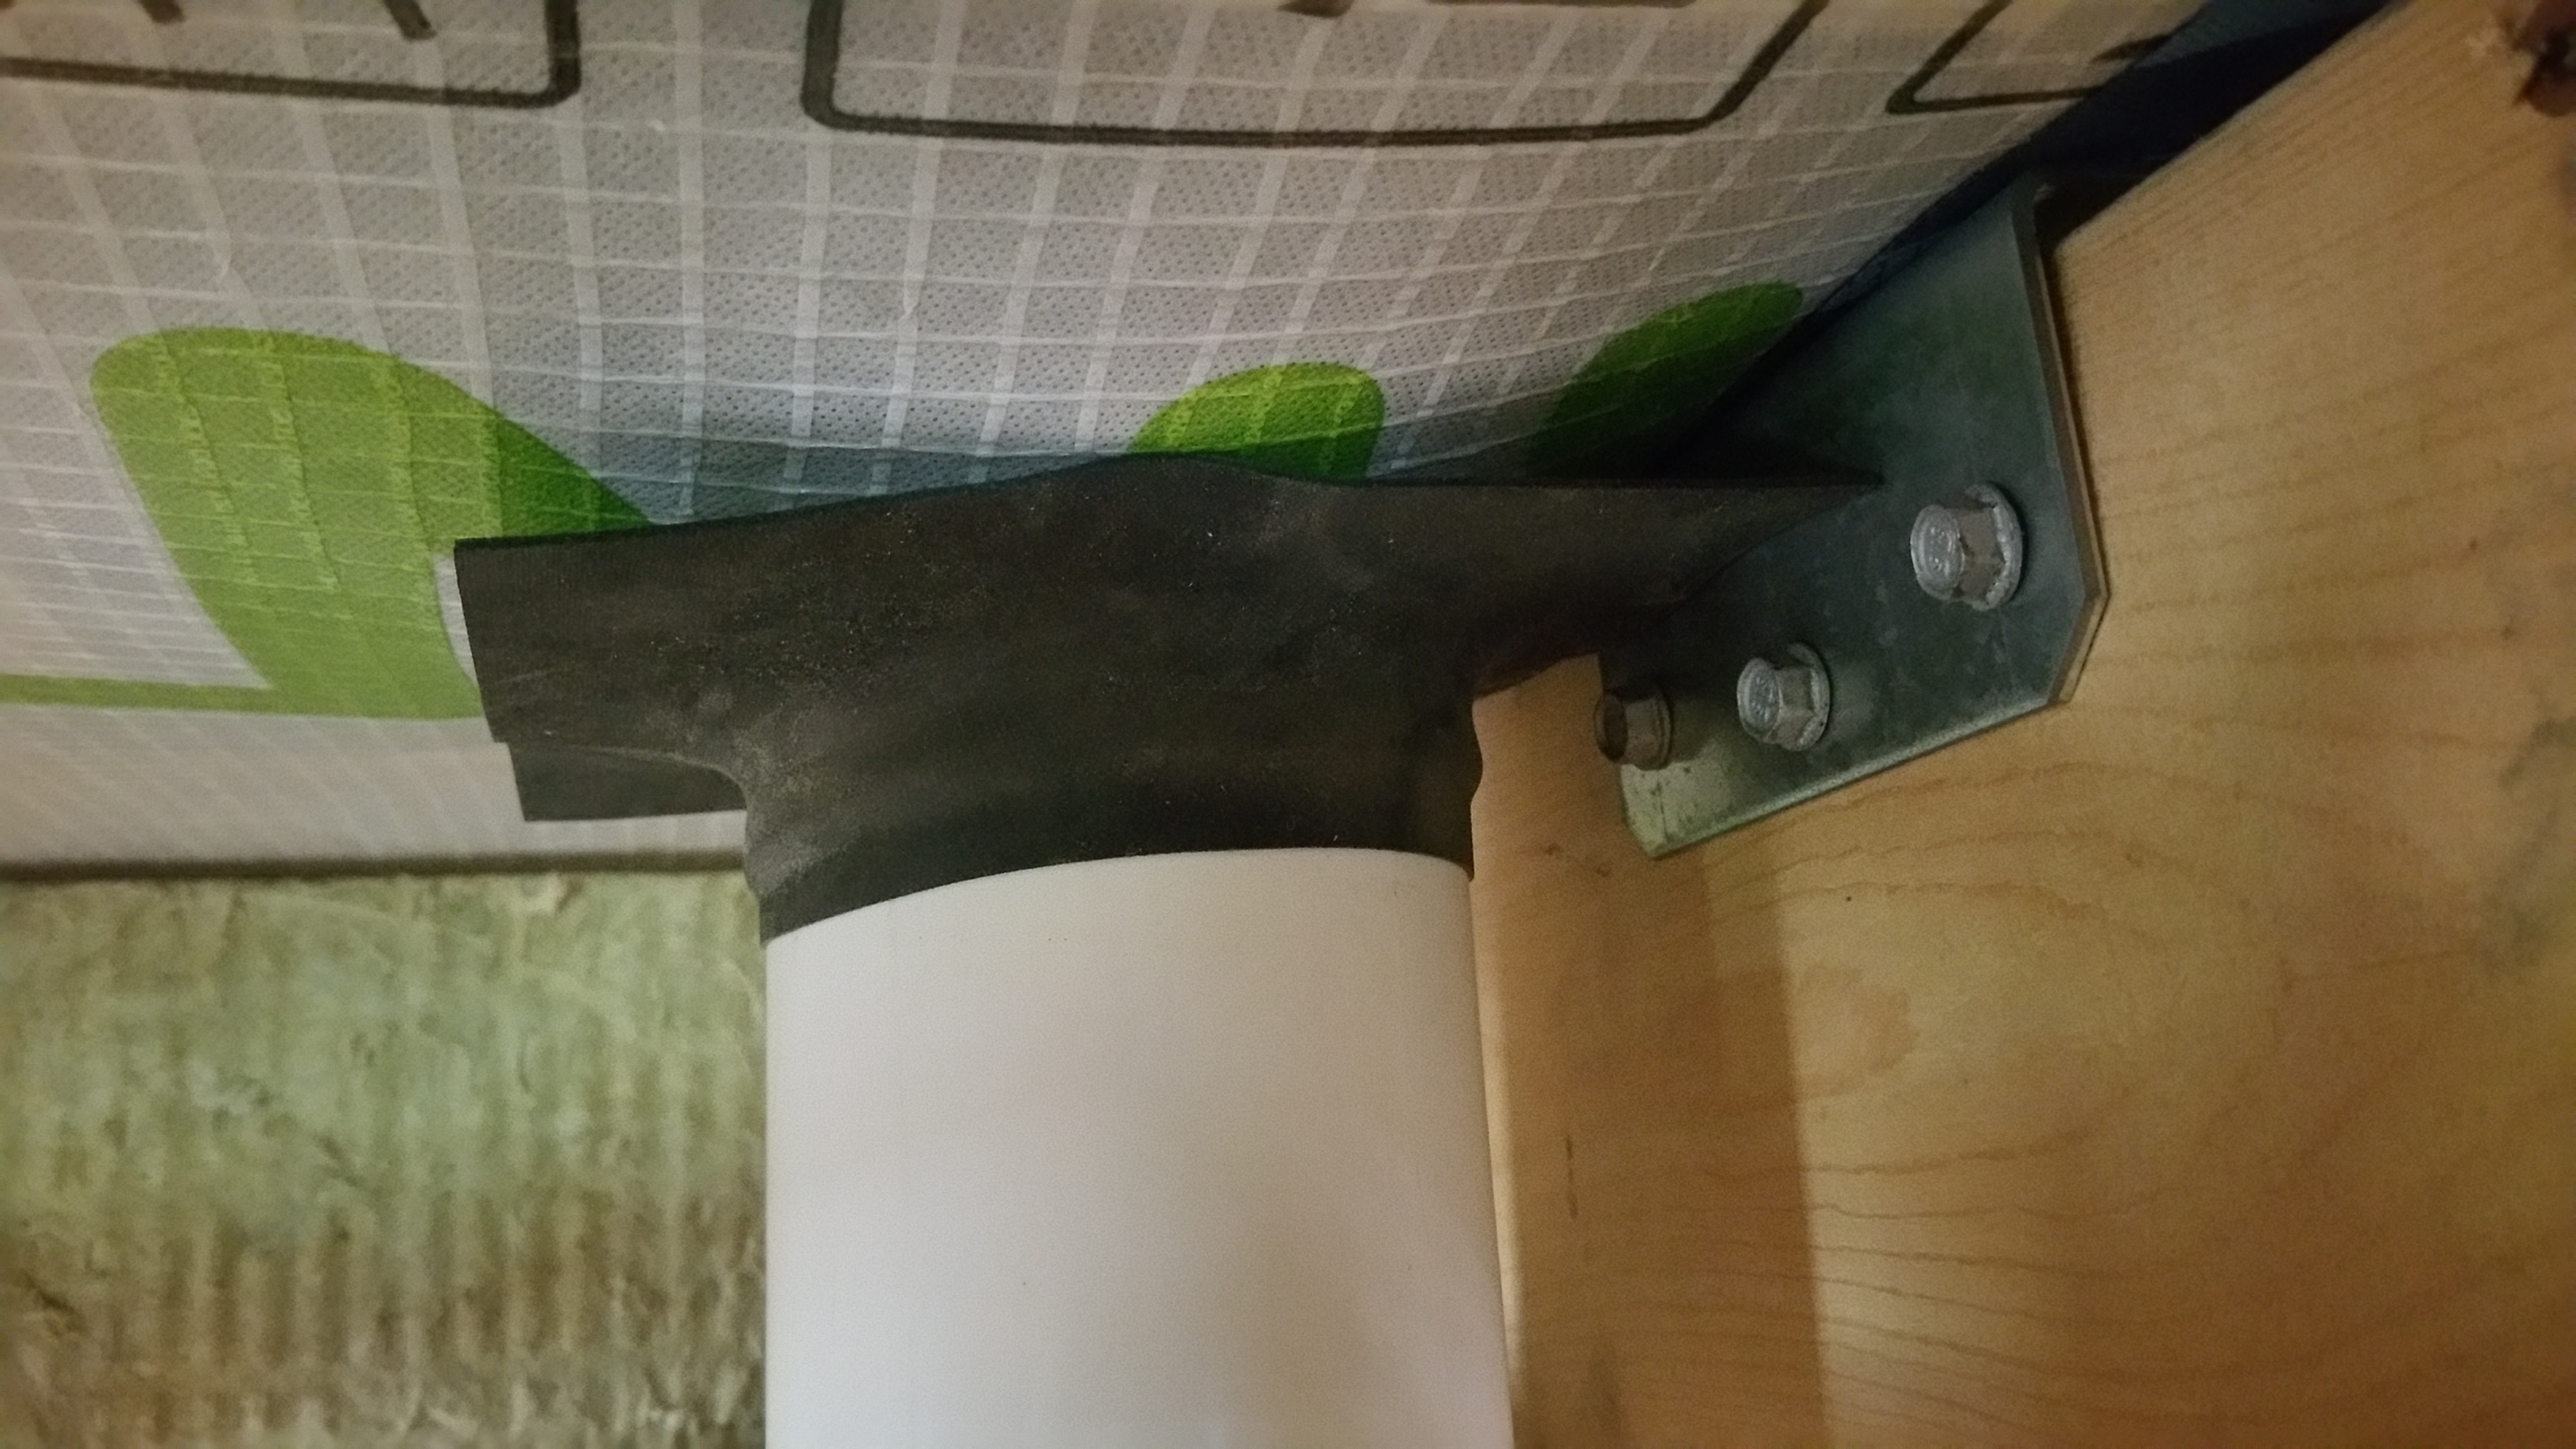
After discussing it with Mike from Compass Heating and Air, who did our ductless mini-split installation, we decided to use a 4″ section of PVC plumbing pipe as our “conduit” for running the refrigerant lines from the interior of the structure to the outside:

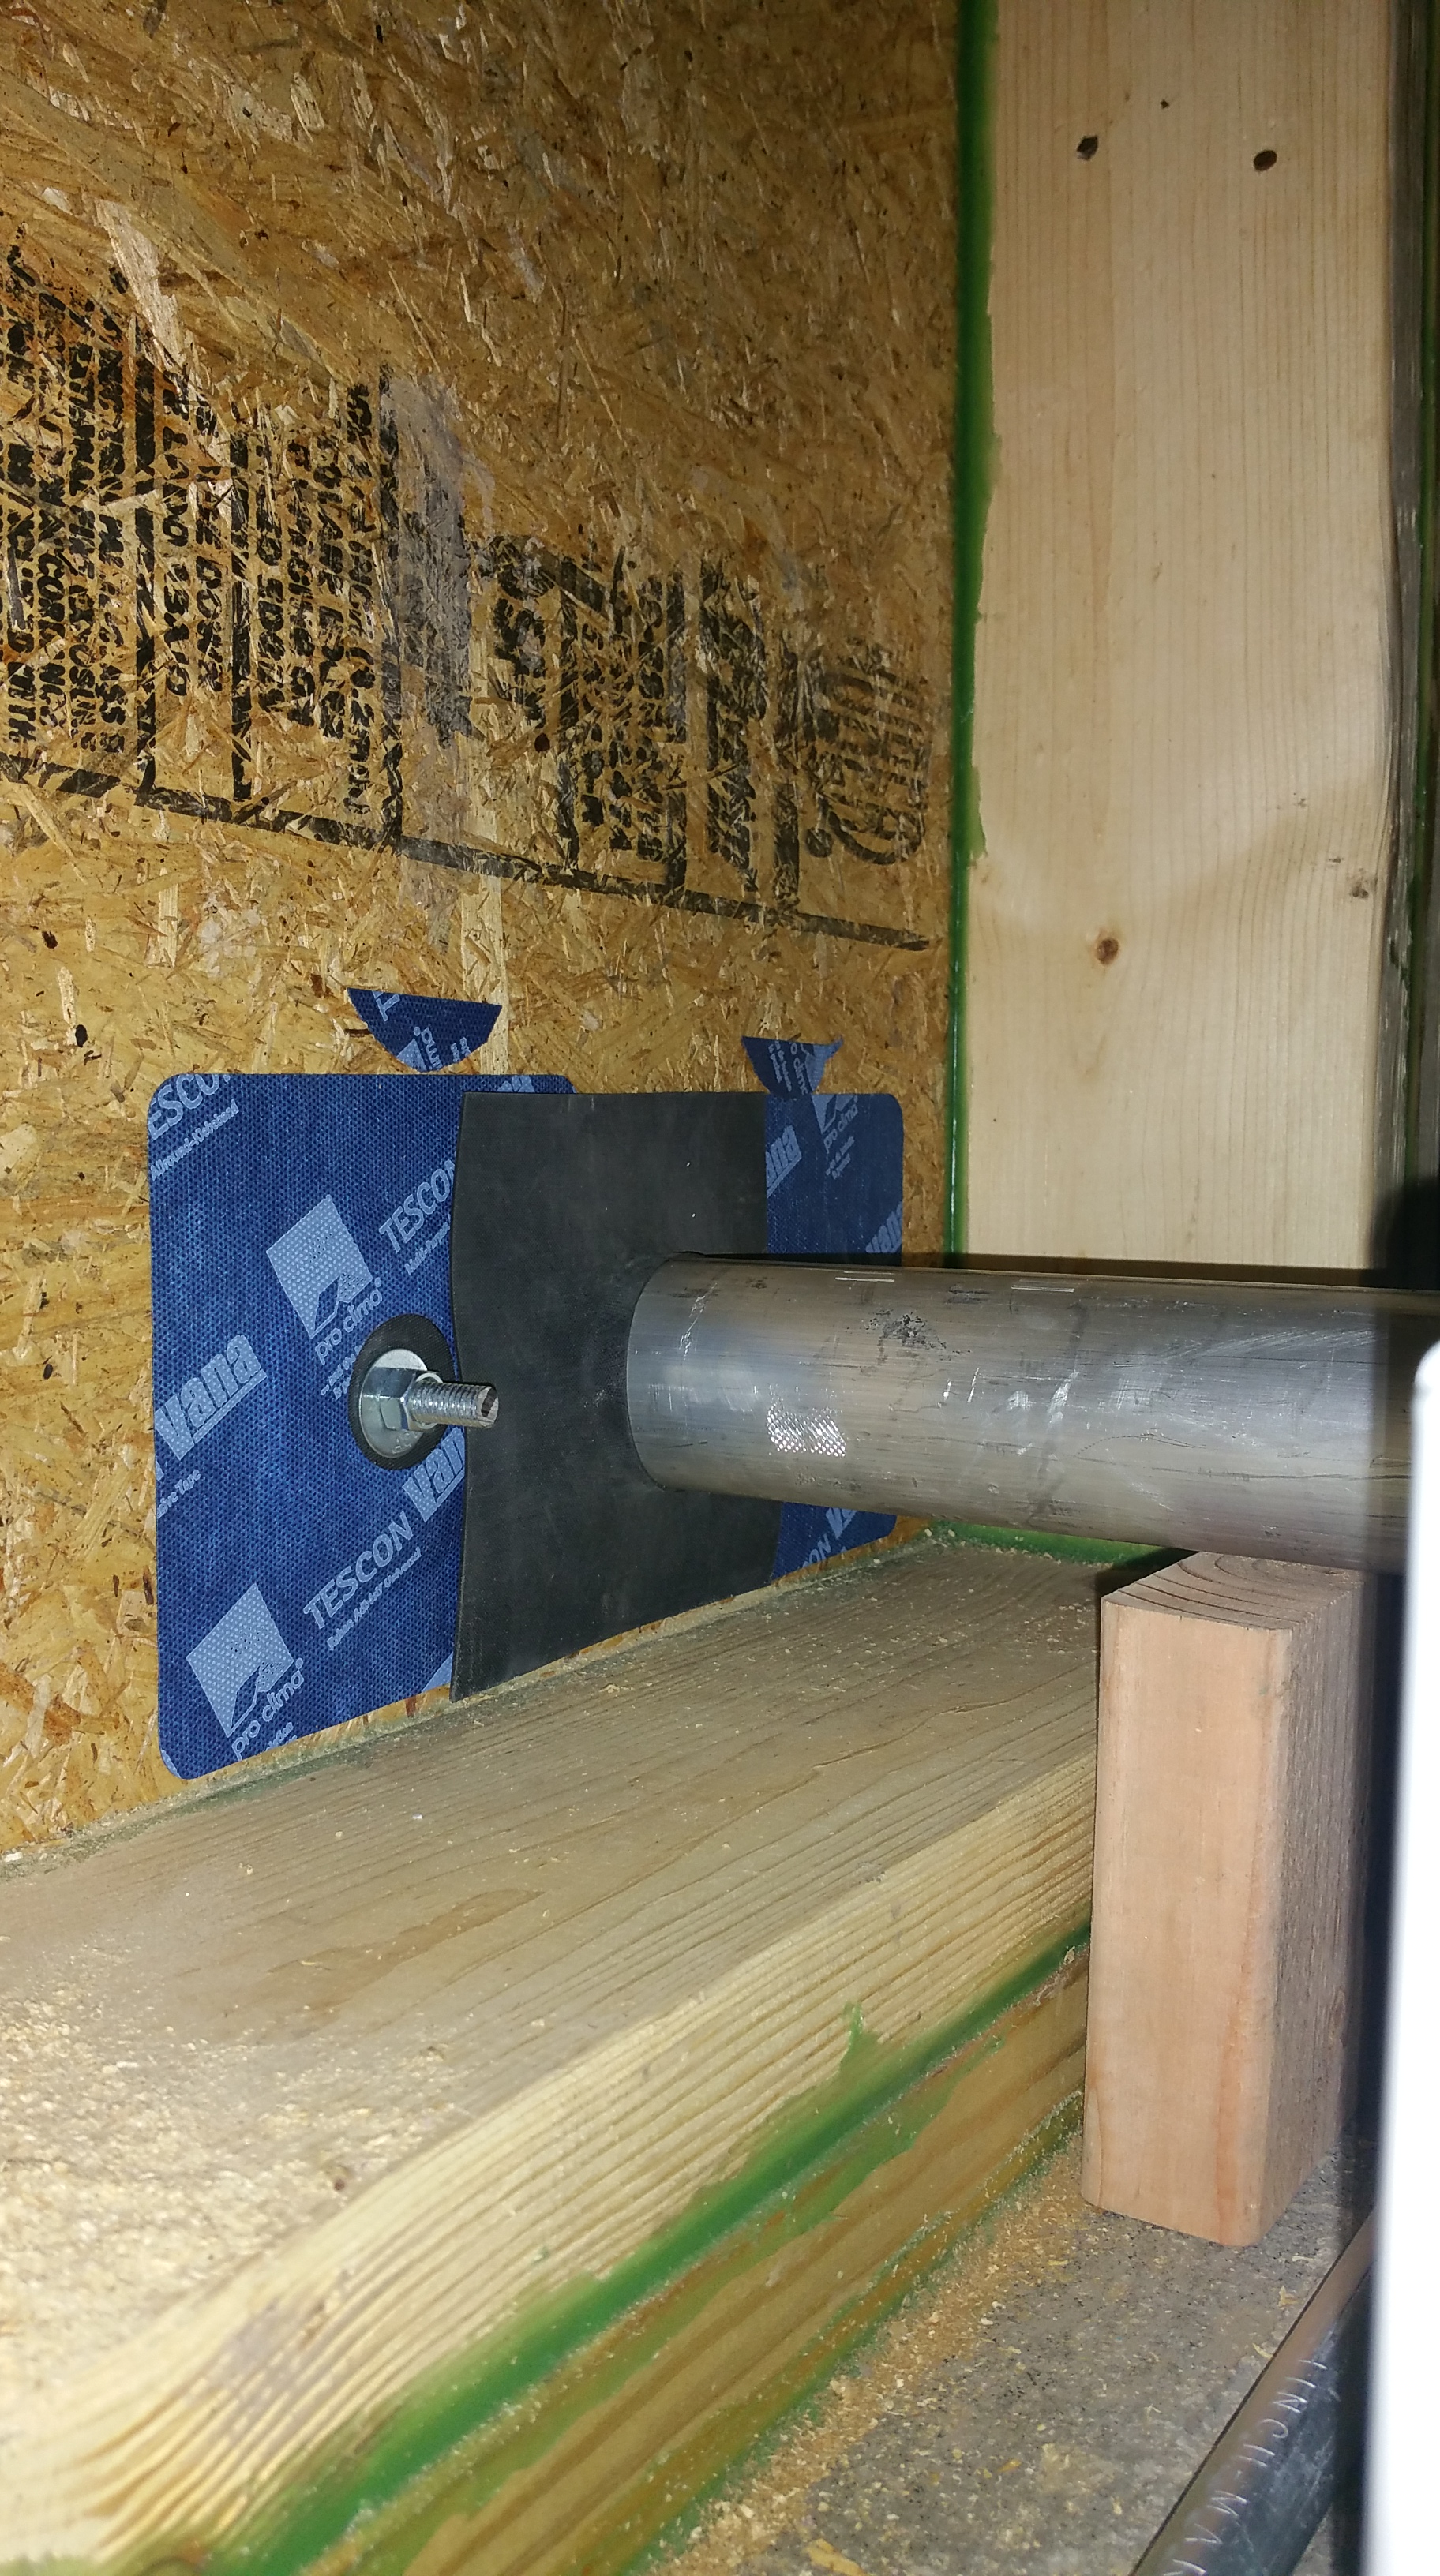
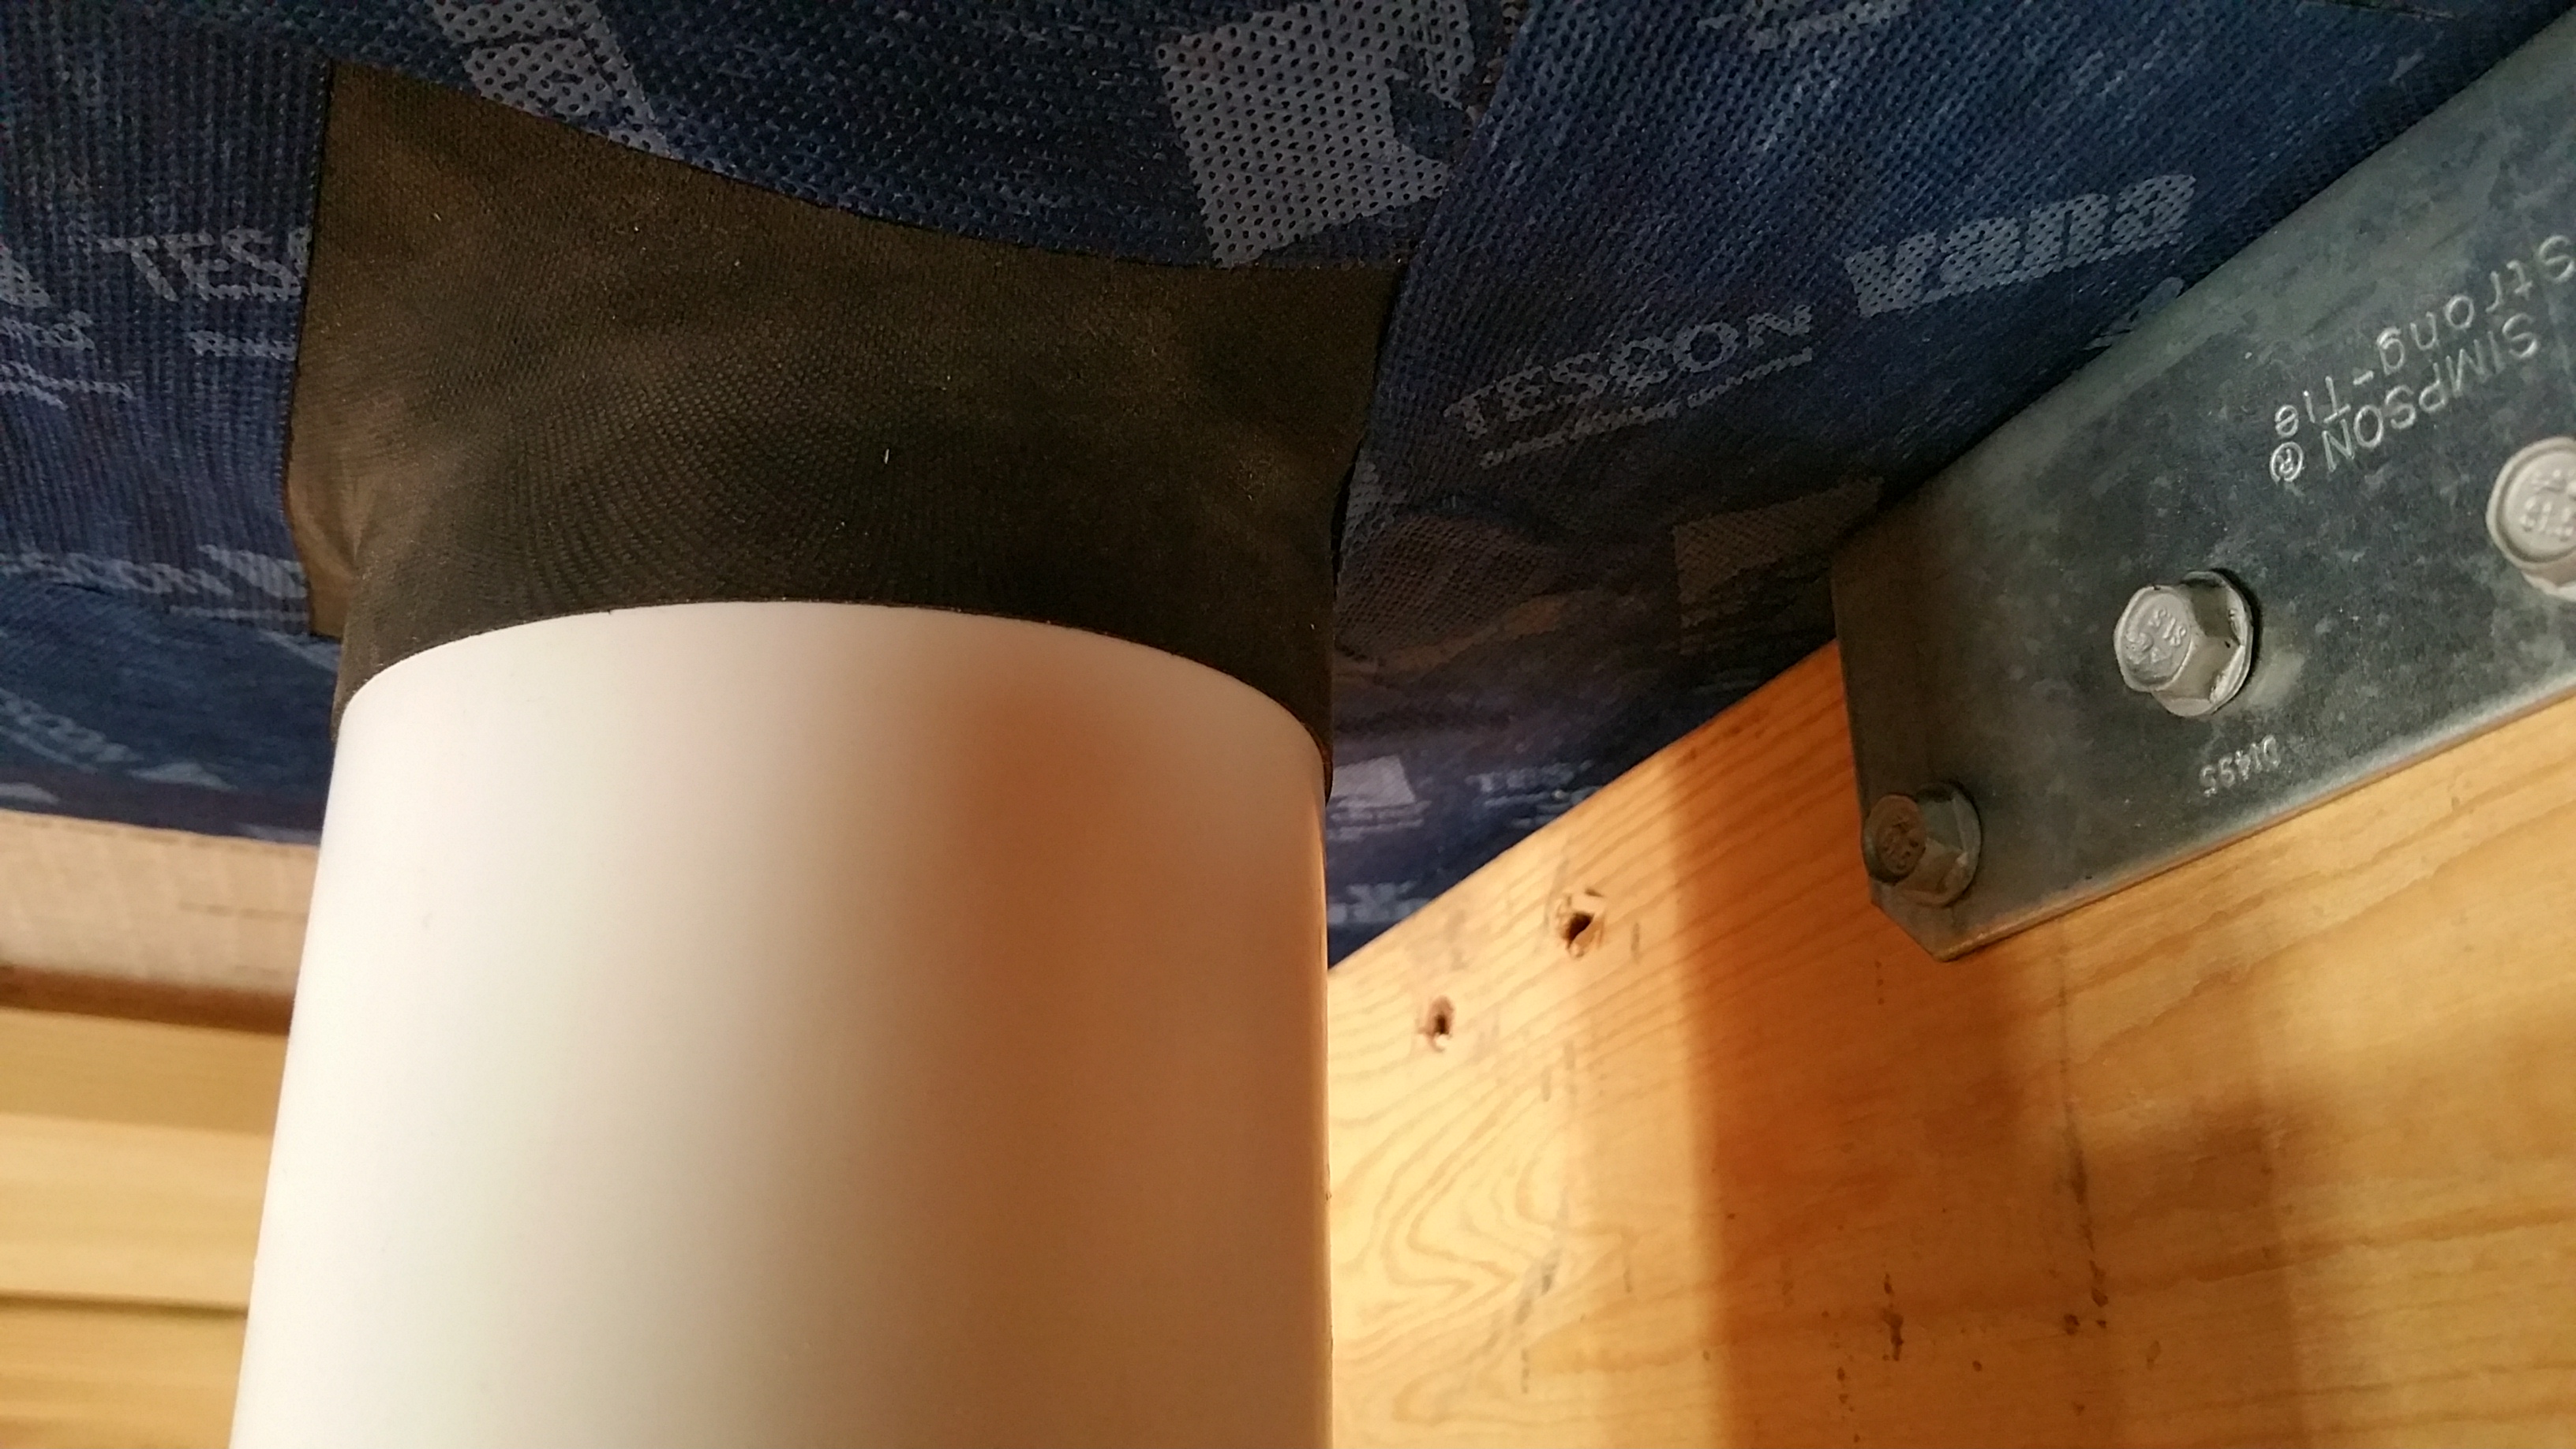
After the PVC was passed through the hole in the Zip, we added a 2×4 underneath it to give it some added stability, along with the usual gasket and tape for air sealing around the PVC pipe:
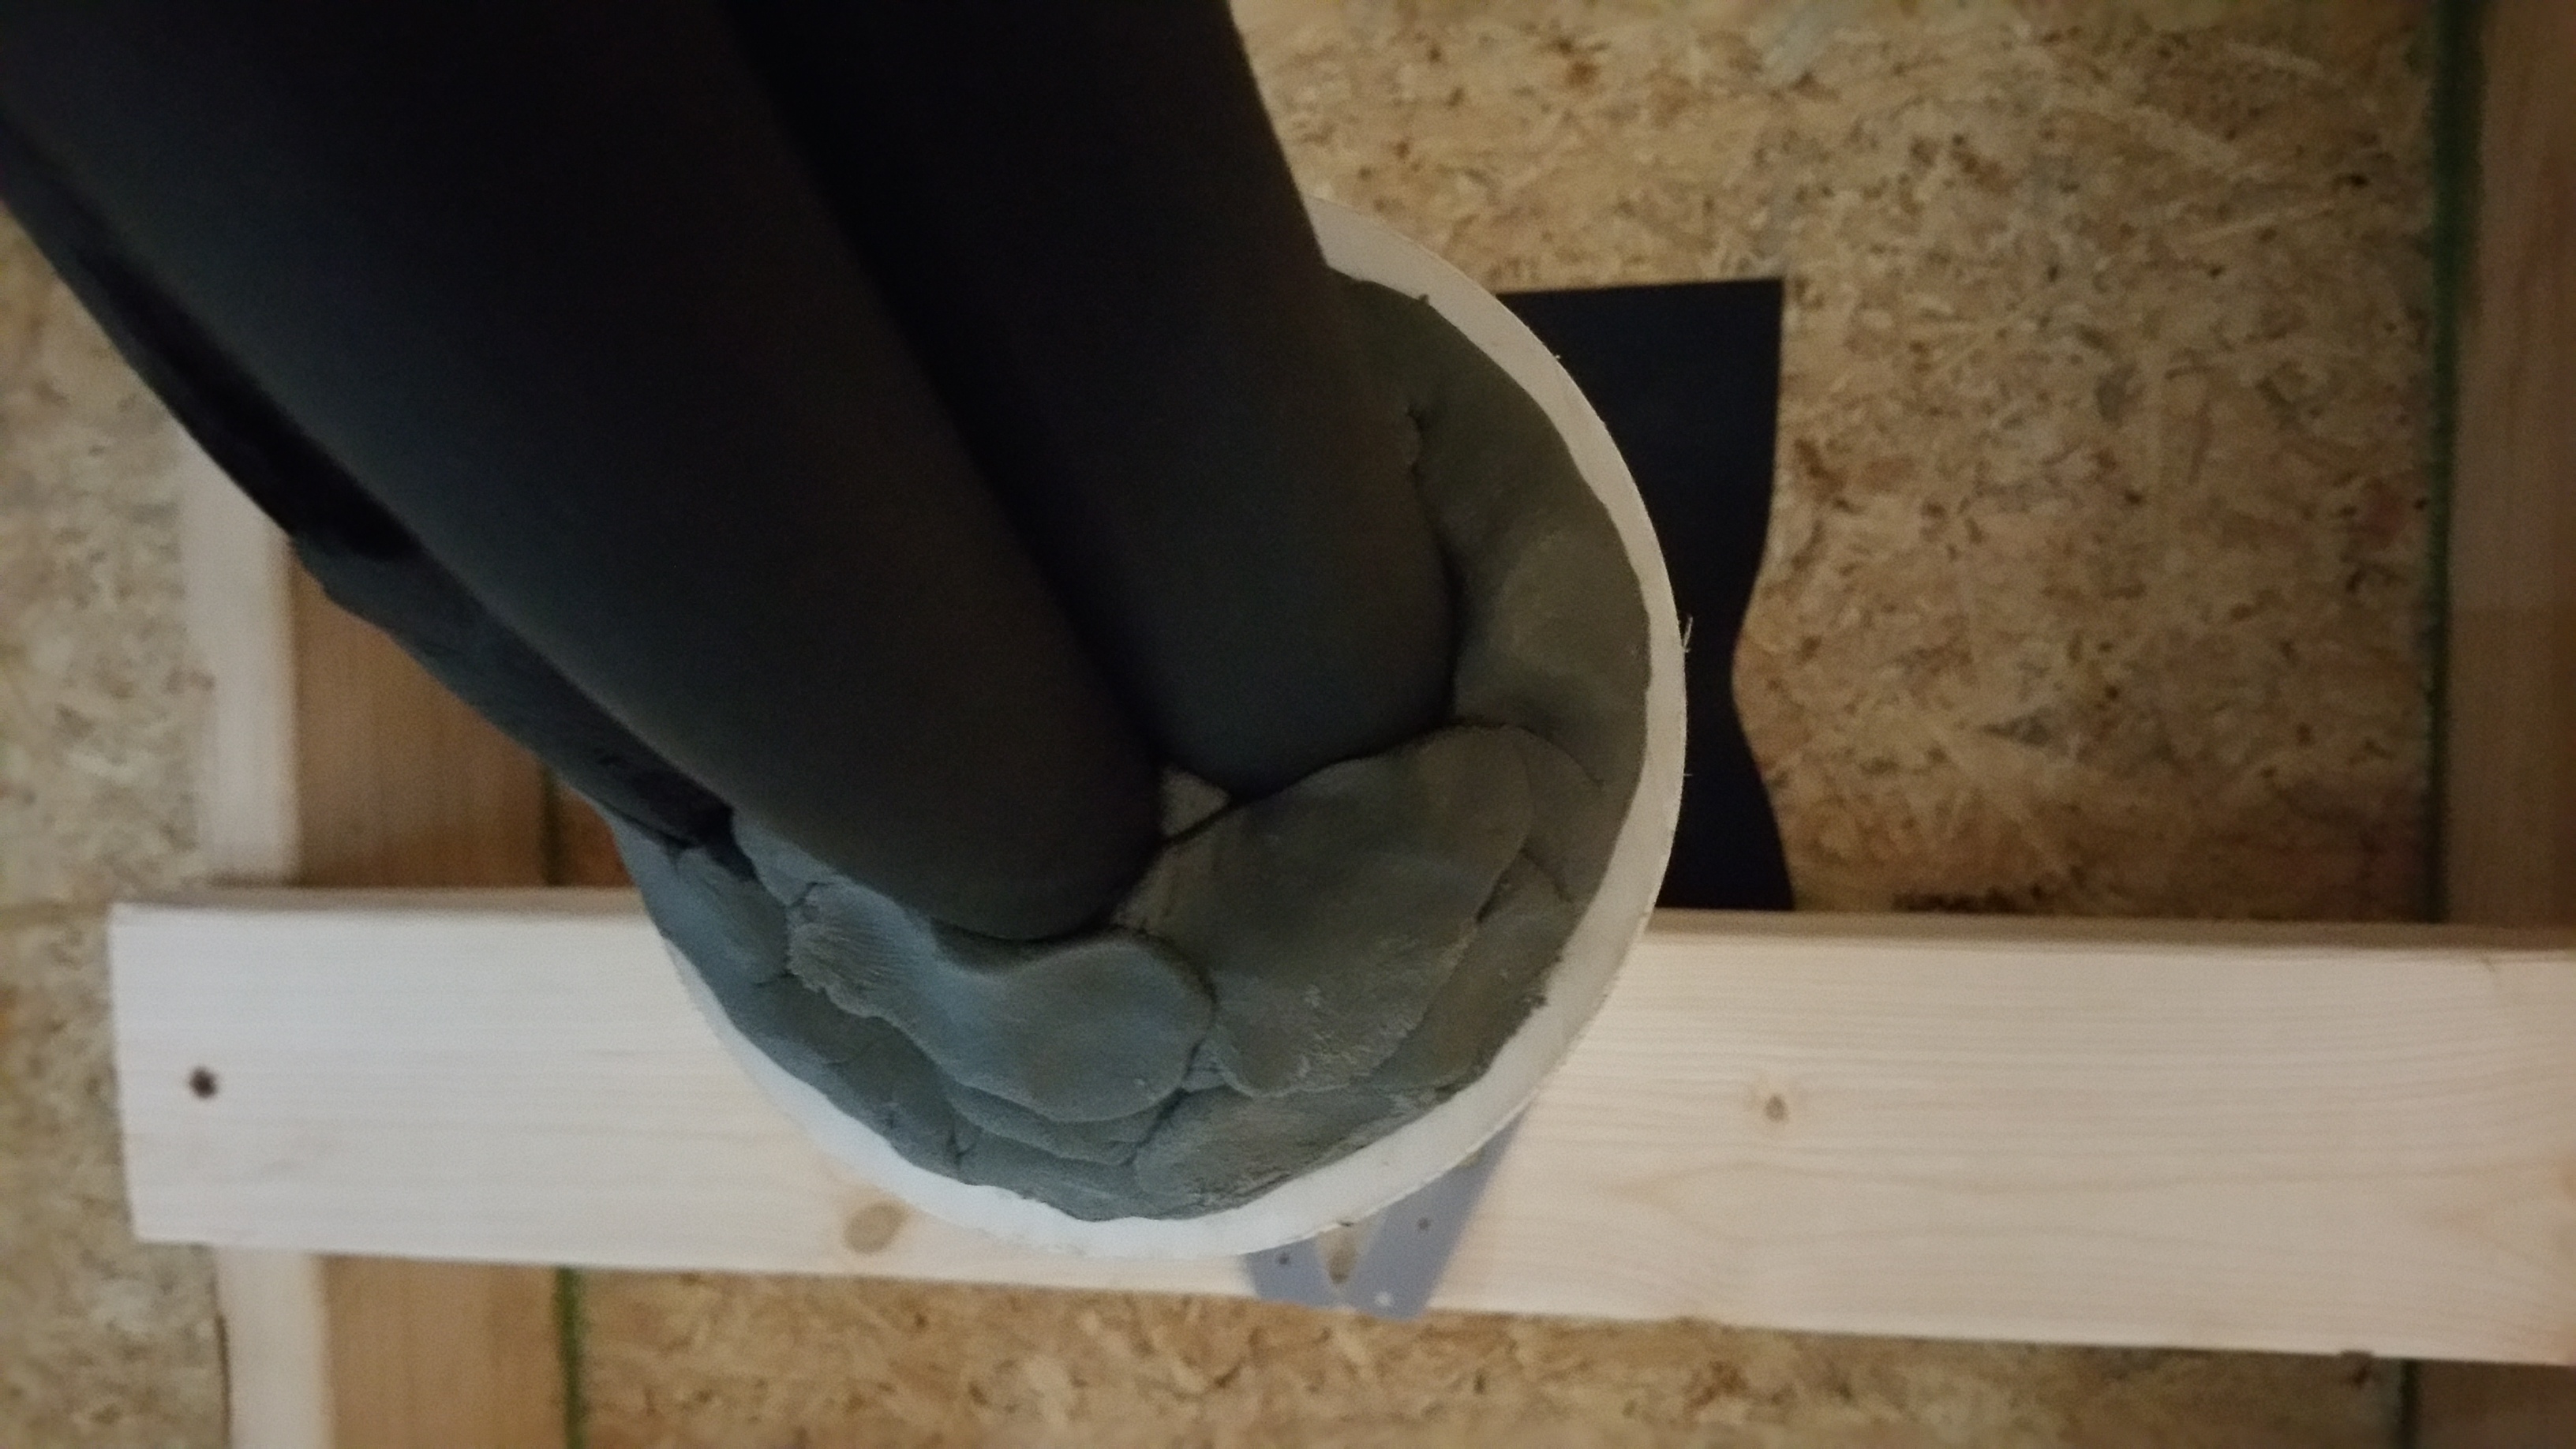
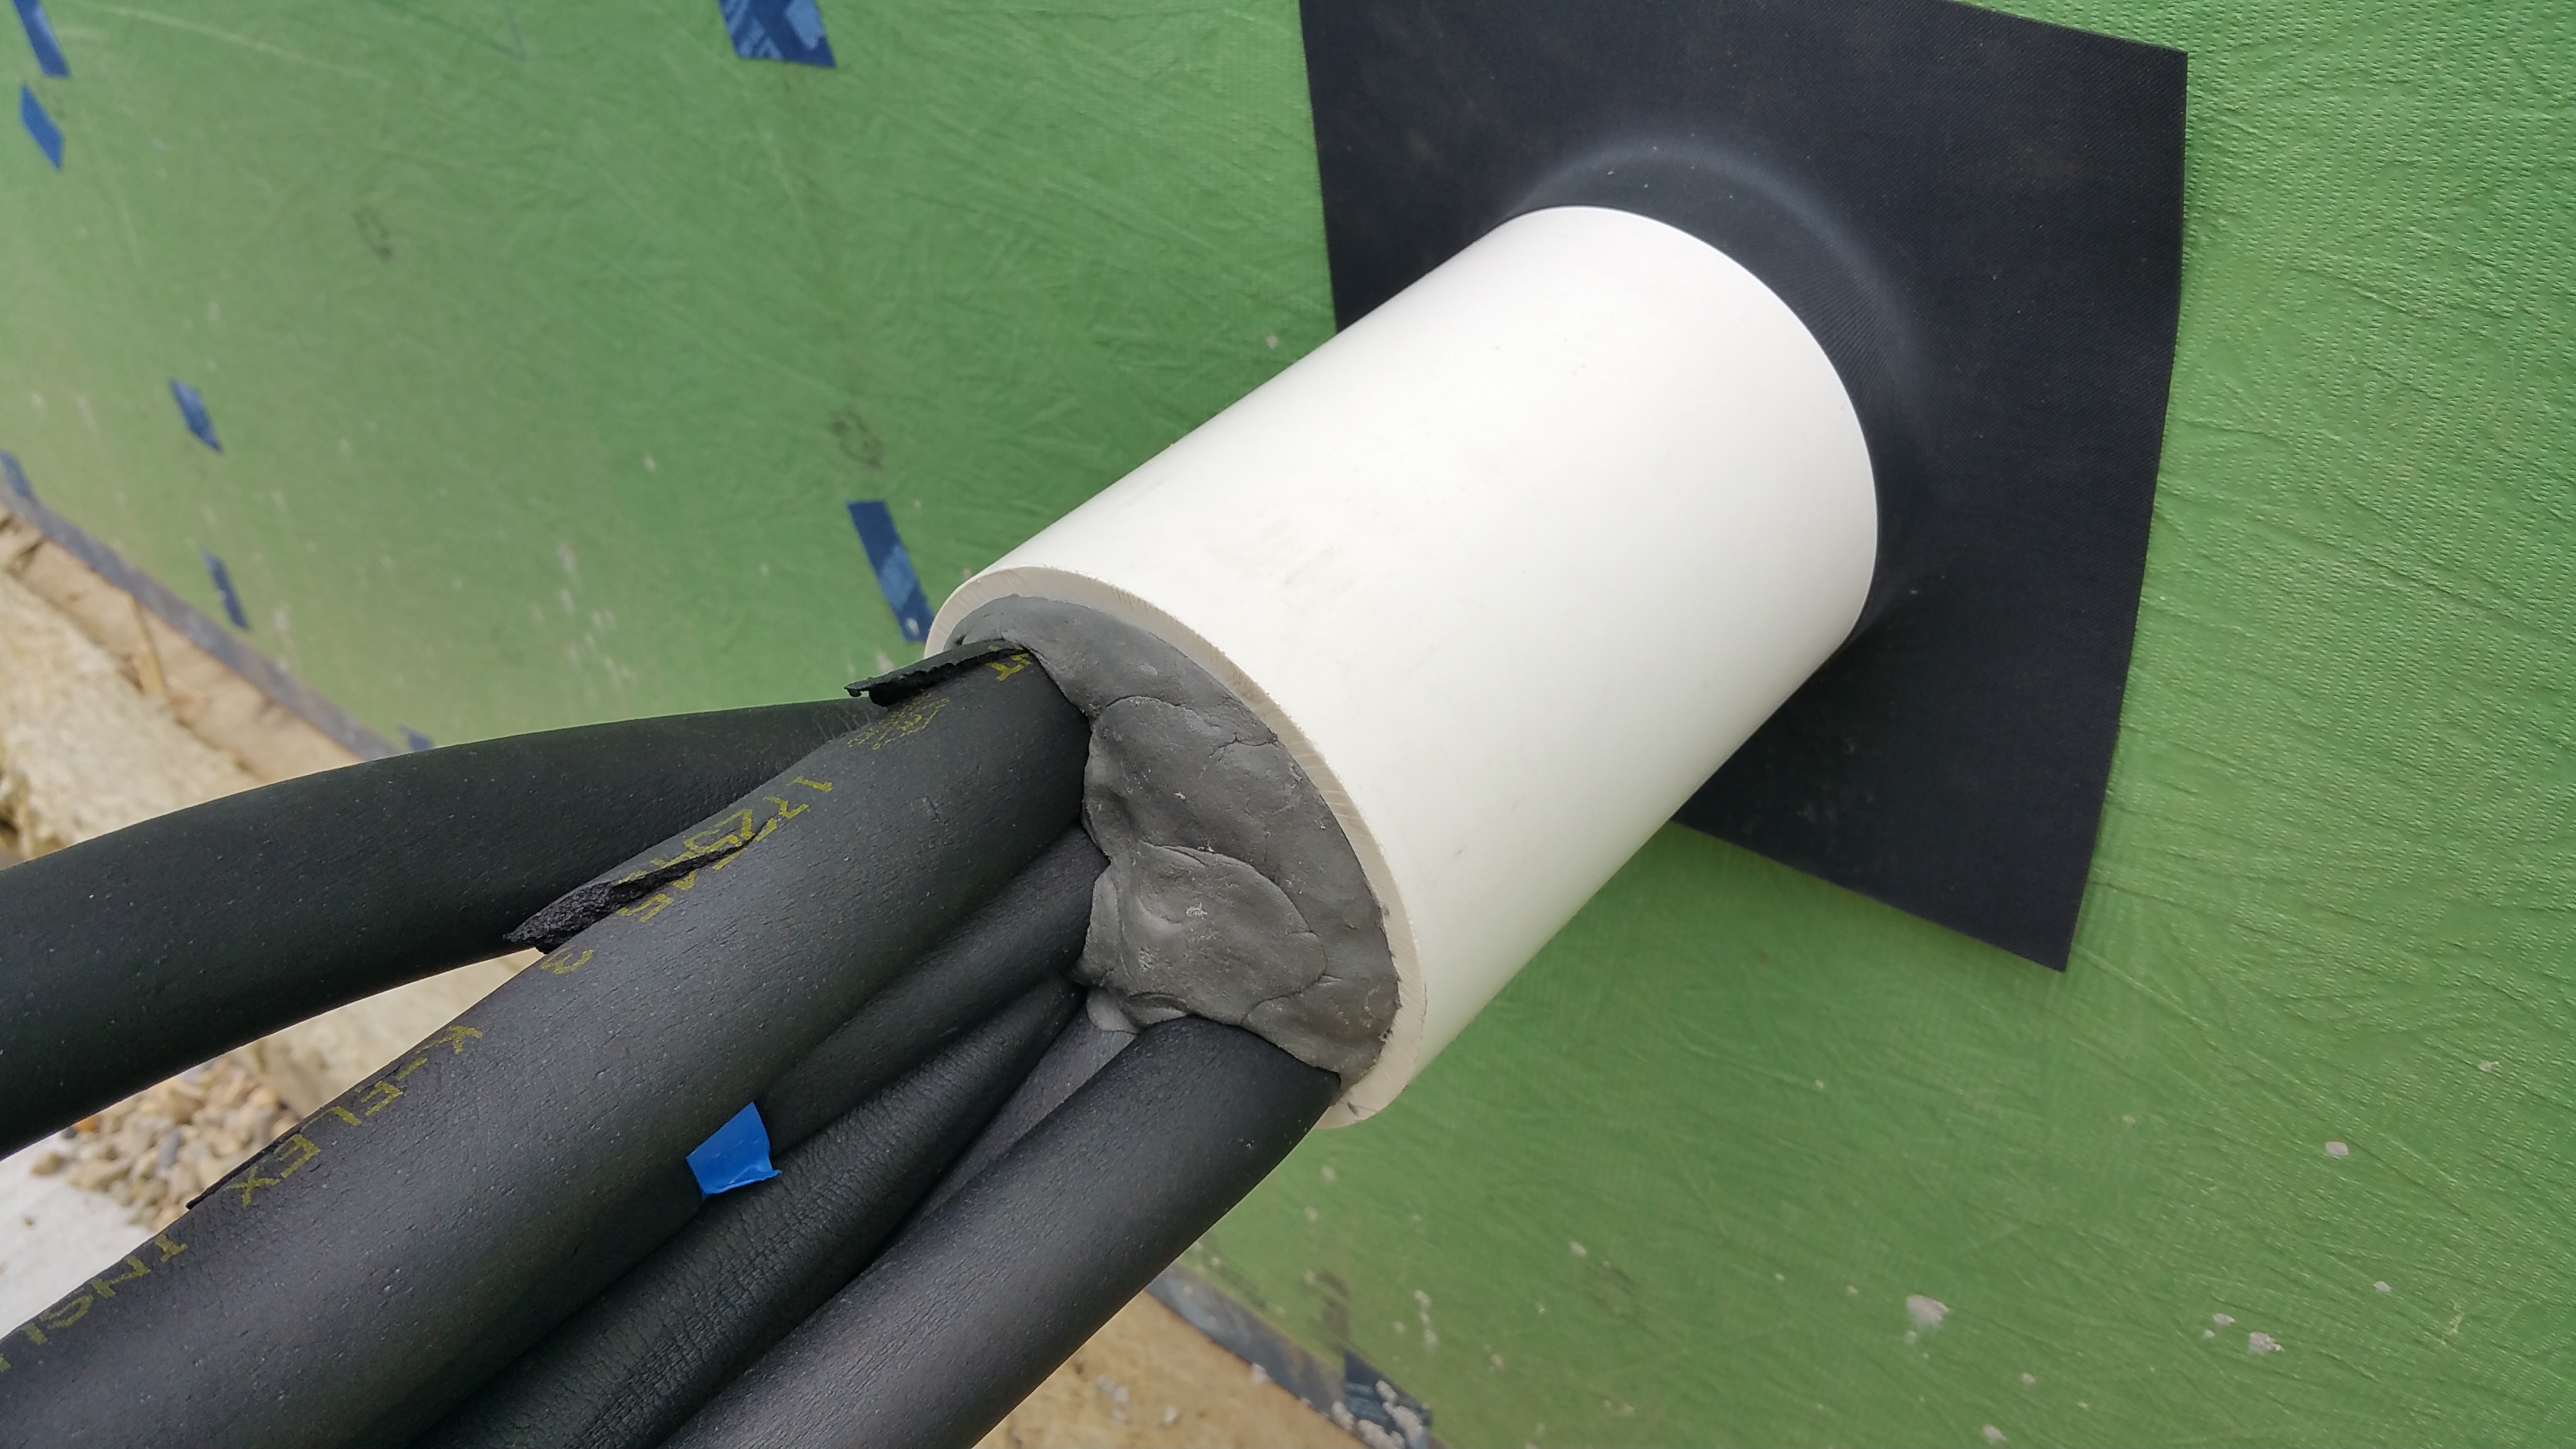
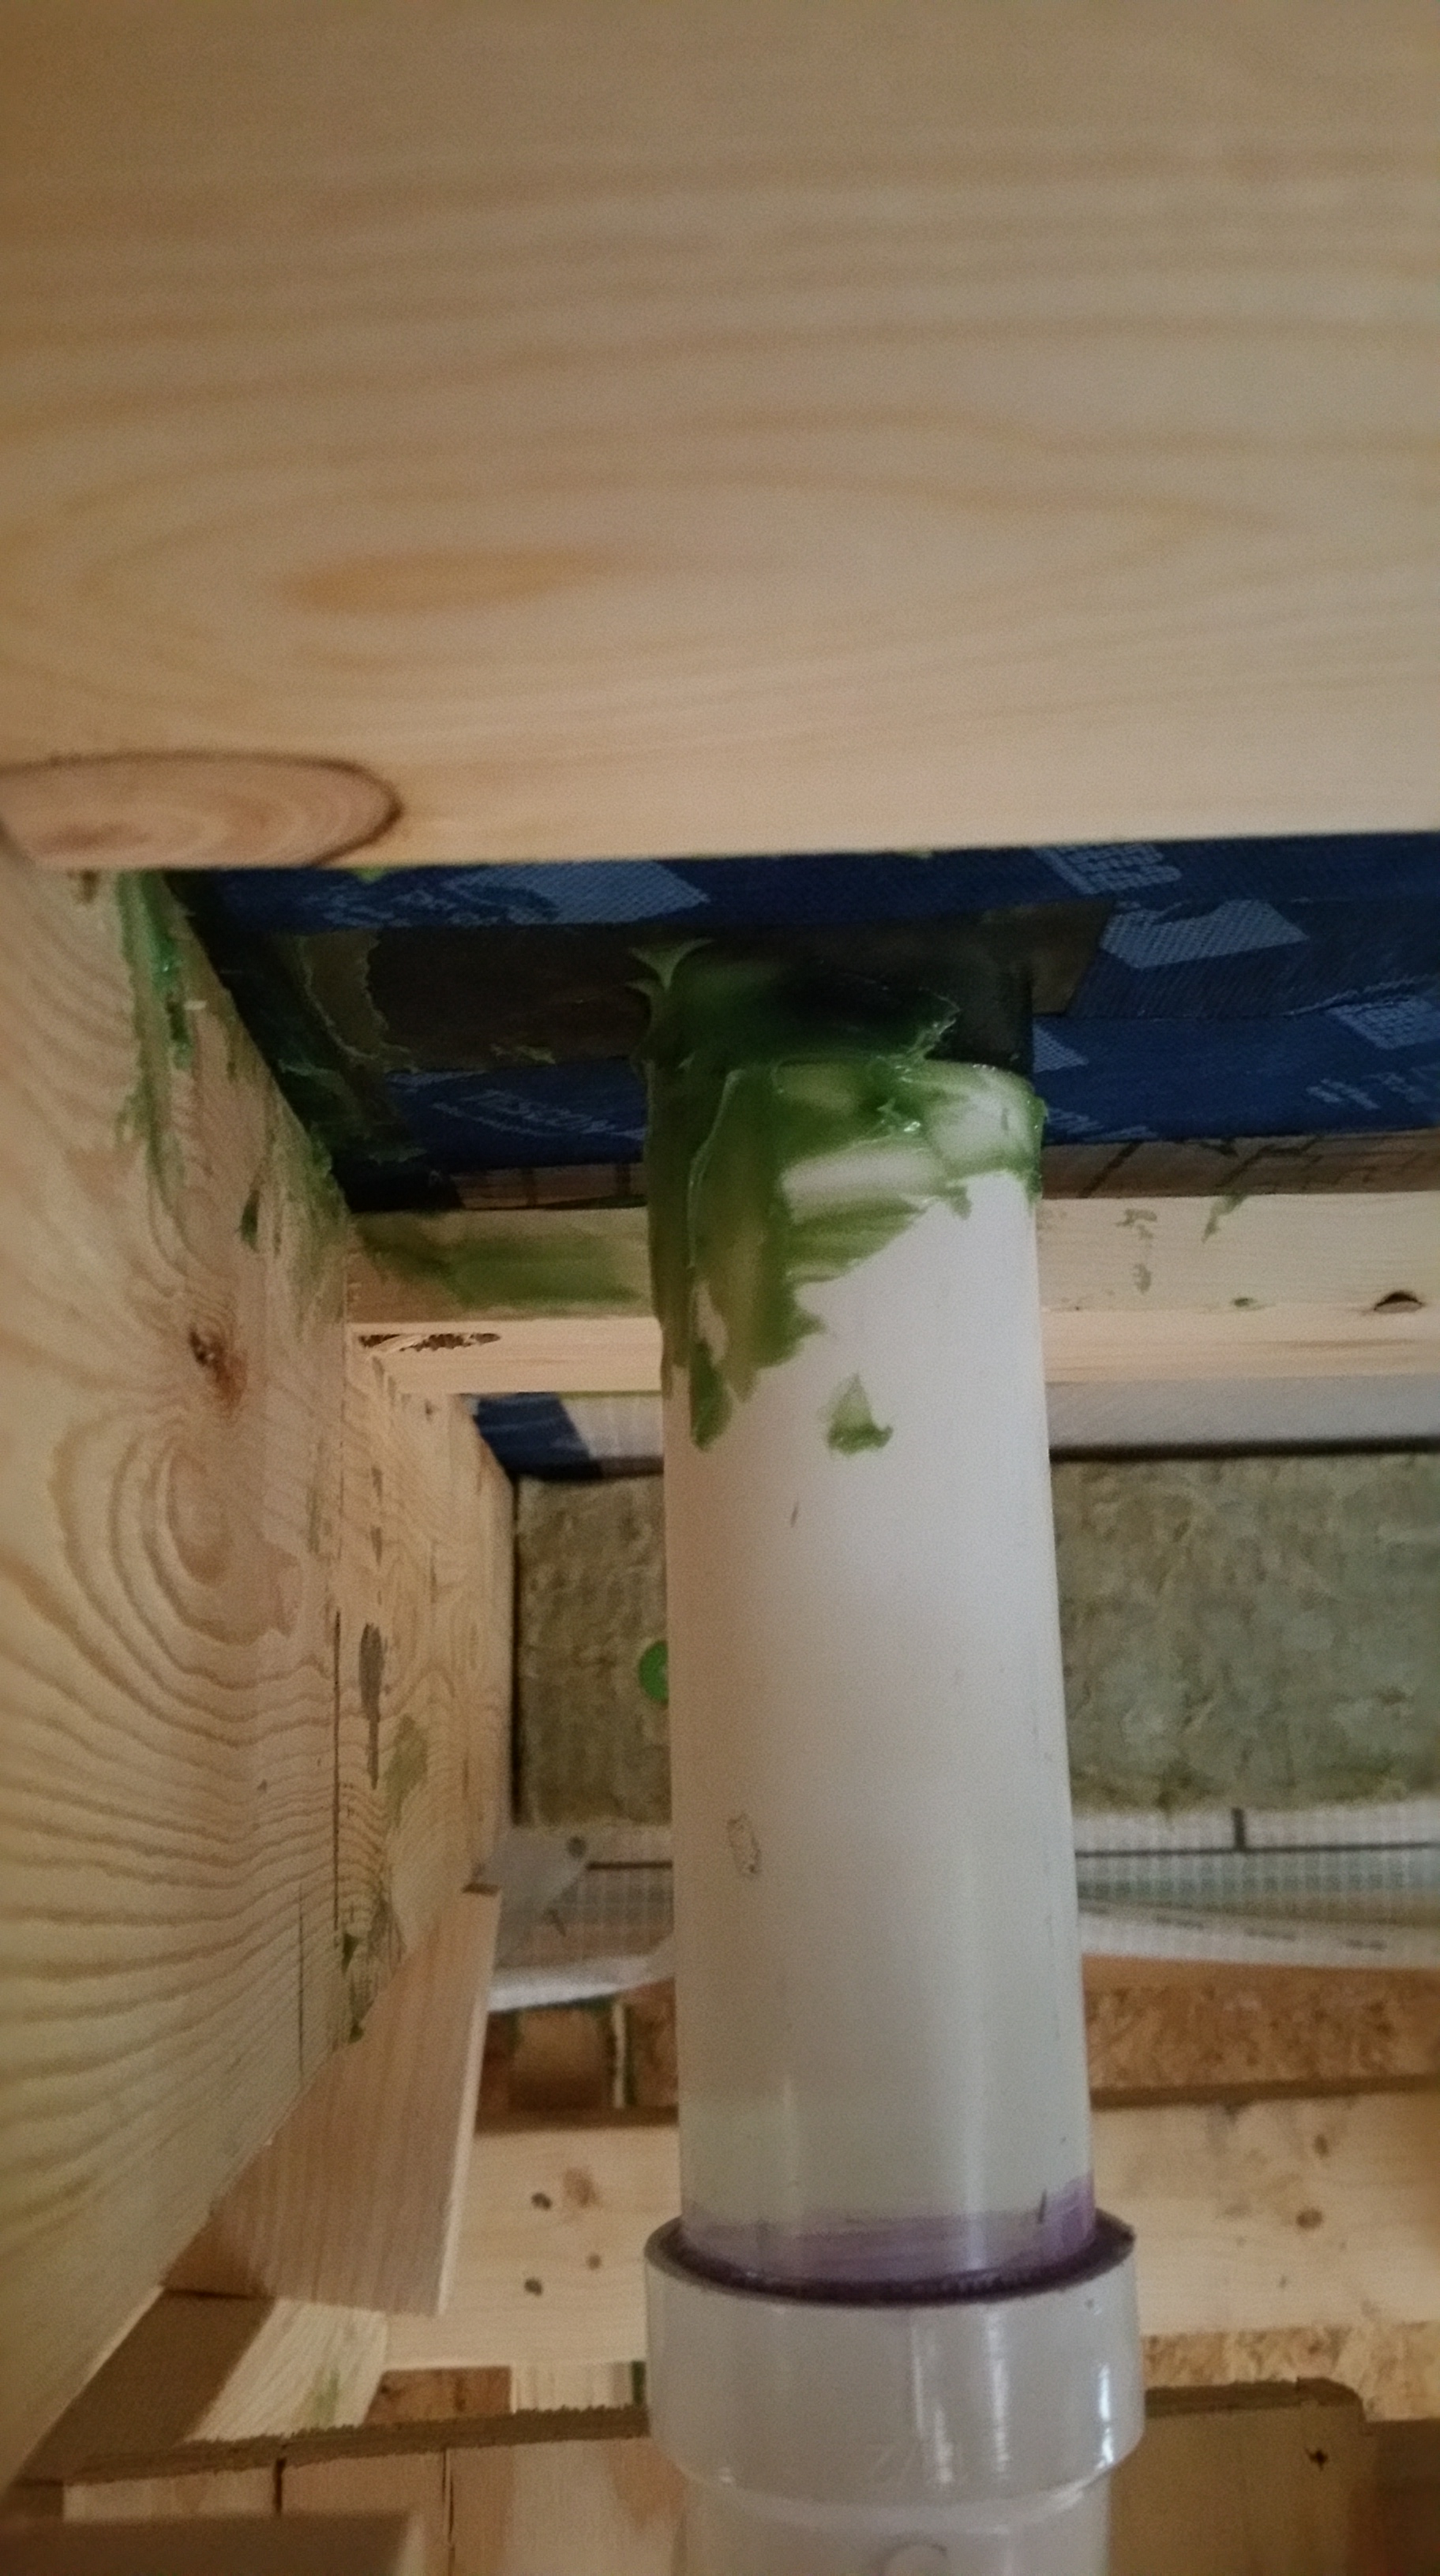
Once the refrigerant lines were passed through the PVC pipe, it was clear that some additional air sealing was required.

I filled the gaps around the refrigerant lines from the interior and exterior sides with duct seal. Before stuffing in the duct seal at either end of the PVC pipe, I added bits of Roxul Comfortboard 80 into the pipe to try and give added R-value to the interior of the PVC pipe (hoping to prevent any possible condensation from forming inside the pipe).
Duct seal proved especially helpful at air sealing multiple weak points in the structure —areas that would’ve been difficult or impossible to air seal with just tape, gaskets, or sealants:
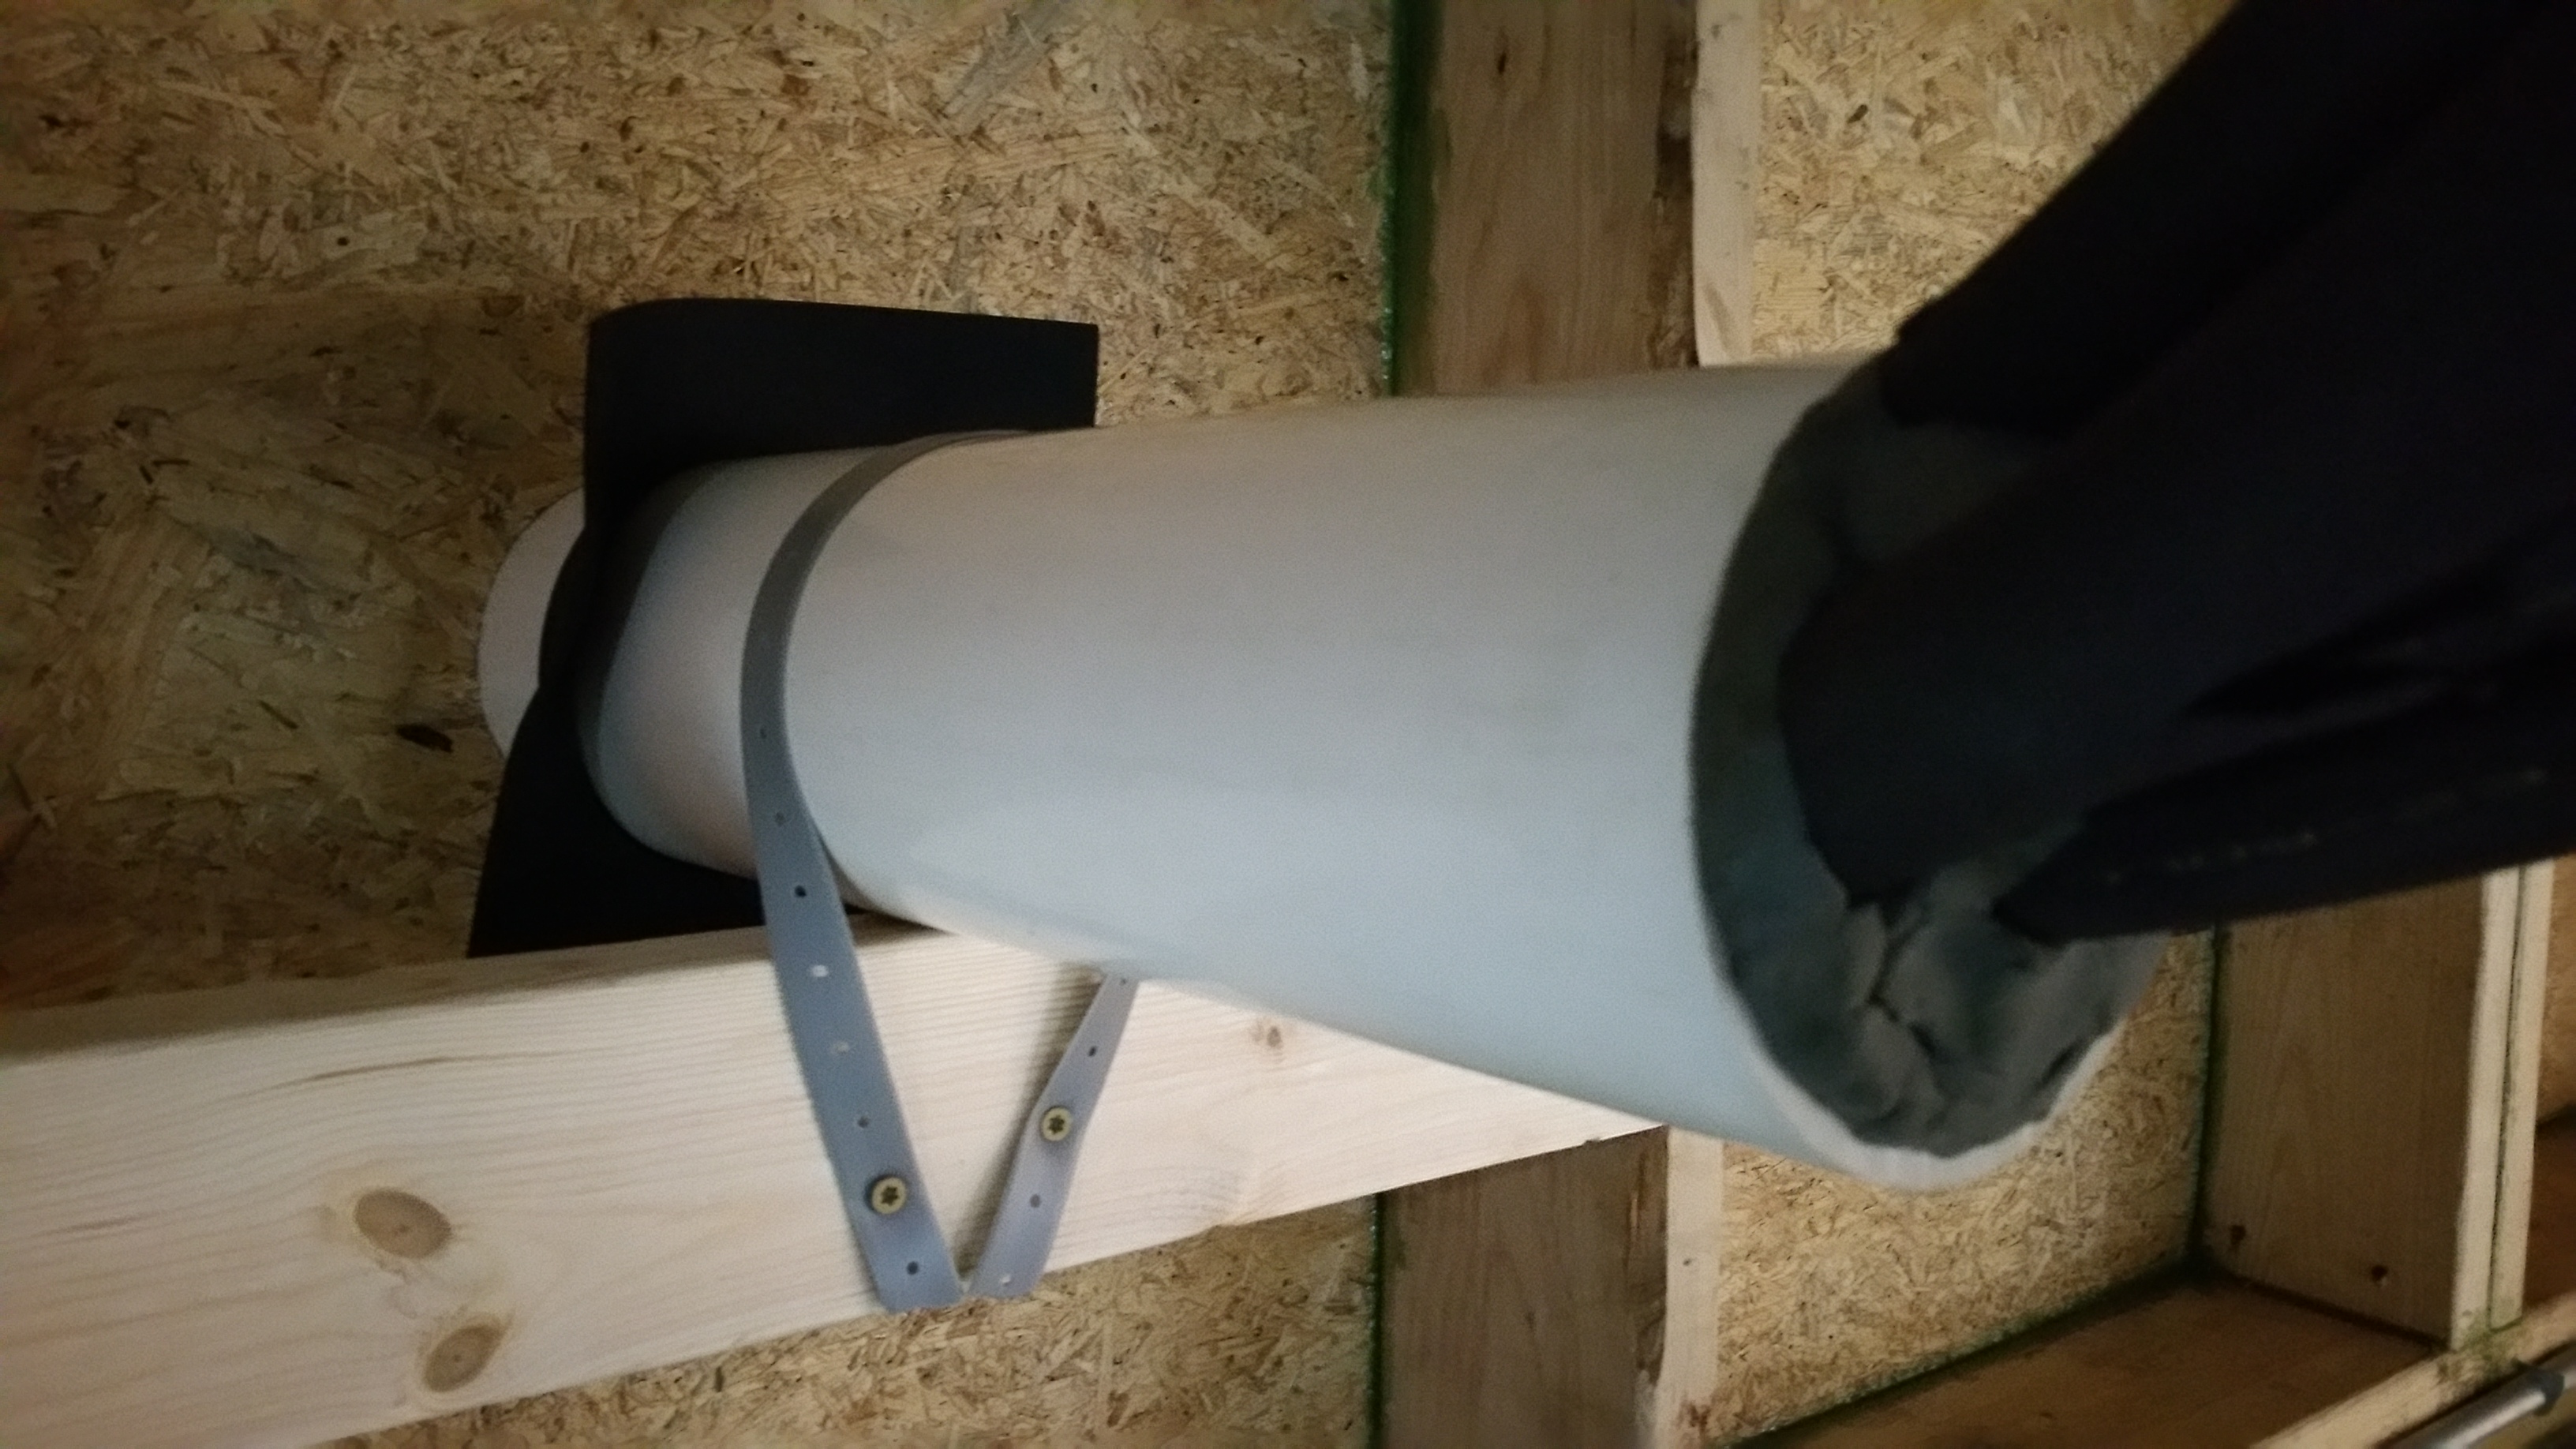
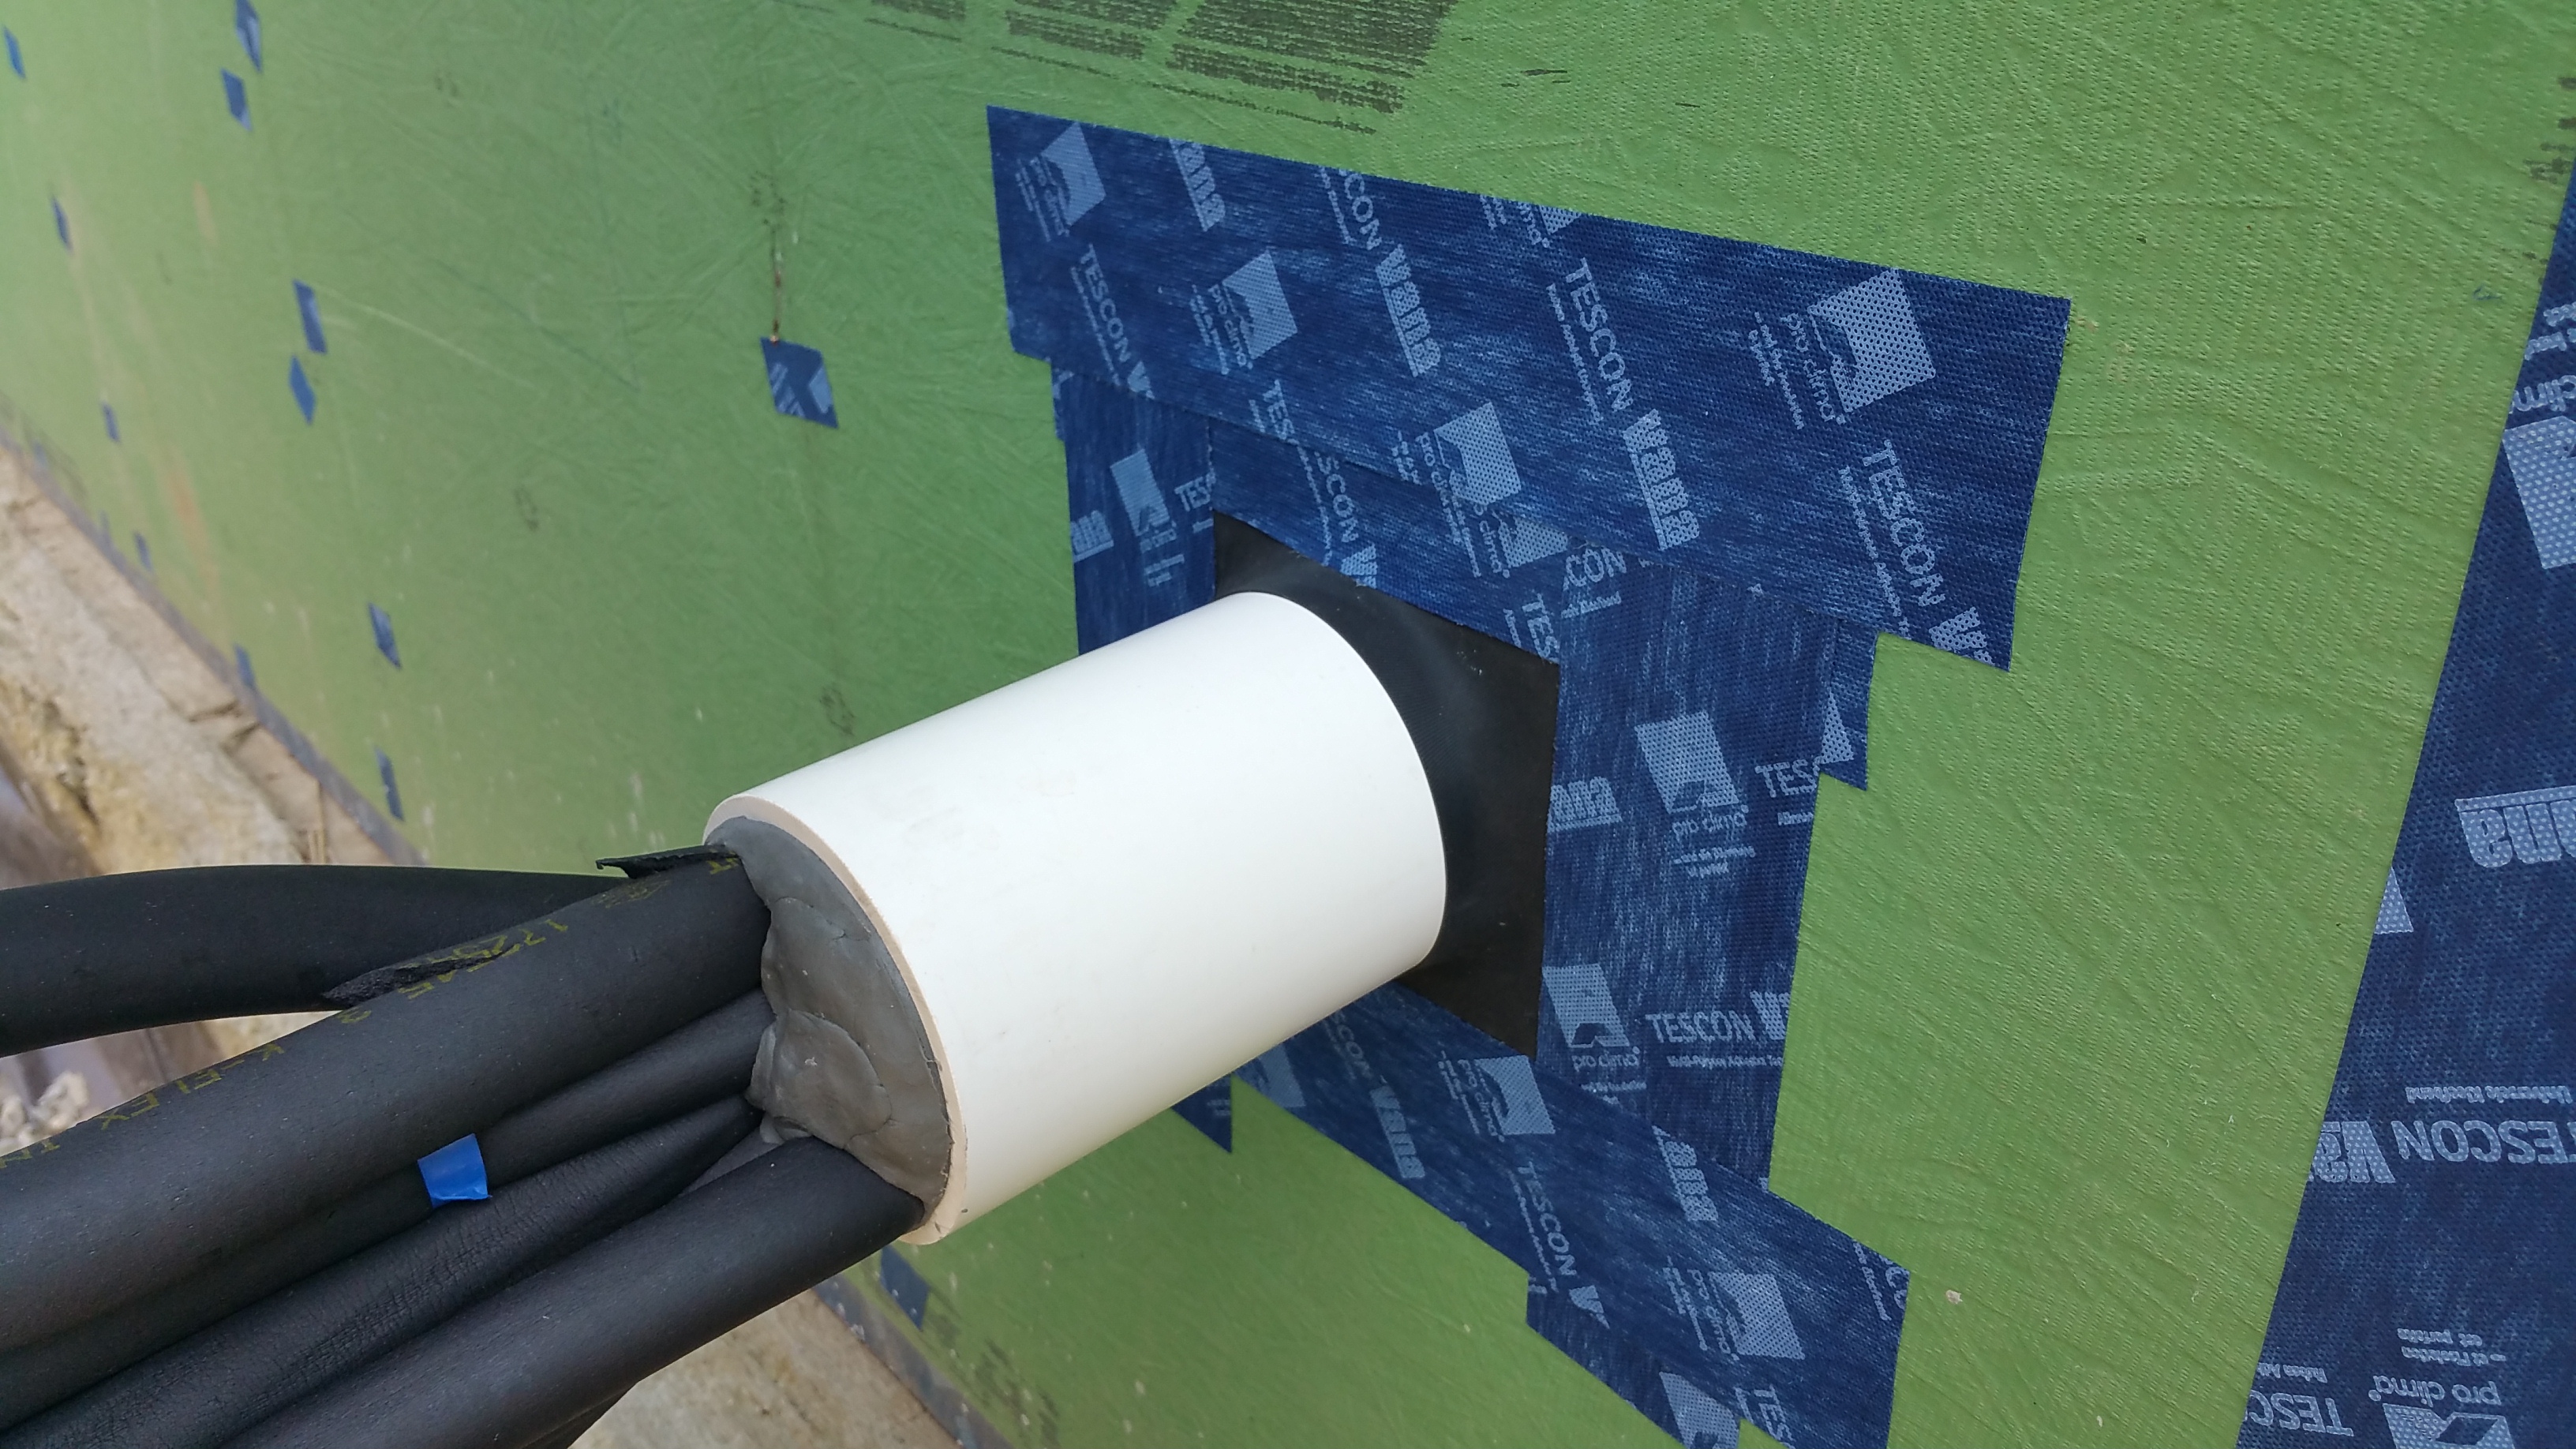
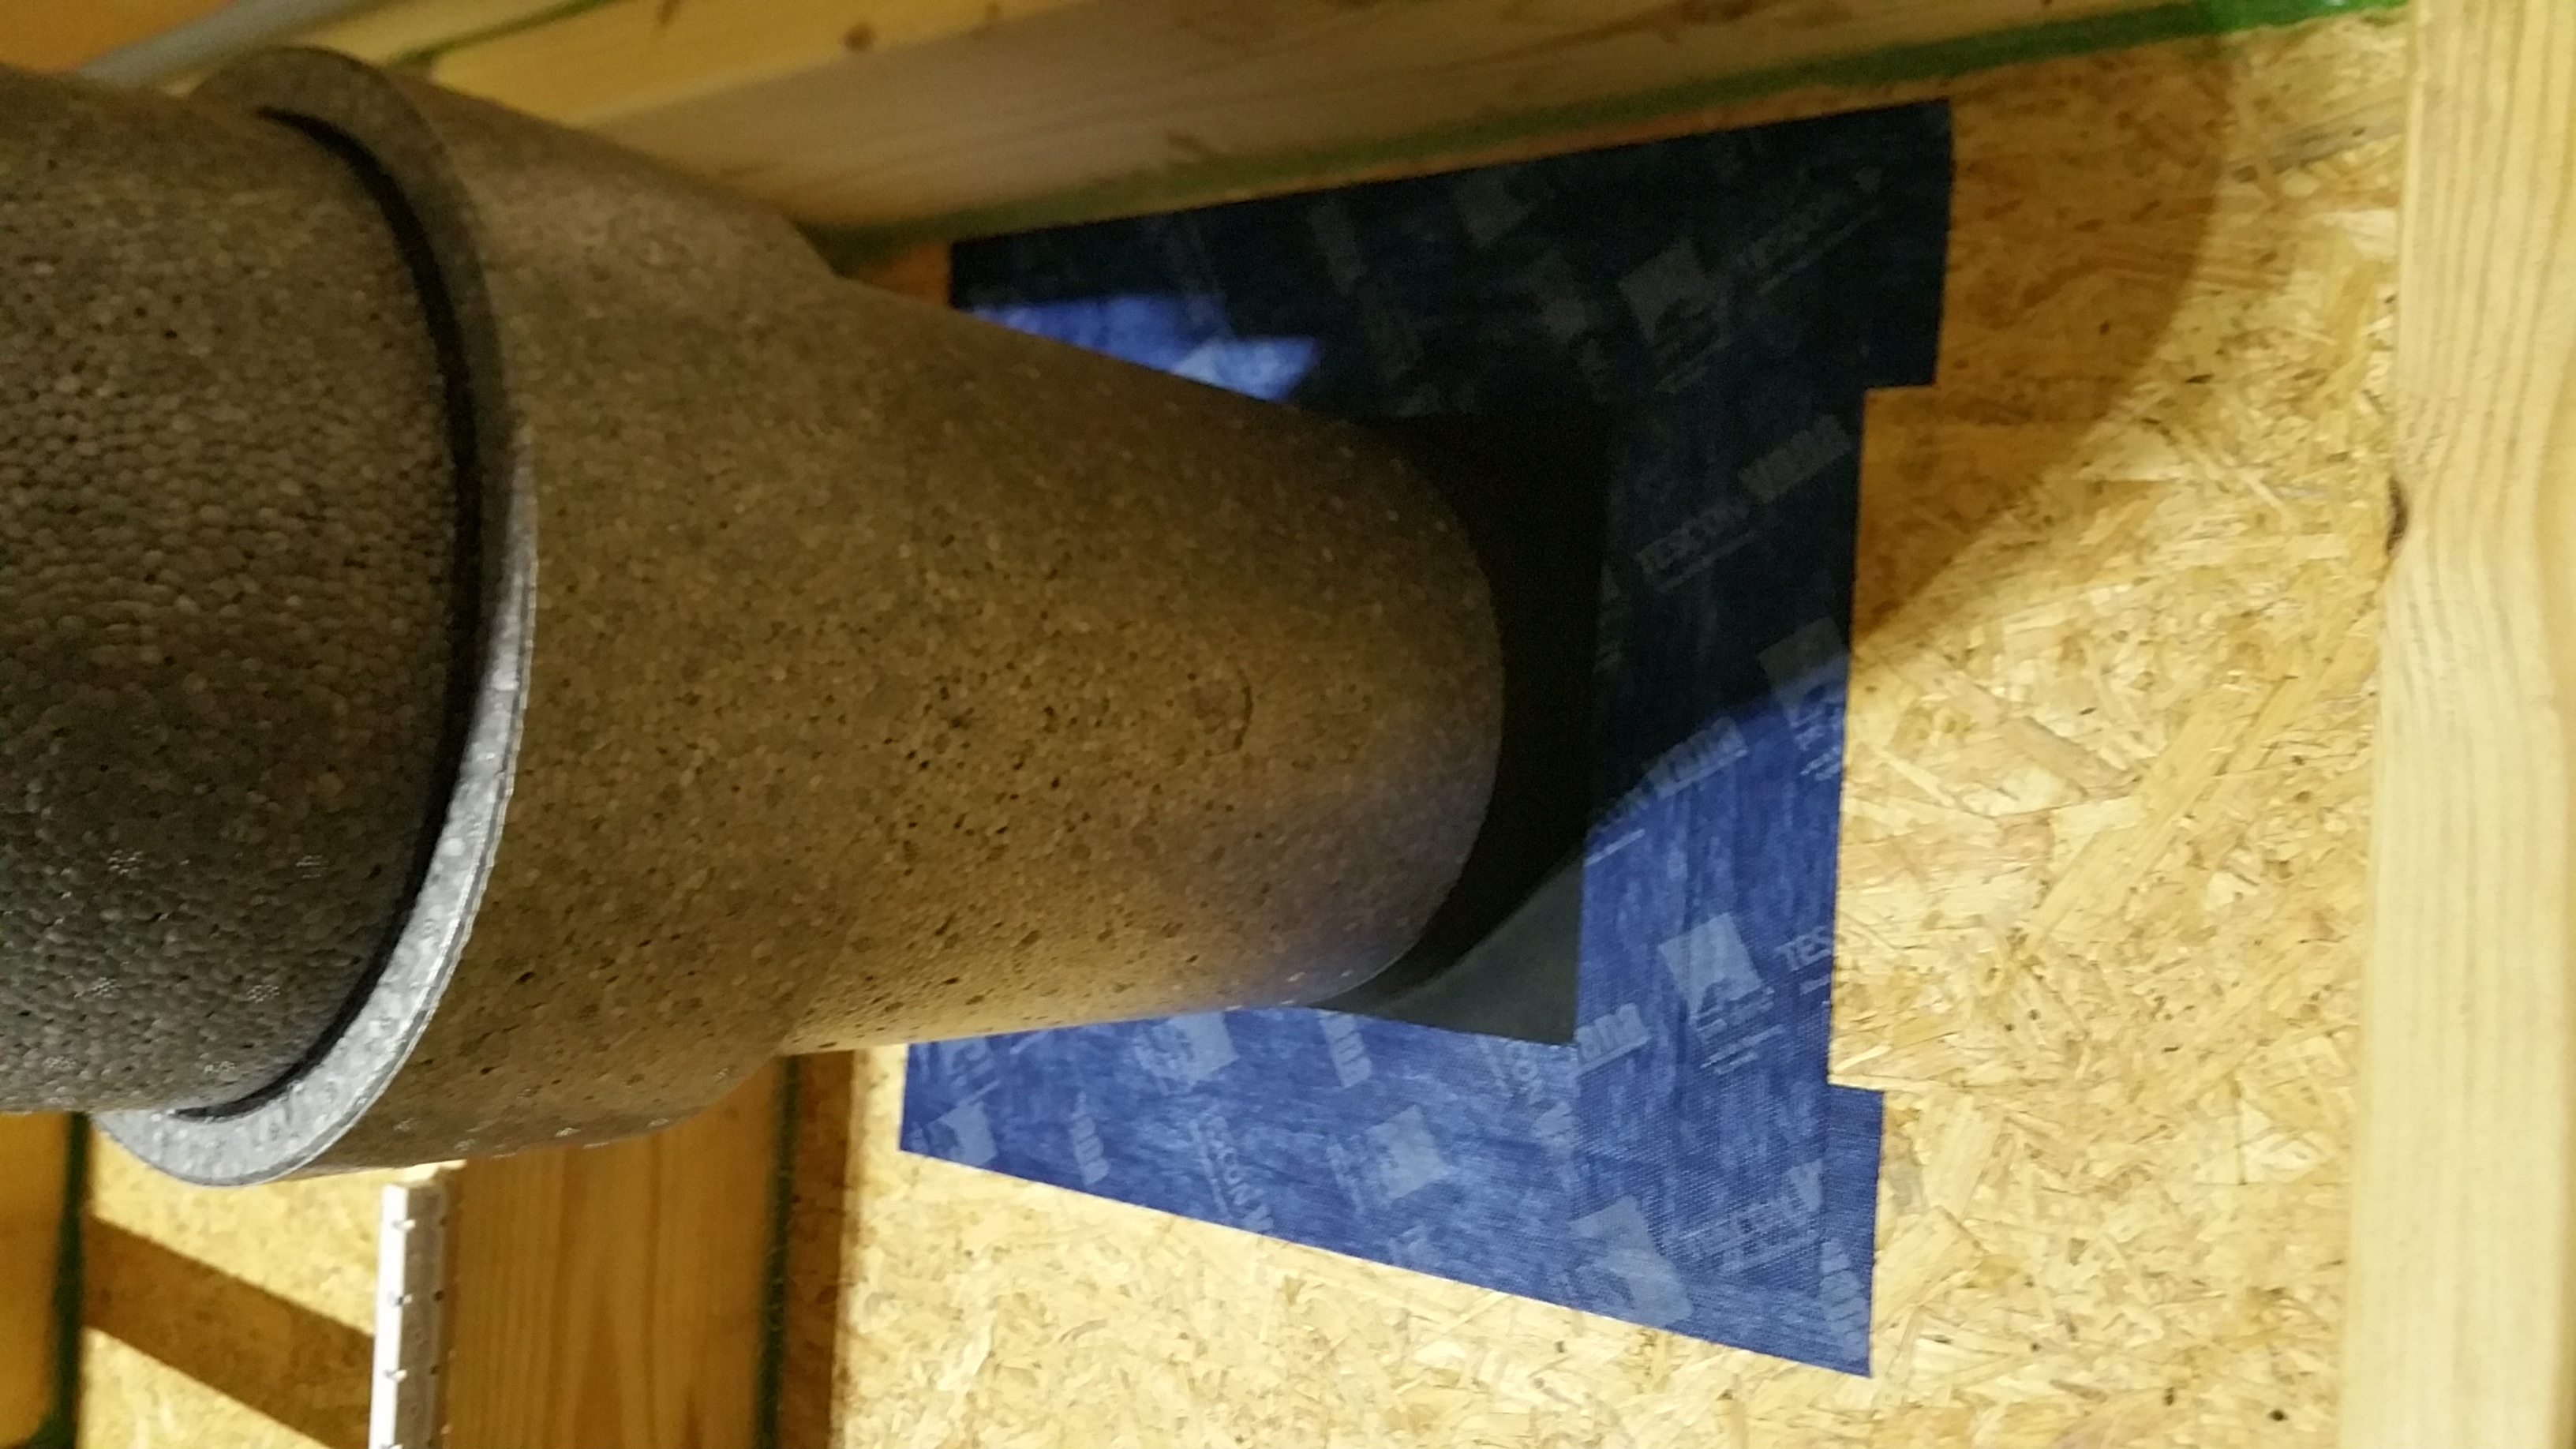
Once the interior was taken care of, I was able to address the exterior side of the PVC pipe:
Again, note that the PVC pipe is extended out in preparation for the layers of exterior insulation, furring strips, and siding:
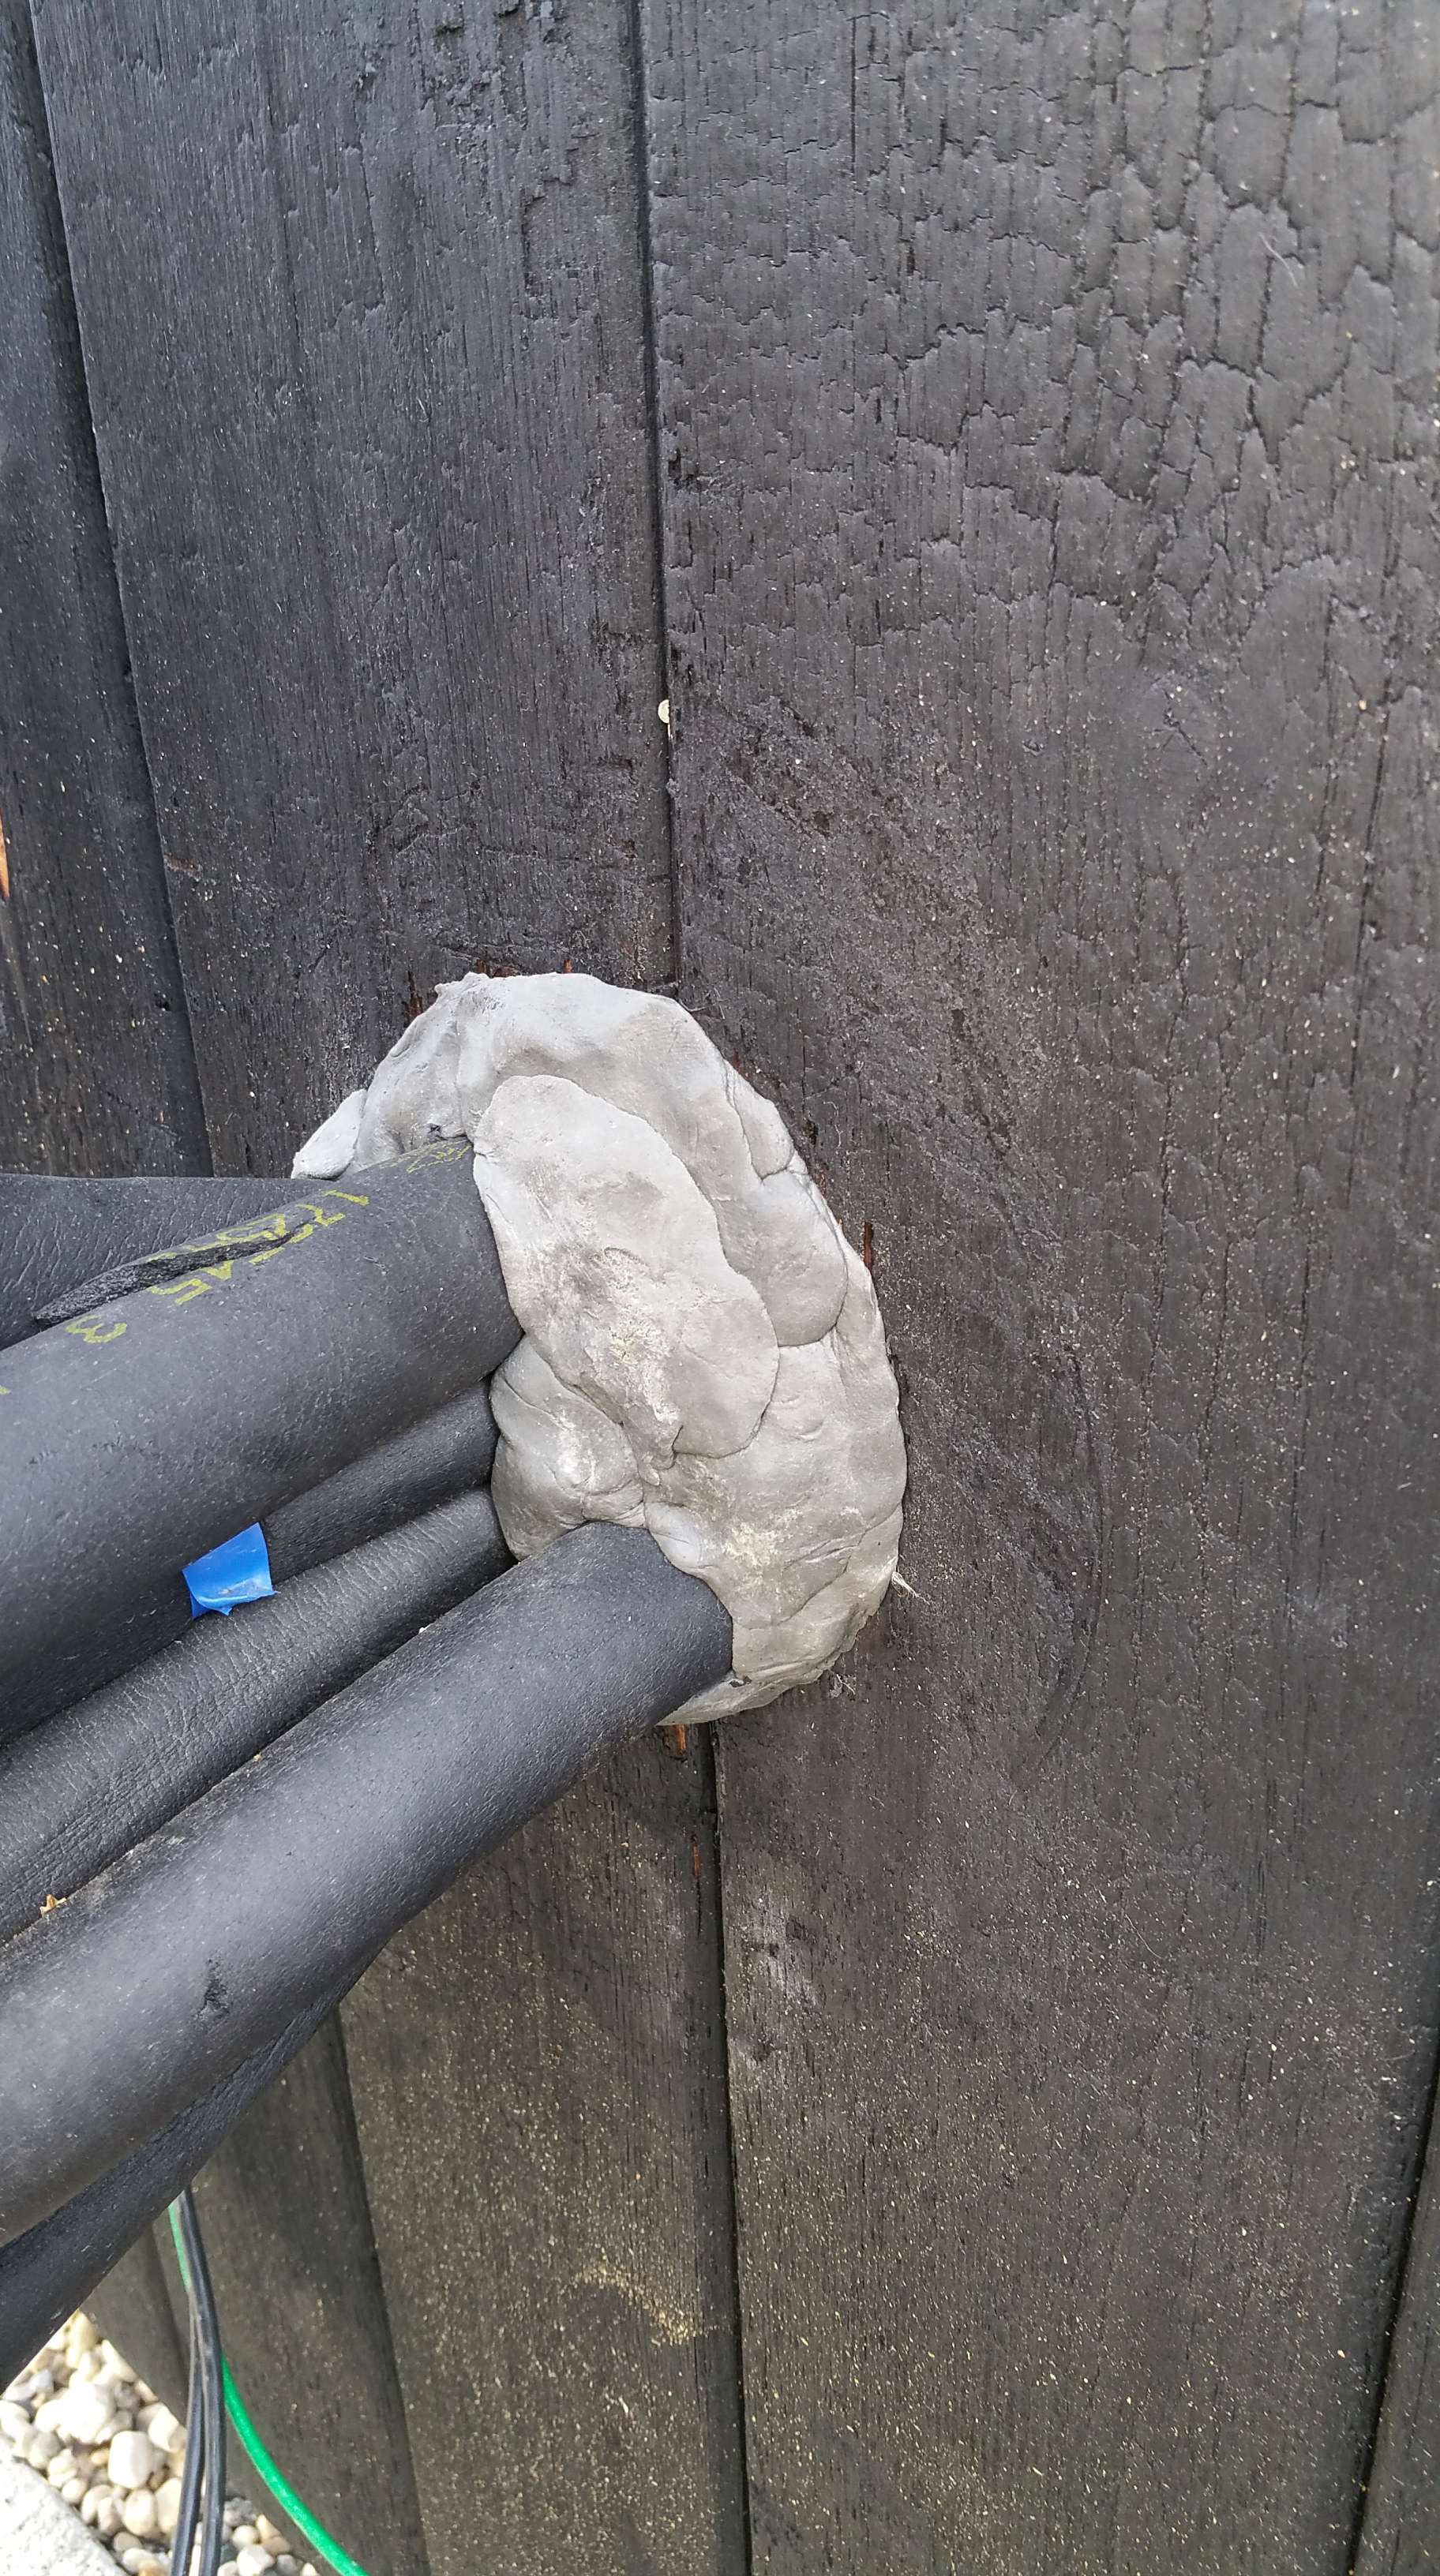
And here’s a view of the same area after the siding was installed (I’ll go into the many details regarding the installation of the exterior insulation, furring strips, and siding in a future post):
Additional areas where the duct seal proved to be invaluable:
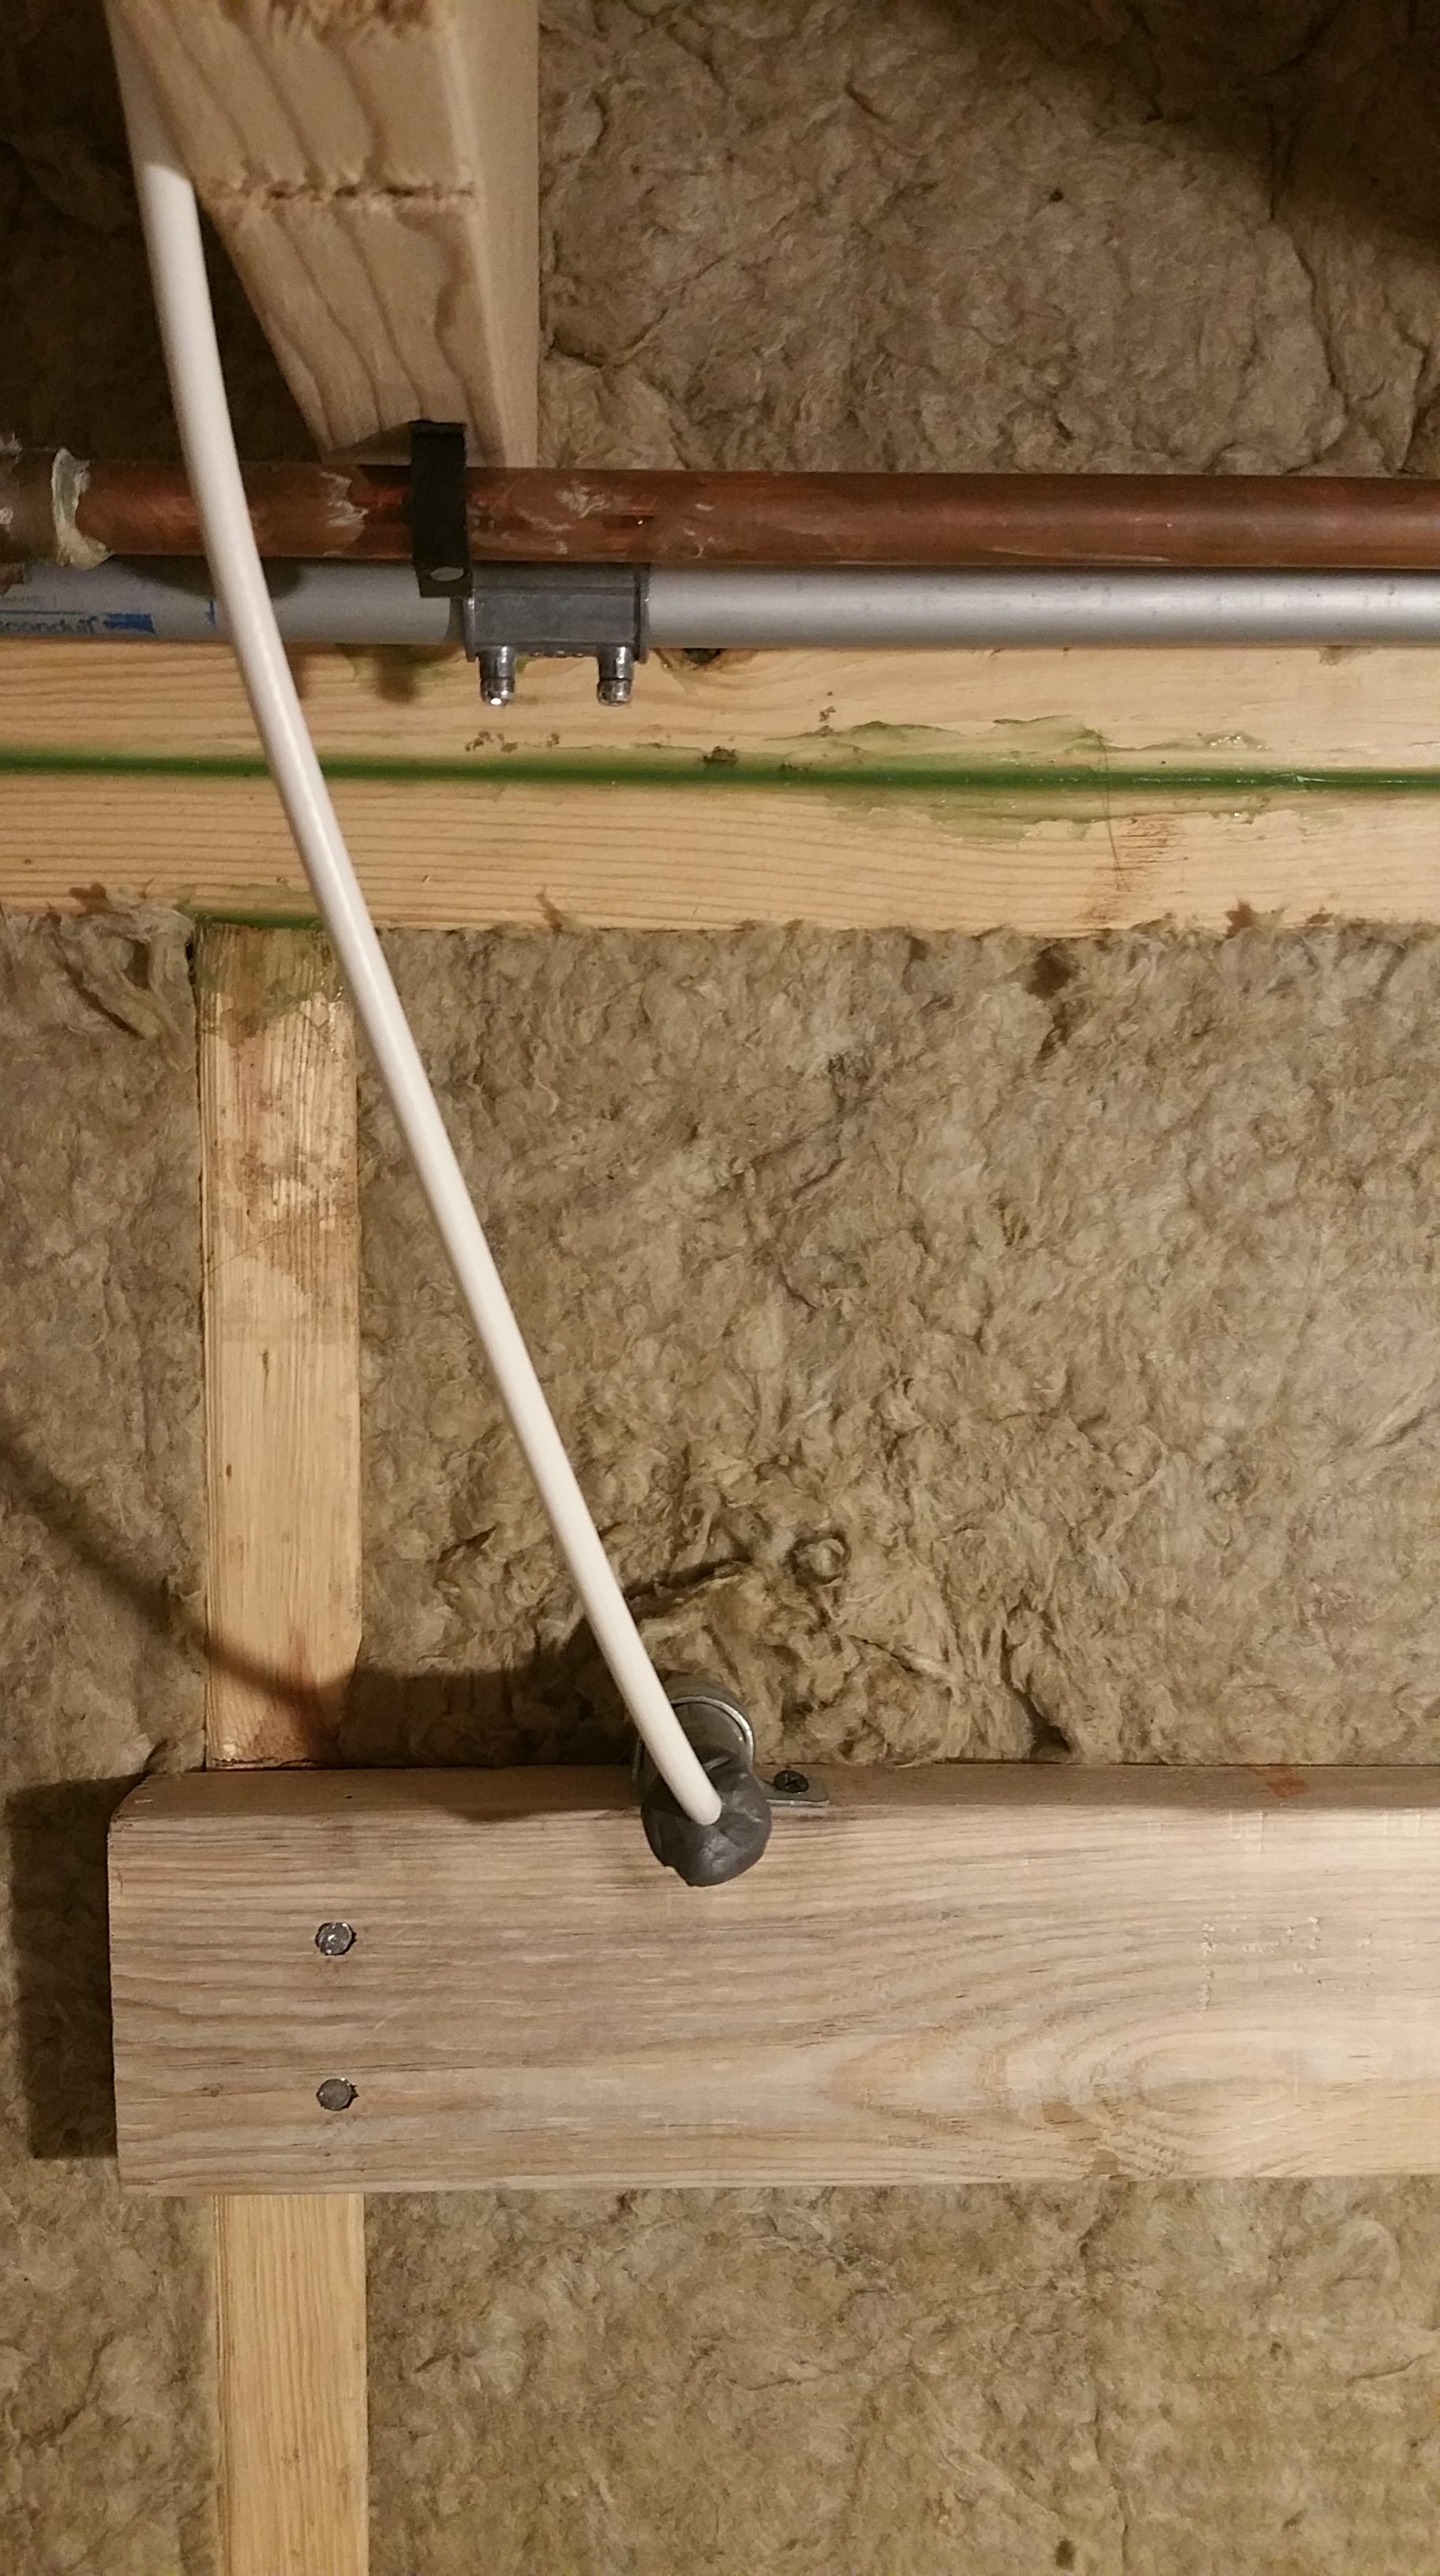
Conduit for the water meter in the basement (only the interior is shown below, but the conduit was air sealed with duct seal on the exterior end as well):


And here’s the same conduit for the water meter as it leaves the house on the first floor:

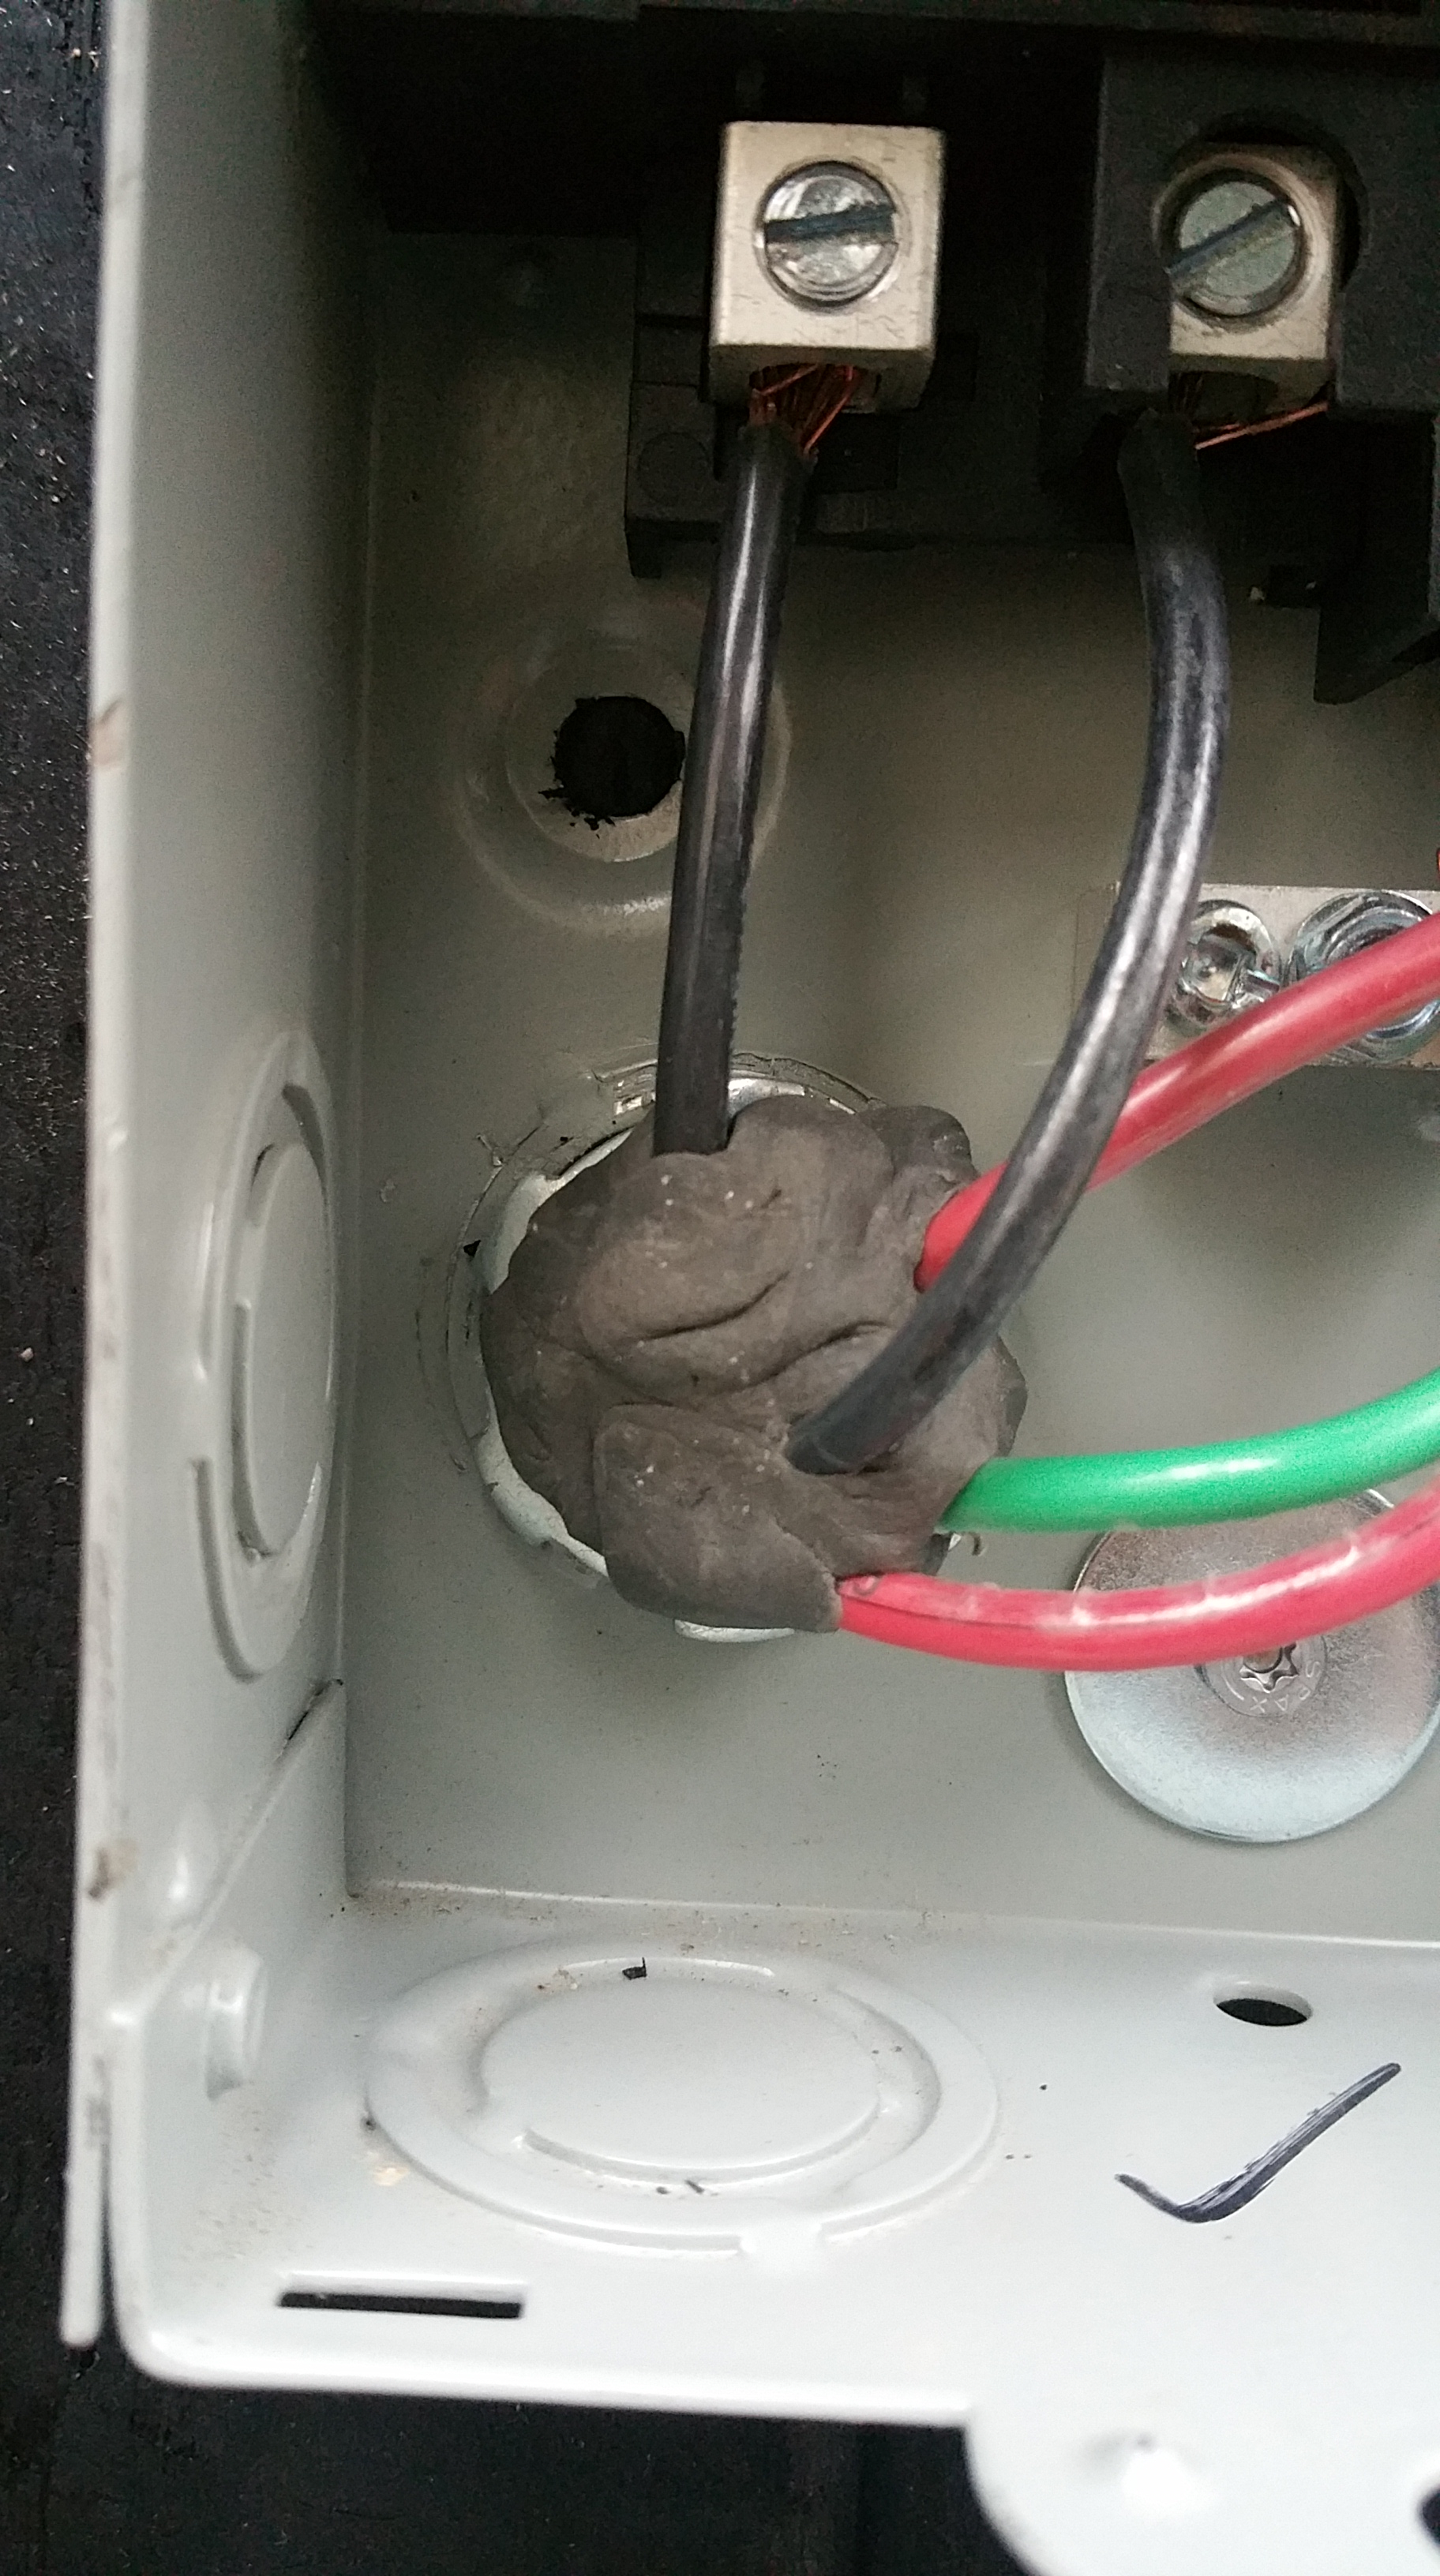
I also had to address the disconnect boxes for our solar array and our heat pump. For instance, here’s our solar disconnect box when it’s open:

And here it is after removing the pull out switch, revealing an air leak:

Close-up of the conduit:

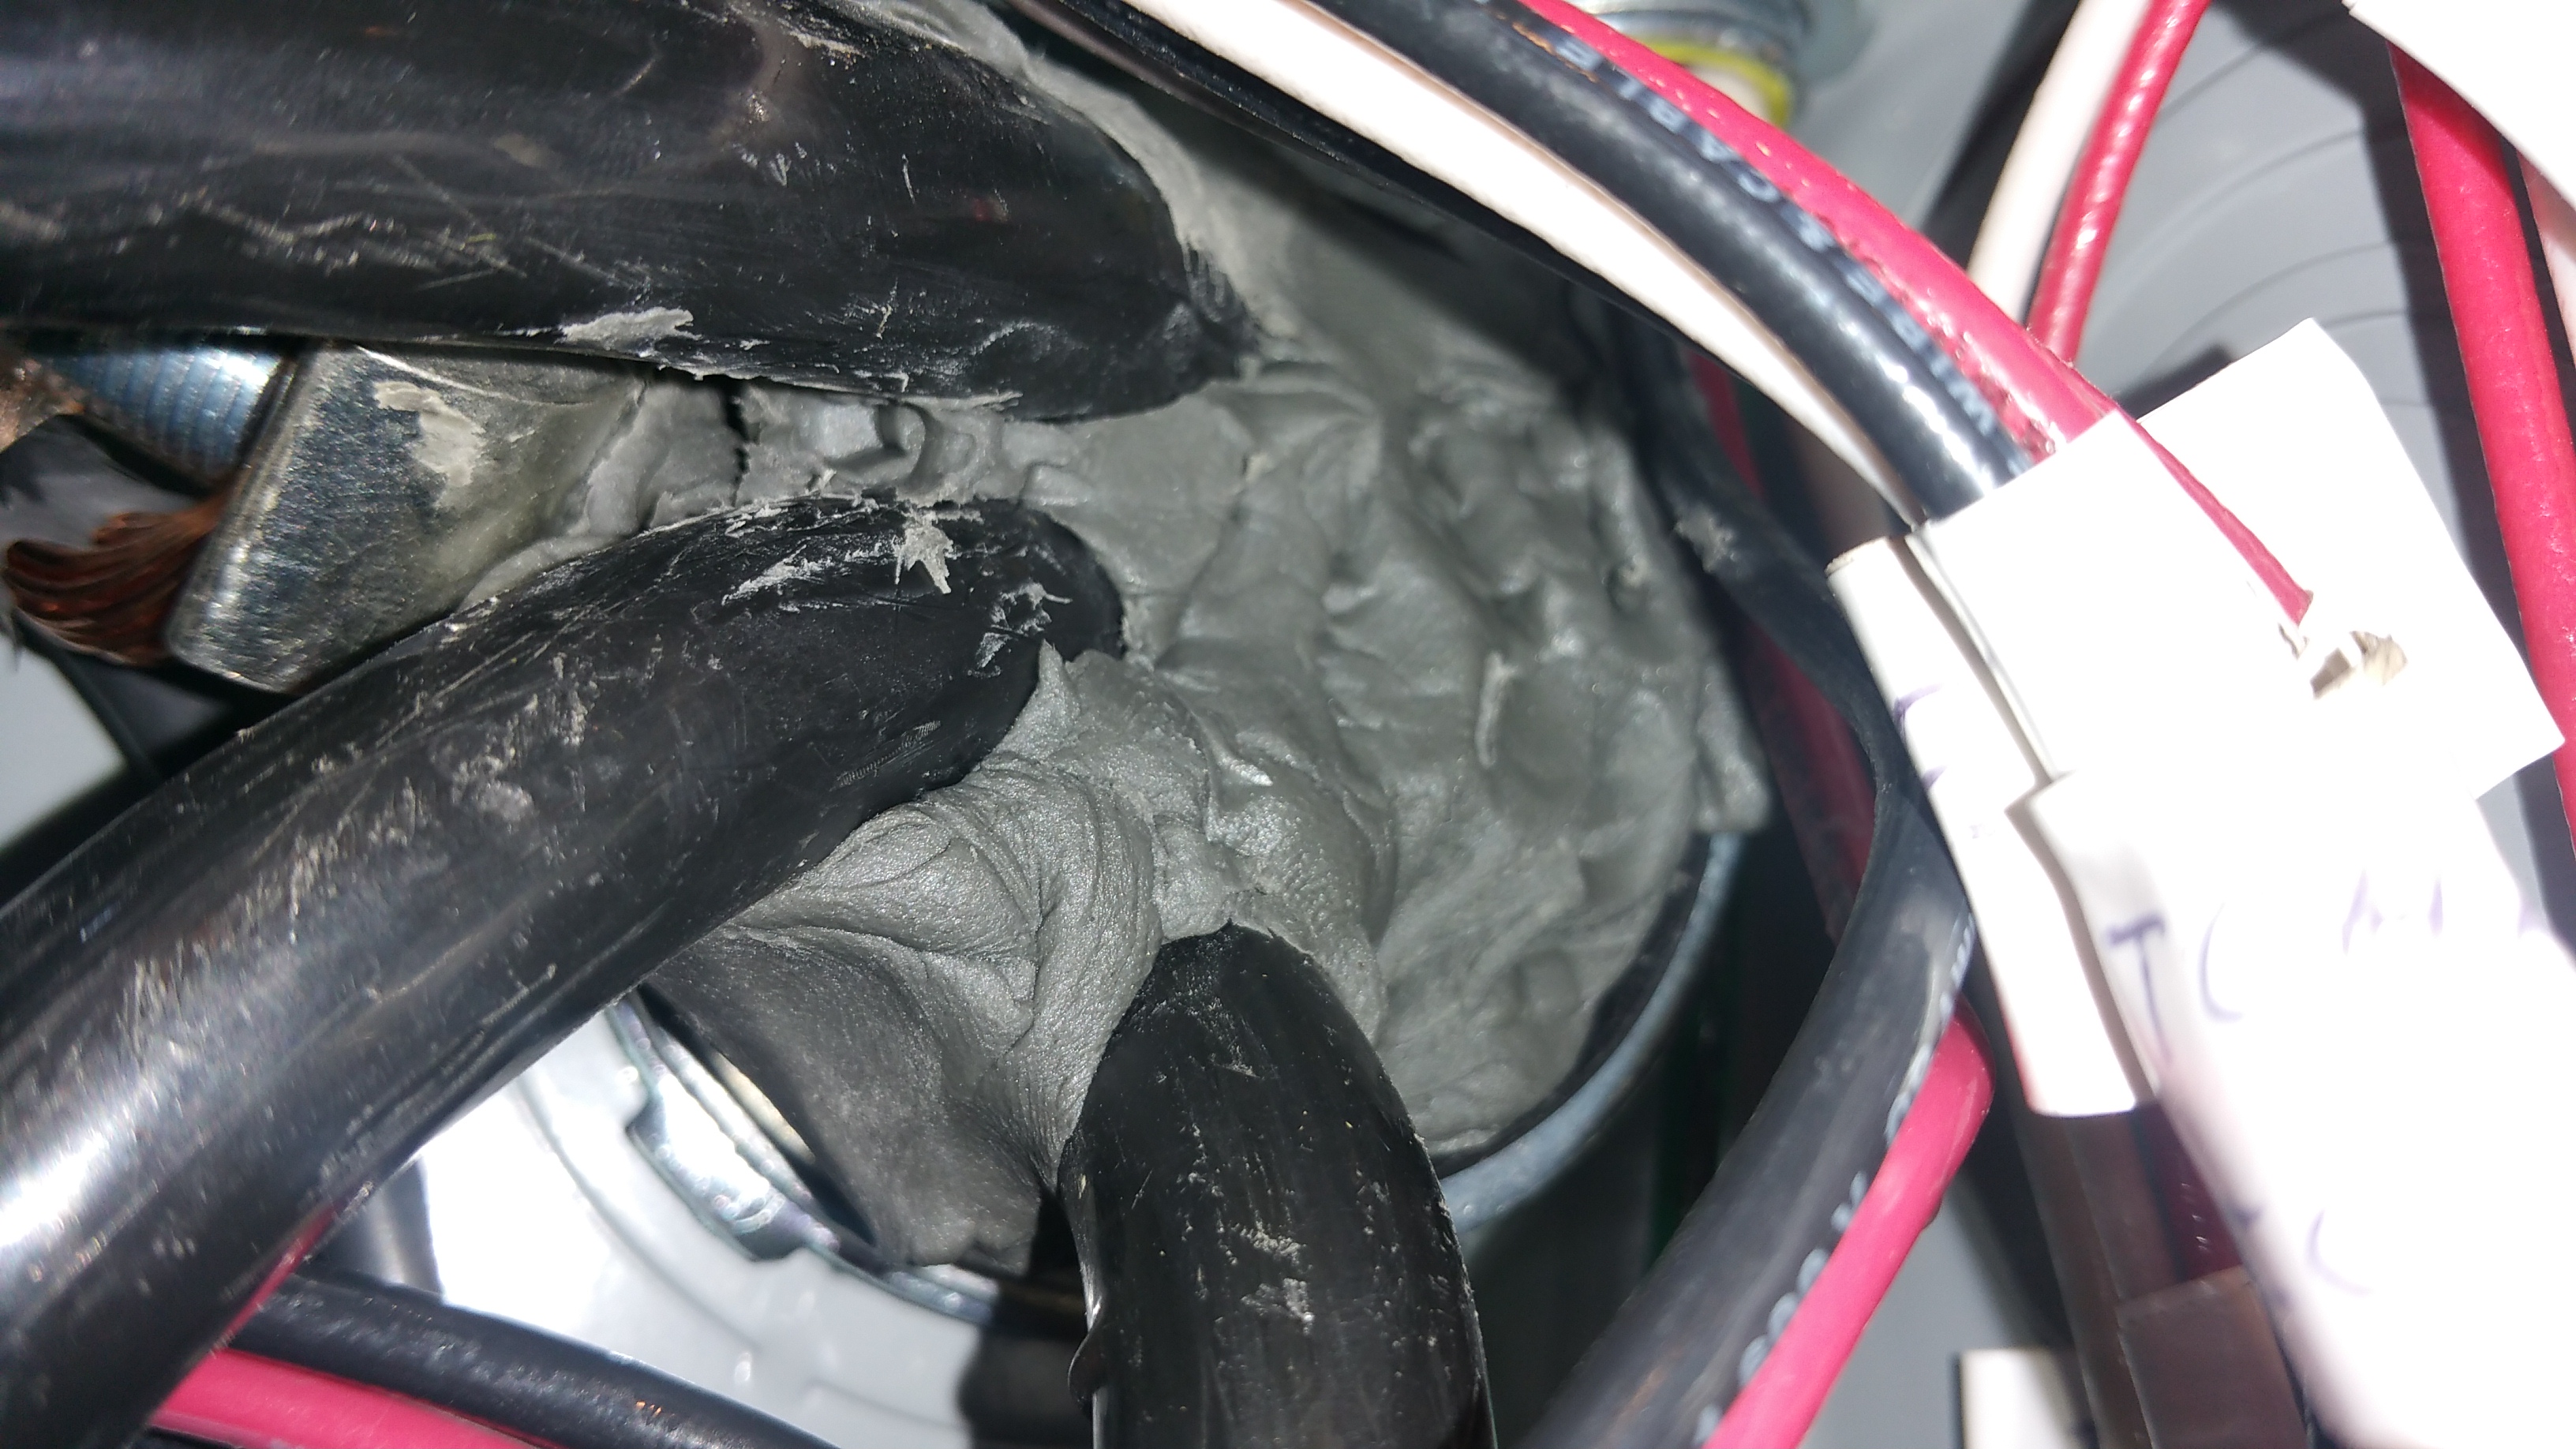
An even closer look:

And here it is after being air sealed with the duct seal:
I did the same air sealing for the Mitsubishi heat pump disconnect box:

Close-up of the conduit sealed with the duct seal:

During my initial blower door test (more on that later), some air movement around the main panel in the basement was detected, so when the electrician came back we added duct seal to the main pipe entering the house (it had already been sealed from the exterior side with duct seal):
Besides the penetrations in the Zip sheathing, there were other penetrations through the Intello (our air barrier on the ceiling) that had to be addressed as well. These areas were air sealed with the same set of products as the Zip.
For example, in addition to the conduit for solar through the Intello, we also had to air seal conduit for electric service to the attic (for a light and switch in the attic), in addition to the the penetrations for radon and plumbing waste vents, some of which are shown below:
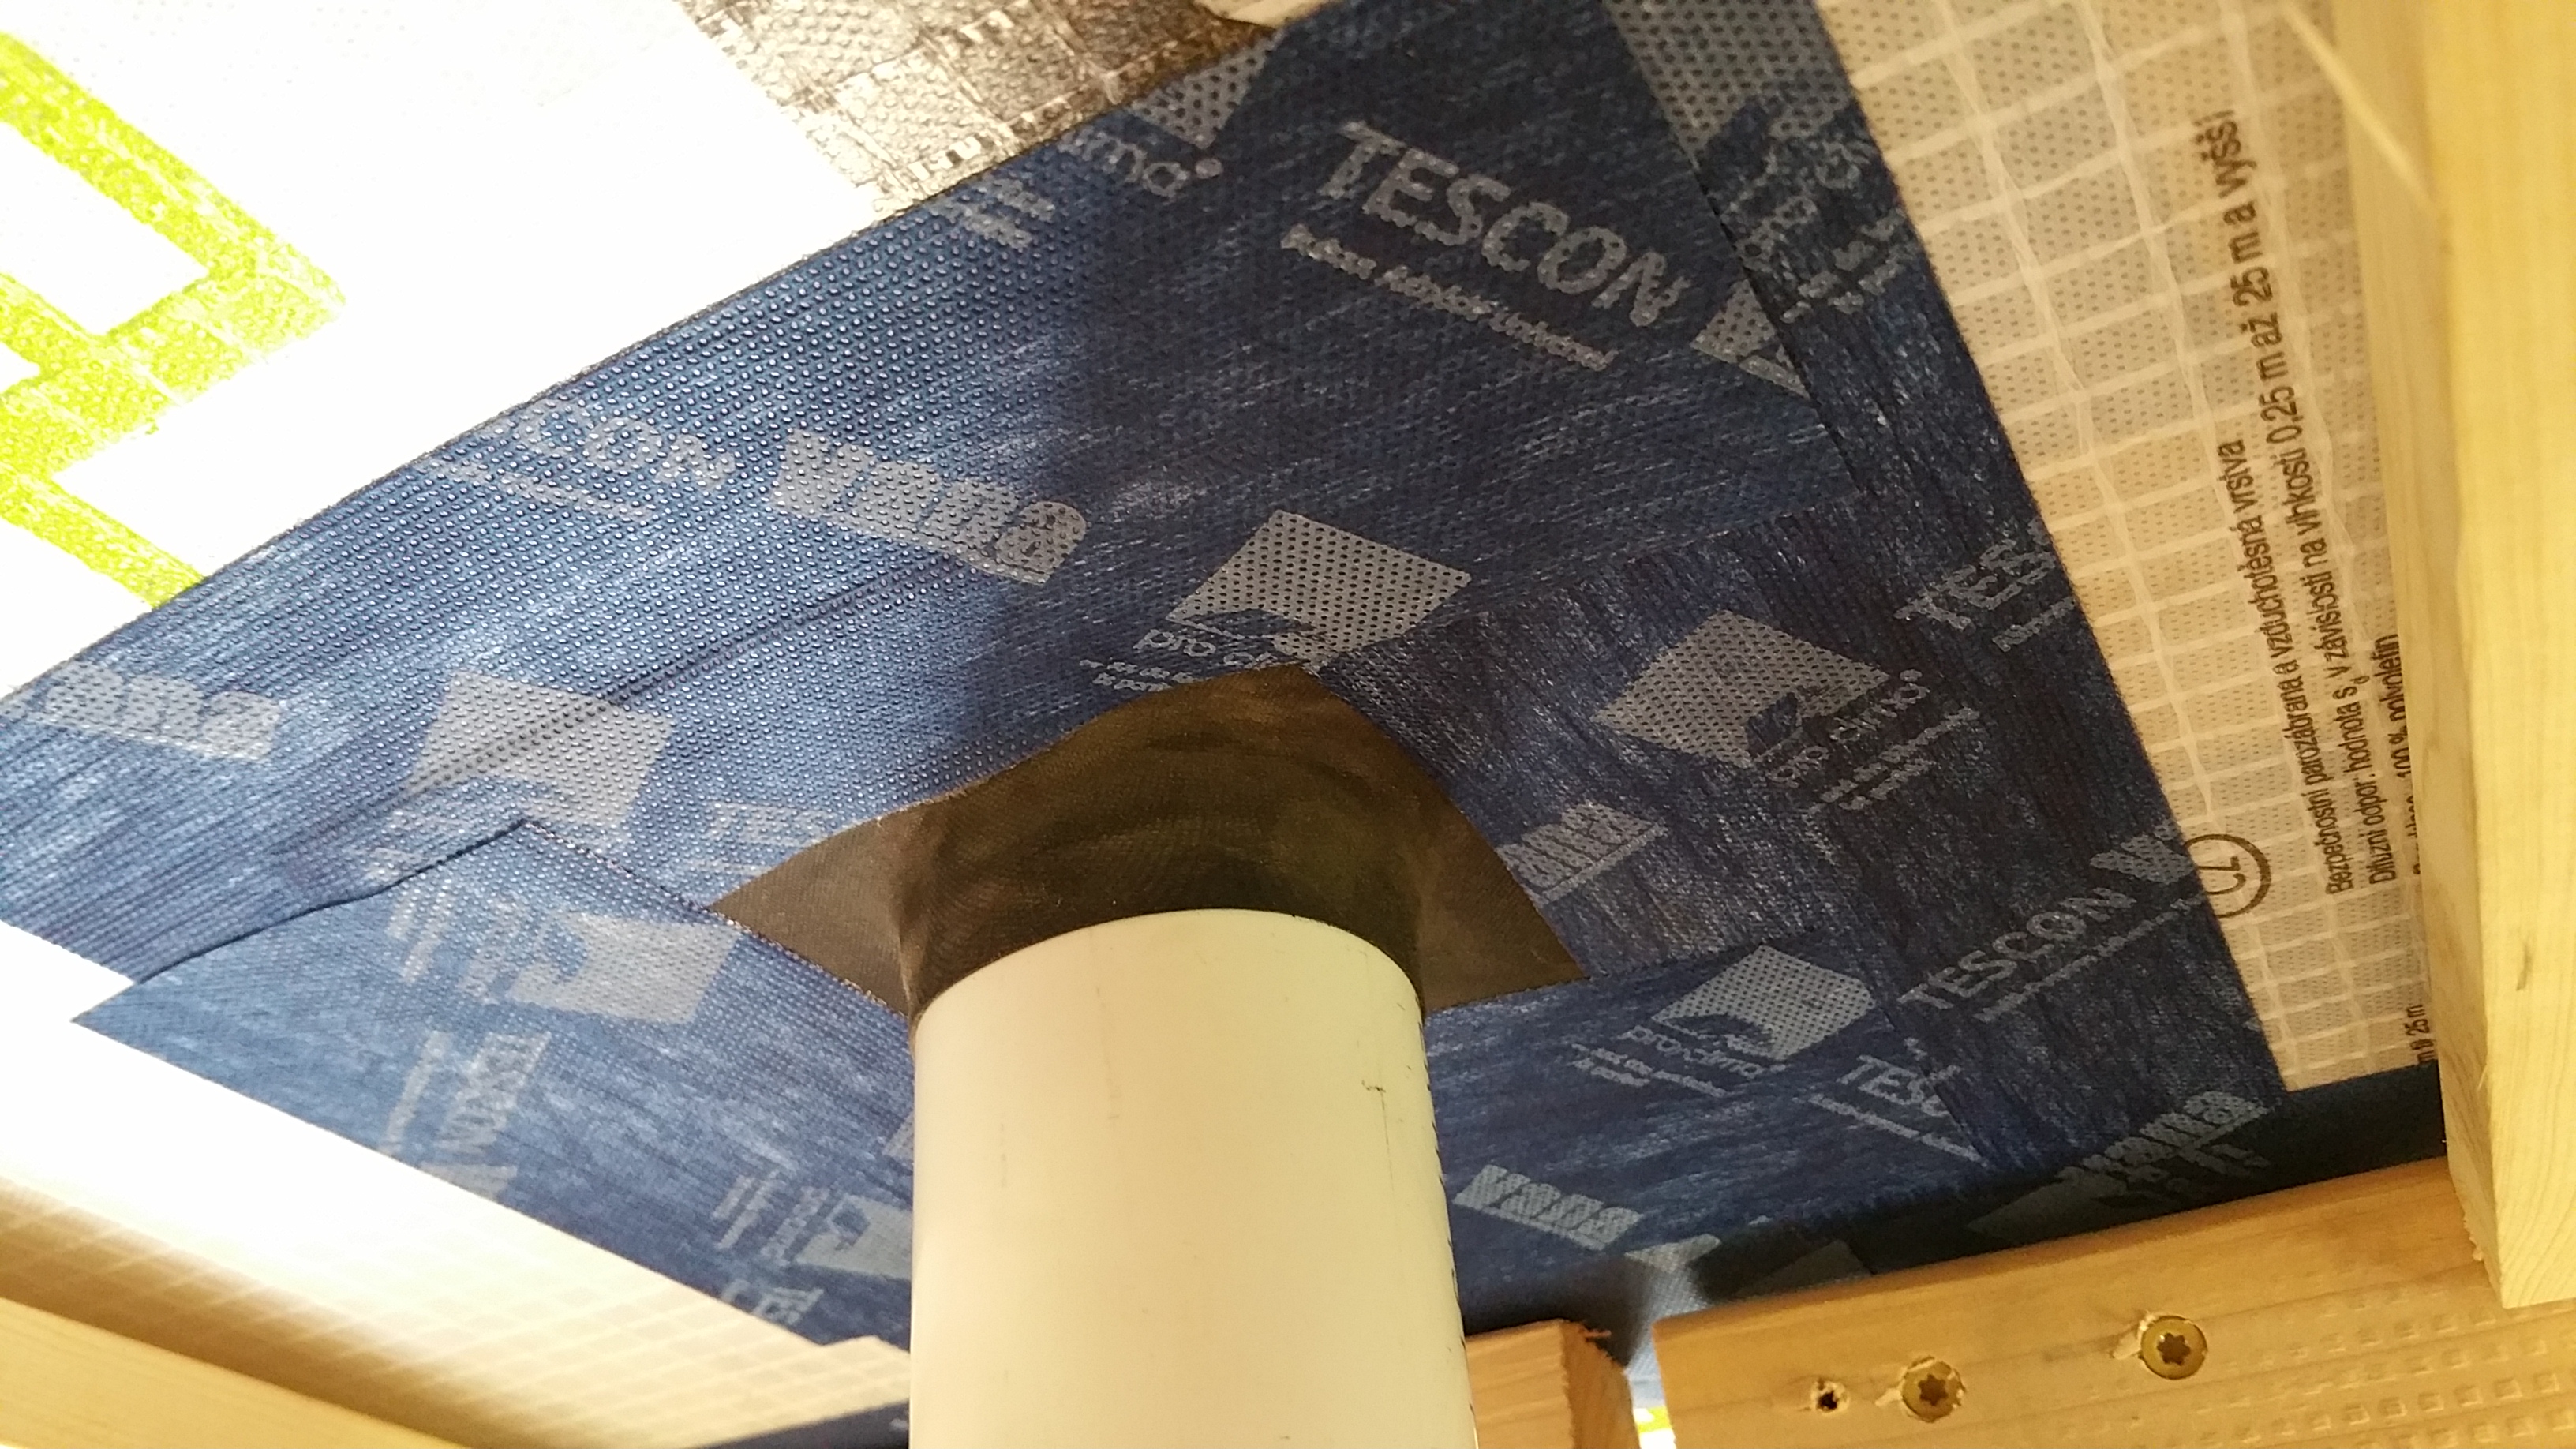
Another view of this vent pipe after air sealing, this time from below:

Here is one of the vents that our first, incompetent plumber installed too close to one of the 2×6’s used to establish our service core:
Here’s the same area after applying the Tescon Vana tape:
Below is another vent pipe incorrectly installed too close to a 2×6. This one was even more challenging to air seal properly. After the gasket and Tescon Vana, I added the green HF sealant as insurance against air leaks, both for now and in the future.
We also had to air seal the penetrations for our Zehnder Comfo-Air 350 ERV ventilation unit. I’ll go into the details of the actual installation later, but here are some photos of the penetrations through the Zip sheathing and how we addressed making them air tight:


We followed the same process — Roflex gasket and Tescon Vana tape — for the exterior side of the Zehnder Comfo pipe:
And here’s a picture of both supply and exhaust pipes for the Zehnder:
During my initial blower door test some air movement around the sump pit was detected.

The sump pump discharge pipe also needed to be air sealed on both sides of the Zip:
Some air movement around the ejector pit was also detected, so I used duct seal to try and block it.

For low voltage — in our case, a cable TV/Internet connection — we found a utility box at Lowe’s (also available at Home Depot and Amazon), and combined it with conduit to transition from the exterior to the interior. The diameter of the conduit is large enough to allow wires for other utilities/services to pass through as well, if necessary, in the future.
An engineer from Comcast-Xfinity visited the site back in the summer, and he gave me the go-ahead for using this box/conduit set-up:

Even the wire for the doorbell was sealed with a gasket and tape:
Air sealing the penetrations was challenging at times, but also a lot of fun — always keeping in mind the goal of meeting the Passive House standard of 0.6 ACH@50 for our blower door test.
Convinced of the connection between air tightness and the durability of a structure — not to mention the impact air tightness has on heating and cooling loads (i.e. monthly utility bills) —I wanted to see just how air tight I could get the house.
Hopefully this inventory of penetrations will prove helpful to someone in the planning stages of their own “air tight” build. It always helps seeing how other people do things — in particular, the strategies they employ and the specific products they use.
Seeing these real world examples of air sealing around the many penetrations in a structure will hopefully give others the confidence to come up with their own plan of attack for building an airtight structure.


That looks tight. Not even a mouse…could get into that house.
LikeLike
I’m doing my best. 😊
Thanks for checking out the blog!
LikeLike
I don’t really understand sealing between the studs and the sheathing, unless it was on a sheathing break. If the sheathing gapping between the studs is not leaking, why would it be leaking when it crosses the stud?
LikeLike
Hi Davis,
Prior to construction, I consulted books and online resources regarding Passive House air sealing. At least in some of these, people were sealing around the framing/sheathing connections. A similar area would be taping or sealing all of the nail holes on sheathing. Based on what I’ve seen since construction, many PH builders have moved away from addressing both these areas (this seems reasonable).
I was obsessed about air sealing during our build because, based on all the information that I could find, the worst case scenario was a structure insulated above code that had areas of significant air leakage. Even a single window with leakage could, over time, spell disaster for the immediate area (e.g., mold and structural damage), so the goal was to get the blower door number as low as possible to ensure this didn’t happen.
If I was building this project today, I would air seal the major, obvious, areas, and then use the blower door tests to hunt down any specific areas showing leakage and address them.
Thanks for checking out the blog!
LikeLike