
Installing Intello
We thought about using the Zip sheathing as our air barrier on the ceiling, attaching it to the bottom of the roof trusses, something I had seen on other builds, but after learning about Intello we decided to use that instead:
Floris Keverling Buisman, from 475 High Performance Building Supply, did our WUFI analysis for us, and he suggested the Intello would be a better fit for our project. The Intello is a smart vapor retarder, so it can expand and contract when it’s needed, and it’s obviously less physically demanding to install than the Zip sheathing.
Once the air sealing was complete around the top of our outside perimeter walls, and the insulation chutes had been installed, we were almost ready for the Intello. At the gable ends of the house, one last detail needed to be put in place, circled in red in the picture below:

By adding this 2×6 on its side, which is in the same plane as the bottom of the roof trusses, it makes it possible to carry the Intello over the transition from the ceiling (under the roof trusses) to the walls (top plates). This is one of those details that is hard to ‘see’ when in the planning, more abstract, and two dimensional phase of designing a structure.

Once the trusses were placed on the top of the walls and you start picturing how the Intello will be attached to the ceiling, it becomes much more obvious that something in this space at the gable ends of the house is needed in order to accomplish the transition from the ceiling to the walls.

After reading about so many other projects that utilized Intello, it was exciting to unwrap the first box.

The directions are pretty straightforward, and the product is relatively easy to install as long as you don’t have to do it alone.

I didn’t get a chance to touch and feel the product before ordering (always fun to do with any new product), so here are some close-ups of the Intello to give you some sense of what it’s like:

I was curious about its strength and tried to tear it with various objects, including the cut ends of 2×4’s and the brackets we eventually used to help establish our service core. The material is surprisingly tear resistant, but a utility knife, or a stray sharp edge will cut through it (as our first plumber proved to me with his careless actions — a story for another post).

Having never used the Intello before, I decided to start small and began by experimenting with it in a corner. Getting the corners fully covered while getting the material to sit flat before applying the blue Tescon Vana tape proved to be the most challenging part of using the Intello.

Here’s two more pictures of the flat 2×6 helping to make the transition from the ceiling to the wall on the gable ends of the house:


In order to attach the Intello to the bottom of the roof trusses, we used the staple gun shown below. Loading it is kind of counter-intuitive (online reviews complain about it not working out of the box, but my guess is — like me — they were trying to load it improperly), but once I figured it out, it ended up working really well, almost never jamming, and it’s very comfortable to hold because it’s so lightweight. It should work with any standard air compressor. It was available on Amazon, and in Menards (a local big box store here in the Chicago suburbs).

We started with these staples:
But we ended up going with these instead:
They seemed to grab better (presumably the sharp ends make a difference), and they sit flatter on a more consistent basis (less time having to go back, or stop, to hammer home proud staples flat).

As we rolled out the Intello, it took some practice to get it to sit taught and flat before stapling.
The dotted lines near the edges of the Intello help you keep the rows straight as you overlap two sheets and progress from one row to the next. The lines also make it easier to maintain a straight line with the Tescon Vana tape (don’t ask me when I realized this latter detail — too embarrassing to admit).

We checked our initial row from above in the attic:

Working our way through the interior walls, especially the bathrooms, was more time consuming and took more effort (I grew to hate those interior bathroom walls — first the Intello, then the service core details described below), but once we were out in the open the Intello was fairly easy to install.


As Eduardo and Jesus rolled out sections of the Intello I followed, pulling on the Intello a little to help make it sit tight and flat before stapling it in place.

There were a couple of sections, some of the first ones we installed, that I managed to wrinkle (one, in particular, became problematic during our first blower door test — and, of course, it was in a tight spot around the bathroom shower area), but overall, the installation of the Intello went pretty well. Like most things you do for the first time, we got comfortable and good at it just as we were finishing up.


After learning about a project on the 475HPBS website…
Masonry Retrofit
… we decided to use the Tescon Vana tape to cover the staples, as well as all the seams, in the Intello. I have no idea what actual impact covering the staples has on air tightness, but visually as you tape over the staples you can see how, if nothing else, it will help the staples resist pulling out under pressure from the eventual blown-in cellulose in the attic.
Even as the build progresses, it’s interesting how details like this pop up, making building “green” a never-ending process of learning something new — someone’s always coming up with a new product or a new way to do things better, faster, or less complicated — which makes the process itself very exciting.


This was a nice moment, being able to look back and see the Intello completely installed. It’s almost a shame that we have to cover it with drywall.

2×6 Service Core
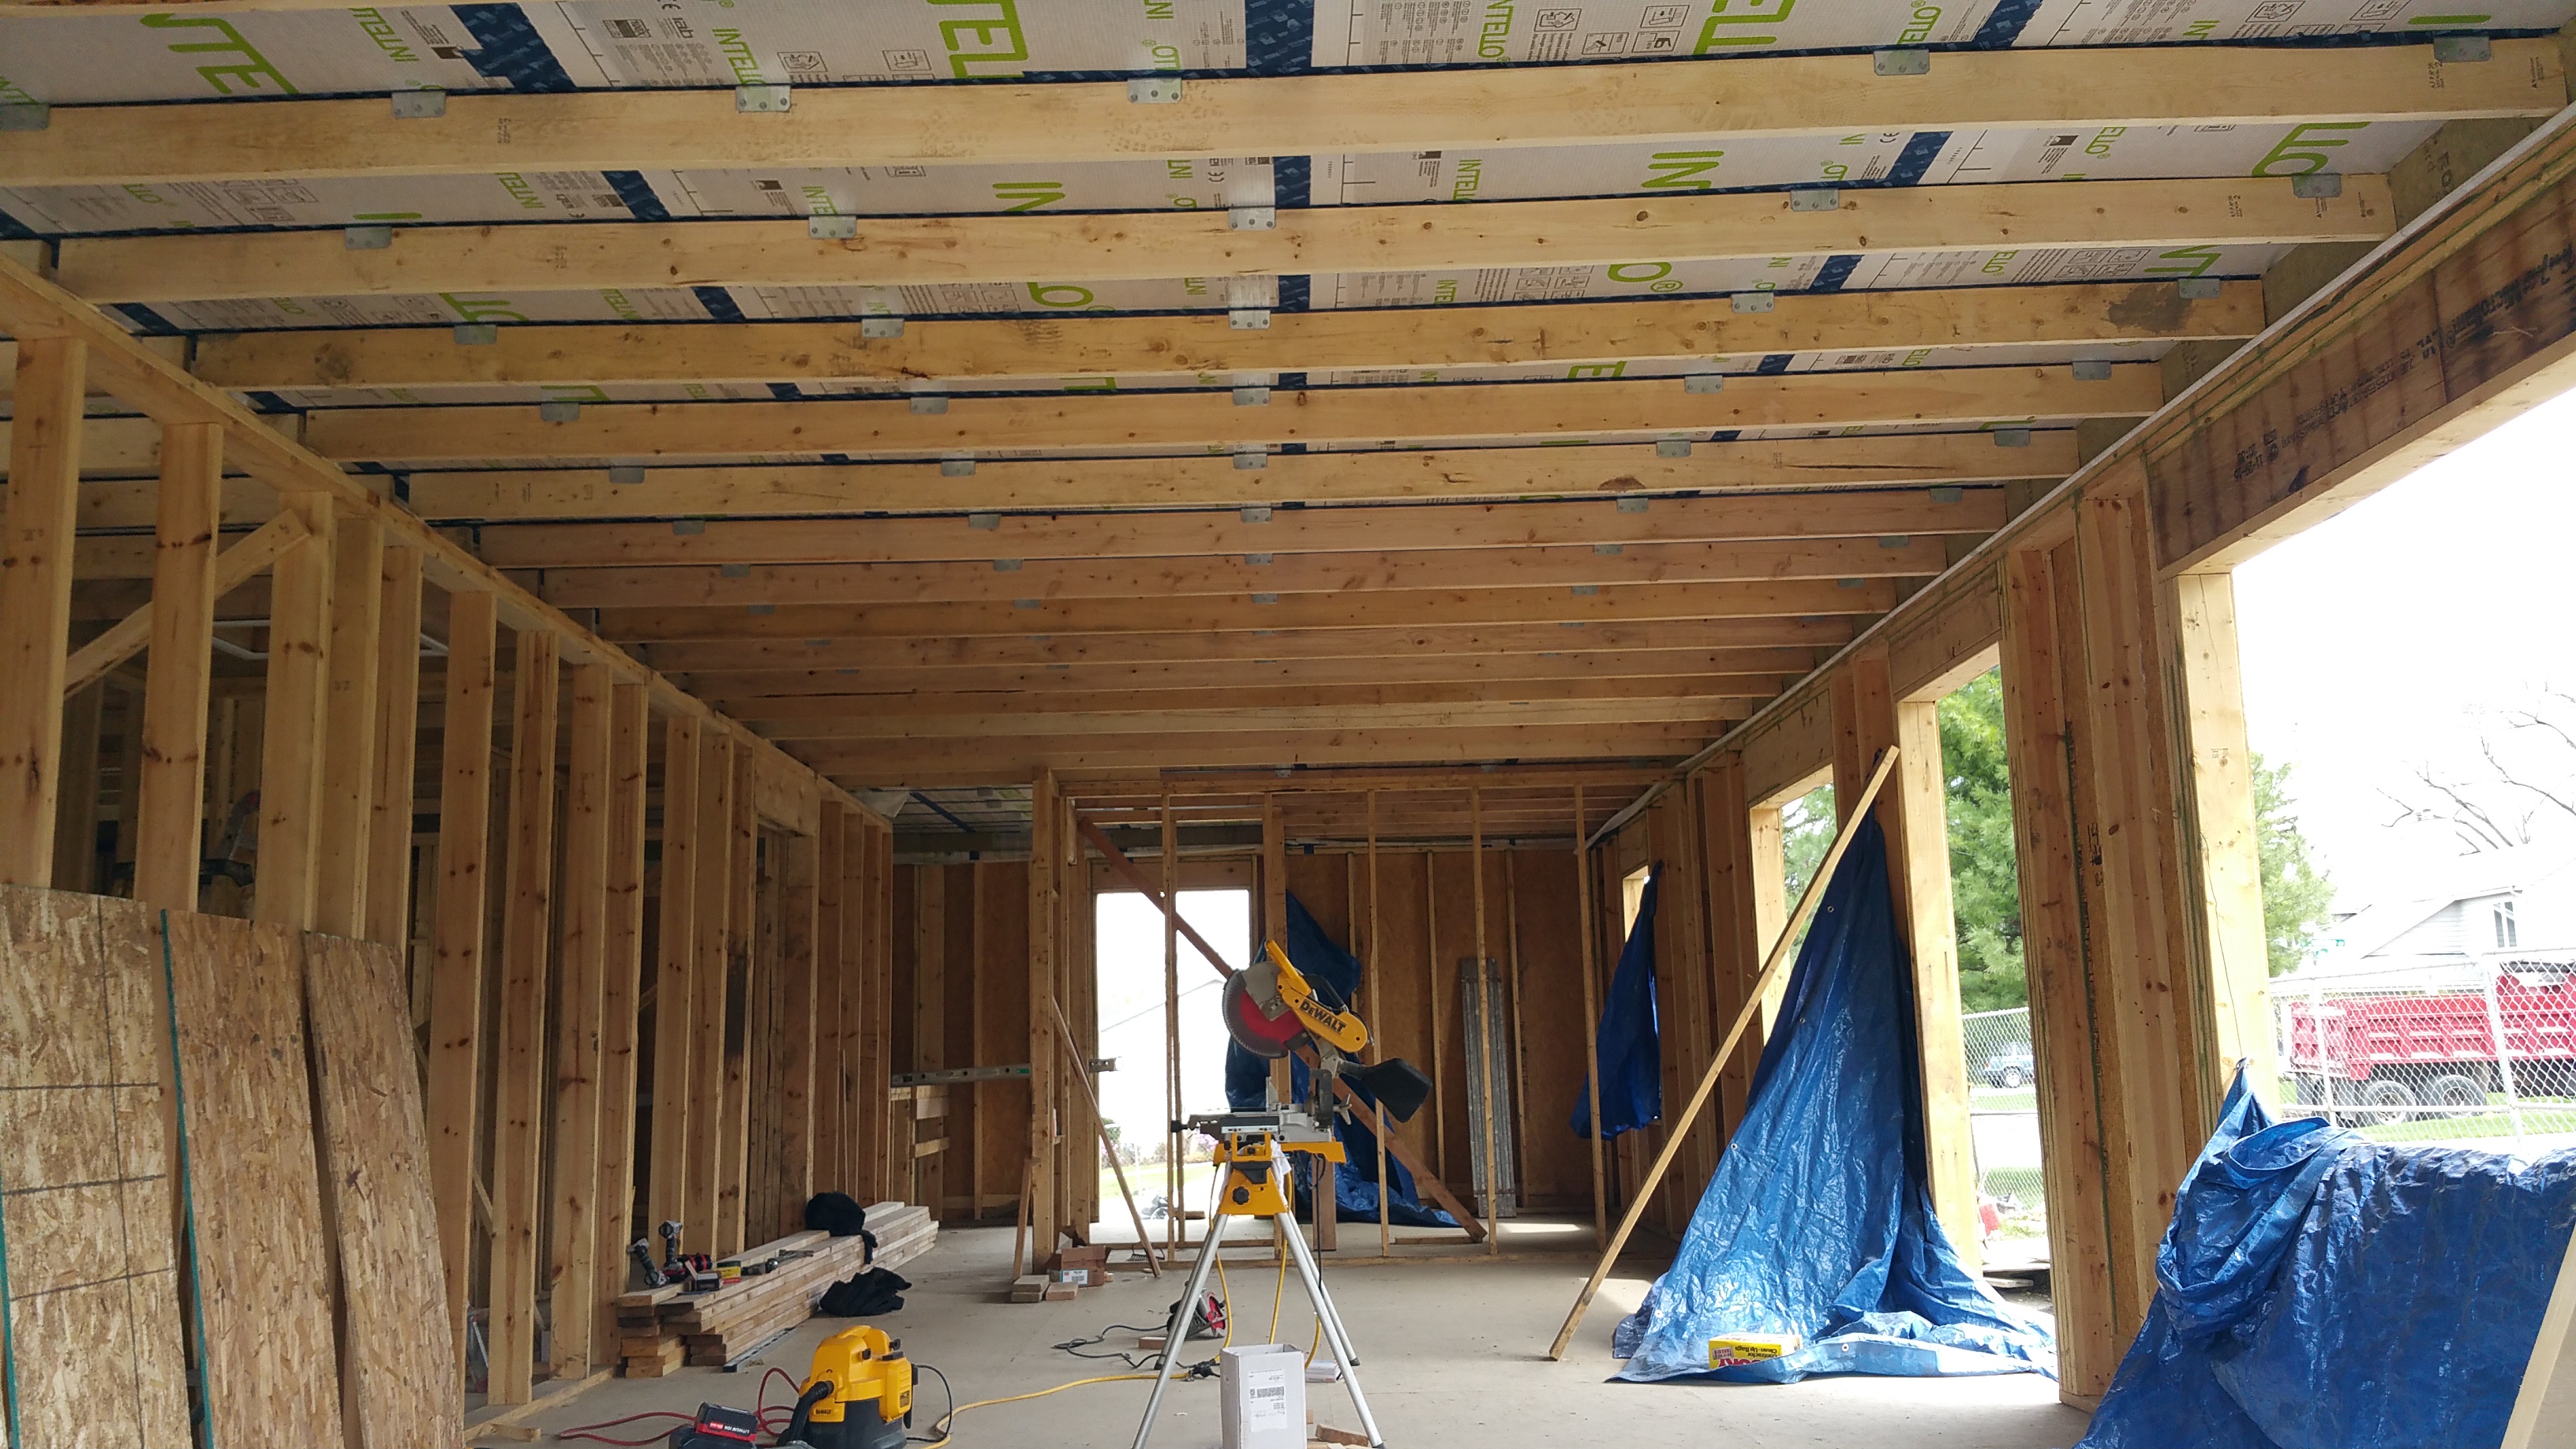
A design goal for the ceiling was to keep mechanicals, like HVAC and electric, on the conditioned side of the ceiling air barrier. By doing this, we avoid having to insulate any ductwork for HVAC, or air sealing and insulating around ceiling lights. In effect, we completely isolate the attic, making its sole purpose (apart from ventilating our “cold roof” assembly) holding our blown-in cellulose insulation (this set-up makes it much easier to air seal the ceiling and get the insulation right — at least based on the projects I’ve read about). In order to do this, we created a service chase, or service core, with 2×6’s:

In addition to serving as a space to safely pass mechanicals through, the only other job for the 2×6’s is to hold up the ceiling drywall. The roof trusses, directly above each 2×6, are still carrying the load of the roof and stabilizing the perimeter walls.

Here’s what the 2×6’s looked like with their brackets once everything was installed.

OB and my wife were invaluable as they helped me cut and install all the 2×6’s.


We installed the brackets first, before raising up each individual 2×6 to fit against the brackets.

Since the brackets were directly attached underneath a roof truss, we were able to keep the 2×6’s fairly straight, even when an individual board itself was less than perfectly straight.

A feisty Robin kept trying to set up a nest on our partition wall (our windows and doors aren’t in yet). Apparently she believed we had created an elaborate bird house just for her. It took almost a week before she finally gave up — but not before starting multiple nests in multiple spots along the wall.

Along the outside walls, at the top of the wall assembly, there was a gap that we utilized for maintaining continuous insulation. This meant there will be no break in our thermal layer going from the blown-in cellulose insulation in the attic to the monolithic layer of Roxul Comfortboard 80 (2″ + 2″) that will be on the exterior side of the Zip sheathing.


Once the 2×6’s were up, we had to install our pieces of 1×4 in order to prevent the 24″ of blown-in cellulose that will be going into the attic from causing the Intello to sag.
The plans called for the 1×4’s to be installed right after the Intello but before the 2×6’s, which would have been a lot easier and quicker, but, unfortunately, the GC’s we fired installed the interior walls too high, making this impossible.
Here’s what it should’ve looked like if we could’ve done Intello and then the 1×4’s (photos courtesy of 475 HPBS) before installing the 2×6 service core:


Having no choice but to methodically cut each 1×4 to fit between each set of 2×6’s, OB was nice enough to help me get it done.

Installing the 1×4’s between the 2×6’s began with some experimentation:

After experimenting with a finish nailer (too easy to miss and penetrate the Intello), we eventually settled on Deckmate screws. It was definitely a laborious process, but eventually we got into a rhythm and got it done, although we wouldn’t recommend doing it this way — way too time consuming.

We tried to keep the 1×4’s about 16″ apart, which should prevent any significant sagging in the blown-in cellulose from occurring (I’ll post photos once the cellulose has been put in the attic).
A lot of blood, sweat, and tears have gone into completing this house.
Here’s some proof:

In trying to avoid puncturing the Intello, I would hold a couple of fingers on the back side of the 2×6, feeling for any screws that would come through on a bad angle. A couple of times I drove a screw too quickly and paid the price.


Maintaining the Intello After Installation
Unfortunately, there was a delay in getting shingles on our roof, due in large part to our first disorganized and incompetent plumber (again, more on this later). Consequently, we were in the awkward position of having our ceiling air barrier and service core all set up but every time it rained we still had a leaking roof. In most areas it wasn’t a big deal, but in about a dozen spots rain would collect and, in some cases, cause a bulge in the Intello as it held up the weight of the captured water. To relieve and ultimately to avoid this pressure, I cut small slits in the Intello where the rain would consistently collect.

Once the shingles were finally on, I went back and found all of these slits and taped over them with the Tescon Vana.

We also found a couple of weak spots in the Intello as we installed it, and even later, during the installation of the service core. These spots were marked as well, and they, too, got covered with the Tescon Vana tape just for added insurance against air leakage.

After having to fire our GC’s, we couldn’t have kept the project going without the help of family and friends. As awful as some aspects of the build have been, it’s been heartwarming to find people willing to help us see the project through to the end (much more on this later).


You must be logged in to post a comment.