
DIY Installation
Building with Passive House principles in mind, we knew that, in addition to maintaining a tight building envelope, and incorporating substantial amounts of insulation around the structure, we also needed to install continuous mechanical ventilation in order to have adequate levels of fresh air, not to mention the ability to expel stale air.
We also needed our system, either an HRV or an ERV, to be highly efficient, meaning it could hold onto some of the heat in the conditioned air even as it introduced fresh and, oftentimes, cold air by means of heat exchange as the two streams of air (fresh and stale) passed by one another inside the main unit (without actually mixing together).
After researching the many options, we ended up going with Zehnder’s ERV, in our case, the ComfoAir 350 (the various Zehnder units are based on overall cfm demand of the structure).
We only considered two other brands for our mechanical ventilation (HRV vs. ERV):
and
In all the research I did prior to construction, these three brands showed up the most in the projects I read about.
Here’s a good debate on the Green Building Advisor website discussing brand options: ERV Choices
Another interesting option would be the CERV system. Because they’re a smaller, newer company, we didn’t feel comfortable pursuing it, but it does look like a viable option worth considering if building a Passive House or Pretty Good House.
I was also familiar with Panasonic units, but I had always read that they weren’t efficient enough in terms of the heat exchange function (or heat recovery) to seriously consider using it in a Passive House or a Pretty Good House in a predominantly cold climate region like ours, here in the Chicago area.
Our Zehnder ComfoAir 350 is said to be 84% efficient in terms of heat recovery (the same principle applies in summer, only working in reverse, when you’re trying to hold onto cooled, conditioned air). Based on what I read during the design phase, the consensus seemed to be that, although more expensive, the Zehnder has a strong track record of performance and durability.
The Zehnder also came with its own ductwork, which we knew would simplify installation, allowing us to do it ourselves, rather than hire someone else to come in and run more conventional ductwork through the house (conventional ductwork would’ve taken up a lot more space as well). Even though the unit itself was more expensive, we thought we could offset some of the total cost for a ventilation system by installing the Zehnder ourselves, thereby saving some money on labor costs.
As far as the ERV/HRV debate for Northern US states, we decided to opt for the ERV because it was supposed to help us hold onto some humidity in winter months, especially important when most structures in the Chicago area are exceedingly dry for most of the winter (and our winters are long). Although I read repeatedly during the design stage that ERV’s can also help control summer outdoor humidity entering the house, this has not been our experience at all. In fact, the ERV seems pretty useless in this regard (more on this below).
The system quote we received was easy to understand, and Zehnder was nice enough to essentially design the system, both in terms of layout (i.e., where we should put all the supply and exhaust points), along with the quantity, or cfm’s, of air for each point. In the end, after commissioning the unit, the system should be balanced, meaning the unit should be bringing in as much fresh outdoor air as it is expelling stale indoor air.
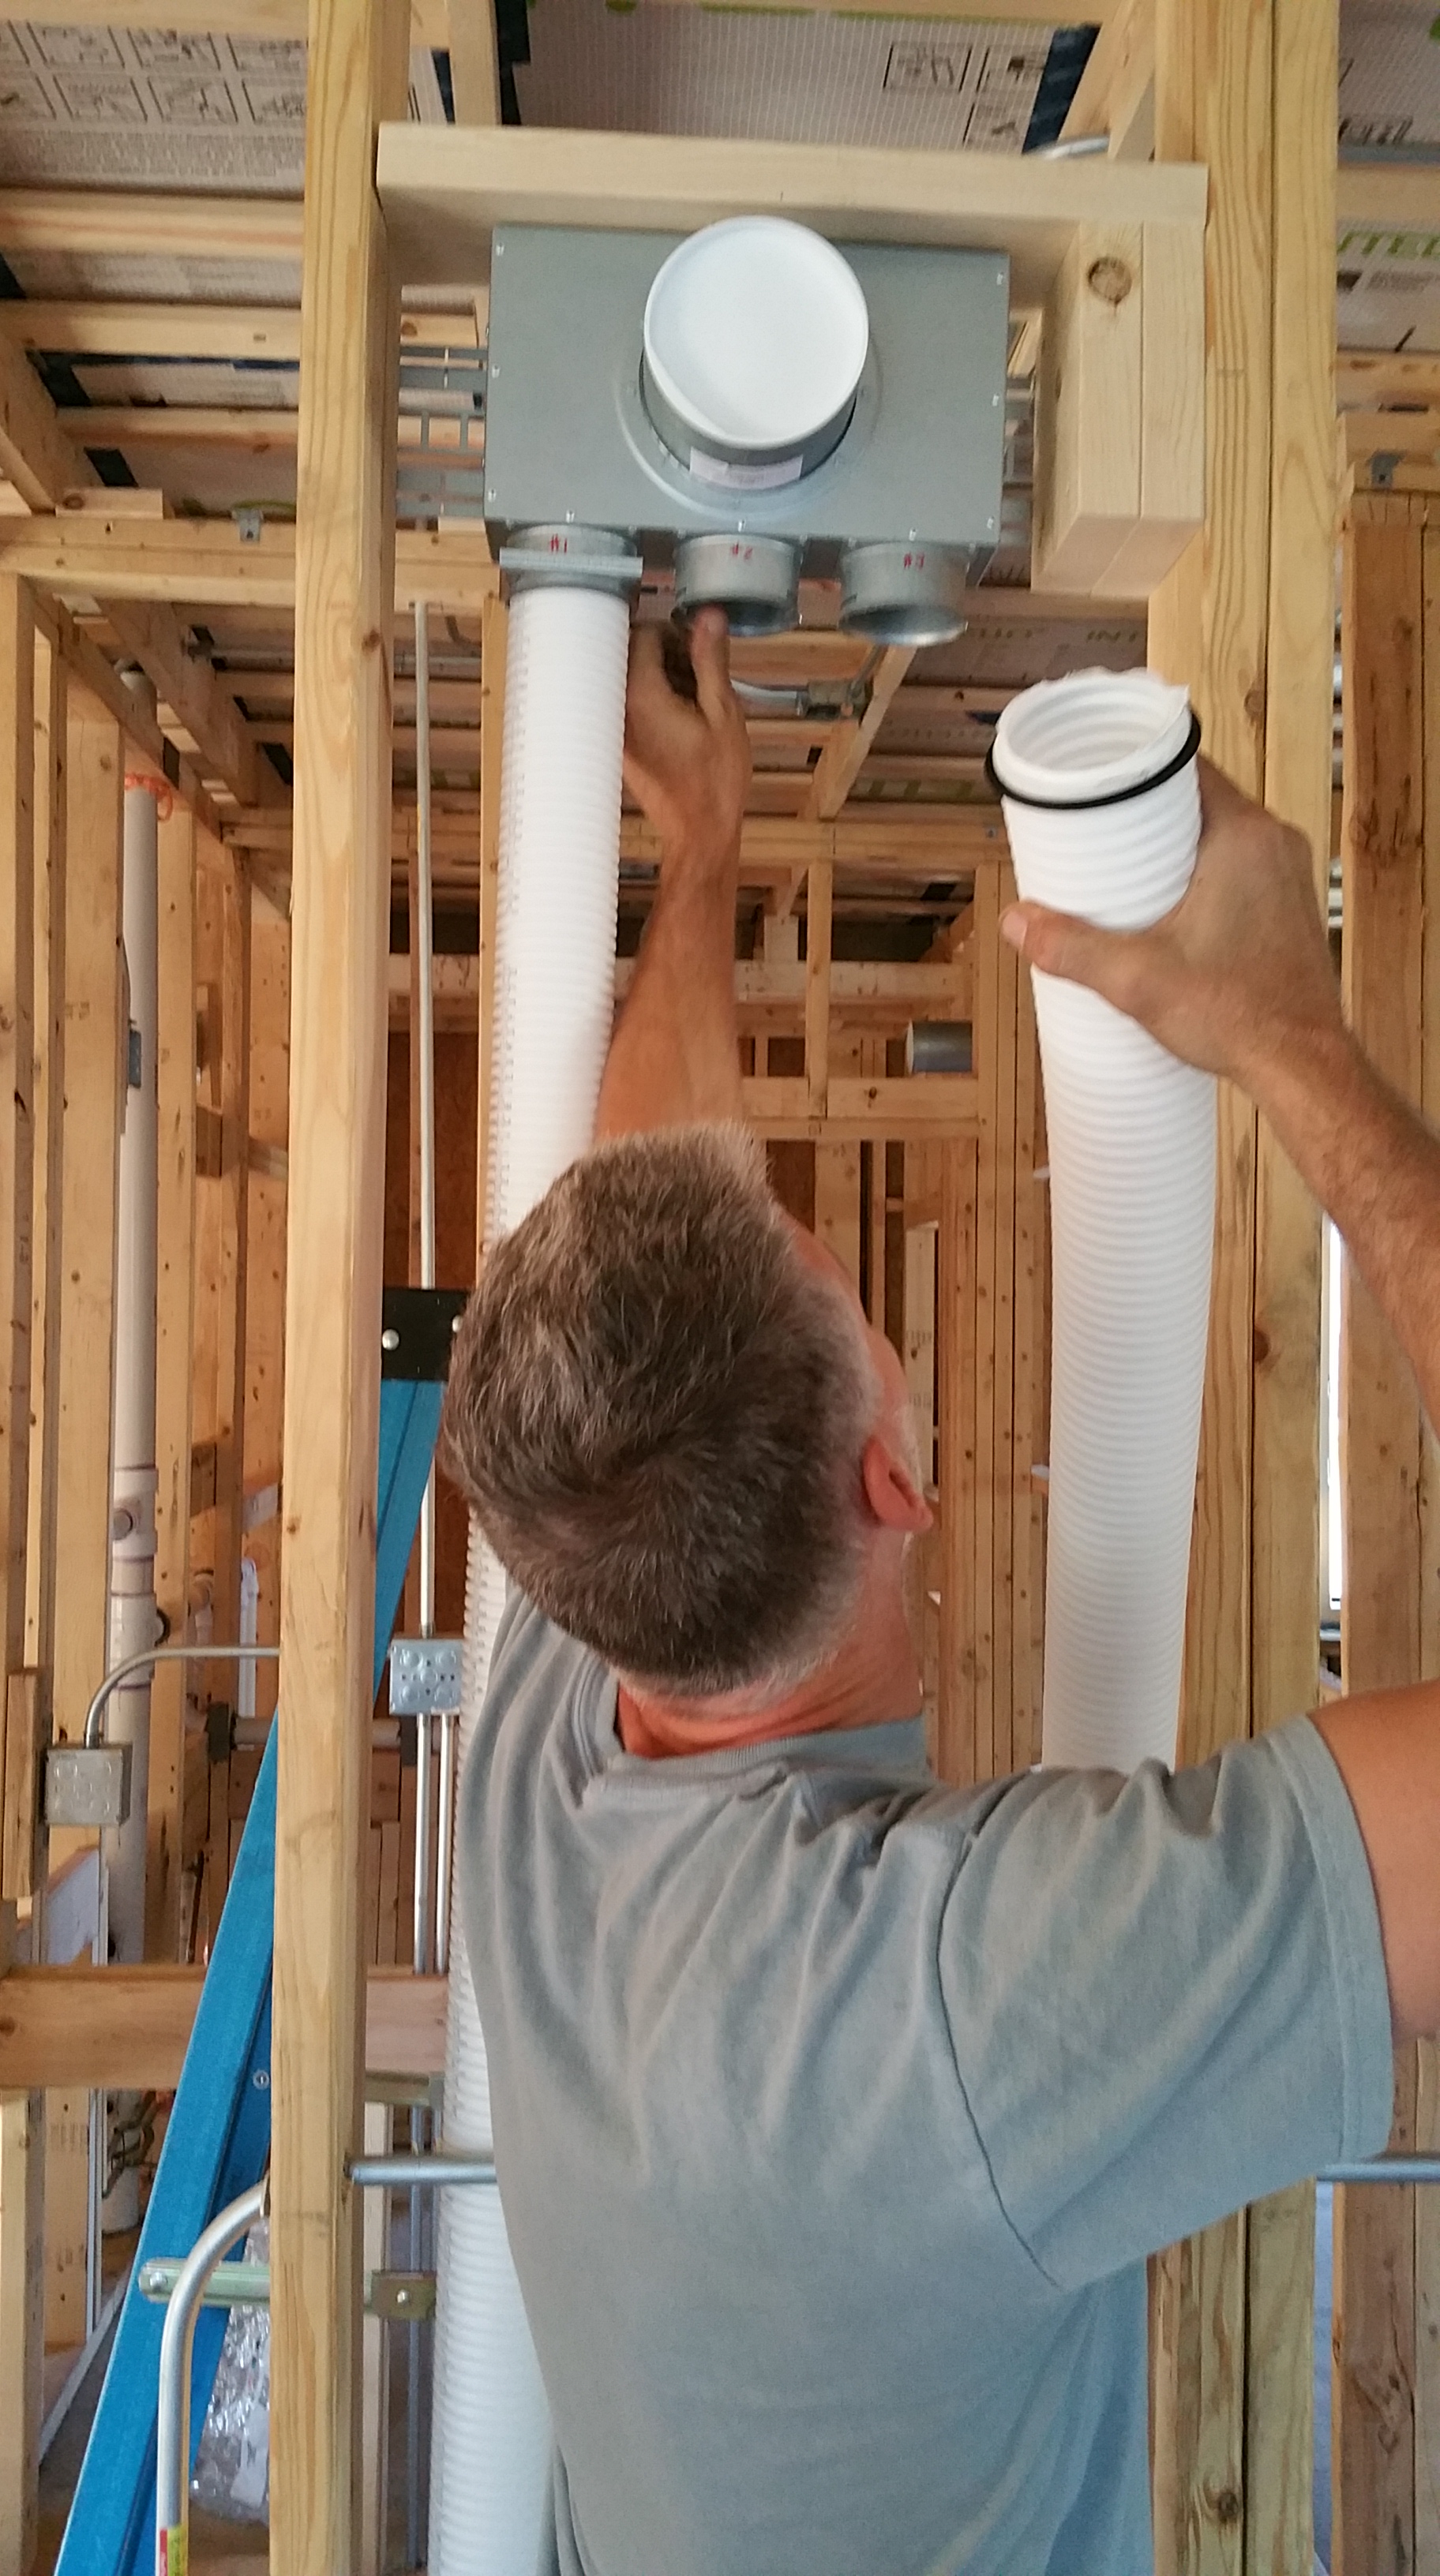
As far as Zehnder units being DIY friendly in terms of installation, in our opinion, this is highly debatable since the installation manual is far from comprehensive. Our installation manual ended at physically installing the main unit on the wall. Not very helpful.
Without a detailed installation manual showing step-by-step how all the individual pieces fit together, you end up with a pile of what initially seems like random parts.

This was incredibly frustrating, especially since Zehnder units are purchased at a premium when compared to other competitive brands, and with the expectation of durability and design precision. It never occurred to me to ask before purchasing the unit for an installation manual, since it seemed a fair assumption that no one would sell a premium product without detailed instructions on how to put it together.
We were only able to proceed because of numerous online videos, googling Zehnder unit photos, and by staring at and experimenting with the various parts to try and figure out how it all was supposed to come together. It was an unnecessary and torturous puzzle that shouldn’t have needed solving, and it wasted hours of my life that I’ll never get back. If you do an internet search and type in: “google review Zehnder America” the experience Sean Hoppes had with his installation wasn’t all that different from ours.
Looking on the current Zehnder website (February, 2019), I can’t find a more detailed set of instructions, either written or in a video format, which is disappointing. This seems like a pretty glaring oversight on Zehnder’s part, and one that should be remedied immediately.
Having lived with the unit for almost a year now, overall we’re happy with its performance, and we feel like we could install one fairly easily now that we’ve gone through the entire process, so it’s a shame we can’t say only nice things about the product simply because the installation manual was so limited or, more to the point, non-existent.
With each video and each photo, it was possible to glean one more crucial nugget of information, which took hours, whereas a detailed written manual or a step-by-step video would’ve made the process straightforward, and by comparison, frustration-free.
The videos below were especially helpful, but, nevertheless, they still leave out quite a bit of pertinent information necessary for any first-time installer (especially regarding all the parts that need to be installed on top of the main unit):
Unless there are no DIYers in Europe installing these units, and this is the expectation Zehnder has for its units both for overseas and here in the US, not having a comprehensive installation manual makes no sense. I’m not sure how even a licensed and competent HVAC installer would fare much better without direct experience installing the units. My guess is they would be searching online for missing info much like we did.
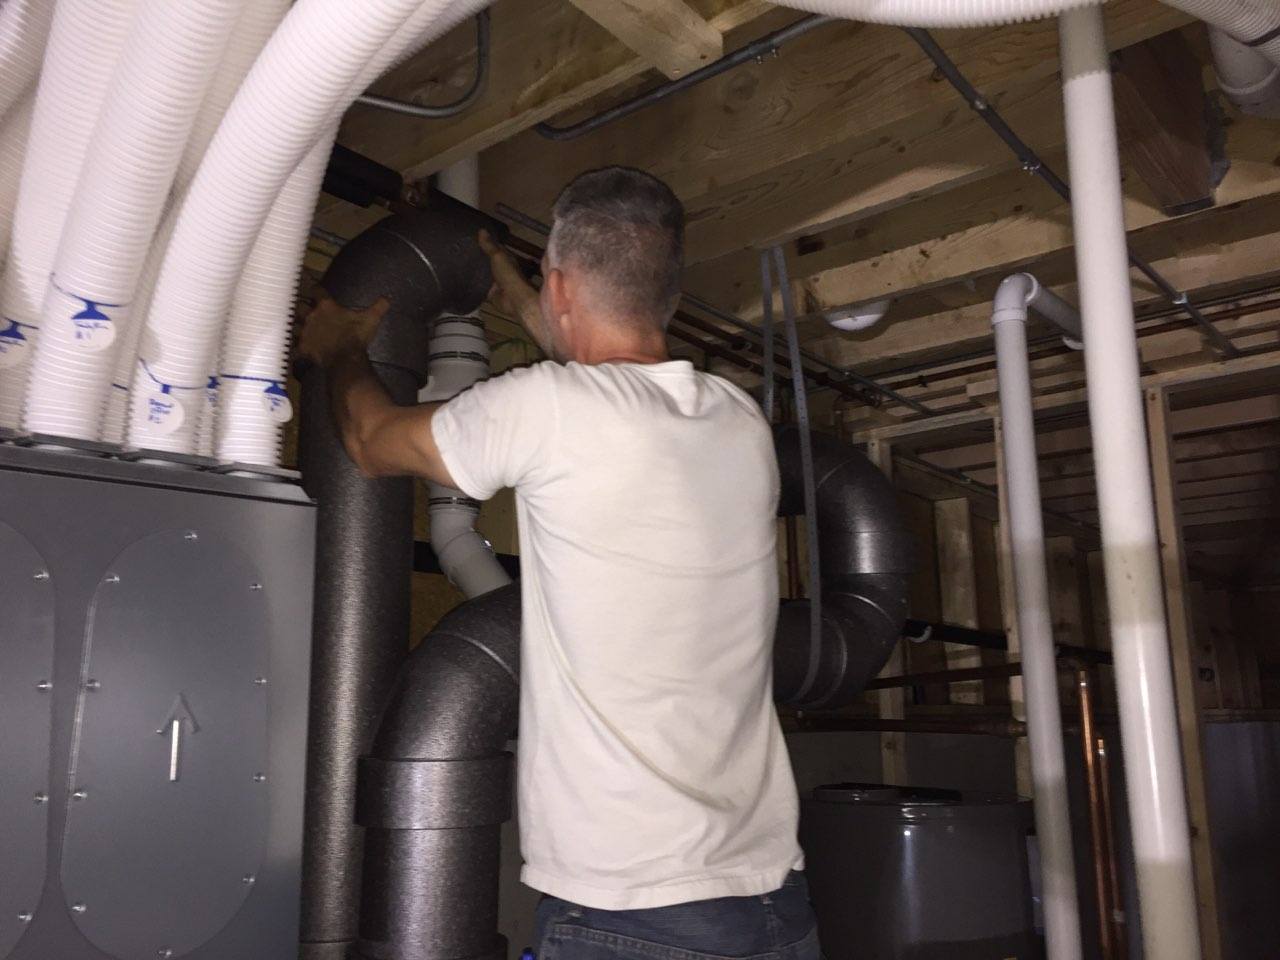
Once we got the main unit installed on the wall, and we figured out how all the parts fit together on top of the unit, by the time we got to installing the small, white 3″ ComfoTubes and the large, gray ComfoPipe, the process became much easier.

In regards to the gray ComfoPipe for the main fresh air supply and the main exhaust, both of which pass through the wall assembly, we found it more effective to put individual sections together on the floor, and, once fully connected, we marked the points at which the pipes met with a permanent marker.
If you try to piece the tubes together one piece at a time in mid-air it’s much harder to gauge when the pieces are actually tightly put together. With each connection point of pipe clearly marked with a Sharpie, it gives you an obvious goal to shoot for once you have the pipe almost in its final position. More to the point, it’s obvious when sections of pipe get out of alignment, or the connection isn’t nearly tight enough — it’s much more difficult to accurately gauge if only going by “feel” once the sections of ComfoPipe are off the floor.

Using a piece of ComfoPipe, we outlined on the interior side of our Zip sheathing exactly where we wanted the pipe to end up (trying to get as close to center as possible — makes air sealing around any penetration much easier). After a hole was cut with a 3″ hole saw, we cut out the rest of the hole using a jigsaw.


Once we started using the Sharpie, it was relatively easy to get all the ComfoPipe installed and air sealed around the Zip sheathing.


Following the directions, we kept the ComfoPipe exit points for supply and exhaust more than 10′ apart outside, where they enter and exit the structure, in order to avoid any possibility of the two air streams mixing, which would undermine the effectiveness of the system.

On the outside, we made sure to extend the ComfoPipe out farther than we needed, giving us some leeway once insulation and siding were installed over the Zip sheathing. This allowed us to cut the ComfoPipe back to the proper depth before installing the permanent covers supplied by Zehnder.

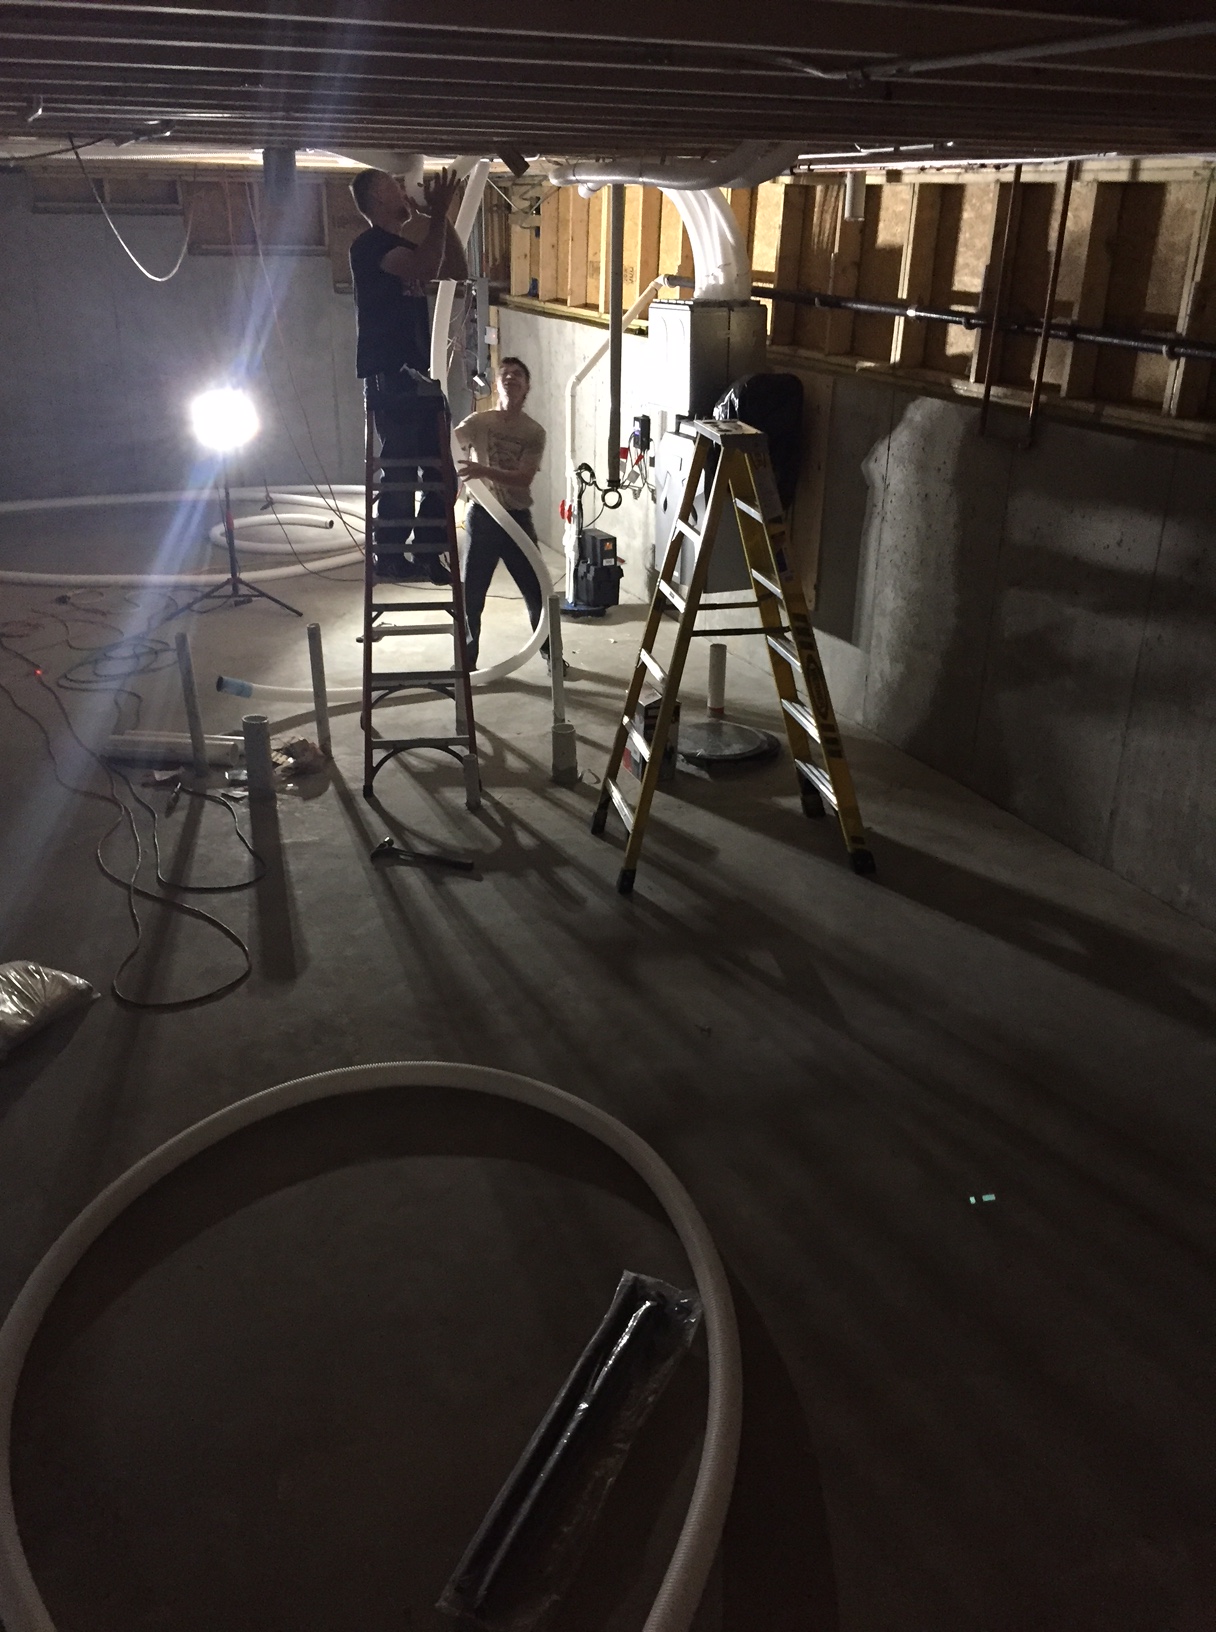
As far as the white tubing is concerned, we really enjoyed how easy it was to put the 3″ ComfoTubes together.
During the design phase, and even after we brought the Zehnder unit to the job site, we always intended to place the diffusers for supply and exhaust points on ceilings. But after really looking at all the cuts in our ceiling service chase that would be required to make this happen, we decided to opt for placing all of them on walls instead.
It proved to be one of the better decisions we made during construction. Not only did we avoid having to make many cuts in our ceiling structure, which would’ve meant a struggle to appropriately map them out around conduit, ceiling lights, and plumbing vents, it had the added benefit of making it much easier to do ongoing maintenance at the diffusers, mainly checking on and cleaning filters, once we moved in.

In fact, during commissioning, our Zehnder rep told me they have issues with homeowners not keeping their exhaust diffuser filters properly cleaned, effectively undermining the efficiency and overall performance of the units. This is understandable if the diffusers are on ceilings, whether at 8′ or 9′. It would be easy to forget about them, or even if you did remember, one can understand the reluctance to drag out a 6′ step ladder every time they needed to be cleaned. We were also told that placement of the diffusers is extremely flexible — almost anywhere can work (check with Zehnder directly just to make sure your proposed placement will work).

By keeping them around 7′ off the finished floor, it’s easy for me to check and clean the exhaust diffuser filters on a regular basis (1-2) times a month. I always have 2 sets of filters, so it’s easy to remove the dirty ones, put in clean ones, and then rinse and dry out the dirty ones.
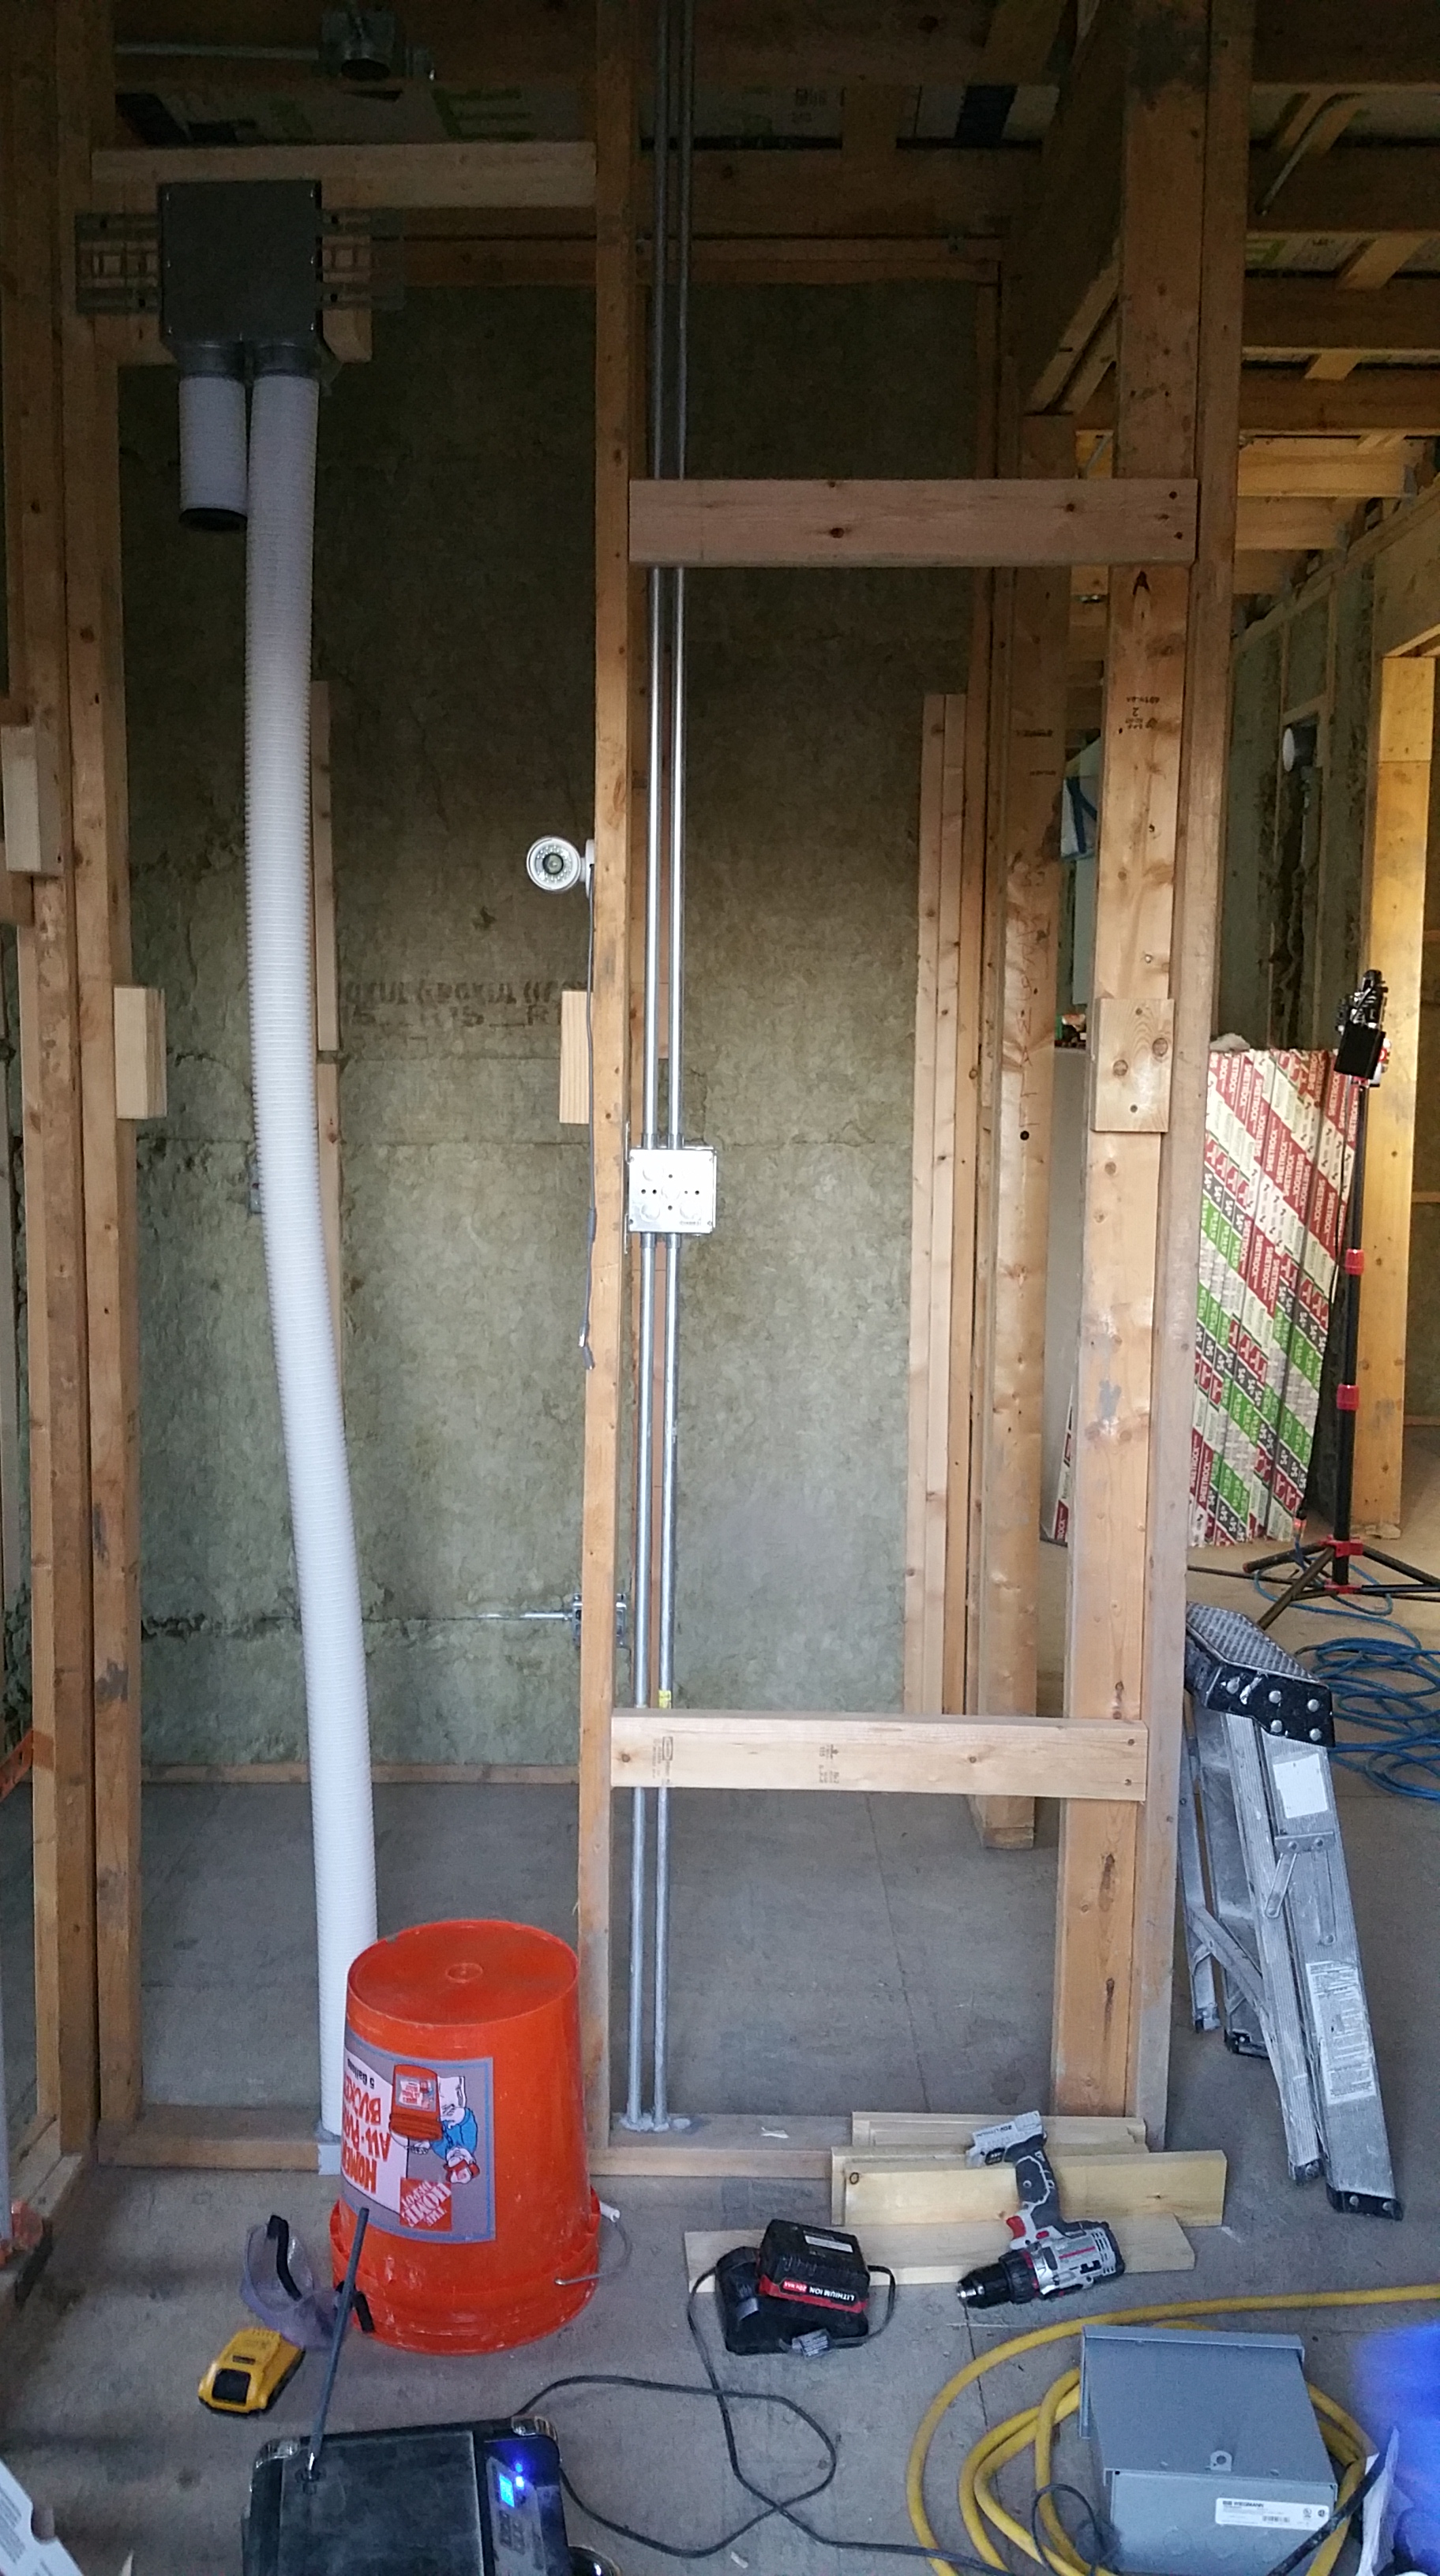
Once we decided to go through walls (both 2×6 and 2×4 framed walls), it was just a matter of deciding where in each wall we wanted the diffusers to be placed, and then cutting the corresponding hole through the wall’s bottom plate and the subfloor — being careful to check, and re-check, in the basement for any floor joists, plumbing, or electric conduit that might be in the way.
For bathrooms we placed the diffusers between showers and toilets, slightly cheating towards the showers to ensure maximum moisture removal.

At the unit itself, Zehnder supplied us with blue (fresh air) and red (stale air) tags, to mark each ComfoTube as it leaves or returns to the main unit. This should make any potential maintenance or repair issues in the future easier to resolve, as well as helping to avoid confusion as you set in place each pipe at a diffuser.


Since we’re leaving the basement ceiling unfinished, it’s an ideal place to see how all the components come together: ComfoTubes meet at the diffuser box, along with the final cover for the diffuser, in this case for supply air. As you can see in the photo, there’s plenty of room in the metal tube of the diffuser box for deciding exactly where to cut it off in order to establish the finished height for the diffuser cover. In the basement we left them at their full height since there didn’t seem to be much incentive to cut them back.

All of the diffuser boxes required at least two ComfoTubes, except for the laundry/utility room, which only required one. Using one of the supplied black plastic caps made it easy to block off one of the outlets in the diffuser box. These black caps are also handy when pulling the ComfoTubes around into position since they help to keep out any construction debris.

Our kitchen required the most cfm’s, at 36, so it required a special diffuser box and three ComfoTubes.

Again, since we didn’t place it in the ceiling, we put it across the kitchen, basically on a diagonal from the stove. So far we haven’t had any issues with cooking grease or odors, and our range hood (recirculating) seems to be doing its job just as well.

Using scrap lumber, we were able to give each diffuser its proper stability in the wall cavities. Although the mounting hardware for each diffuser box seems rather fragile, we managed to avoid any issues.
Applying a bit of hand soap around each opening in a diffuser box made getting a solid fit between the ComfoTube, the black O-ring, and the diffuser box fairly straightforward.


It was also fairly easy to get each ComfoTube exactly where we wanted it. Since they’re so small (at least compared to traditional sheet metal ductwork), the tubes are easy to manipulate and move around, whether over a basement beam, around plumbing, electric, or any other structural component that’s not easily relocated. As long as you don’t need to make a short 90° turn, the tubes are easy to work with, so I imagine they would be ideal for renovation work in older homes.

With most of the ComfoTubes in place, we just needed to add a couple of walls in the basement before finishing up the last few ComfoTubes.

Once all the ComfoTubes were installed at all the diffusers and at the main unit in the basement, we were able to pull all the lines tighter for a less messy final installation.

Using 2×4’s, we created a little window for the ComfoTubes to pass through under the floor joists. This structure helped to get the ComfoTubes moving away from the main unit in an orderly way that made it much easier to organize all the tubing once it was all installed:

Using plumbing hangers also kept the ComfoTubes under control and organized.

The commissioning of the unit, after drywall was complete, was fairly easy and straightforward, apart from a couple of wiring and electrical issues that had to be dealt with by phone with a Zehnder rep beforehand. And ordering filters from the Zehnder website has also been a straightforward and painless process so far (they’re not cheap, but they do seem to be highly effective).
The only issue we’ve really noticed with the unit is during summer when outdoor humidity levels are high. Since the ERV is constantly running, there’s no way to avoid bringing in some humid air in the summer.
And, unfortunately, it’s enough so that our Mitsubishi heat pump set-up (a future Part 2 of 2 for HVAC details) can’t properly get rid of the excess humidity either, even as it keeps the interior more than adequately cooled. We tried setting the heads to dehumidify, but they just dropped the temperature (almost to 60° F) without budging the humidity in the house very much — the rooms were freezing and clammy. As noted earlier, an ERV just can’t handle elevated levels of humidity in the summer on its own.
By having meters in various areas of the house it’s easy to see when humidity levels become a problem (we’ve been happy with our AcuRite gauges). Last summer our solution was to buy a couple of small dehumidifiers, one for the first floor and one for the basement. They worked, but they also ate up a lot of energy. Setting the Zehnder fan speed to LOW seemed to help somewhat, but not enough to avoid using the dehumidifiers. This summer we’re going to try a stand-alone Ultra-Aire whole-house dehumidifier, which should use less electricity, and it should perform at least as well, if not better, at removing excess humidity.
Having read that anything above 60% indoor humidity can be problematic, especially in tighter, high-performance homes, it was disheartening to see the numbers move towards 70% in early summer. This is what prompted the purchase of the dehumidifiers.
From everything I had read during the design phase regarding Passive House, I knew indoor humidity in the summer could be a slight issue, but having experienced it firsthand, it now seems obvious that incorporating a dedicated dehumidifier in any structure that will see elevated levels of summer humidity, even if it’s only expected to last for just a few weeks, is simply a necessity. Based on what I’ve read recently, it sounds like Passive House designers, who were already doing this for Southern US states, are moving towards doing it in states much farther north. Presumably this would also hold true for anyone designing a Pretty Good House as well.
Granted, 60-70% indoor humidity (or even higher) for a couple of weeks probably won’t ruin any structure, but for us, at least, keeping it in the 50-60% range during the hottest days of summer not only gives us some added peace of mind, regardless of the hit we’ll take in terms of overall energy use, but it’s also an issue of comfort (I grew up in a house without air conditioning and still have vivid memories —all of them bad — of enduring hot and humid summer days and, even worse, long summer nights).
Much like the initial complaints of overheating, due to excessive or improper placement of glazing, especially on southern facades, this issue with excessive humidity seems to be part of the evolution in understanding how Passive Houses, or high-performance homes generally, actually work in real-world conditions. Although the concept has been around since the 1990’s, anyone building to or even just towards the Passive House standard should know they are guinea pigs to some extent, no matter how well established the idea may be in building science terms.
In the winter, we’ve had no issues. When temperatures fall below 20° F, we set the Zehnder to LOW, in the hopes that it will reduce demand on the heat pumps slightly, and it seems to hold onto humidity somewhat when the cold air being introduced would otherwise be excessively dry. Indoor humidity levels have been pretty consistent: above freezing they typically stay around 40%, and when temperatures plummet towards zero or below they’ve still stayed in the 30-35% range. We’ve rarely seen indoor humidity drop below 30%, even on the coldest days, which definitely makes a difference on overall comfort levels. I’ve also noticed that wood flooring and wood trim doesn’t shrink nearly as much as it did in our last, conventionally built home.
Also, even when we experienced record low temperatures last month (January, 2019), hitting -24° F without windchill, the Zehnder kept on running without any issues. As far as we know, it never shut off to try and protect itself from the cold (our mini-split system did, but more on that later). The product literature is somewhat vague, only noting that low temperatures could cause a unit to shut off, but it’s unclear at exactly what temperatures or what combination of other environmental conditions might cause this to happen.
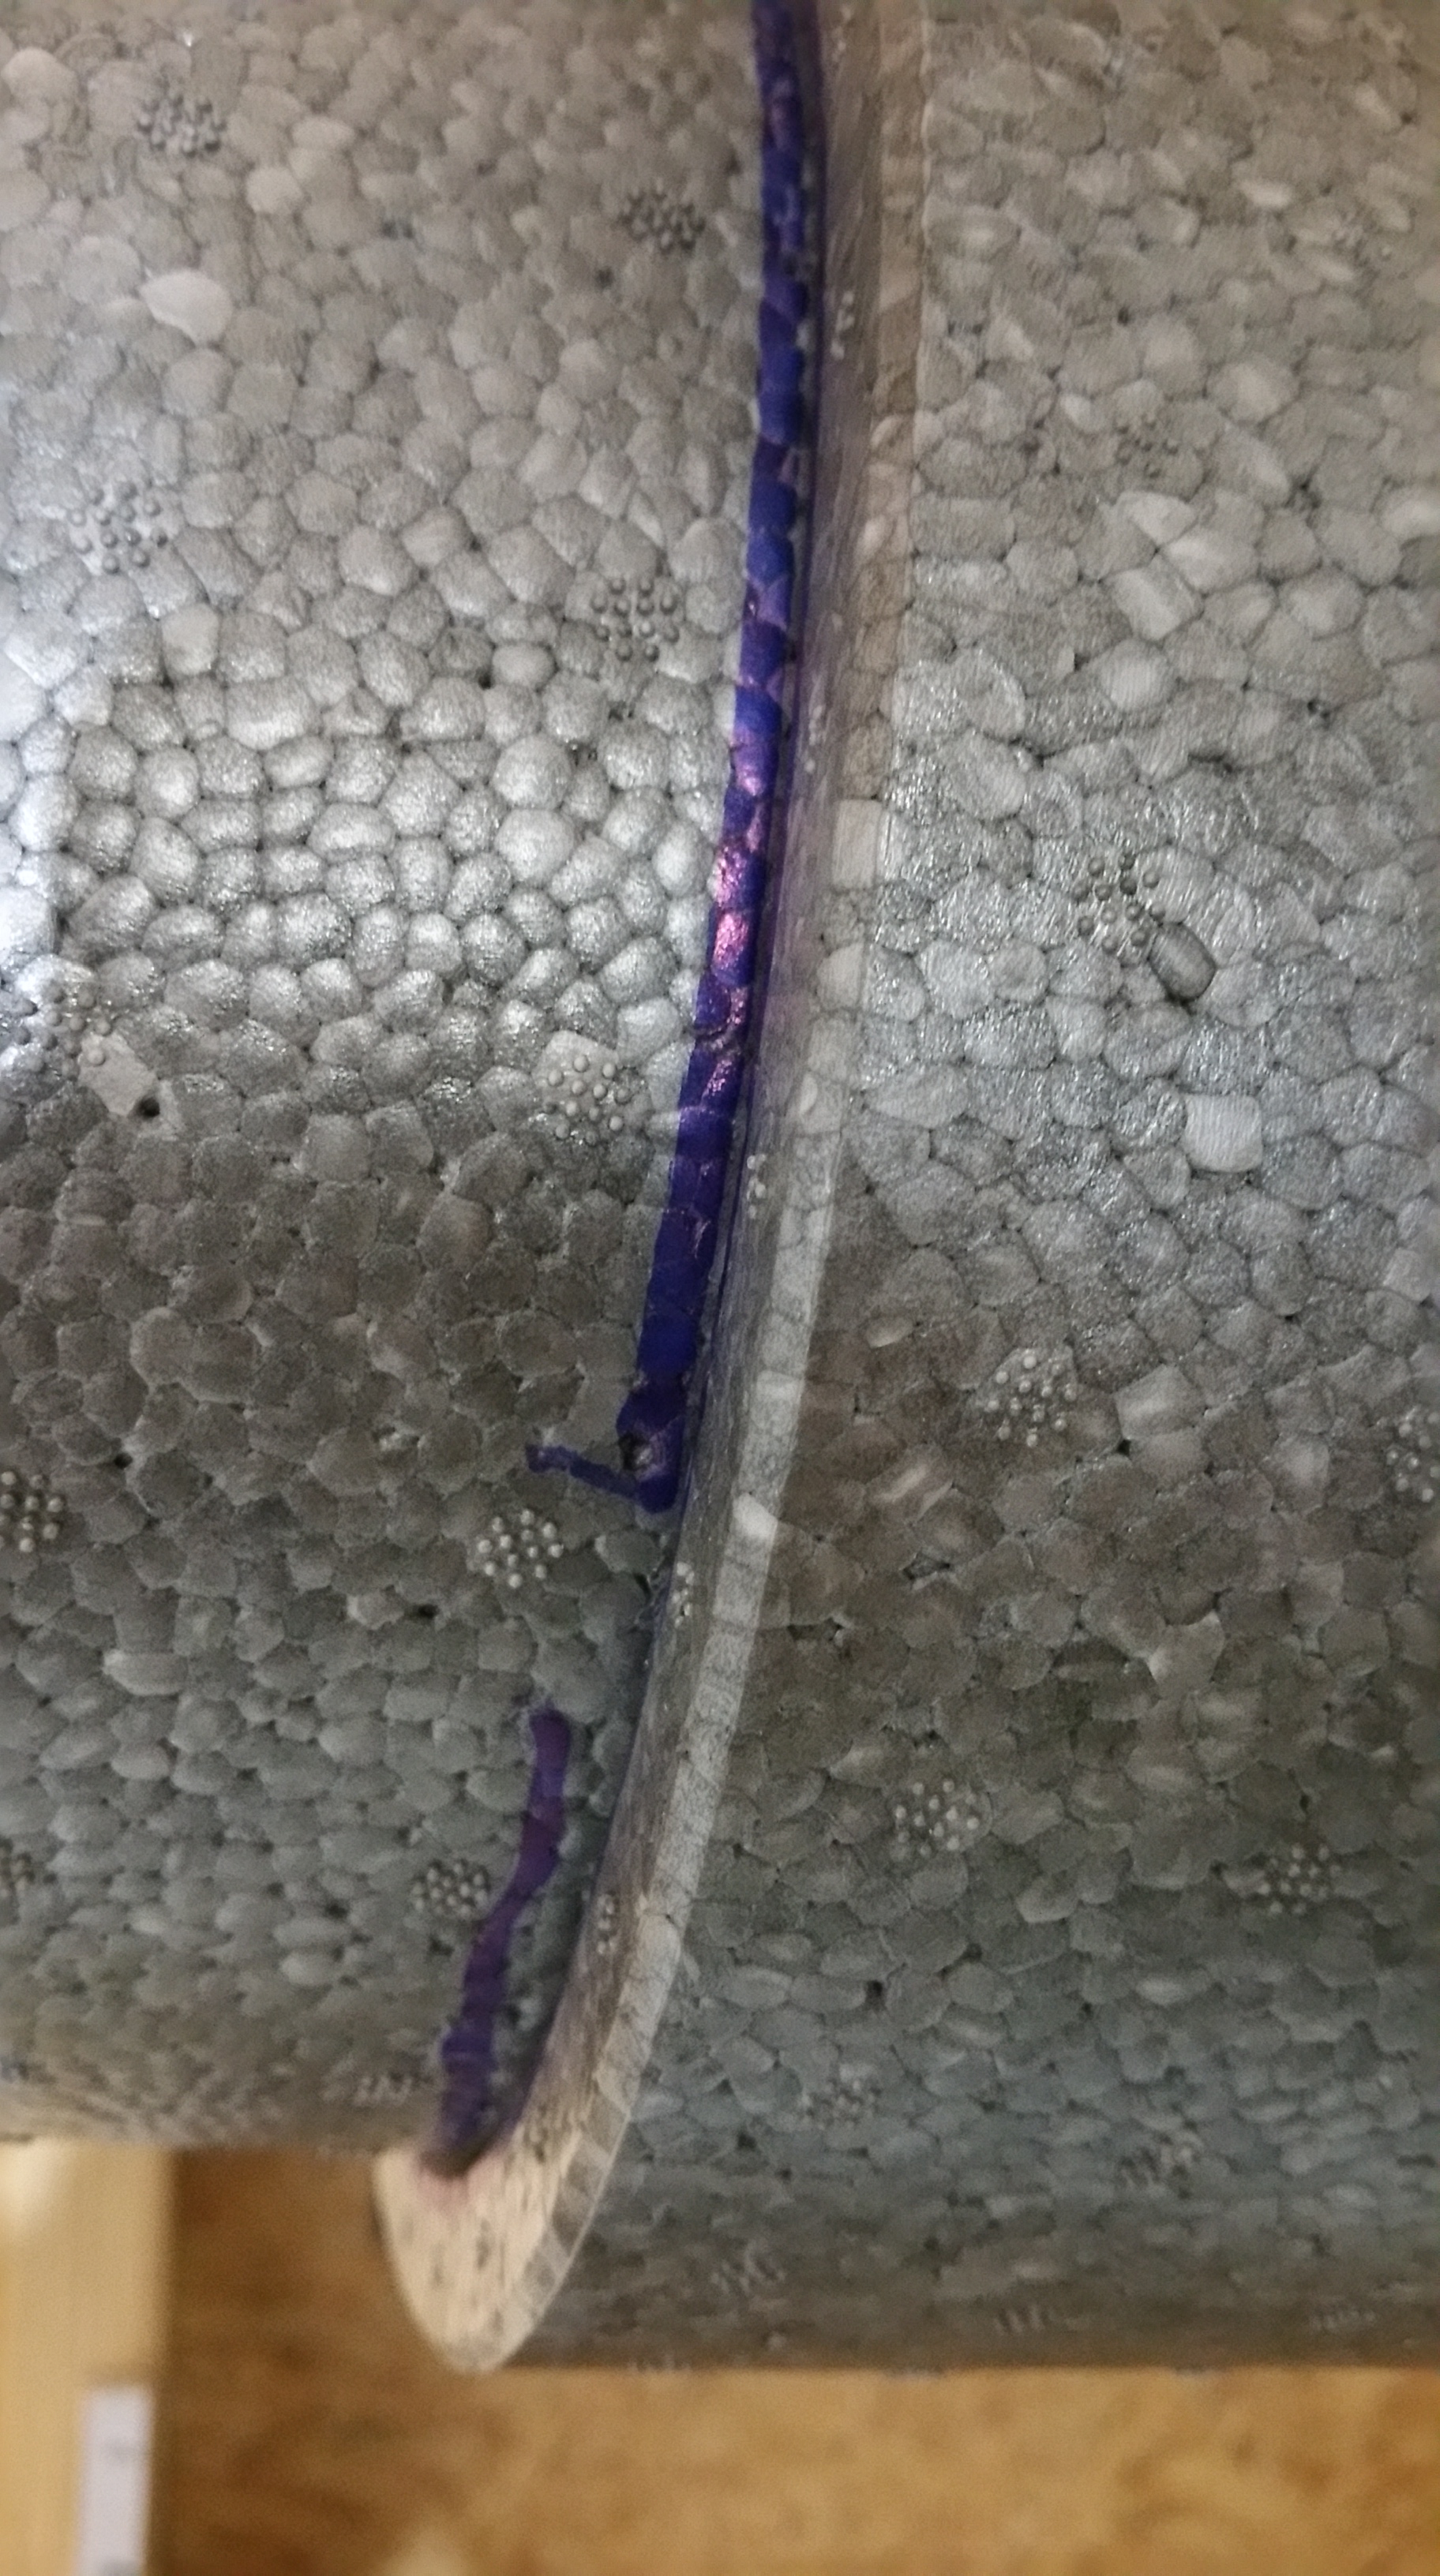
Most people either tape or use sealant on the gray ComfoPipe seams to block air leakage. During our blower door test no air leakage showed up, even with a smoke pen test. Nevertheless, during our recent cold snap some frost was evident on the ComfoPipe seams, so I’ll eventually caulk these seams with Pro Clima’s HF Sealant, since there must be some air leakage, be it ever so minor.
In terms of the boost function, when turned on it pulls from all the exhaust diffusers, not just a particular bathroom or the kitchen. Again, for the kitchen, even if we’ve been roasting garlic or cooking something else that’s equally pungent, by the next morning any cooking smell is usually completely gone. There’s never been any lingering smells emanating from the kitchen.
For the kitchen, when you want to utilize the boost function you just set the ComfoSense wall unit to HIGH (the Zehnder equivalent to a standard wall thermostat). Unlike the bathroom boost switches, which run on a timer (set at the main unit in the basement), when you’re done cooking you have to remember to go back and lower the fan speed, otherwise it just stays on HIGH.
The ComfoSense unit also can display error functions or tell you when filters at the unit need to be cleaned. It also has an AWAY function, meaning you can have minimal fan speed to exchange air while you’re on vacation instead of just unplugging the unit altogether.


The boost switch in a bathroom is set to run for 30 minutes on the highest fan speed. So far, this seems to be plenty of time for it to work properly. Unlike a normal bath fan, which tends to be quite loud, even when the Zehnder is in boost mode it’s still incredibly quiet, so guests need to know they only need to press the switch once — it is indeed working.
For the bathrooms, the boost function has been working really well at removing moisture after showers. Nevertheless, in the winter, when temperatures are below 20° F and we decline to use the boost function after showers (again, hoping to hold onto some of the added humidity), the bathroom humidity levels still quickly drop from the 60’s and 70’s back to the mid-30’s in less than an hour (and this is even when the Zehnder fan speed is set to LOW).
We’ve also been happy with the diffusers, in terms of installing/removing them when necessary, but also in terms of their overall look. Whether on more neutral colored walls, or something bolder, they just look nice in our opinion.

They’re subtle enough to blend in to the background, but attractive enough so when they are noticed they don’t stand out in a negative way.


As far as changing filters at the unit, or even cleaning the core itself, so far it’s been a trouble-free experience.
Here’s a photo of a supply-side filter after one month of exposure in winter:

During the summer, of course, they look much worse after a month with so much more “stuff” floating around (e.g. pollen, debris from landscaping, insects, etc.). Also unsurprisingly, the exhaust-side filter always takes much longer to get dirty as stale air makes its way out of the structure (it probably helps that we don’t have any cats or dogs).
And since we didn’t need the framed-out HVAC chase in the corner of our Master Bath for all the ComfoTubes that we initially planned to send up into our ceilings, we ended up using this area for some much needed niche shelving for various toiletries and even some towels.
Overall, then, we’ve been extremely happy with our Zehnder ERV unit.


I am just completing my q600 install – I was initially going for a CA550 but took long enough that the new unit is out. Good points on the instruction manual. Did you not have a file called something like CA550 with 2 sets of distribution boxes? This shows how the majority of the pieces fit together – my file came together with my initial layout and quote from zehnder. I agree that it would be nicer if the installation was more detailed – I had my sheet metal guy do some of the work and double checking his install I found he had the return silencer mounted upside-down.
It would also have been nice if the exterior of the white spaghetti pipes was a different color that could be visually inspected easily for any damage. I did notice that the ele had drilled into the pipe at one point but it was subtle and required careful inspection to notice.
Locally we didn’t have shielded 18/2 18/4 easily available so I had to special order it into an electric wholesaler and buy 1000′ of it. The local zehnder dealer didn’t sell it. Did you use shielded low voltage or just opt for regular?
Also notice that your bathroom boost switch is a legend? The local rep specs Levition 56081-2w for installs here. I wonder if the comfotube air leakage is due to foam shrinking and expanding.
My biggest pain point was using a 3″ hole saw to try and pull the comfotube through my TJI ceiling joists where the run was perpendicular. Should have gone with a bigger hole saw !
My exhaust run was also ~25′ so I had to upsize to 8″ pipe but the zehnder only has a 7″ maximum exterior grill so I had to downsize right at the exterior grill.
LikeLike
I was never given the file/document you’re referring to. After we installed our unit our local sales rep told me that Zehnder was working on a more complete install manual along with a detailed installation video, but the last time I looked on their website I still didn’t see either one.
Hopefully they eventually get around to doing it.
All I remember is the electrician using Cat5 wire after the Zehnder rep told me the old-style bathroom boost switch had too many issues with interference.
I never thought about cold air in the gray Comfopipe causing shrinkage, enough to allow frost to form at the seams, but it certainly seems possible.
The only issue we observed with the 3″ white comfotubes was making abrupt 90 degree turns. Thankfully we always had enough room for more gentle turns. If we hadn’t had the space, I’m not sure what we would’ve done.
What did you think of the exterior grilles in terms of looks? I was happily surprised at their quality. We also really like the supply and exhaust diffusers.
LikeLike
Exterior grills look pretty good – I still need my standing seam siding so I’ll have to see in context when I get that on. I went with the Luna supplies which look pretty nice and has a 180 blocker where the installation is high up on a wall and you want the supply not to be pushed up to the ceiling.
For the return diffusers I decided the $15 one from homedepot looked pretty decent – https://www.homedepot.ca/product/hdx-5-inch-6-inch-round-air-diffuser-white-thd/1000433046 and just went with those. I’ll have to see how the commissioning goes but it seems like the returns don’t typically get adjusted? My quote included dampers for the rectangular boxes when used as supplies but not for returns. Either way the cheap homedepot ones can be tightened for adjustment and look very similar to the zehnder ones when installed.
LikeLike
I’ve never heard of the 180 blocker, but that makes a lot of sense.
We found that about 7′ off the floor is ideal for returns — high enough to be out of your sight line, but low enough to remove and clean without using a step ladder or stool.
LikeLike
This install manual also does a pretty good job – page 5 is similar to the distribution boxes diagram that I received with my quote.
Click to access Zehnder-Installation-Manual-10.12.18-1.pdf
LikeLike
That manual would’ve saved me a ton of frustration — too bad it came out a year and a half too late to help me!
A companion step-by-step video would make installation even easier for any first time installer.
LikeLike
For your bathroom booster switches can you press either up or down to boost, or do you have to push up?
LikeLike
For our switches, we have to push up.
LikeLiked by 1 person
Thanks! My supplier recommended the SPDT switches and jumping the two throws together – this allows you to hit either up or down to activate the boost and I guess then you don’t have to worry about installing the switch upside down.
LikeLike
We’re about to install ours so REALLY appreciate these photos! And that manual is way better than the one I found online.
I’m surprised your kitchen has 36 cfm, they only put 13 in ours. Did Zehnder do your calculations?
We do have 36 supply in great room outside the kitchen, but only 13 extract with a boost from the kitchen area (we actually are putting it in the adjacent pantry since we will have cooking appliances in there with no hood).
LikeLike
Hello Cindi,
Thanks for checking out the blog!
Did your unit not come with installation instructions? I was told by a Zehnder rep back in 2017 that they were developing a video series to take installers through a step-by-step process, but, as far as I know, this hasn’t happened yet. Seems like a win-win both for clients and Zehnder if they did make a video. Less frustration for everyone involved.
Yes, Zehnder did our calculations. I was under the impression that 36 cfm for a kitchen was fairly standard practice. I’m surprised they’re suggesting only 13 cfm for extracting stale air from the kitchen. Even our bathrooms are 24 cfm. The only space we have with similar cfm is in our laundry room/pantry at 12 cfm.
Will you be using a standard, ducted range hood? What is the maximum cfm on the unit? Is this for a ‘tiny home’ sized kitchen? Or just a standard sized kitchen?
It may be worth double checking with your architect, builder, and Zehnder to make sure the 13 cfm number is accurate and, if so, to find out the rationale for what seems like such a low number for a kitchen.
Maybe I’m not completely understanding your layout though, so it’s possible the explanation is fairly straightforward once it’s explained to you.
Please let me know what you find out. I’m genuinely curious to hear the explanation.
Feel free to email me directly at: zewt [at] hotmail [dot] com if that’s easier.
LikeLike
My zehnder install specified 25 cfm exhaust air in the kitchens and I have direct vent fan hoods in addition to that. A house without a direct vent hood fan is a house that is designed for people who do not cook.
LikeLike
As houses become more airtight, whether Passive House or not, the ducted rangehood with make-up air does seem to be the way to go. It’s a topic that comes up semi-regularly on forums like Green Building Advisor:
https://www.greenbuildingadvisor.com/question/hood-fan
https://www.greenbuildingadvisor.com/article/makeup-air-for-range-hoods
https://www.greenbuildingadvisor.com/article/all-about-makeup-air
https://www.greenbuildingadvisor.com/article/makeup-air-for-kitchen-exhaust
https://www.greenbuildingadvisor.com/article/can-a-range-hood-and-an-erv-get-along
Even so, we’ve been happy so far with our recirculating hood. This is likely true only because we regularly change the black charcoal filters, and its use is limited to daily dinners, with only an occasional weekend lunch. We’re also not deep frying, cooking fish, or using a wok. The strongest cooking smells we produce occur while roasting garlic. Even in this case, by breakfast the following morning any lingering garlic smell is gone. If we were more adventurous in our cooking, we definitely would have pursued a direct vented rangehood combined with make-up air that utilizes a mechanical damper.
LikeLike
We will have a range hood with make-up air, yes. But as for the Zehnder, they only put 13 cfm plus a boost in our cooking area. I asked the US rep last week and she said 3 tubes in the kitchen is higher than most, 2 is more typical. Not sure why I only got 1, other than maybe I already had so much extract air in the house that my overall cfm is pretty high for 2 people. (214 cfm in 3800 sf plus a shop and a conditioned crawl.)
LikeLike
Thank you for coming back with an update.
I wonder if Zehnder recommended three tubes (36 cfm) for our kitchen in part because of our open floor plan, with the kitchen and family room a combined 500-600 sf.
If you get a chance, let us know what you think of the system once it’s up and running.
LikeLike
But yours are extract in the kitchen, right? You would want supply in the rest of the great room. I have 3 supply in the other side of the great room and just the 1 extract in the kitchen/pantry.
It makes sense to me there wouldn’t be that much extract in the kitchen since you should always be using a hood when cooking.
But it is interesting to me how they design systems so differently. Honestly I kept finding mistakes in mine and having to have them re-do it. I haven’t been super impressed with the design side of working with them, so I hope the product works better than the process. I will let you know!
More examples, I was given wrong information about how it would handle small amounts of makeup air. And every single piece of documentation and photo they have shows the white comfotubes but they sent me the comfoflex which they then said they have been giving everyone by default for 4 years.
LikeLike
Yes, 36 cfm exhaust in our kitchen, with 24 cfm supply in the adjacent family room.
When you say 3 supply, do you mean 3 comfoflex tubes going into one diffuser? So 36 cfm supply in your great room? This is then combined with the 13 cfm exhaust in the kitchen? If yes, I don’t understand why they did it this way. Even when the range hood and make-up air are off, I don’t understand the set-up.
Our experience with Zehnder was the inverse of yours. We’ve been happy with the product itself, so far, but repeatedly frustrated with customer service. Although ordering replacement filters has been perfectly seamless since our move-in, during and just after construction we had questions that went unanswered. Of course our biggest frustration was the lack of adequate installation directions when my wife and I began to set-up the system.
In this respect, I think they need to improve their customer service, along with updating their marketing materials. Someone on GBA was expressing the same frustration in regards to the comfoflex when they assumed they’d be receiving the white comfotubes:
https://www.greenbuildingadvisor.com/question/anyone-install-a-zehnder-lately-completely-different-comfotubes
Zehnder, on the technical side, may be under some stress, like most companies these days, in the sense that as soon as they have someone fully trained to competently do layout design work for their units, those people may move on to other career opportunities. Zehnder may be caught in this endless cycle of training new people.
This is a long winded way of saying don’t trust ‘experts’. It was perhaps the most eye-opening aspect of our build. Without exception, anyone who hurt us financially, or just behaved in an incompetent manner, had an advanced degree and usually ‘green’ building credentials to go with it. In other words, if you think something may be wrong, don’t hesitate to ask probing questions and ask for evidence that their proposed layout will work properly.
Are you acting as GC on your project? Or do you have a GC or architect involved that you trust? You could have them follow-up with Zehnder, asking for assurance that their proposed set up will work. Additionally, I’d ask to speak with previous clients who are living with a similar set up to the one they’re proposing for your house, just to make sure these homeowners are happy with the way the system operates on a daily basis.
LikeLike
Eric, they told me the whole house just has to balance, not any specific area. I think by the time they added up the code required exhaust for 4 bathrooms, laundry, kitchen, plus shop, art studio and 50 cfm for a conditioned crawl, you run into the limit for the Q600 which is 60% of 353. I figured it was fine because I would be running a hood when cooking anyway. So I actually moved my 13cfm (+ boost) into the adjacent pantry where I have small cooking appliances with no hood. I actually am not sure what the point would be of a high cfm in a room that already has a high cfm device for when it is needed.
LikeLike
I have an L configuration of kitchen / living / playroom ( open concept ) with the square footages being 330 ( 2 tubes ), 260, 200 (2 tubes). When I was going through the design process my cfm was maxed based on the original ca550 ( 174 cfm * 2 = 348 cfm ) so it might just be in my case that this was the best trade off without putting two zehnder units in. You probably have more of an optimal configuration. The CA 550 is rated at 324cfm @ .96″ wc ( maybe ~348 at .8″ wc). The Q600 is rated at 353 cfm @ .8″ wc.
LikeLike
I have 3900 sq ft – 4 people and 174 cfm.
What zehnder unit are you running that gives 214 cfm?
LikeLike
Q600 is rated at 353 max
LikeLike
Oh so you have 107 supply and 107 exhaust. I am using 174/174 for 348cfm total on the Q600.
Odd given you have a lot more available cfm capacity that they didn’t spec you two tubes to the kitchen. To balance they could have just added a few more supply to bedrooms or hallways.
LikeLike
No, I have 214 supply and 214 exhaust (at medium) which is at 60% of the max capacity. The supply + exhaust doesn’t add together. The only reason you have 2x is they like to have 50-60% margin so there’s room to boost.
Do you end up running at medium all the time?
Why do you think it’s important to run more to the kitchen if the kitchen also has a hood? Just wondering.
LikeLiked by 1 person
Even with the best rangehood, and with make-up air, you’re unlikely to capture all of the cooking smells, moisture, and particulate:
https://www.sciencedirect.com/science/article/abs/pii/S0360132319307346
It also assumes the rangehood is always being used, even when baking.
The rangehood also loses its effectiveness as the food is being plated and served, or if the food is just resting on a nearby countertop/island.
Even if it’s only to ensure no lingering smells from cooking, you may want to have at least 24 cfm of exhaust in the kitchen area.
LikeLike
Great points!
LikeLike
“I’ll have to see how the commissioning goes but it seems like the returns don’t typically get adjusted?”
Did this turn out to be the case during commissioning?
LikeLike
Our supply and exhaust diffusers both have adjustability built in. This allows for final tweaking of proper cfm at each diffuser during commissioning.
We have the diffusers shown in this video. The steel stem inside the diffuser is where the adjustments can be made:
https://youtu.be/BxfUGbNdJbc
I’m not aware that the newer Q units are any different in this regard. Do your diffusers look different than mine? If yours do look different, does it appear that there’s no way to adjust them?
https://youtu.be/Ho1RtLy2wFw
LikeLike
I was responding to the person above who didn’t think the exhaust ones got adjusted during commissioning. It sounds from your response like that is incorrect.
LikeLike
Eric – roughly how long are the longest tubes you have going to bathrooms? do you see a difference in ventilation when the tubes are longer? I am trying to figure out if I need to plan on more tubes for 2nd story bathrooms than those really close to the unit.
Cindy – how did your set up with little/no ERV exhaust in the kitchen area and using the vented range hood work out? do you like it?
LikeLike
For each of our bathrooms, the Comfo Tubes run about 20-25 feet from the main unit in the basement.
You can check with Zehnder, but I don’t think you’ll need more tubes.
When they commission your unit they’ll be checking CFM at each diffuser to ensure the system is balanced and meeting the design specifications.
LikeLike
Hi, the house keeps being delayed so I won’t know for several more months 😉
LikeLike
Eric & Cindy – thank you for your super fast responses!
My Comfotube runs will have to be quite a bit longer than 20-25ft to get from the basement to the 2nd floor, but we are in Colorado, pretty dry climate even in the mountains compared to IL. We had not really planned for a ventilation system and space to run tubes is hard to come by. I am not sure how much I trust Zehnder rep recommendations, because if you read many blogs, there are vastly different approaches&recommendations. In our case, they were looking at exchanging all air volume within a certain amount of time, but we have cathedral ceilings in some spaces and my logic tells me that if I have more air available, I need to exchange less often, not more…Their alternative method is to figure 30CFM per bathroom & kitchen , 10CFM for 1/2 bath and laundry and then just add enough supply to balance.
I do have another question: does the ERV exhaust to the outside smell really bad? When I looked through the Zehnder info, it said not to place the exhaust near entrances, but for us within a few feet from entrance but around a small corner would be the easiest place to reach that’s above the snow in winter & away from good fresh air intake locations.
LikeLike
The only time the Zehnder exhaust port to the outside has a smell is when we’re cooking. Otherwise, nothing.
Would it be possible to have the exterior exhaust grille installed 8′ or higher on the exterior wall? This may help limit the cooking smells from around your entrance area.
How far along in construction are you? Have you had a blower door test completed in order to establish how airtight the structure is?
LikeLike
For me the location was more about where to get good fresh air, and where to release stale air where humidity won’t cause harm (even though most will be removed by the ERV.)
I also have many very long tubes, and they certainly don’t run straight, they have jogs I’m sure it’s not ideal but I imagine we’ll just run at a higher speed than we otherwise would.
LikeLike
In the case of multi-story building it is often better to remote the manifold and keep the tubes short. I put a 6 port manifold on the top floor of my build supplied with a 6″ sheet metal duct and then ran the comfo tubes from that location.
LikeLike
Thanks everyone for the feedback-super helpful.
Using a remote manifold should help with both with finding the space to go to the 2nd floor from the basement & shortening the smaller tubes. I actually had a chance to talk to someone at Zehnder today and he said that up to 60ft (my hardest to reach room), he wasn’t too concerned but also agreed that the remote manifolds would make for better, less restricted airflow. He confirmed that Zehnder has the appropriate reducers to fit regular 6″ ducts into their units & that as long as you insulate them, you can also use those for the supply/exhaust to the outside, for example to accomplish a sharper turn than with the comfotube.
As for exhaust air, code calls for 3′ distance to openings (doors/windows) and if mainly cooking smells make it there, I feel more comfortable with my placement about 5ft around a corner from our entrance.
LikeLike
Eric,
Thank you for your informative blog. I read it frequently when building our own passive house in the Washington D.C. area. While we weren’t brave enough to manage the build ourselves, the wealth of information and tips from your blog helped us to better plan and also oversee the details with our builder.
Having now lived in the passive house for about 3 years, I wholeheartedly agree that one of the issues with the ERV (we also have a Zehnder) is weak humidity recovery / control. Luckily our builder recommended putting it in a whole-house Ultra-Aire dehumidifier from the get-go, which works well in during the humid summer months. In the winter we also have scheduled the ERV fans to “low” for parts of the day in order not to bring in too much dry air from the outside.
One possible tip that may be useful to you and other readers is that in the Zehnder’s ComfoControl app under Tasks -> Bypass you can turn off the bypass functionality. It comes on when the system thinks it may passively cool the house (or warm in the winter months). As I understand it the bypass in the “on” position increases the air flow to the maximum, effectively decreasing heat / moisture recovery. I am sure it works beautifully in the dry European climates but is counterproductive in the humid summers that many of us experience in North America. The bypass gets especially aggressively activated during summer nights which in turn increases humidity inside. Unfortunately you can only turn it off for 24 hours at a time. I contacted Zehnder America last year and suggested that they ask Zehnder HQ in Europe to add a small feature to allow the user to turn off the bypass permanently, but Zehnder America wasn’t too optimistic that such a feature would be implemented any time soon. For now I just turn it off manually everyday April through September.
LikeLike
It’s always nice to hear from folks who find the blog helpful on their own projects. Thanks so much for taking the time to post a note on your experience.
Hopefully your tip will prove helpful to others struggling with high indoor humidity.
Thanks again for posting a comment, and congrats on your house!
LikeLike
I am shocked you have to turn it off manually every day. Then again, after spending $40k on mine I now realize it has many more limitations than I originally thought, and would have gotten something different. At least summer bypass will work in my climate where summer nights are cold and dry.
LikeLike