The oil I see used most often on charred wood is Penefin, which is available in many of the big box stores. Another one I’ve used in the past is Sikkens. Cabot is yet another brand I’ve used (mostly for decks).
Any semi-transparent wood stain should work. If you go with a brushed char finish, you may want to experiment with color options to see what kind of effect it may have on the final finish (the semi-transparent stains typically come in a range of subtle color choices).
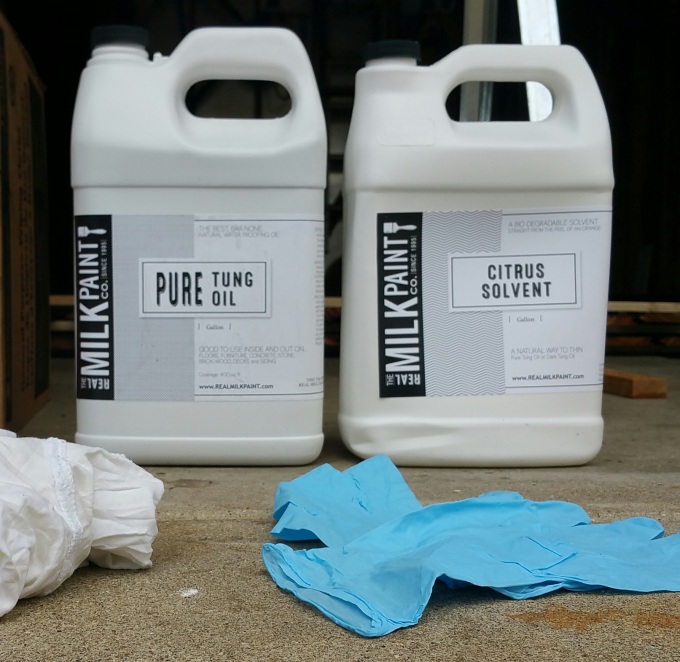
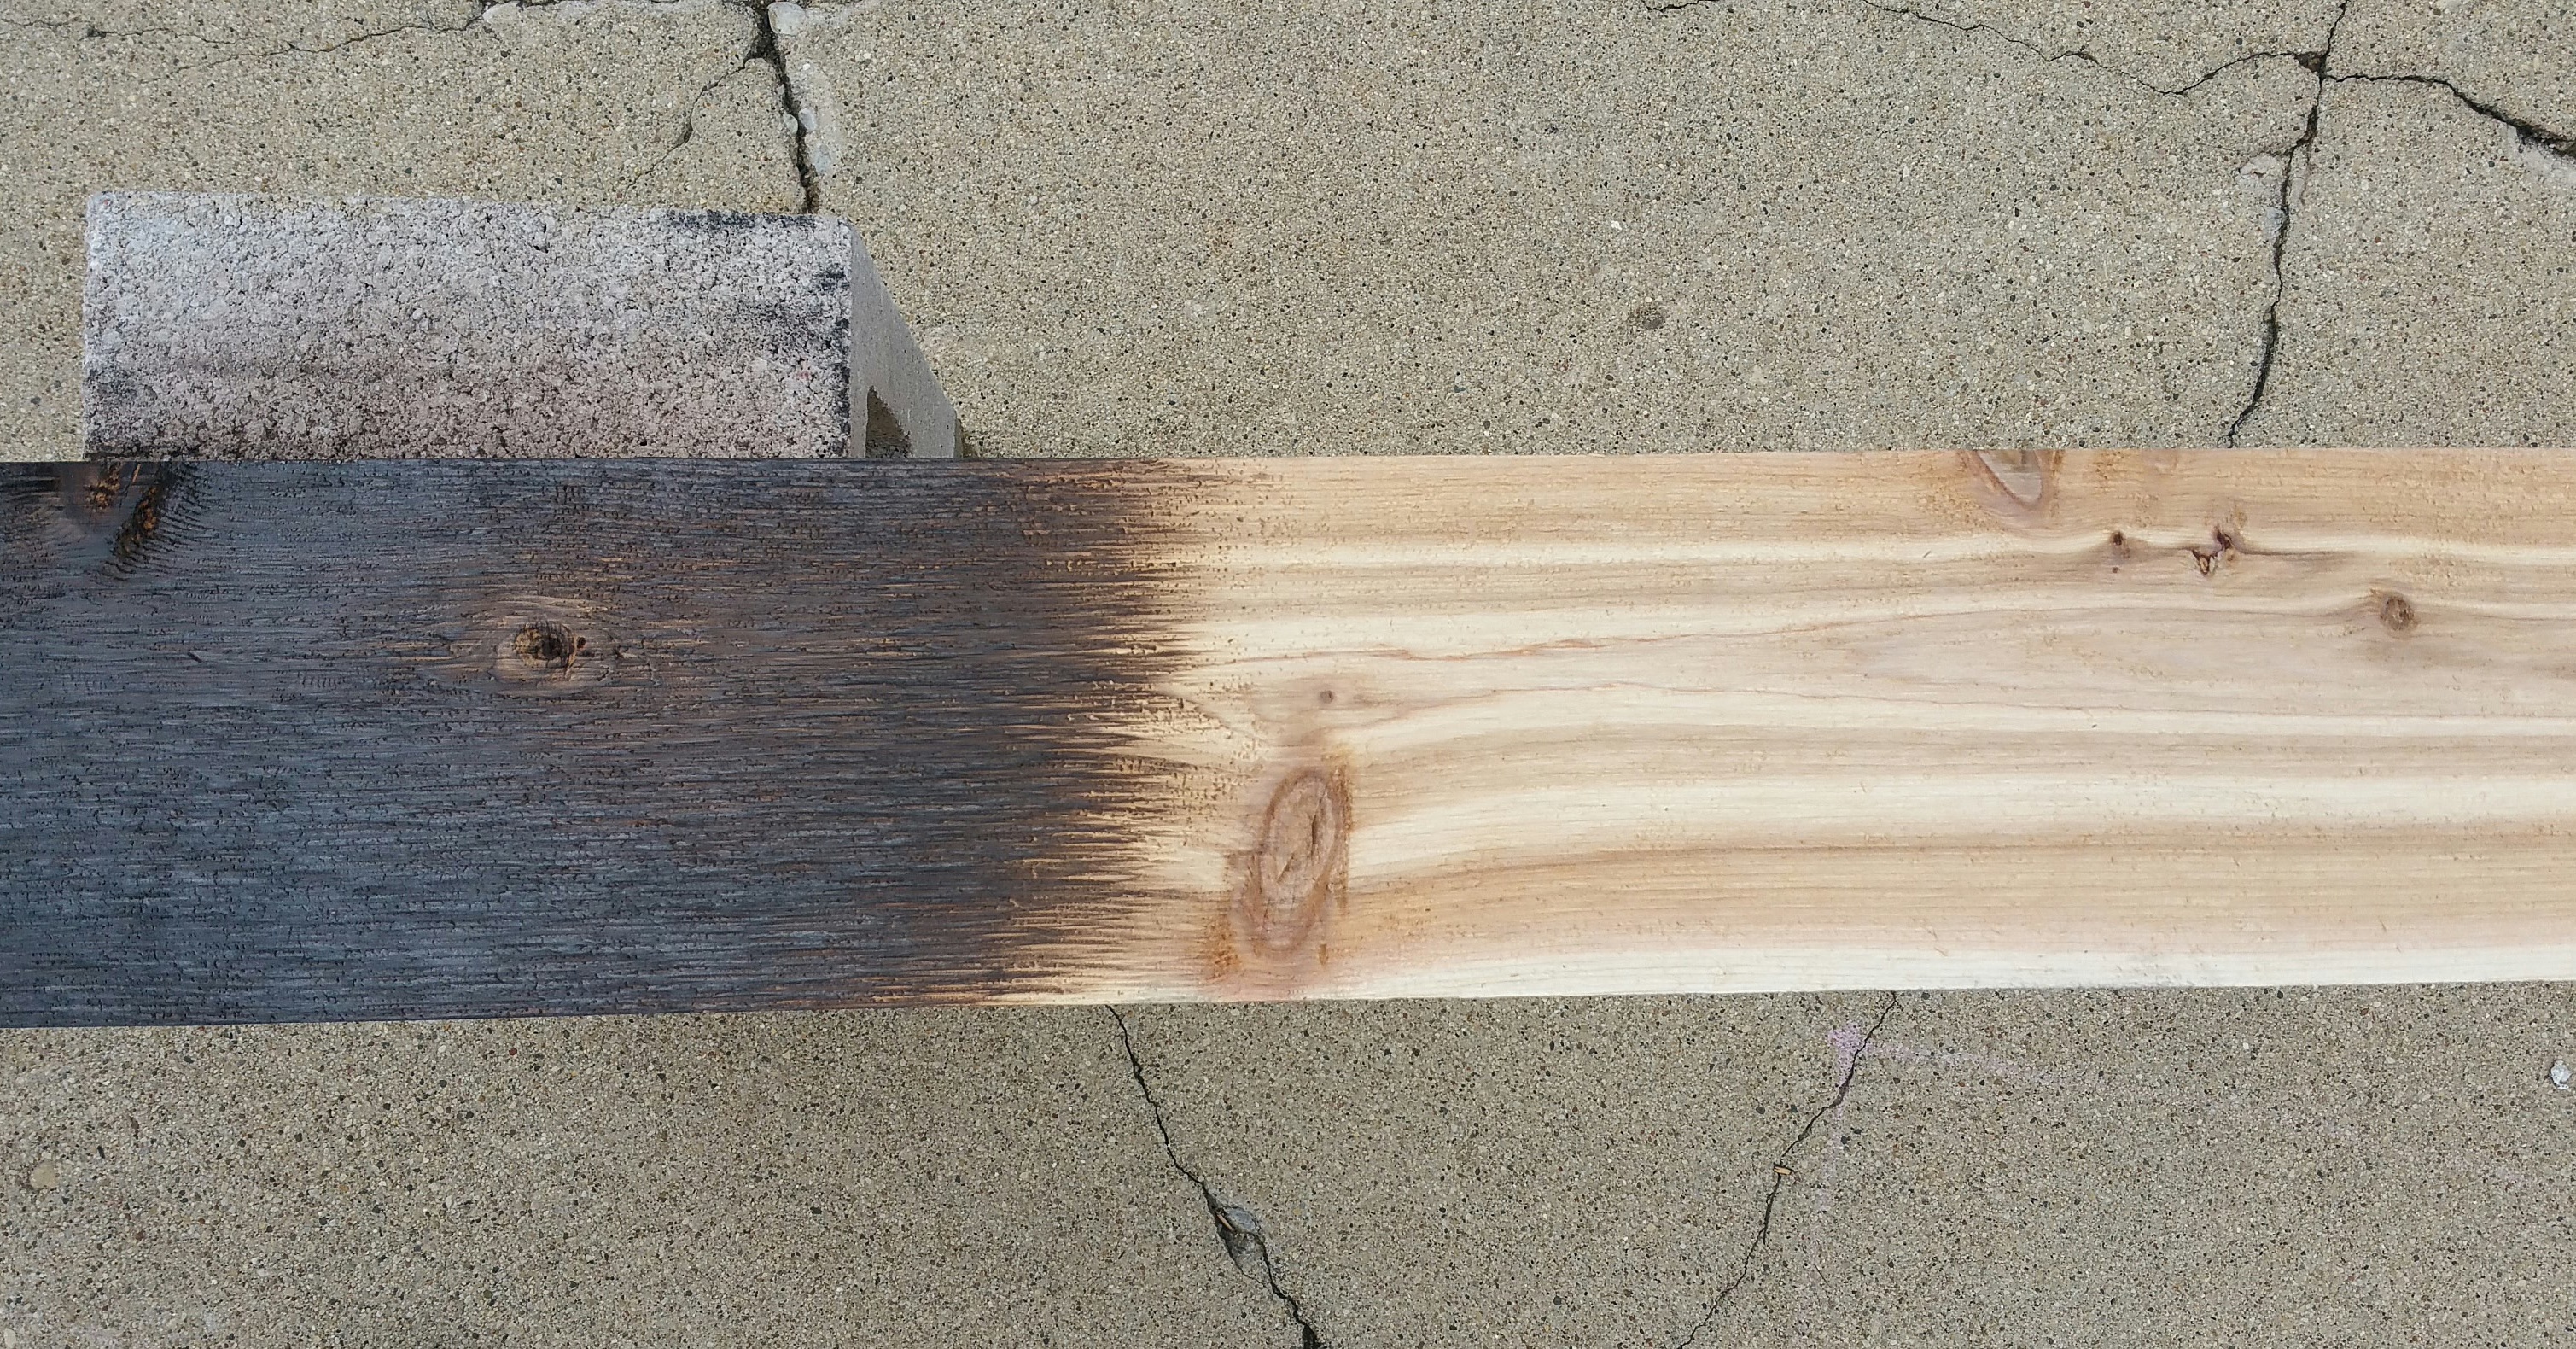
In our case, we decided to use Tung Oil mixed with Citrus Solvent (available from: realmilkpaint.com). Having used it previously on arts-and-crafts projects with good results, and because it’s considered No VOC, we felt it was a good choice (although not the cheapest option). We’ll also be using the same combination of products for our hardwood flooring.
Tung Oil & Citrus Solvent. We use a 1:1, or 50%-50% mix that combines the two products together.
We used a 1:1 mixture of Tung Oil and Citrus Solvent (they even sell it this way, pre-mixed, if you don’t want to deal with combining individual batches together). The Citrus Solvent acts like a traditional paint thinner (without the VOC’s or strong chemical smell), diluting the Tung Oil so it can more easily soak into the wood (it also smells great since it’s made from orange peels). The Citrus Solvent is also used for cleaning up tools, equipment, and any spills of the tung oil (also works great as a general purpose degreaser — especially above and around a stovetop).
USE CAUTION! — Although natural and safe, the Citrus Solvent can irritate bare skin. I always use either Latex or Nitrile gloves (readily available at any hardware store).
If you try using the Tung Oil alone, the difference in performance is obvious (the oil will mostly just sit on the surface, with little of it soaking in — a frustrating waste of time and money).
I decided to use a trough for dipping each board based on a project I saw online:
Their house and blog caught my attention early on, when we were just beginning to think about building new. Their project, along with several others, really got me excited about the possibility of building “green”.
GO Logic (Red House project; featured in the video below)
Spartan and Hannah’s home (zeroandbeyond.com) is an excellent example of the Pretty Good House concept, and it’s definitely worth checking out, especially under the heading of Presentations: How to Build an Affordable Net Zero / Super Energy-efficient Home(pdf).
A lot of great information to get you thinking about exactly what it is you may want to build, and how to financially pull it off. They also have a lot of thoughtful and inventive design elements (love their granite floor built with cut waste from various countertop jobs — a very creative idea with a unique look).
Anyway, back to the trough: It’s much faster than trying to use a brush or roller, and it guarantees full coverage (many thanks to Spartan & Hannah for posting this simple, but time saving idea).
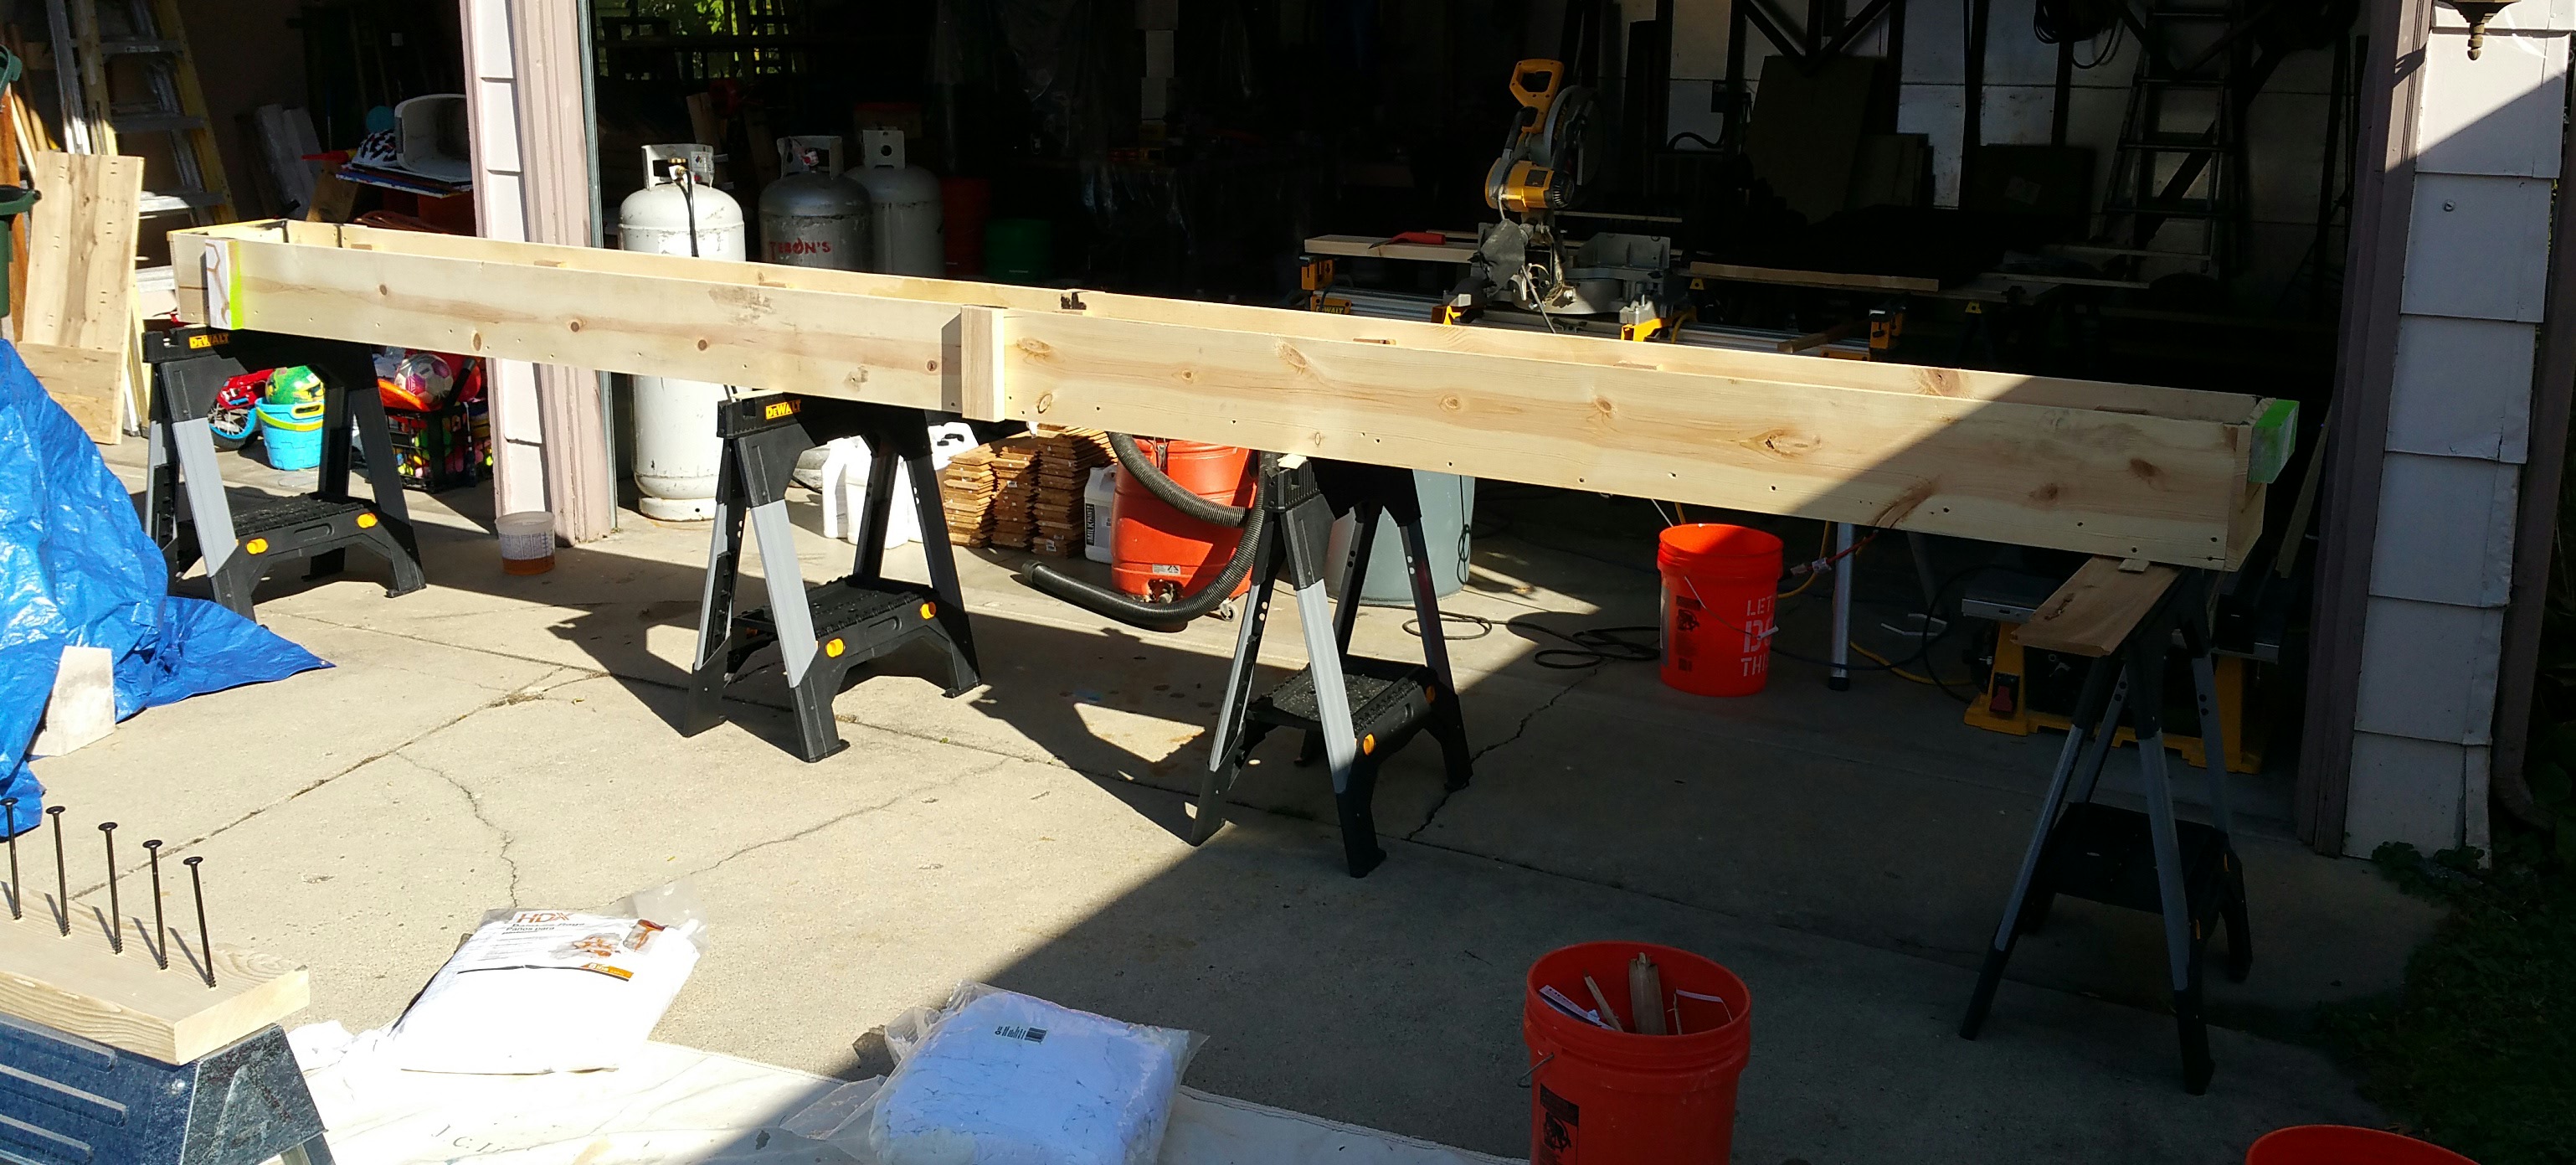
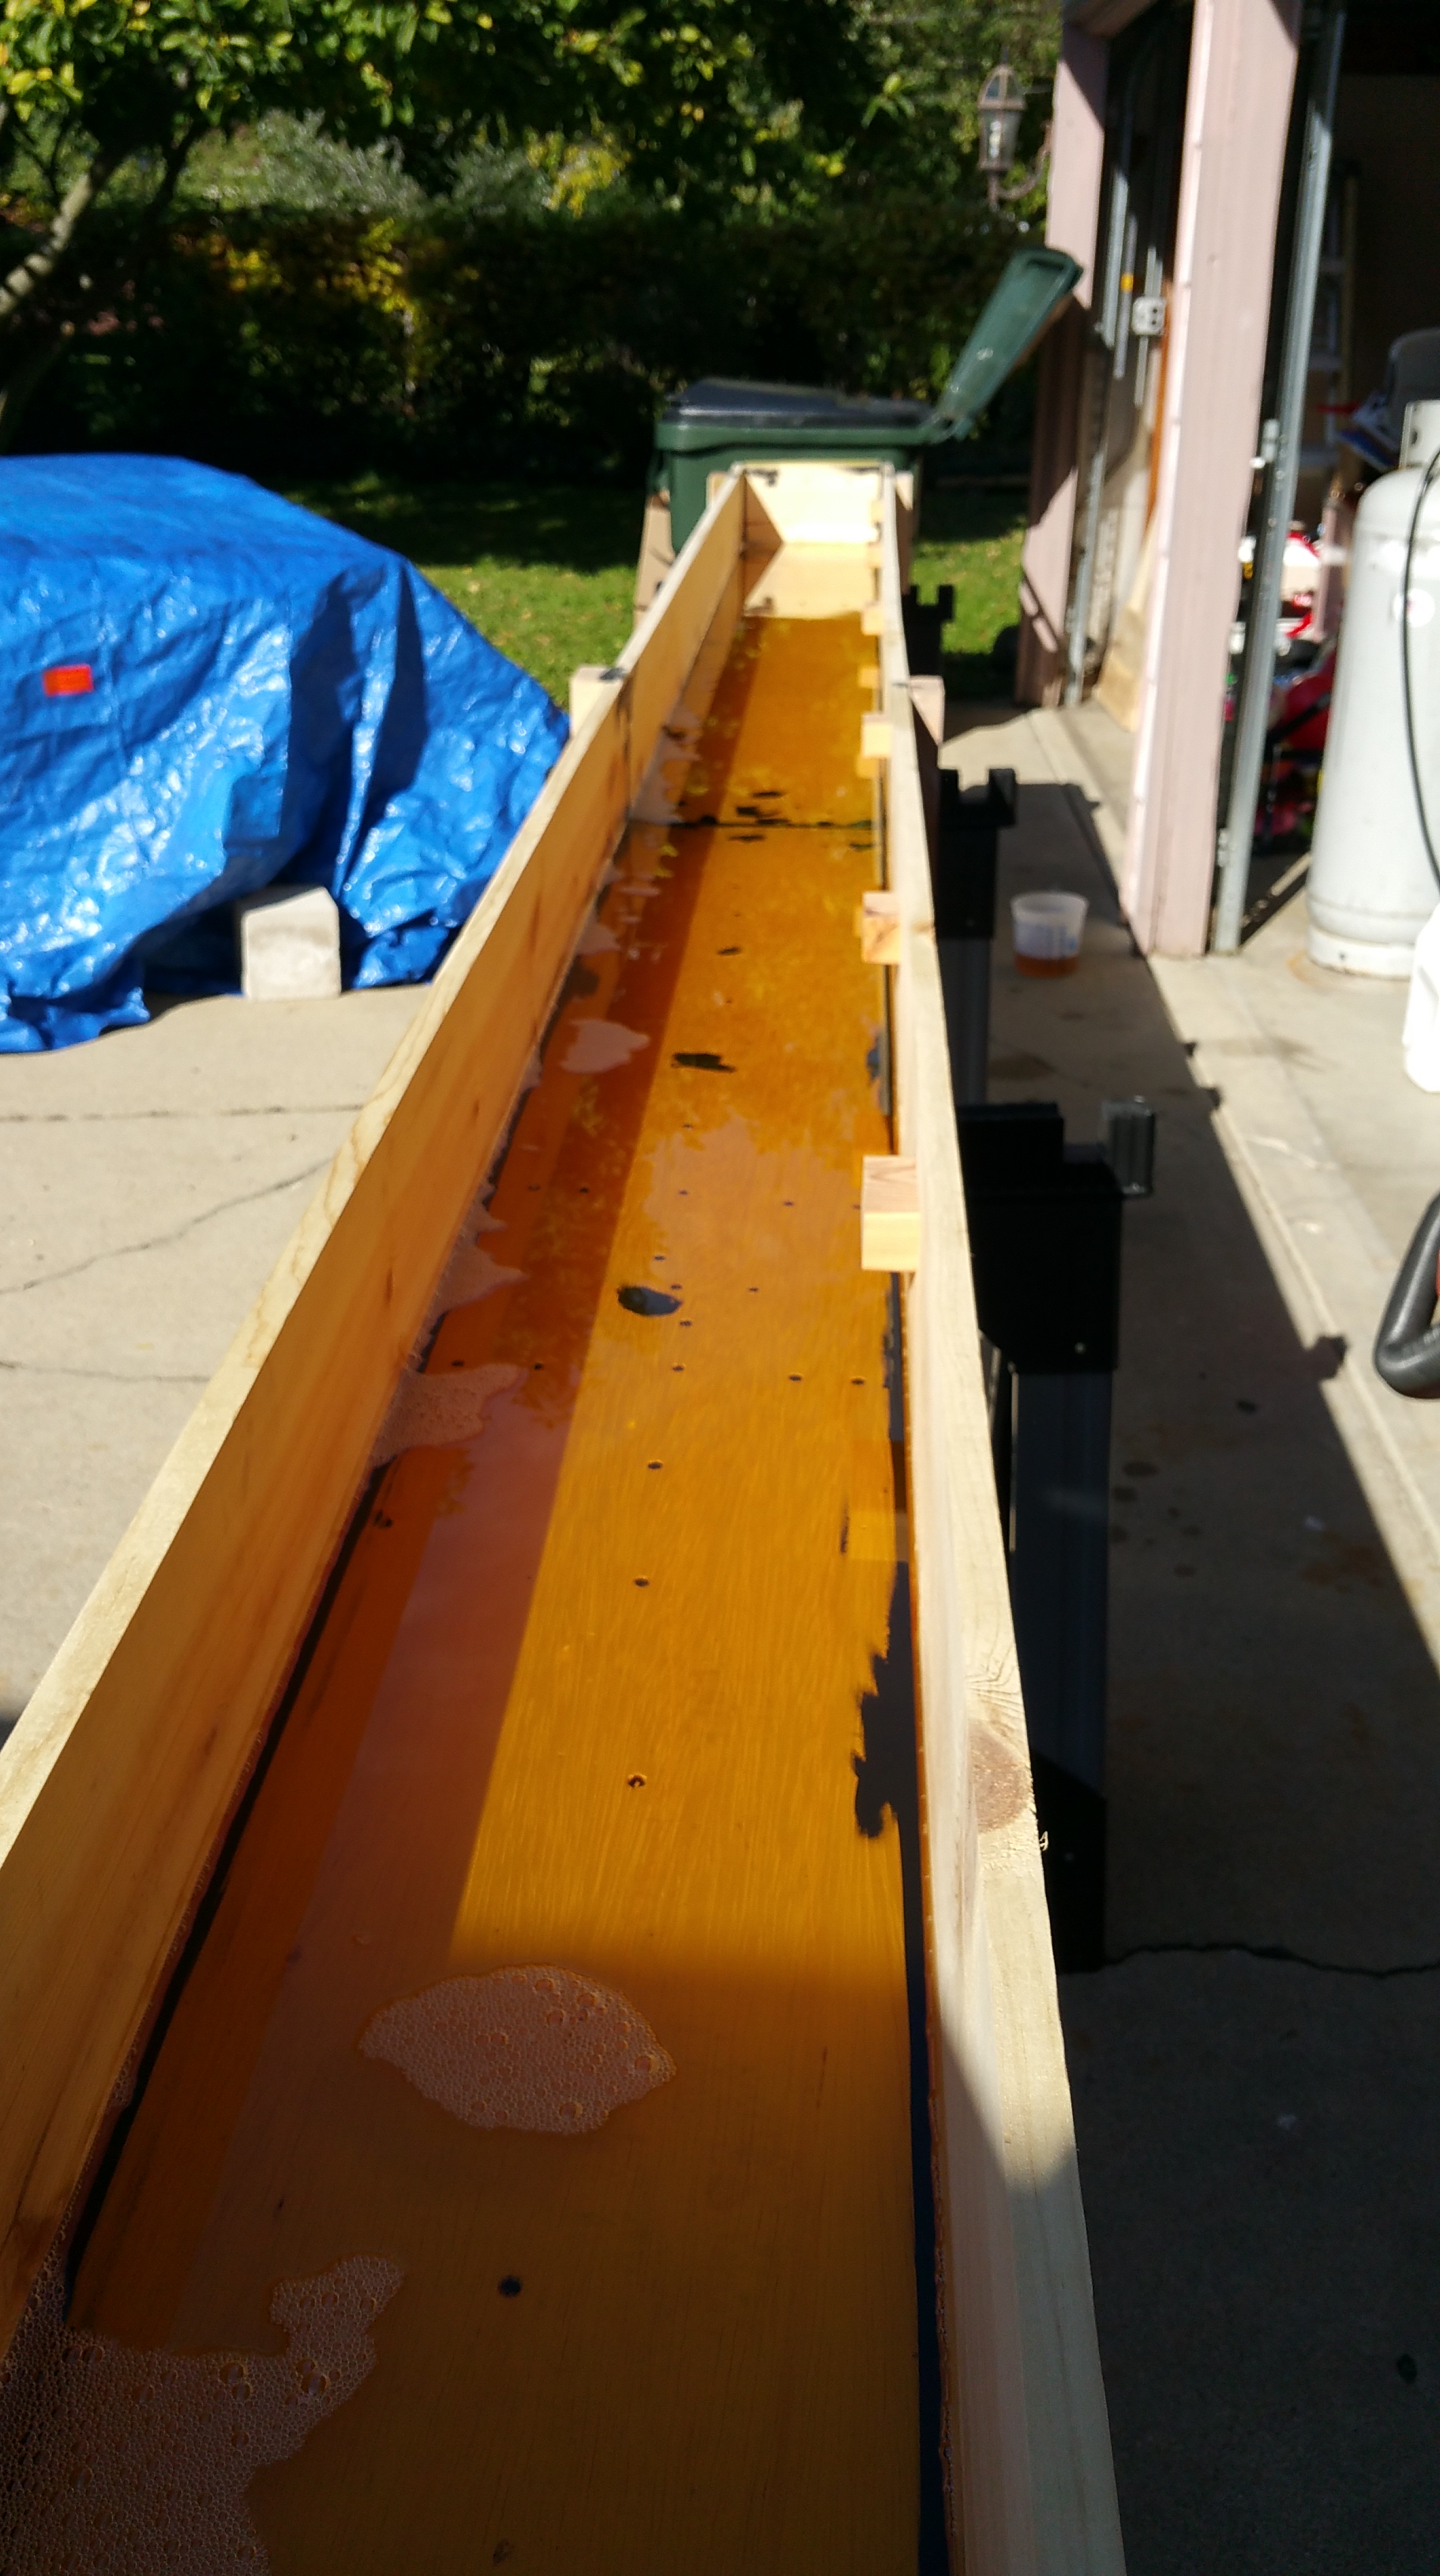
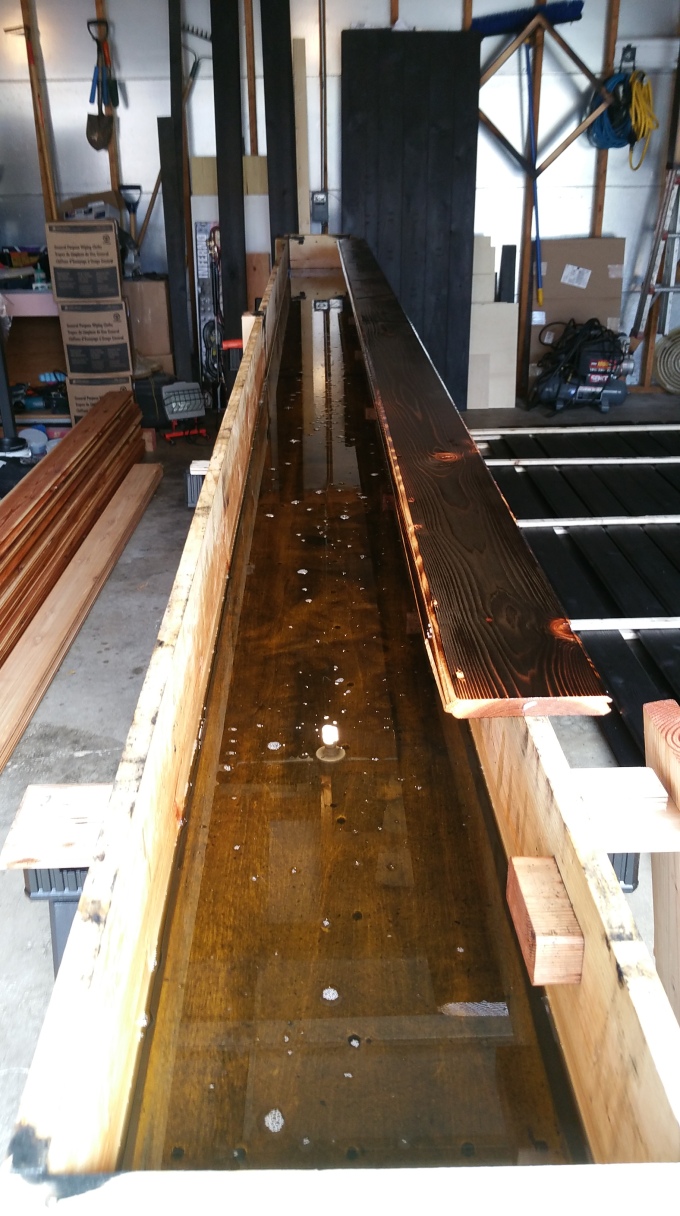
Below is my version of the same thing:
Made from scraps with 1×12 pine for the sides, and then 3/4″ plywood on the bottom. There are also 2×4’s underneath for structural stability. It’s about 1′ longer than our longest board, making it easy to get boards in and out (roughly 17′).
Inside the trough, and to the right, I used cut ends of 2×4’s to create a ledge to rest the piece of cedar on while wiping it down with a squeegee. On each end of the trough I added a 2×4 to make it easier to lift and move around.
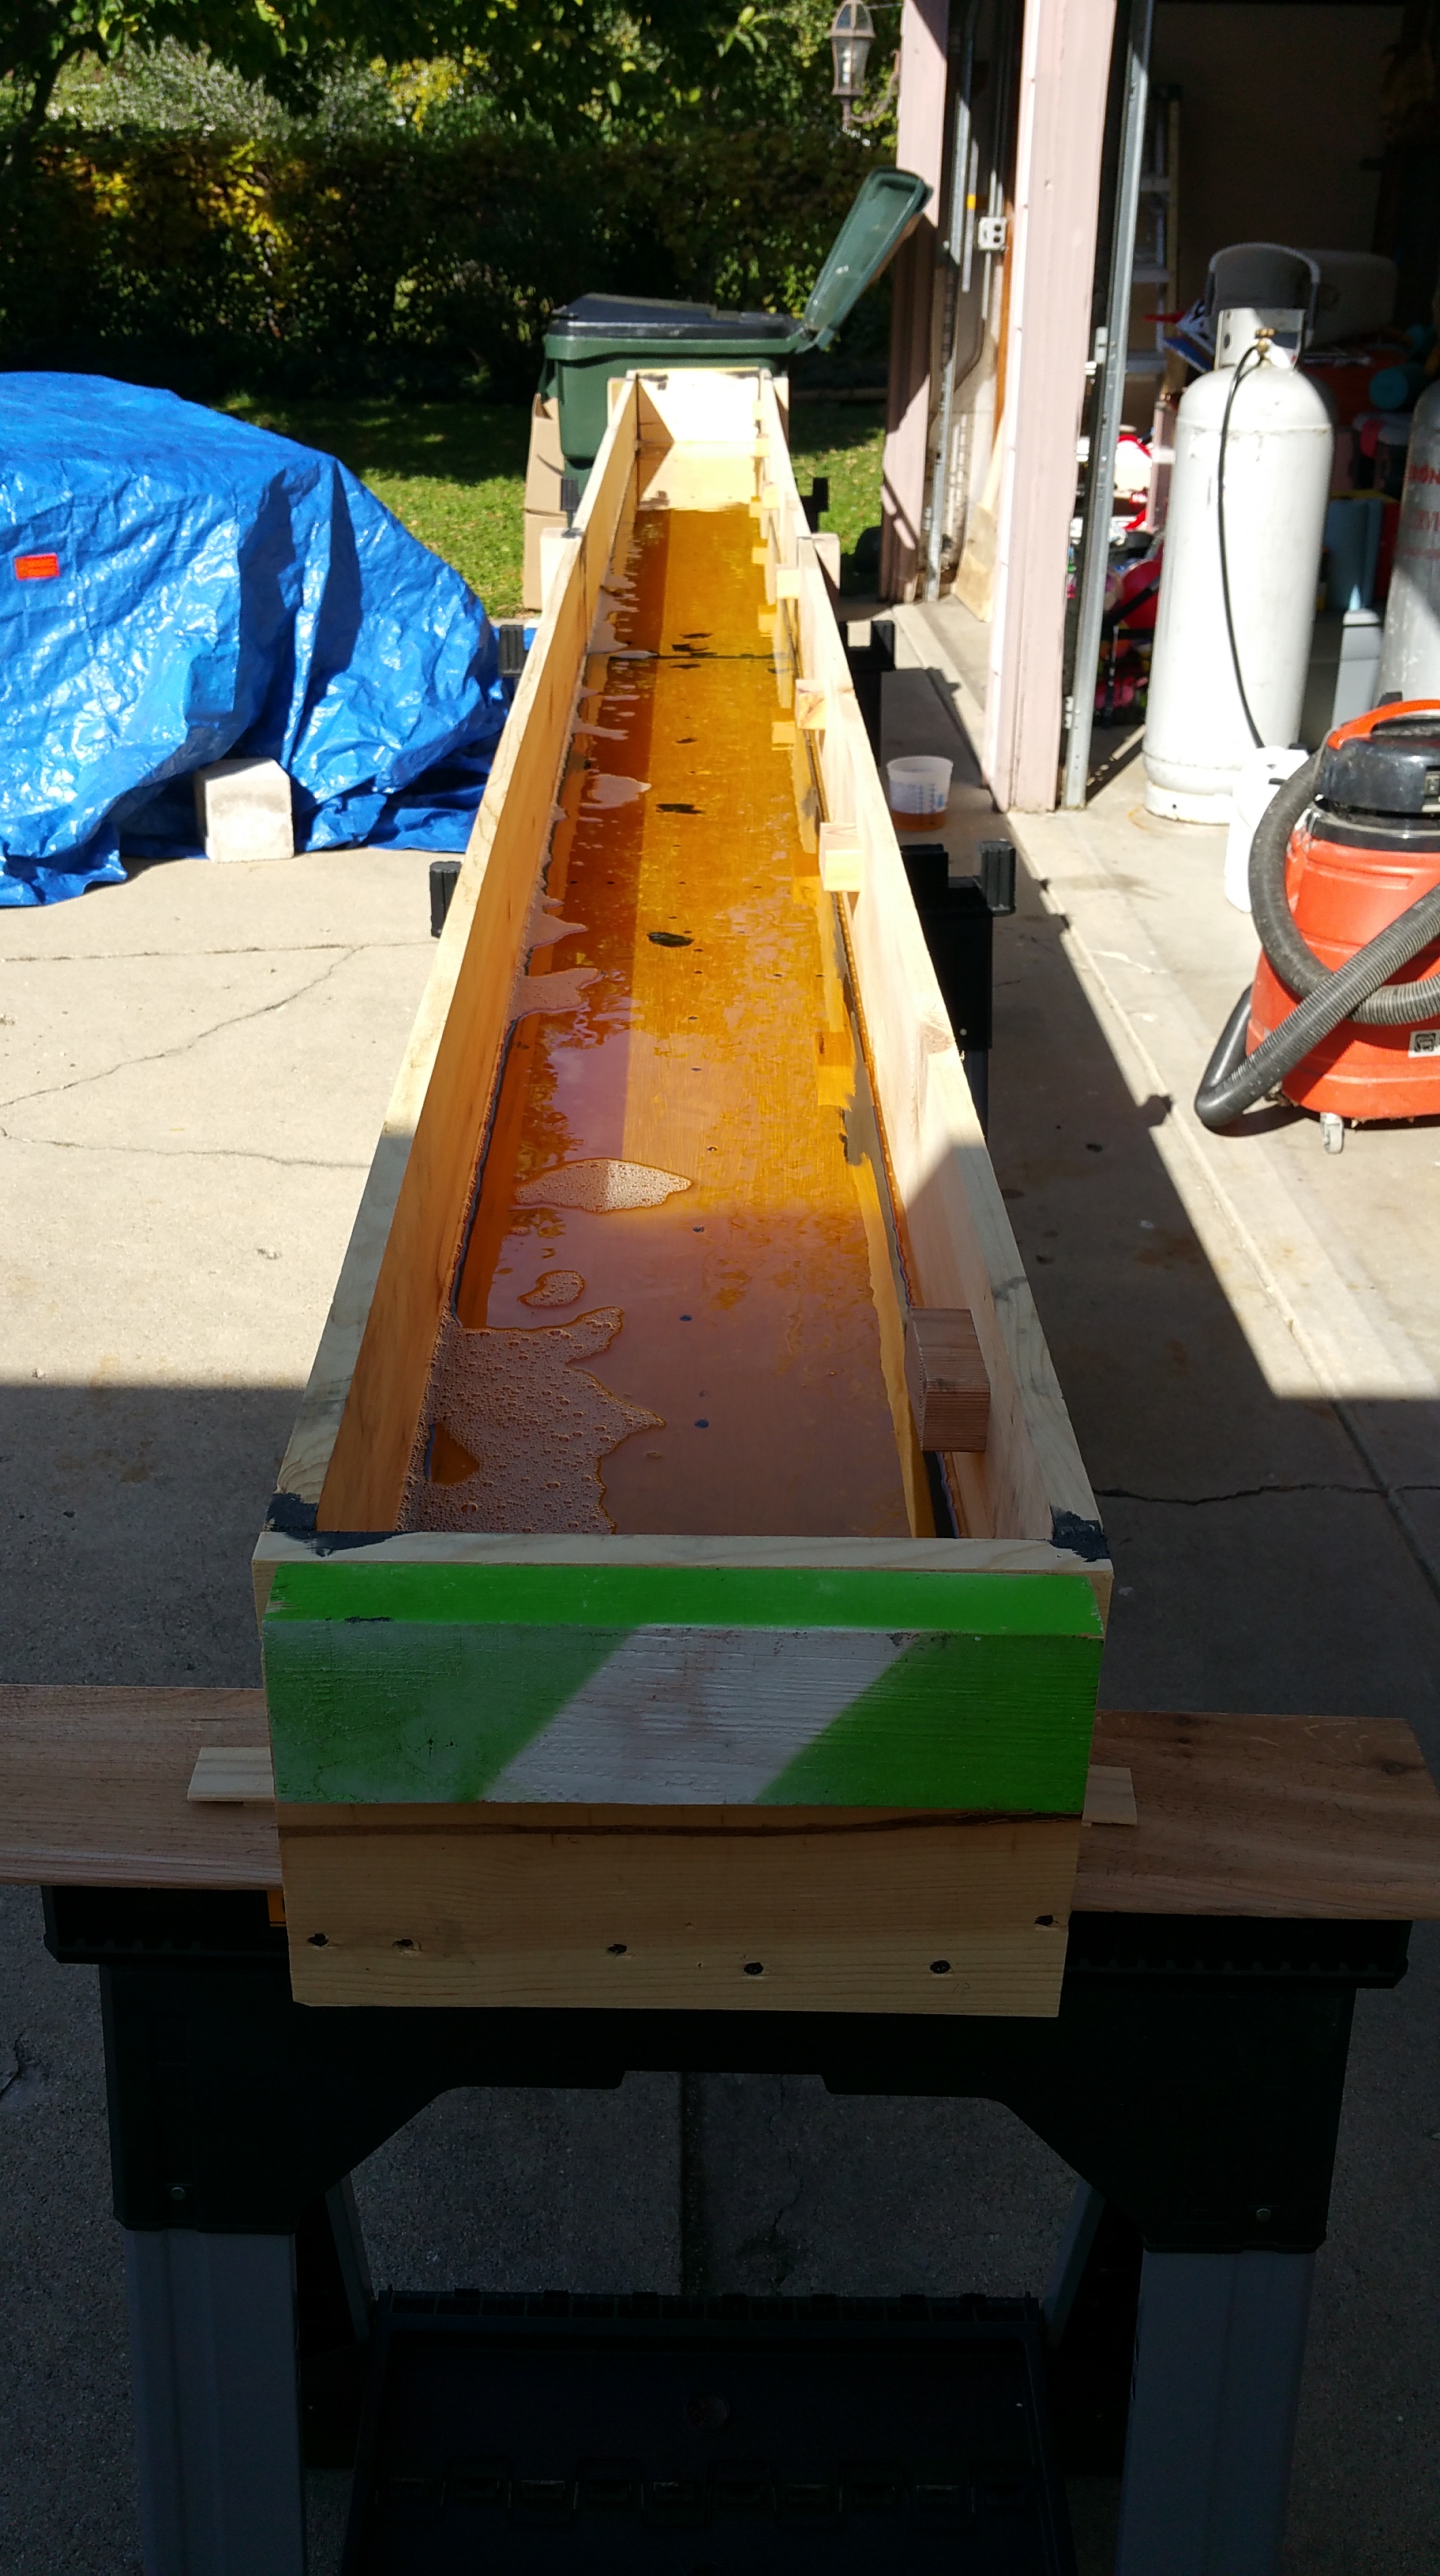
Once built, I went back and caulked all the seams, and any deeply set screws. We fill the trough with 6-8 gallons of the Tung Oil & Citrus Solvent mixture. It lasts quite awhile (and it’s fun to soak the boards).
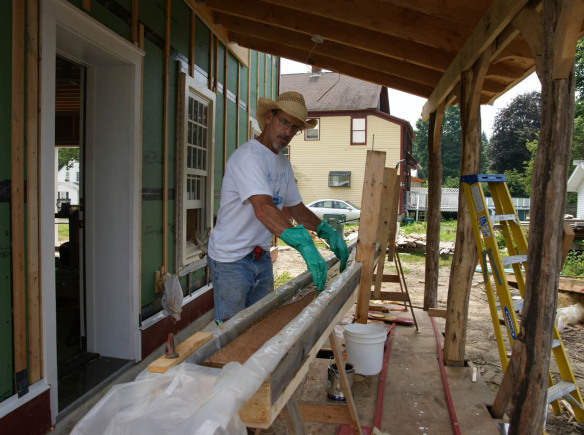
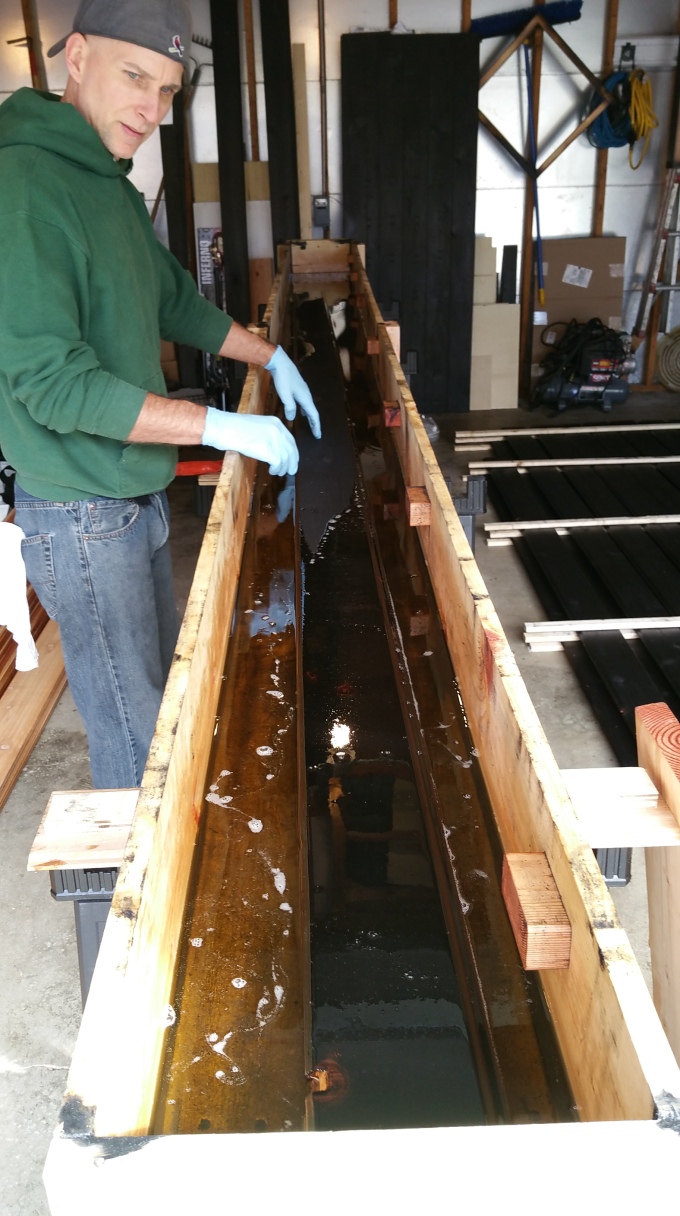
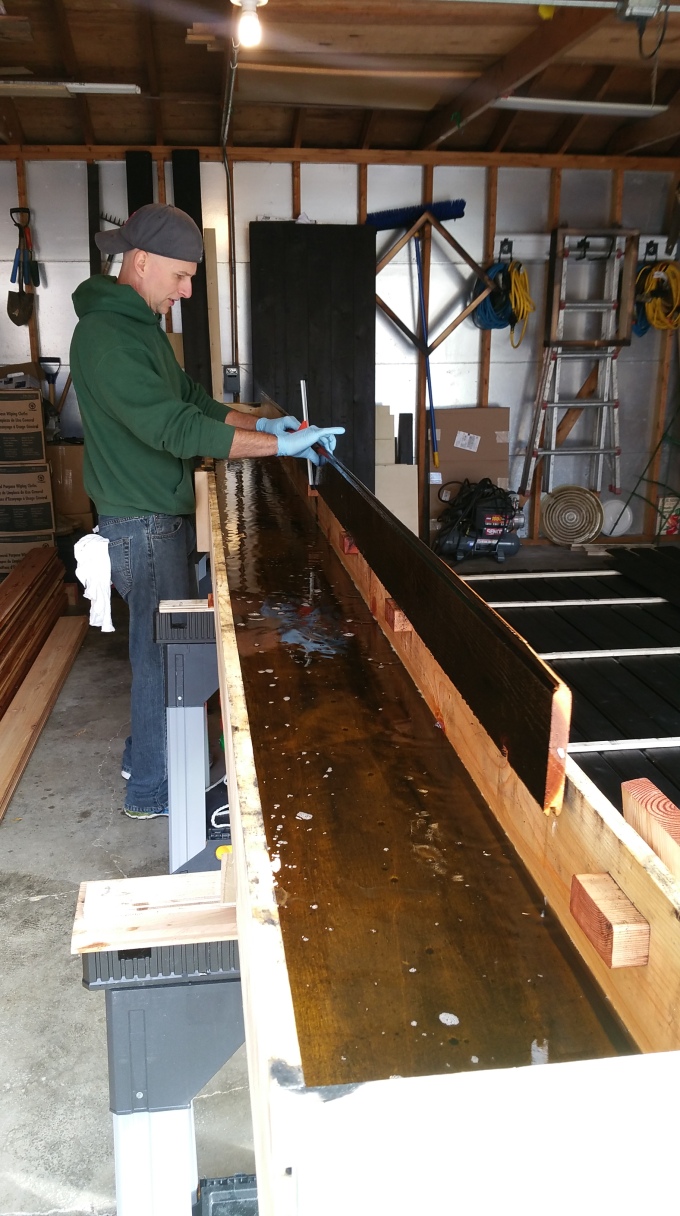
Once in the trough, we would let each board sit for about 30 seconds in the Tung Oil and Citrus Solvent bath, before pulling it up and resting it on the 2×4 ledge. Seated on its perch, the board would get wiped down initially with just a squeegee.
Soaking for 30 seconds.
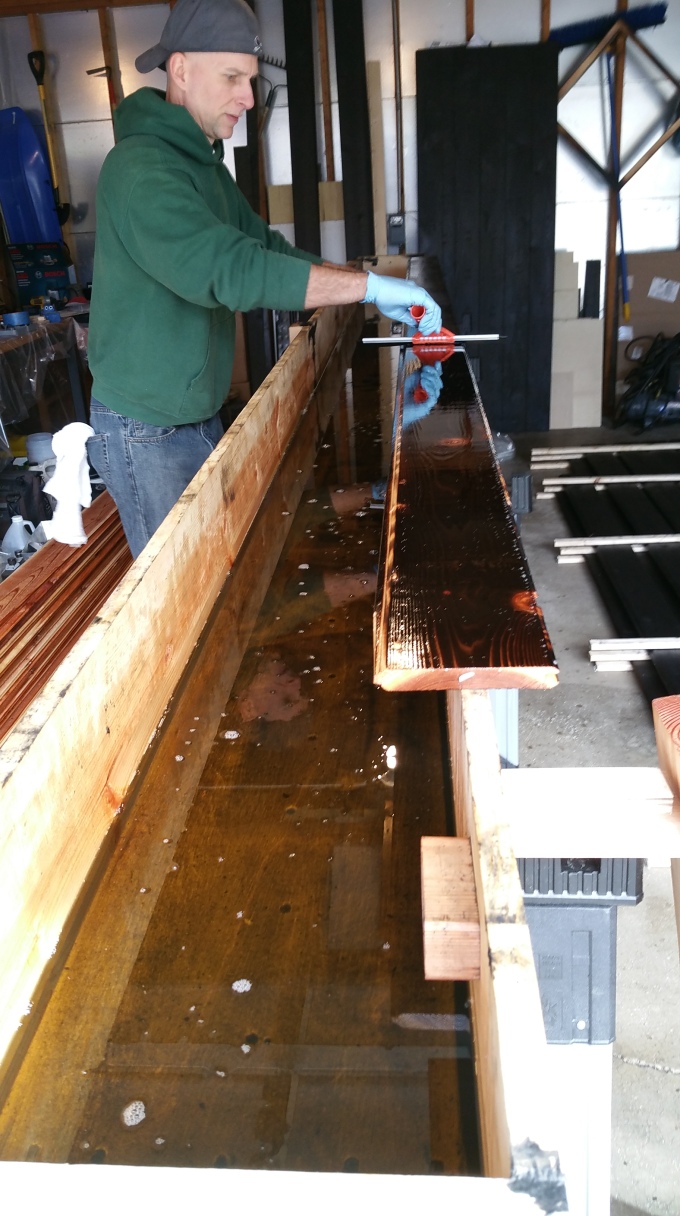
Resting on the 2×4 ledge for wiping down the rough side.
Board flipped, resting on the ledge, wiping down the smooth side.
Board wiped on both sides, now ready for the drying rack.
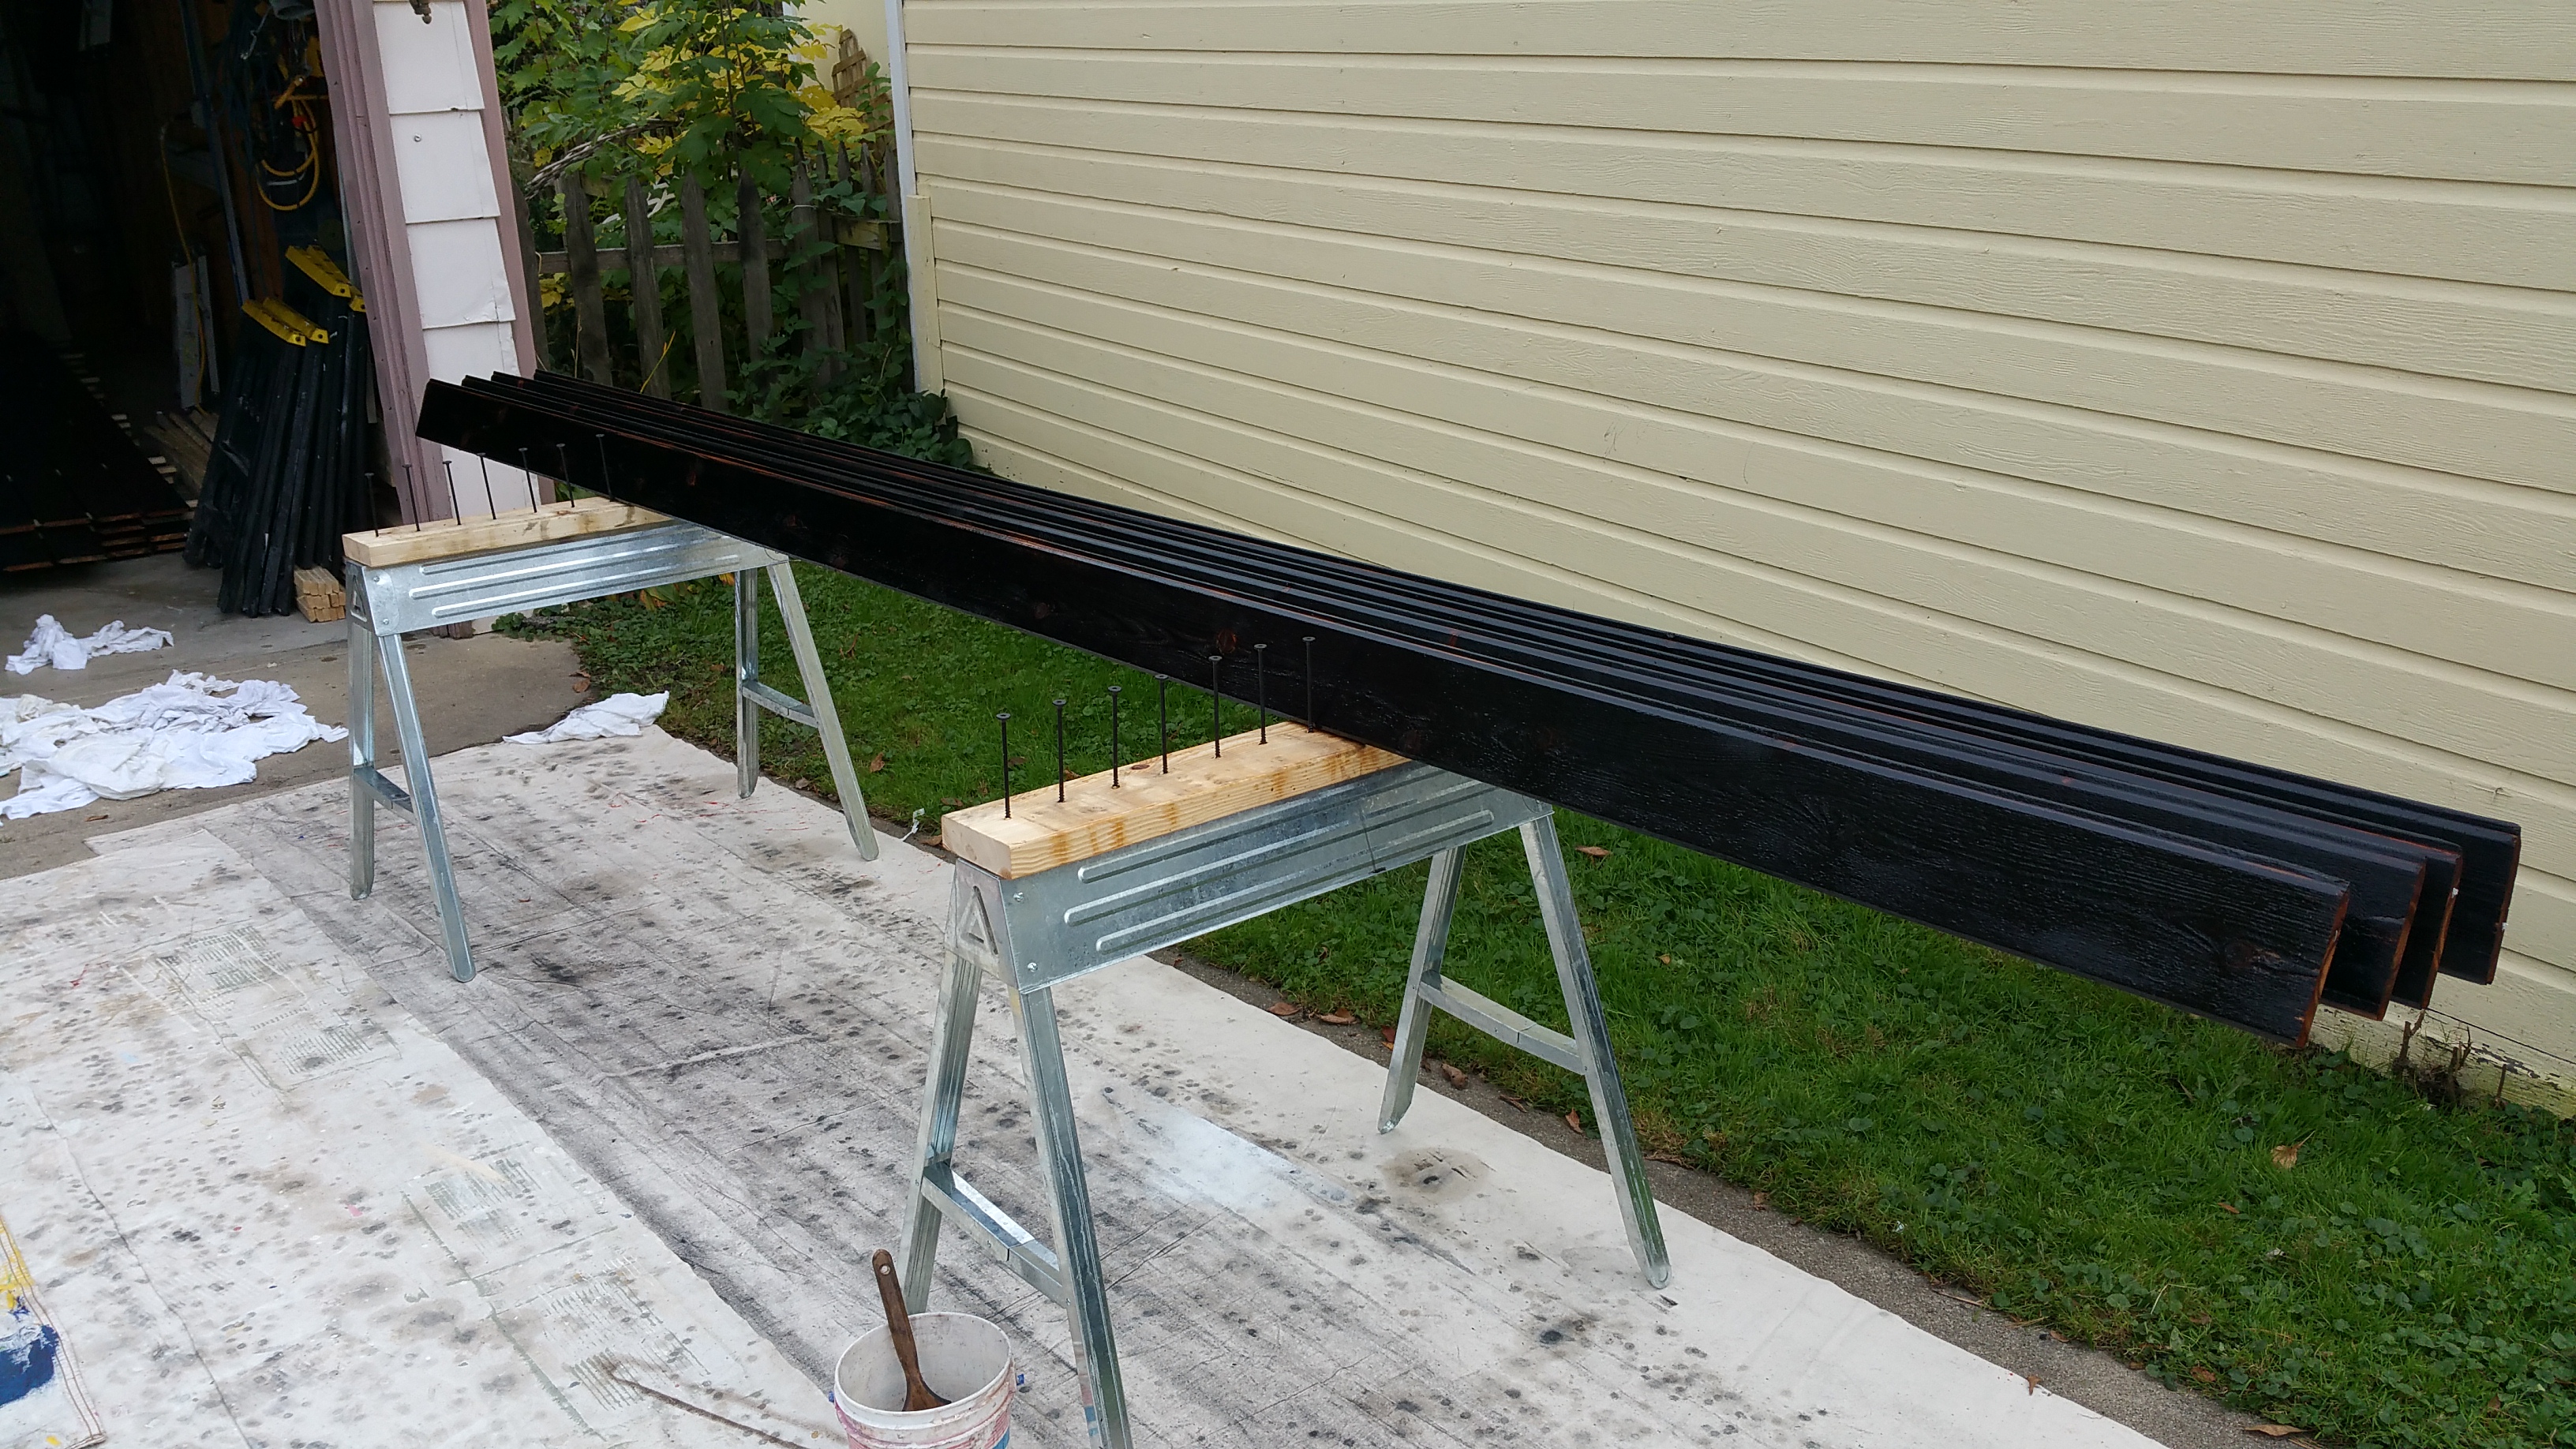
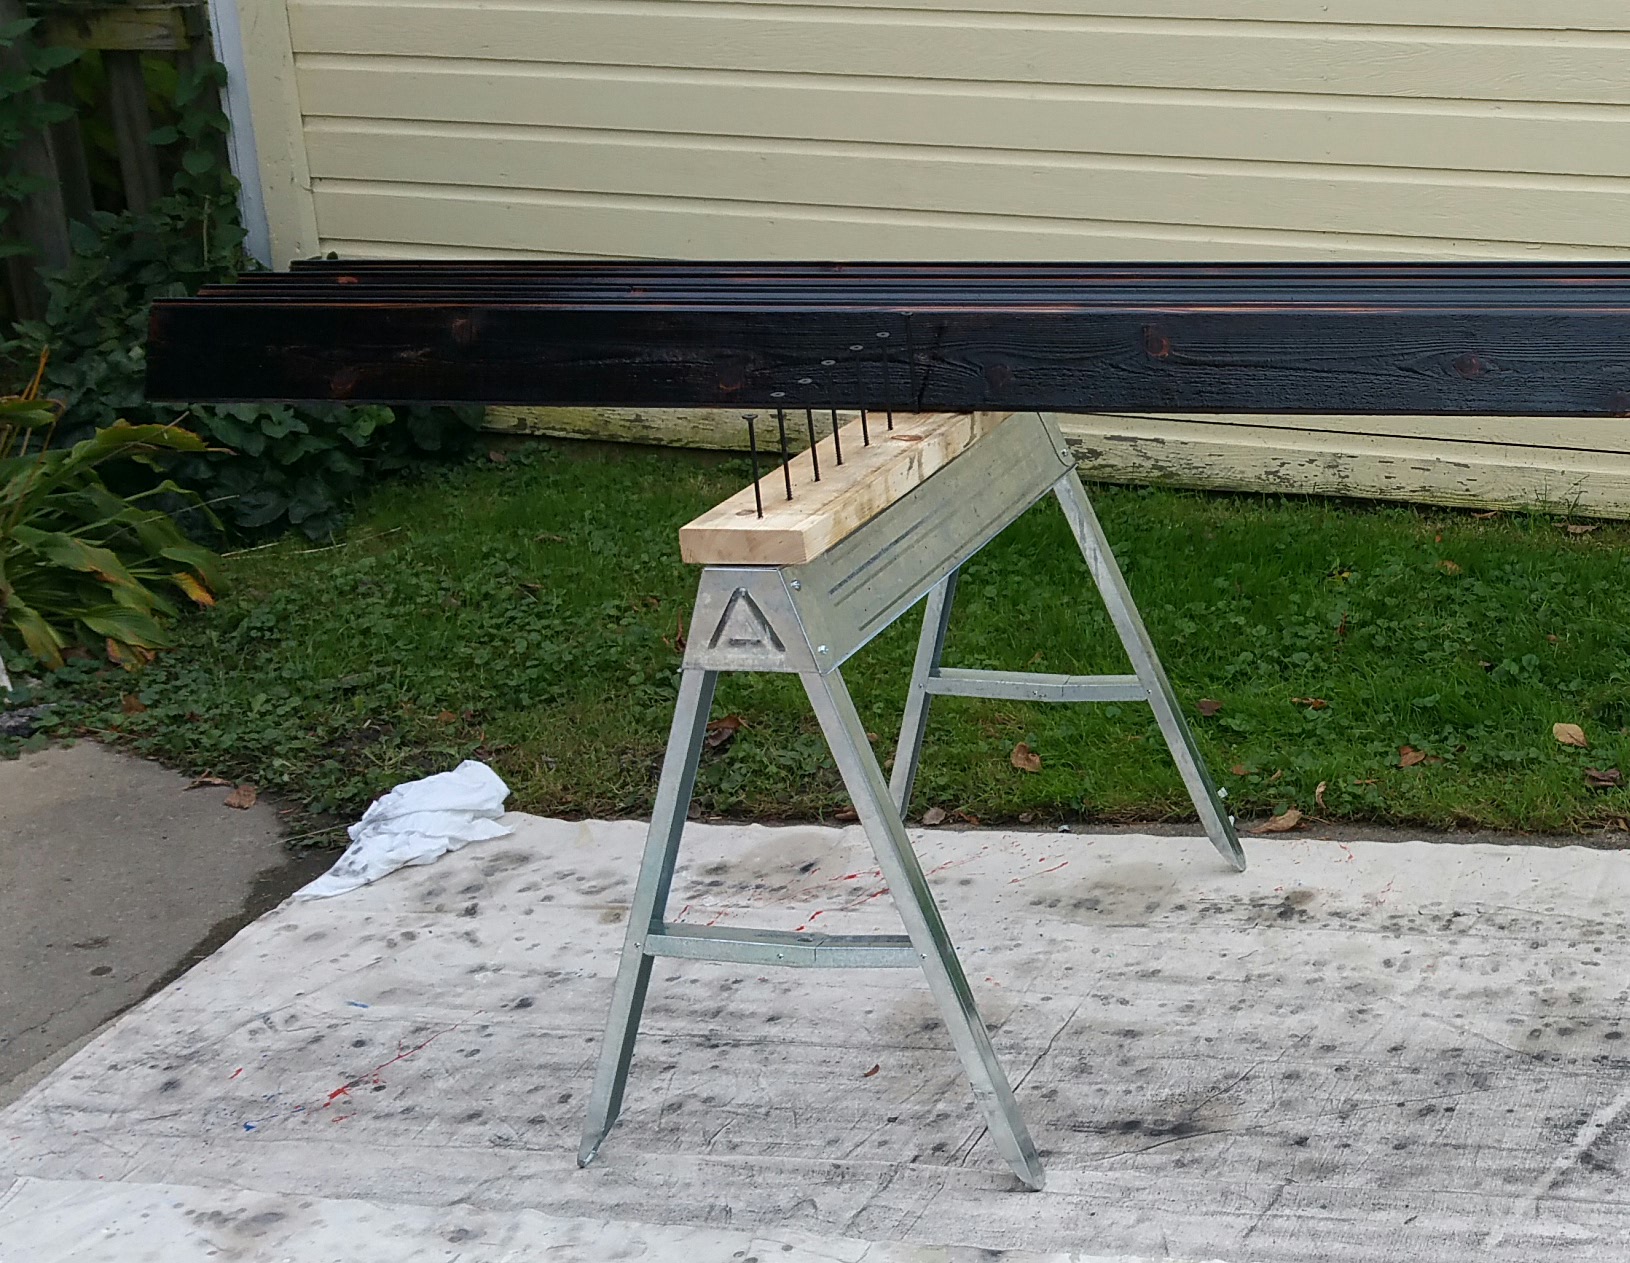
At this point, we would walk it over to the drying rack.
Picked up these inexpensive sawhorses at Home Depot. The 2×6 is screwed to the horse from below. We used 6″ screws to make our rows.
Once on the rack, we would use a brush to apply an additional coat of Tung Oil and Citrus Solvent, but only to the rough side, since it will be exposed directly to the elements.
A board on the drying rack, just after being brushed with the Tung Oil. Spacing out the 6″ screws gives enough room for 10 boards.
After about 20 minutes on the drying rack, we would wipe down both sides of each board (the most laborious part of the job). Usually by the time you’ve placed the tenth board and brushed it, the first board is ready to be wiped down. We found that dust free cotton rags are the best option for this.
Typically, there’s not much oil left on the surface, as most of it has soaked in. The wiping just removes any excess that could cause an unwanted film to form on the surface of the wood (not attractive).
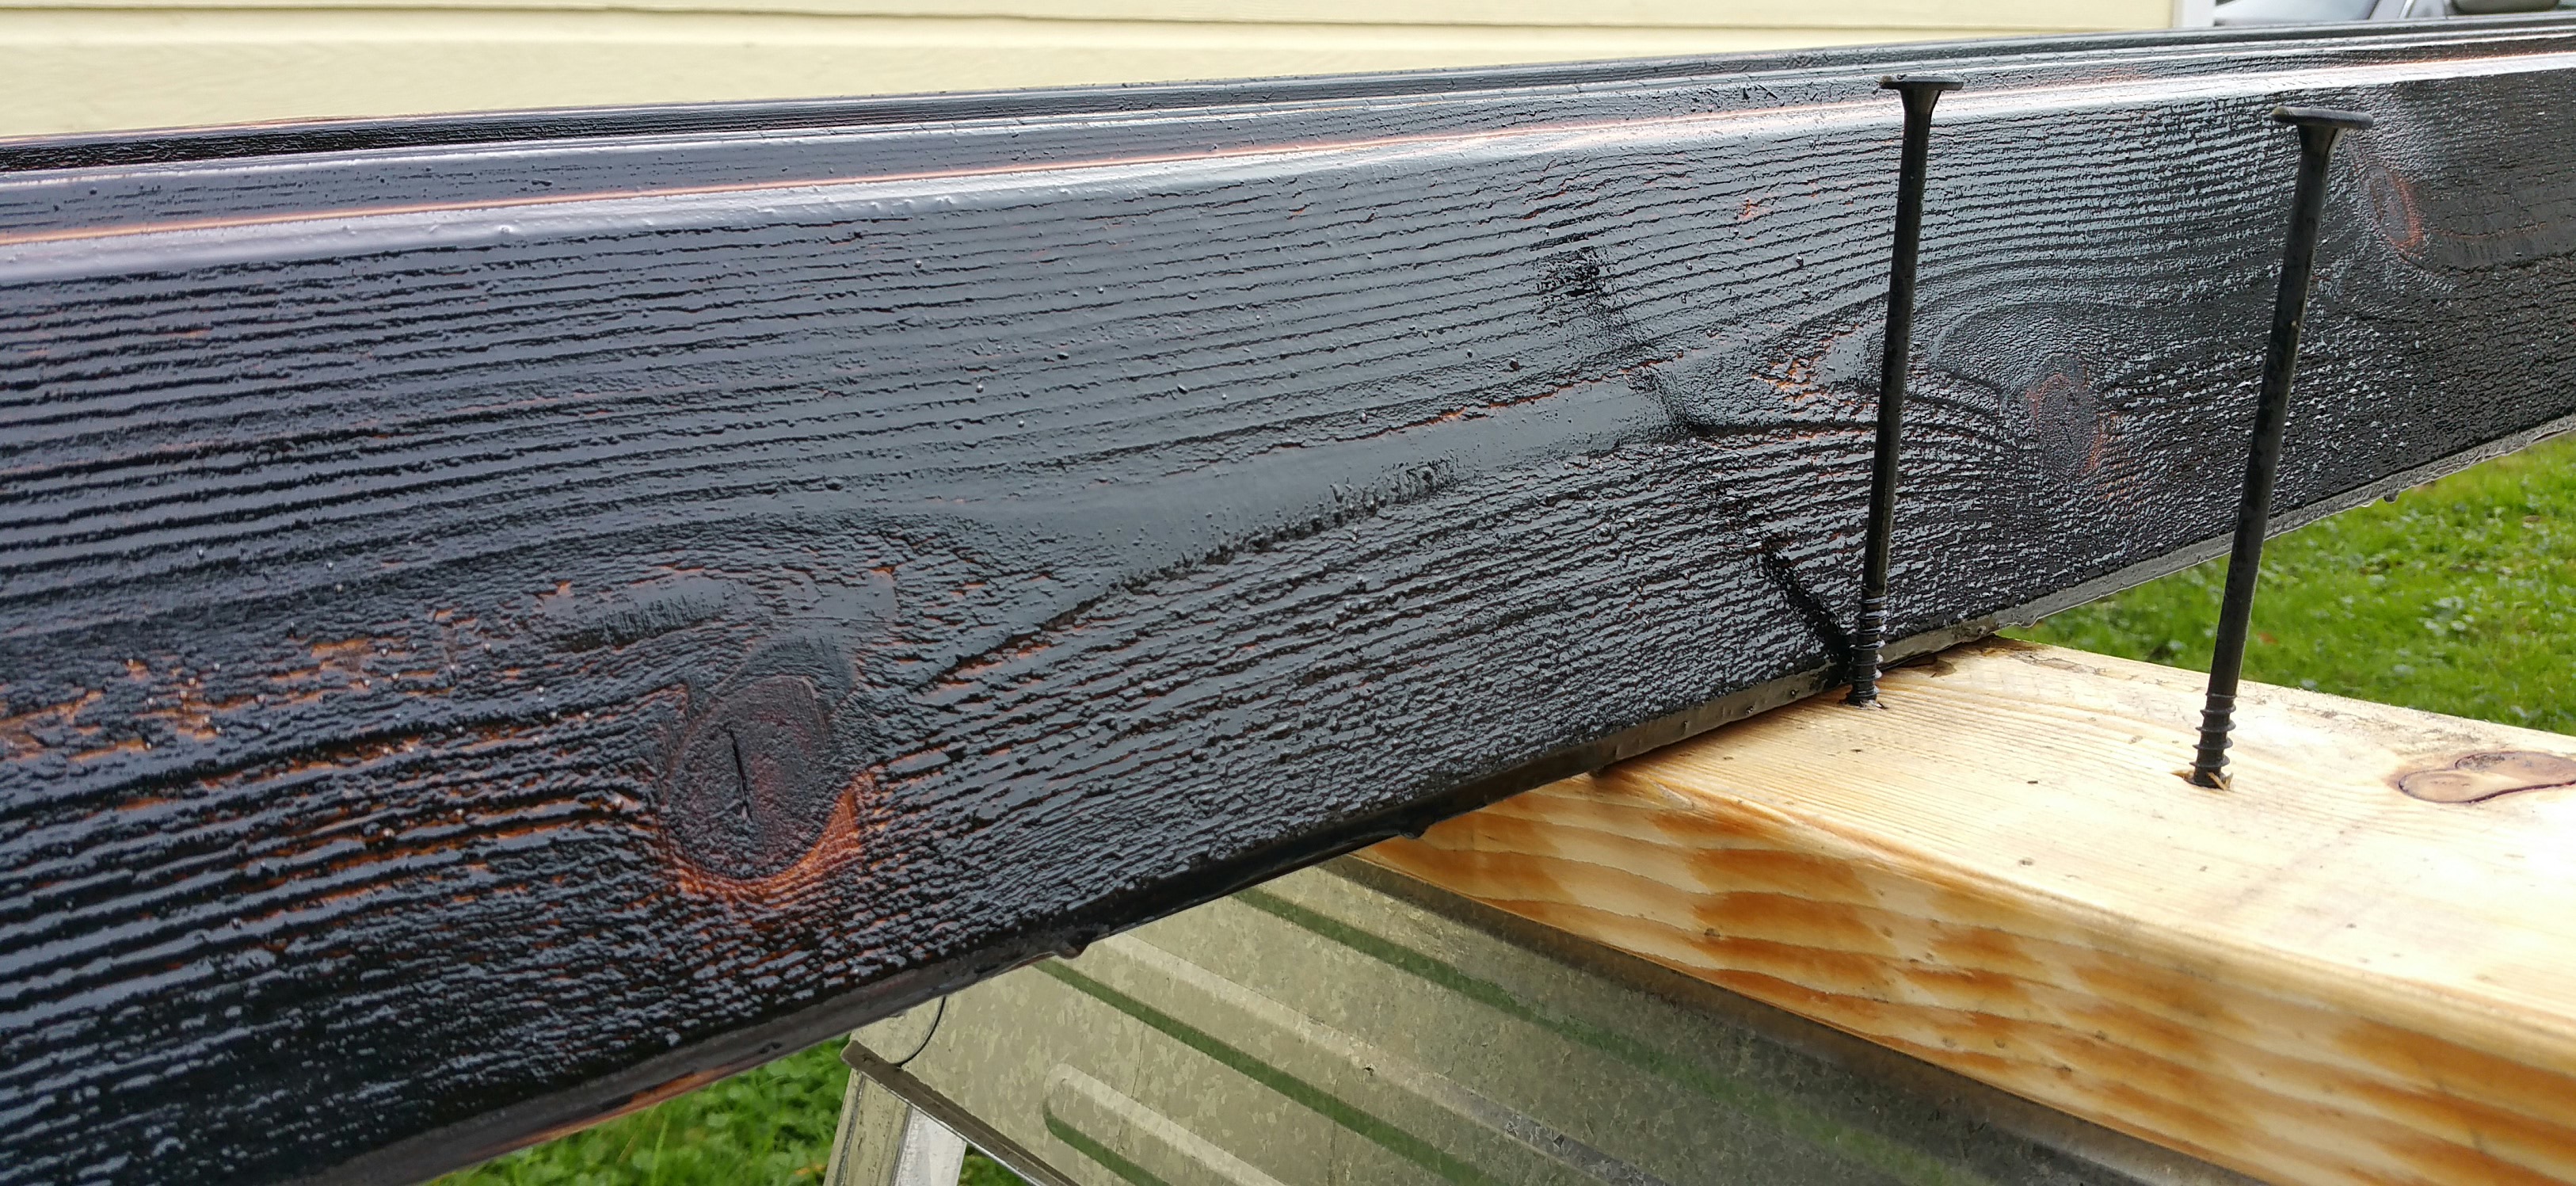
Board ready to be wiped down after resting for at least 20 minutes on the drying rack — most of the oil has visibly soaked in.
The only real down side to the wiping (apart from the time, energy, and the cost of the rags) is that it makes the boards more uniform in appearance — in other words, some of the texture in the gator look is lost due to the wiping. Nevertheless, this comes with an added benefit, namely, removing any char that might otherwise flake off in the first couple of rainstorms.
When the boards are finished and completely dry, the finish looks very durable (and sleek).
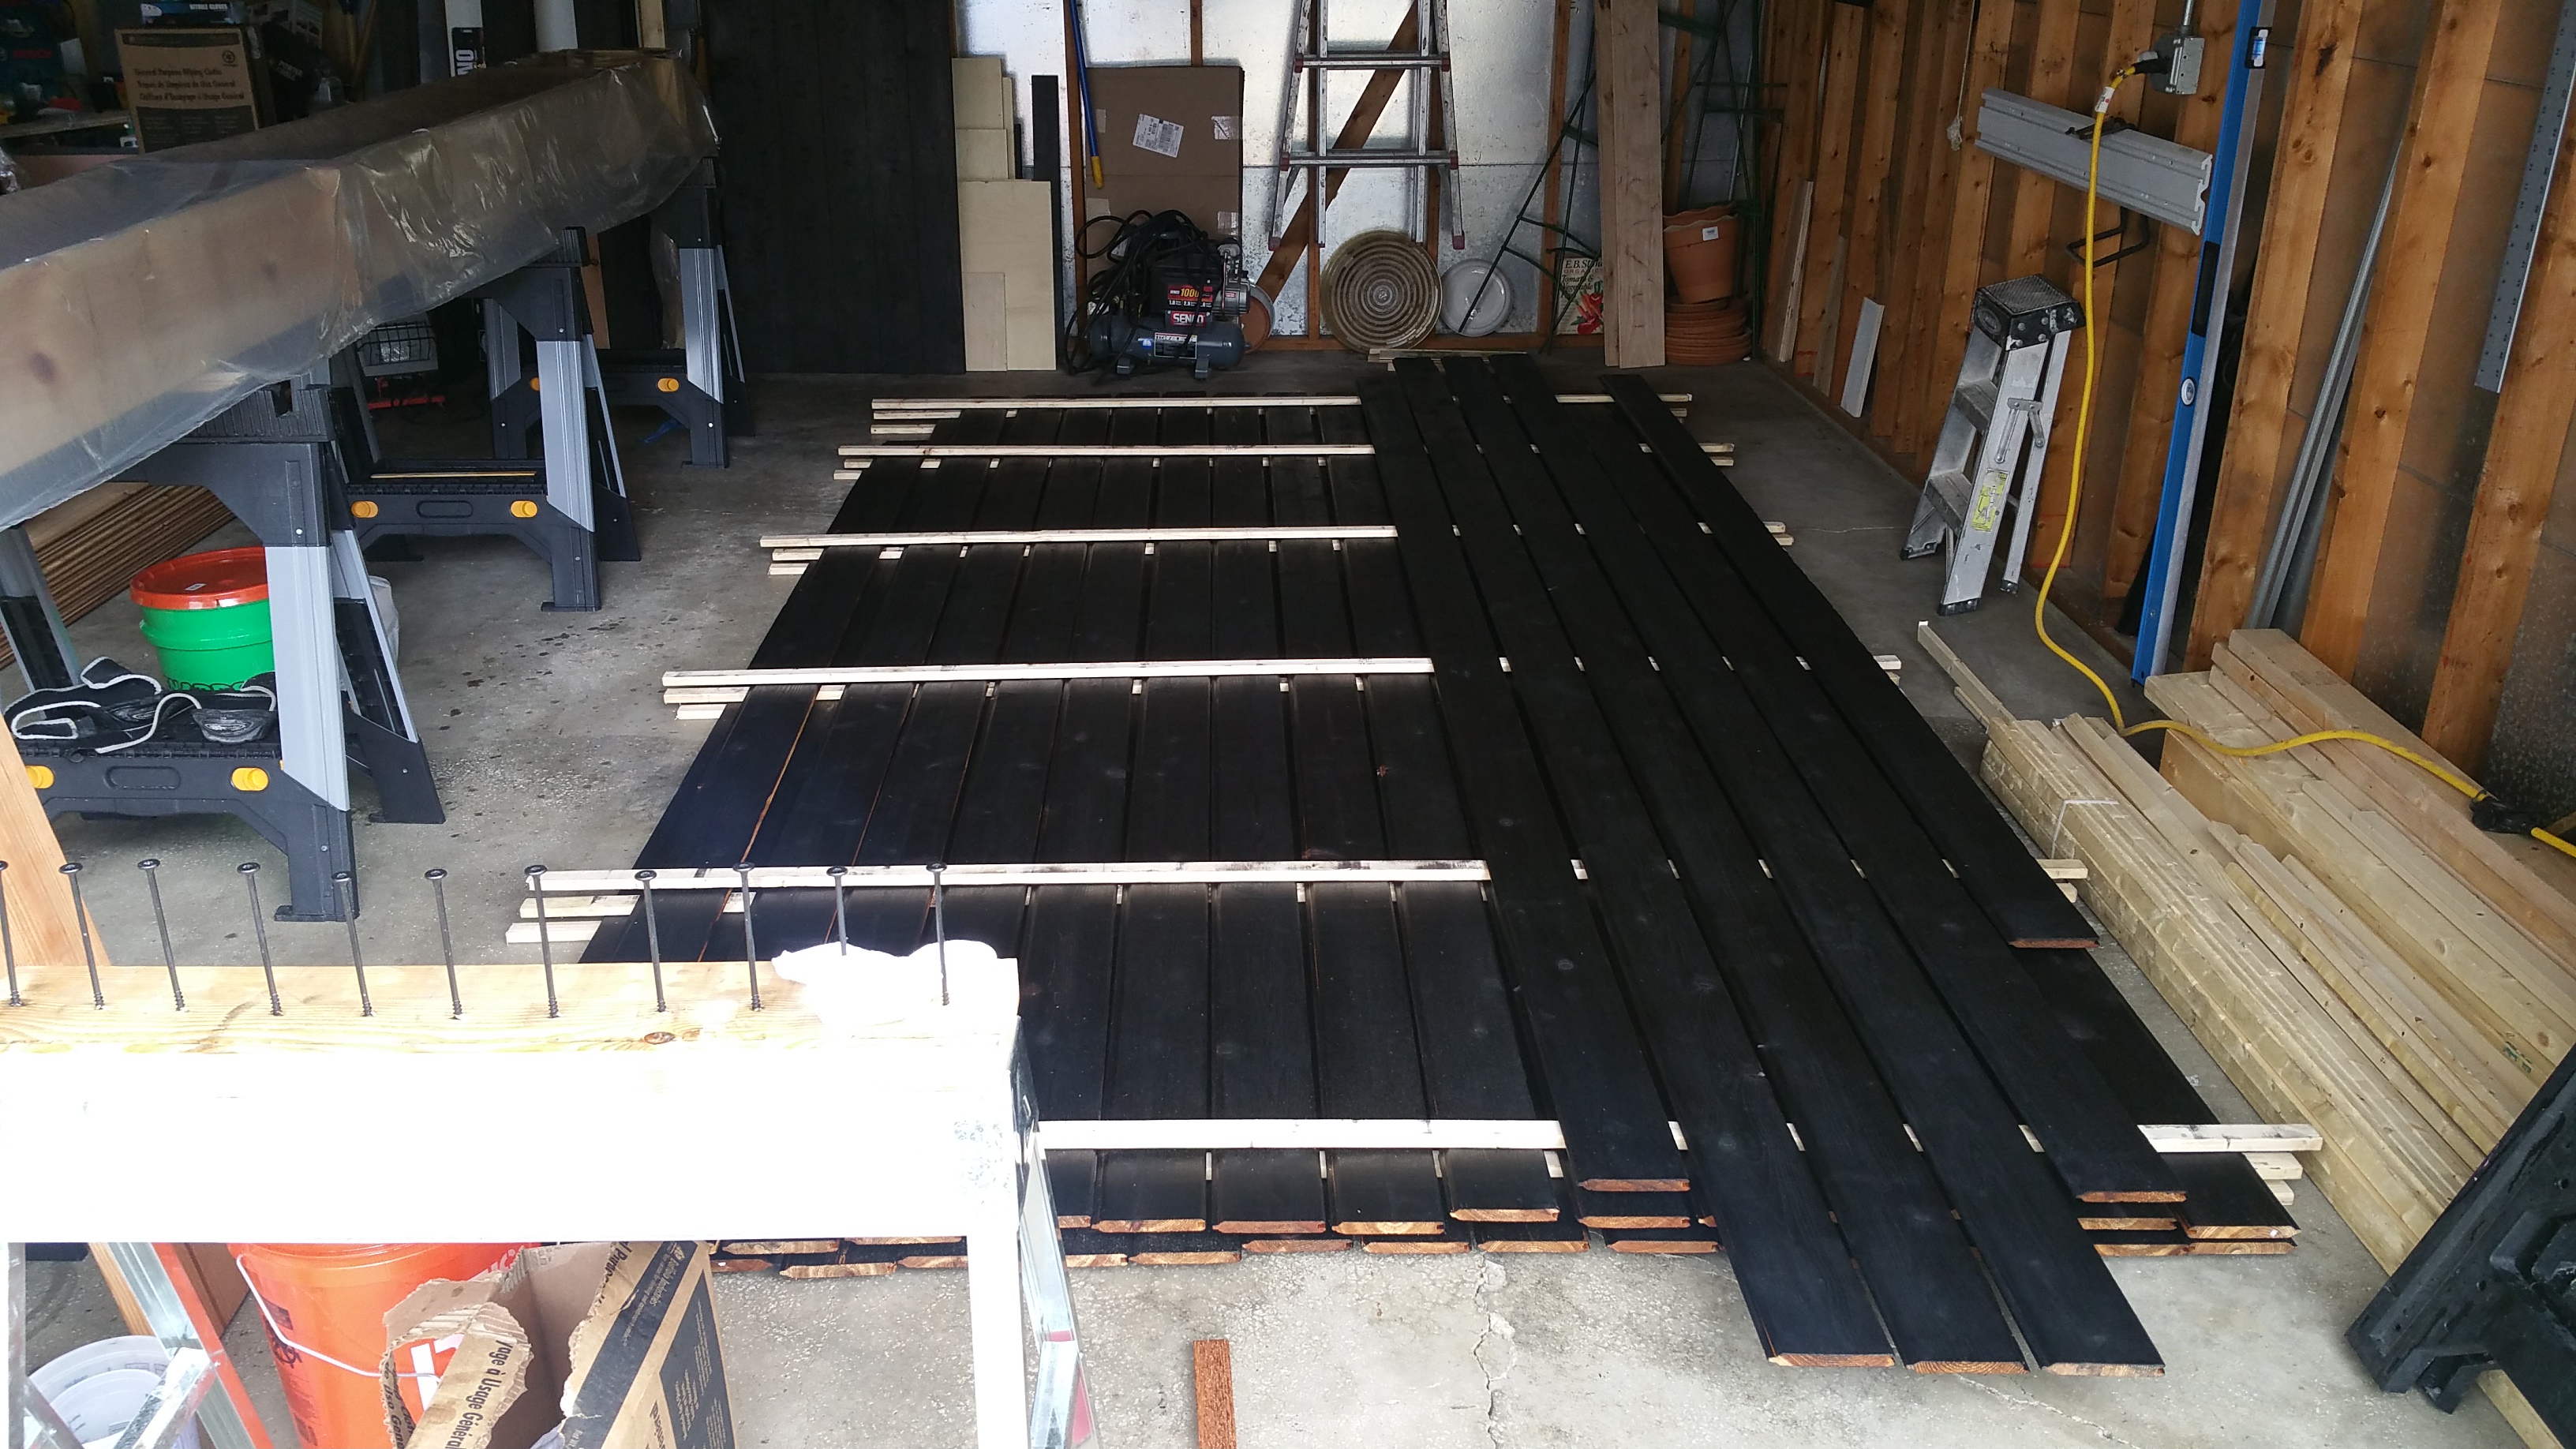
Oiled boards.Oiled boards being stacked for drying.
Depending on temperature and humidity, it takes roughly a week for the boards to be dry to the touch.
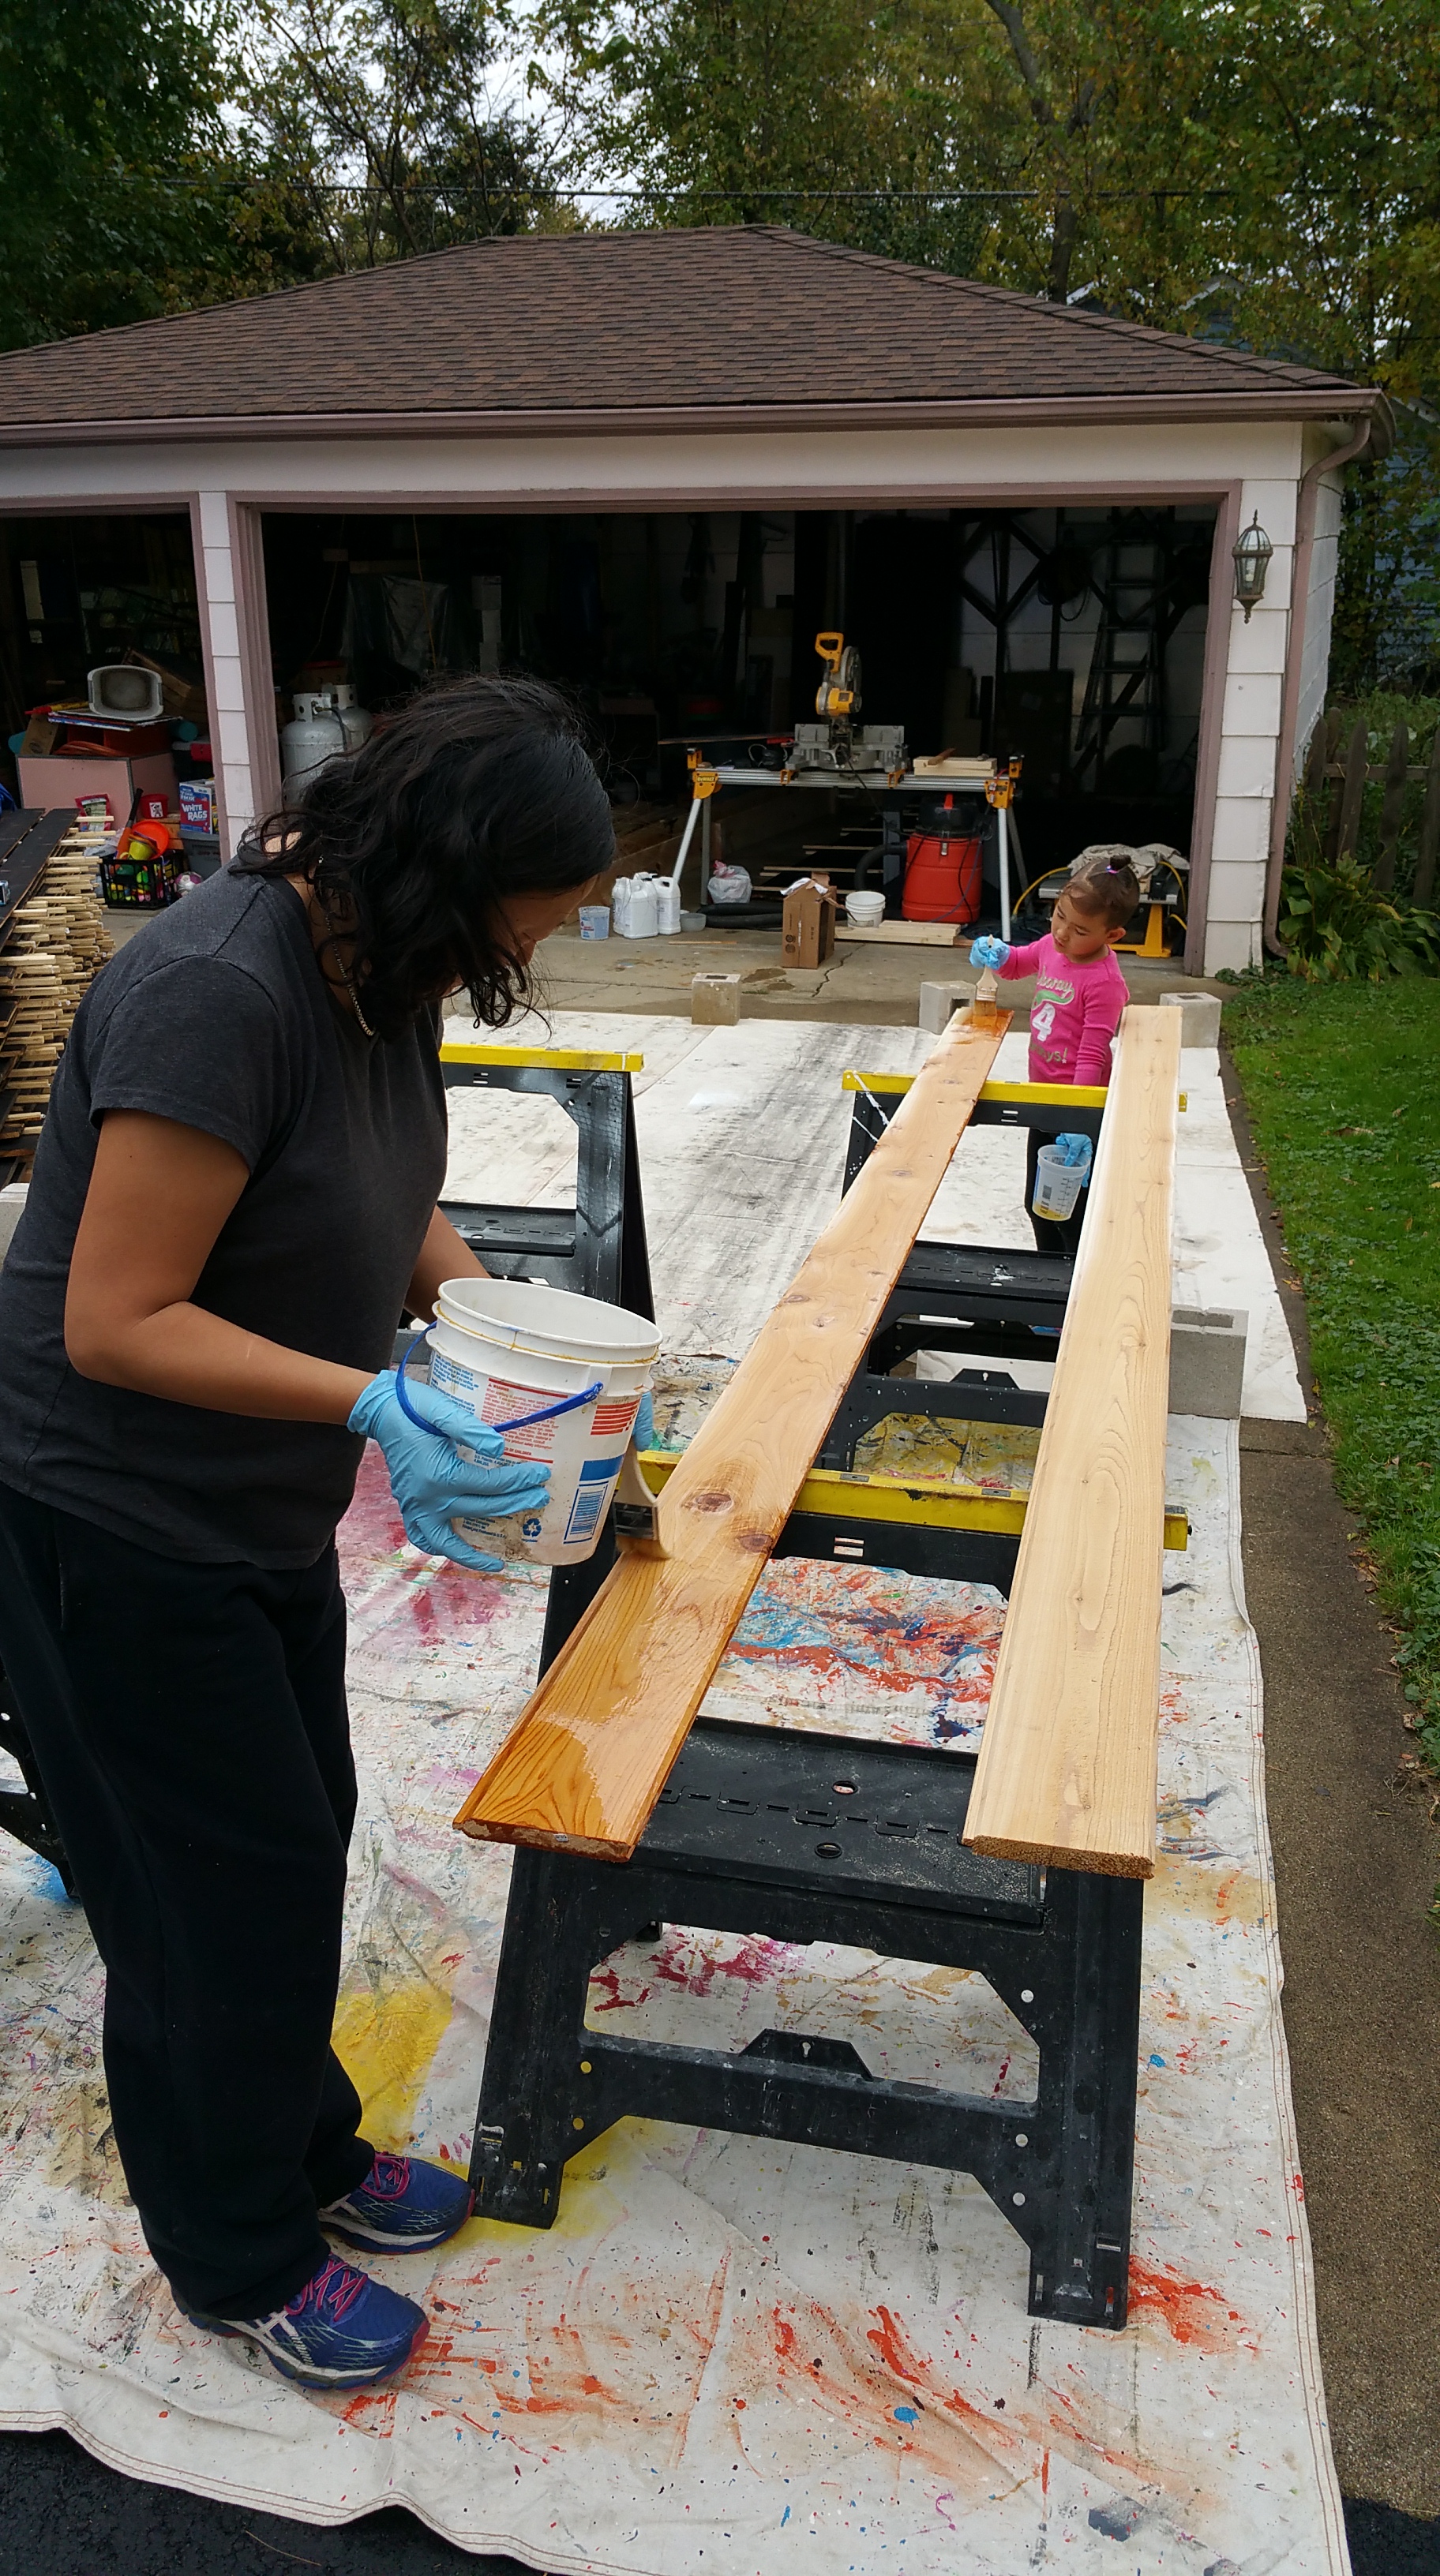
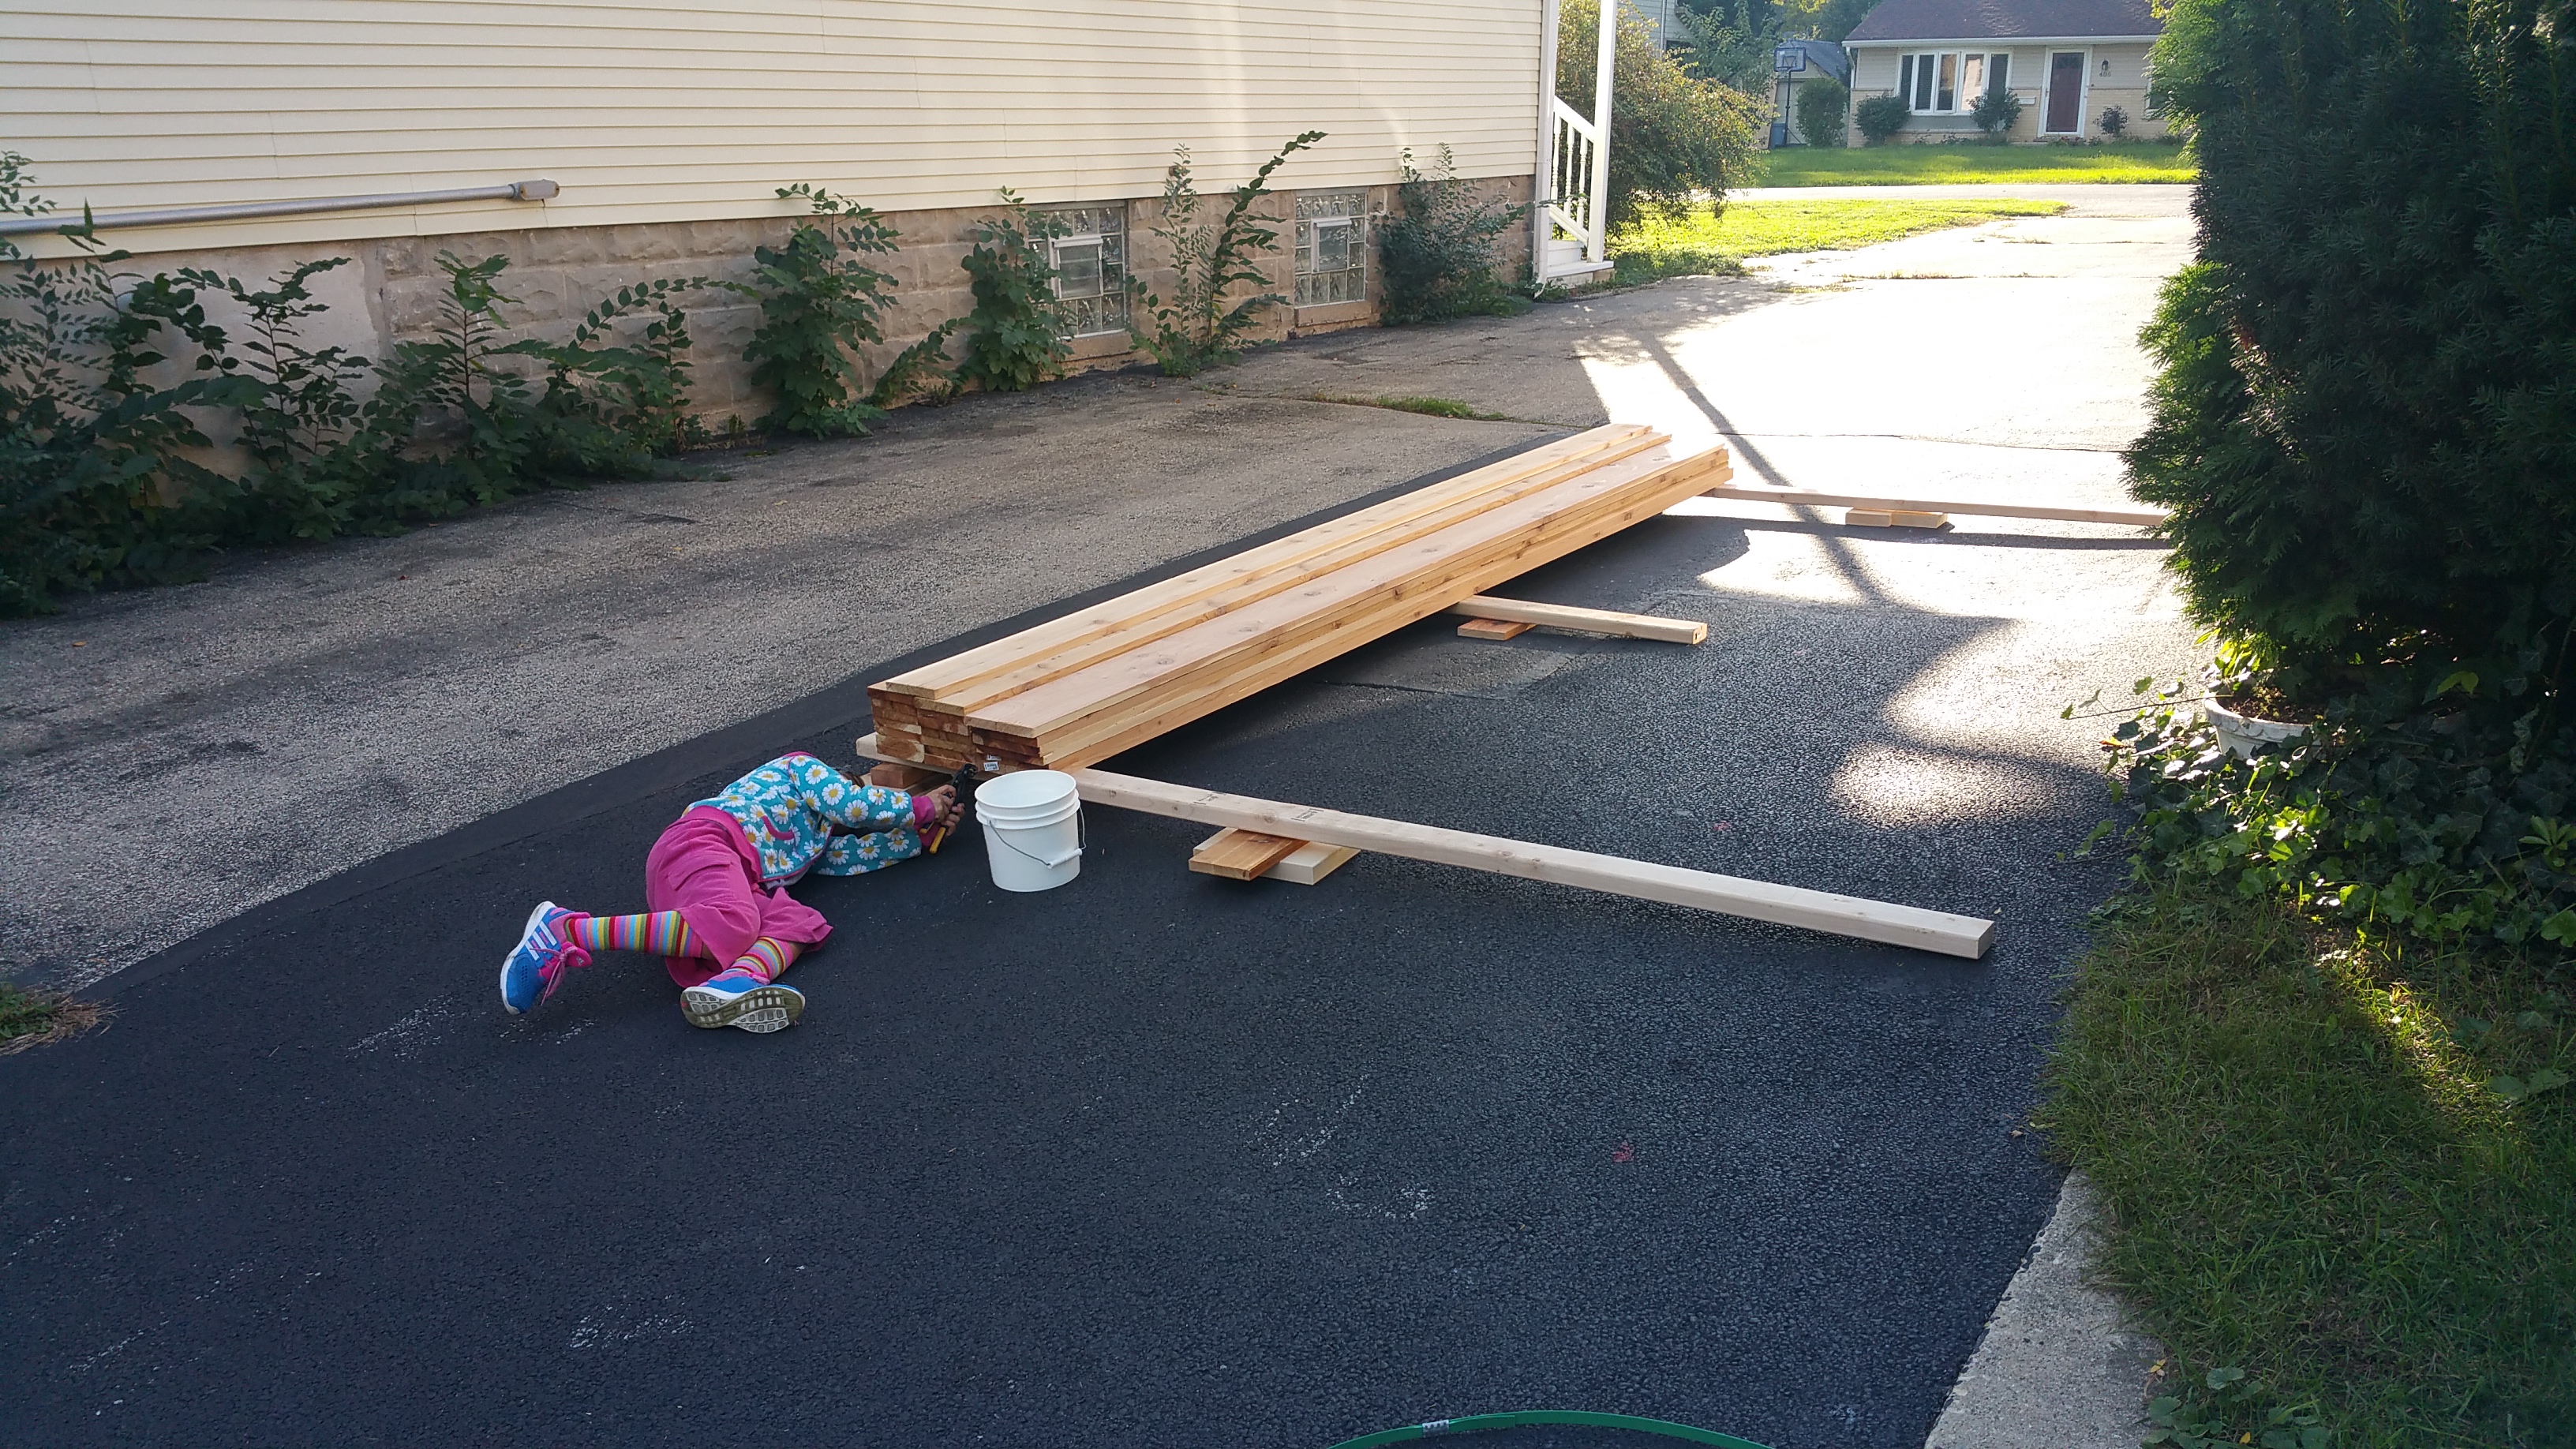
My helpers. This is the fun part: applying Tung Oil to new boards — the change in appearance is immediate and dramatic.
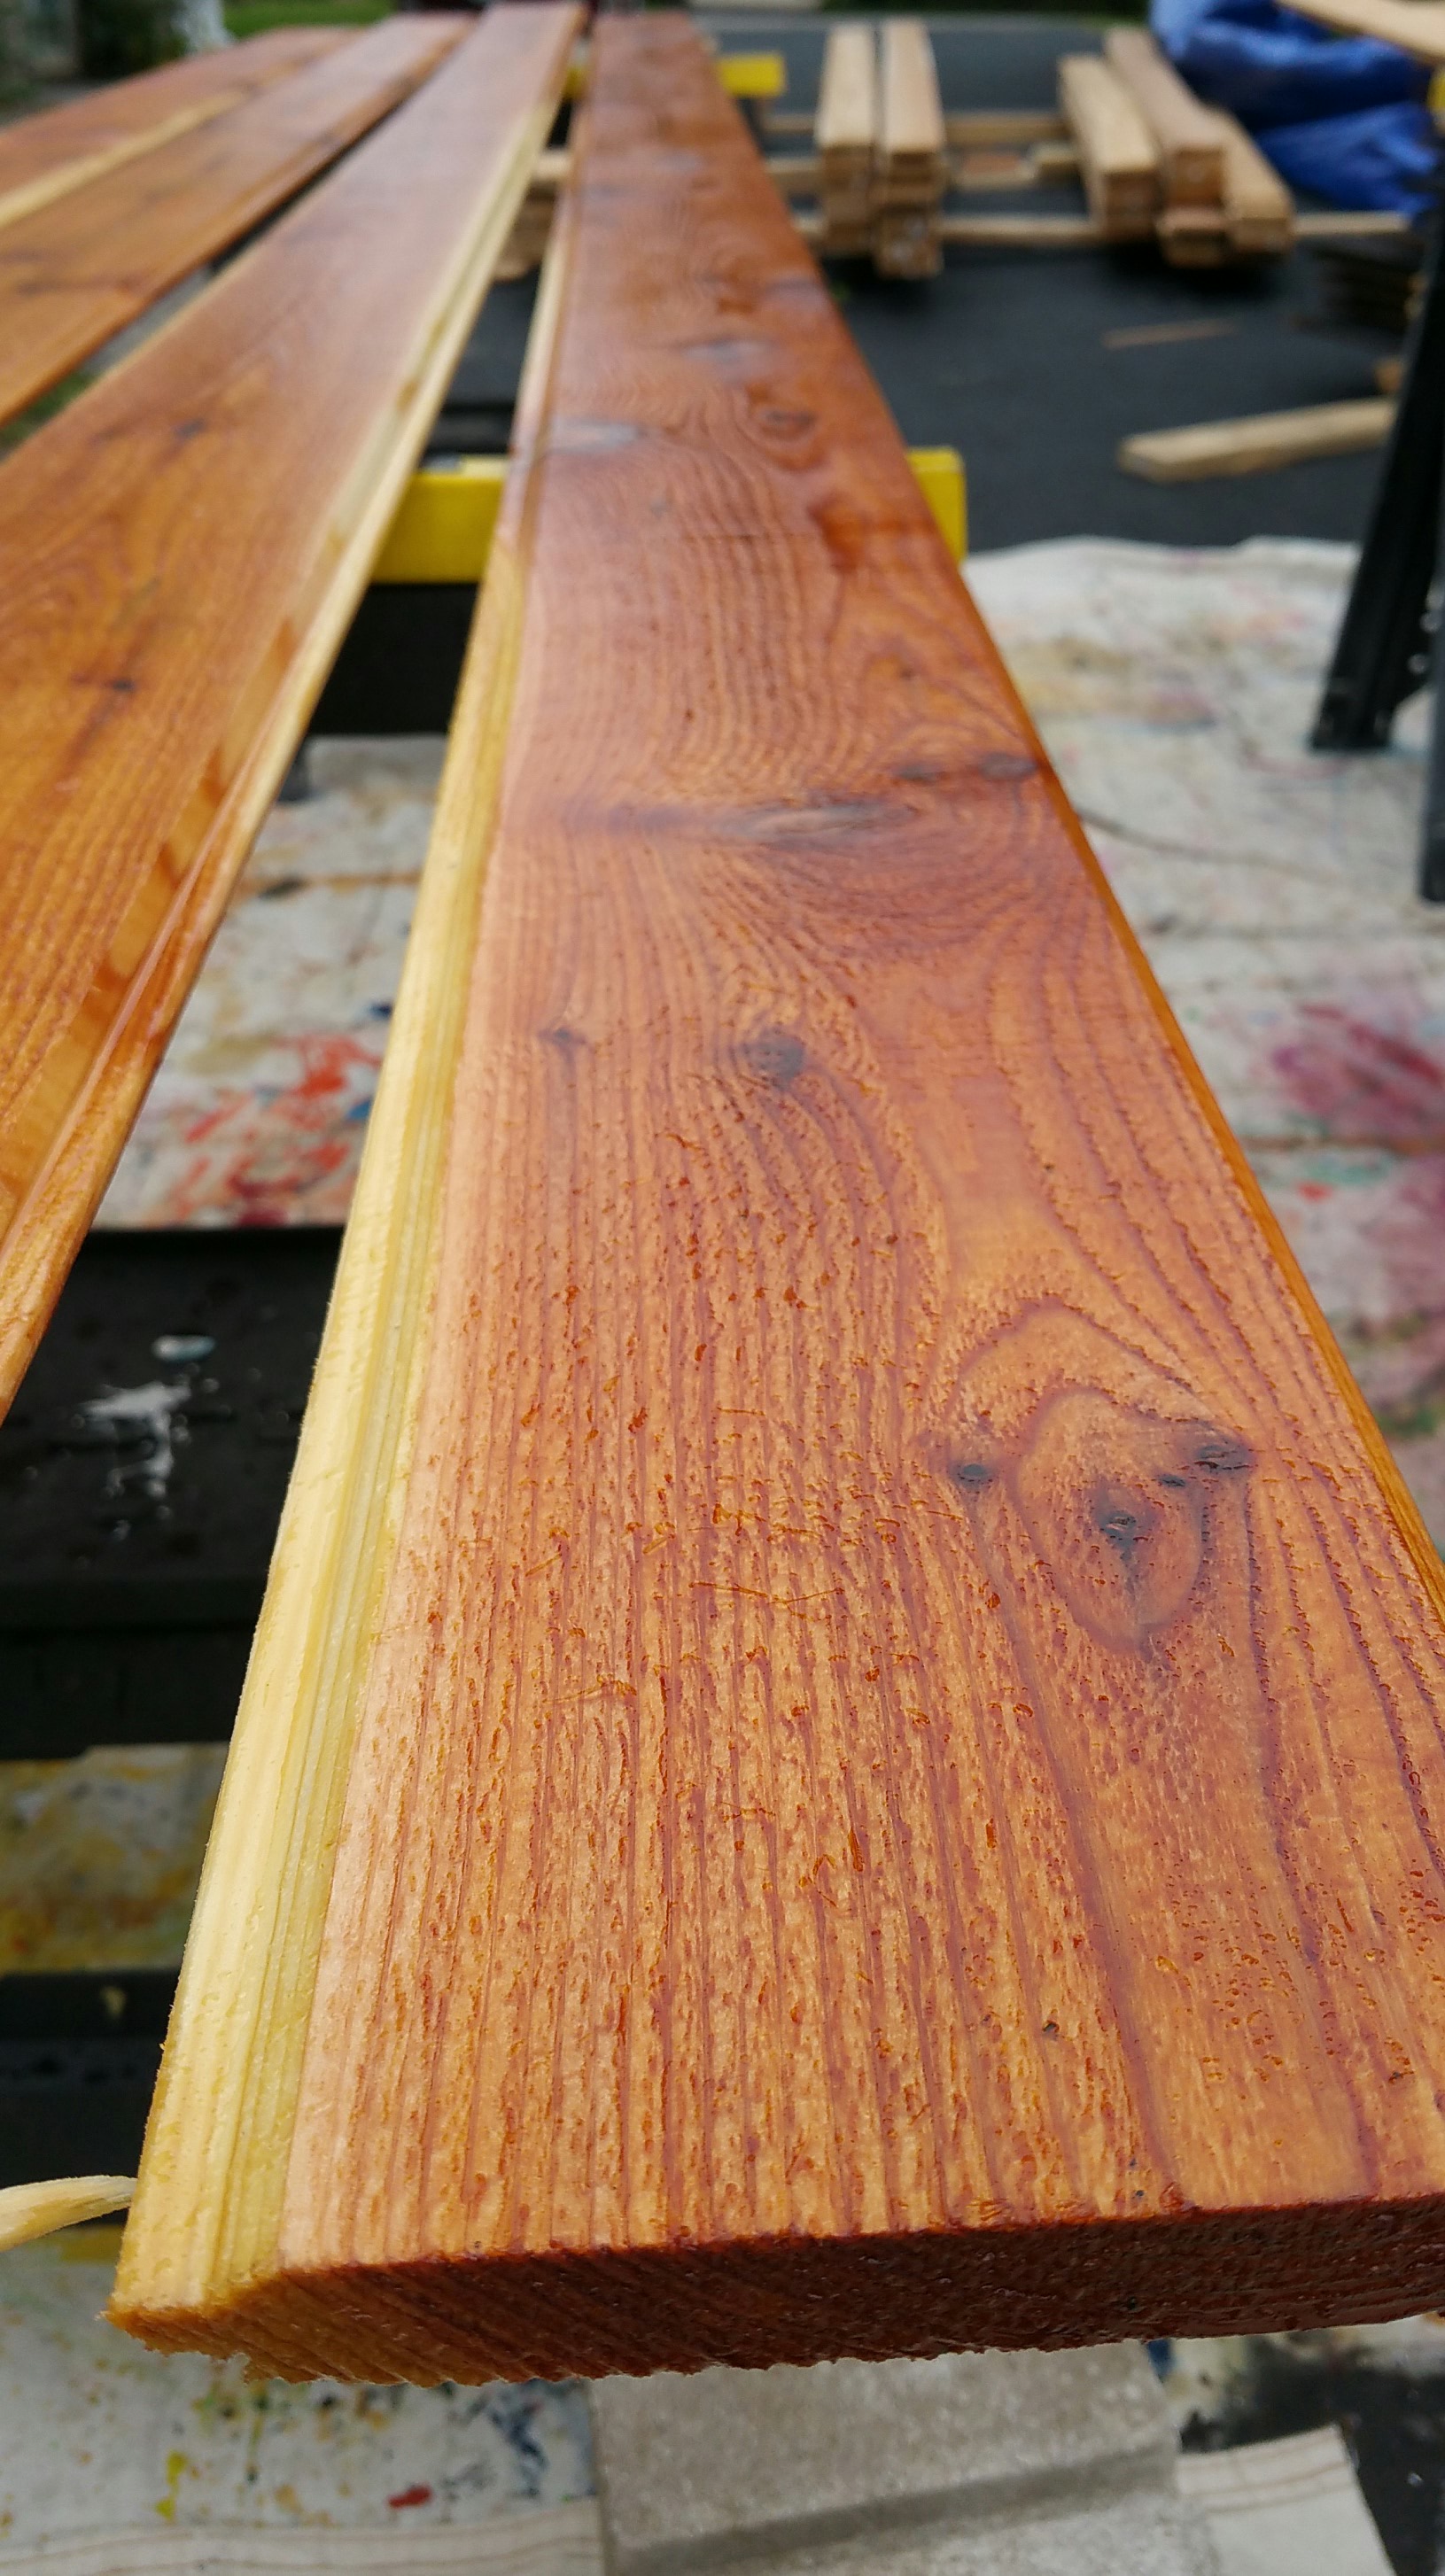
Oiled “natural” cedar, waiting to be wiped down.
Natural oiled cedar next to charred cedar. We’re going to keep some boards natural as an accent.
It’s the wiping down of each board that requires some real elbow grease – no surprise my daughter disappeared at that point in the process (can’t blame her, it’s tedious work).
As long as you have at least two people working together — pulling boards, dipping, transferring to the drying rack, and then wiping down — the process isn’t too bad. Going solo would get old very quickly. It’s even better if you have a couple of people just setting up the drying rack and wiping down while a third person pulls boards and dips.
There’s no question the process takes time and effort, but the results are unique and, we think, very beautiful.
The last bees of the season keep showing up as we oil the boards. They can’t resist the citrus solvent. It’s always sad to see them go at this time of the year.
September, 2019 Update: To see how the charred cedar turned out on the house, go here:
For our siding we’re using an old Japanese technique for preserving wood called Shou Sugi Ban(aka: charred cedar — although any number of species of wood could work).
Charring a 1×6 piece of cedar. This will likely end up as either a piece of window or door trim.
You can check out a series of helpful DIY videos here:
There’s some flexibility in exactly how it’s done, and there are various looks that can be achieved. For example, we’re going for mostly a “gator” finish, meaning the cedar will have an alligator skin-like appearance. This is considered a heavy burn.
An alternative way of doing it would be to “gator” it first with fire, then scrape the excess char off, leaving behind a smoother, lighter, but still charred and protected finish (see video below).
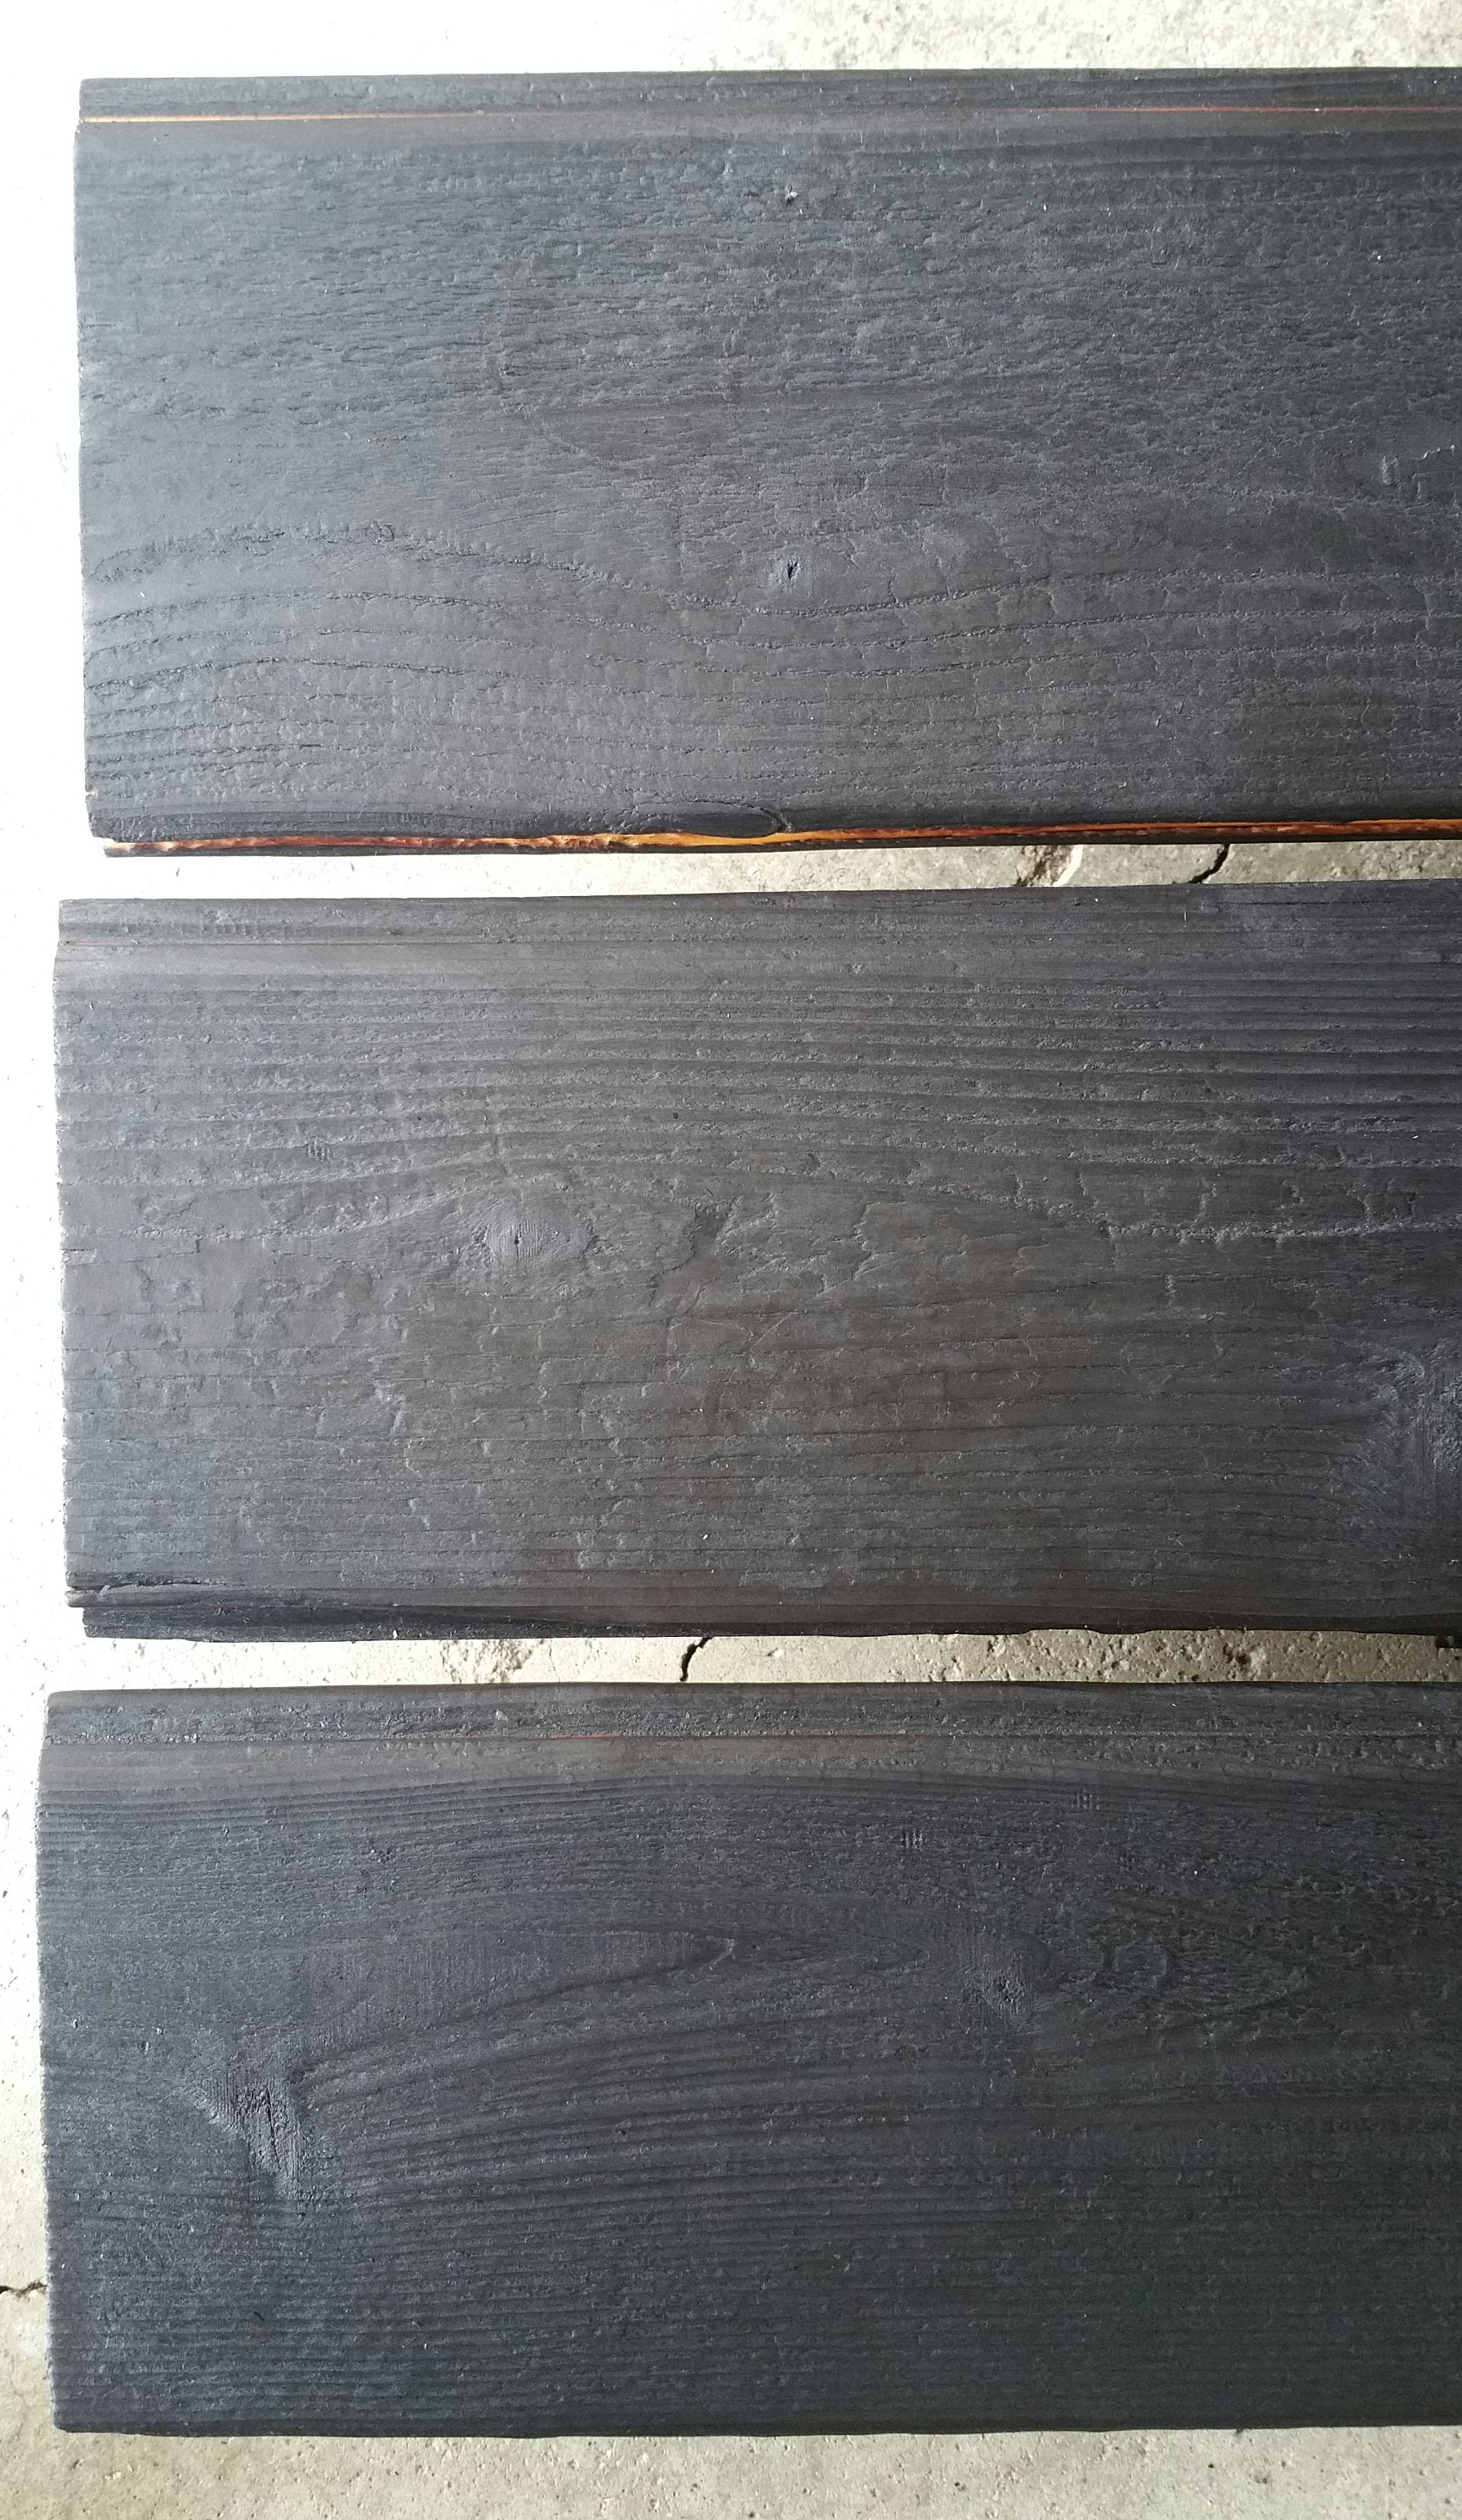
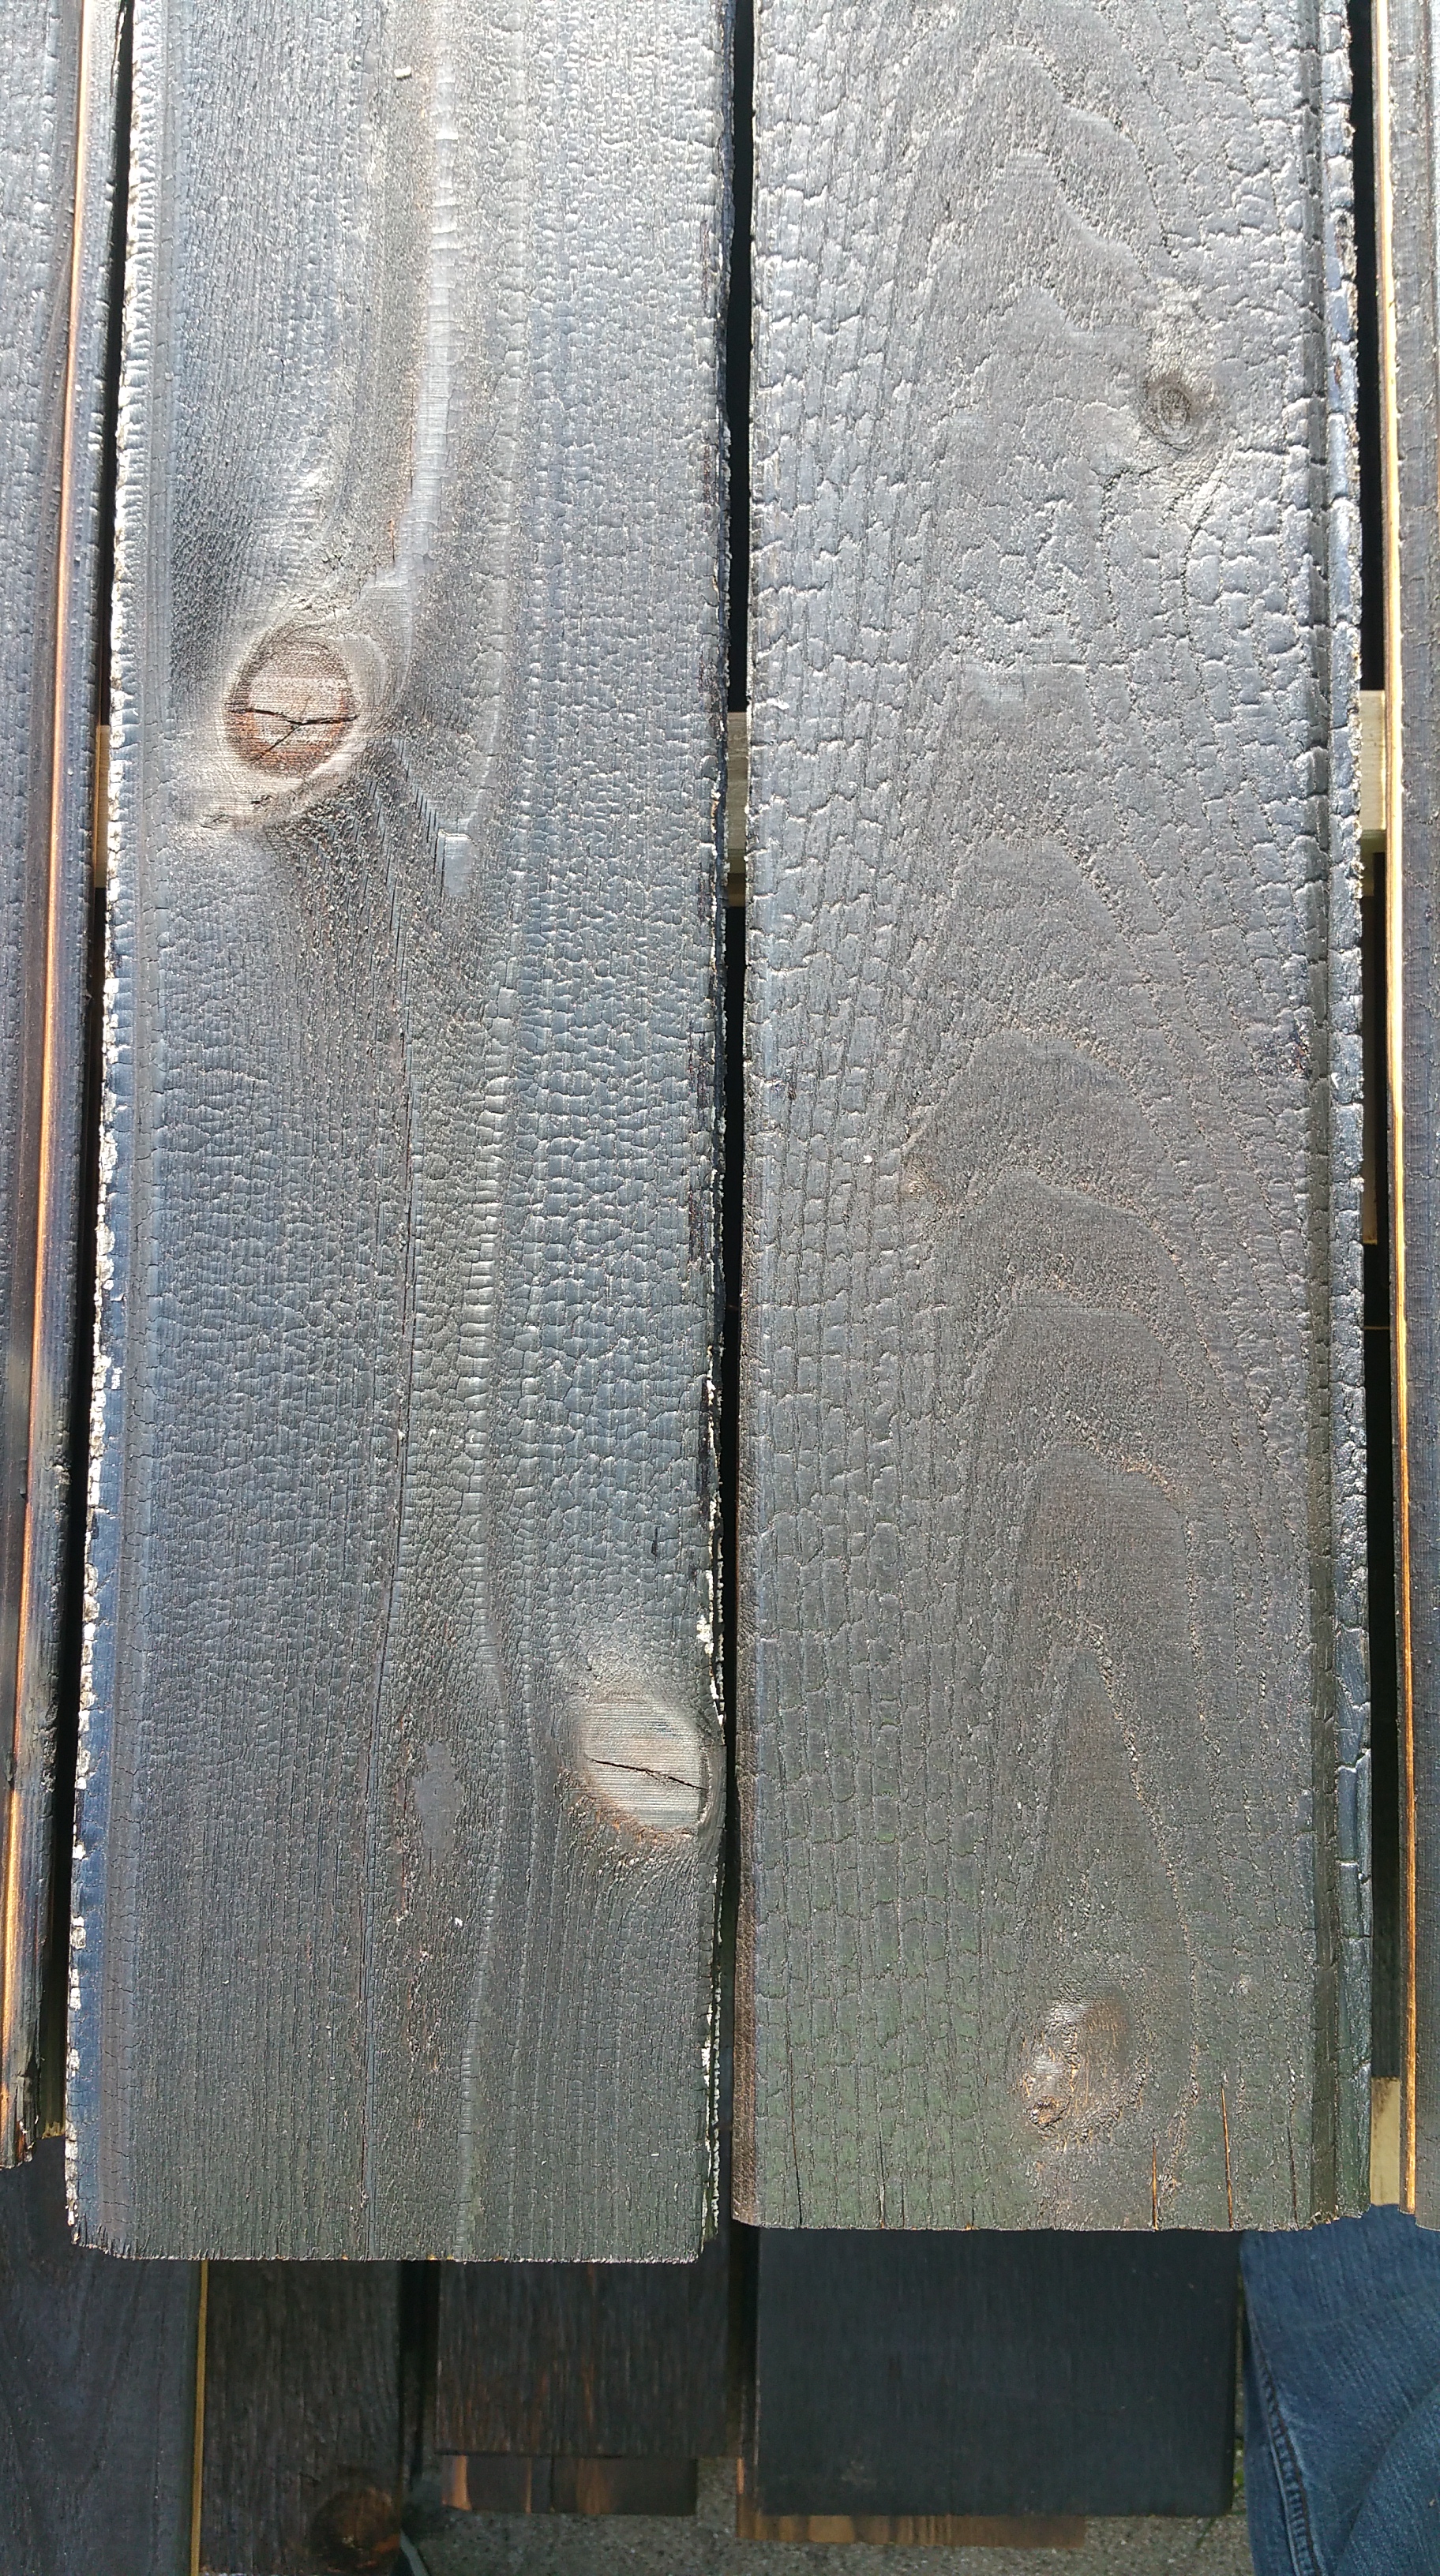
Here are a few pictures that highlight the difference:
2 boards on the left: gator finish / 3 boards on the right: brushed finish.
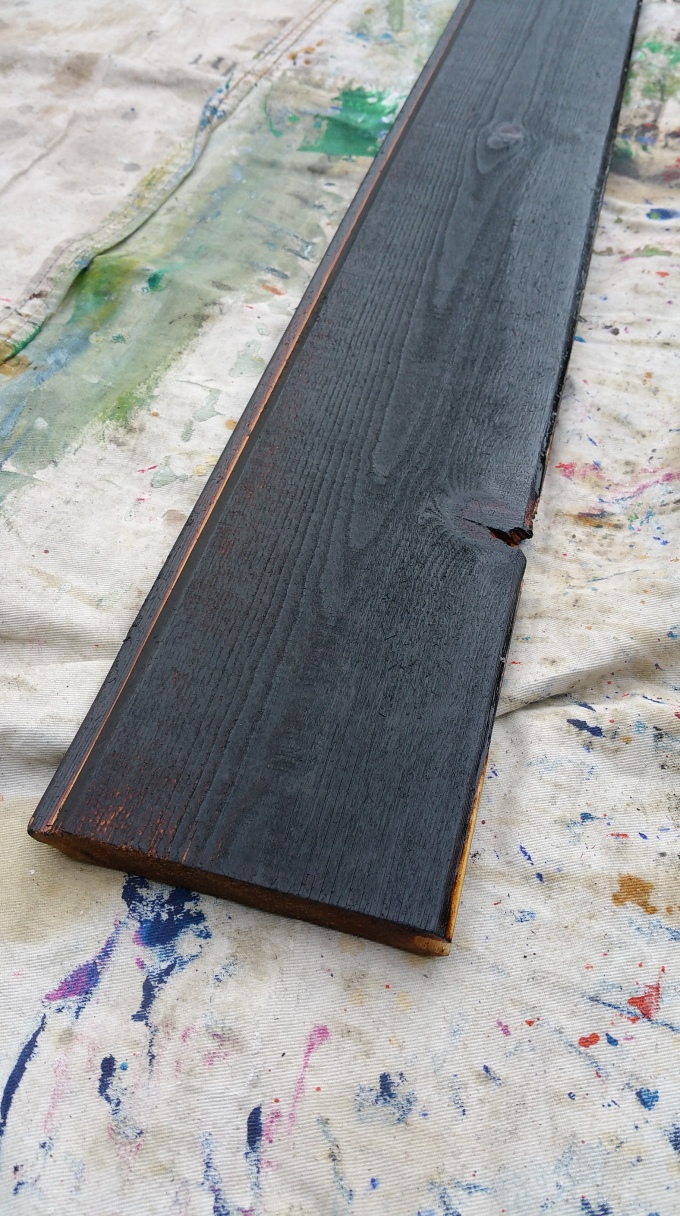
Once the charred wood has been oiled (whether it’s with a gator finish or a brushed finish), it will look something like this:
Scrap board showing gator and brushed finish after oiling.
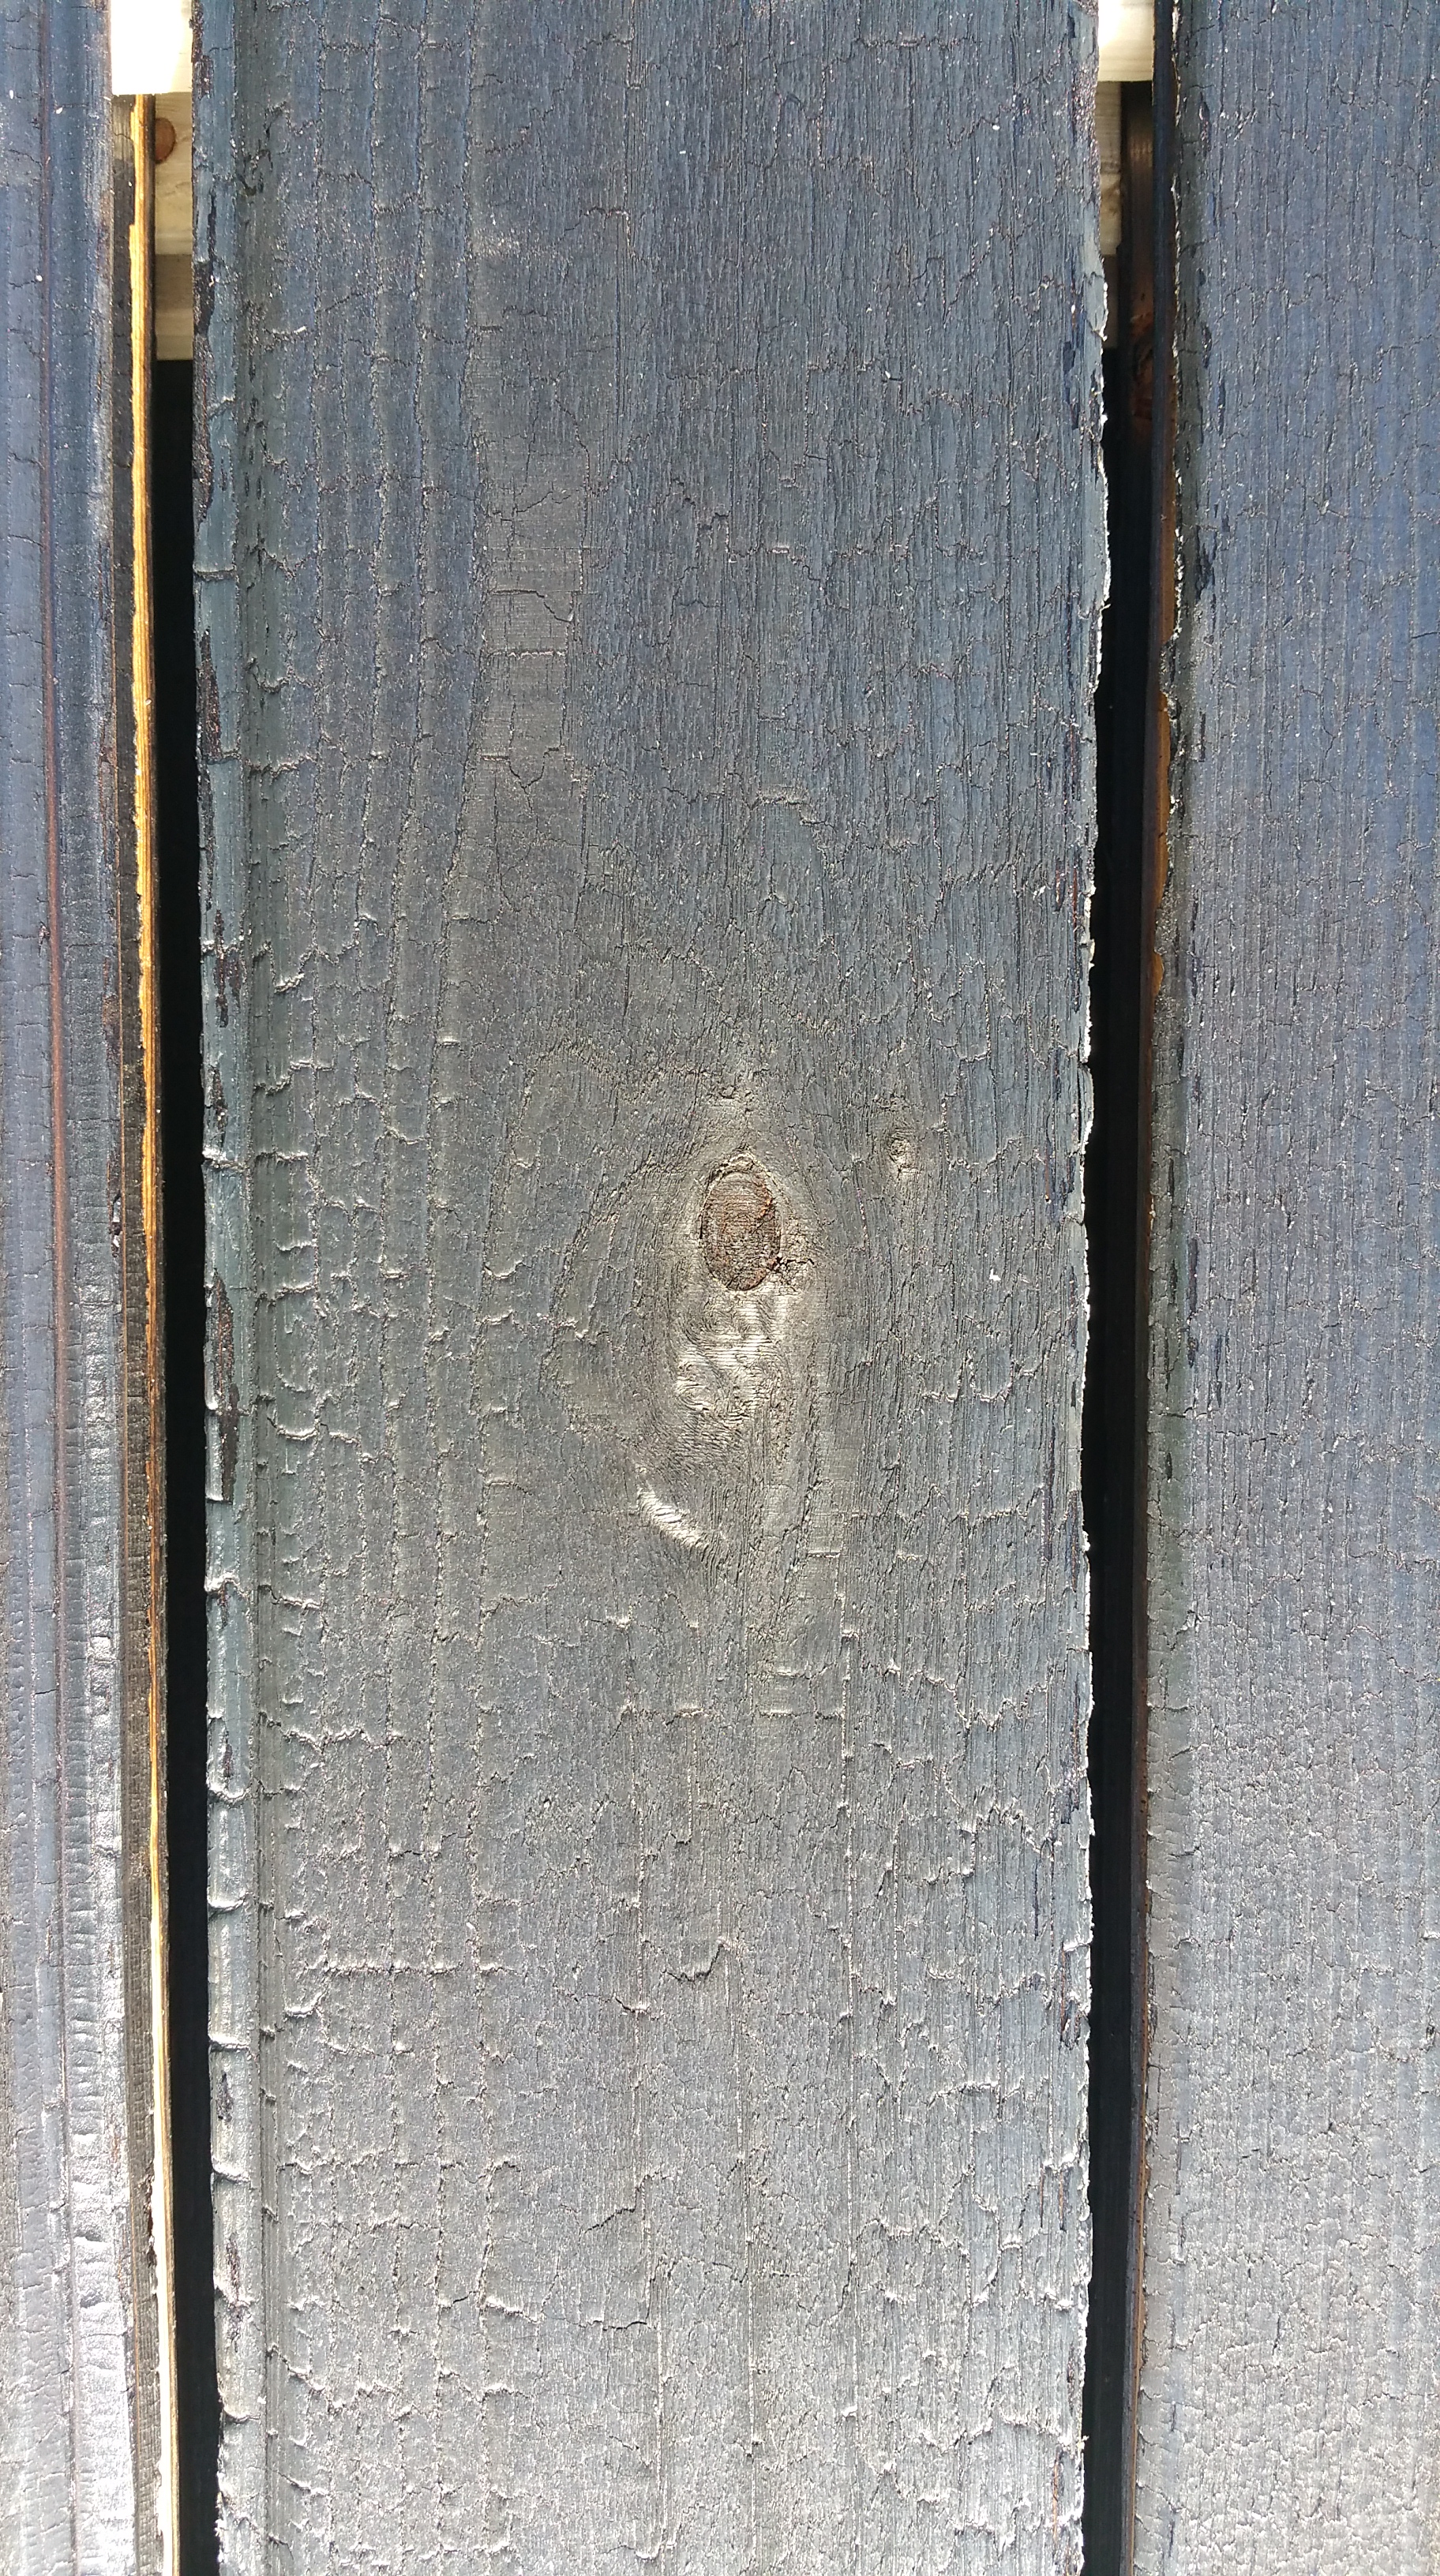
Close-up of gator finish after oiling.
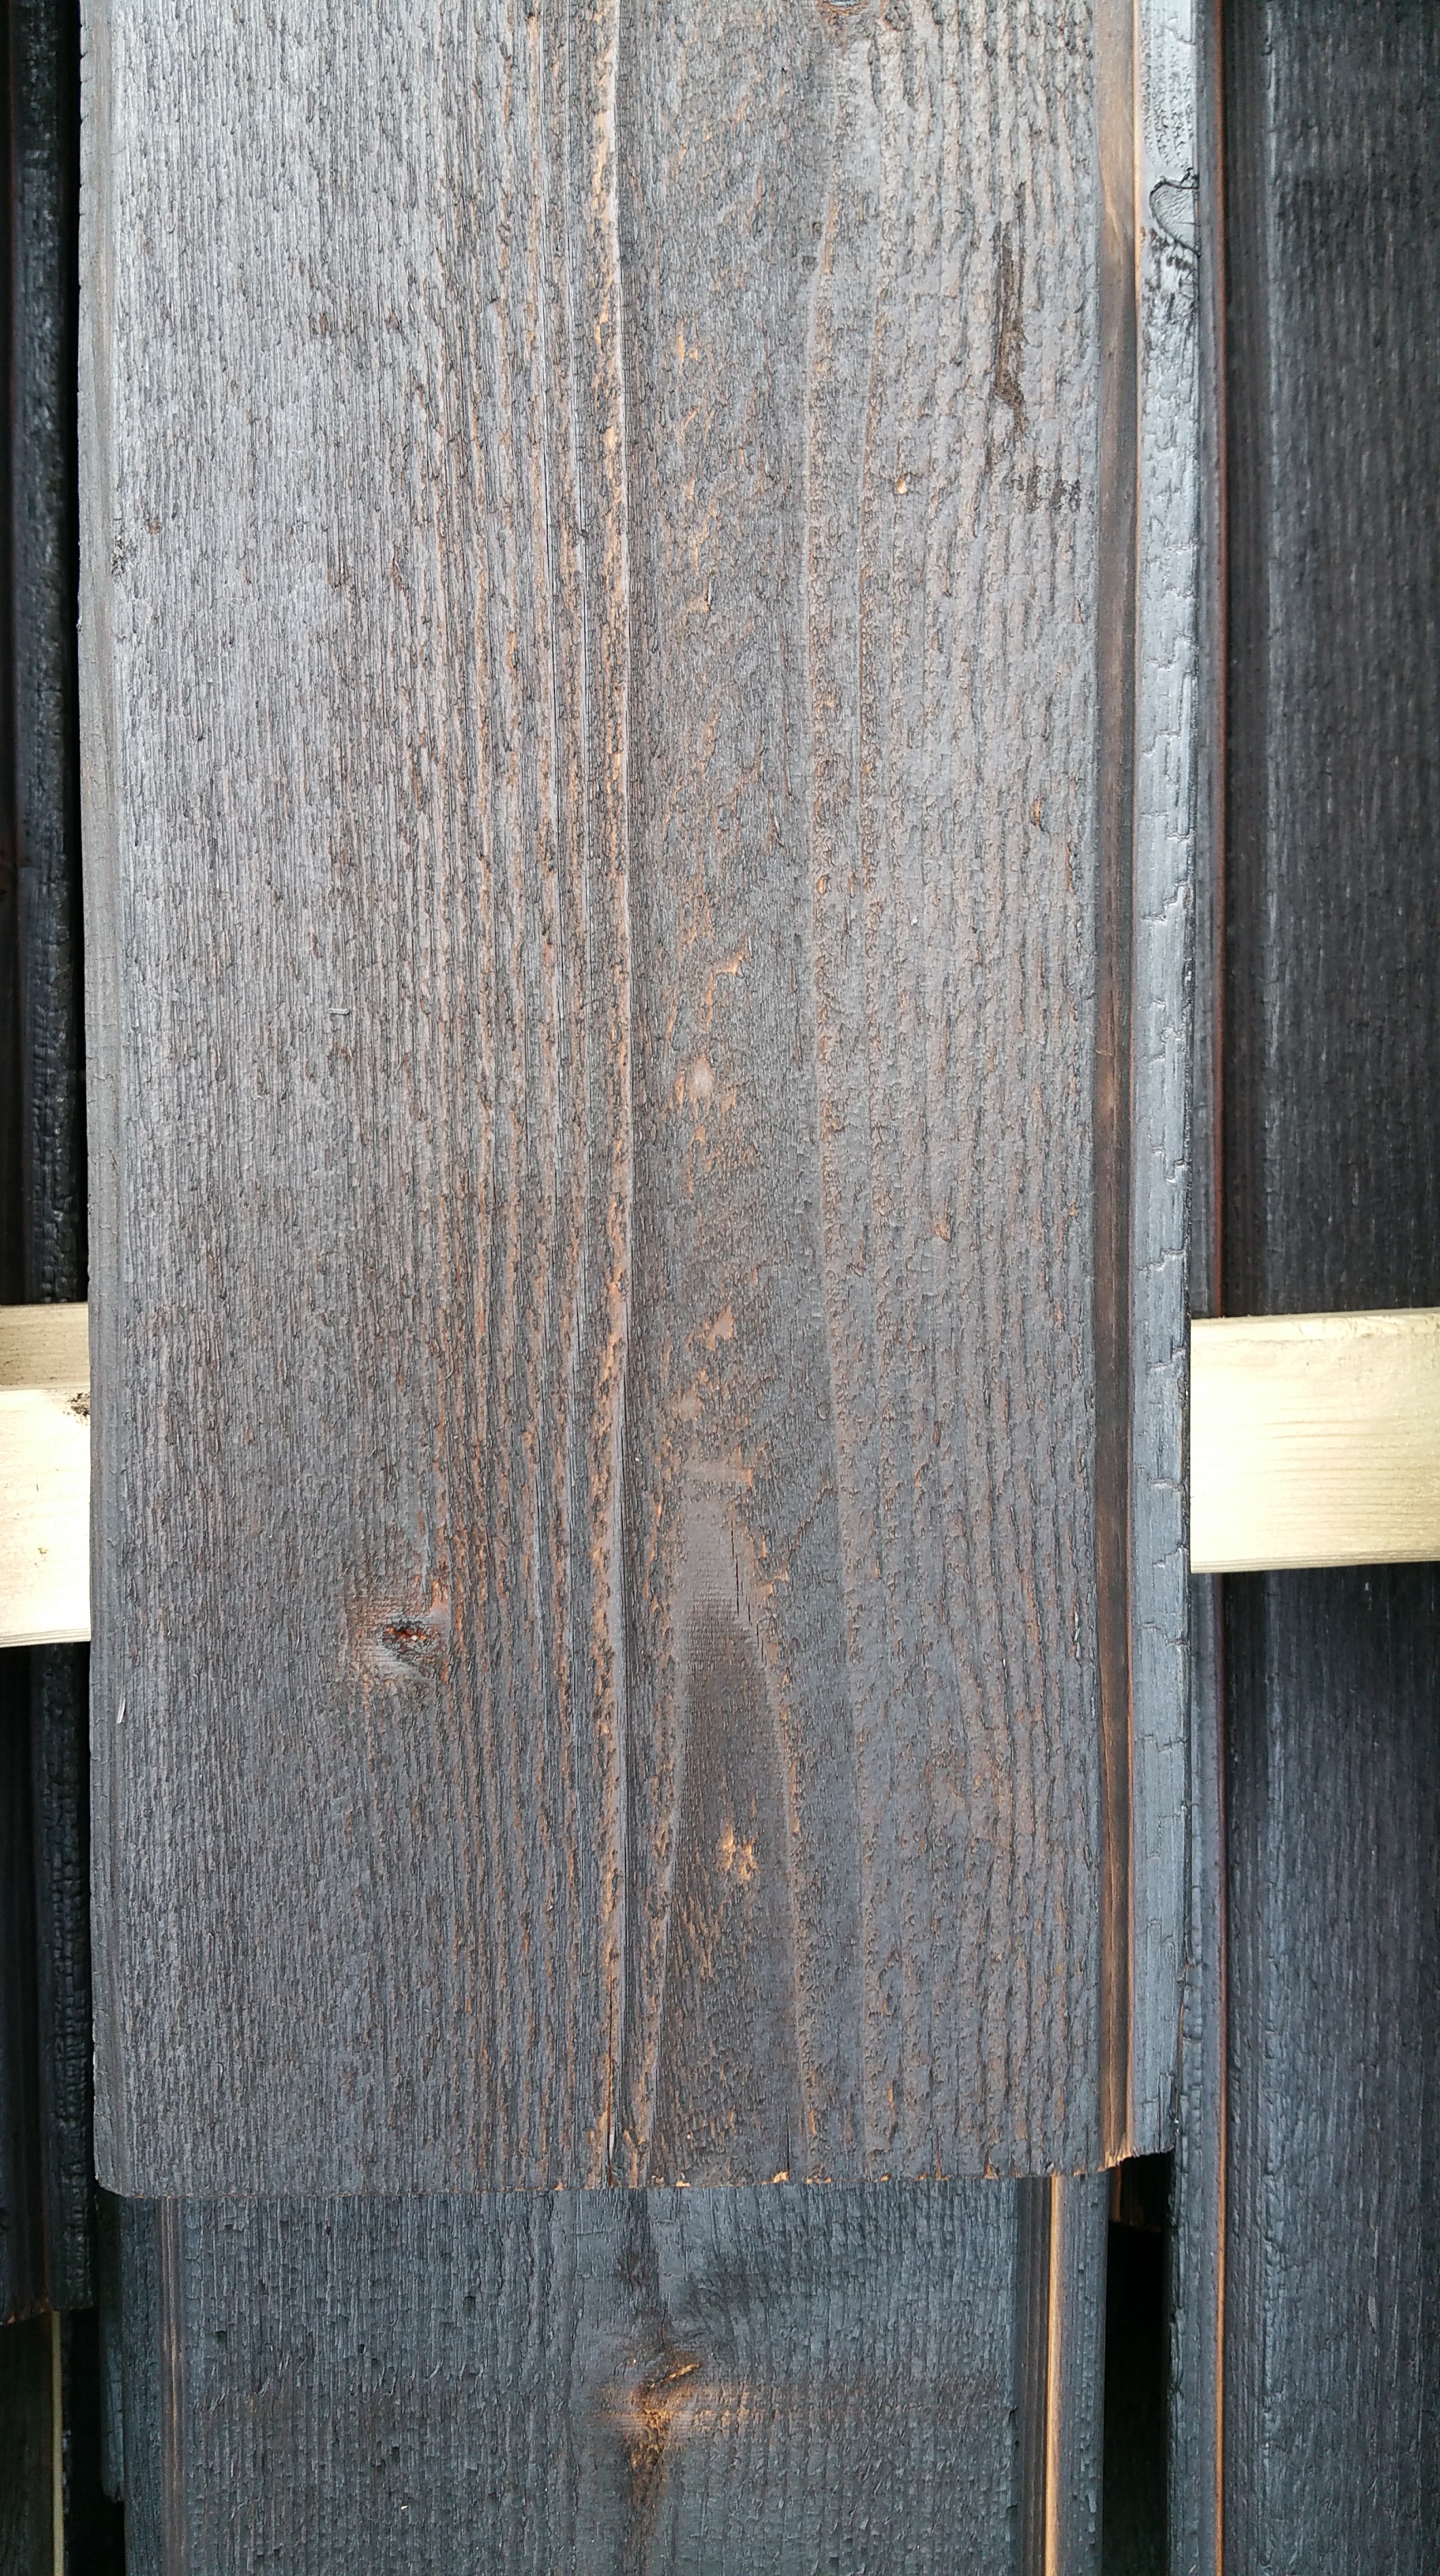
Close-up of brushed finish after oiling (cloudy day). In sunlight, the red tones of the cedar become more pronounced.
There are companies in the US that are exploring the limits of what can be done with shou sugi ban, including the use of various species of wood, a range of options in the level of char, and potential areas for its installation:
The beginnings of our stack, using 1×2’s to give the wood support and plenty of space for air circulation (this becomes more important after we apply the oil finish).
Either way, the char doesn’t go very deep into the wood, and it doesn’t have to in order to be effective — either for looks or durability.
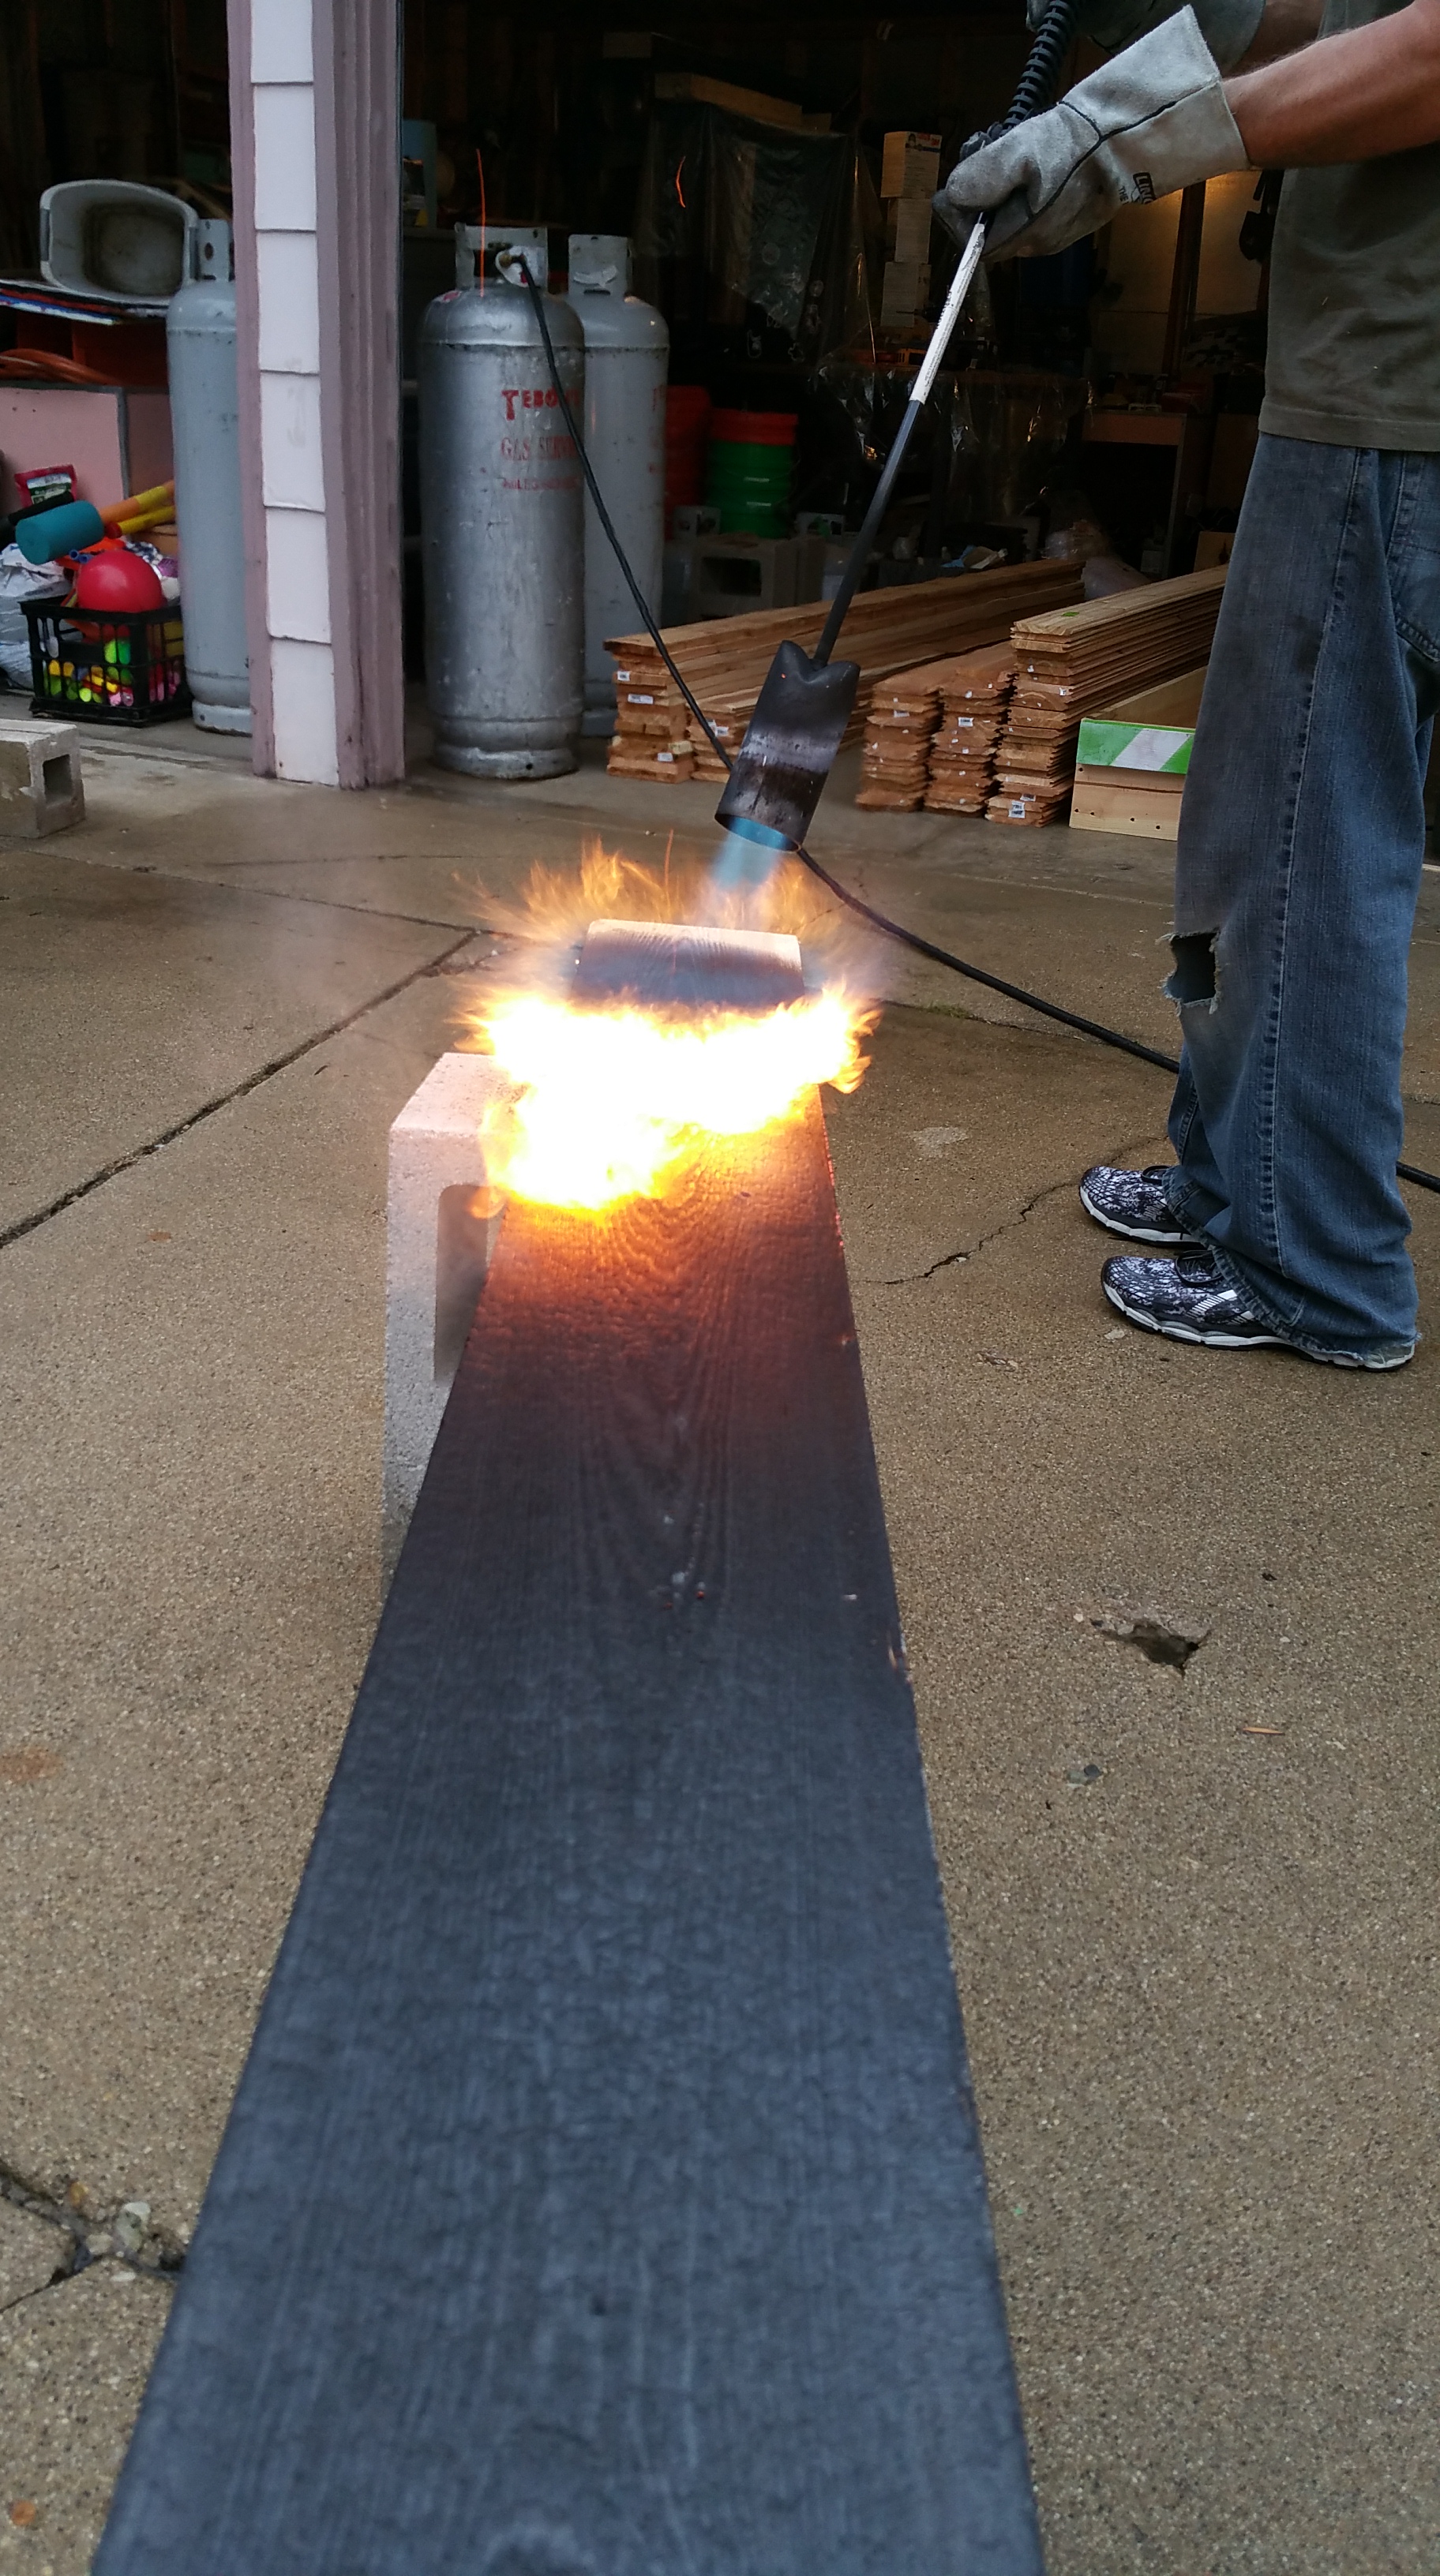
For instance, once the wood has been charred, it will be fire resistant. The charred surface actually protects the wood from further burning. I had to see this to believe it, but if you char a piece and then hold the torch in one spot it really does resist burning (you can eventually reduce the wood to ash, but it takes a surprisingly long time).
The charred wood will also be unappetizing to insects or rodents, and once covered in its attractive black armor, the surface can face decades of sun and rain (80-100 years is the usual claim for its longevity) with little or no maintenance, apart from an occasional fresh coat of oil (every 15 years or so?).
Our wall assembly will utilize a fairly substantial rain screen, meaning there will be significant air movement behind the siding, so one could argue it should be unnecessary to char the back of each piece, but we’ve chosen to do so for the added peace of mind (and not a really significant amount of additional time — and the charring is fun to do anyway).
For cut ends and mitered joints, we will use tung oil to help seal these areas (similar to painted wood siding that gets a swipe of oil based primer in these same spots just before installation).
Most of the siding will be 1×6 tongue and groove. The remaining 1x material will be for areas of trim.
Once charred, the wood can immediately be installed, or, as we’ve chosen to do, you can oil it first. After experimenting a little back in 2015, applying an oil finish seems to bind the char to the wood better than leaving it just “as is” (regardless if the level of char is light or heavy).
Also, if you don’t oil, then the surface remains like a charcoal briquet, so any time it’s touched some of the char will rub off — just imagine the reaction of friends or family the first time someone leans against the siding, or if you have kids running around and they touch the char. It could be a real mess.
In addition, if you choose not to oil, then every time the charred wood is cut during installation black dust will go flying (whoever does the installation will not be pleased when their hands, bodies, and lungs are covered in a layer of fine soot — picture a 19th century Welsh coal miner).
So for durability, looks, and ease of installation, we’ve decided to take the extra step of oiling each piece as well (more about this process later).
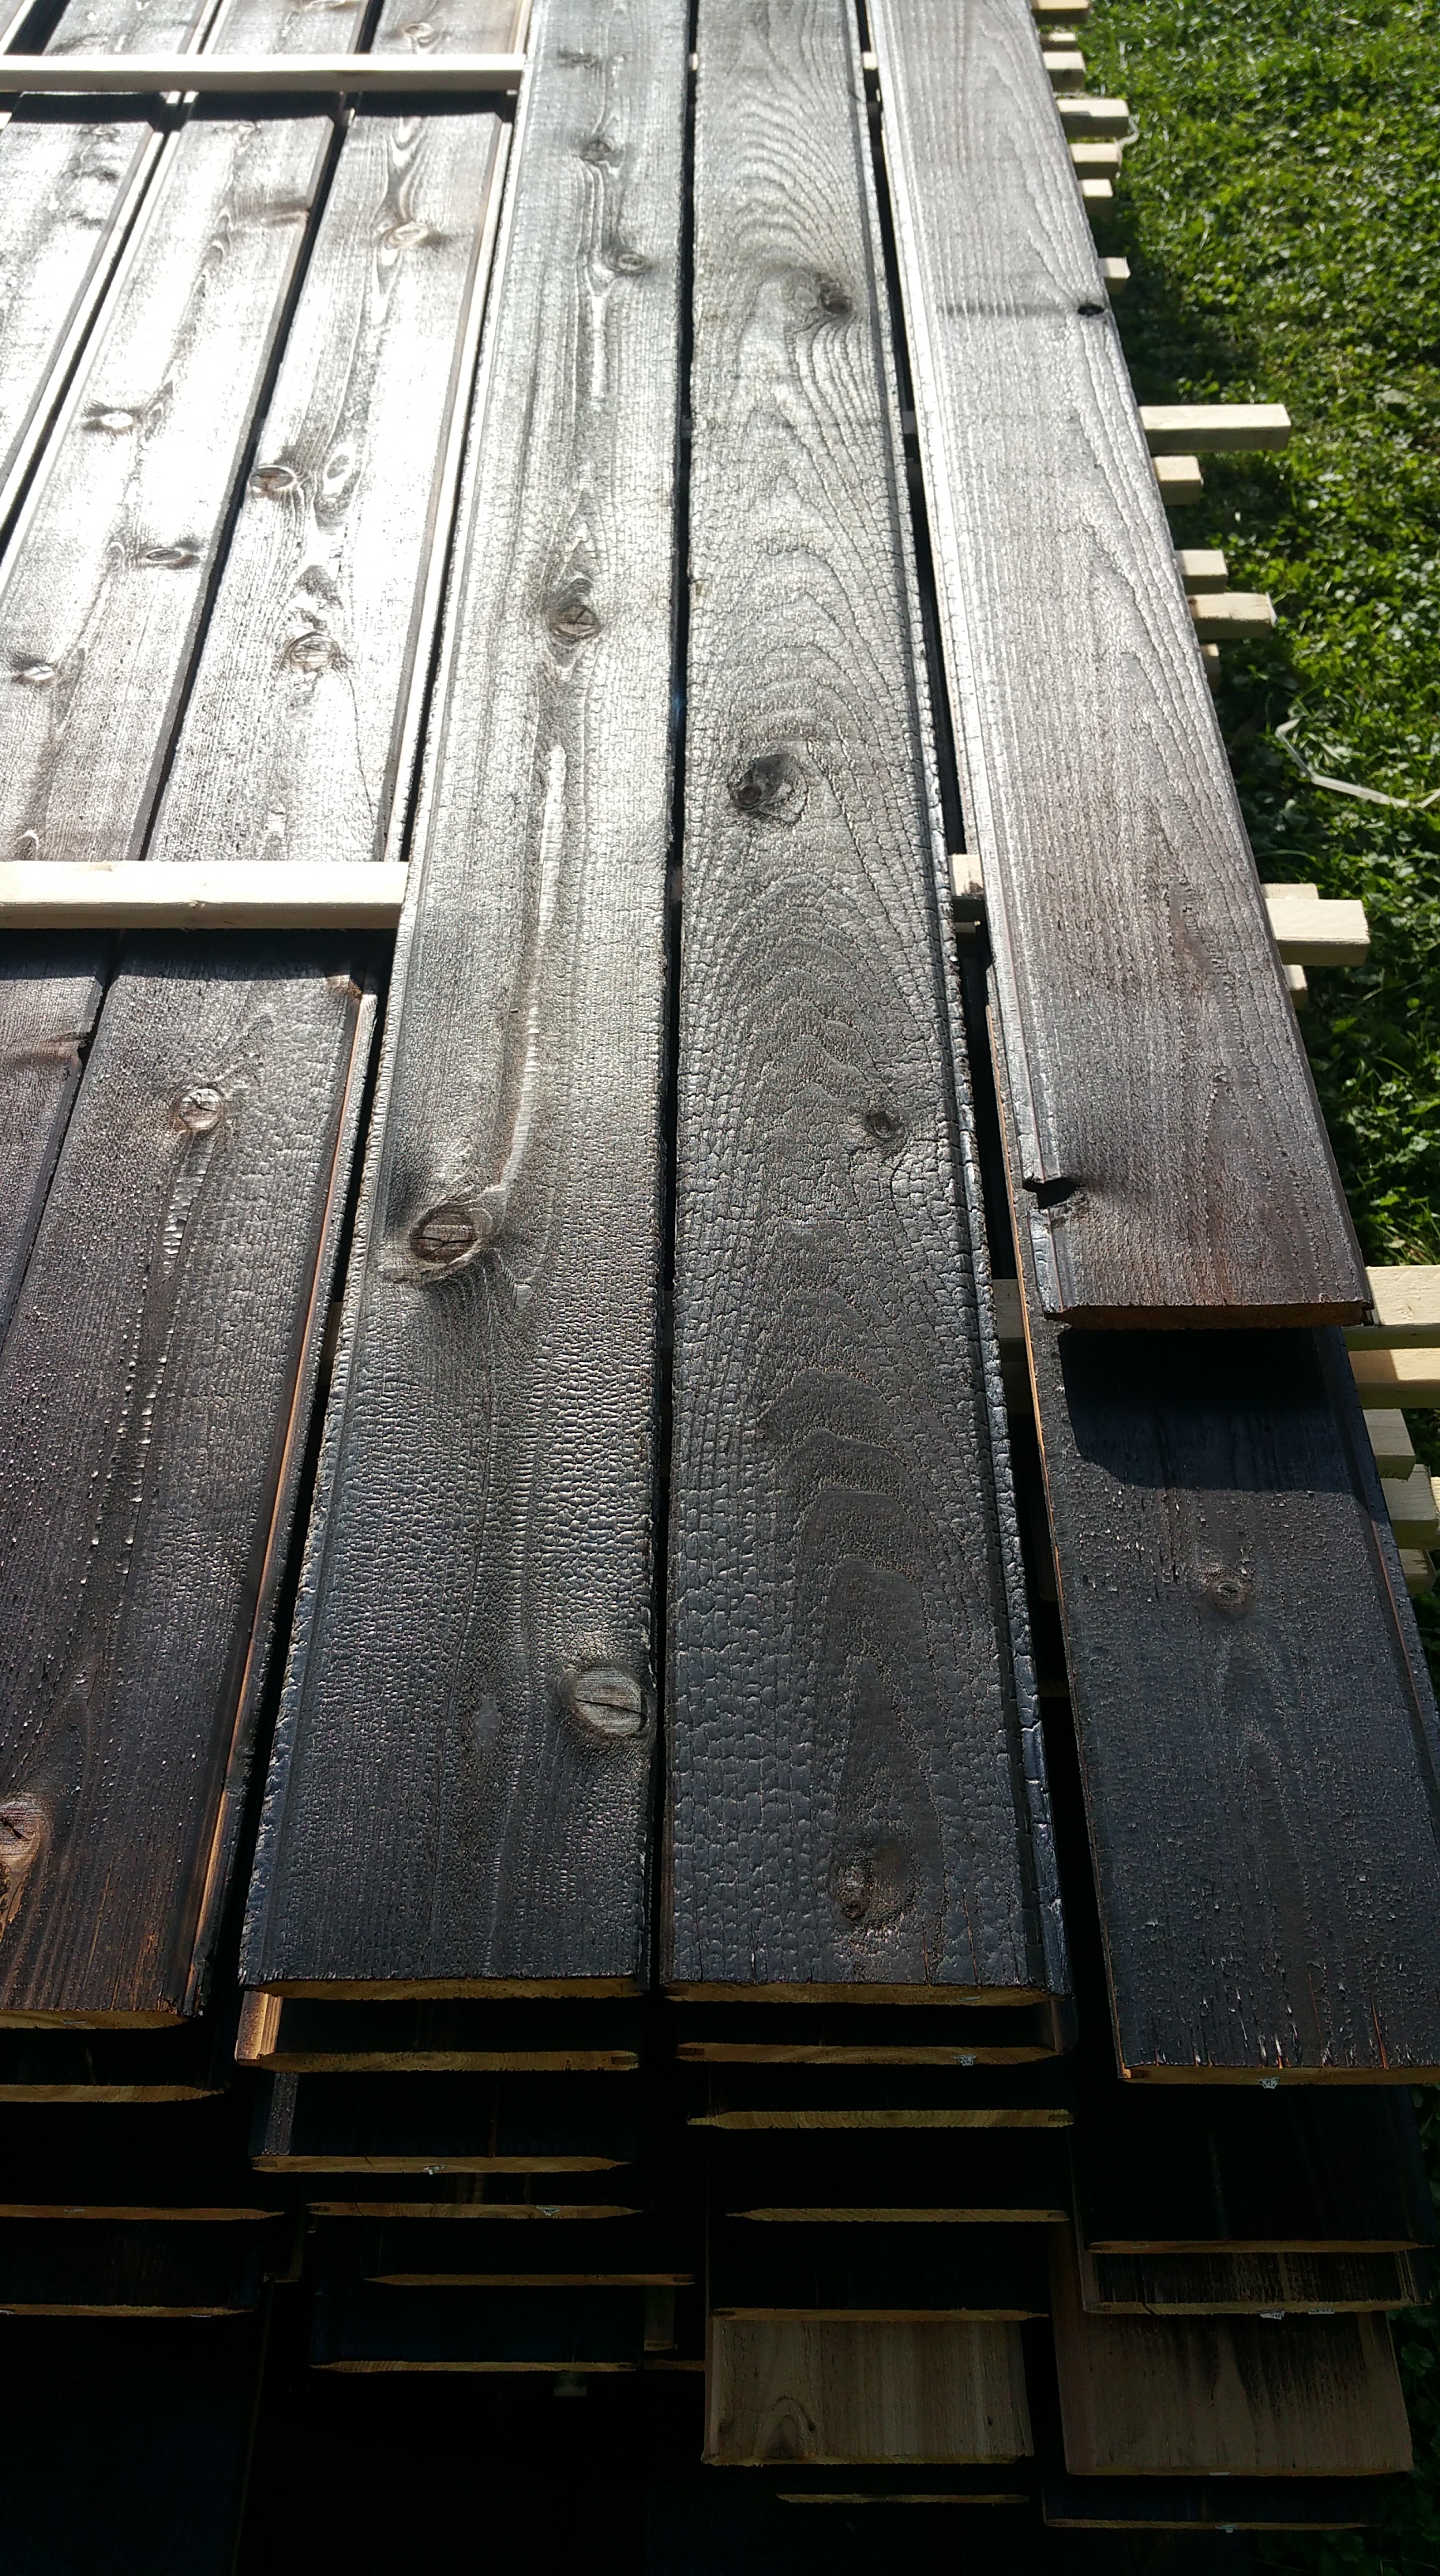
The stack as the sun begins to set.
An alligator (or just ‘gator’) finish with the knots still showing through.
The charred wood, depending on the angle and level of light, can take on silvery tones (although, in our experience, this mostly goes away once the wood has been oiled — producing a uniformly black appearance).
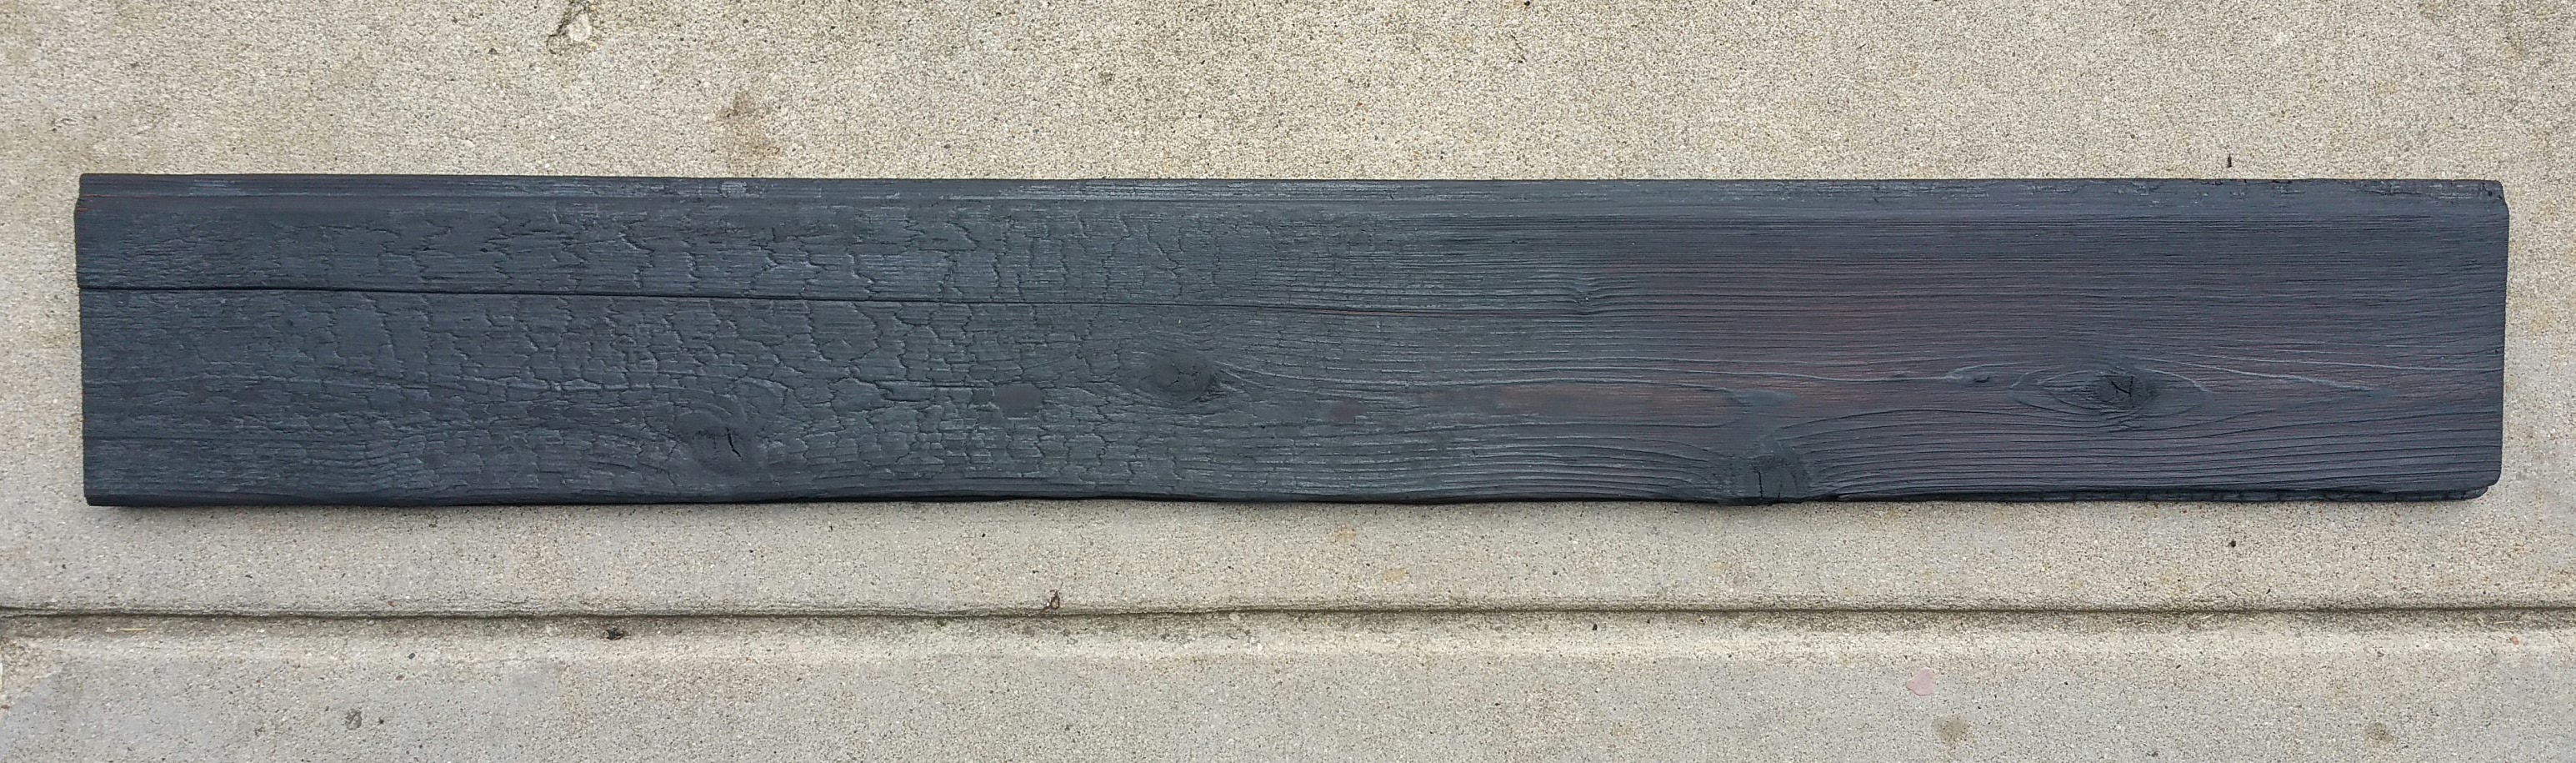
A board with a lighter char.
There is a range in the level of char we want to achieve. While most boards will have the gator finish, much lighter boards (a few even lighter than the one pictured above) will be part of the mix as well. We think this will make for a more interesting overall look, but it also takes the pressure off, slightly, if you have more than one person doing the charring (each person will have a slightly different definition of ‘gator’).
We’re also curious to see how the lighter boards will age with time: Will the lighter undertones of raw cedar turn gray and blend nicely with the char? Or will the natural color, peeking through the black surface, stick around longer than we think?
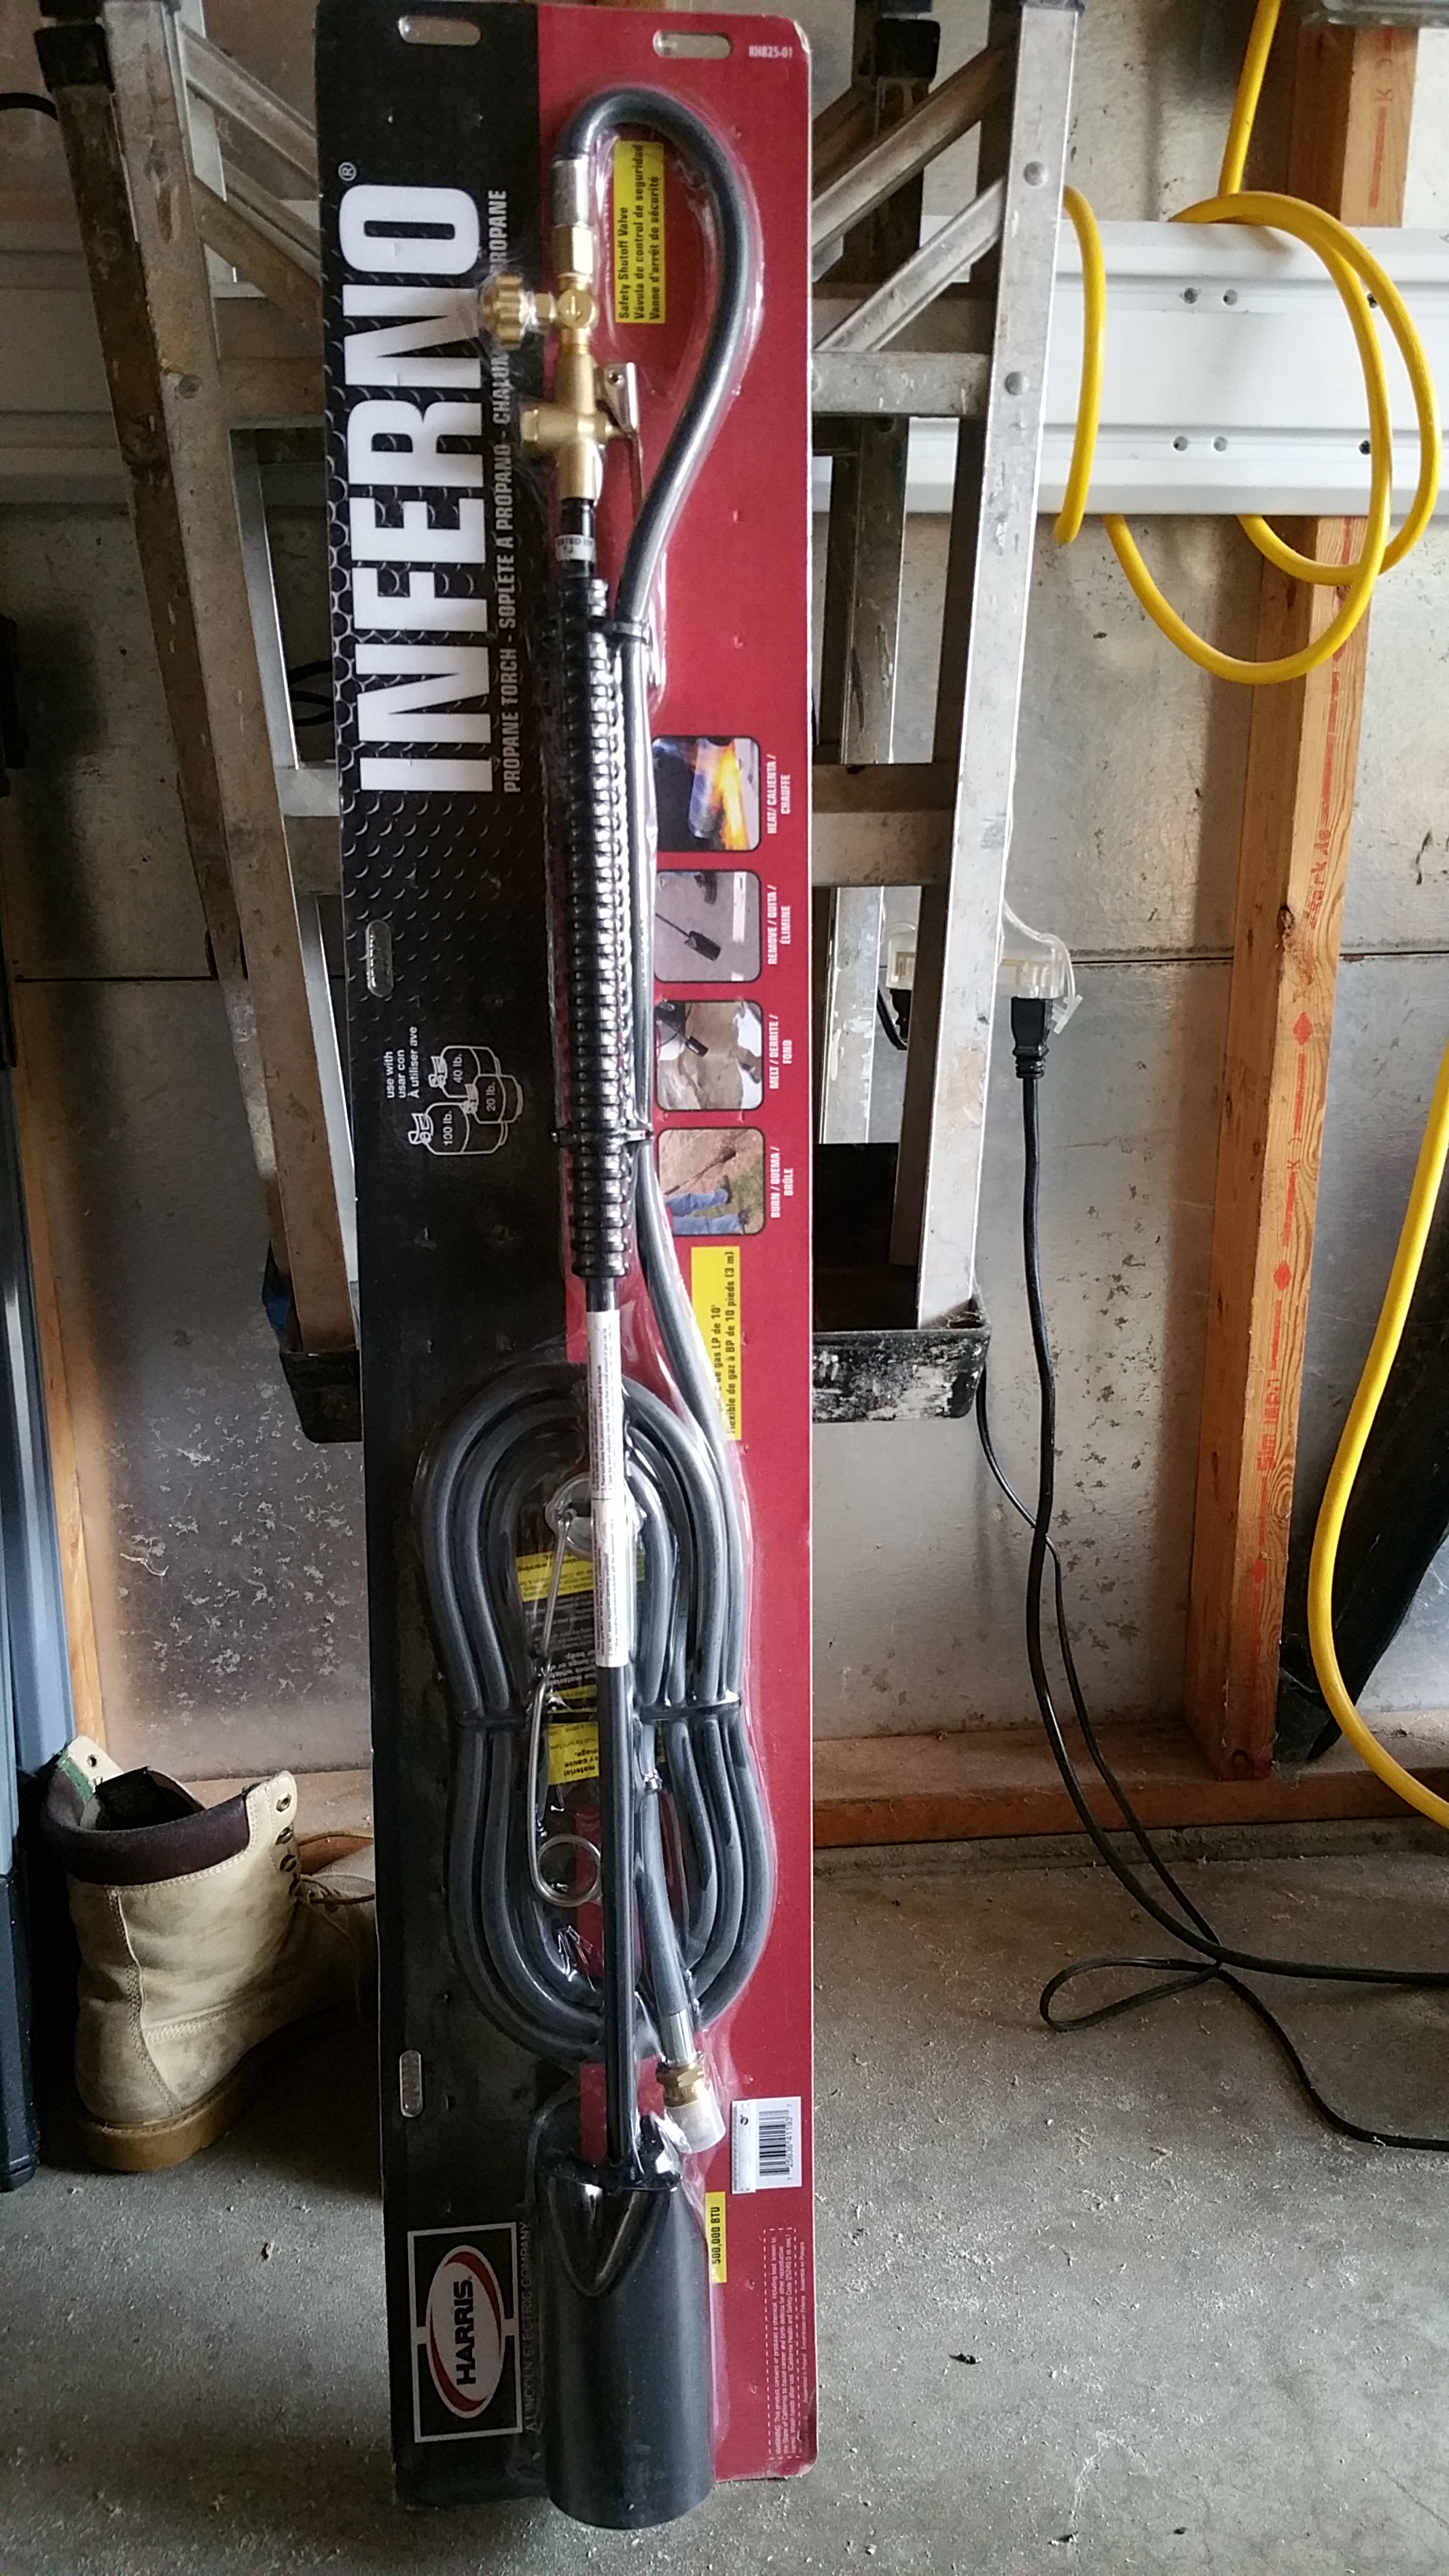
As far as the tools involved, the following have worked for us:
Found the Inferno torch on Amazon.com and at our local Home Depot.
So far, it’s been a real workhorse.
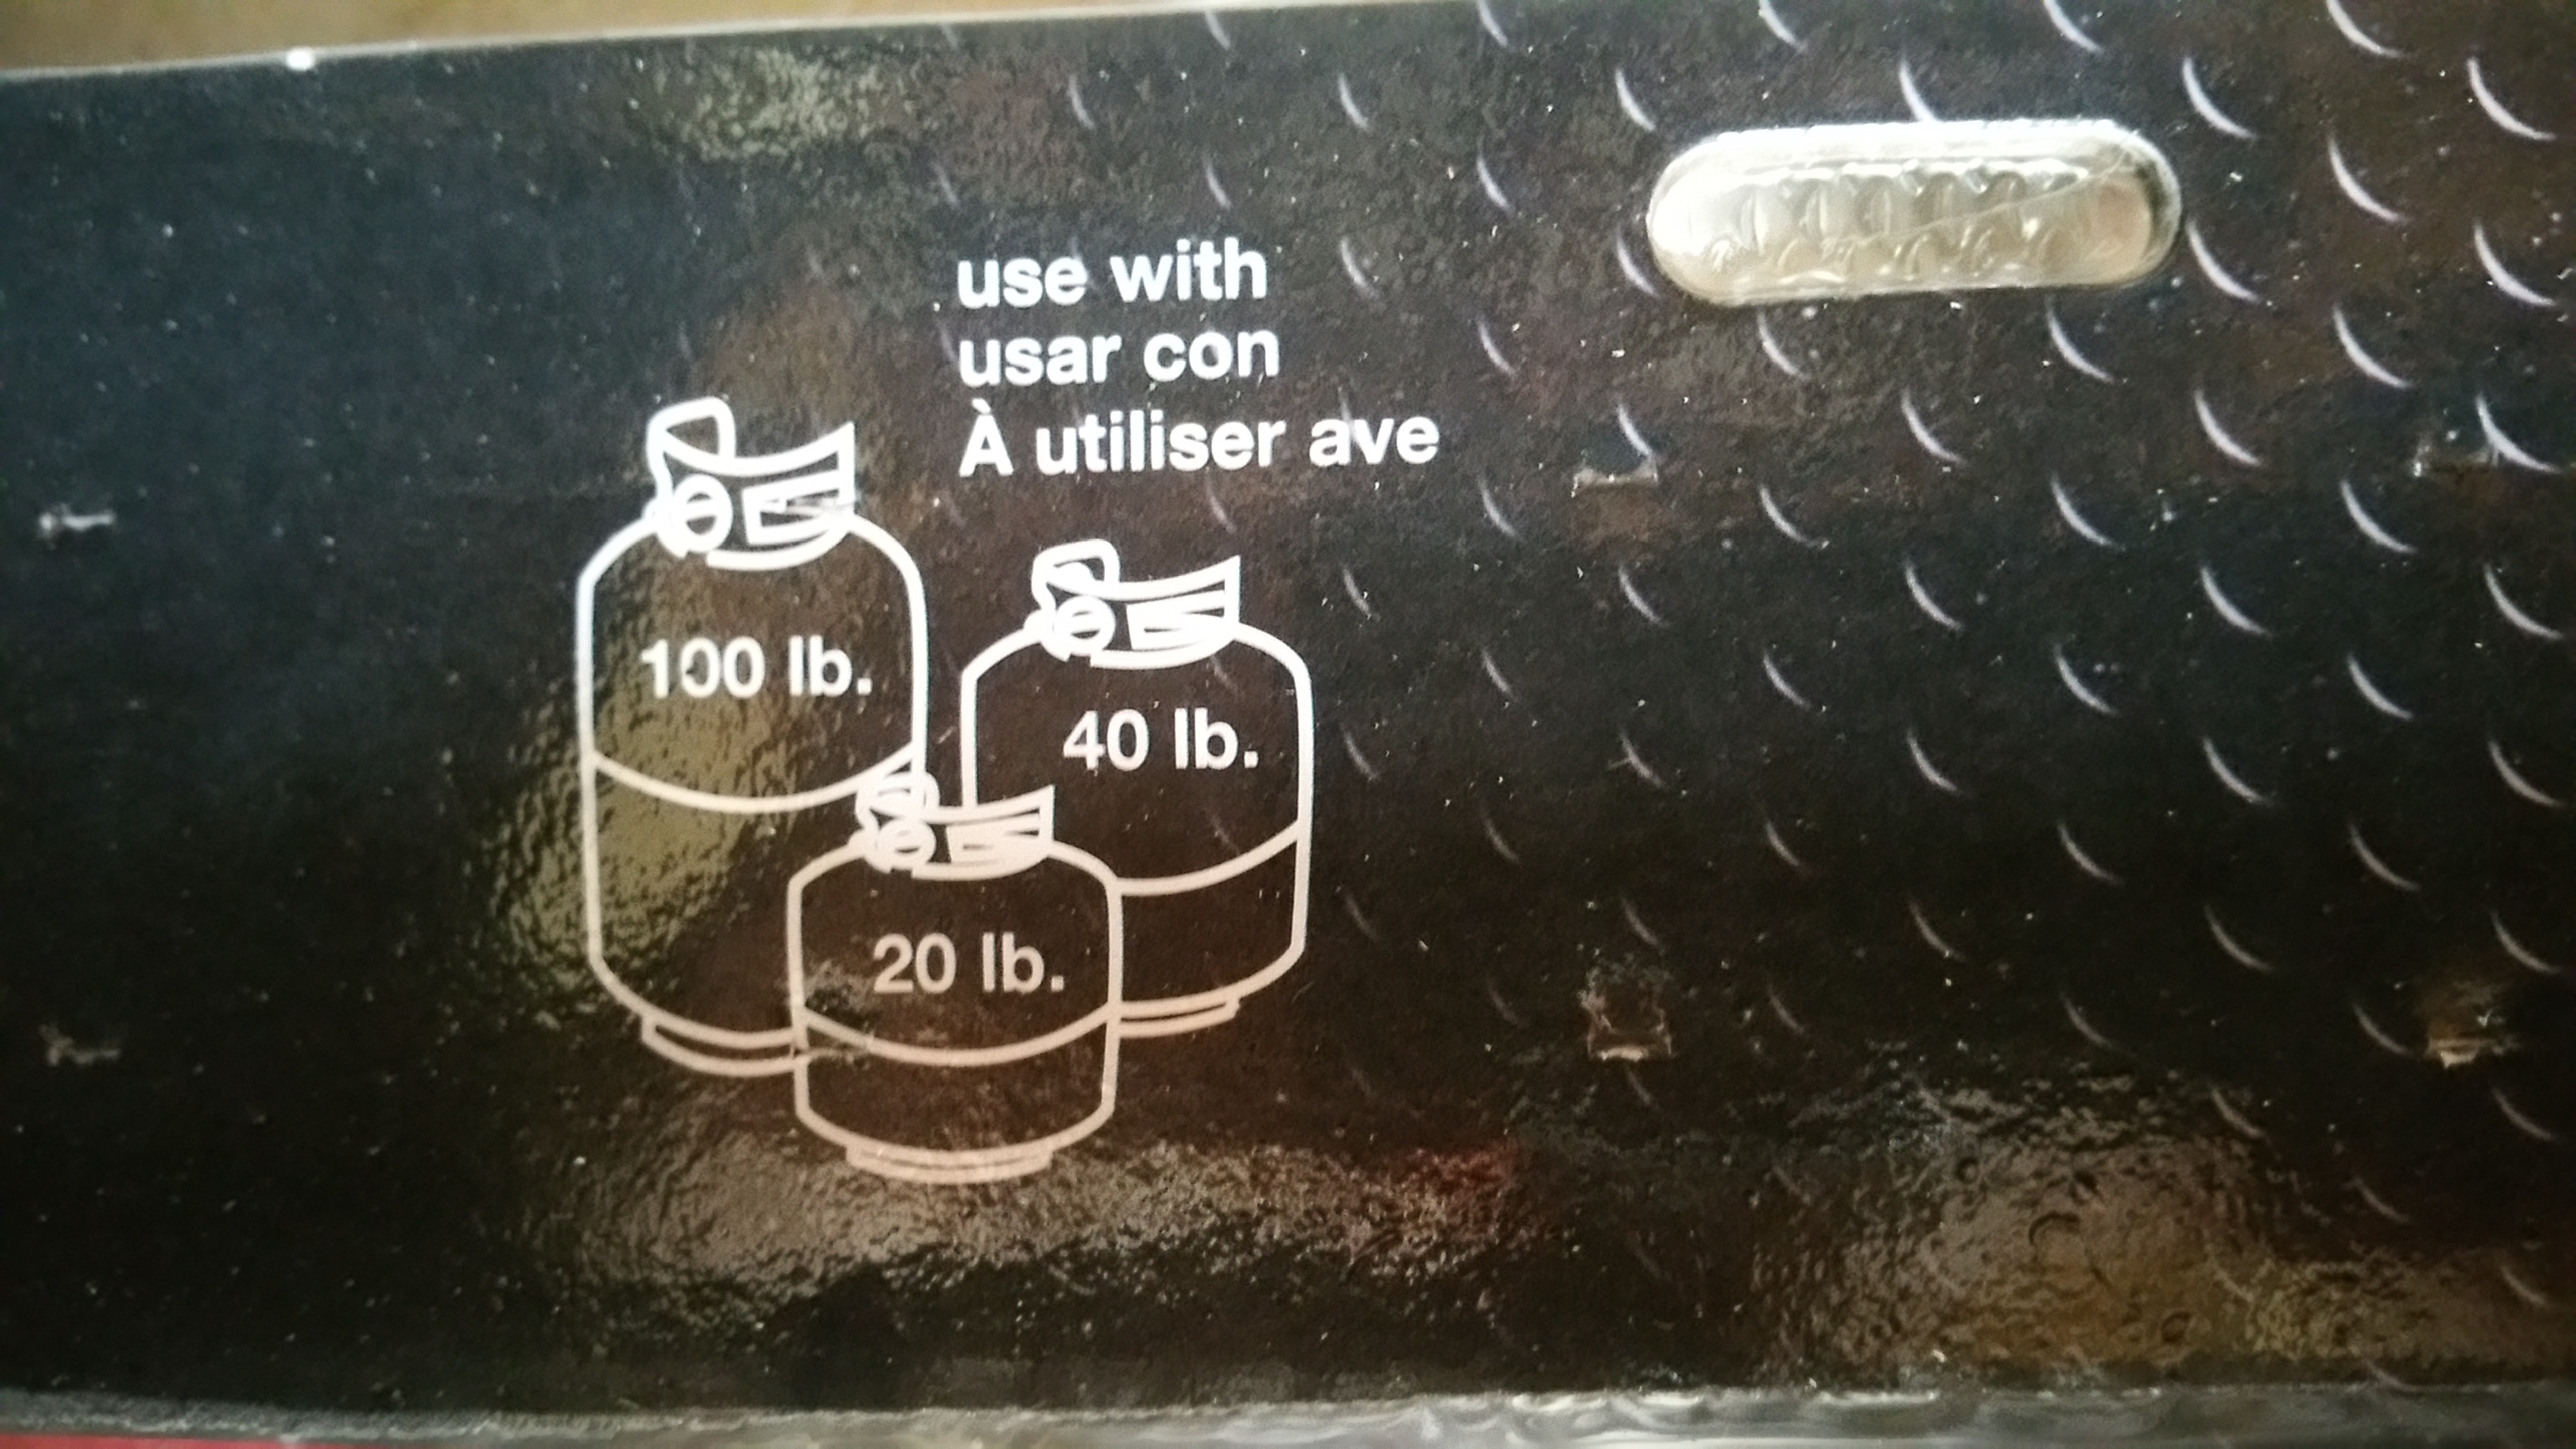
The inferno will work with almost any size tank.
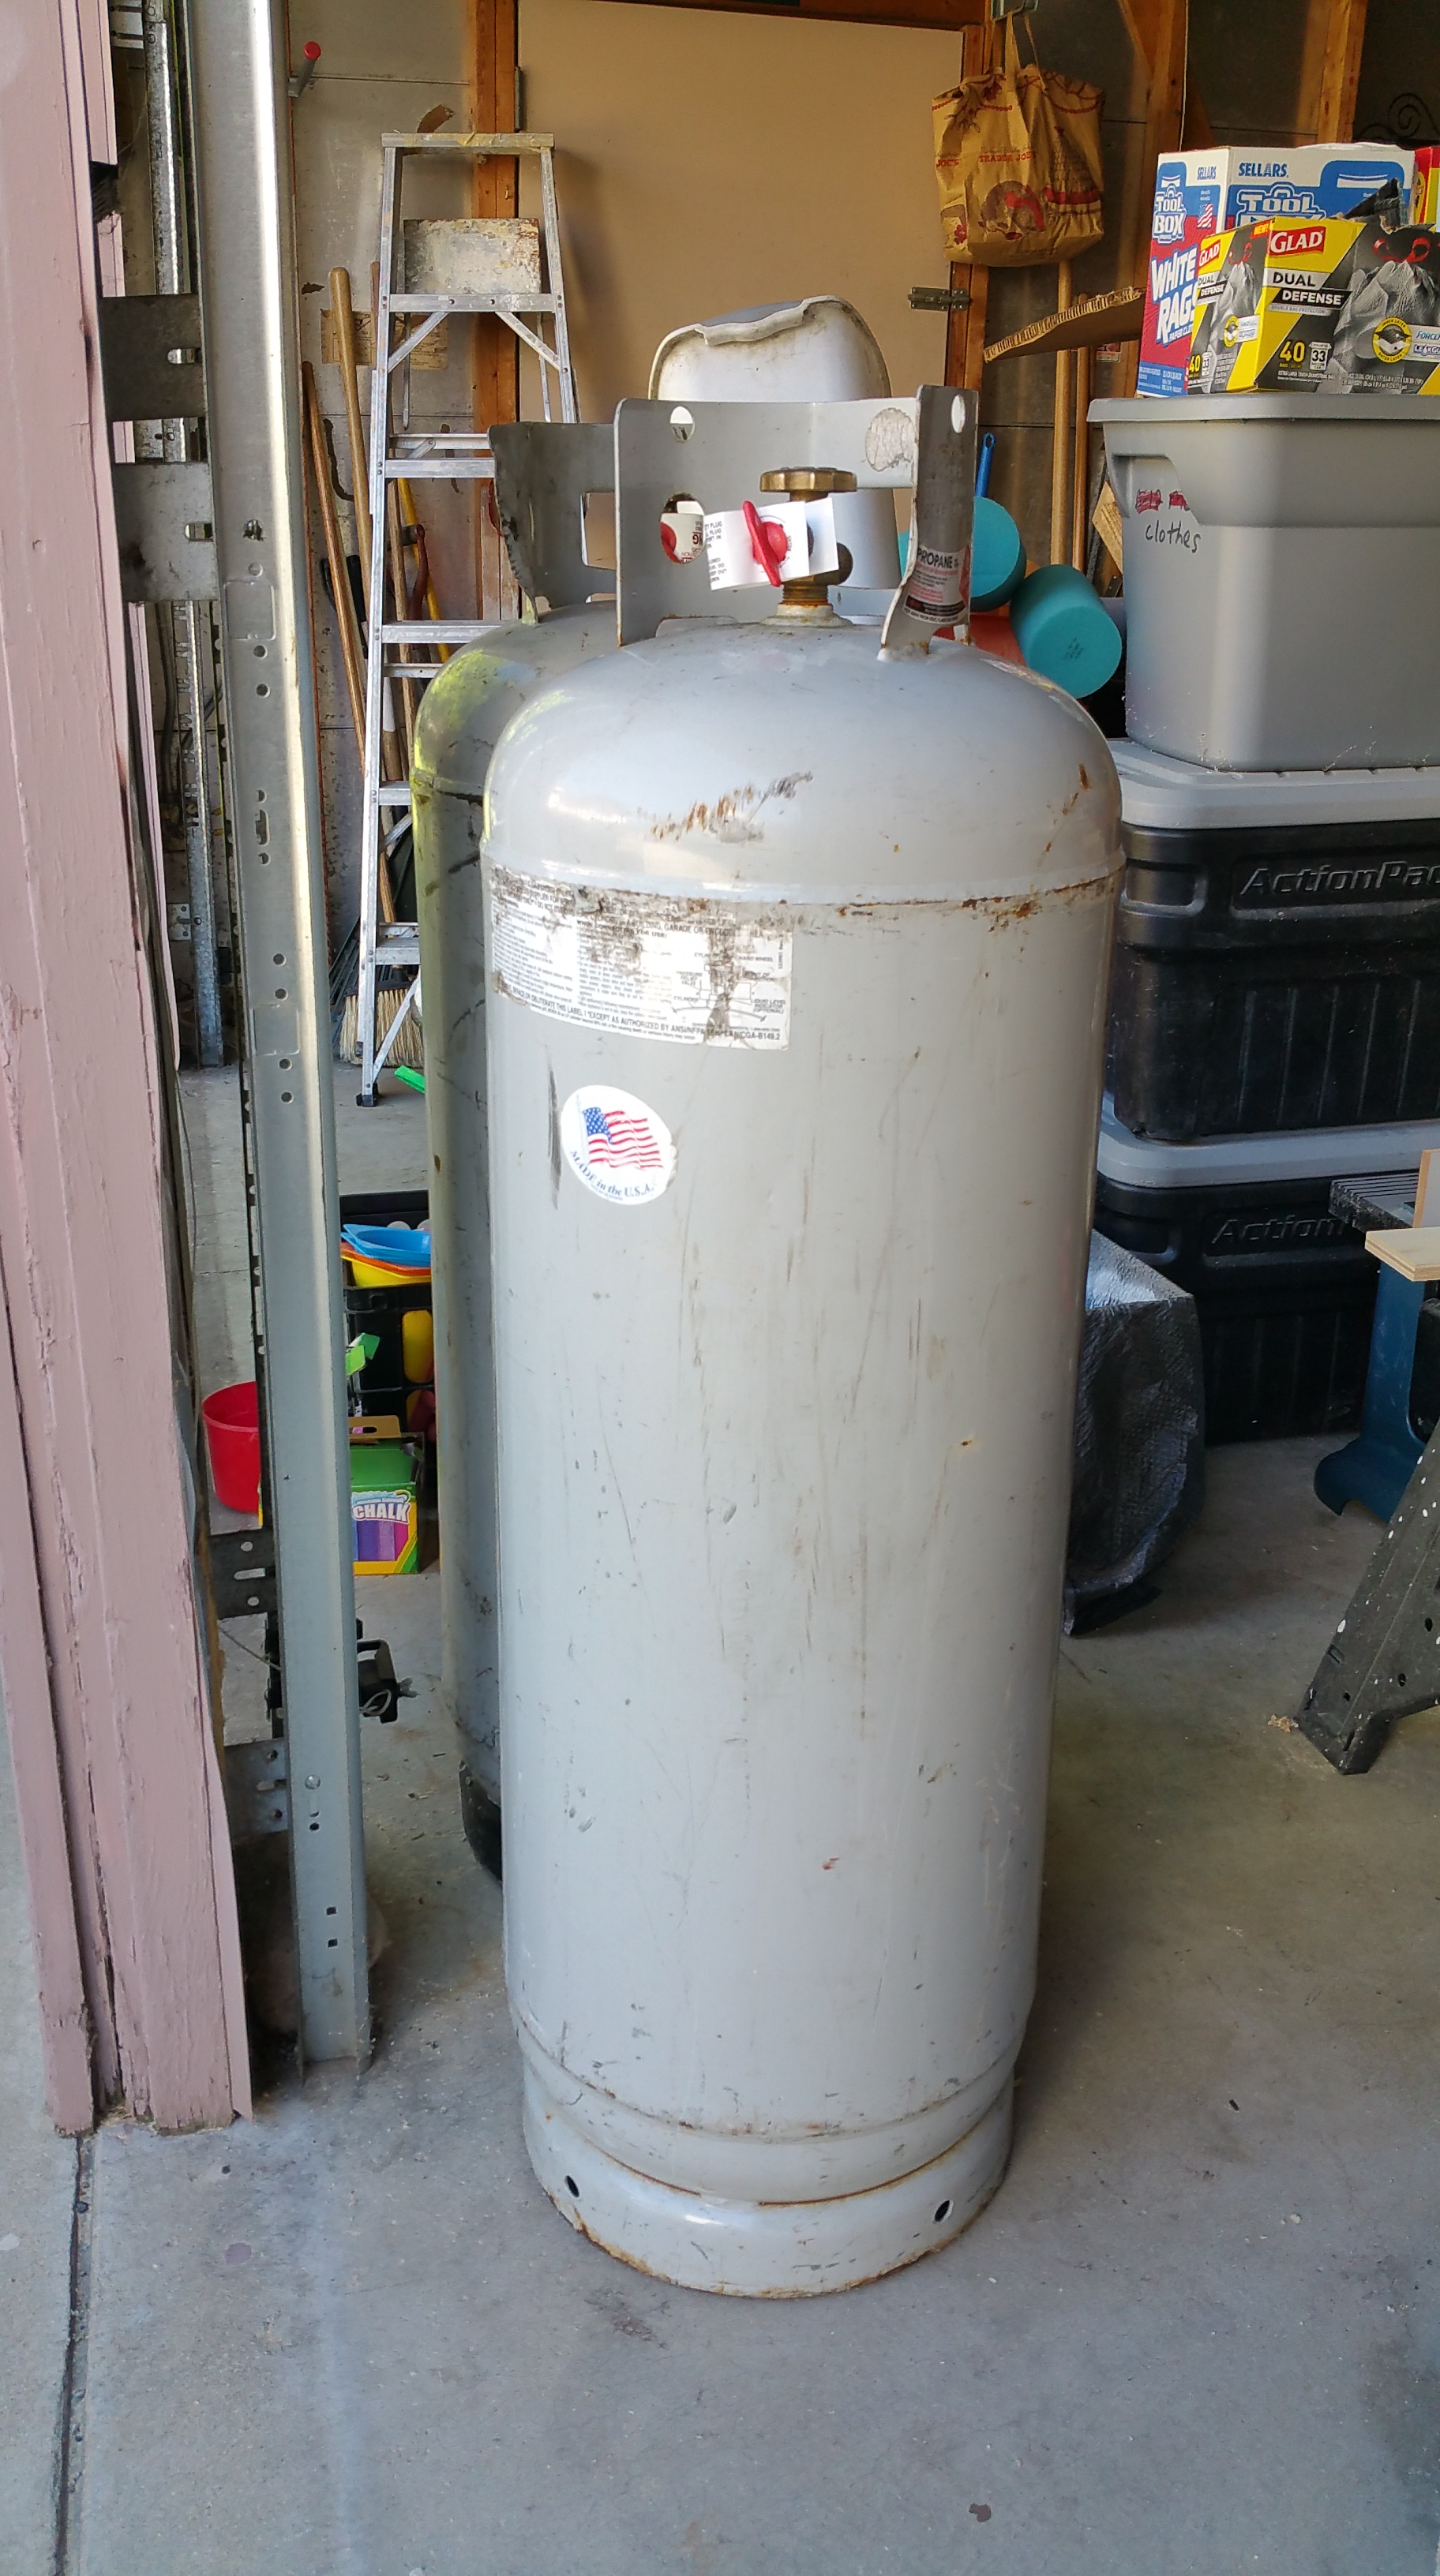
100 lb. tank from Tebon’s Gas Service in Niles, Illinois.
We were planning to use the typical 40 pound propane tank that’s used for grilling. Fortunately, my wife was smart enough to look around online for us, and she found these 100 lb. tanks instead.
These 100 lb. tanks have worked out great — no trips to a big box store for refills on the smaller tanks. And by buying the gas in bulk, they’ve also saved us some money as well.
You can follow the level of the tank by looking for condensation. The only down side to these larger tanks is once they hit this level, about 1/4 full, pressure drops significantly, so it takes twice as long to burn a board.
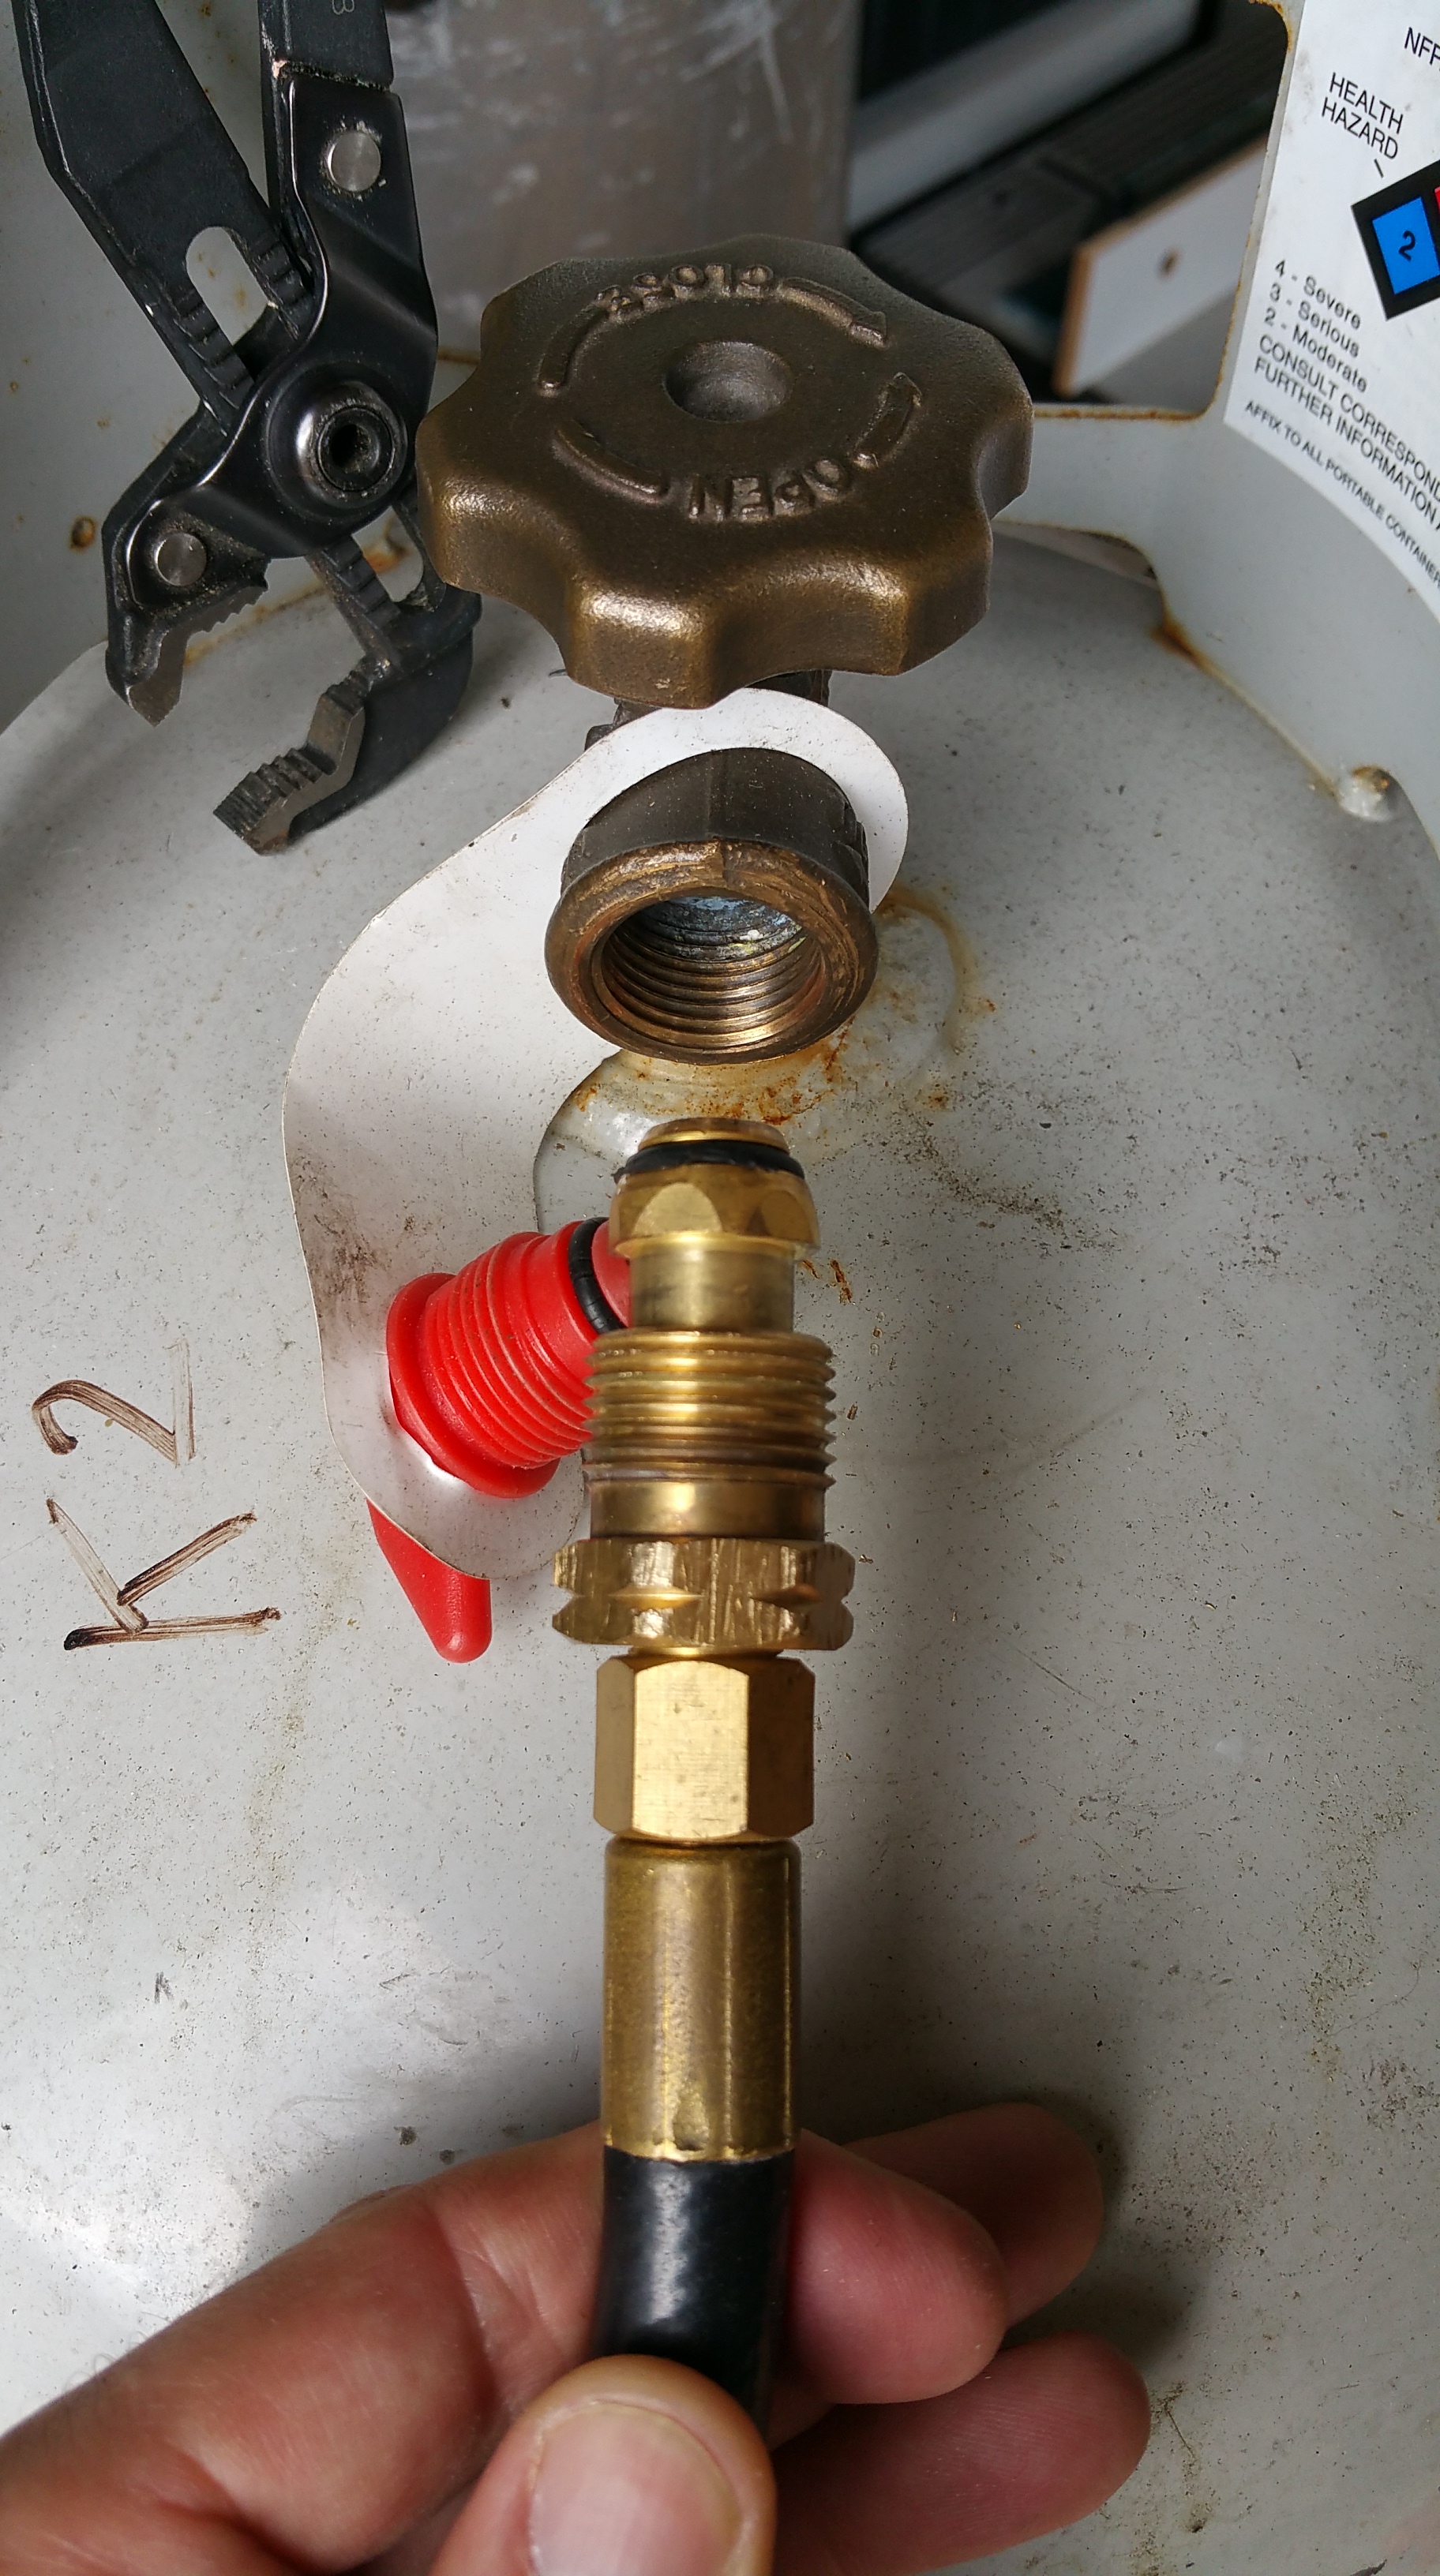
Here are some of the key connections involved:
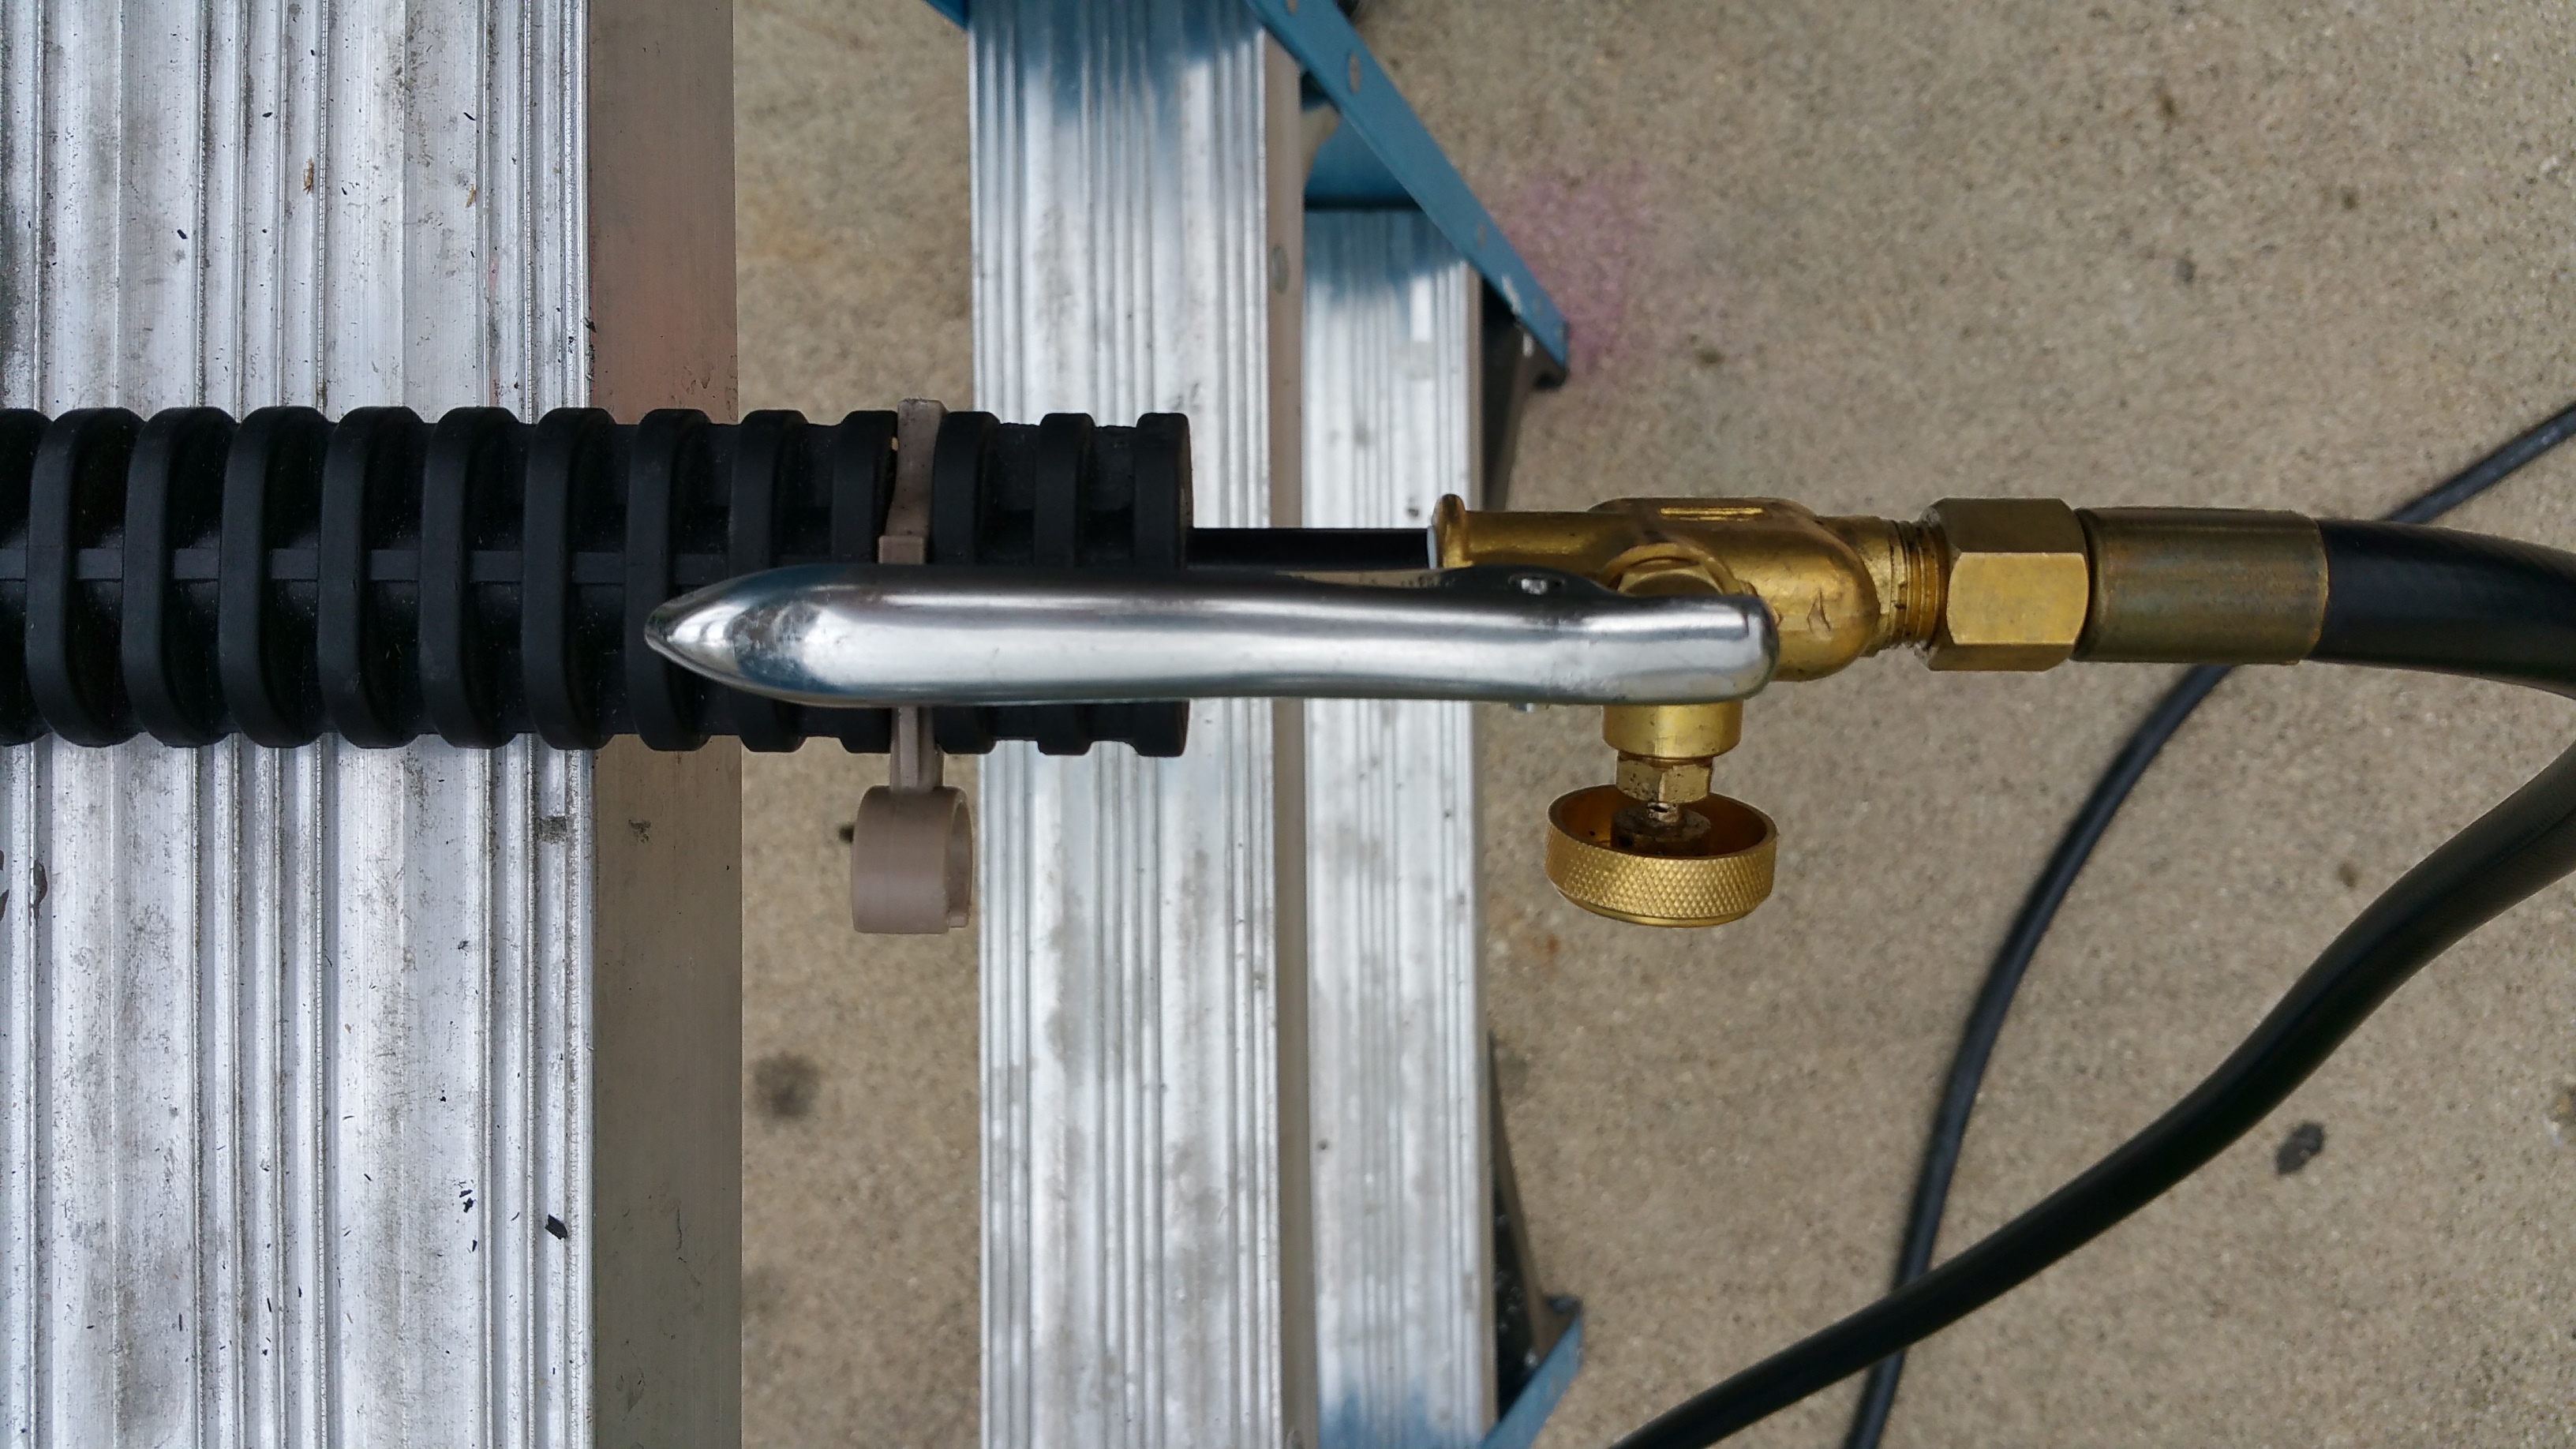
10′ hose combined with 25′ extension hose.
The long silver component is the throttle for the boost function.
The Inferno comes with a 10′ hose, which works okay, but we bought a 25′ extension hose on Amazon that definitely makes life easier by allowing you to get further away from the tank for a wider range of motion.
If you decide to use an extension hose, you’ll need this sealant to make proper, sealed connections. If you’re lucky, someone in tool repair at your local hardware store will do this for you.
In terms of safety, in addition to a pair of sunglasses or construction safety glasses, proper hearing protection is a must. If you’re doing just one or two boards, the noise level of the torch isn’t a big deal. However, if you plan to do dozens of boards at one time, we would definitely recommend some kind of hearing protection. The torch is undeniably loud (we’re lucky we have patient, forgiving neighbors).
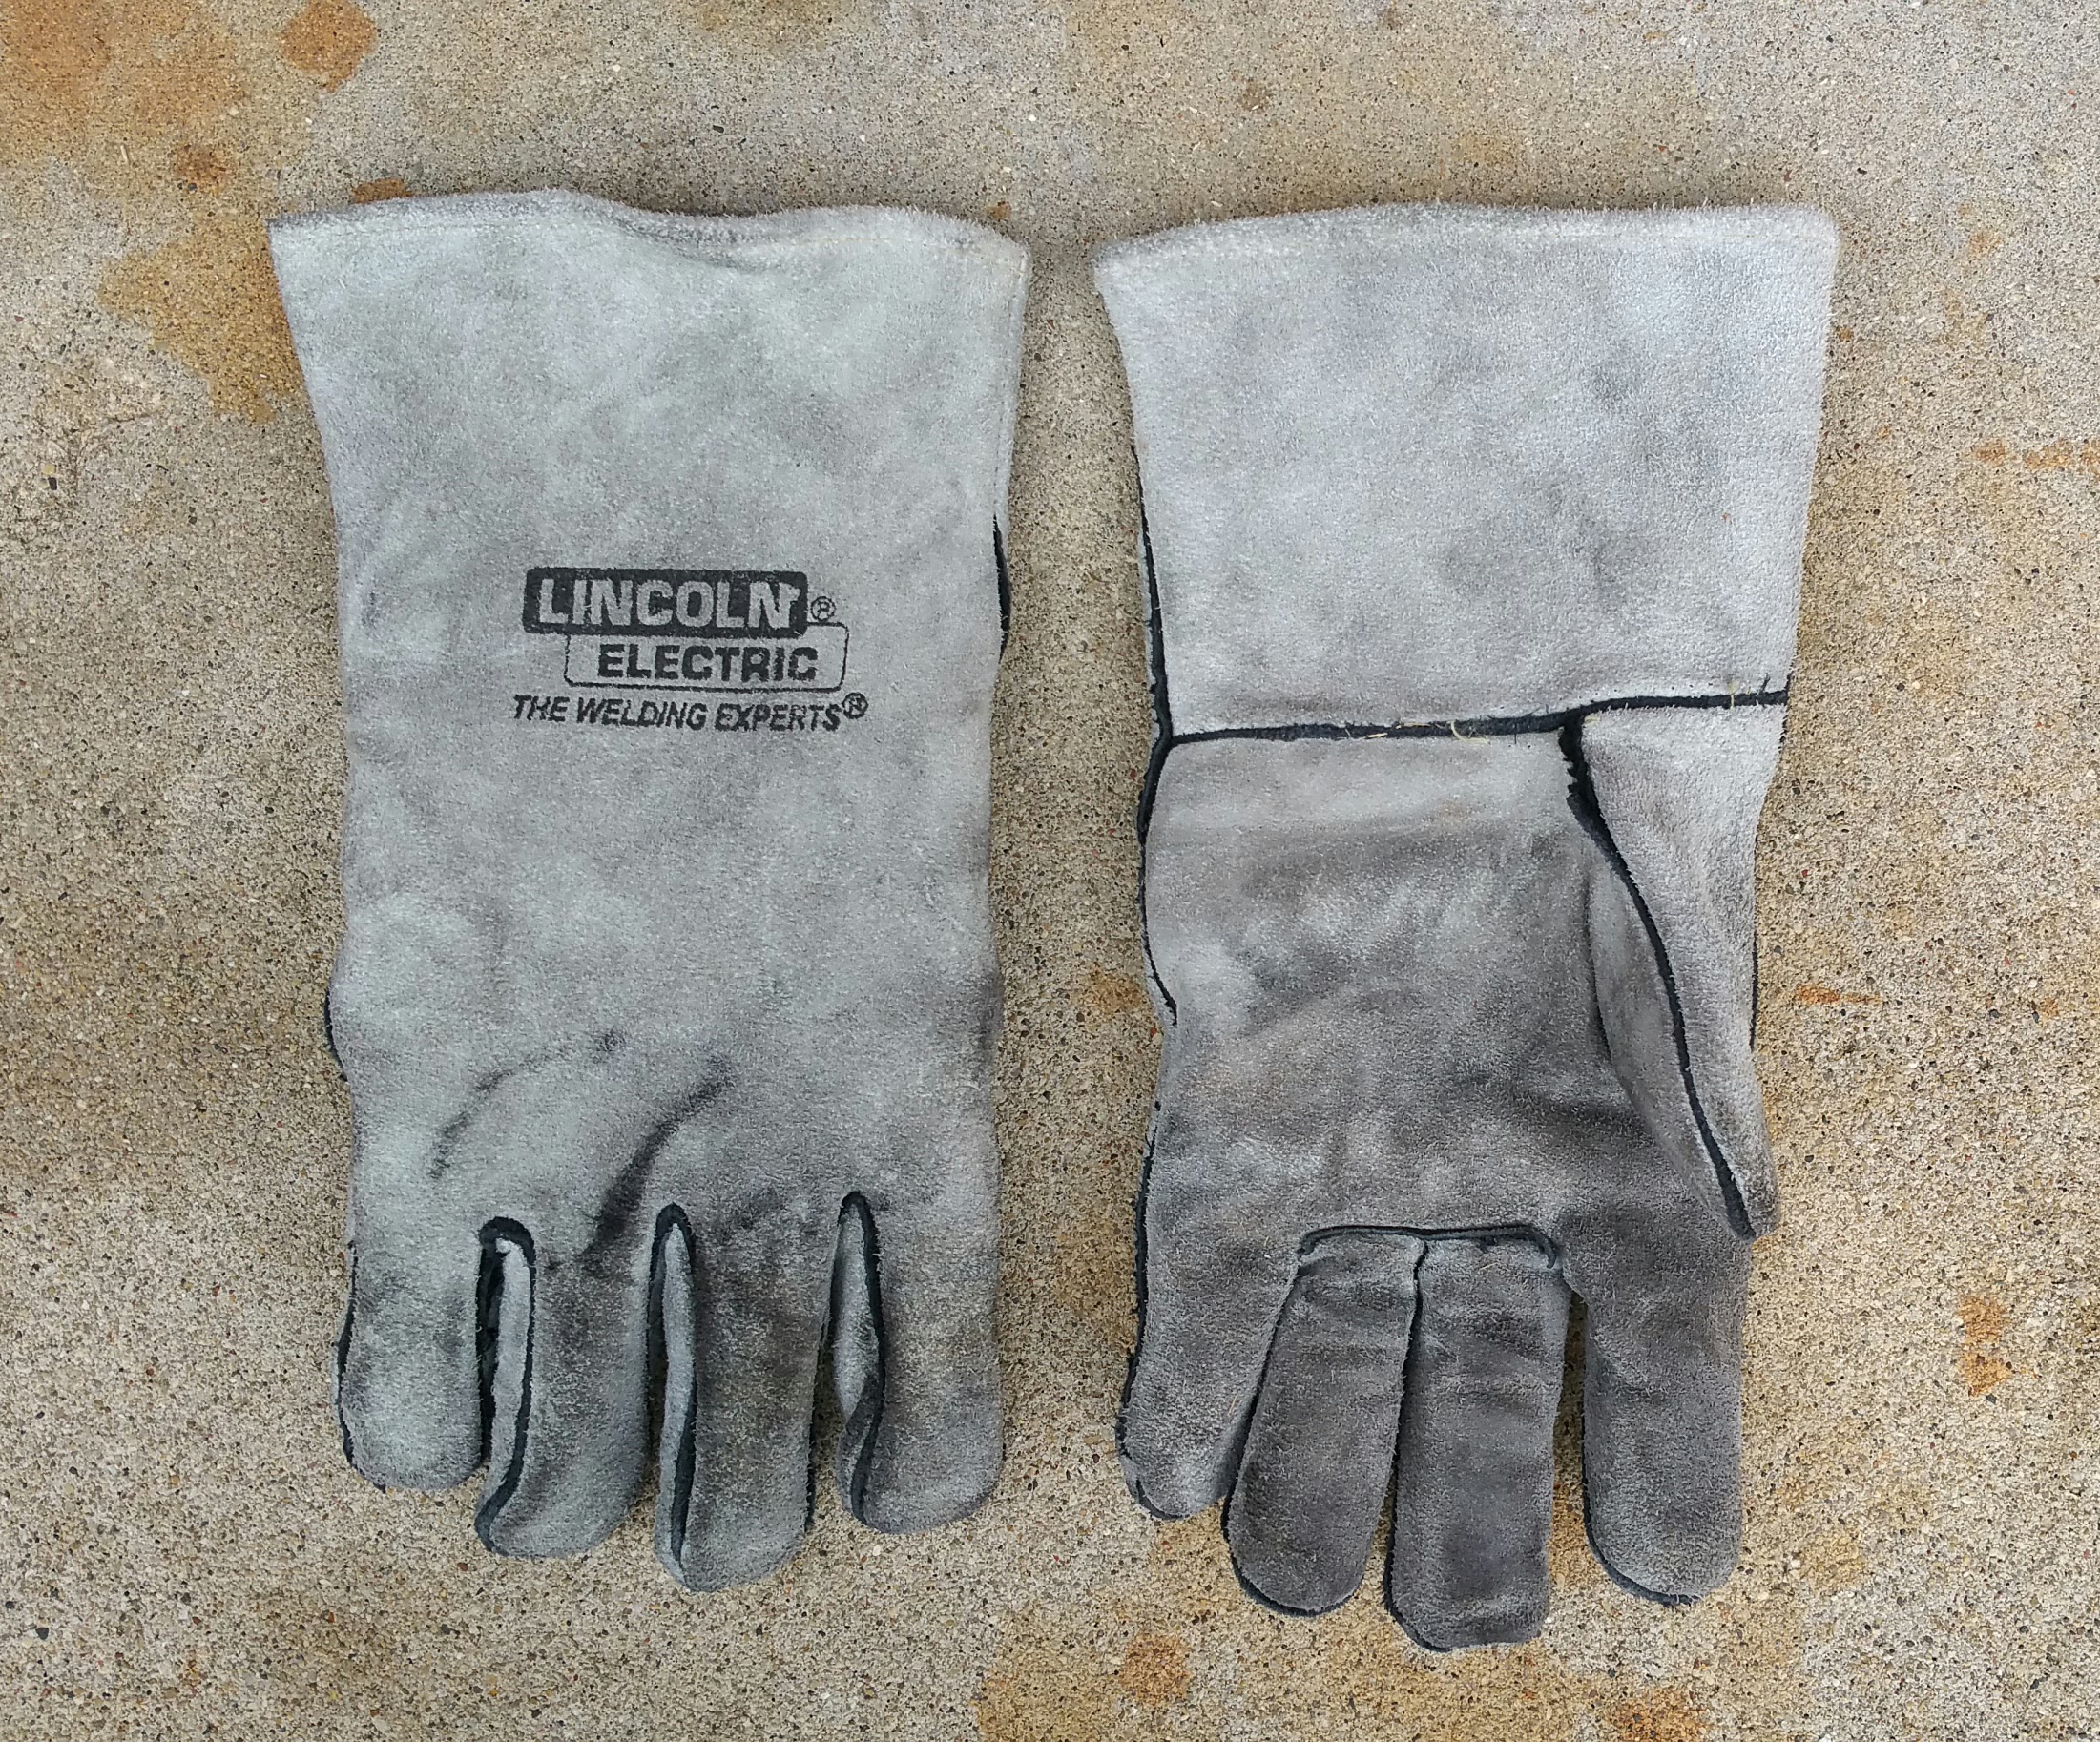
Welding gloves have also been a real help. On windy days, the boards tend to stay lit longer, but it’s easy to just pat or rub out the small areas of flame with the welding gloves. And they’re a must for moving the boards around right after charring.
We found these in our local Home Depot tool department.
We also keep a couple of 5 gallon buckets around, only partially filled, so it would be easy to toss it at someone who’s just burst into flames (let’s hope this never happens).
In addition, we have a 6′ step ladder set up as a station to hold the torch when not in use, and it’s a convenient spot to drape a garden hose with a nice spray nozzle, so it’s in easy reach if something should go wrong. We also occasionally spray down the concrete, hoping this discourages any stray embers from landing and then floating away to ignite something in the surrounding area.
To be honest, the only time I got myself in trouble was when the 100 lb. tank was 1/4 full and the pressure had dropped. Normally, we barely have gas running through the hose and coming out of the torch because the boost switch on the torch is so effective. Because of the pressure drop, I turned up more gas, hoping it would counteract the loss of pressure, but instead I just managed to catch my jeans on fire at the knee (momentarily, thanks to a handy 5 gallon bucket of water). I was extremely lucky, and lesson definitely learned.
Right as the sun is going down is the most exciting time to burn — the flame becomes vivid, and it’s really fun to watch as it dances across the surface of the board.
That left hole in the knee is the one that I managed to catch on fire — notice I’m keeping a safe distance from the flame.Playing with fire: Do you see the lion’s head?Head of a cardinal?
The 1x material, whether 1×6 or 1×8, takes longer to burn since we found it impossible to get the face and the edge all in one pass. You can definitely pick up more of a rhythm with the 1×6 T&G boards. And we haven’t gone for a gator appearance on the back (smooth side) of each board, instead going for a lighter char, which also helps to speed things up for each board.
How much will all this cost?
How long will it take?
For our single story, just under 1700 sq. ft. house (outside dimensions), with an attached 2-car garage, these are how our numbers break down:
Time to burn (per board): about 1-2 minutes a side
In 6-8 hours, 40-80 boards is realistic (depends on level of char, and if it’s 1x or T&G)
Total time to burn all the boards we should need: ±80 hours
For torch, hearing protection, welding gloves, extension hose: $100-150
Per 100 lb. tank: $80-90 (8 total tanks to finish).
1×2’s, or similar material, for stacking the completed boards: $100-200
#3 or better Cedar (1×6 T&G, 1×6, and 1×8): approx. $8-10,000
Keep in mind, this doesn’t include the time or expense required to oil each board (again, more on that later).
One final, additional challenge was getting quality boards.
Our first order of cedar, via a big box store, came from Mary’s River (they’ve either gone out of business, or their manufacturing plant burned down — depends on who you ask). Their rate of waste was about 10-15%, so not bad at all. It felt like I had to go looking for bad boards (board bends to the left or right at the end, U-shaped from the middle, broken or missing tongues/grooves, or cracked/split boards).
In subsequent orders, with a company called Tri-Pro, the rate of waste was about 40%. Luckily, the big box stores are okay with returns, nevertheless this gets frustrating.
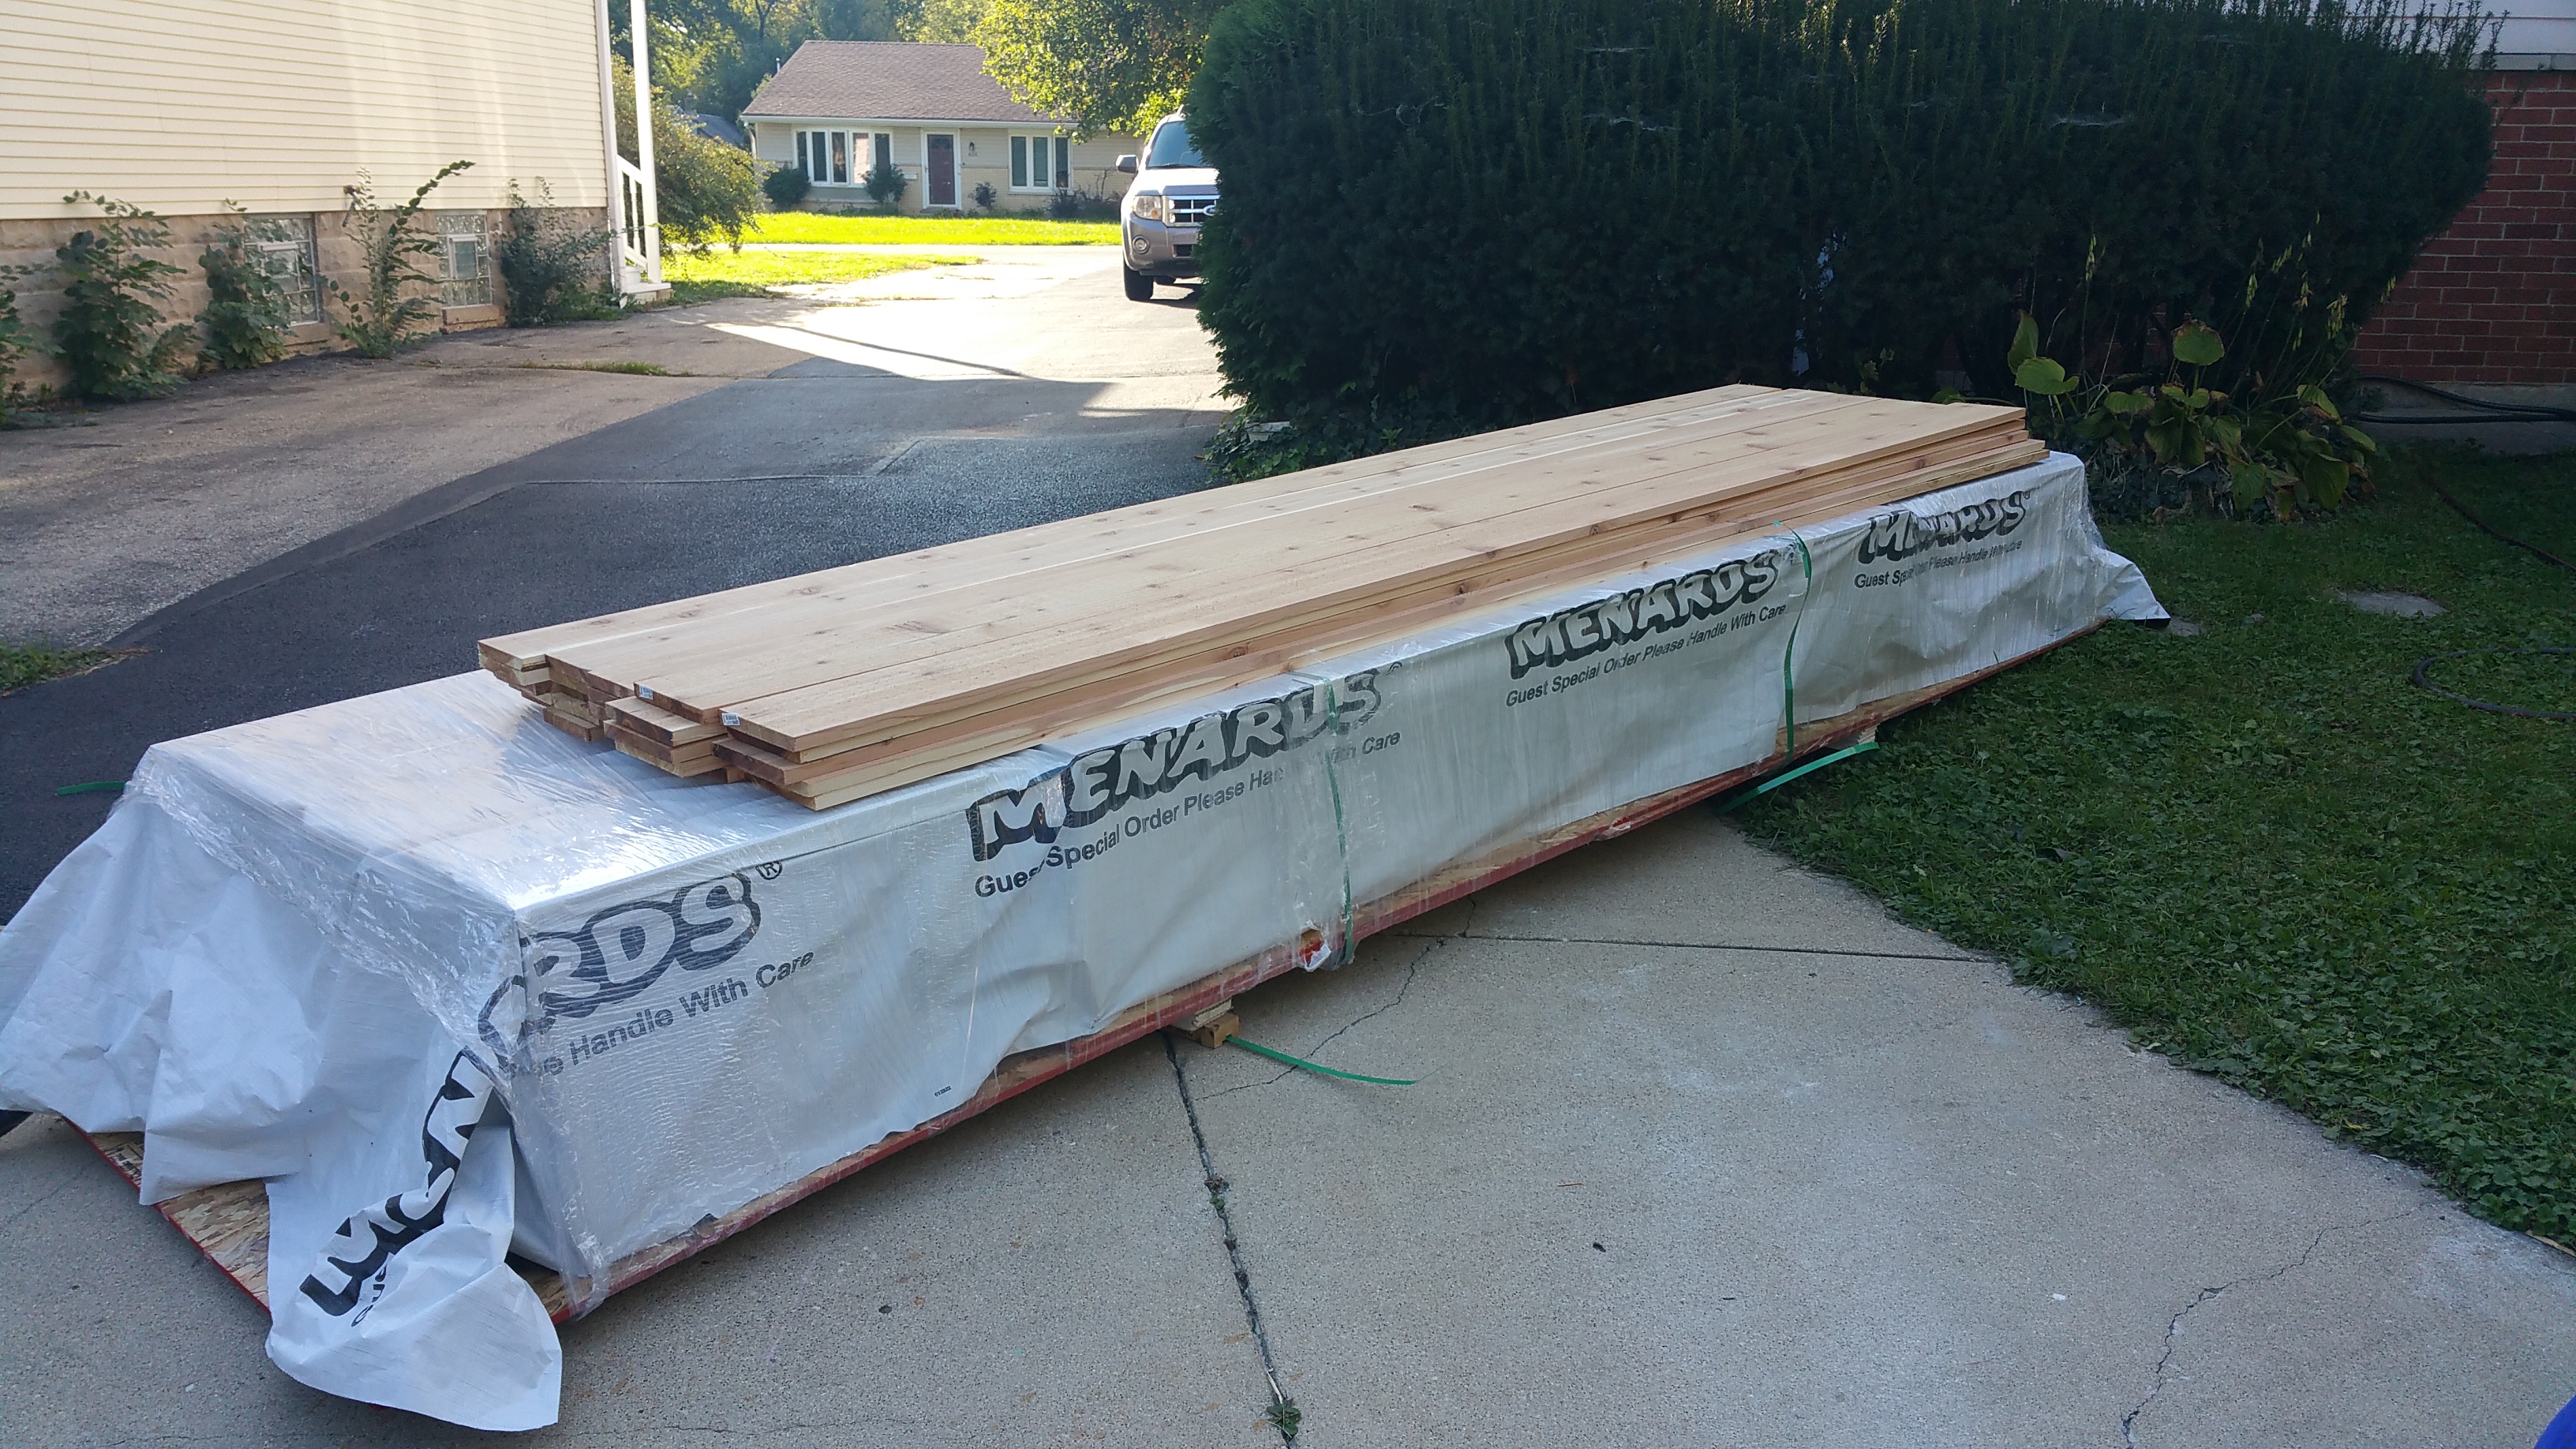
And even with the big box stores themselves, there can be significant differences in quality from one location to another. Our first couple of orders were poorly packed and just wrong. Then, after going to a second location to order, in Long Grove, this showed up:
A neatly packed pallet — when you’ve dealt with a messy one, this is a thing of beauty.
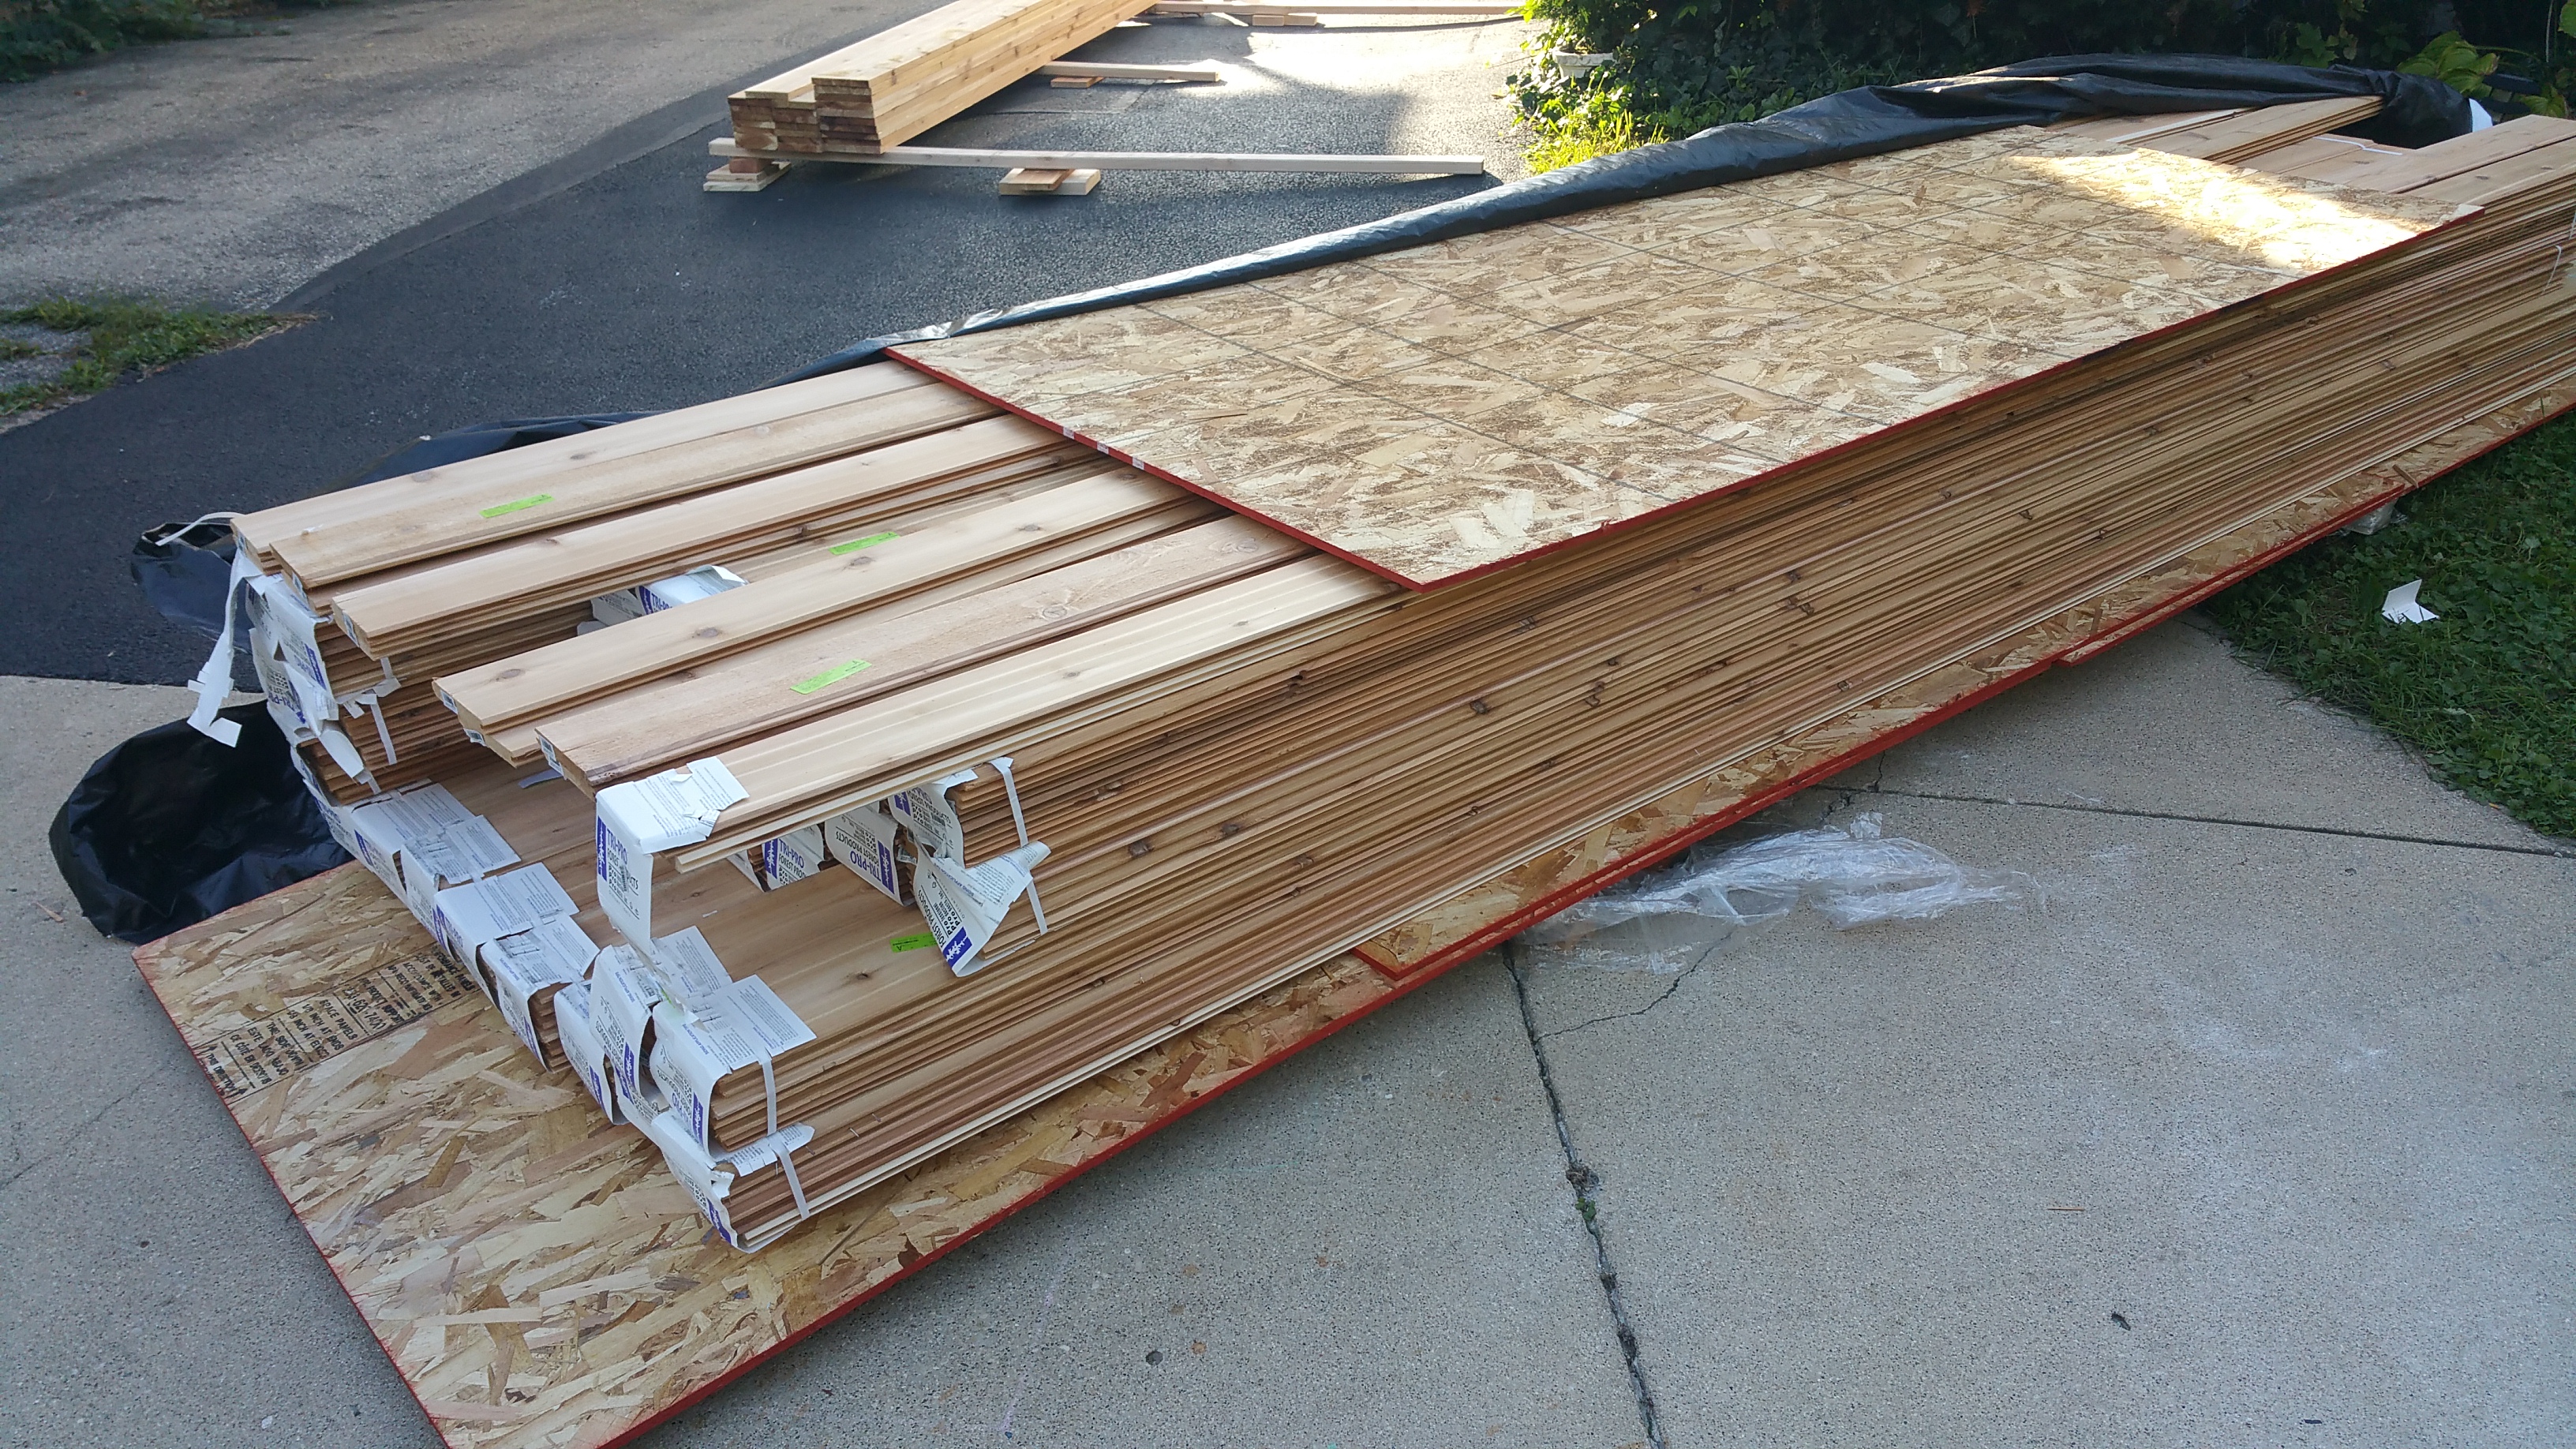
Deconstructing the pallet. The plywood really makes a difference in protecting the wood.
“We are proud of this pallet”… and it clearly shows. Thank you!
I can’t tell you whether the person (or persons) who put this specific pallet together actually enjoys their job, but what I know for sure is that they give a shit (to be perfectly blunt).
Unfortunately, this level of quality and pride in workmanship is exceedingly rare — anywhere, in any occupation — so when you see it, it can’t help but stand out and grab your attention.
We even got the Beast involved — pulling labels, tags, and staples.
I can still remember seeing the striking cover of Vivian Maier: Street Photographerfor the first time. The image hints at the story of her life — the mystery surrounding a great talent who went unheralded while alive, but who is now universally recognized and celebrated — while remaining dramatic all on its own.
The documentary about the discovery of her cache of photos, her life, and the work, is equally compelling:
There is something oddly electric about walking the streets of a large city and capturing life as it happens in beautiful photographs. There is an intensity in the captured moment that would otherwise go unseen if not for the skilled and curious eye of a photographer like Vivian Maier. To be able to see the world through someone else’s eyes is always a gift, but especially when the outcome is such mesmerizing images.
After the initial interaction (whether positive or negative), the real test for art, it seems to me, is: Does it compel you to come back again and again? On this basis, Vivian Maier’s work is one of my personal favorites. I never find the images boring, or find myself hurrying past some images to get to others. Her photos almost force you to slow down and really take in what she’s looking at.
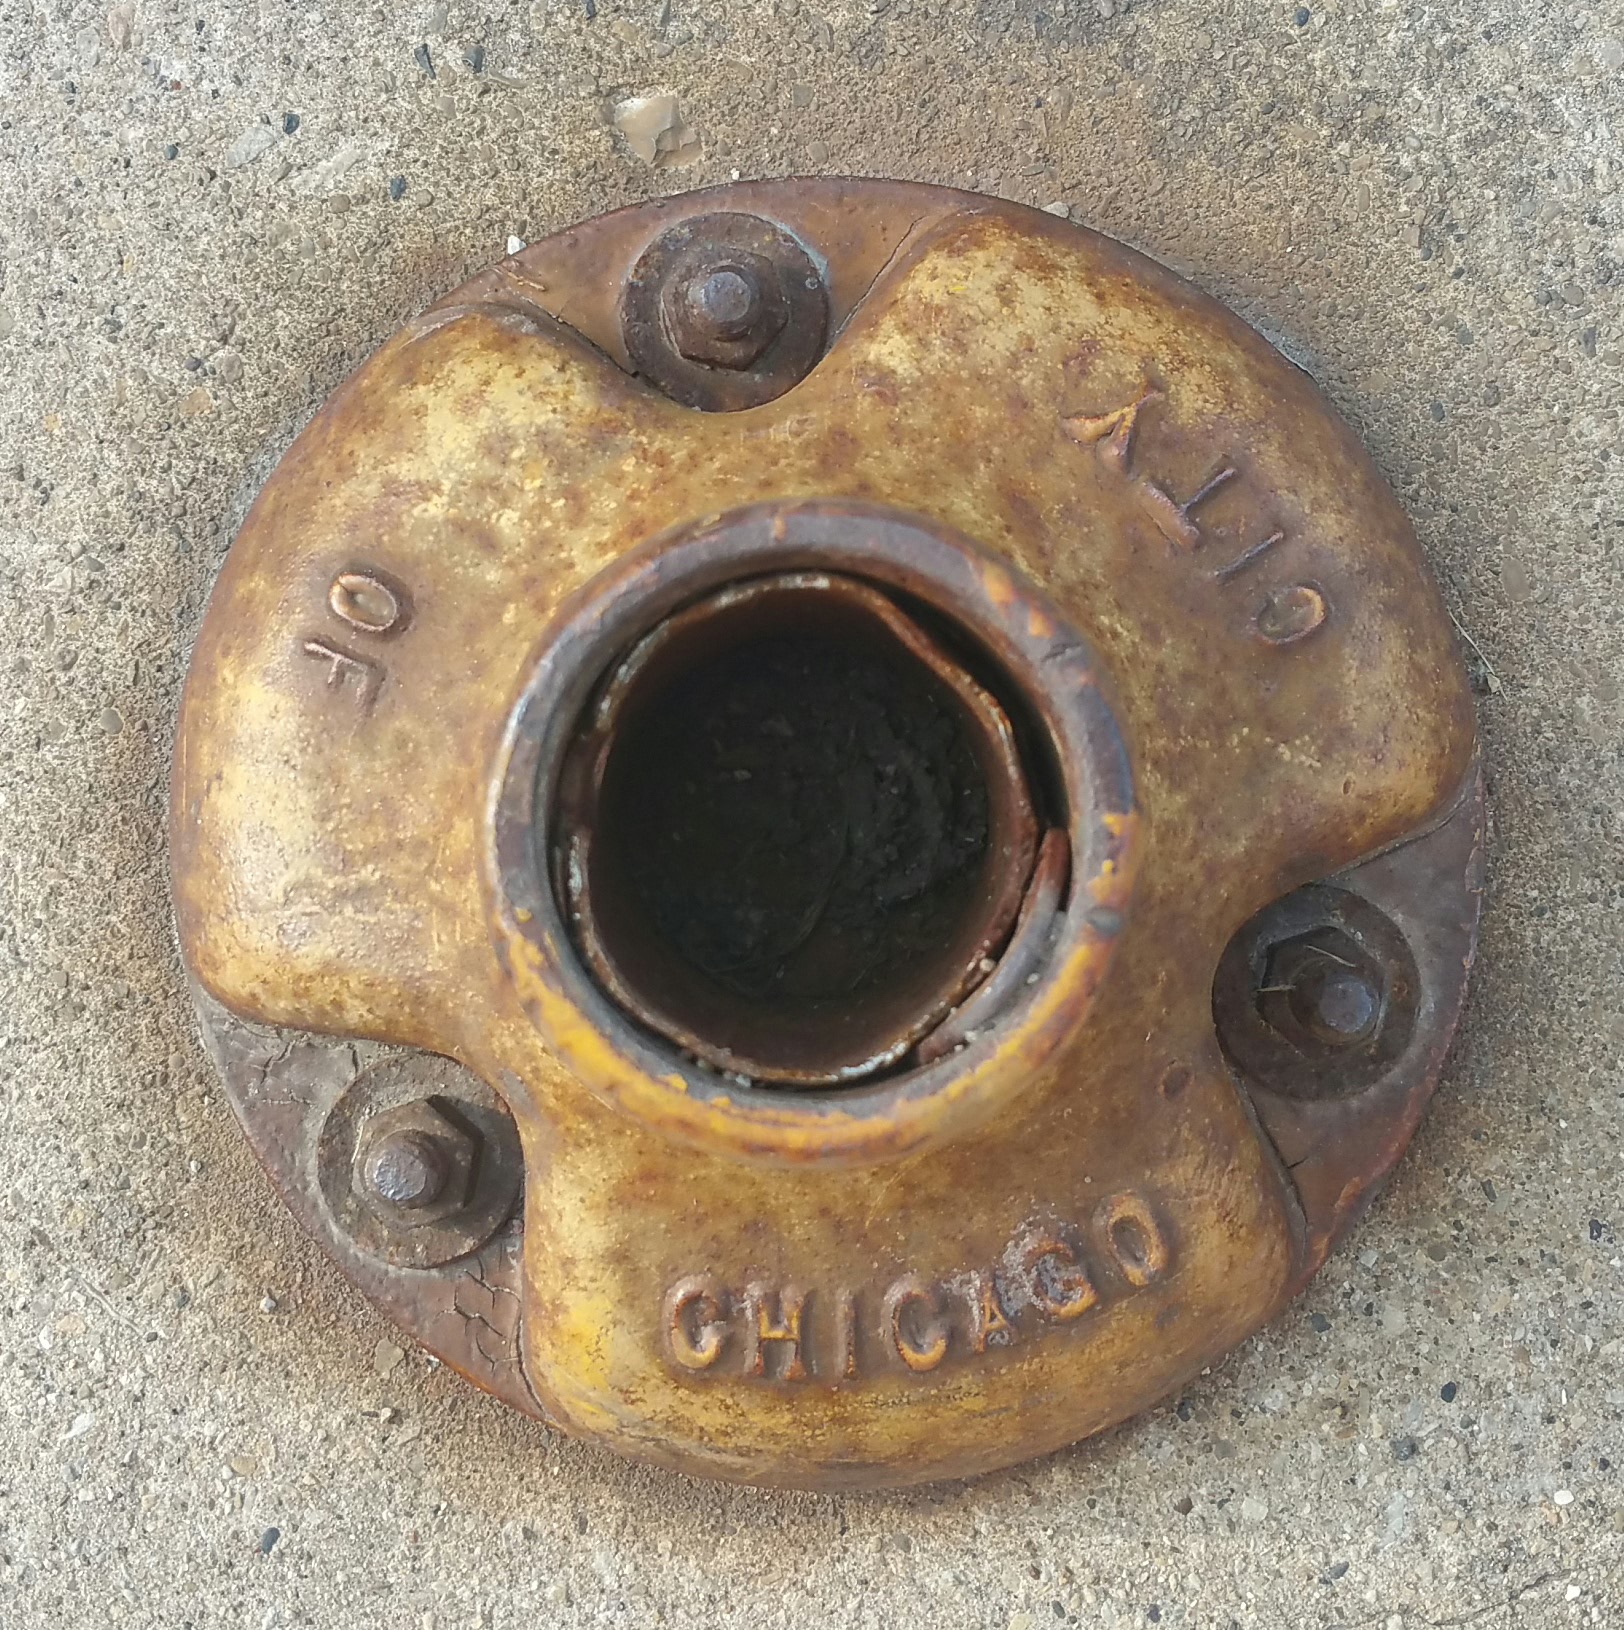
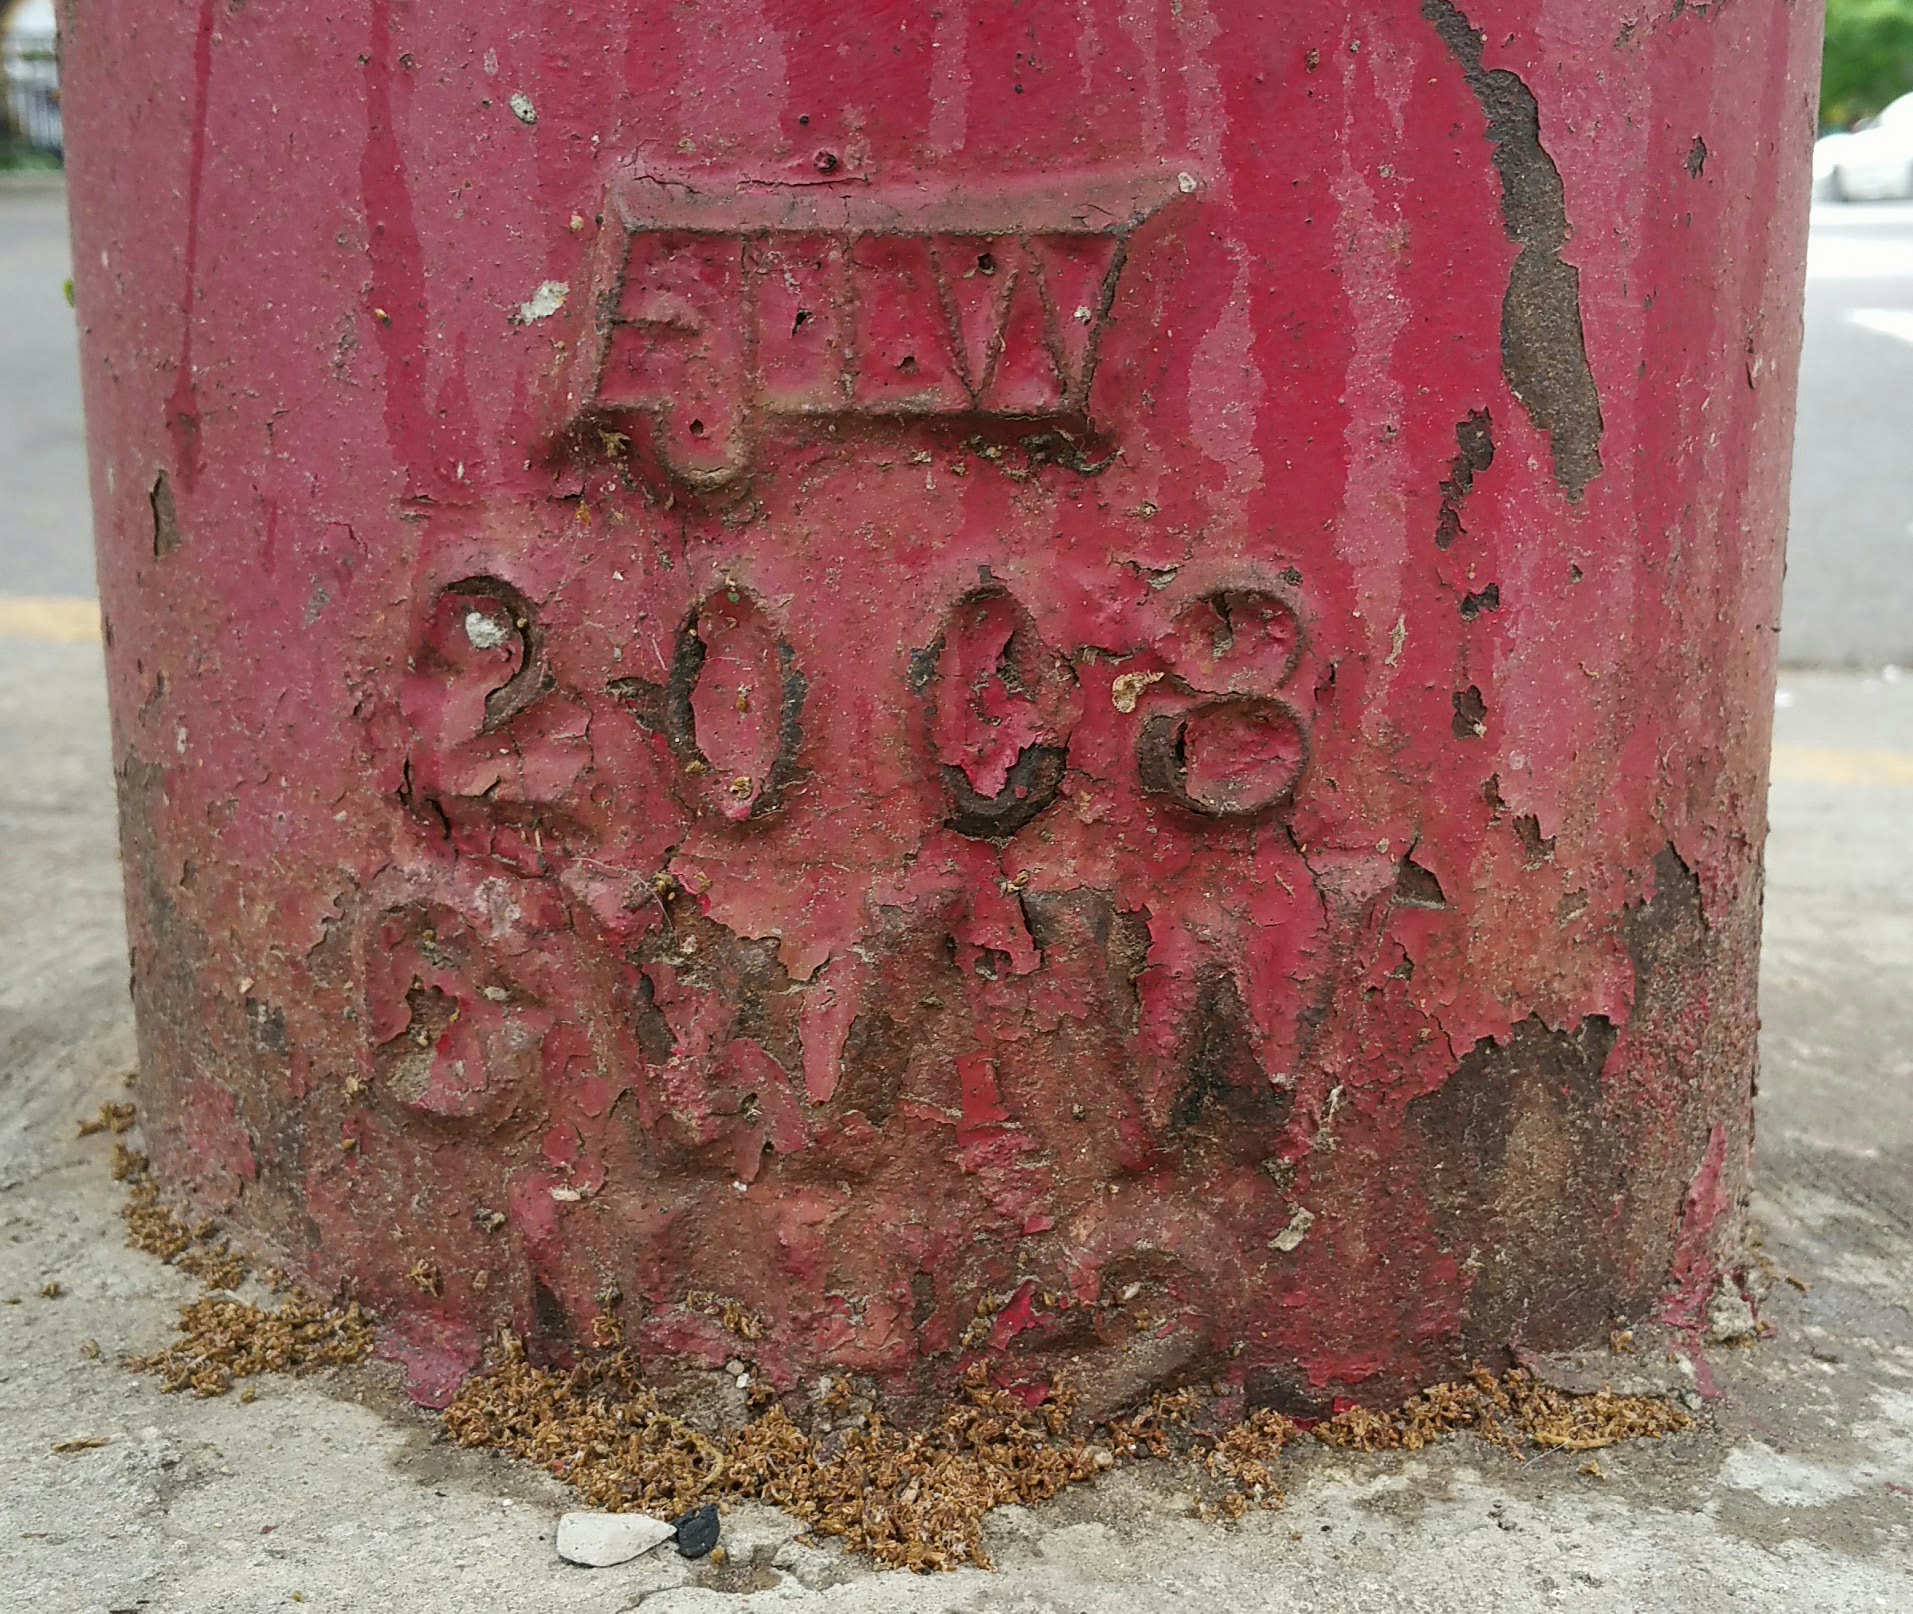
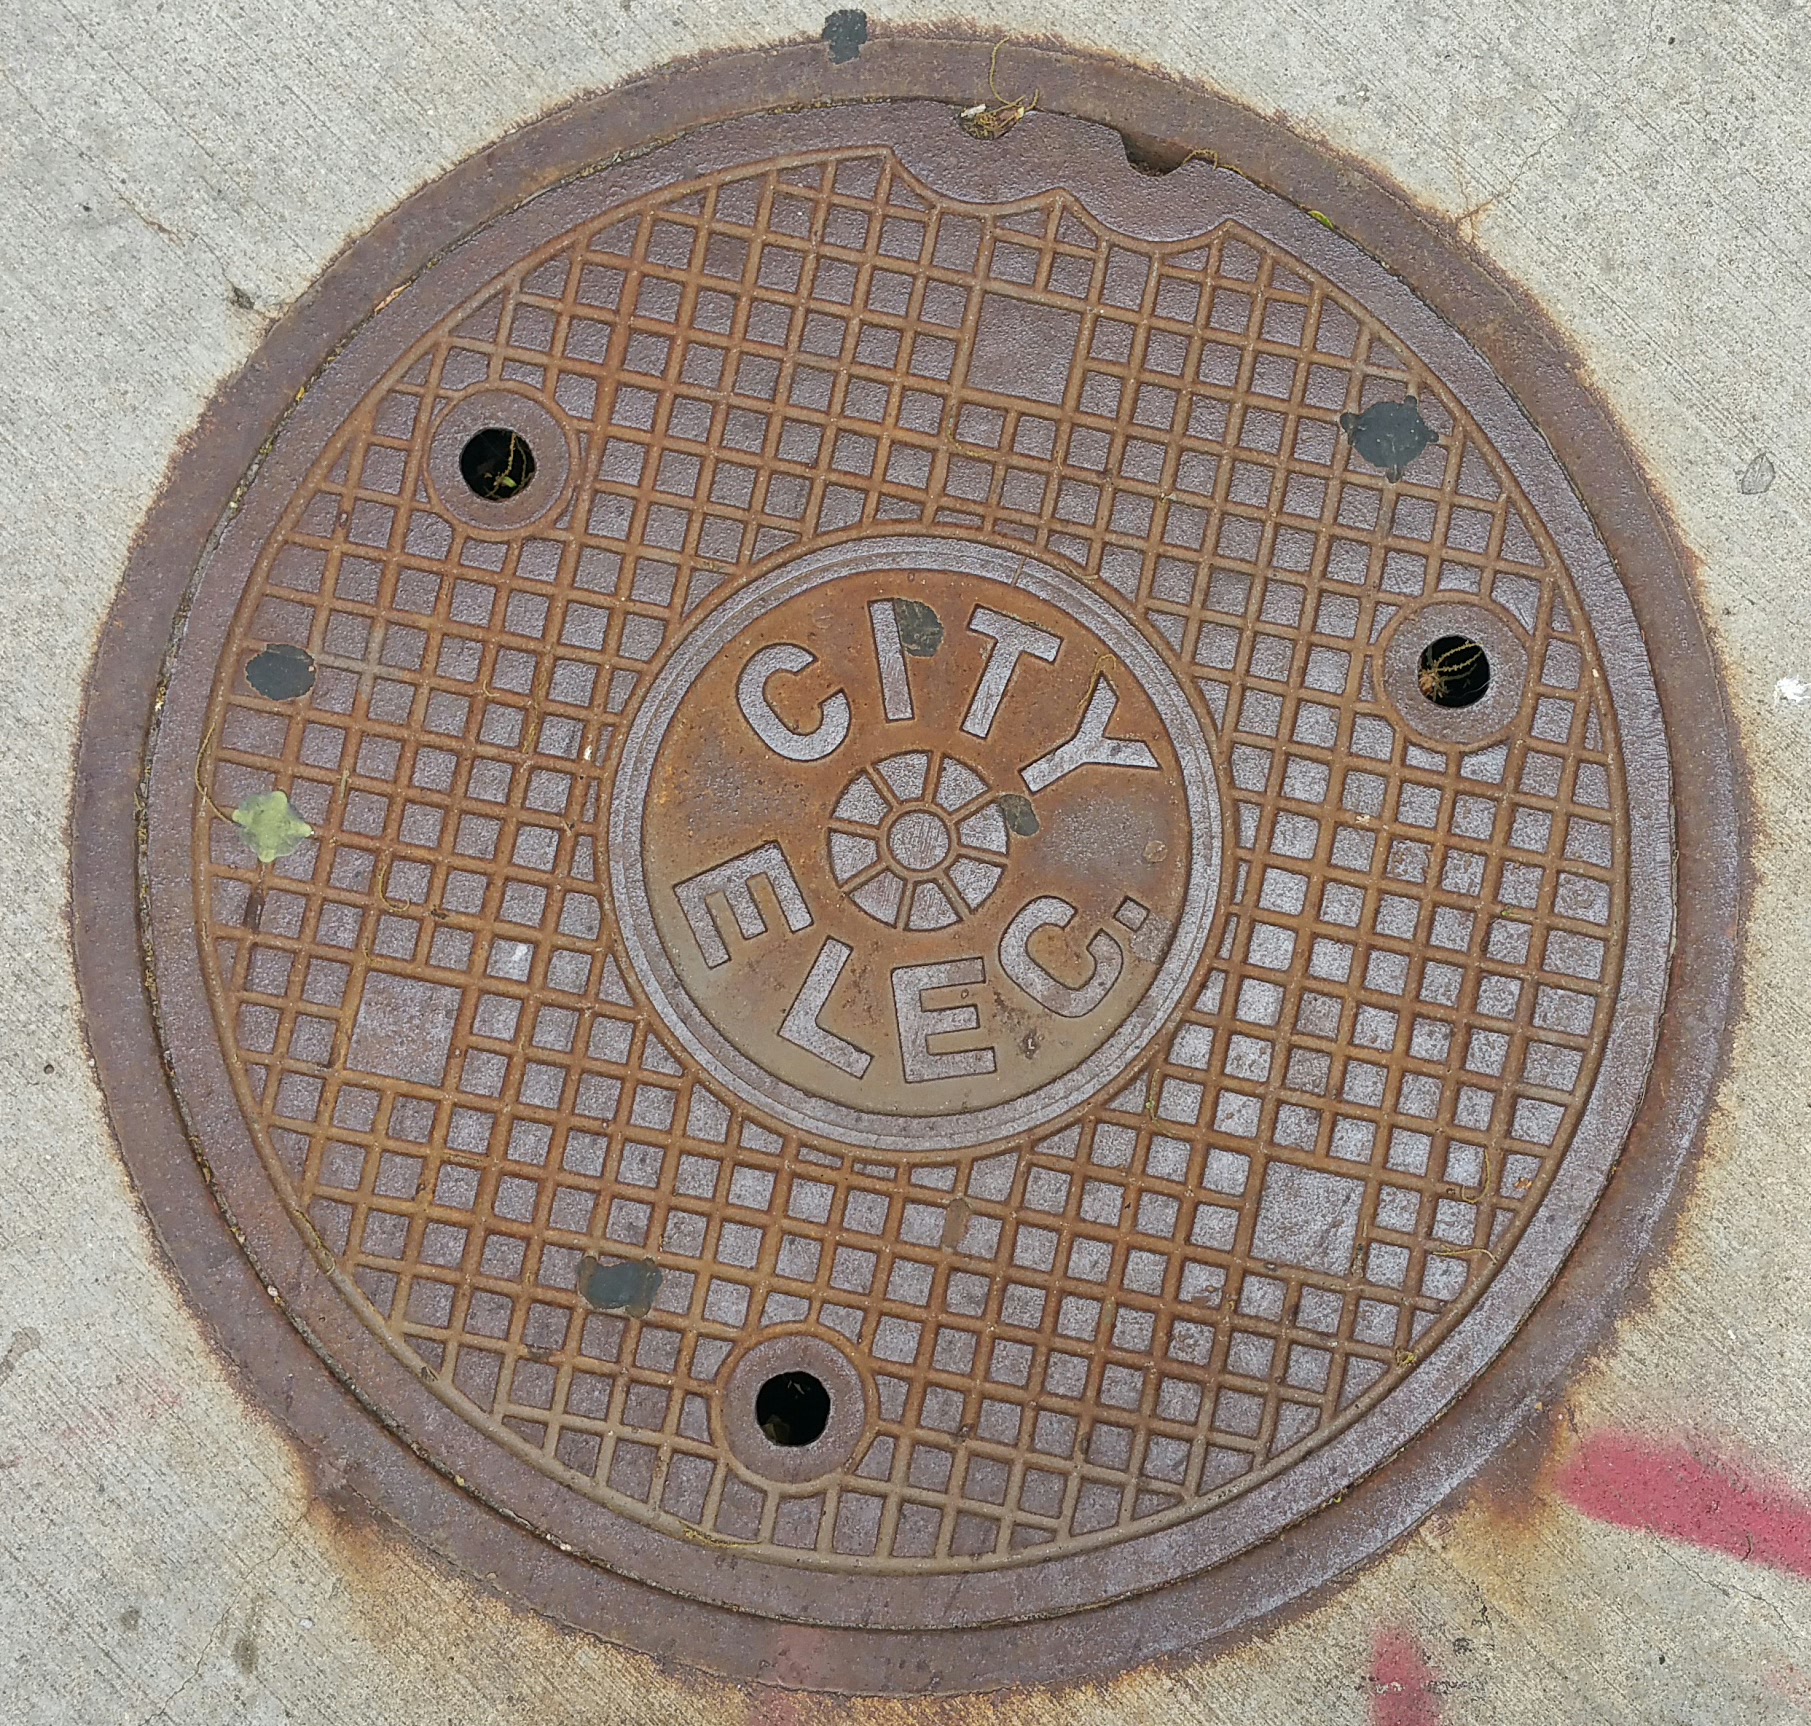
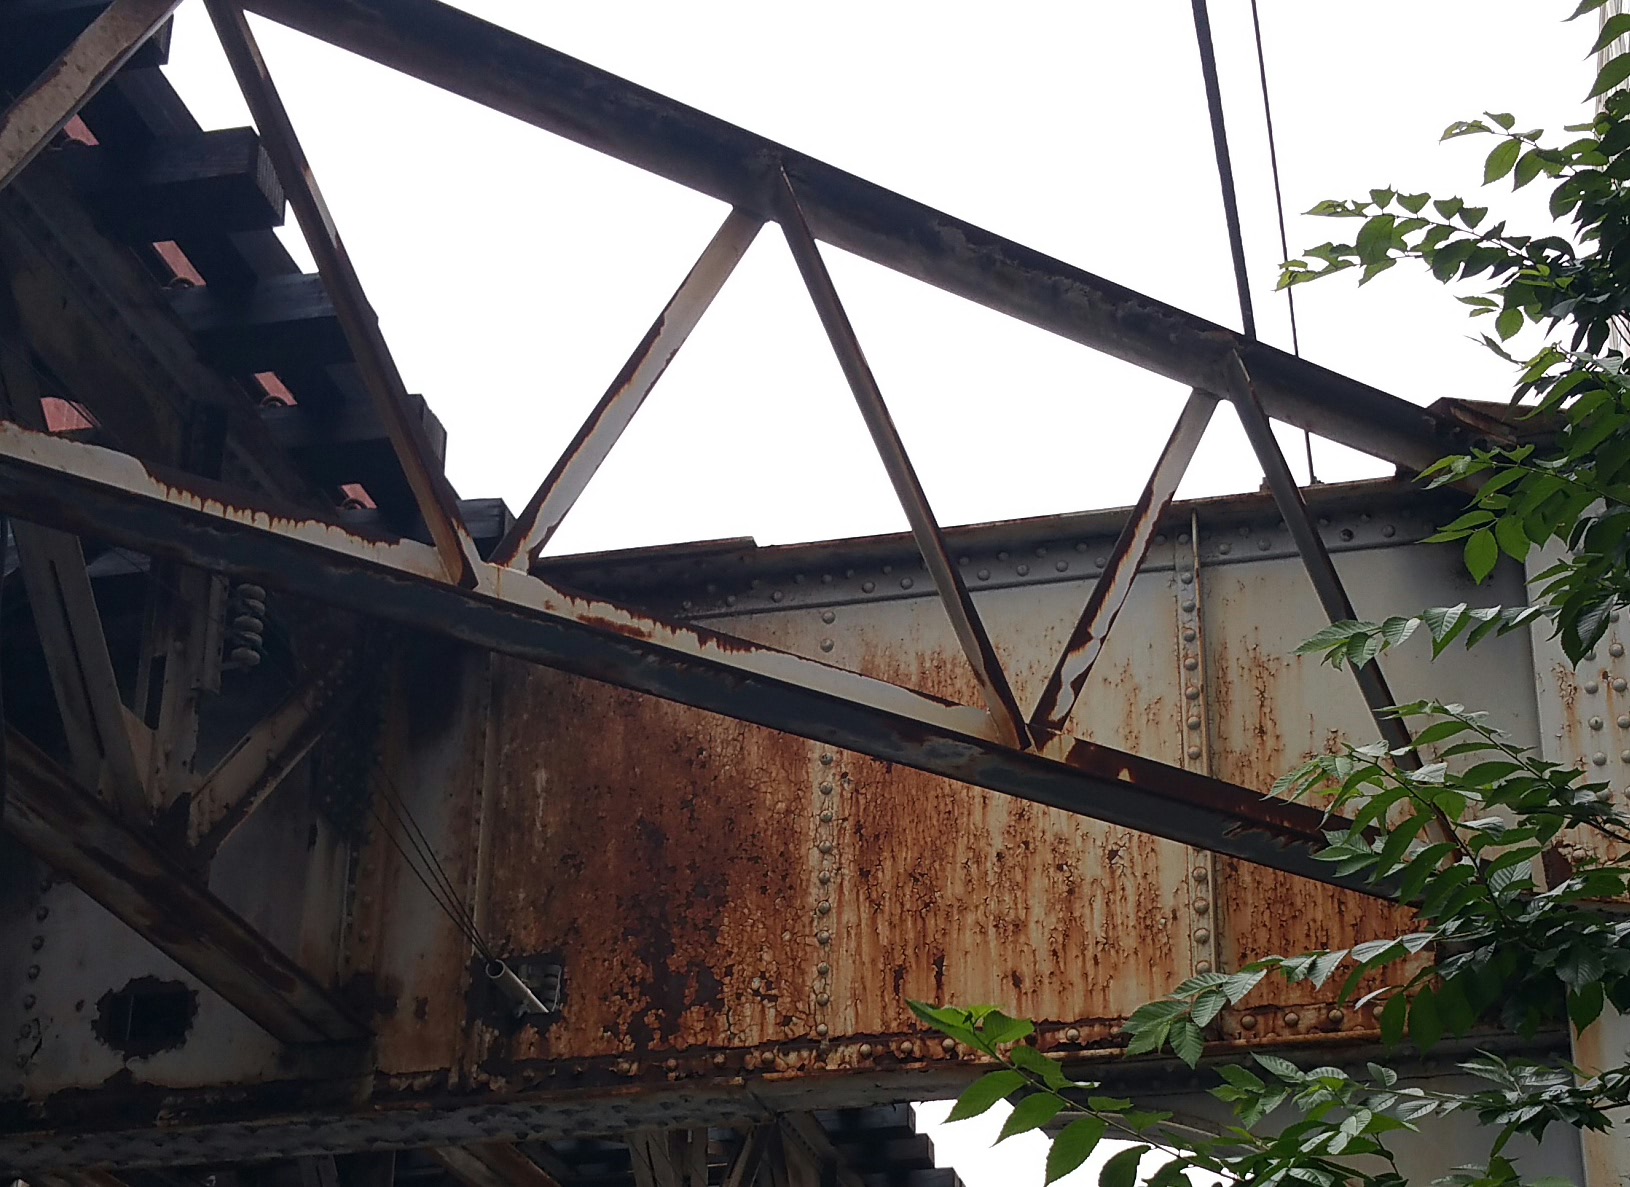
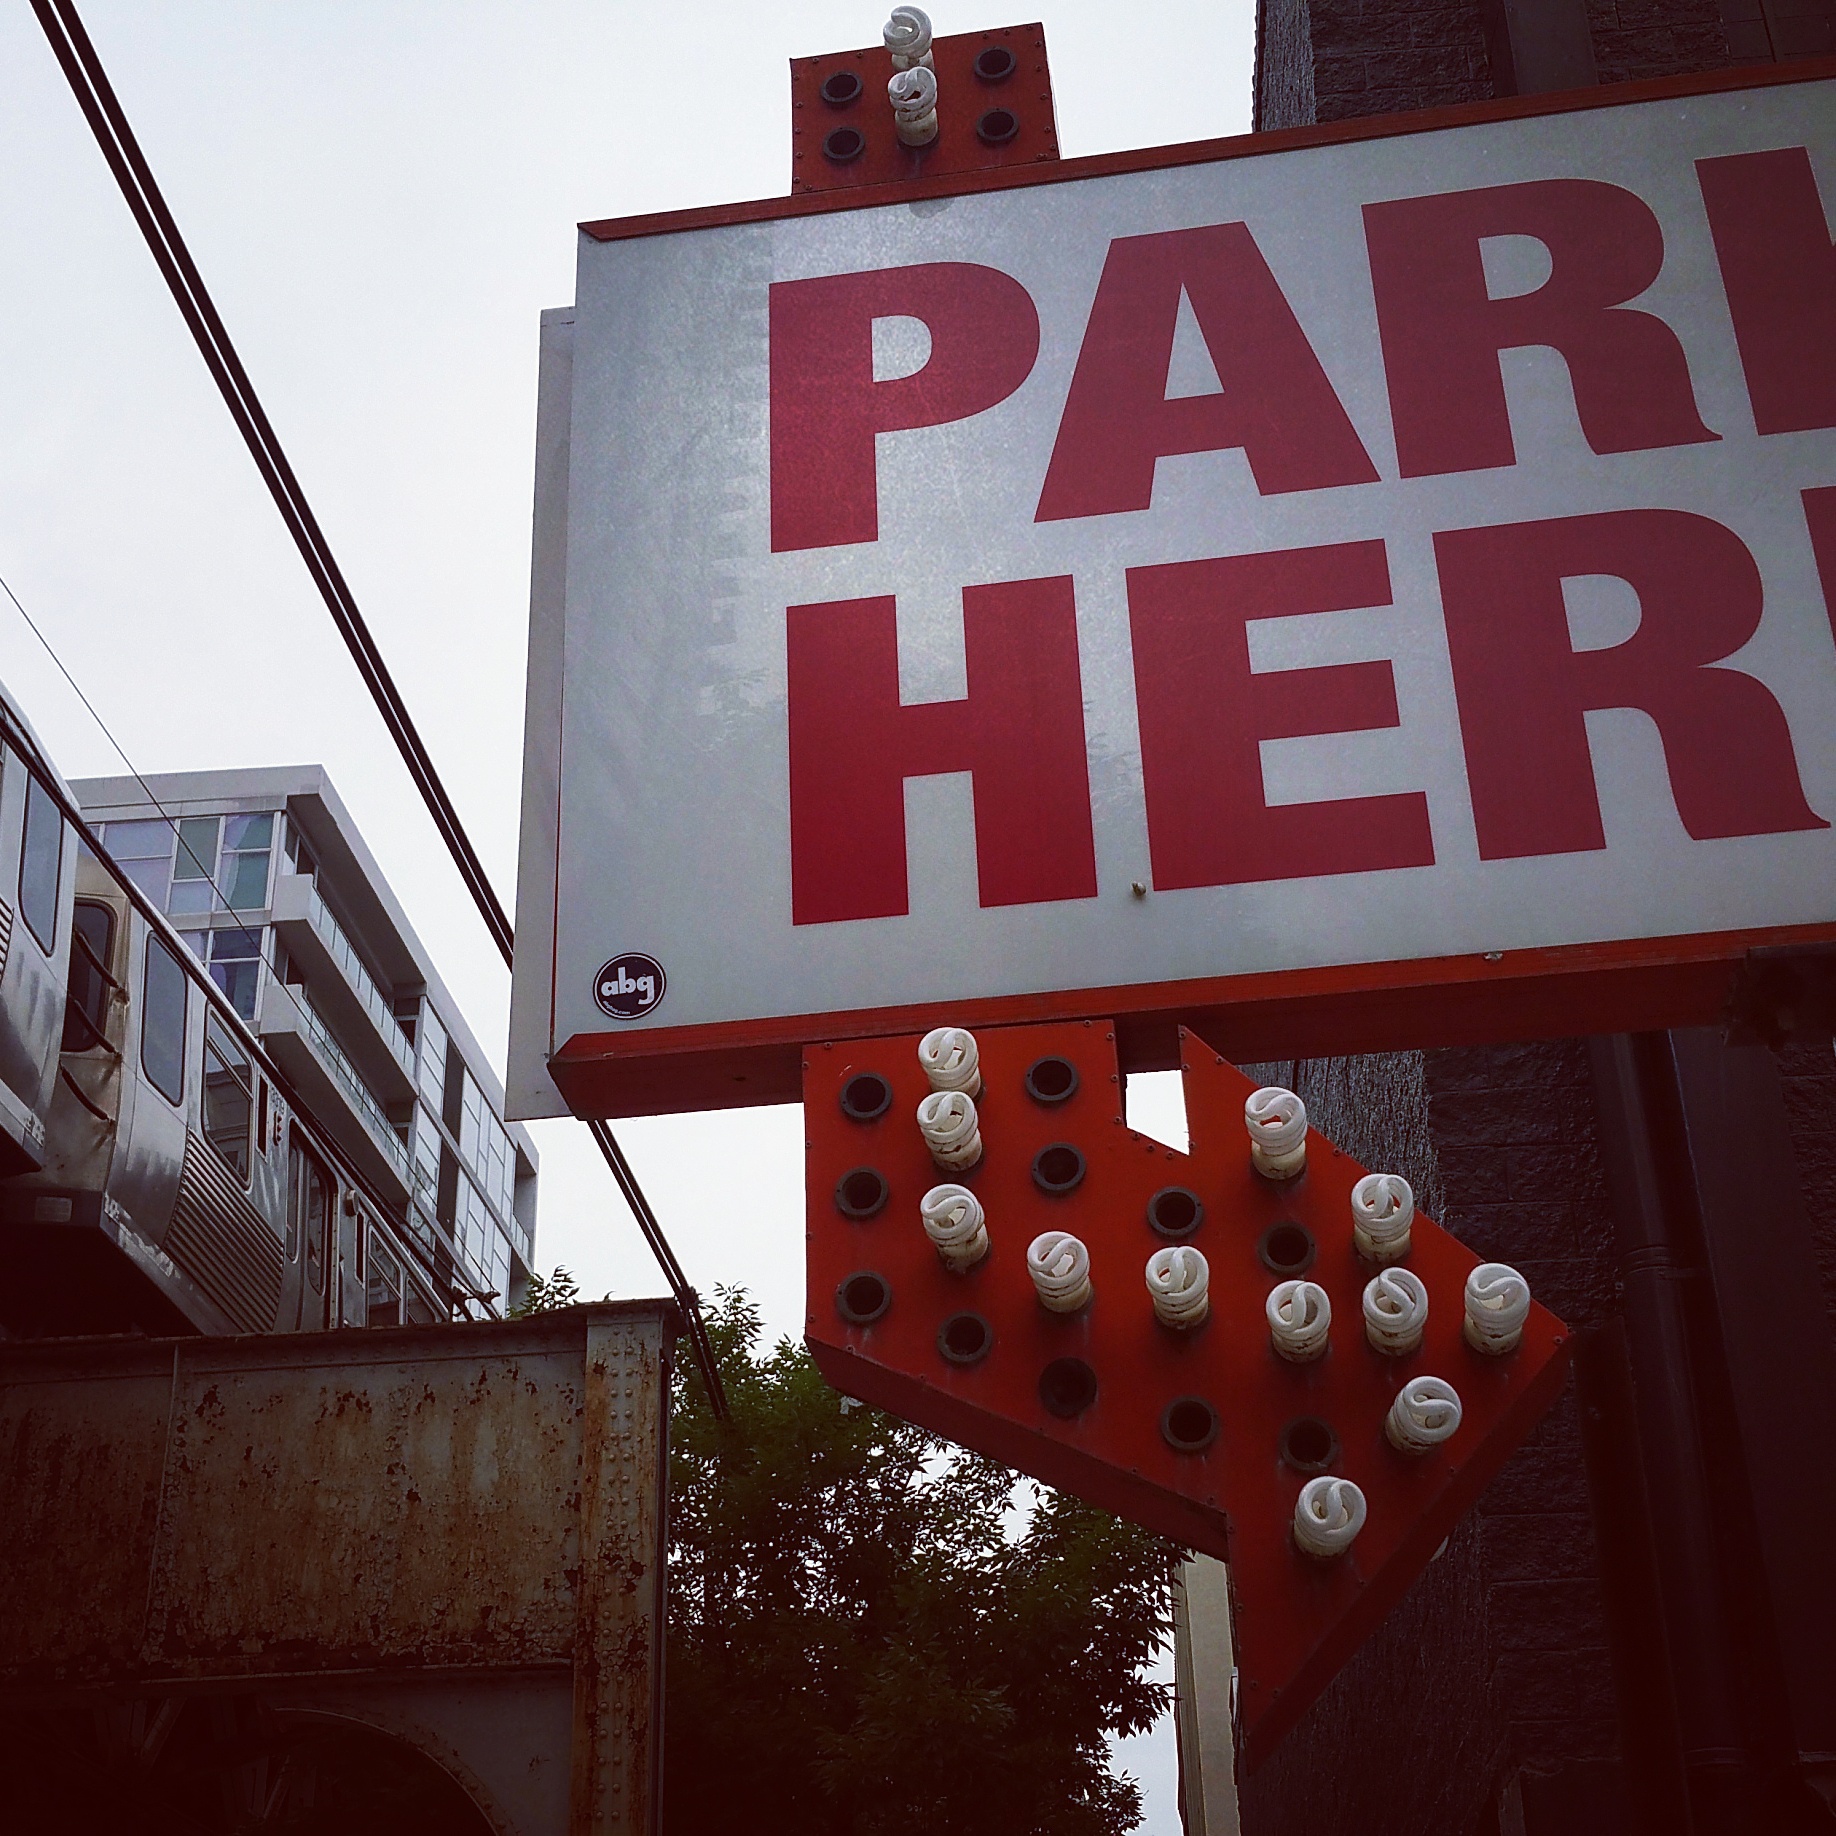
Since my daughter was already showing an interest in taking photos (i.e. taking advantage of a moment’s distraction to snatch our smartphones and go directly to camera mode), we decided to go on an adventure into Chicago to take some pictures. Using Vivian Maier as our inspiration, we headed into the city with cameras ready. Instead of people watching, we went looking for a particular subject matter, having narrowed our focus down to rust.
The challenge would be to find areas of rust that we thought could make compelling photographs (the real challenge was editing down the hundreds of — mostly forgettable — photos we ended up taking):
After spending the better part of a day in the city looking for rust, one side-effect was we saw intriguing areas of rust everywhere we went for days afterward. For instance, the last photo above was taken at a farm near us. Even now, if we’re out walking, my daughter still points to interesting examples of rust. It’s amazing how well the human brain can focus if you tell it where to look.
Part of the ulterior motive behind our day of photography was to start thinking about rust as a design element for our new house. Since we will have an Urban Rustic theme, we knew what the basic elements were going to be:
Wood
Concrete
Metal
For metal, I knew it would include exposed lag bolts, washers and nuts, along with some industrial/farm tools, in addition to a couple of areas dedicated to rust. Incorporating rust in a dramatic, yet limited, way would prove more challenging and time consuming than I first imagined (more on this later).
To achieve an Urban Rustic look (think Modern Rustic, only less ornate), we wanted to blend elements seen in farmhouses and those associated with big city design (more factory than penthouse), especially those prominent in the early 20th century. Although mostly informal, we also wanted the look of our house to incorporate a few modern ‘bling’ items along the way, too.
For more info on the dichotomy between rural areas and big cities, and how the suburbs fit in, go here: Building in the Suburbs
Here are the main design elements for both the exterior and the interiors:
Wood (Charred Cedar)
Some really helpful videos that gave me the confidence to try this:
Some charred cedar boards I did last summer: The first two on the left have an “alligator” finish; the three on the right have been “brushed”, allowing more of the red in the wood to show through after much of the char has been removed.
A sample board showing the charred cedar in combination with “natural” oiled cedar. Still working on the exact layout and combination of the charred and “natural” boards. We will want to try something more adventurous than the basic layout you see here.
The charring is surprisingly easy to do with a little practice. If, however, you’re not up for it, but you’d still like to use it on your own house, here are some companies that will do it for you:
I use their Tung Oil and Citrus Solvent products to finish the cedar, and it works great on concrete or stone, especially when going for an “aged” effect. We’re also going to use it for finishing our wood floors — produces a fairly durable, easy to touch-up, slightly amber matte finish. It is also very easy to work with.
Concrete
buddyrhodes.com
I really like their Craftsman mix — great for decorative pieces, easy to work with, and it produces really great results (and it’s easy to add glass or pigment to the mix as well). Their Bone Paste slurry mix is also fun to use, and great for creating dramatic highlights when filling voids.
homemade-modern.com (they have interesting projects, with easy to follow instructions)
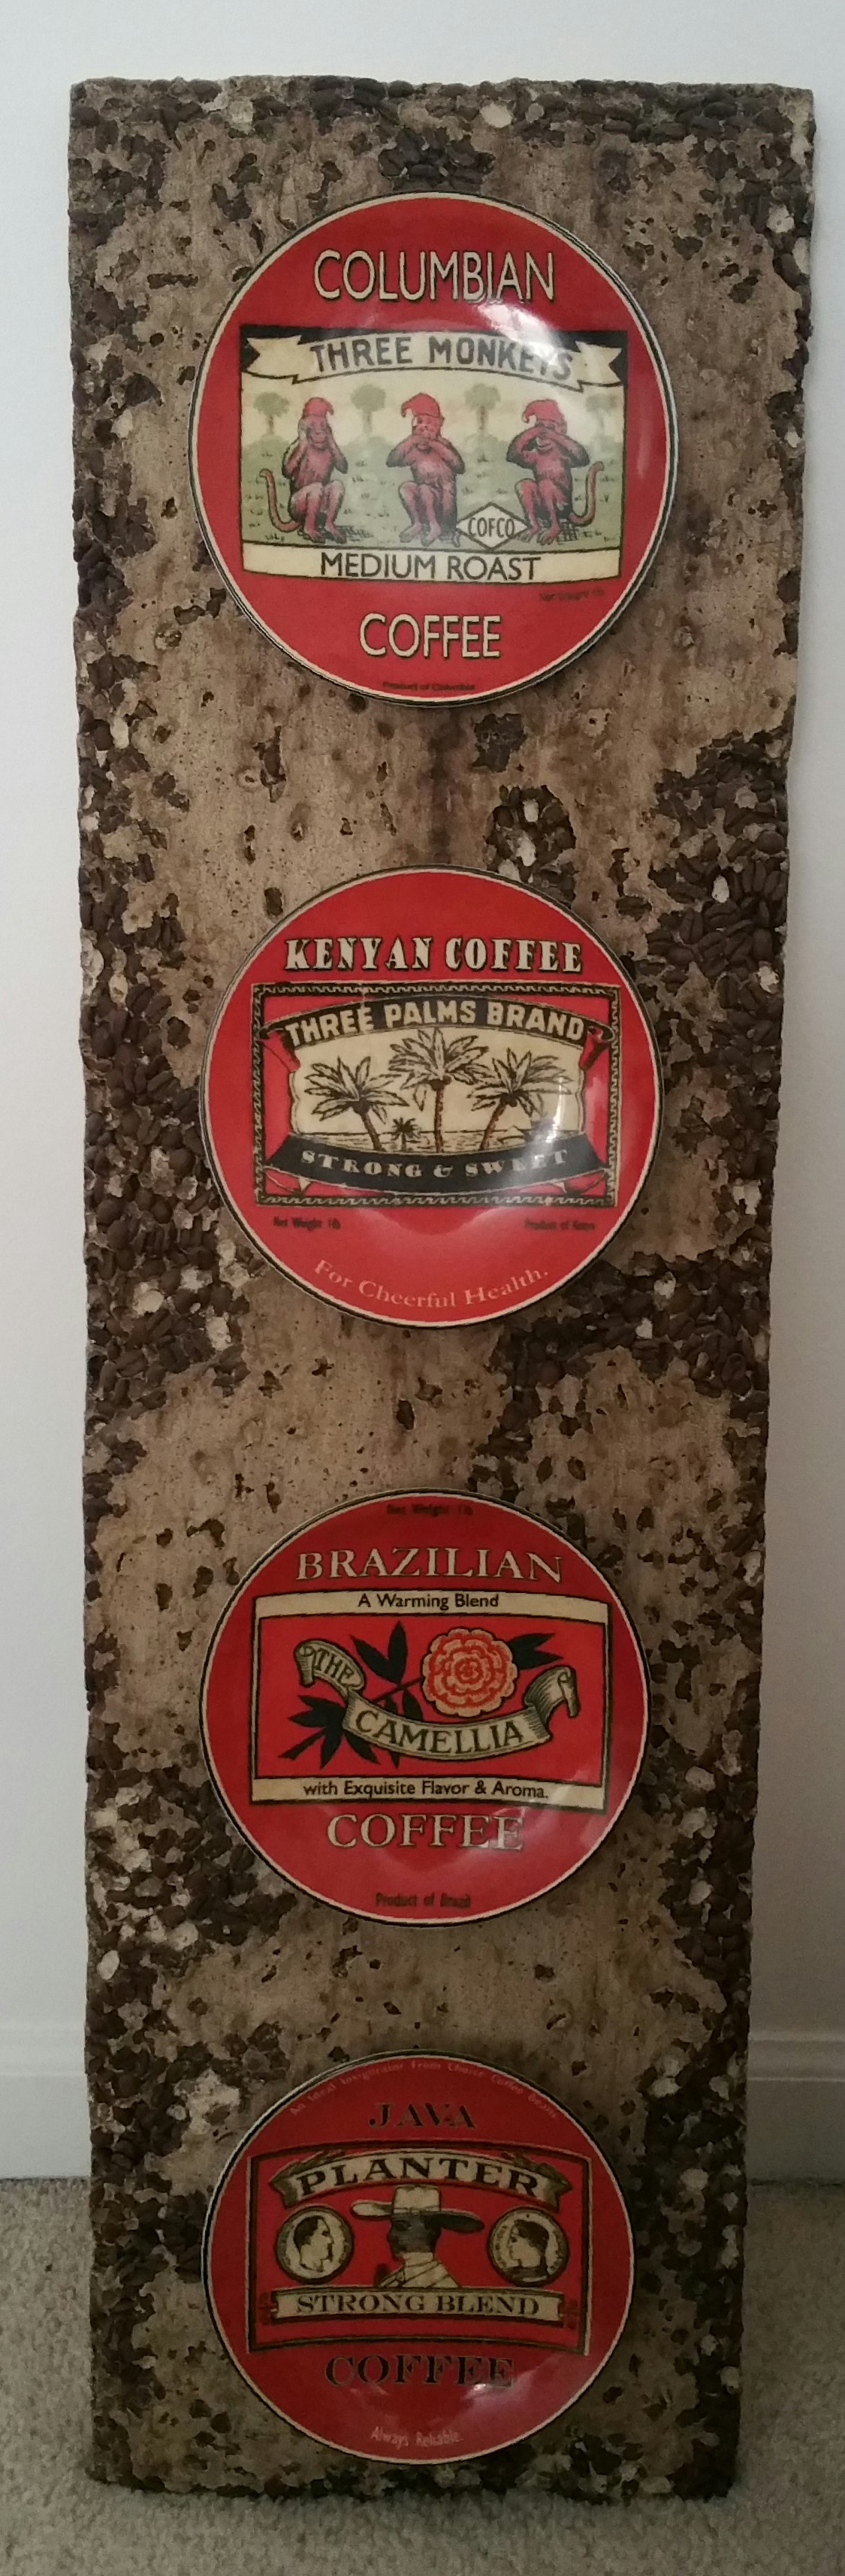
Concrete is usually thought of as oppressive and ugly, but there’s actually a lot of interesting ways to use it that bring out its potential as a decorative element.
Below is a concrete piece using Buddy Rhodes with real coffee beans embedded in the concrete (the beans were on the bottom of the form before pouring the concrete over them). I used the Dark Tung oil product from realmilkpaint.com to give it an added “aged” effect:
Metal
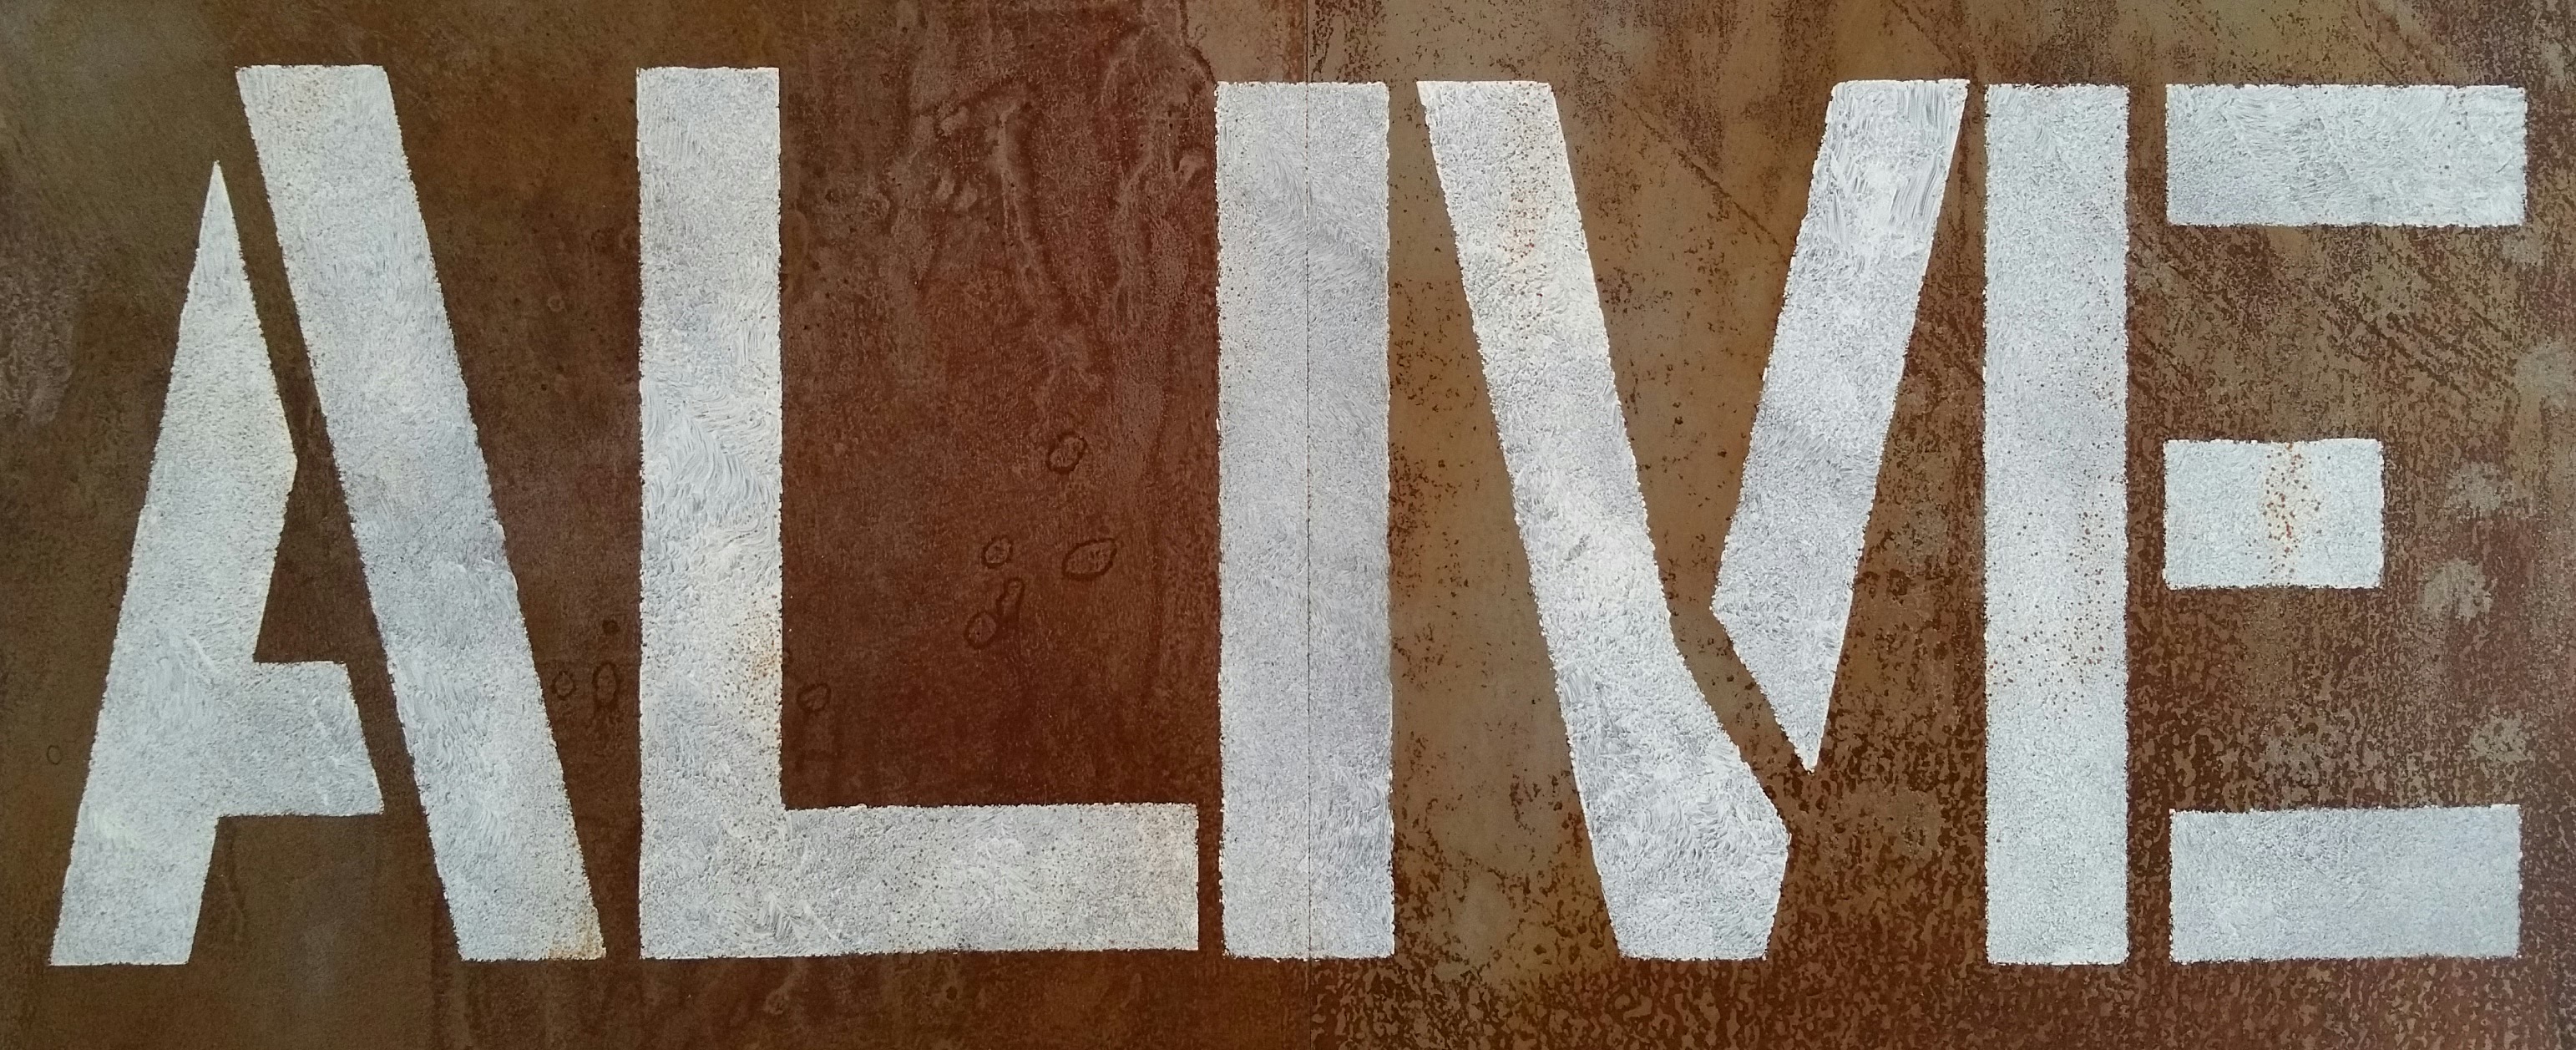
I’ve learned how to prematurely rust bare steel, so some key spots will have this.
There will also be metal hardware involved.
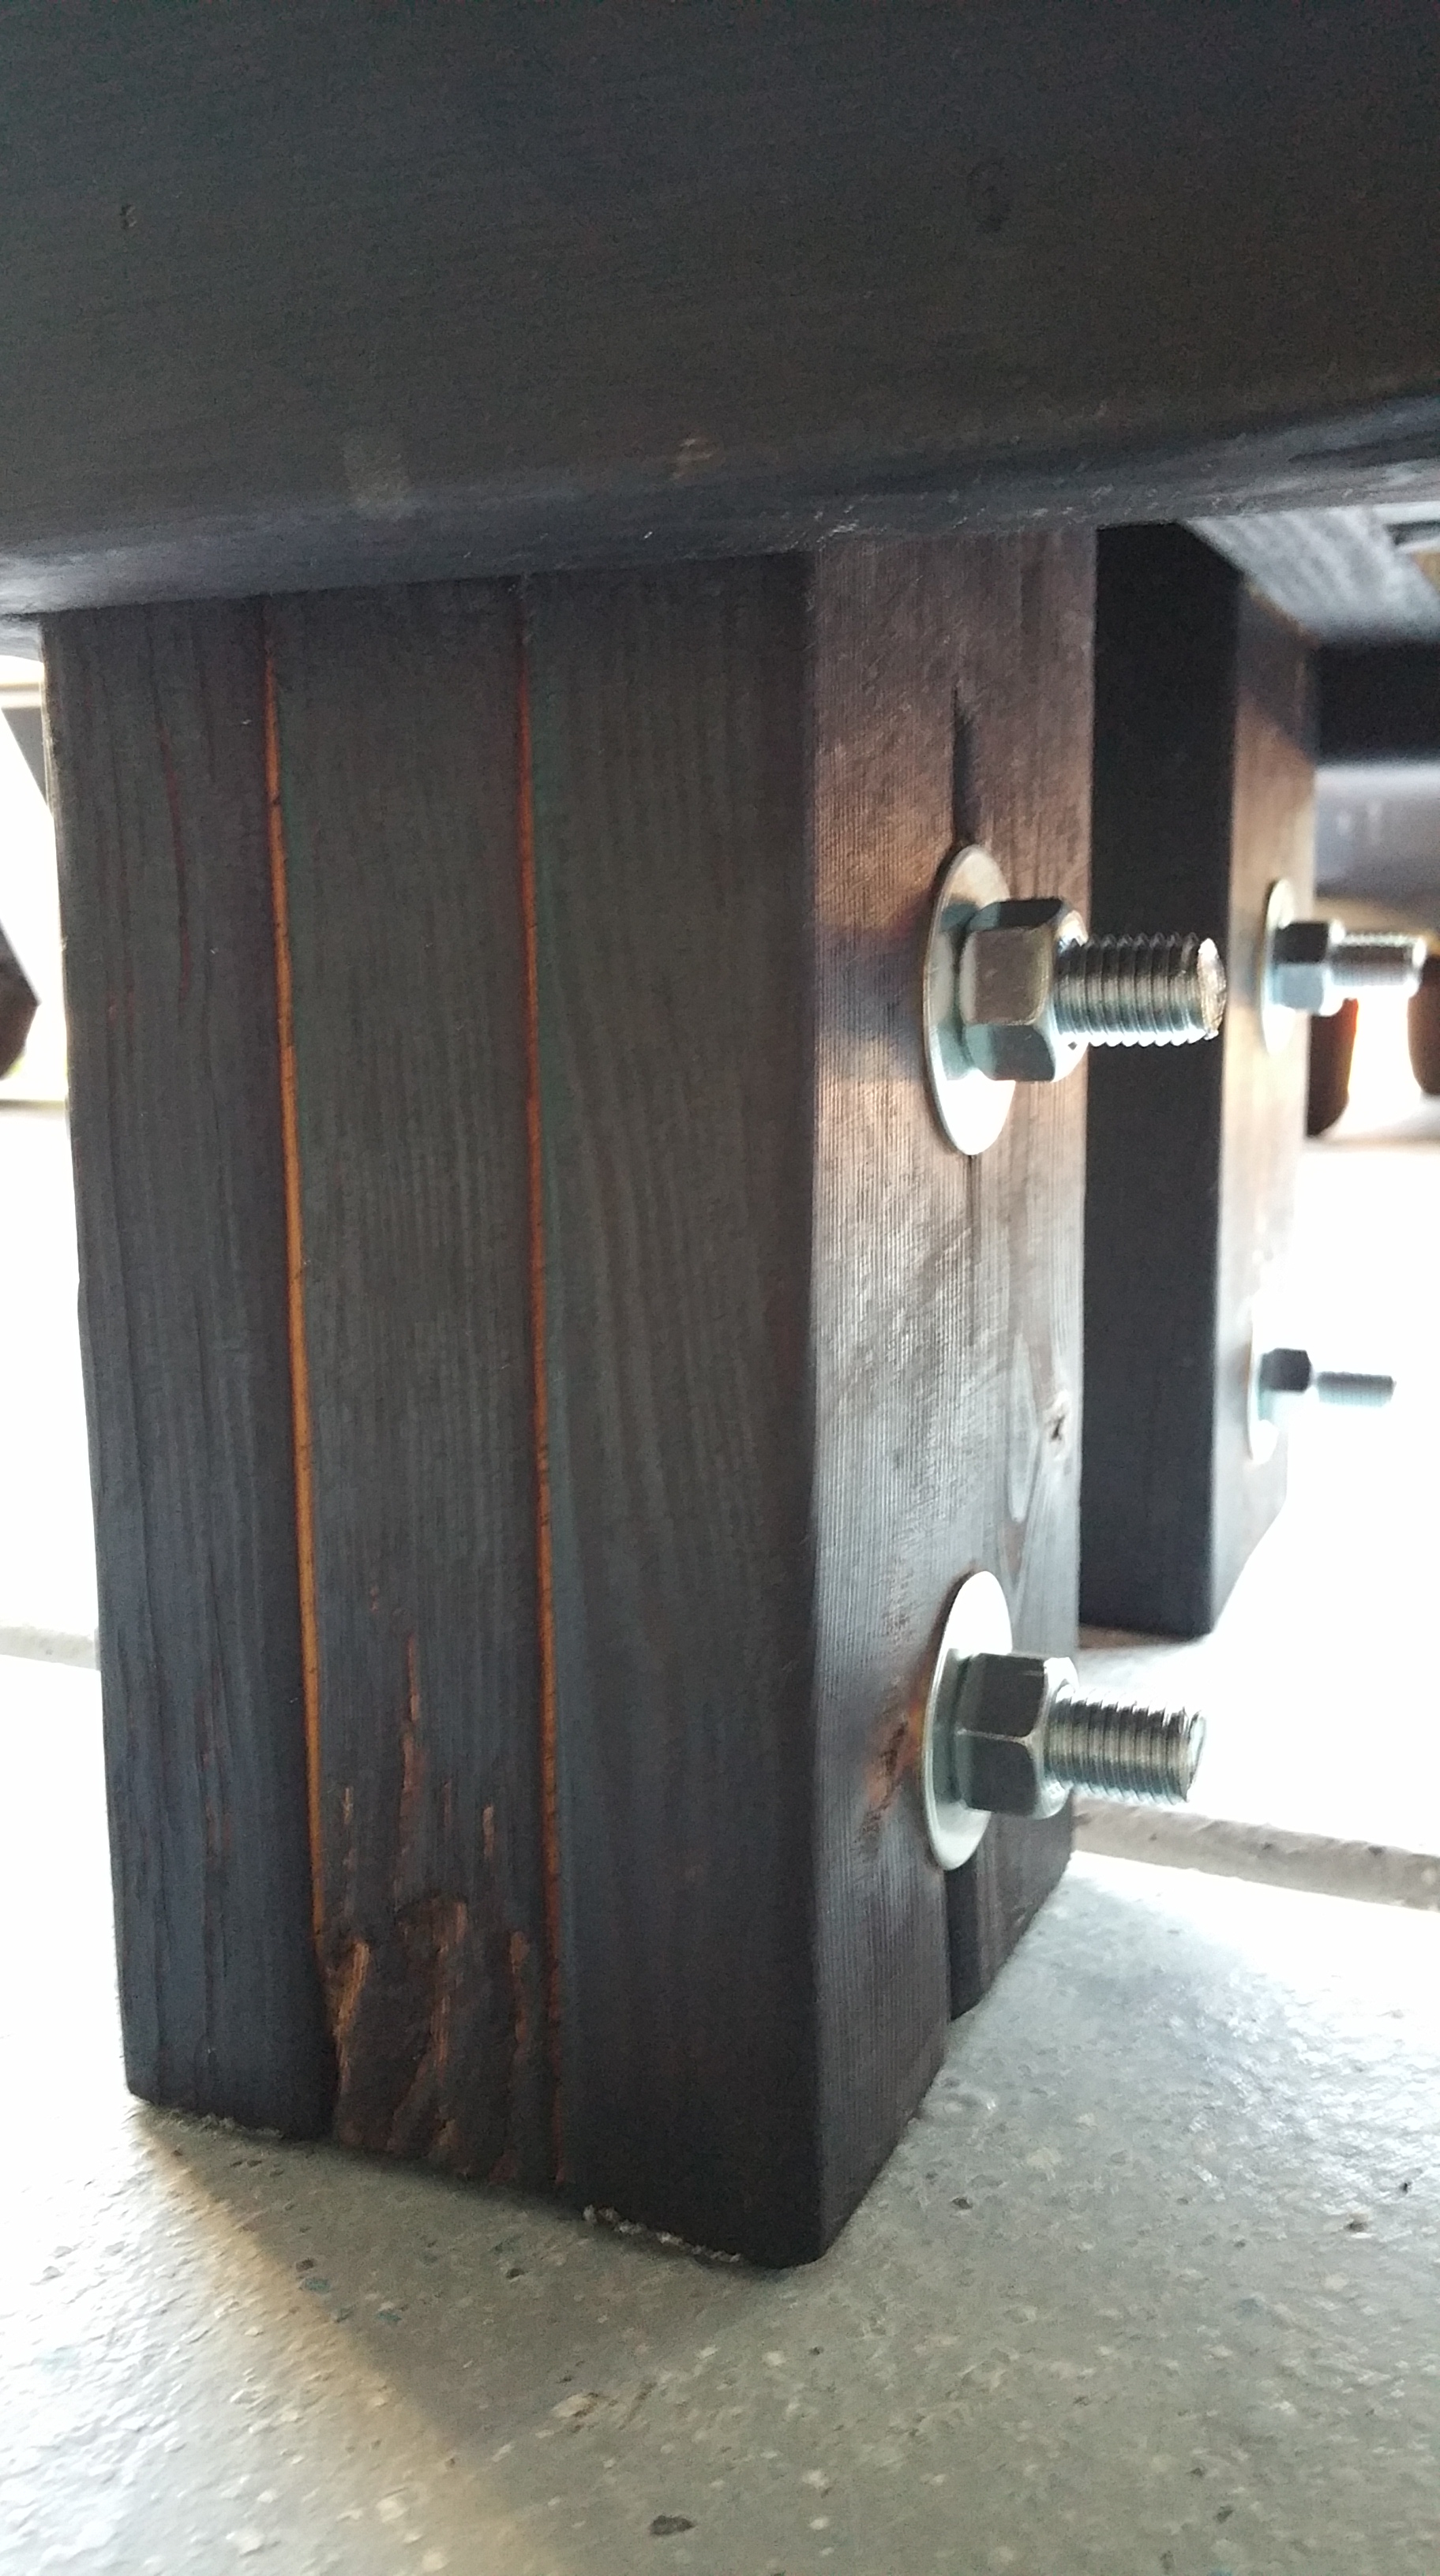
Unfinished charred bench from last summer.
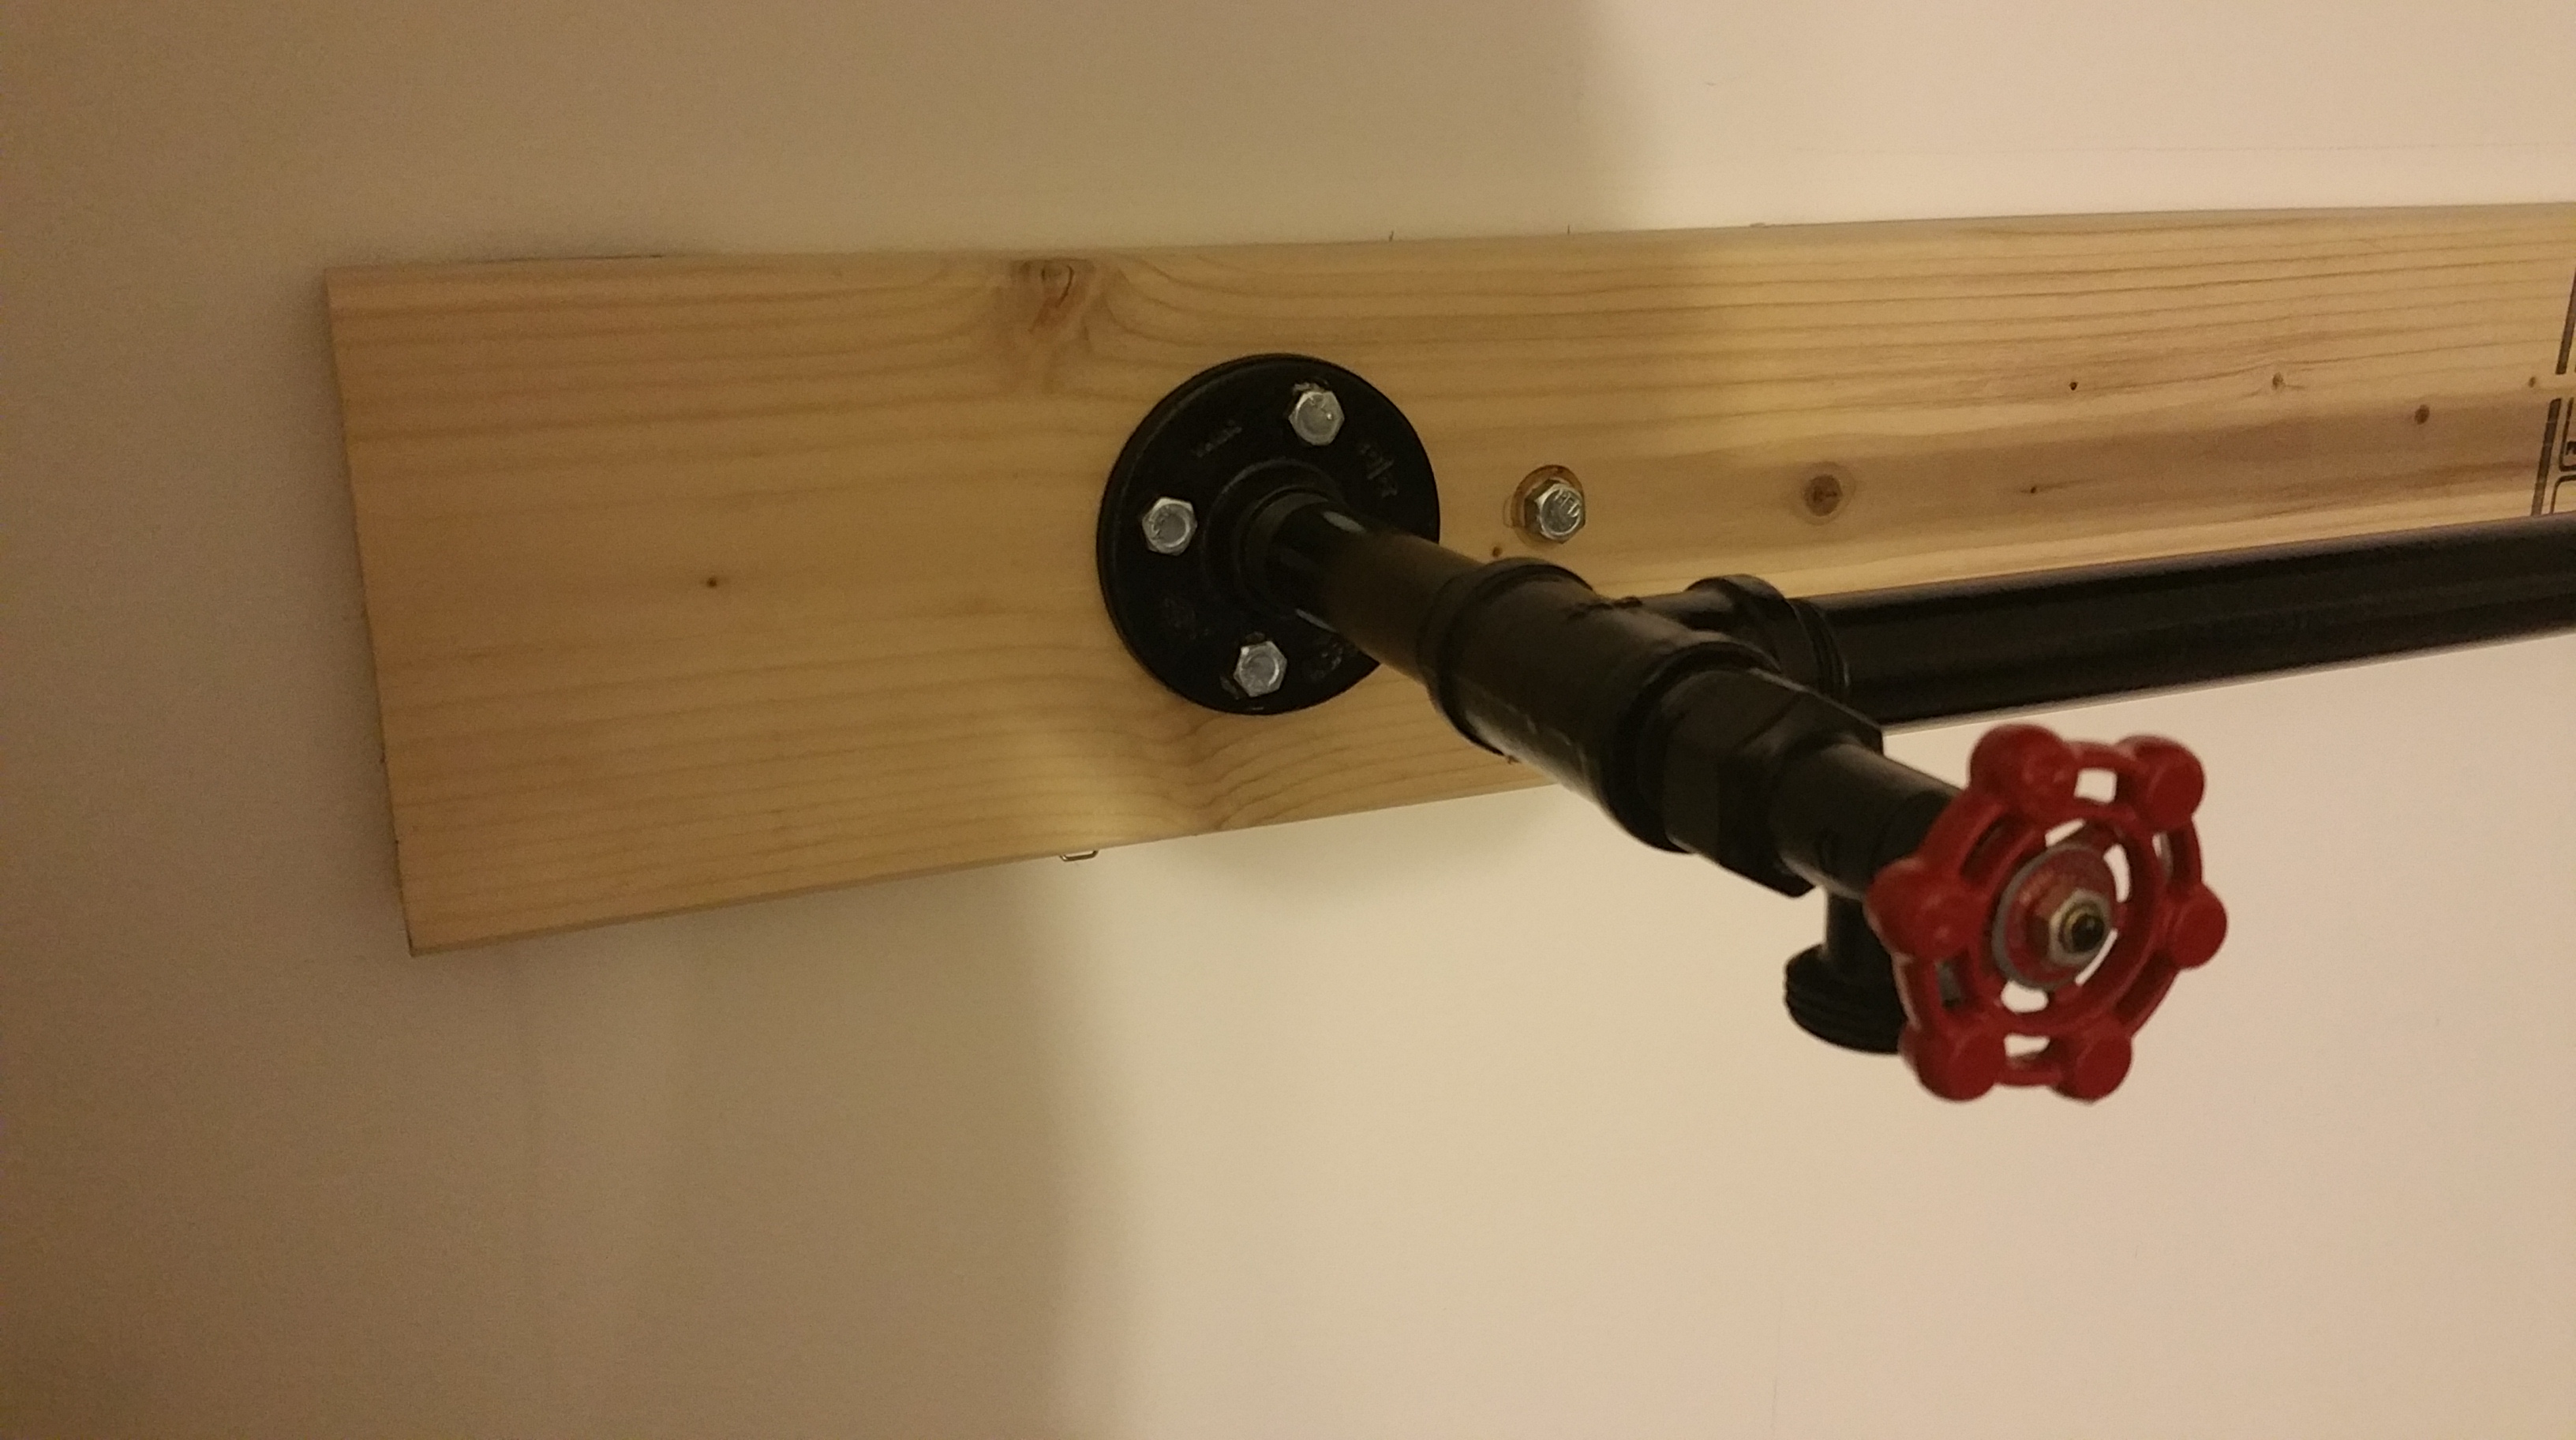
We will be using gas pipe for shelving and storage elements.
We’re going for an Urban Rusticlook and feel, so there will be some factory/farm tools, with a variety of similar objects around as well — either partly reconditioned, like below, or re-contextualized in some fun way:


You must be logged in to post a comment.