
Window Options For a Passive House
Even in 2017, when the majority of our build was completed, the number of Passive House quality window and door options was increasing. Today, in 2018, they’ve only continued to grow.
On a side note, the following info would also be appropriate for many Pretty Good House builds.
For example, here is an article from the Green Building Advisor website from June, 2018 discussing high-performance window options: What Windows Should I Buy?
In addition, 475 High Performance Building Supply is selling an Austrian high-performance window, Bewiso:
A New Jersey Passive House builder, Darren Macri, has created his own product line: Wythe Windows
And GO Logic is an importer of a German brand: Kneer Sud Fenstern und Turen
They have an old blog post on their site discussing their history with the brand: GO Logic
Some additional options include:
GLO windows out of Montana: https://glowindows.com/window-style/tilt-and-turn-windows/
EcoSupply Architectural Products: https://www.ecosupplycenter.com/solutions/exterior-solutions/windows-and-doors/windows/
Mavrik: https://www.mavrik.build/materials-1
Zola, in particular their uPVC options: https://www.zolawindows.com/upvc#Slide1
European Architectural Supply (Schüco brand): https://www.eas-usa.com/
Klearwall (Munster Joinery, based in Ireland)
Bieber: https://bieberusa.com/why-us/12-reasons/
There are also some custom, small-scale, American-made options as well:
And it’s worth doing an internet search looking for suppliers in your specific area. In our case, Hawkeye Windows and Doors is fairly close, located in Iowa. As I relate towards the end of this blog post, Larry, the owner, really helped me out of a jam when the salesperson for our windows and doors proved incompetent and, frankly, useless. In fact, when a reader of this blog contacted me recently (2020), I had this to say about Larry: “He proved incredibly helpful and responsive. If I was building again, or building for someone else, I would definitely get a quote from him. The real value in working with someone like Larry is that he’s close enough geographically to be willing to travel and do the install with his crew (Midwest region)… in addition to being readily available should any issues develop after installation.”
They all share similar characteristics, including insulated triple pane glass, thermally broken sashes and frames, multi-point locking systems for airtight seals against gaskets on the frames, the European-style tilt-turn function, and the seemingly ubiquitous but beautiful Roto hardware.
It’s nice to see that more options are becoming available to those looking for high-performance windows in the US — hopefully this means a long-term movement towards better overall building standards in terms of quality, durability, and performance.
And here’s a quick overview on high-performance builds and the need for quality windows and doors: Hammer and Hand
Although not everyone is entirely convinced, and there’s still debate regarding exactly what’s “necessary” in terms of performance (the exception would be building to the Passive House standard, either PHIUS or PHI, where the requirements are more black and white). There’s a lot more latitude if building a Pretty Good House, or the homeowner is only looking to meet the benchmark of Net Zero.
Suntuitive Dynamic Glass for Our West-Facing Windows
When my wife’s cousin found out we were trying to build a high-performance new home (a mix of Passive House and Pretty Good House), he suggested we incorporate his company’s self-tinting glass. Used largely in commercial applications since its introduction, the product is beginning to make inroads into the residential market as the cost comes down: Suntuitive
For anyone near the northwest suburbs of Chicago, you can see the glass in person at the Ziegler Maserati dealership in Schaumburg, Illinois: Exterior View
As the product has continued to evolve, they’ve been able to remove much of the “green” look to the glass. This is evident in the Ziegler dealership glass, but even in that application I didn’t think that it was all that prominent. The overall look of the glass was still impressive.
As to function, the Suntuitive coating between the layers of glass adjusts its level of tint based on the temperature of an inner layer. In the summer, this has obvious benefits when high temperatures combine with glaring sun to enter a structure, particularly in the east in the morning or the west in the afternoon (even to the south without some protection with overhangs). But the really nice thing about the product is that it doesn’t tint on the coldest days in winter, allowing for some solar heat gain and natural daylight exactly when you want it most on sunny, wintry days.
For energy reasons, and also personal aesthetic choices, we decided to forego any windows on the east side of our house. Instead, we just have our front door facing the street (it has a limited amount of privacy glass to let in some morning light). On the other hand, because we wanted to use a significant amount of glass on the west side, which faces our backyard, and we knew overhangs couldn’t offer much relief from the summer afternoon sun, Suntuitive was a great solution for us — especially since we wanted to avoid using blinds or curtains as much as possible.
Following Passive House principles for glazing, we wanted to optimize our views and connection to the outside through our limited and strategically placed number of windows.
Here’s a useful video showing the effects the sun can have on a structure in various seasons:
And here’s an interesting video discussing the challenges associated with managing both solar orientation and scenic views when they’re in conflict:
For our house, we only have a single window to the north (for my daughter’s bedroom), while the majority of our windows are on the south side, where we spend most of our time in the living spaces (open kitchen and family room). In effect, we’ve limited our windows in private areas of the house, mainly two bathrooms. Besides energy concerns, we didn’t think it made sense to add additional glass to our north, mainly because our neighbor’s house blocks any meaningful views while also reducing privacy.
Additionally, we have a significant overhang on the south side, which allows us to block out most of the summer sun while allowing in plenty of winter sun for passive solar heating during our coldest months, so the windows on the southern facade easily take care of most of our daylighting needs.
By utilizing the Suntuitive glass on only the west-facing windows (family room and master bedroom) it allows us to maintain our open view of the backyard while avoiding migraine-inducing summer afternoon sun.
Here are the specs for the particular glass we chose to use (they have a wide variety of options, including color variations): Vertical CrystalGray Triple Glaze Performance Sheet – Lee-Whetzel
Although we lose some potential solar heat gain through these windows in winter (compared to the glass in a typical Passive House certified window), we feel it’s more than compensated for by the blocking of hot, bright summer afternoon sun.
Here’s a company video describing the Suntuitive product in real world applications:
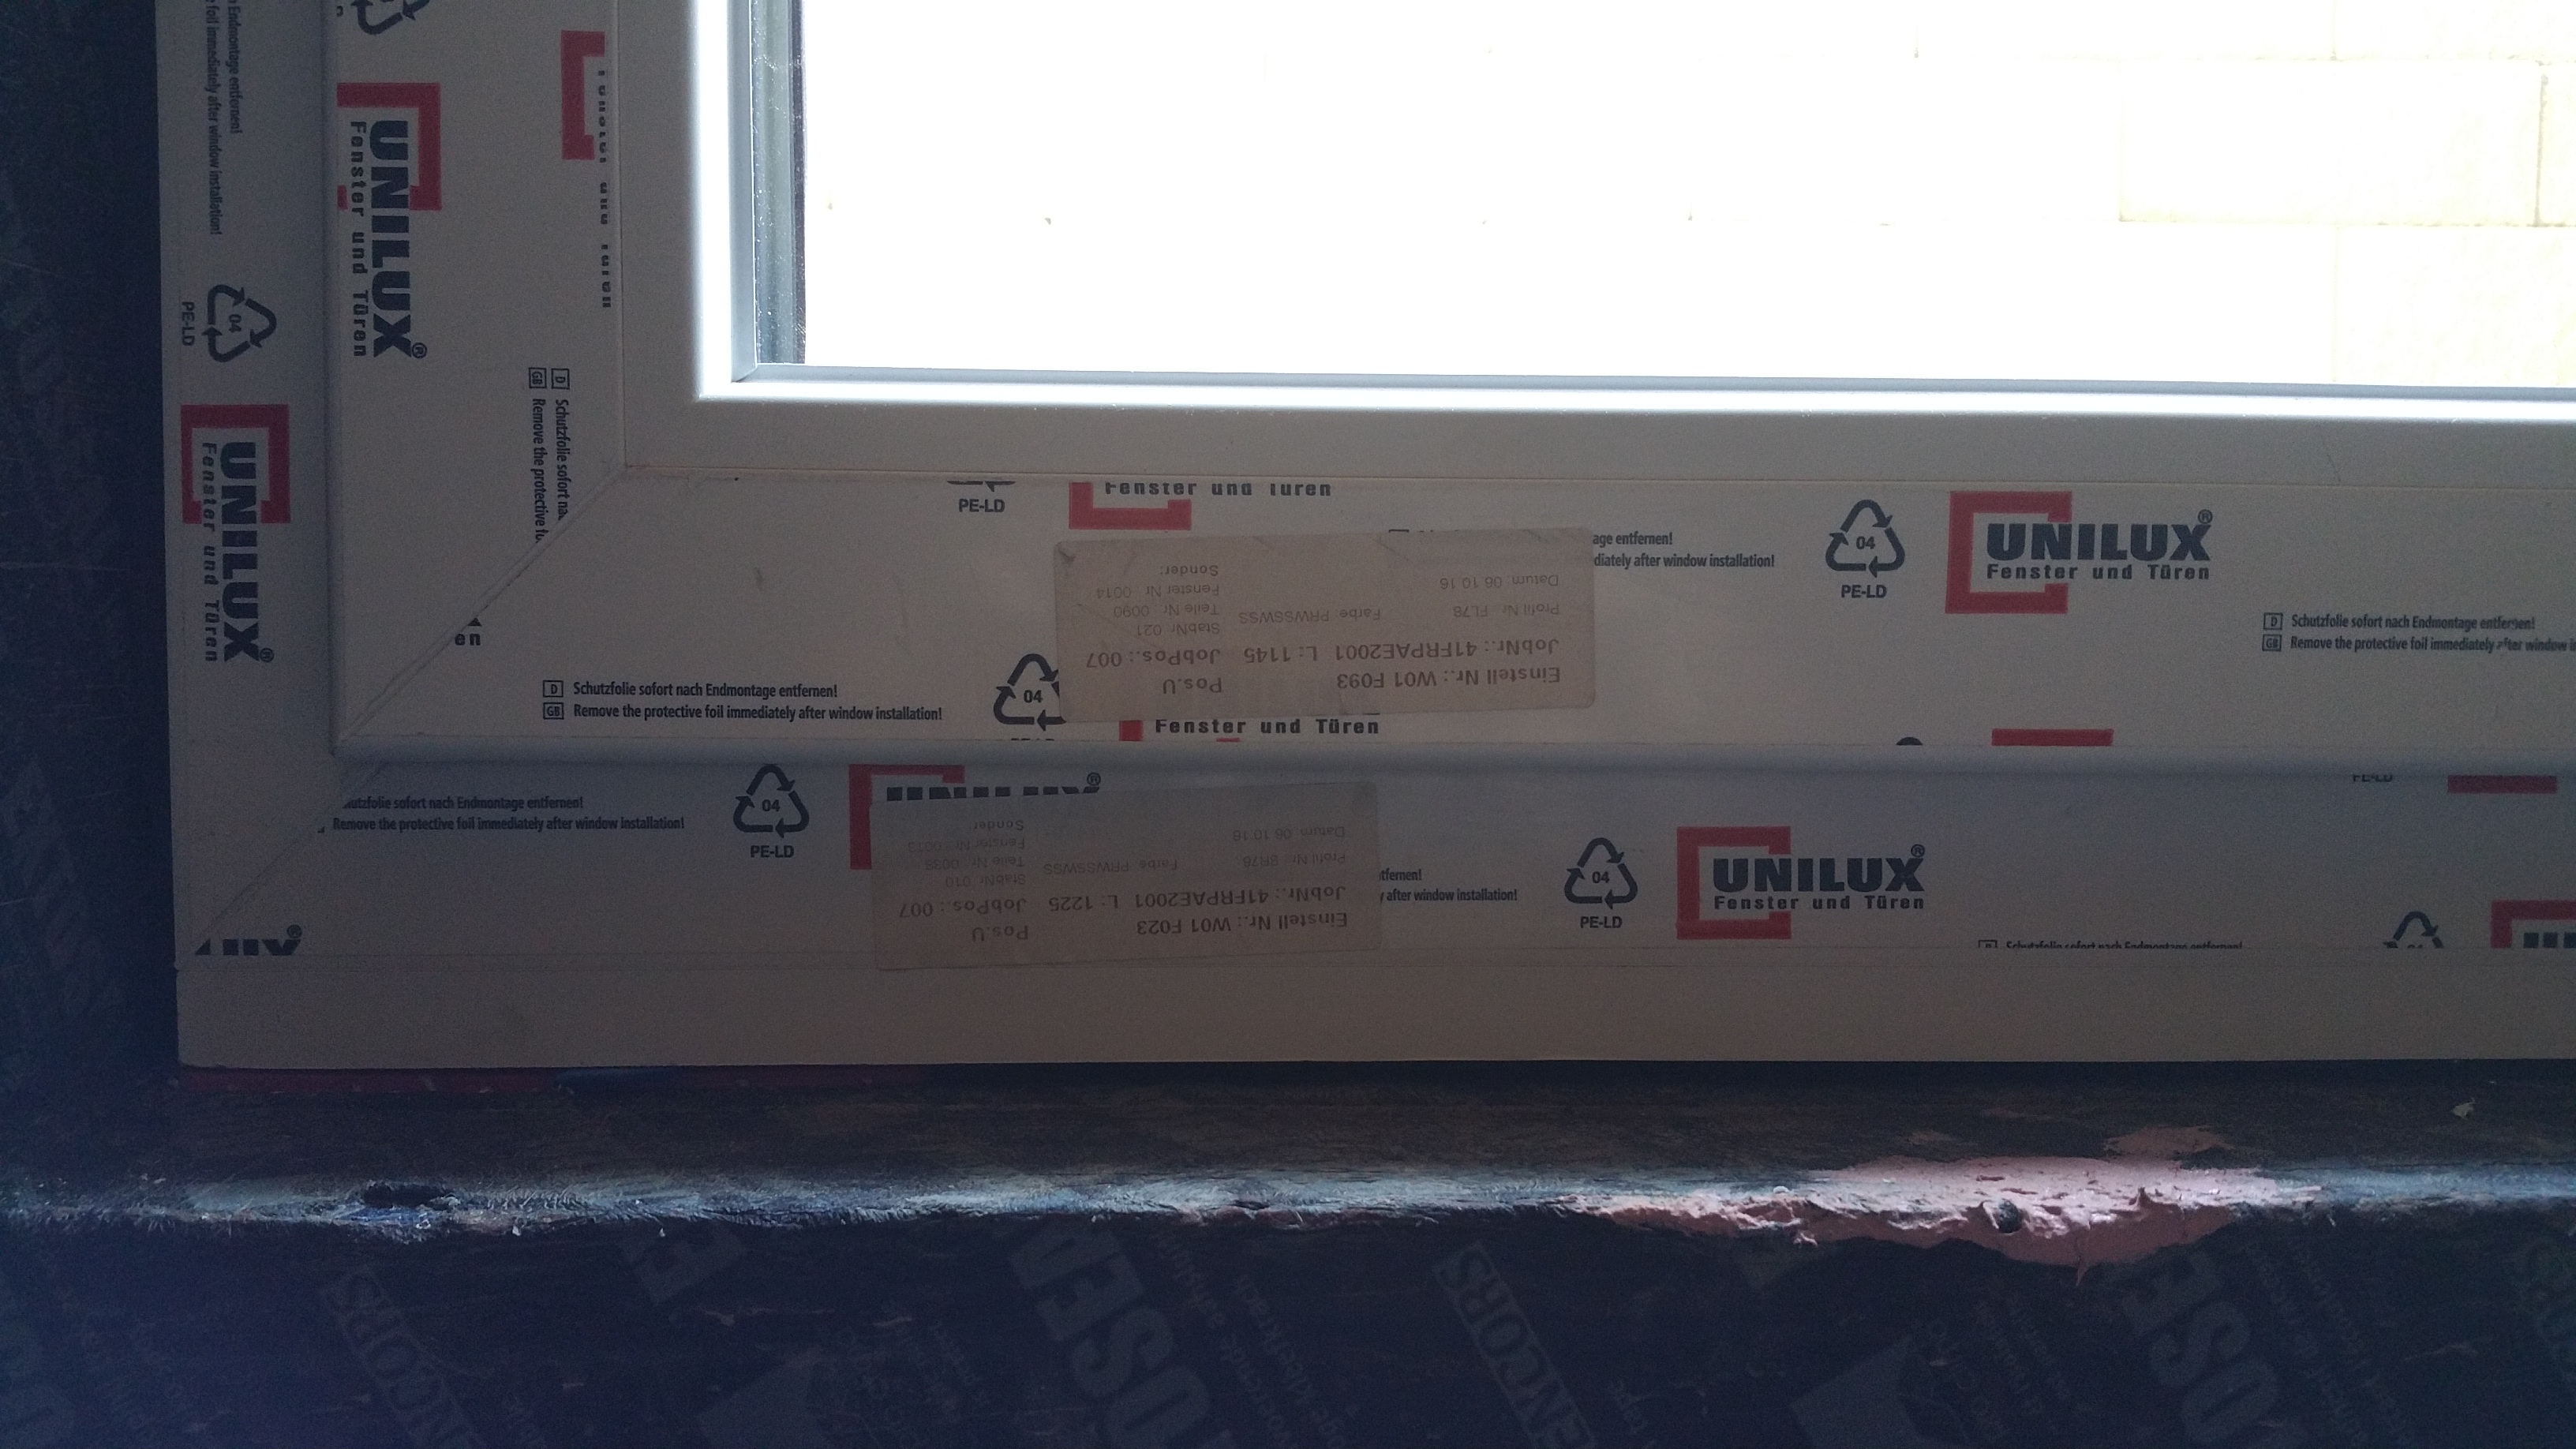
Unilux Windows and Doors
My wife’s cousin suggested a couple of options for the Suntuitive glass: Kolbe Windows or Unilux Windows.
We went to see the Kolbe windows in a local showroom, but they didn’t seem impressive. It also didn’t help that the salesperson was dismissive of the product, suggesting that if we were considering Kolbe we should just use Marvin instead (another brand they sold). The salesperson literally had to wander around looking for a sample unit, eventually finding one buried in a corner. We’re not even sure if what we saw represented the full breadth of the Kolbe product line.
At any rate, since Unilux was willing to work with the Suntuitive glazing, it made it easy to go with them rather than trying to convince another Passive House certified window maker that Suntuitive could be compatible with their product line.
[Note: Suntuitive is constantly adding new manufacturers willing to work with their product, so contact them directly if you have a specific brand you’d like to use on your own project.]
After deciding to go with the Unilux windows and doors, we ended up with the following specs:
[Please note: The numbers below were mostly supplied to me by my Unilux window rep. Following up with a Unilux rep on the East Cost, Scott Gibson, from Green Building Advisor, received different information. If you’re contemplating using Unilux, contact your local rep or the company directly in Germany for written confirmation regarding performance numbers — especially if you’re running data through a program like PHPP.]
Main Floor Windows (excludes west-facing windows with Suntuitive):
- Interior wood with aluminum-clad exteriors
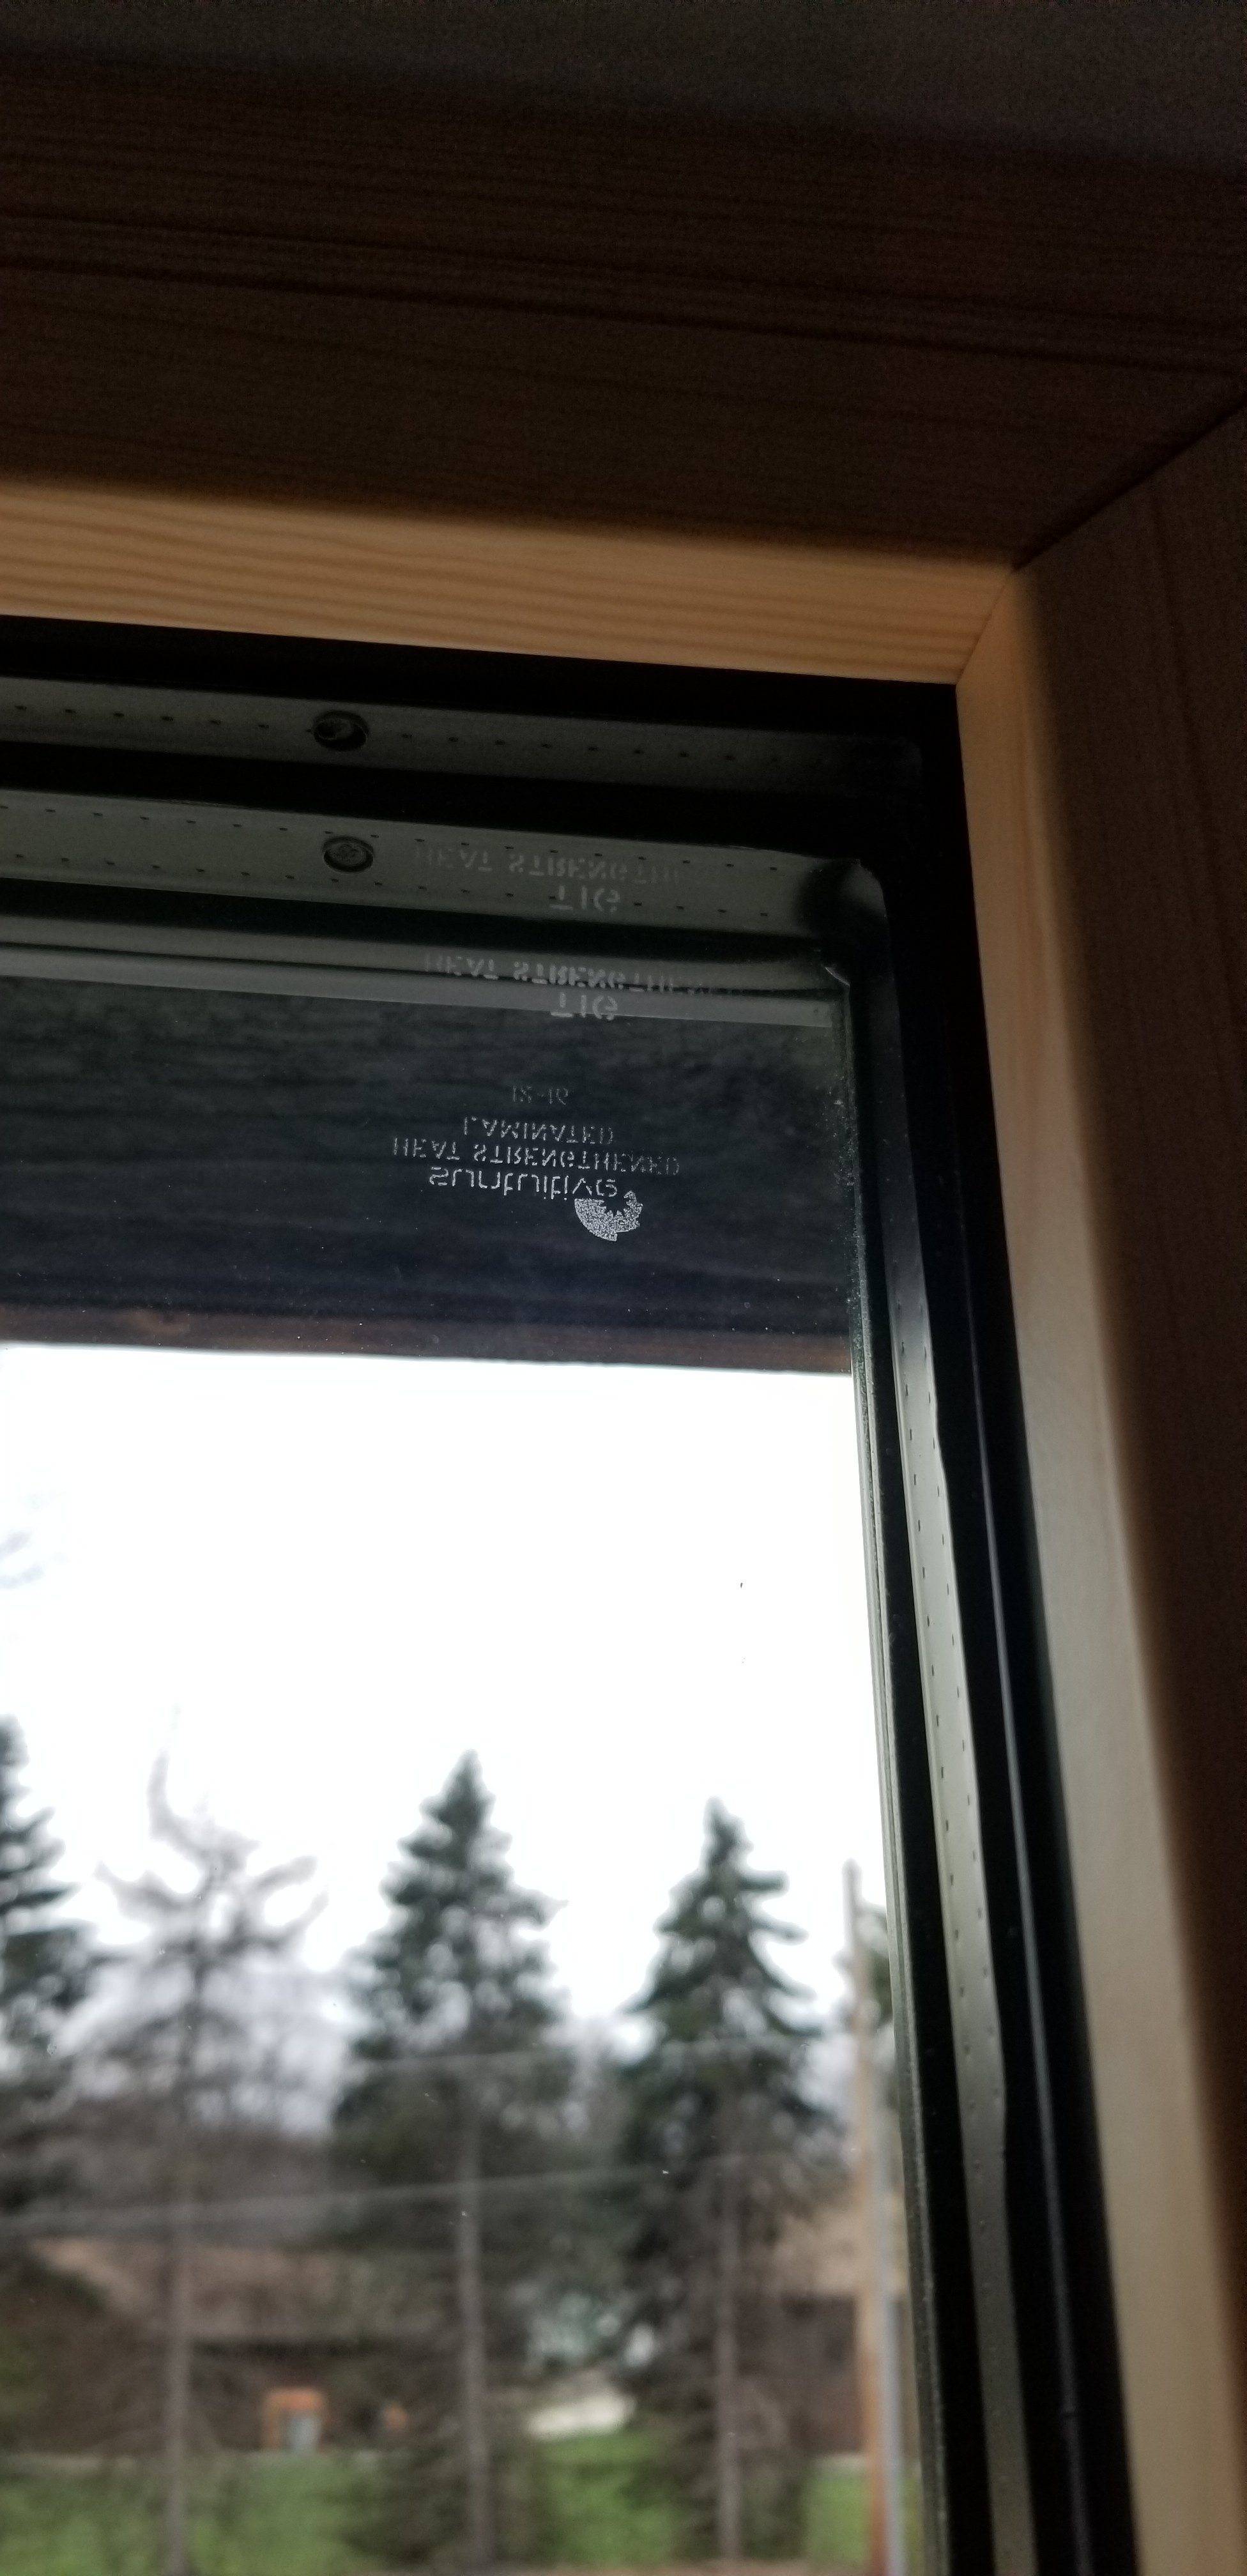
- Glass: Unilux Super-Thermo 3
- Triple pane with a reported R-ll center of glass
- R-8 for whole window once frames are included
- Triple pane with a reported R-ll center of glass
- U-factor of 0.18
- SHGC of 0.53
2-Basement Windows:
- Isostar: interior uPVC with exterior aluminum-clad
- The same glass as the main floor windows.
Two doors:
- One for our front entry, and one for our kitchen. They both have the R-11 center of glass glazing, with the kitchen door having a significant amount of privacy glass (it faces south), which is really enjoyable on cold days with the sun shining.
We chose PVC for the basement windows to save some money, but also because we thought the natural wood finish on a basement window might look out of place — we’re painting the concrete foundation walls, and partially drywalling an office area, but otherwise we’re leaving the basement unfinished (it will look finished for our tastes at any rate).
The total cost for the windows and doors was just over $26,000 (including the Suntuitive for the windows facing west), with the two doors representing almost $10,000 of this total.
In regards to the Suntuitive glass, it is currently selling for roughly $31/sq. ft., depending on specific application requirements. You can contact my wife’s cousin, Dan, at his email address if you have technical questions, or if you’d like to get a quote for your own project: leed@pleotint.com
I don’t believe the Unilux windows and doors are technically certified by PHIUS or PHI, but their performance metrics are close to the necessary requirements, so we were comfortable using them, especially since we had no intention of pursuing official Passive House certification anyway.
Window Bucks
After firing our two GC’s in February, 2017, we lost a few weeks as we scrambled to cut ties with them while simultaneously lining up new subcontractors to keep the project moving forward.
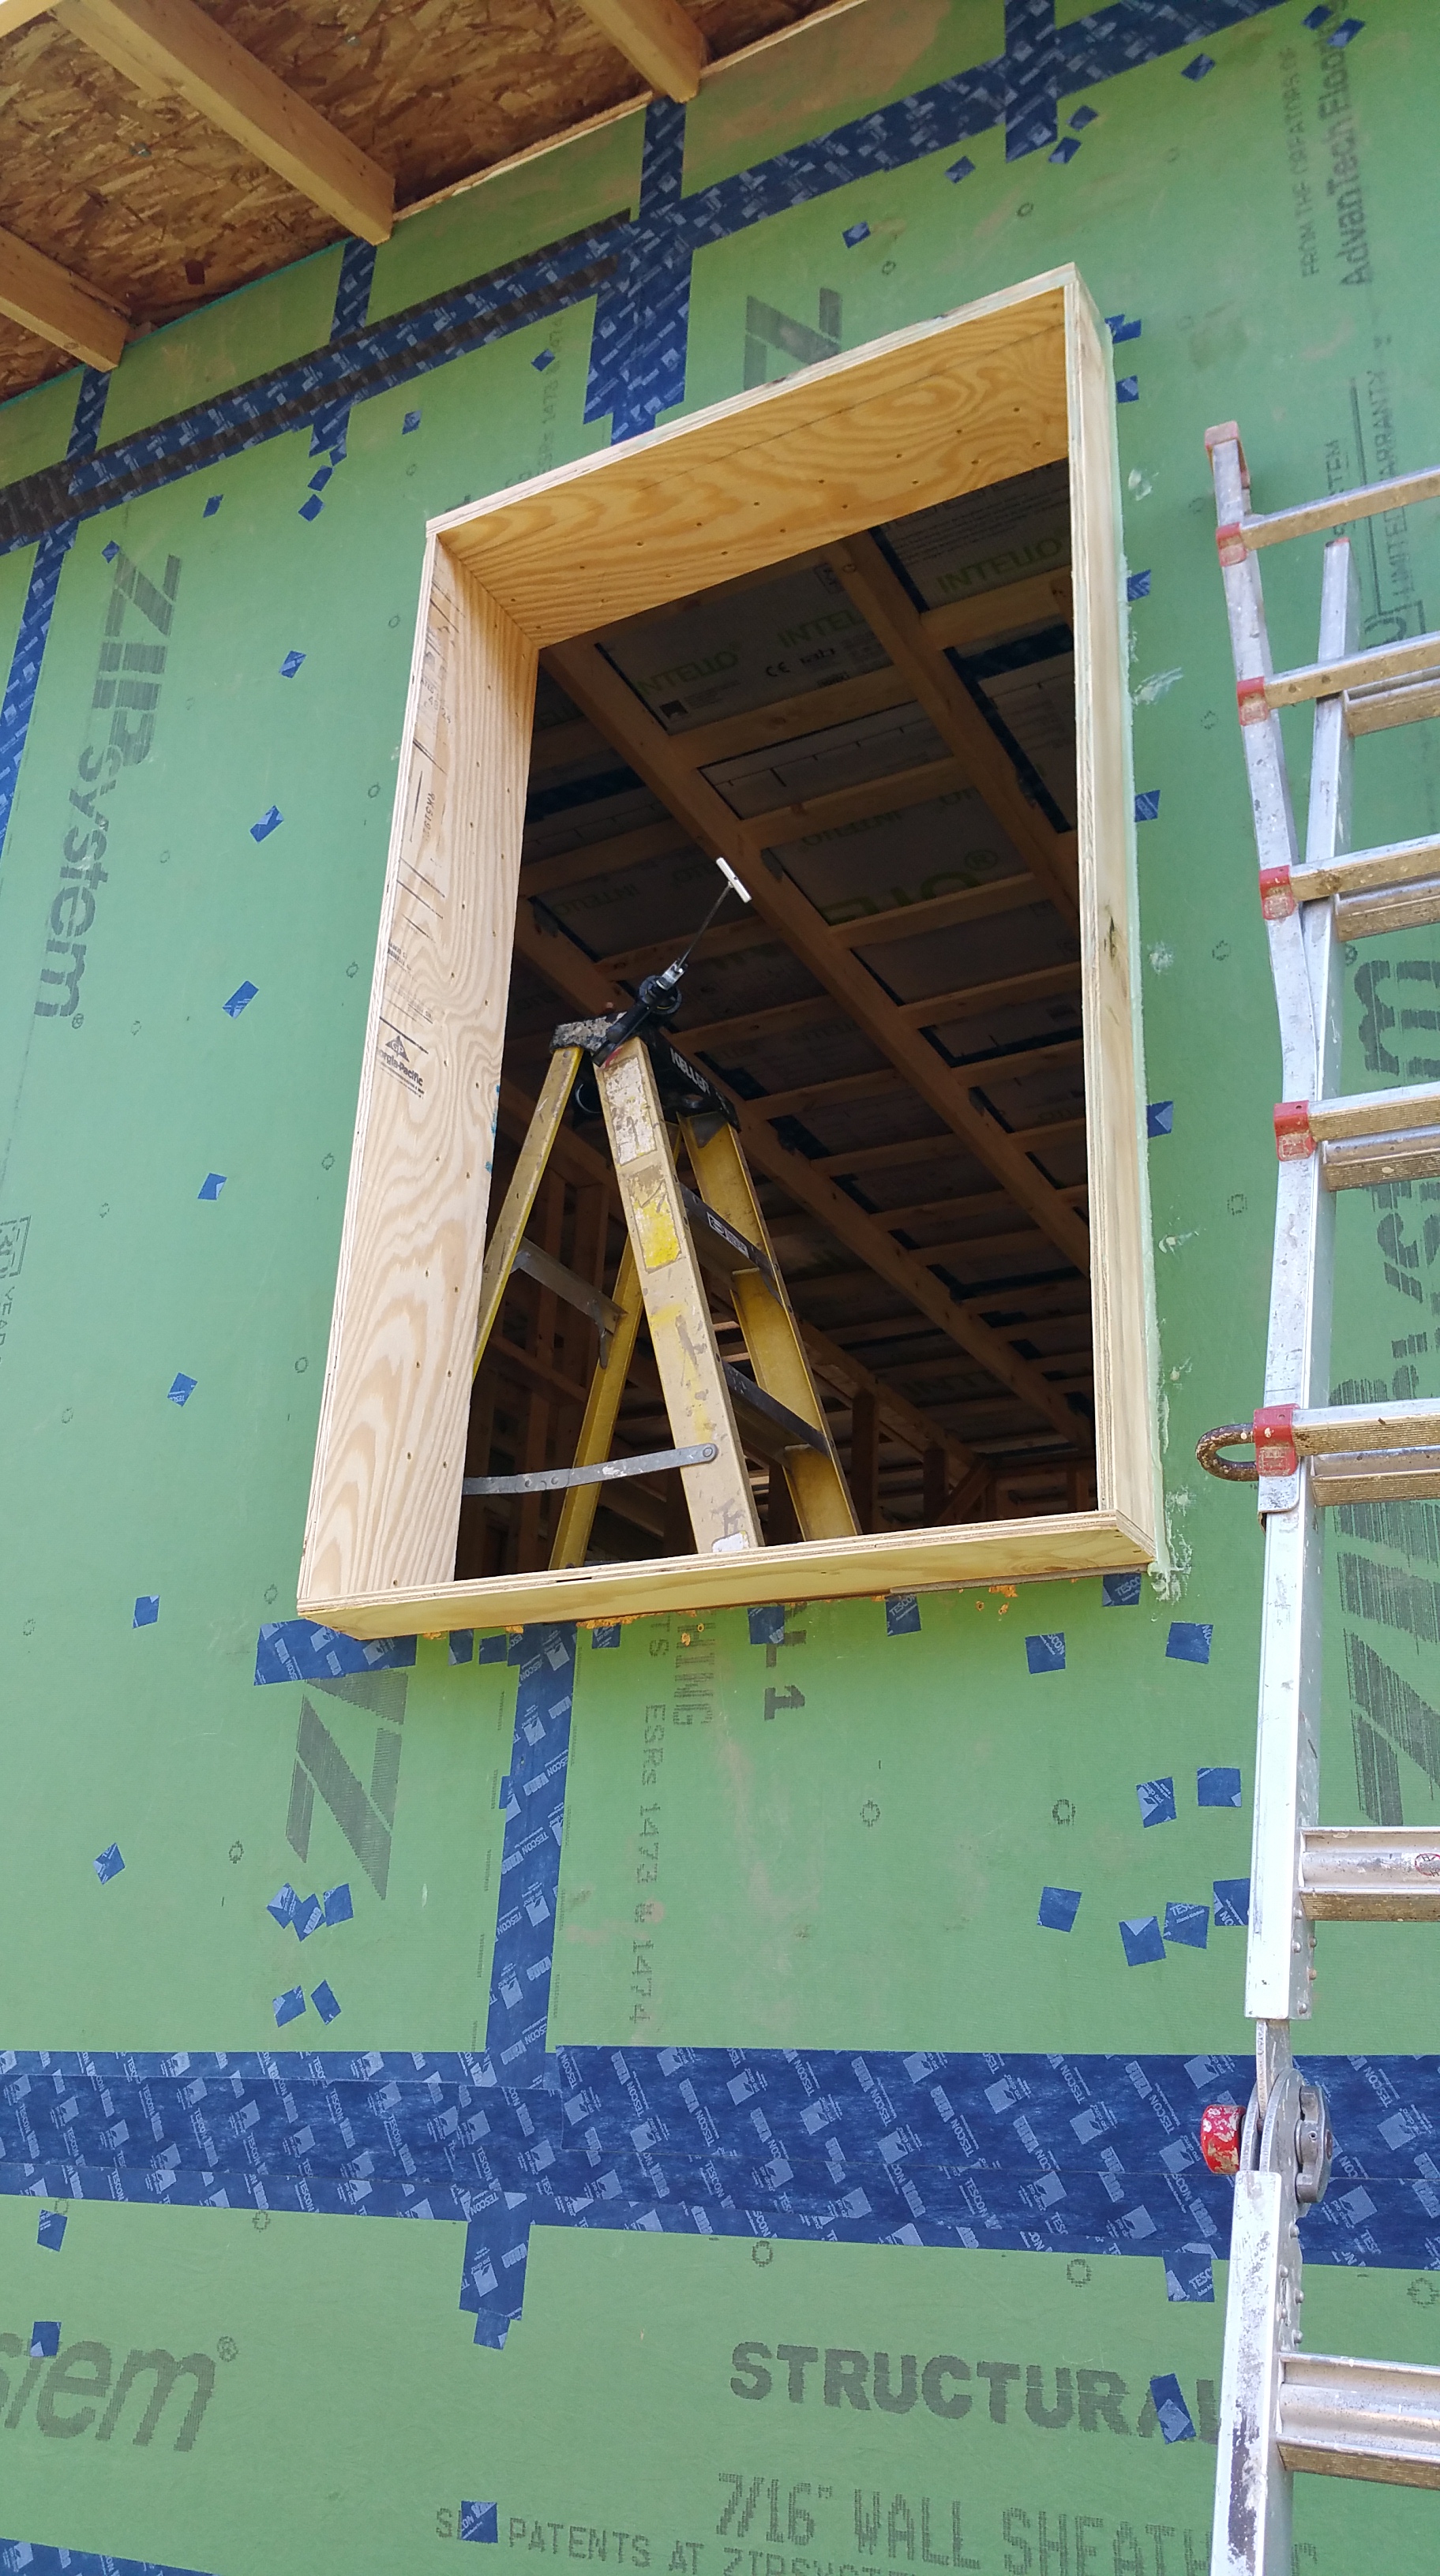
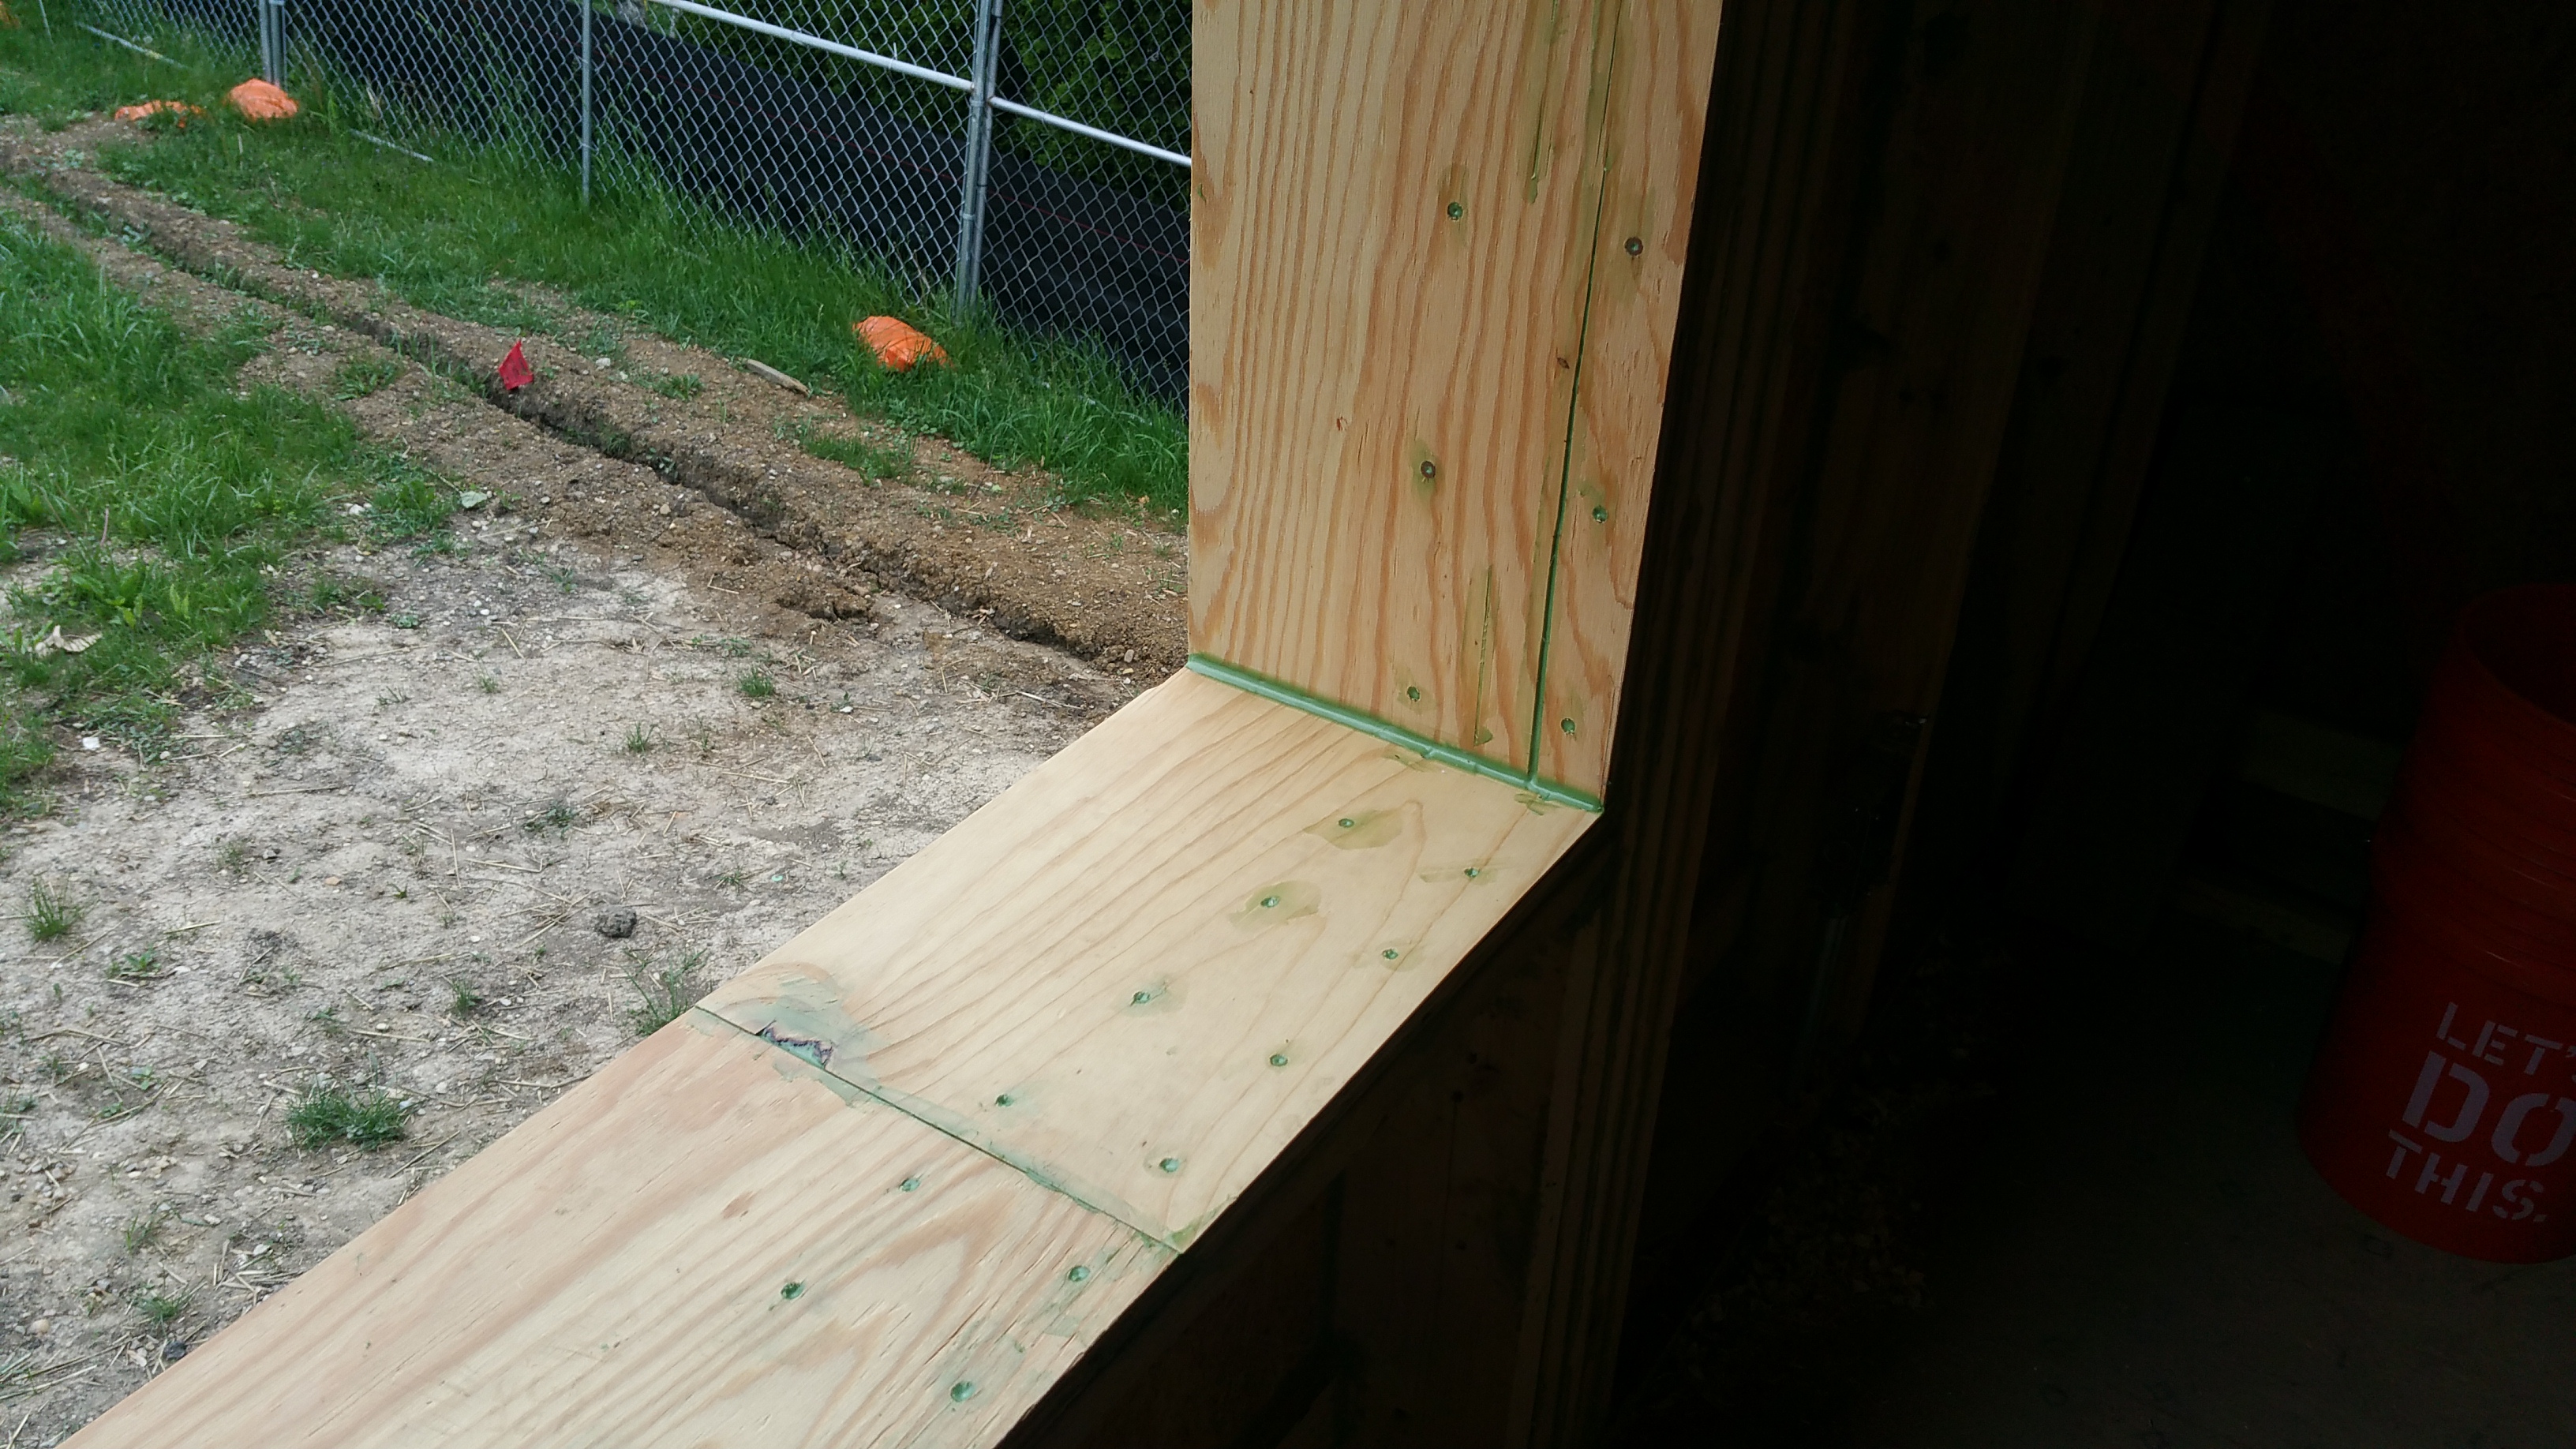
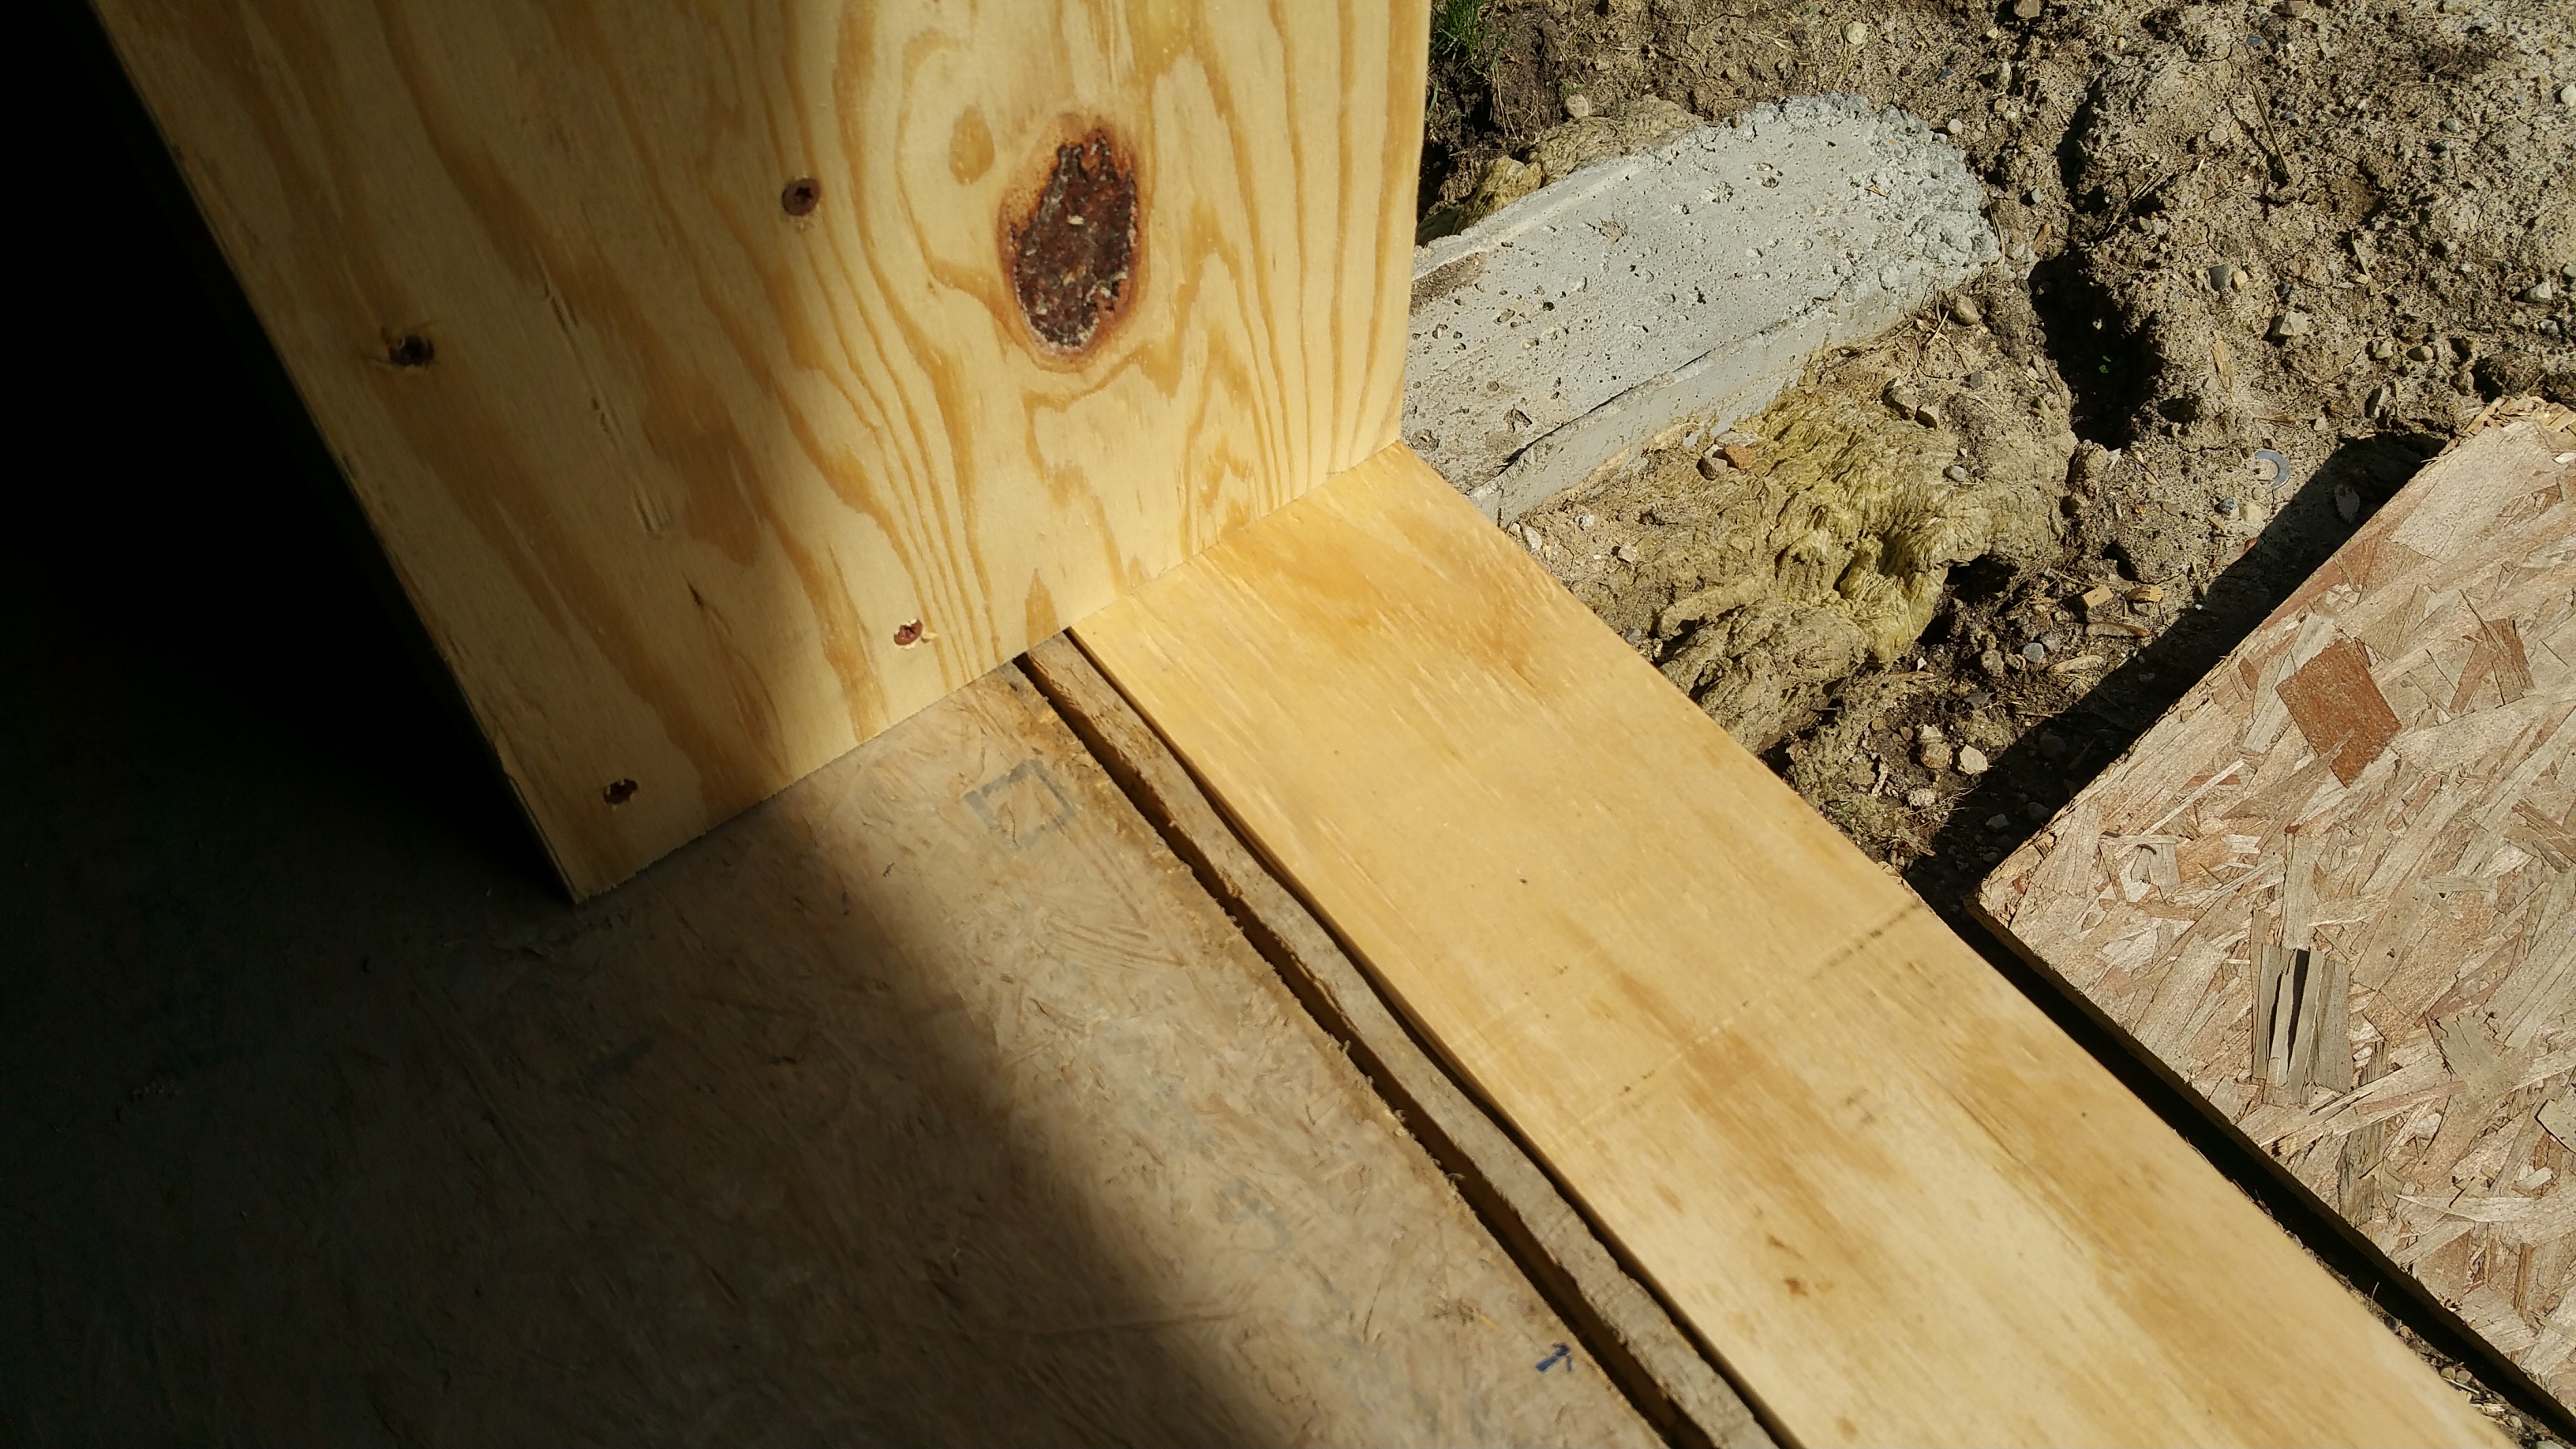
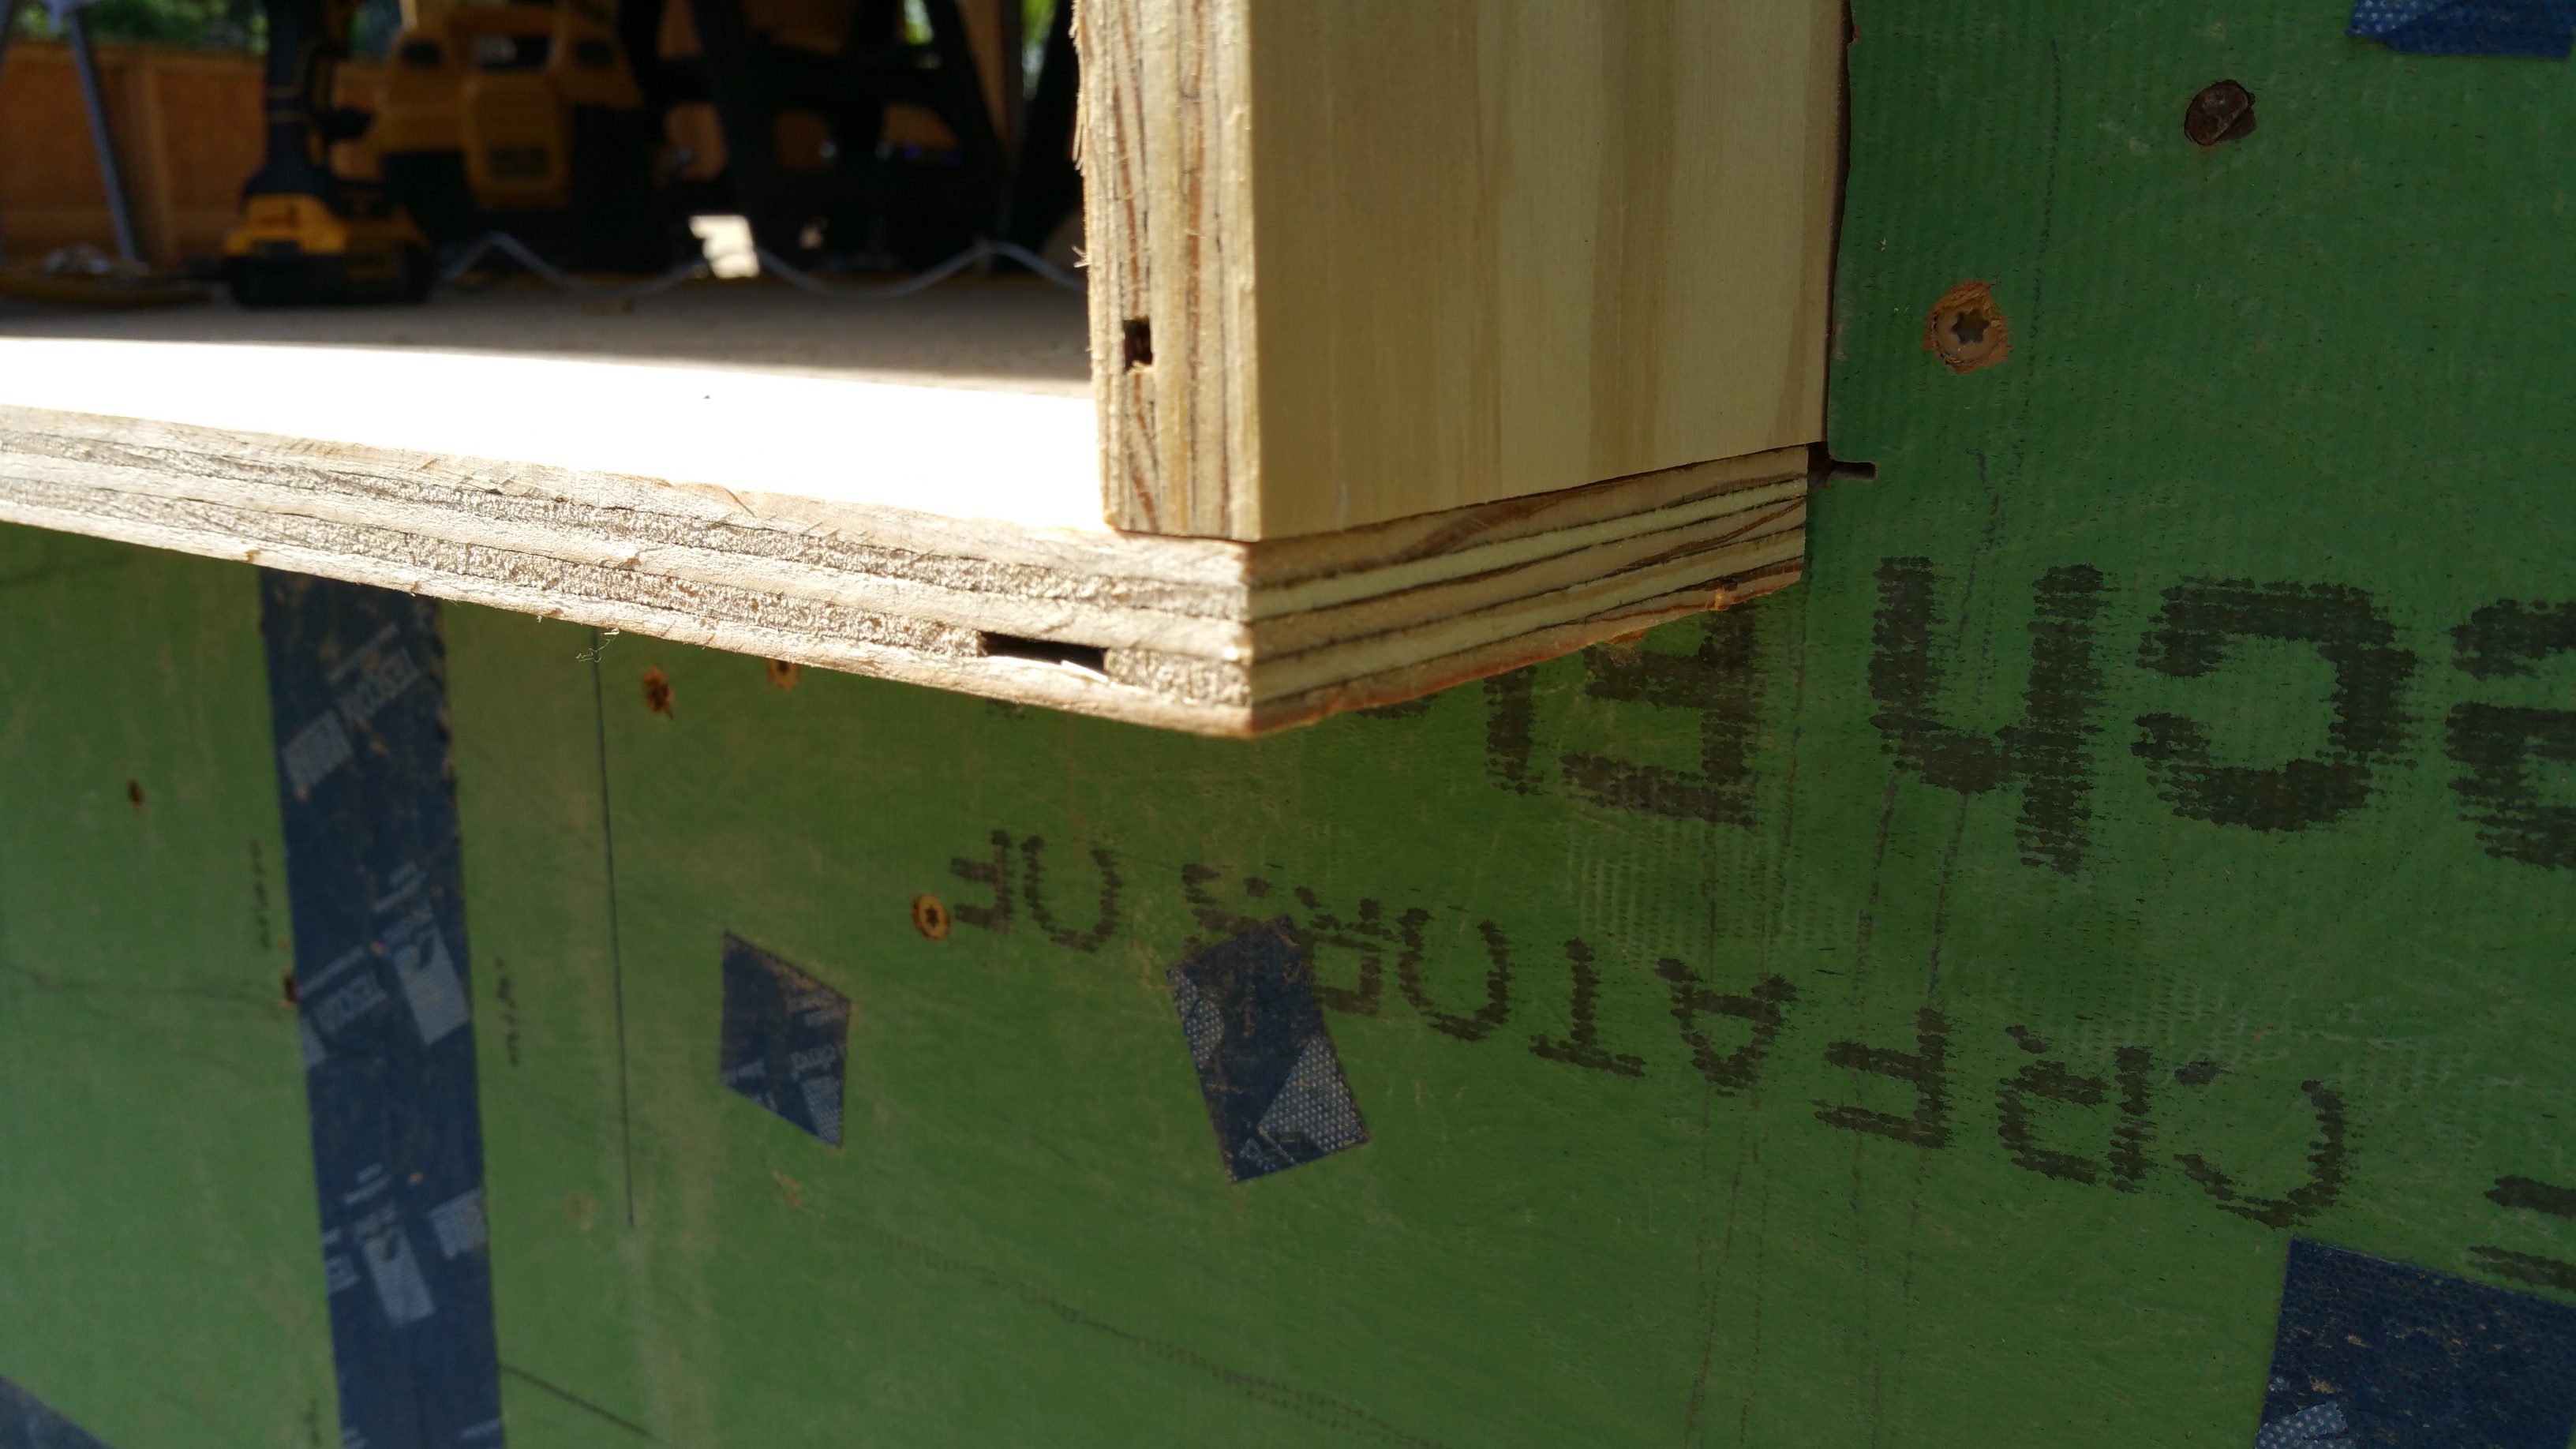
Once things were back on track, I was able to begin installing the window and door bucks in preparation for the delivery of the eventual windows and doors.
Using 3/4″ CDX exterior plywood, I installed the bucks so they would extend out far enough to meet up with our eventual two layers of 2″ Rockwool Comfortboard 80 and two layers of furring strips for our ventilated rainscreen (vertical and horizontal since most of our charred cedar siding would be oriented vertically).
Here’s how a similar set-up looked on Hammer and Hand’s Madrona House project:
We decided to go with “innie” windows, so our windows would be placed near the center of our wall assembly to optimize their energy performance. Placing windows near the center of the wall assembly also creates nice shadow lines on the structure throughout the day. Overall, we just really like the way recessed windows look on a house.
Prior to construction, I created a mock wall assembly with a window buck, which proved to be good practice for building the real thing.
Mock wall assembly after practicing with the tapes:

It’s also worth mentioning that it’s important with these tapes to make sure that once applied you go over them, applying pressure, to ensure the adhesive is properly activated. 475 HPBS always included at least one of their blue Pressfix tools in each box of tape that I ordered. The tool is roughly similar to a bondo spreader.
We were following many of the details in Hammer and Hand’s Madrona House project:
I watched their videos dozens of times, especially this one, trying to make sure I got all of the details right. Their Best Practices Manual was also invaluable as I kept referring to it throughout the duration of the build (an incredible gift to contractors and self-builders alike who are tackling a high-performance build for the first time).
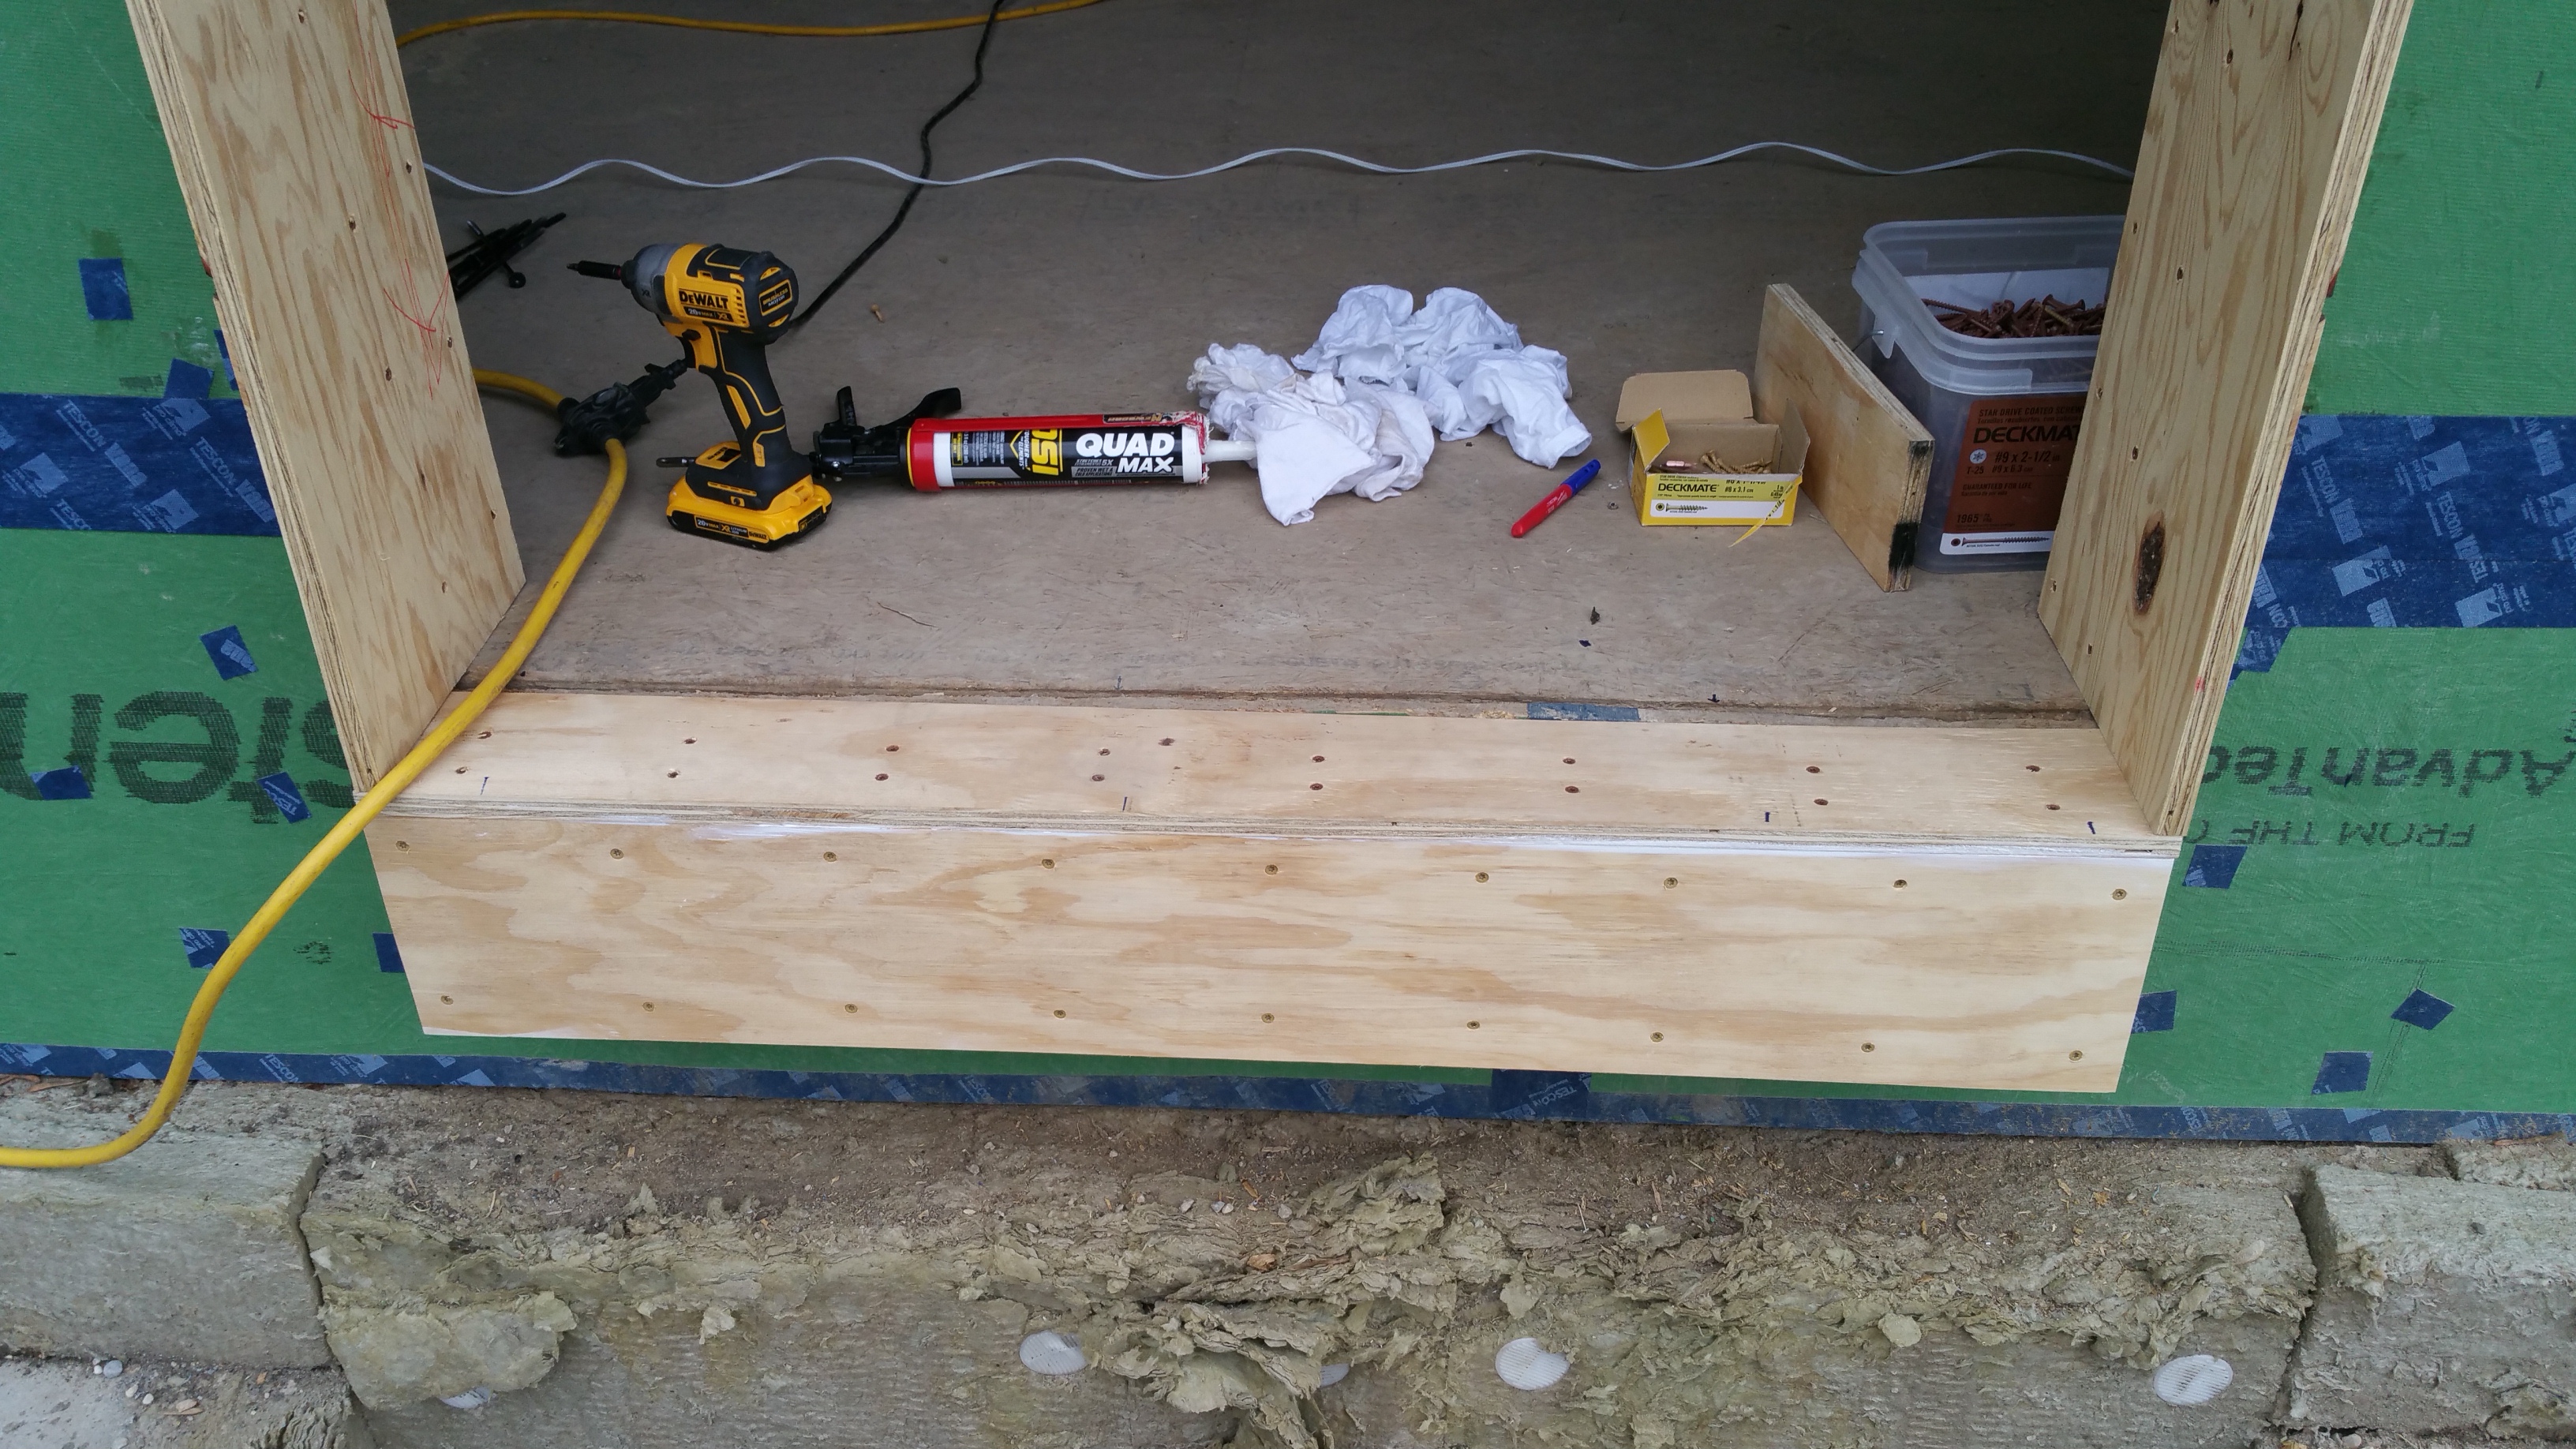
Once each buck was installed, I went around and used HF Sealant to seal all the gaps, seams, and screw holes in the window and door bucks.
Here’s a close-up of the same window as the HF sealant is being applied:
And here’s a different buck being sealed on the interior surfaces:
Another view of the buck being sealed up with the HF sealant:

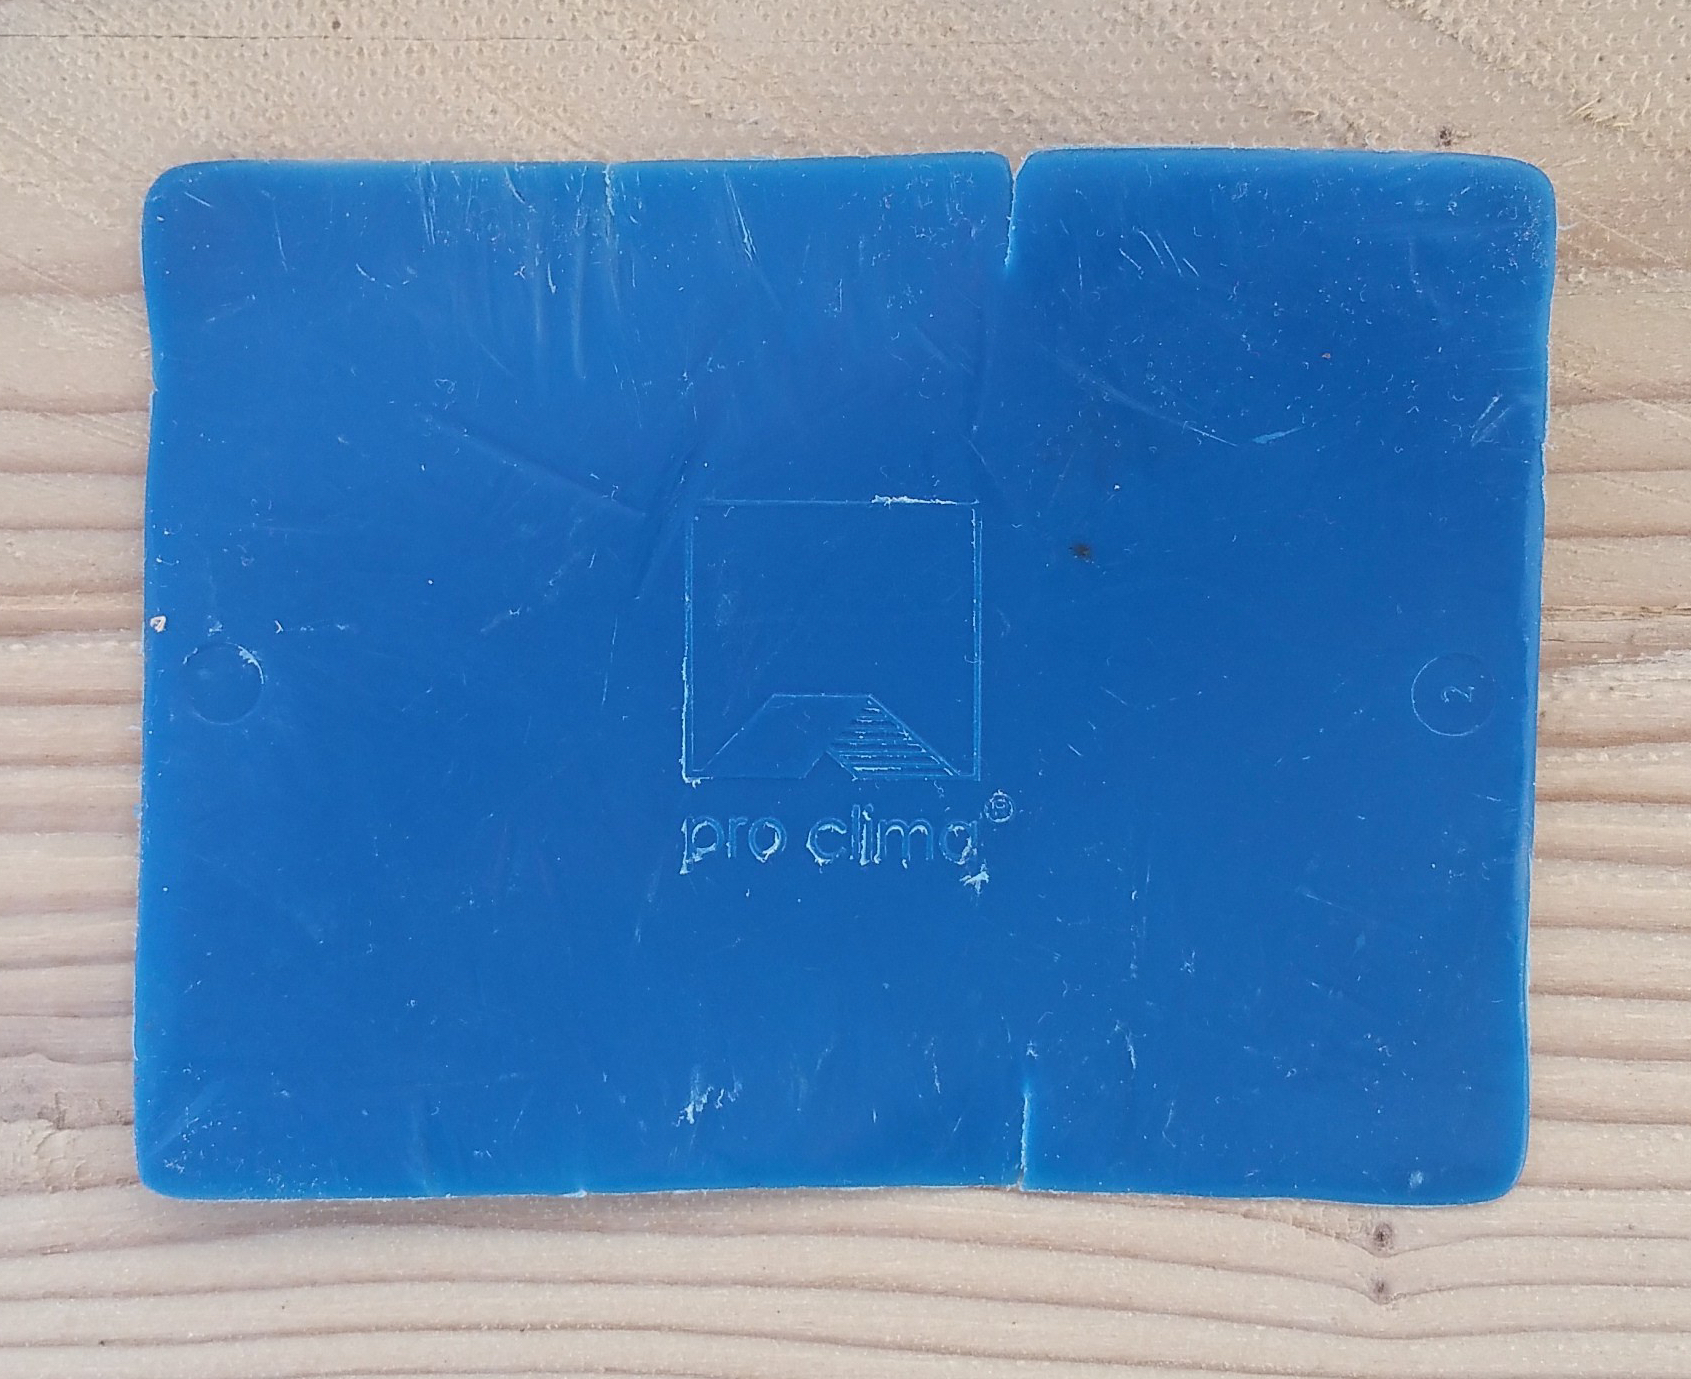
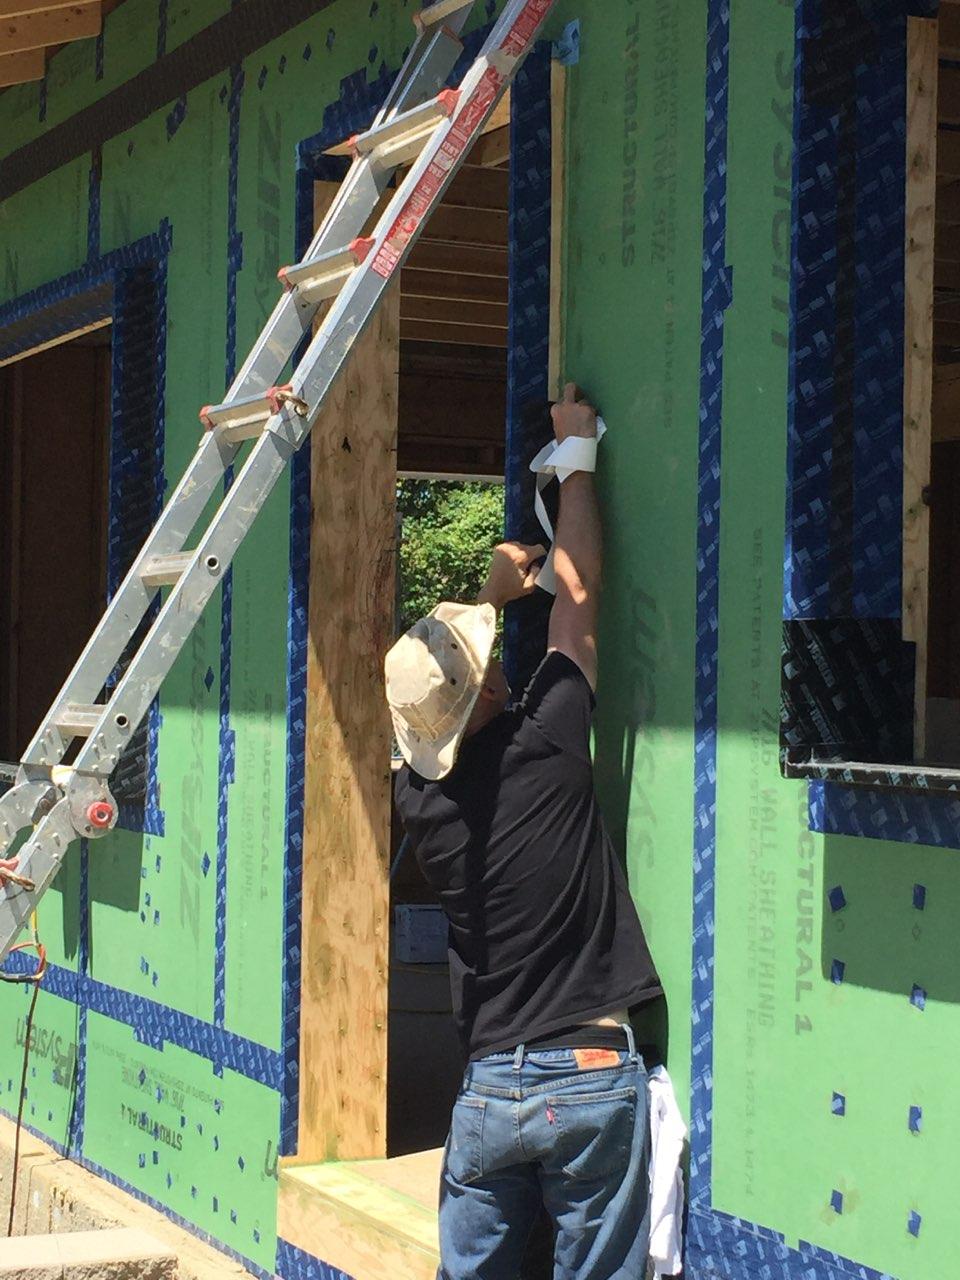
With the bucks installed, I could then begin applying the various air sealing tapes to all the surfaces of the bucks. I decided to use the Pro Clima line of products, available from 475 HPBS, after ordering them and using them to create my mock wall assembly.
The other option would’ve been to use the Siga brand of air sealing tapes, available from Small Planet Supply, or the black Huber Zip sheathing tape.
Although clearly based on my own personal prejudice rather than scientific evidence, I was reluctant to use the Zip tape, 3M tape, or something similar, mainly because I knew the European brands have a much longer track record of success.
Yet another option would’ve been to use liquid applied membranes (e.g., Prosoco, again Zip, or others), which I’ll address later, when noting the details for sealing up my front door buck area.
Knowing that corners and other areas where elements meet up could be problematic for proper air sealing, as pointed out by Sam Hagerman in this Hammer and Hand video:
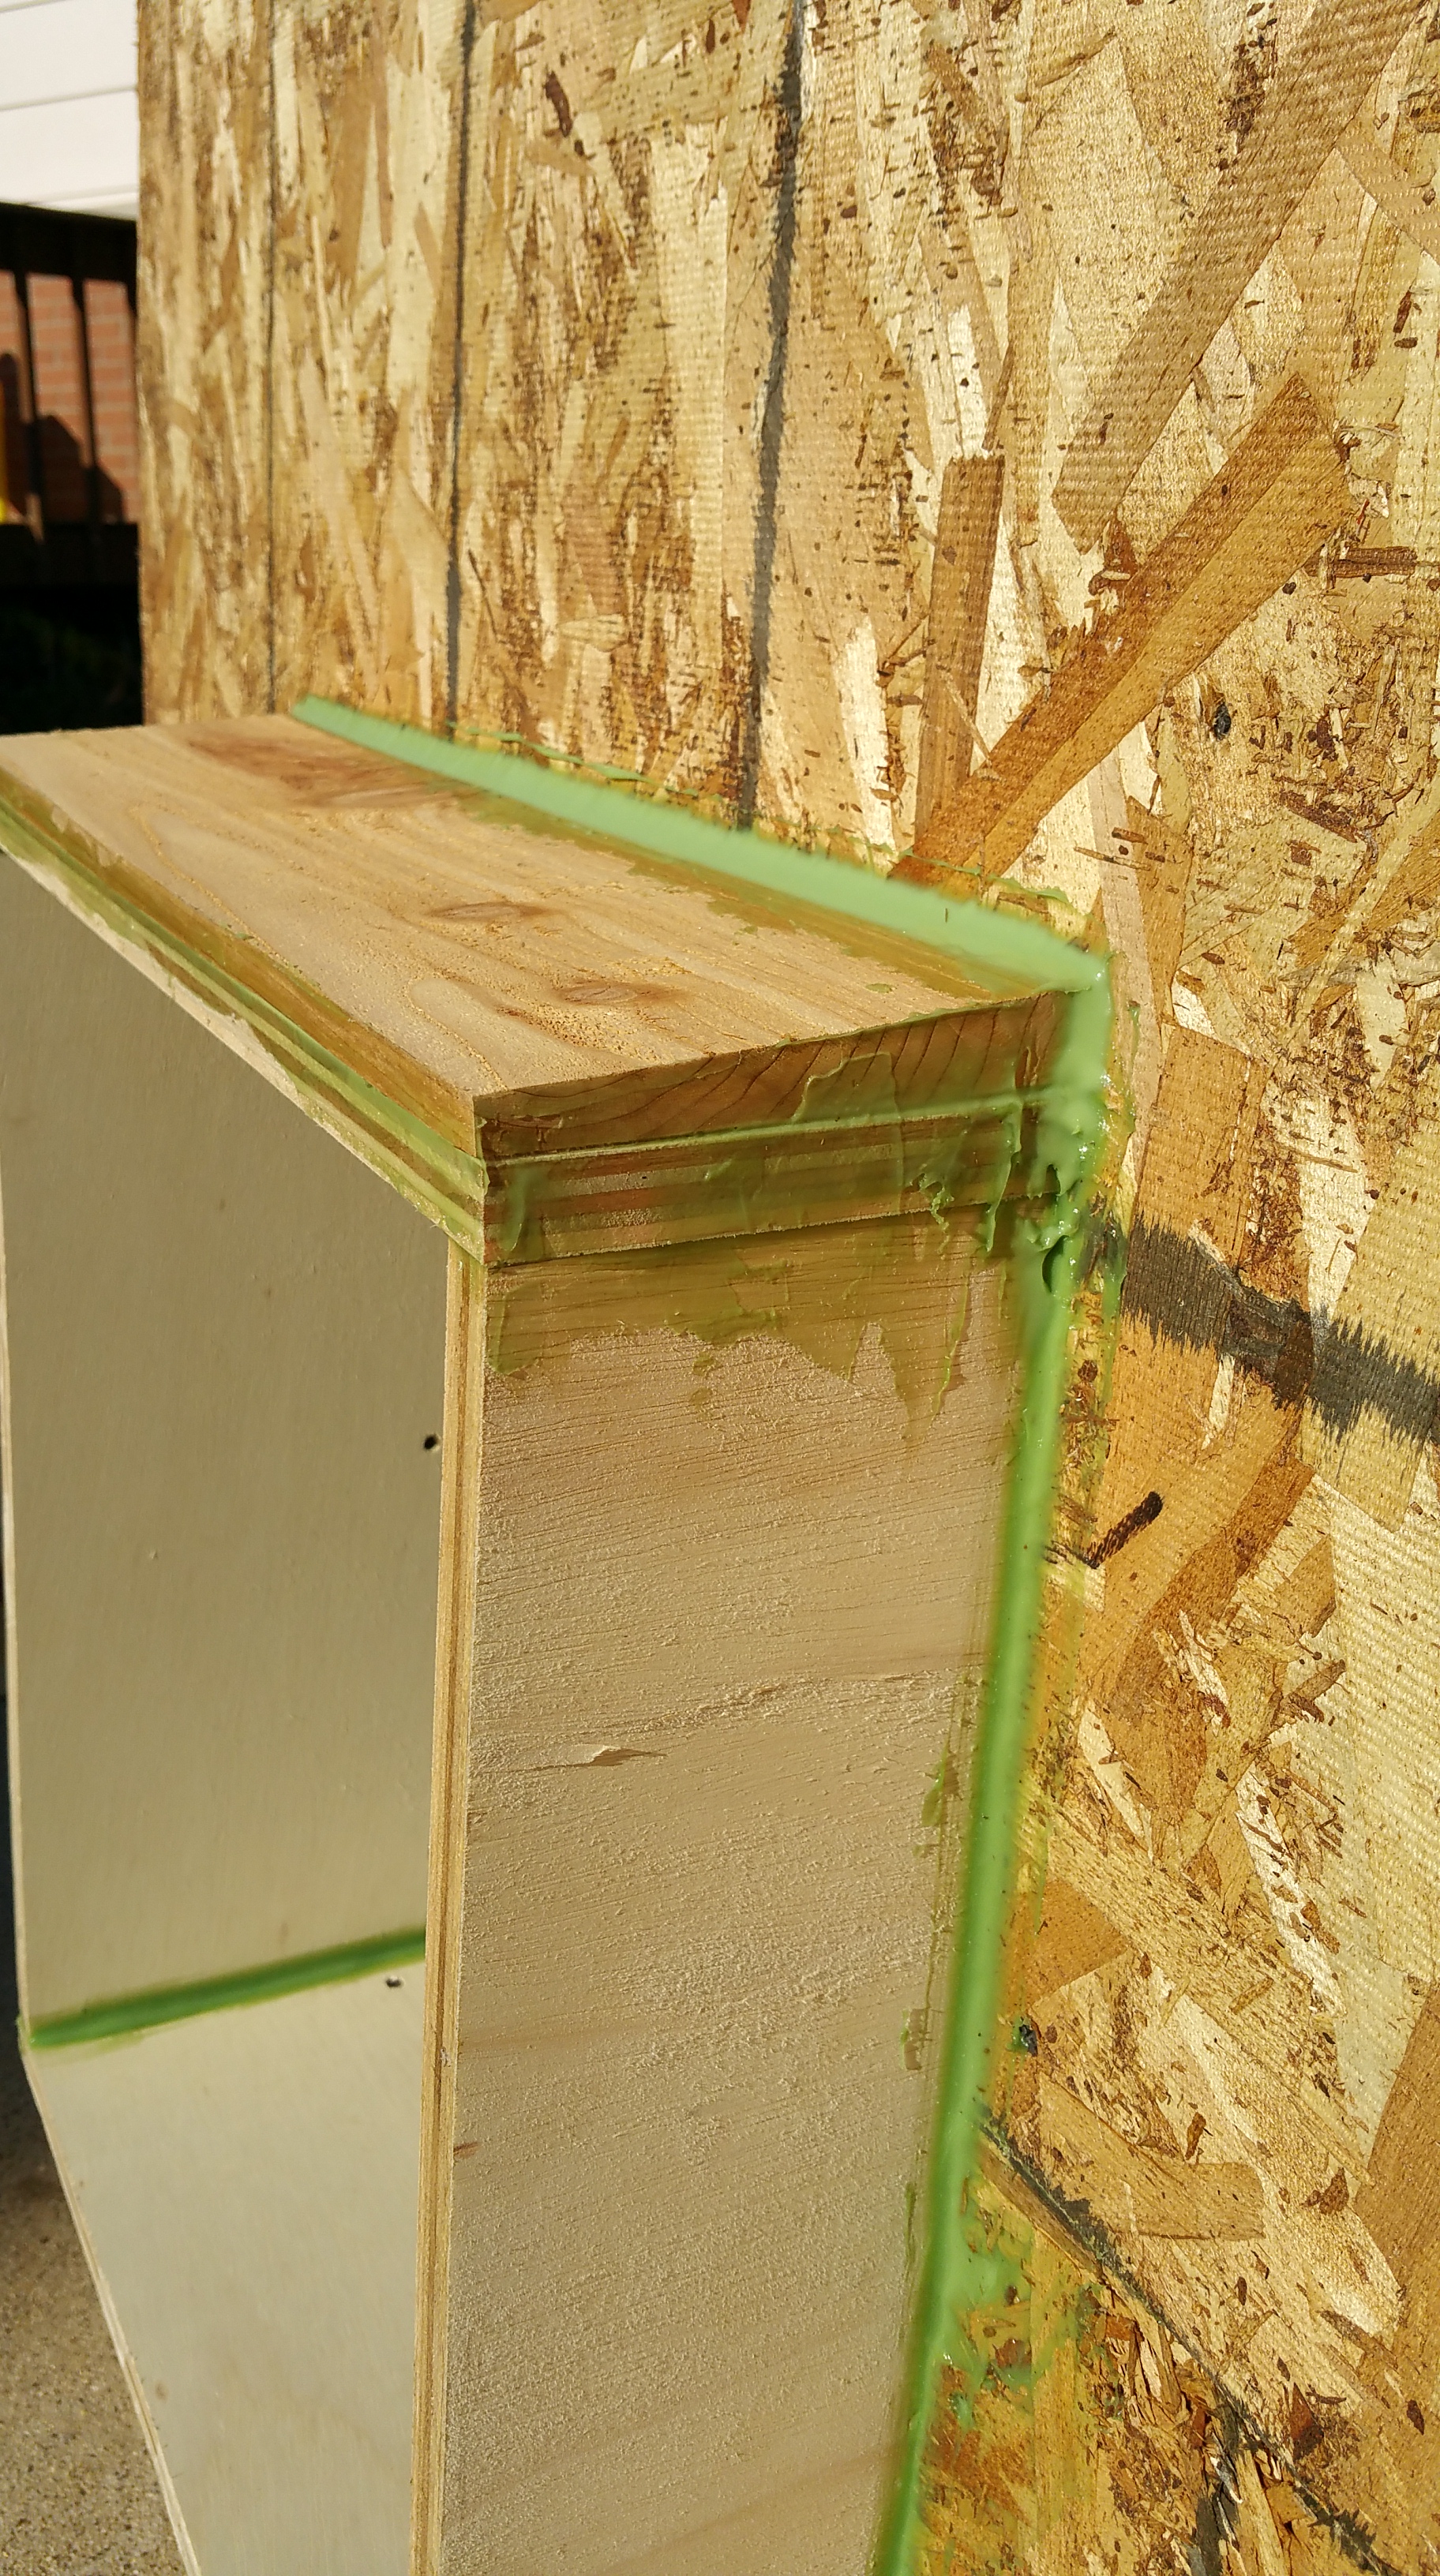
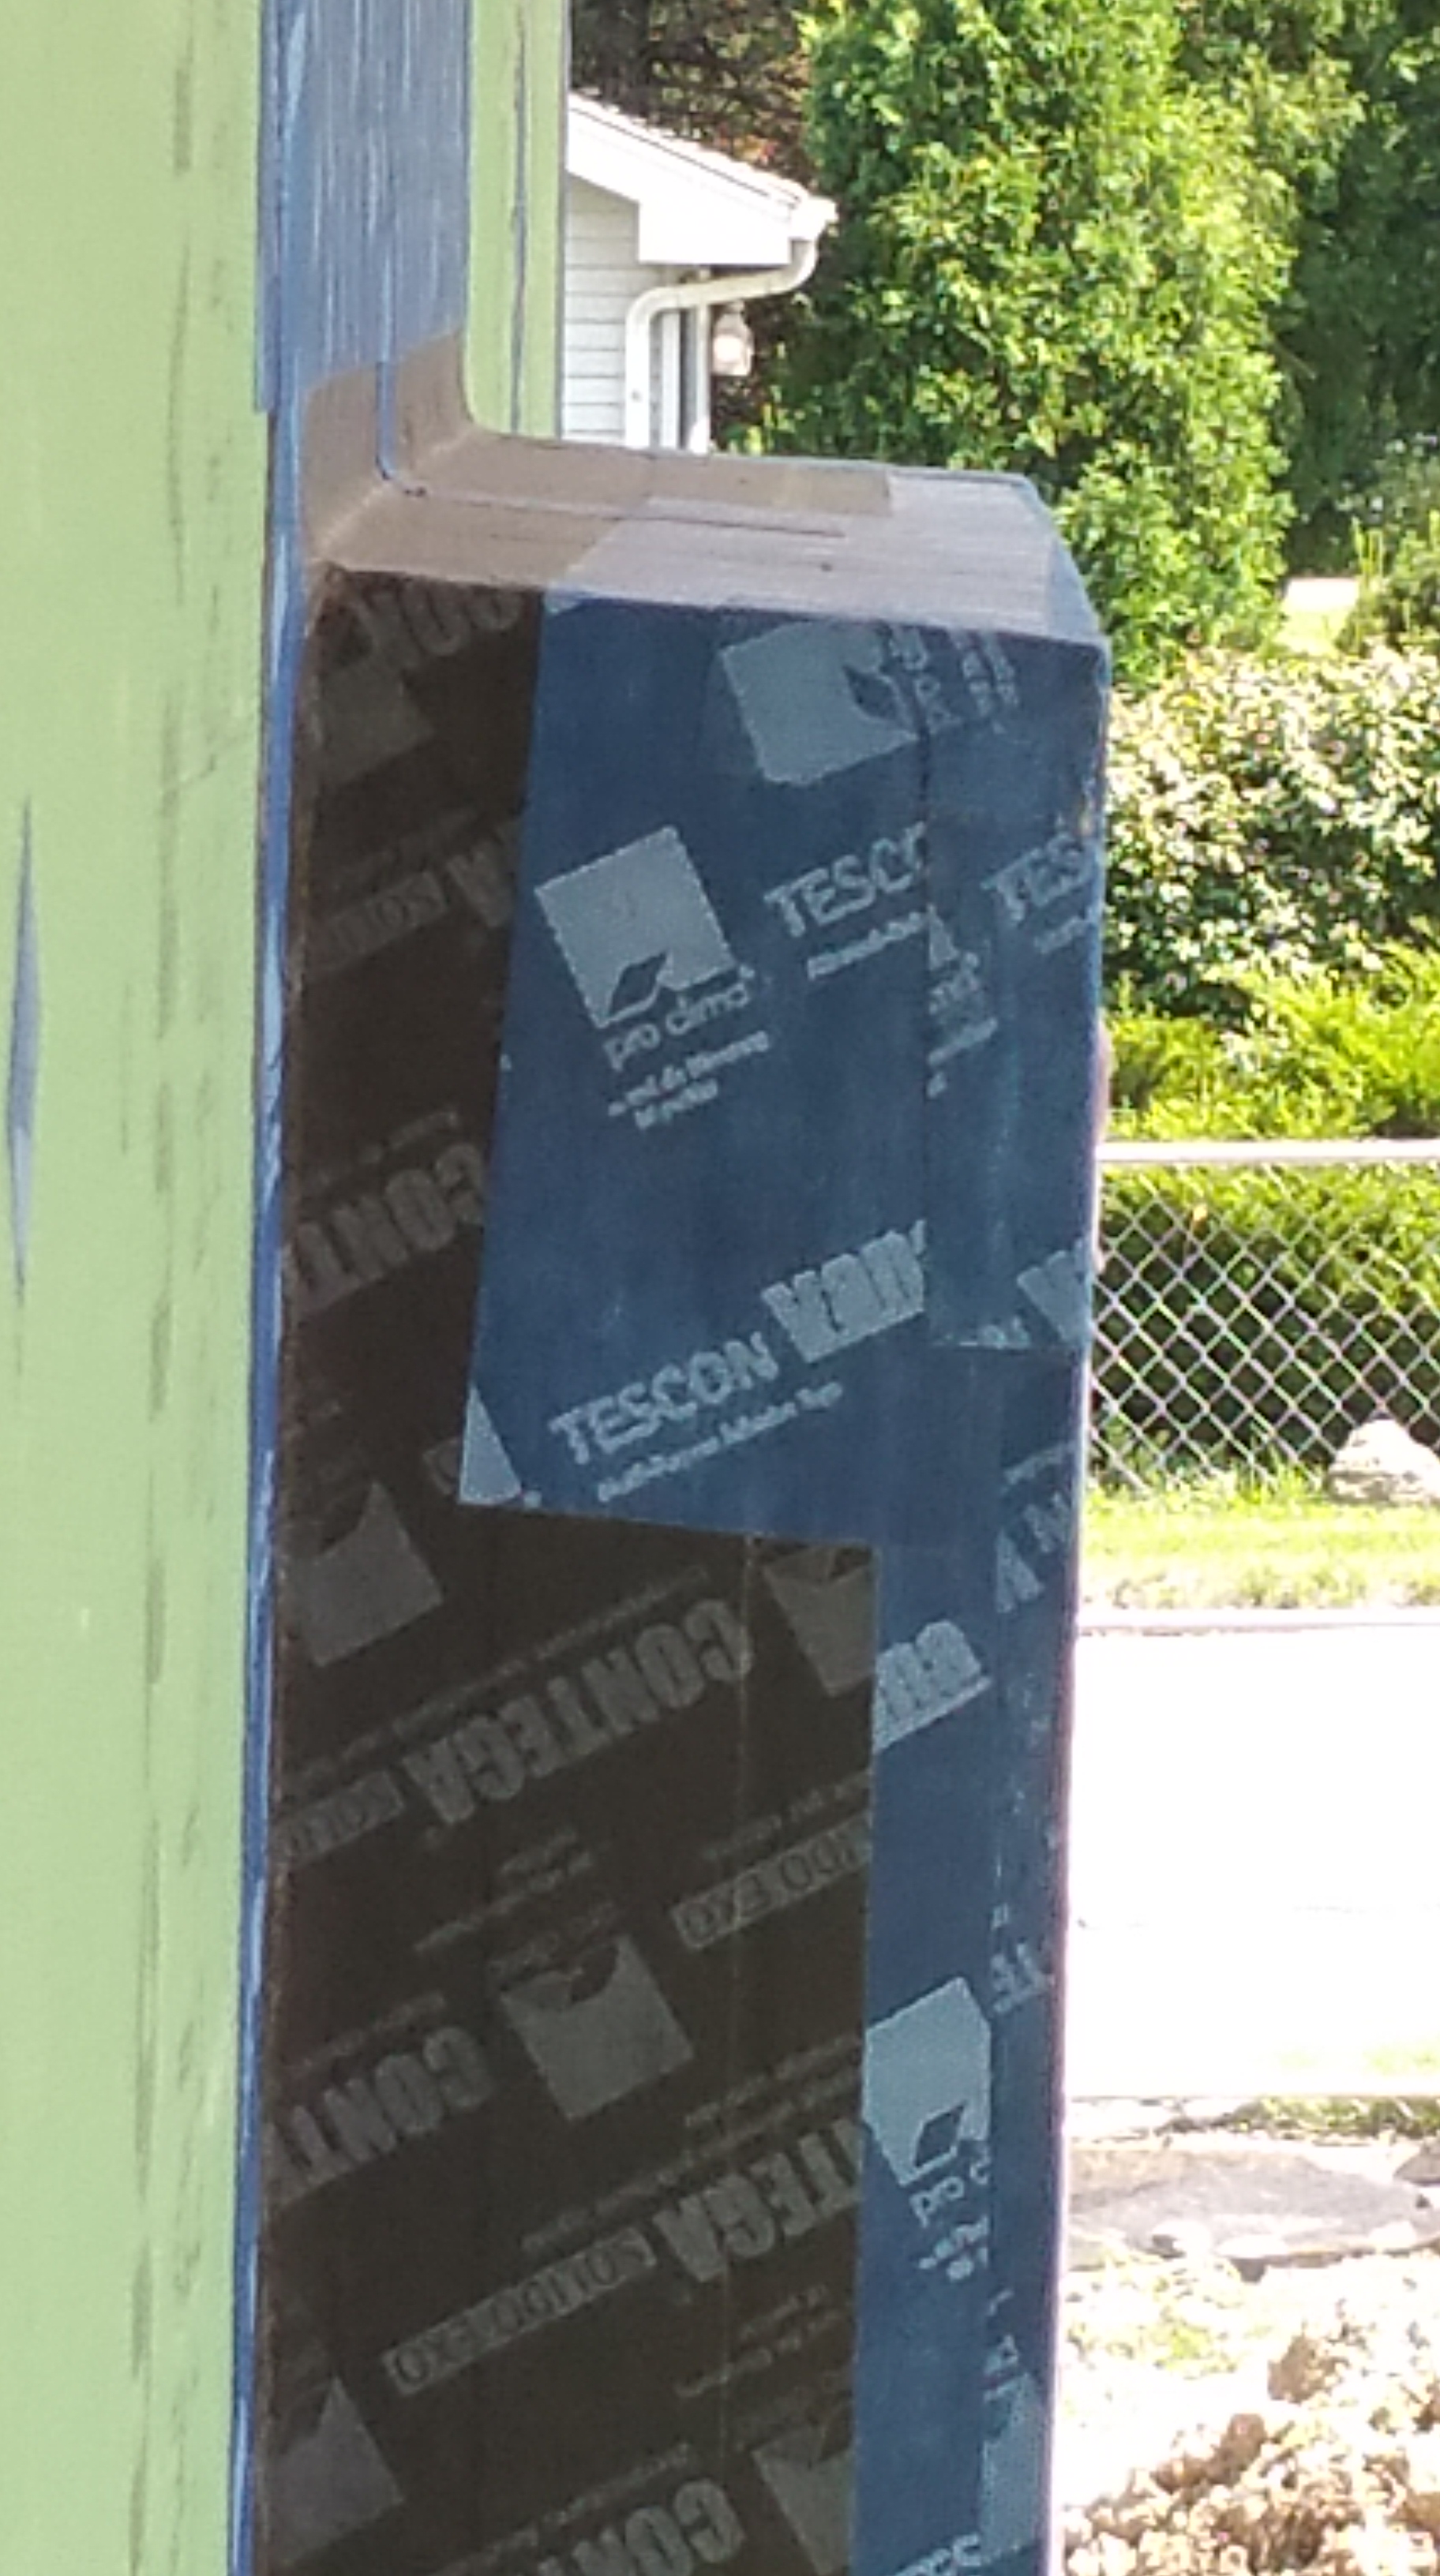
I started by addressing some of these areas first. For example, here’s the lower right of a window buck where it meets the Zip sheathing:
By building up the corners in this way I was hoping to guarantee complete coverage against air and water infiltration at these tricky points.

Here’s the top of the buck where it meets up with the Zip sheathing:

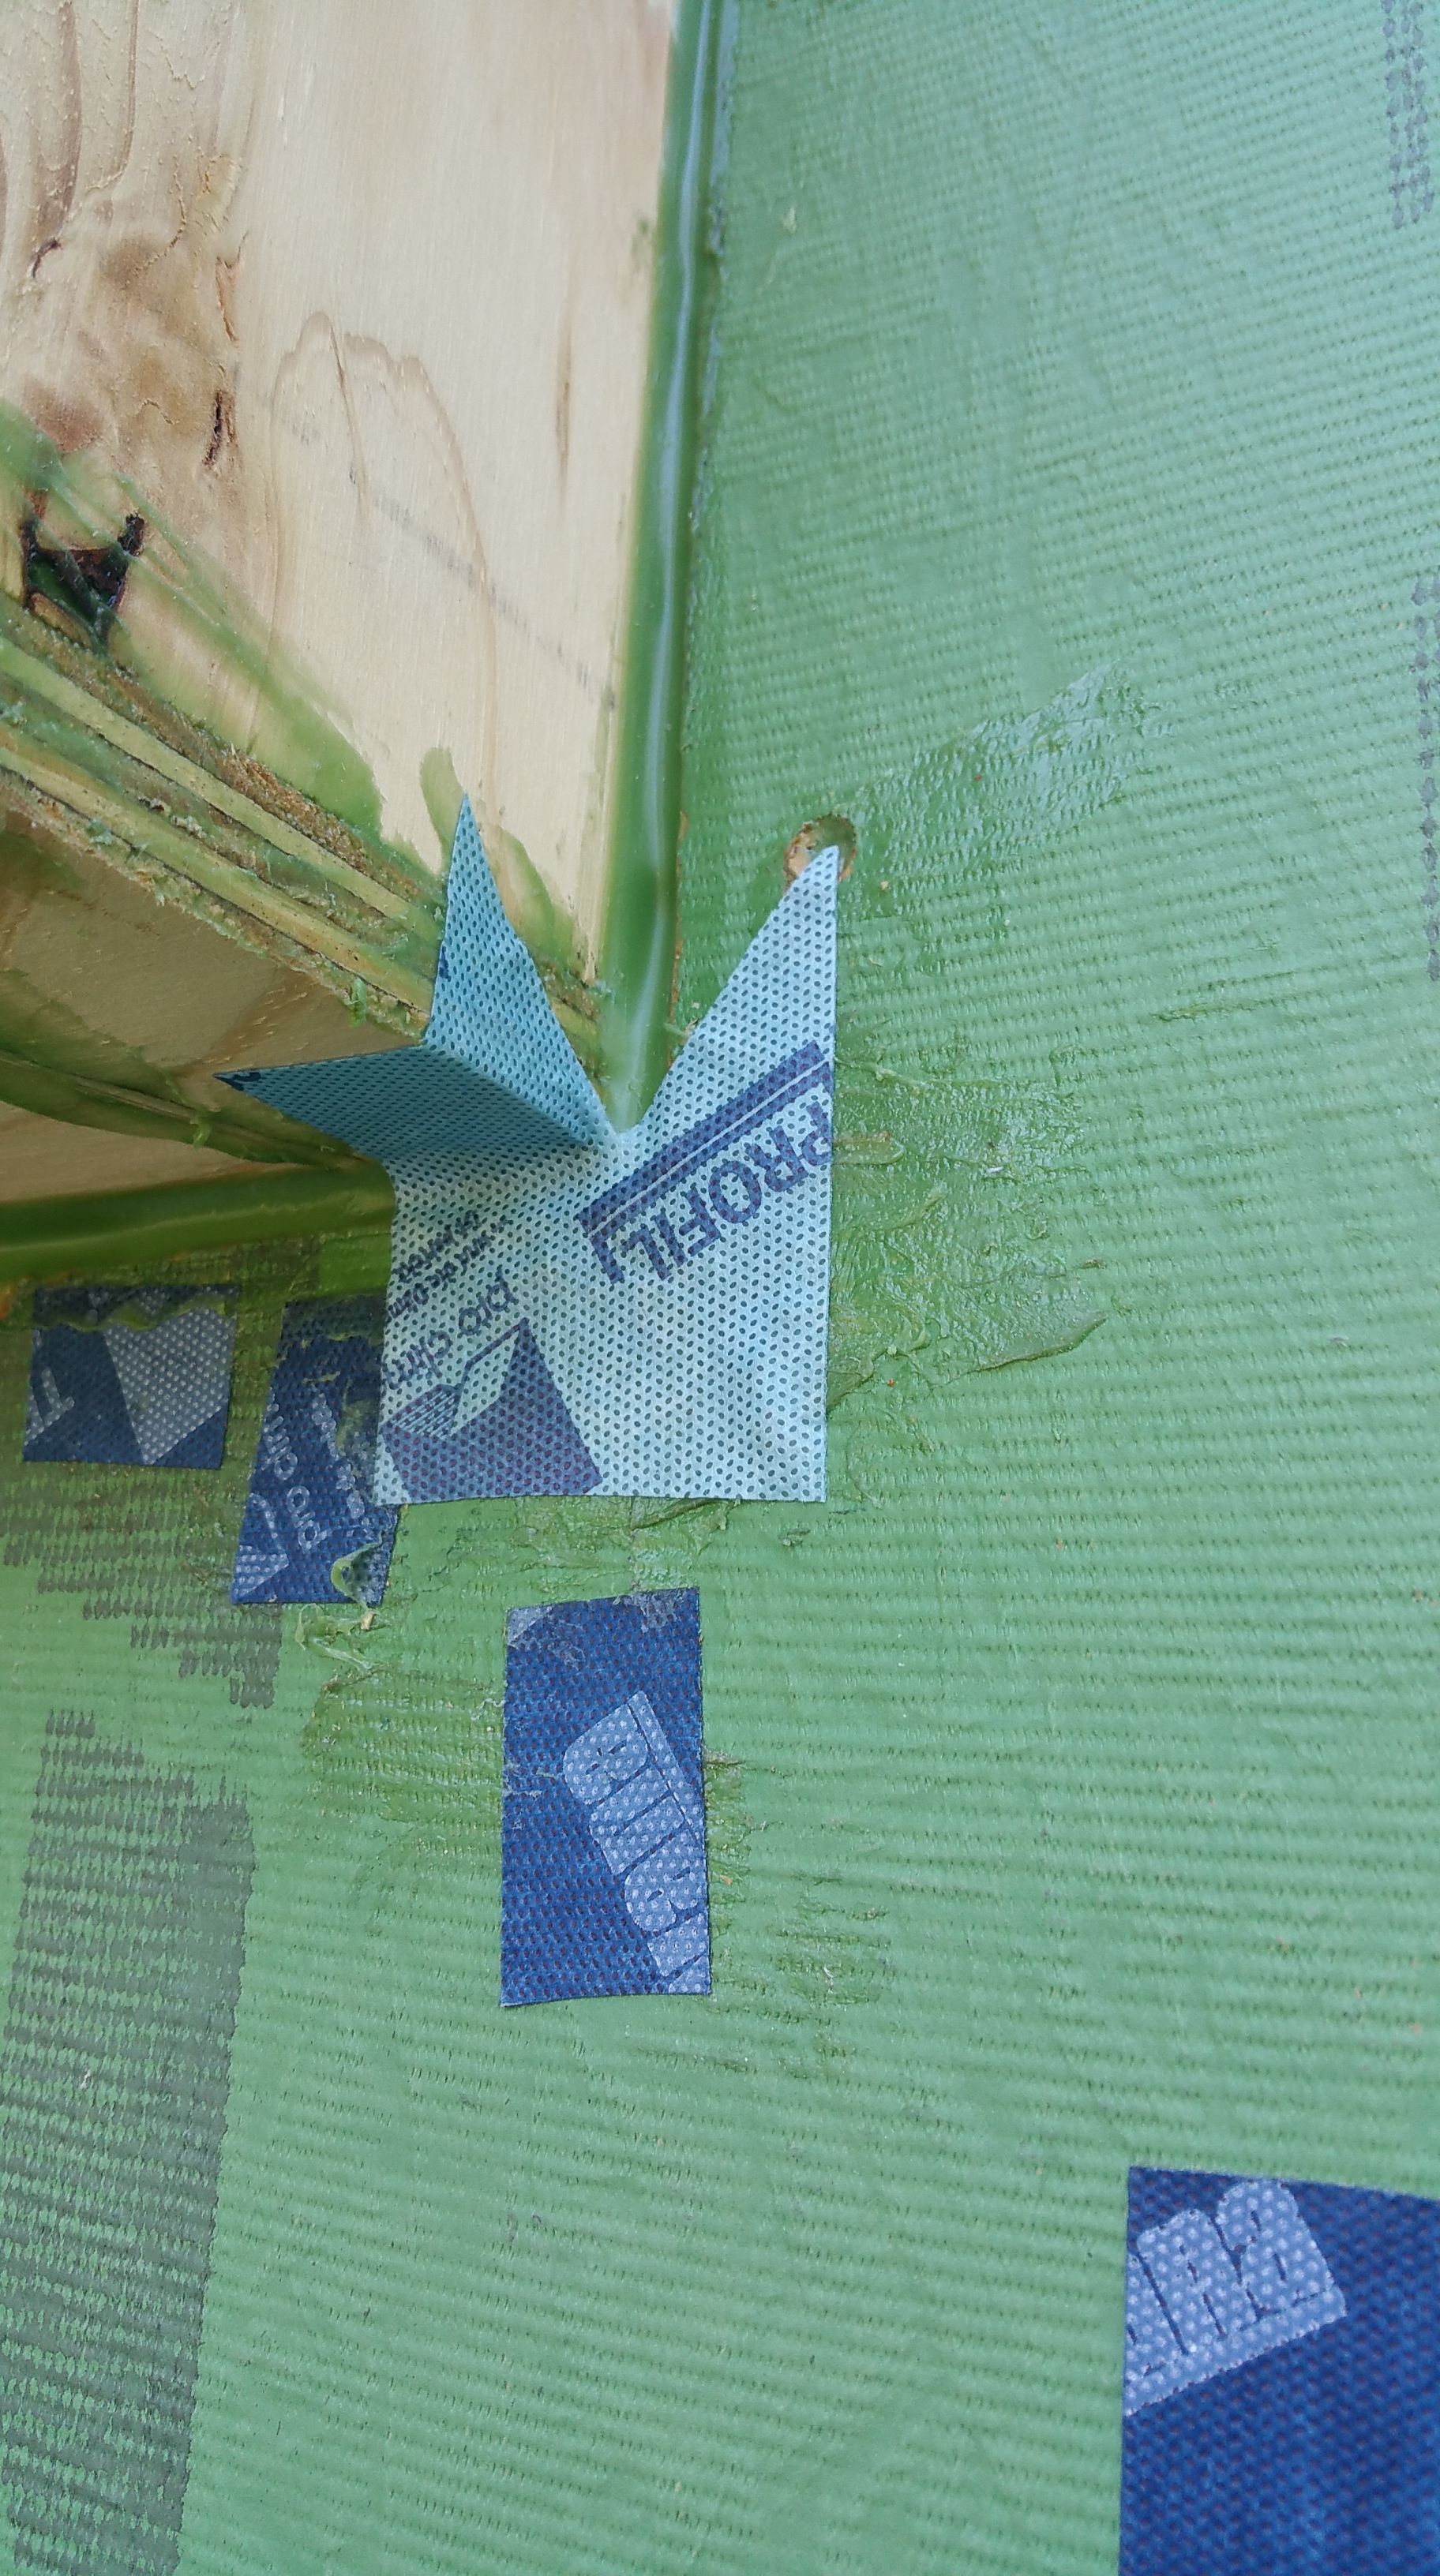
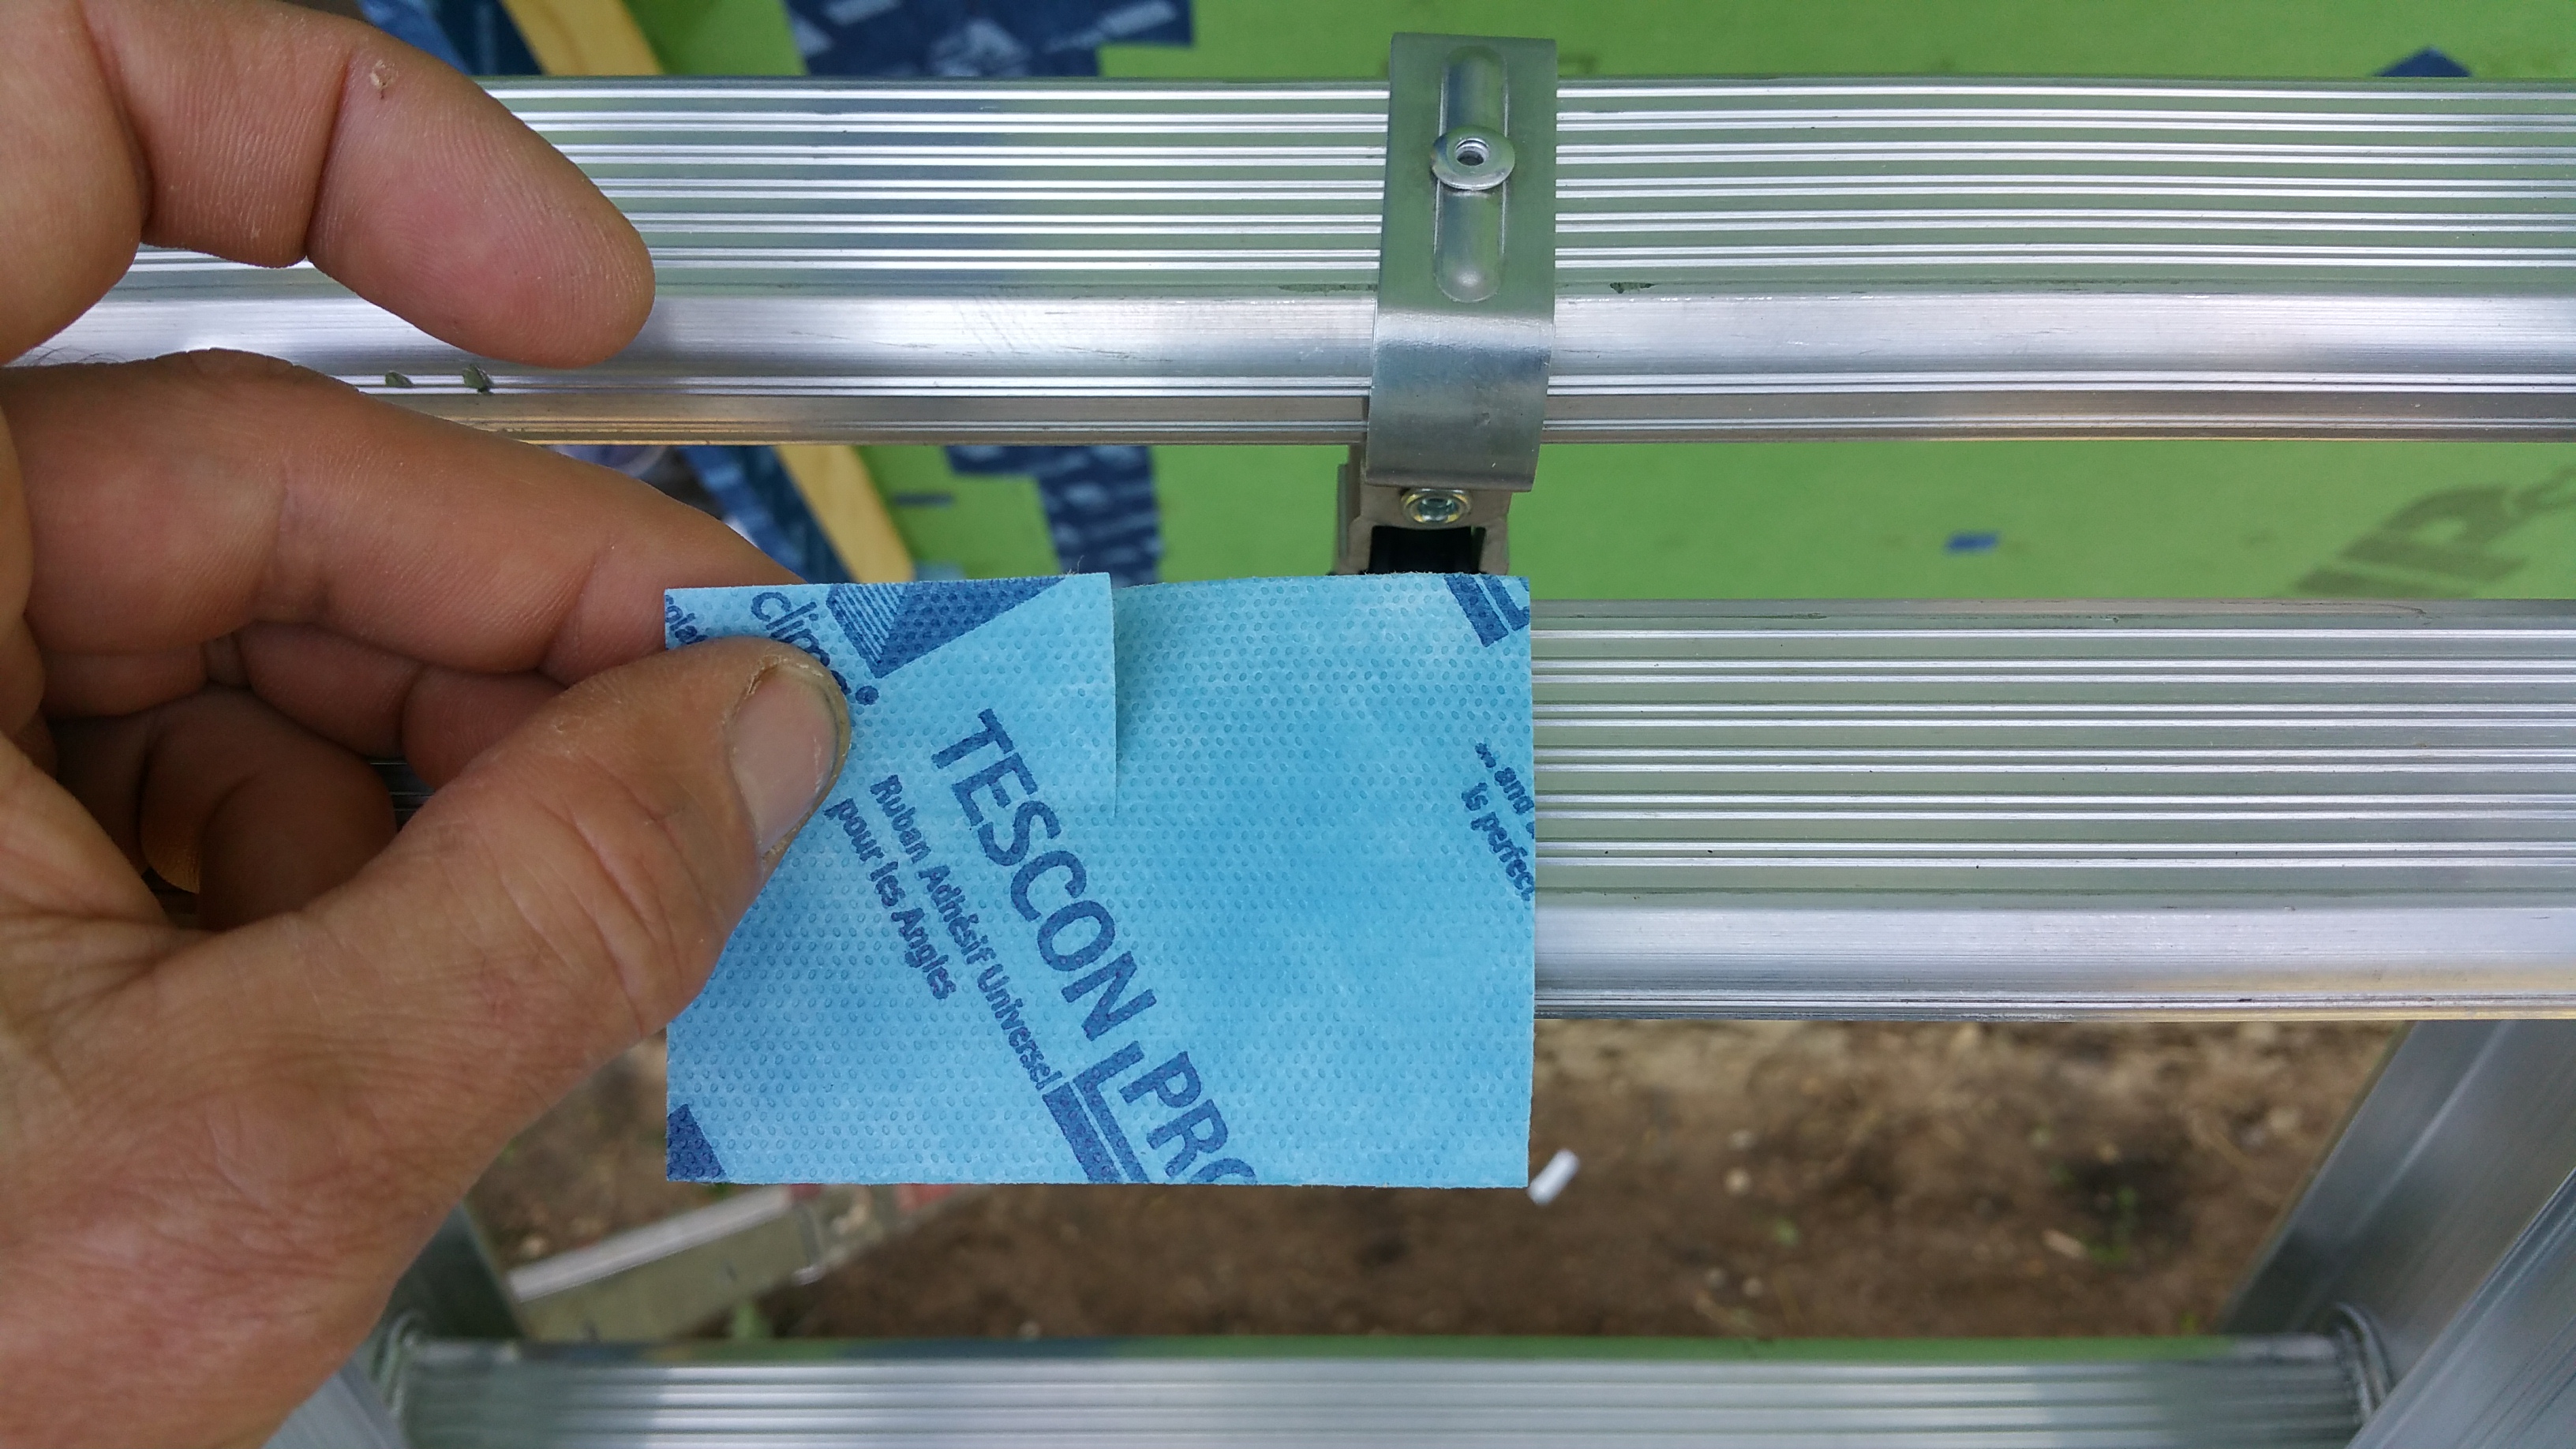
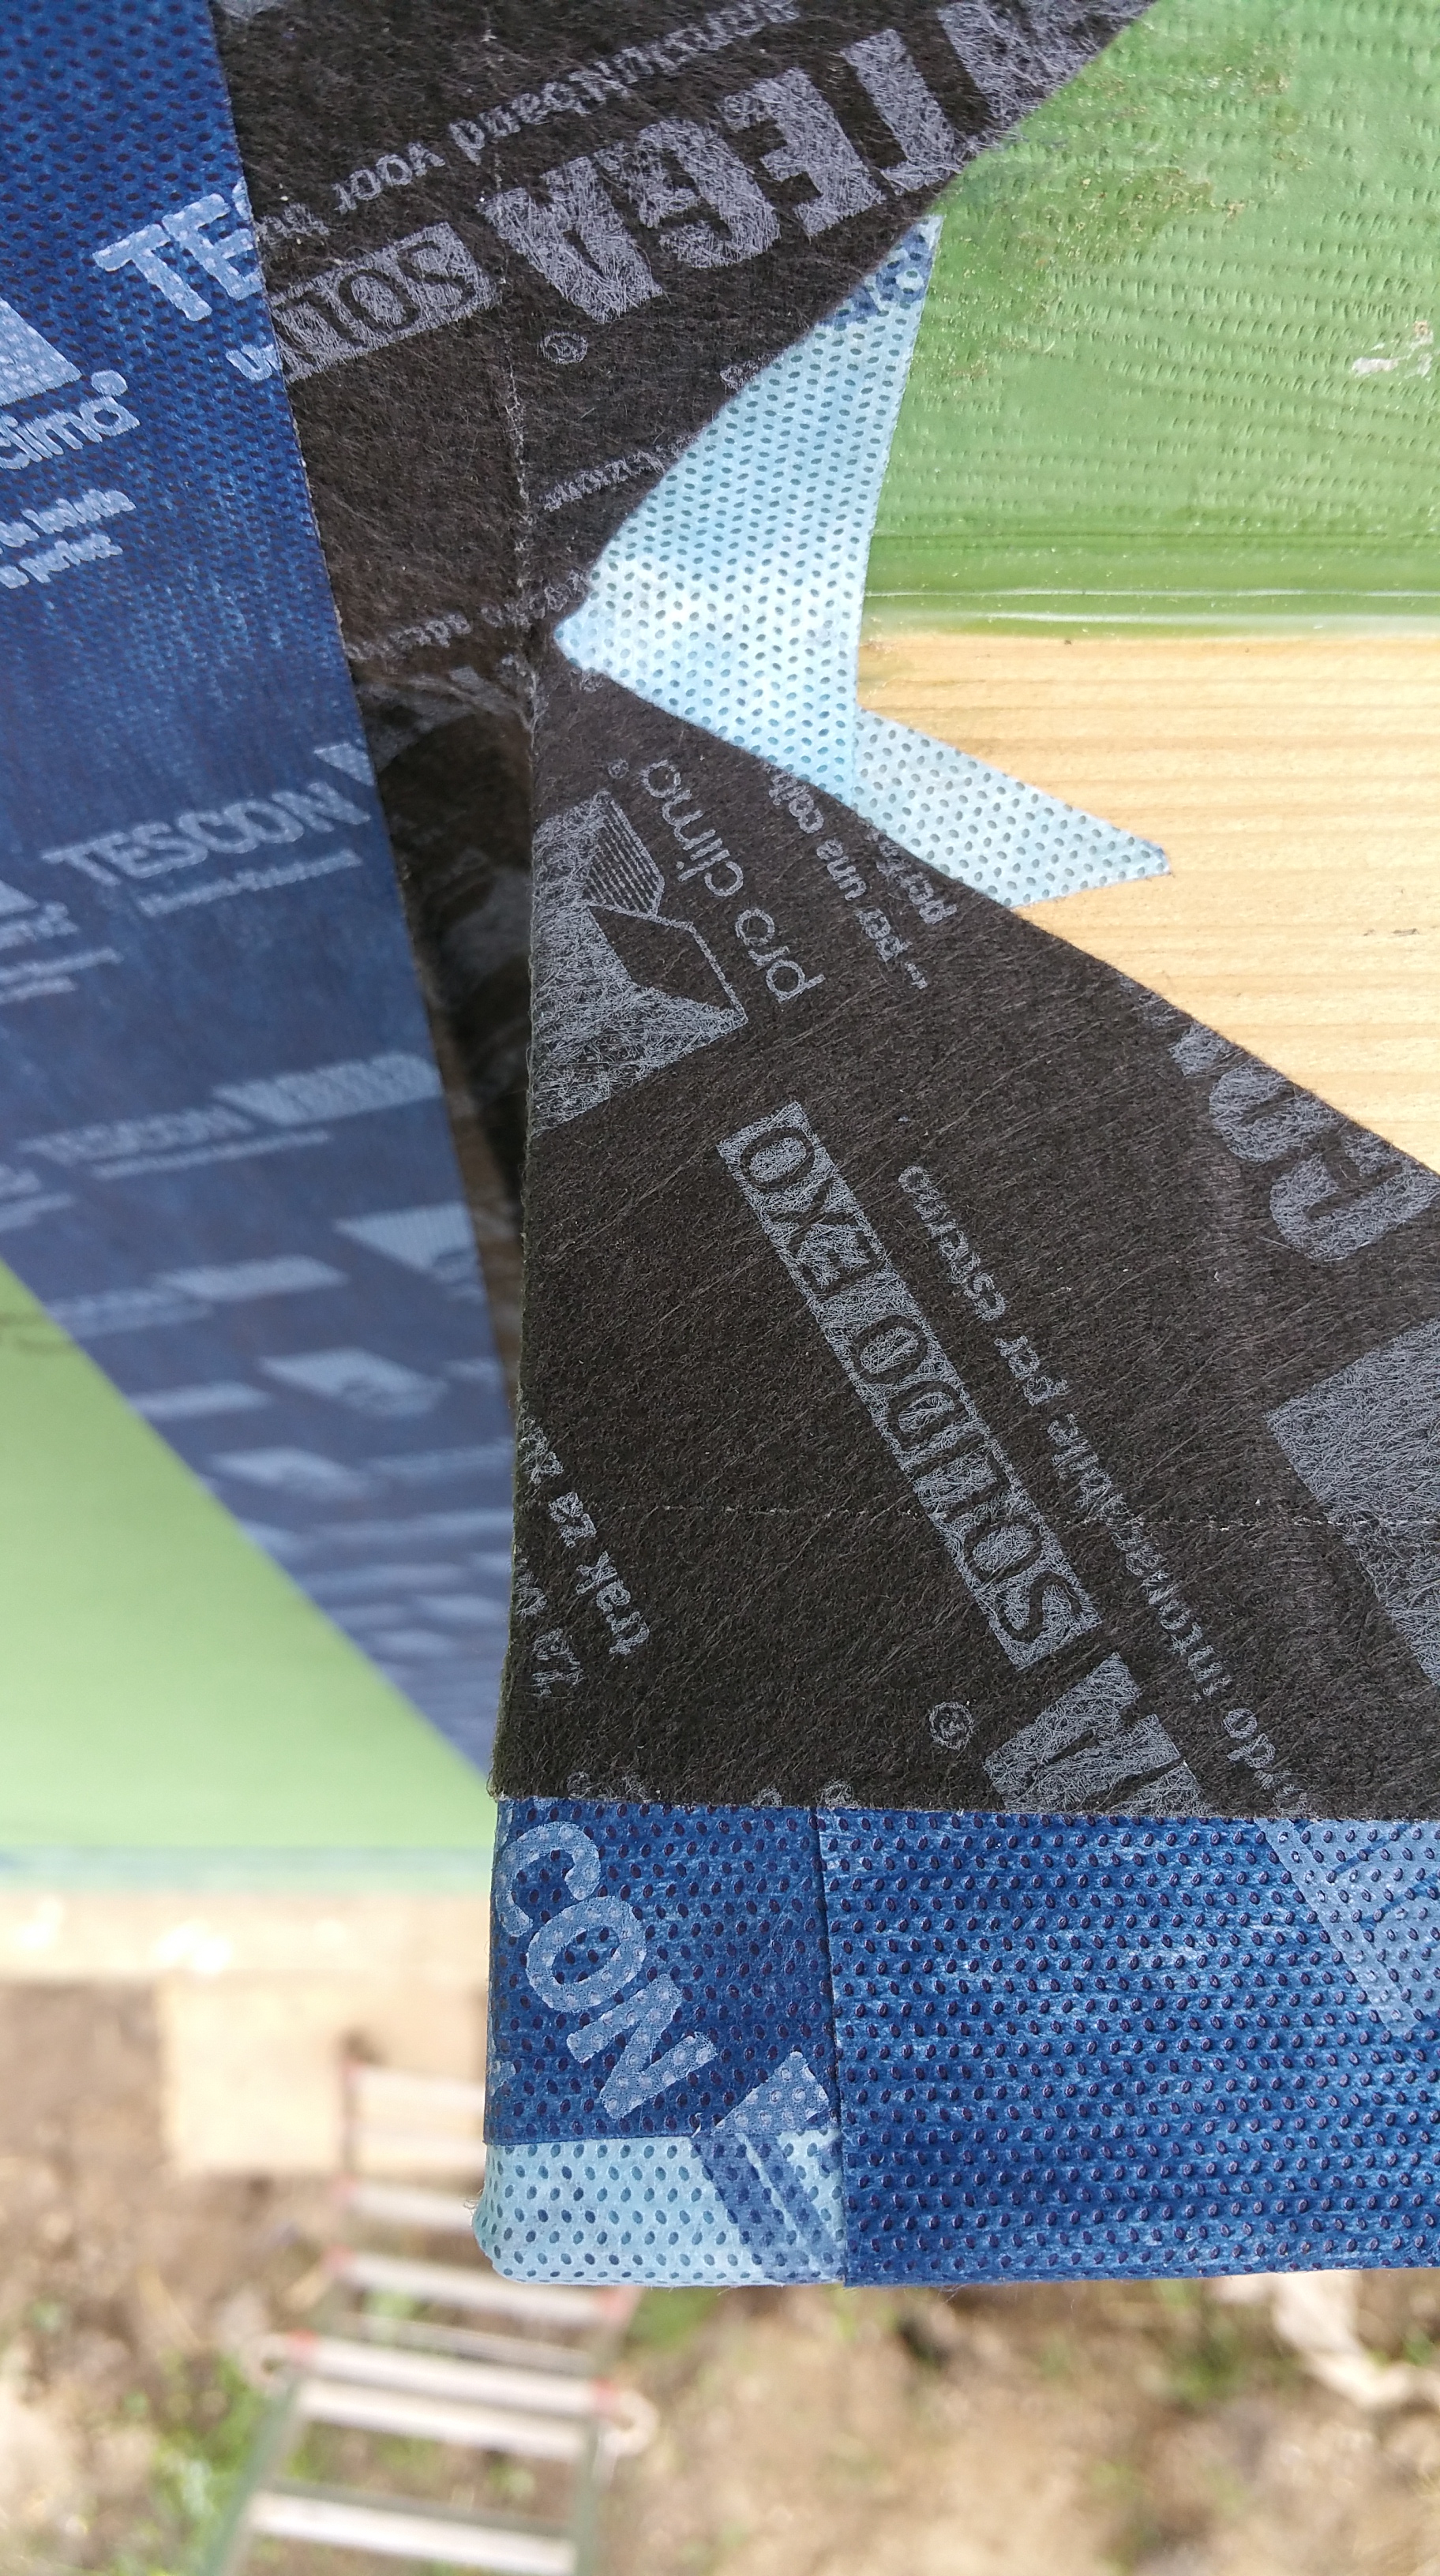
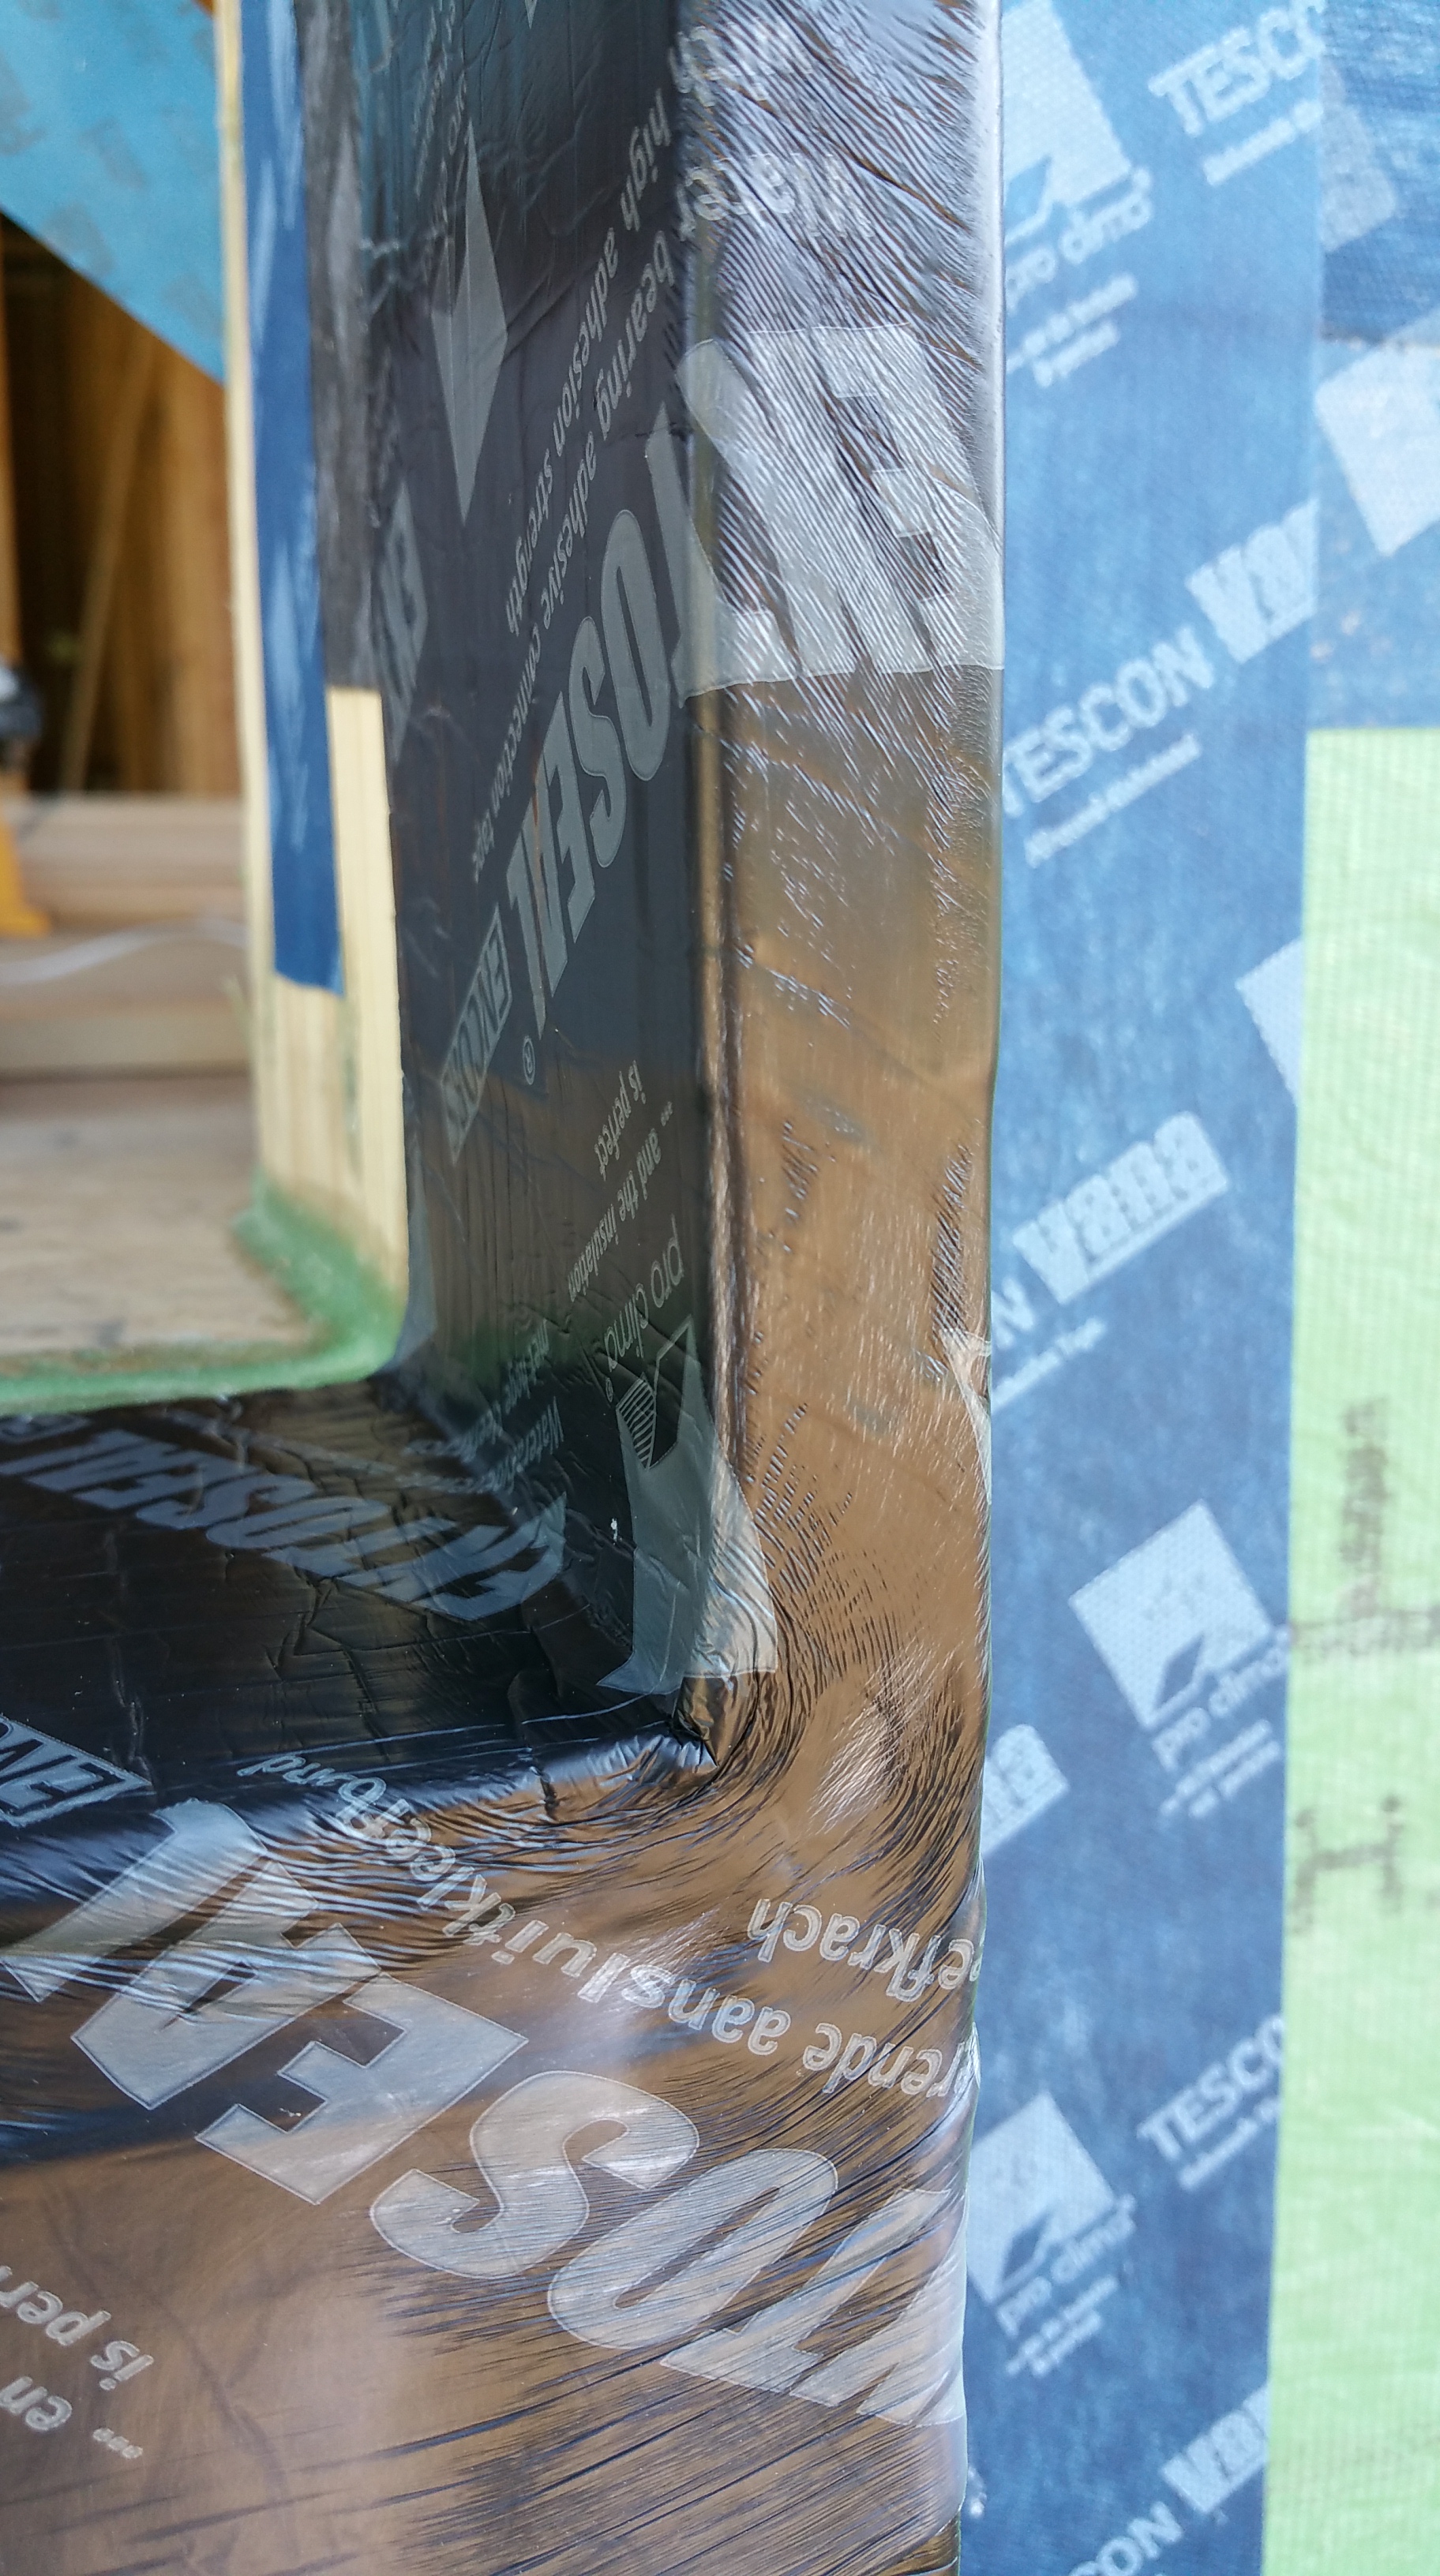
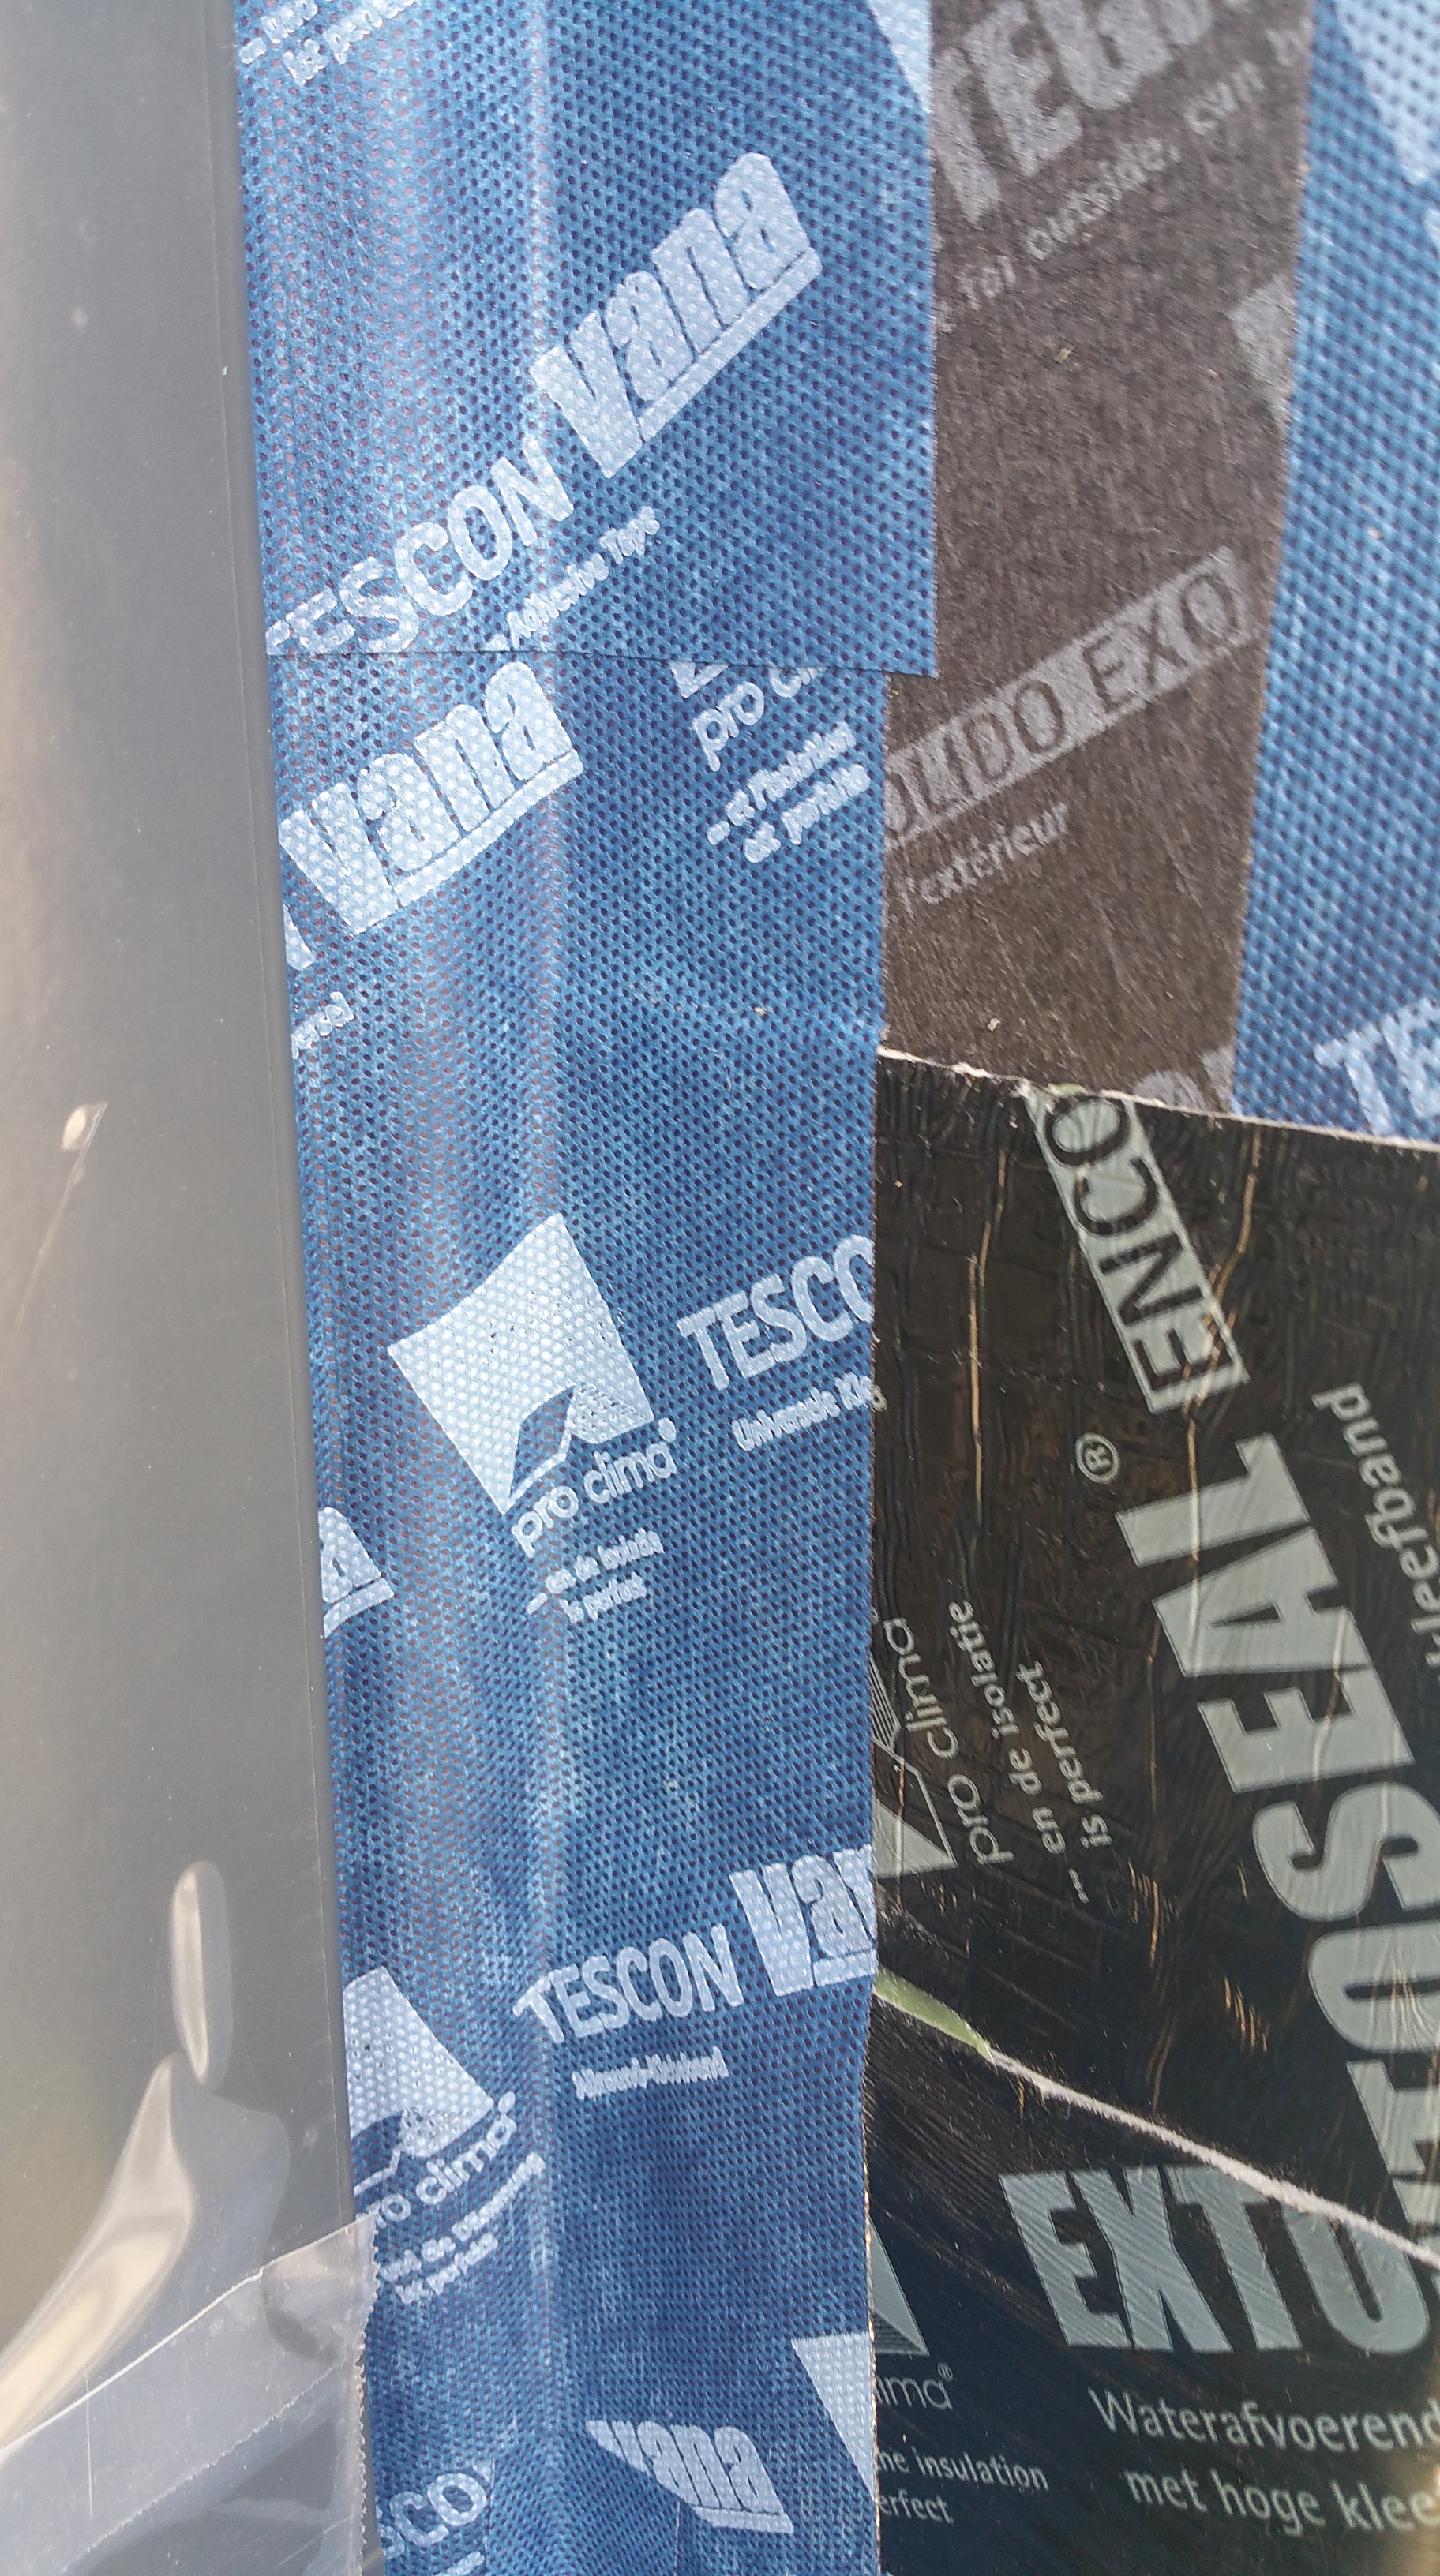
The Profil tape, which splits into thirds on the back, makes corners much easier to tackle.
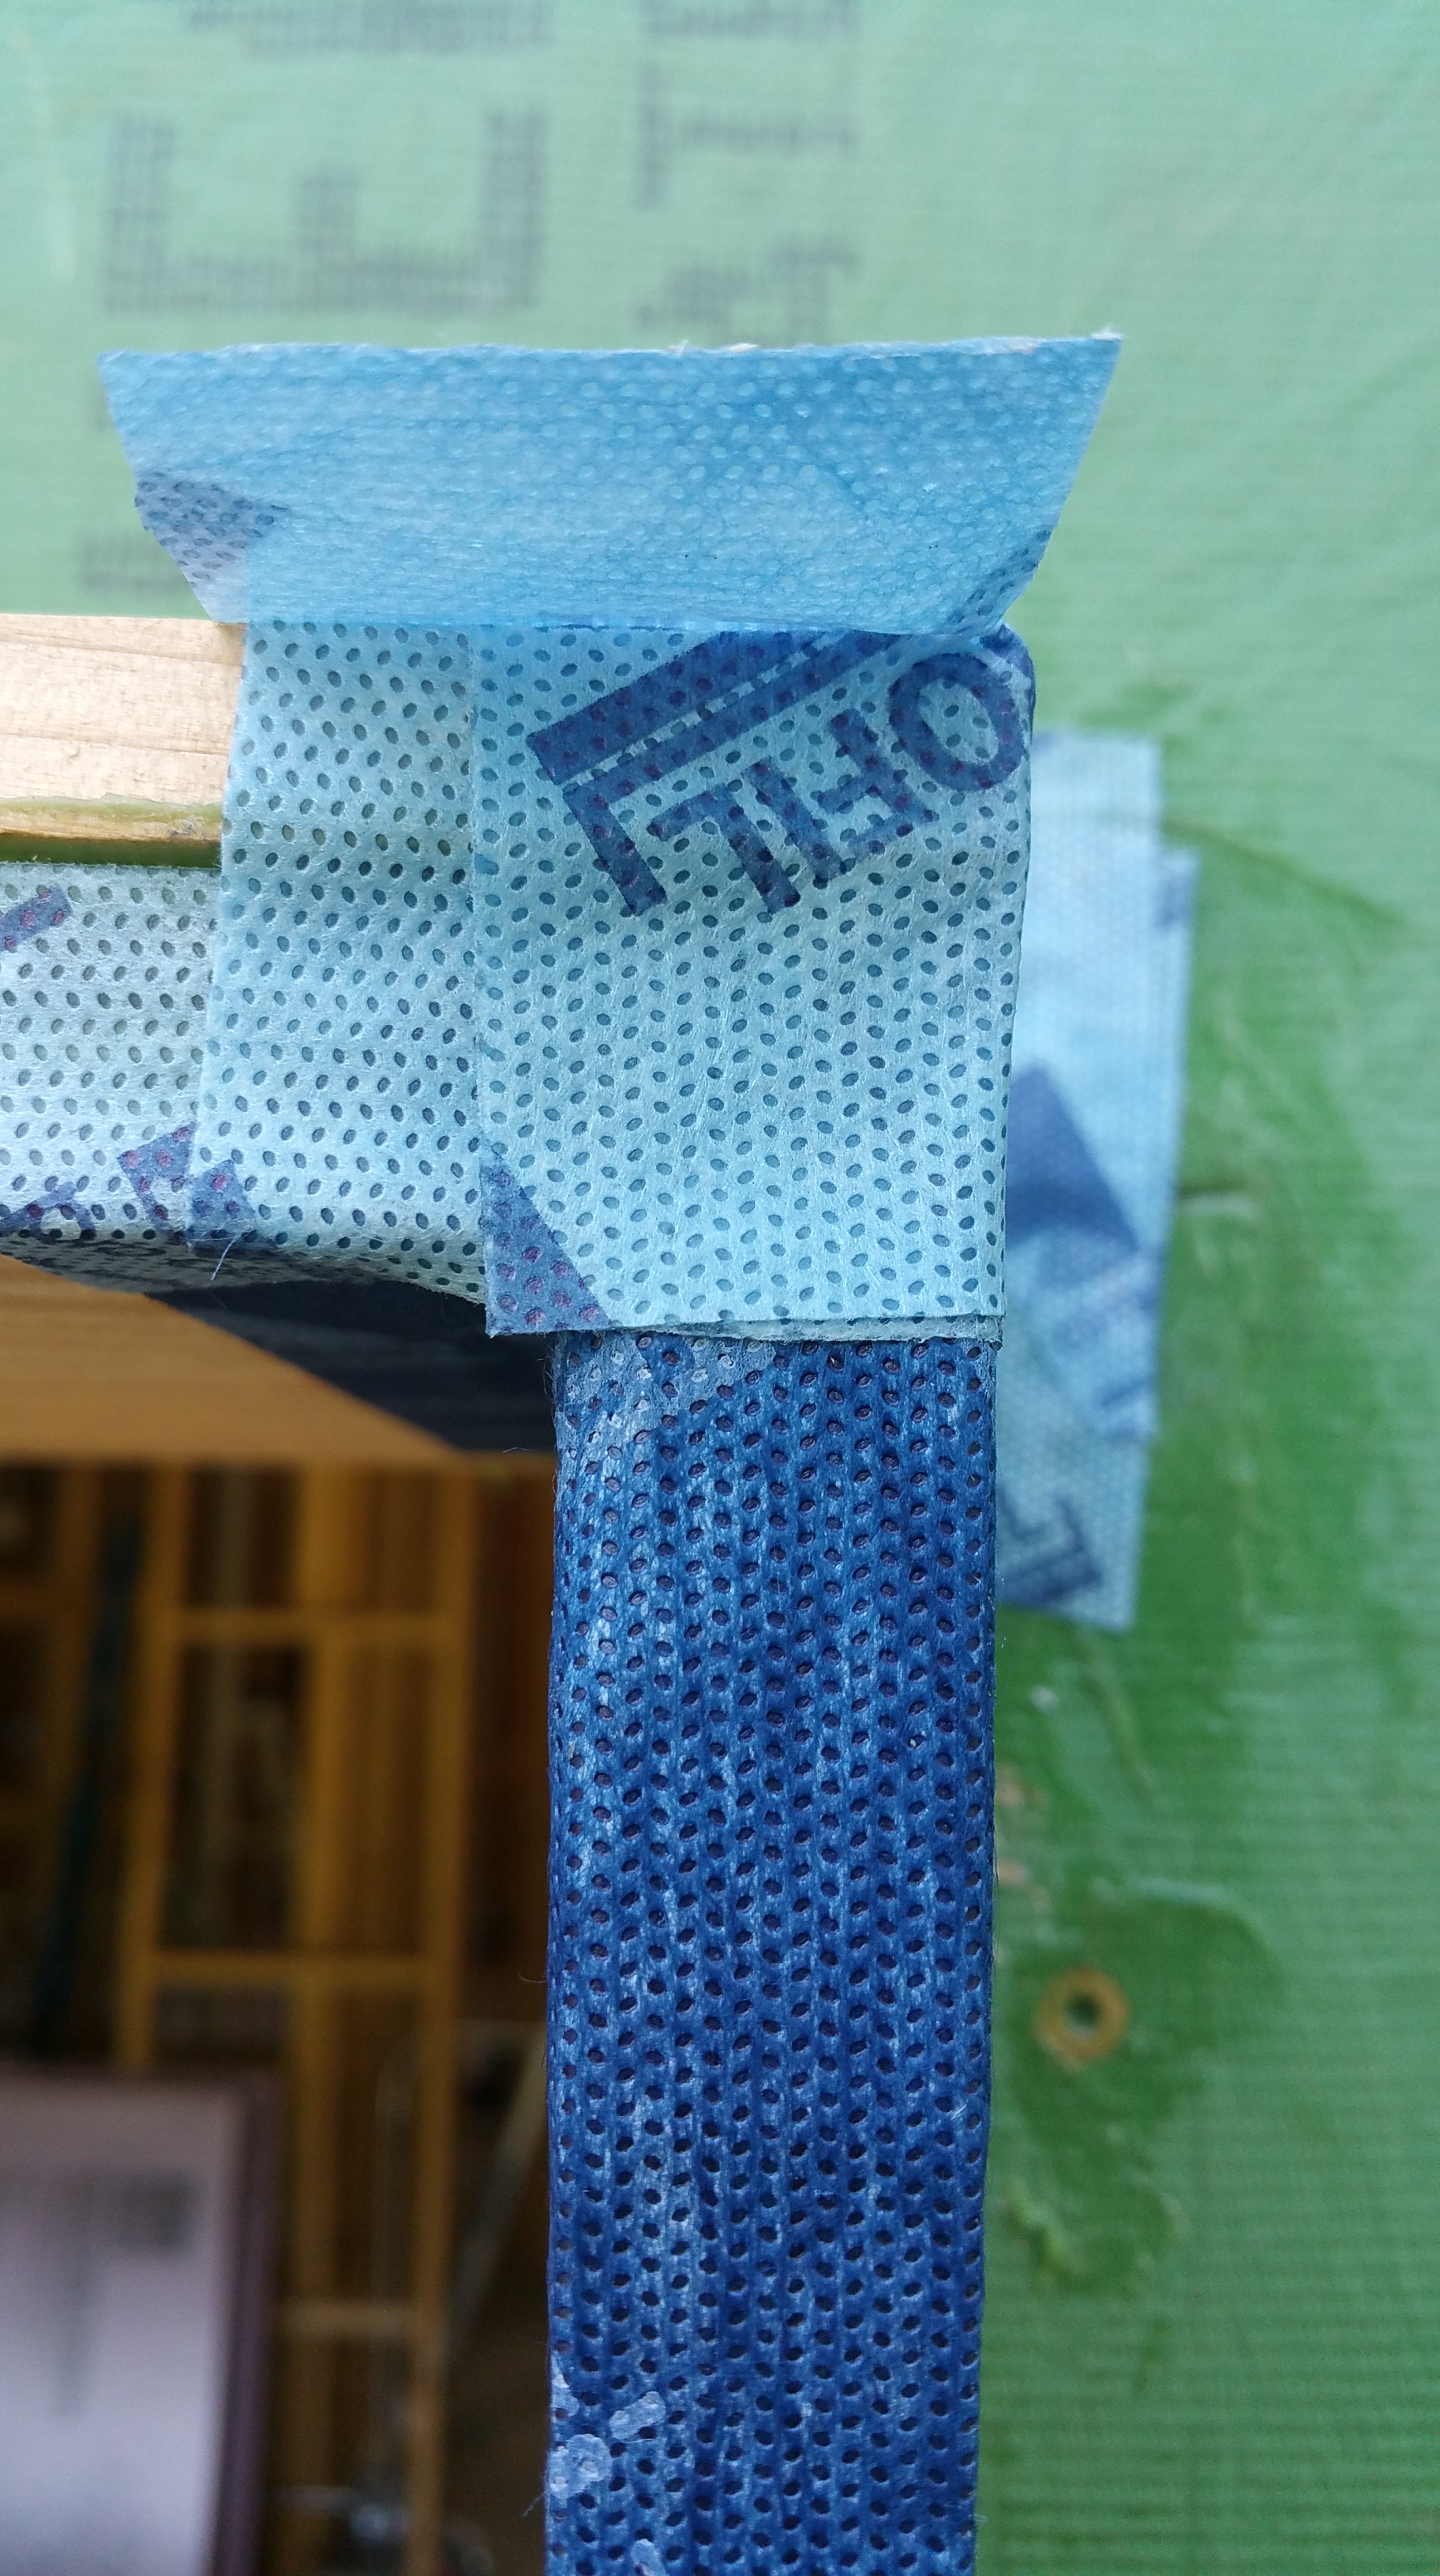
After using the Tescon Vana in the upper inside corner of the buck, I used the Profil tape to address the upper outside corners of the bucks:

Here’s two views of the second top piece for this area:

Here’s another view of the same area, this time looking at the buck head-on:
By making small cuts in the Profil tape with a razor blade, corners are easy to shape to the form you need. Although making a cut while the tape is already in position is relatively easy to do, avoiding any damage to underlying layers is obviously very important. For this reason, it’s probably safer to make cuts before getting the tape into position.
For instance, an initial cut in the Profil tape:
And then making a fold to establish the basic shape for an outside corner:

Once you initially set the tape in its position, gently remove the white backing paper, trying to avoid moving the tape too much, which would change its position or cause wrinkles.
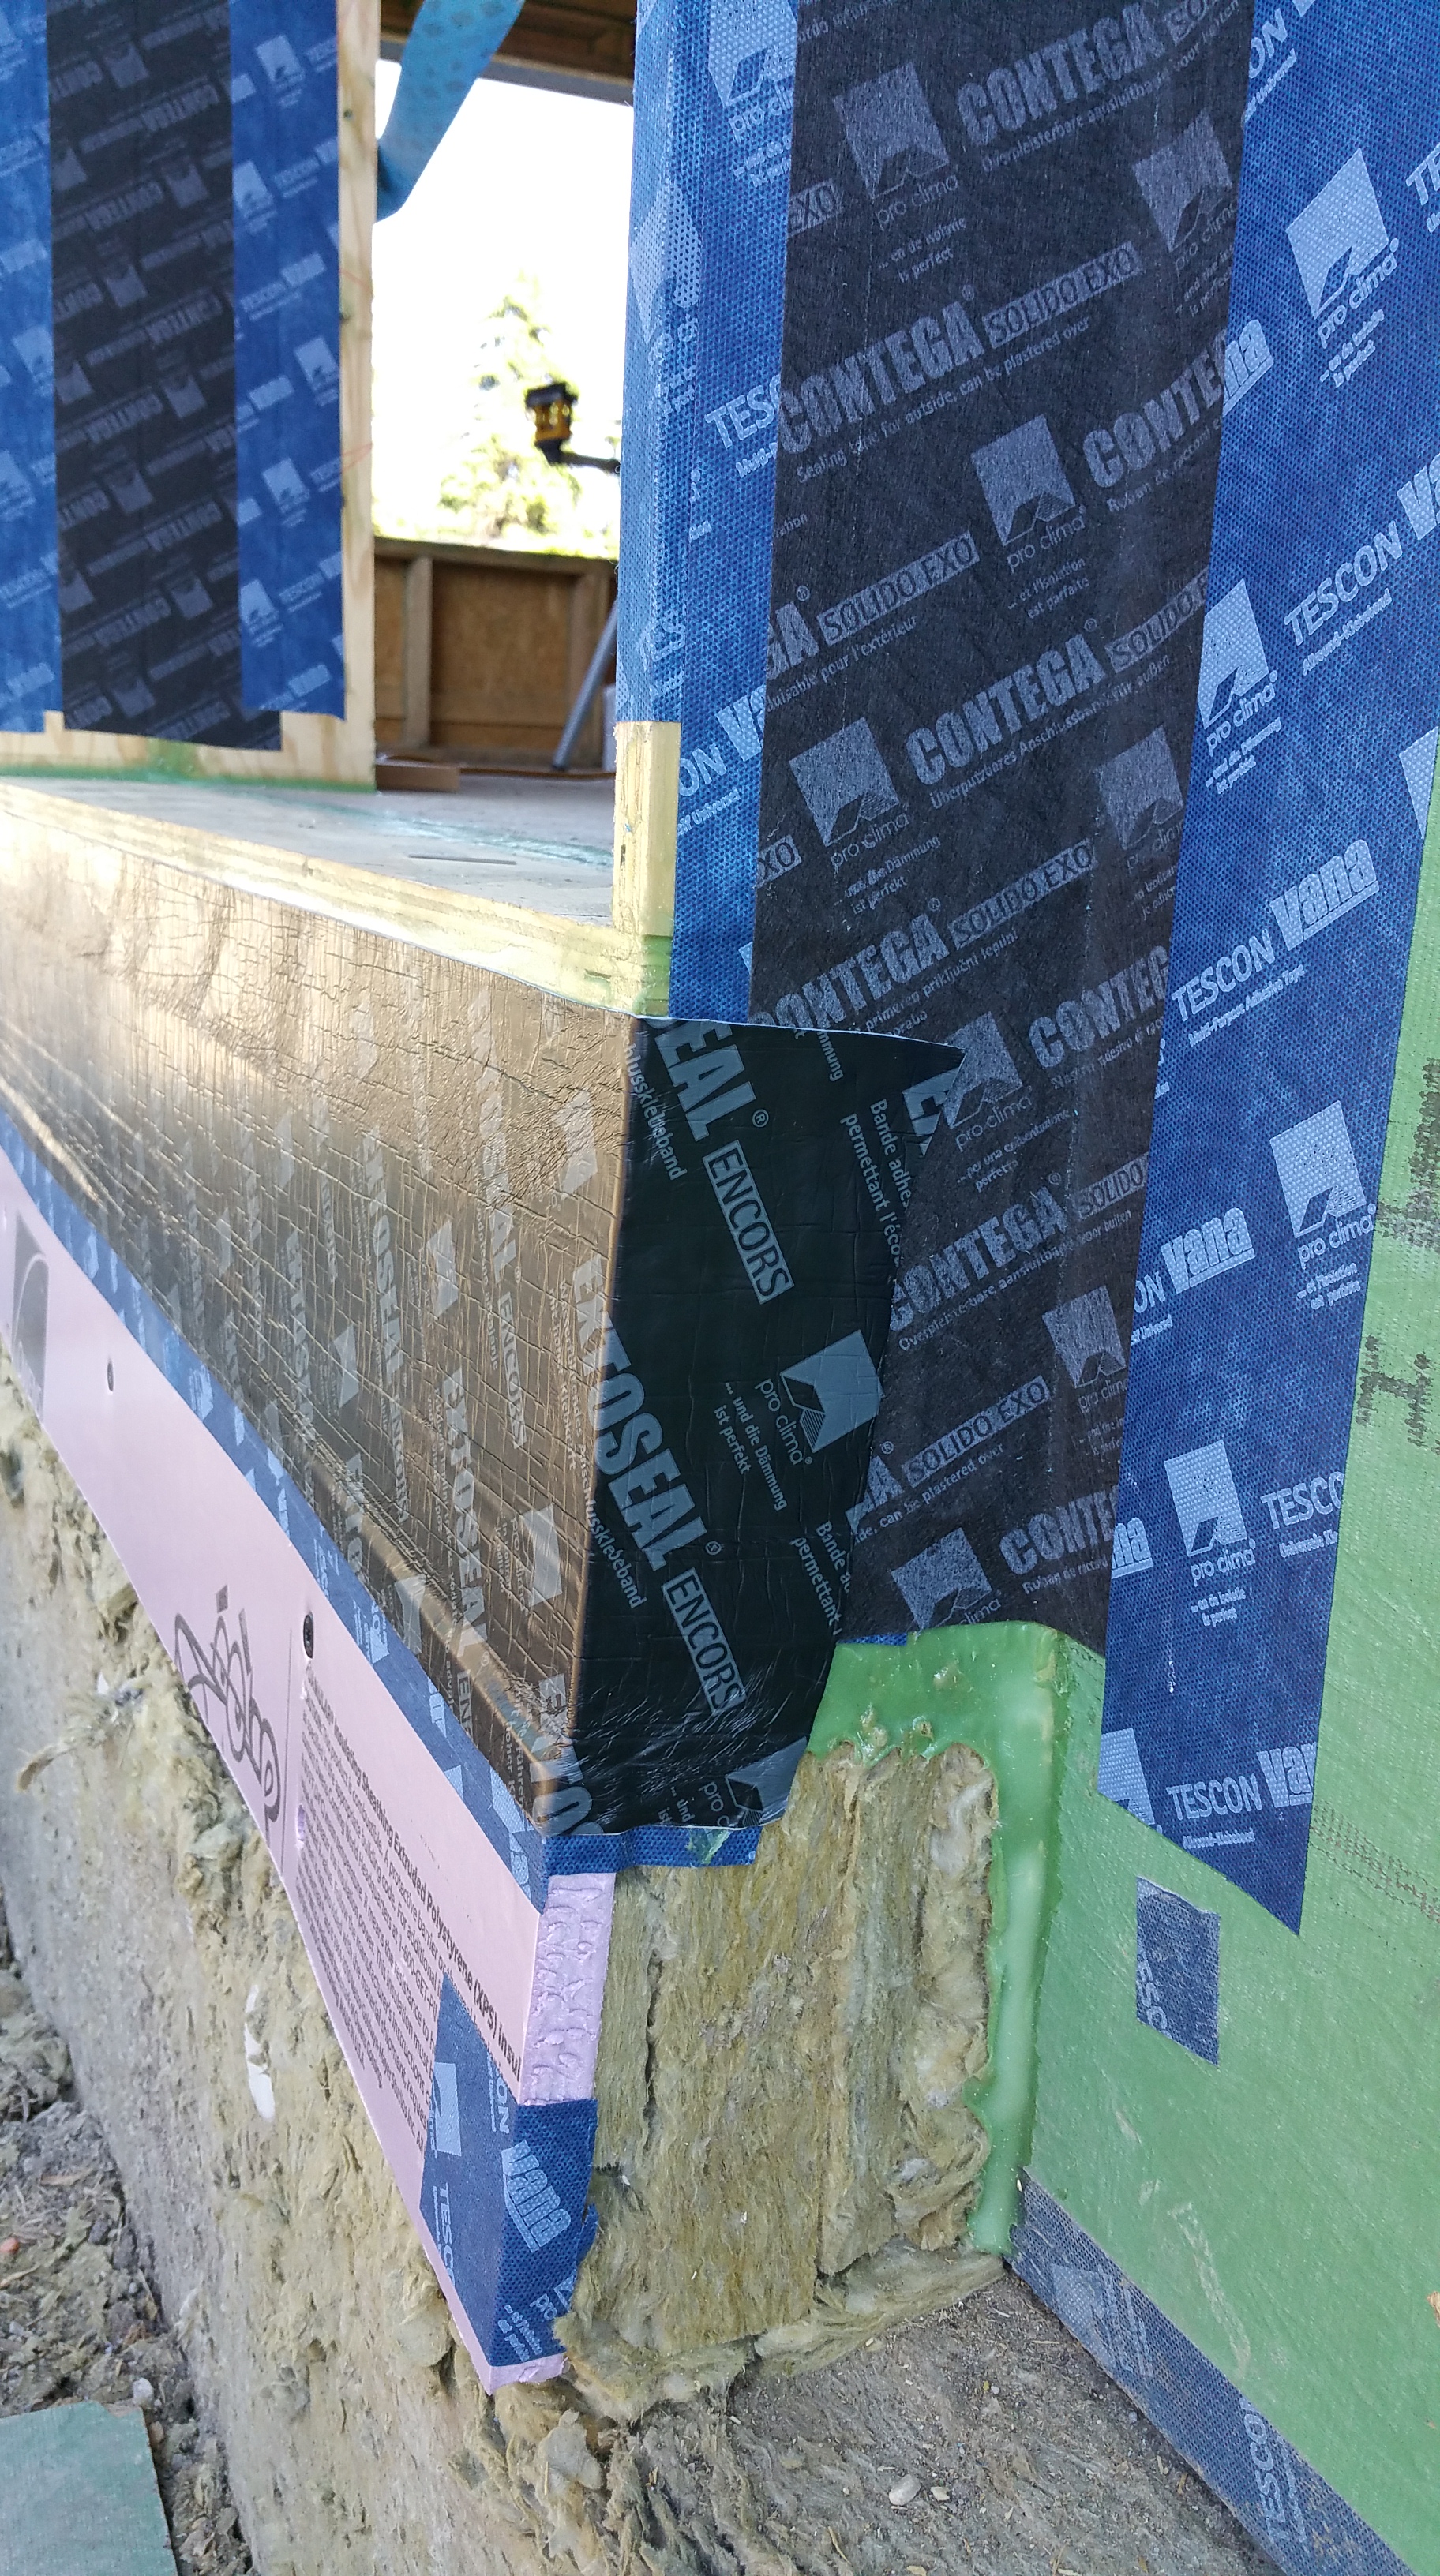
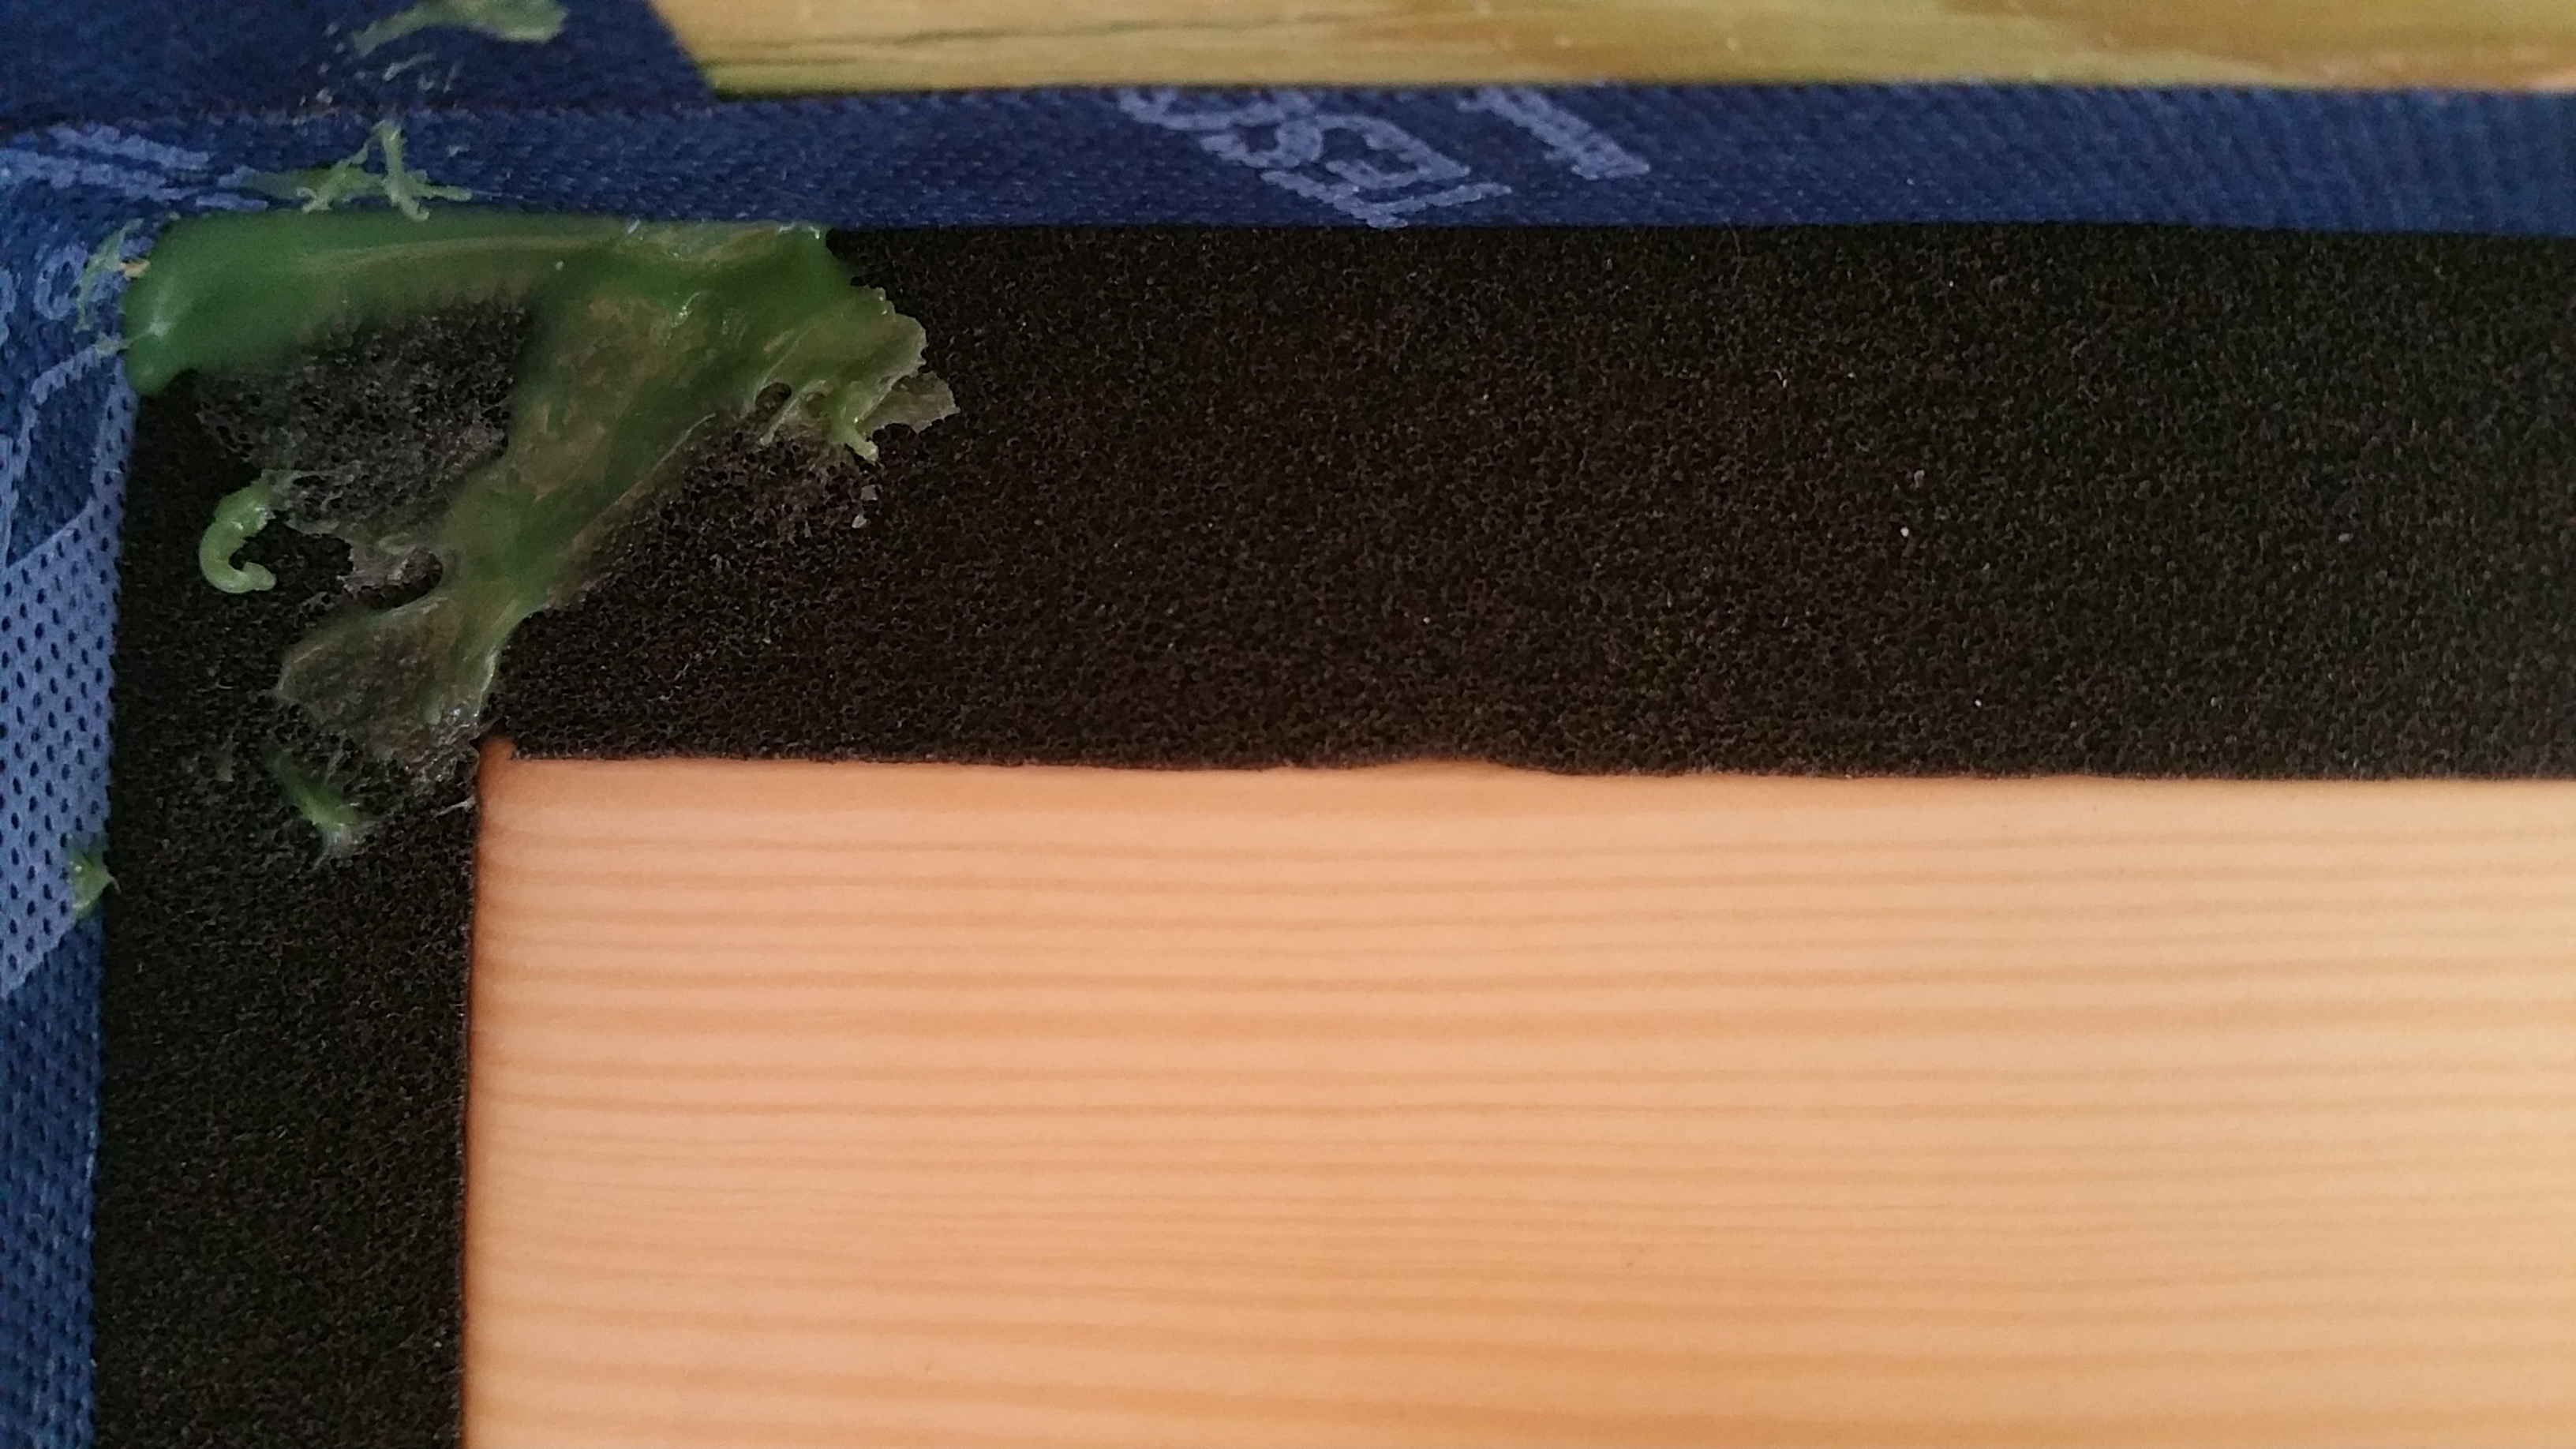
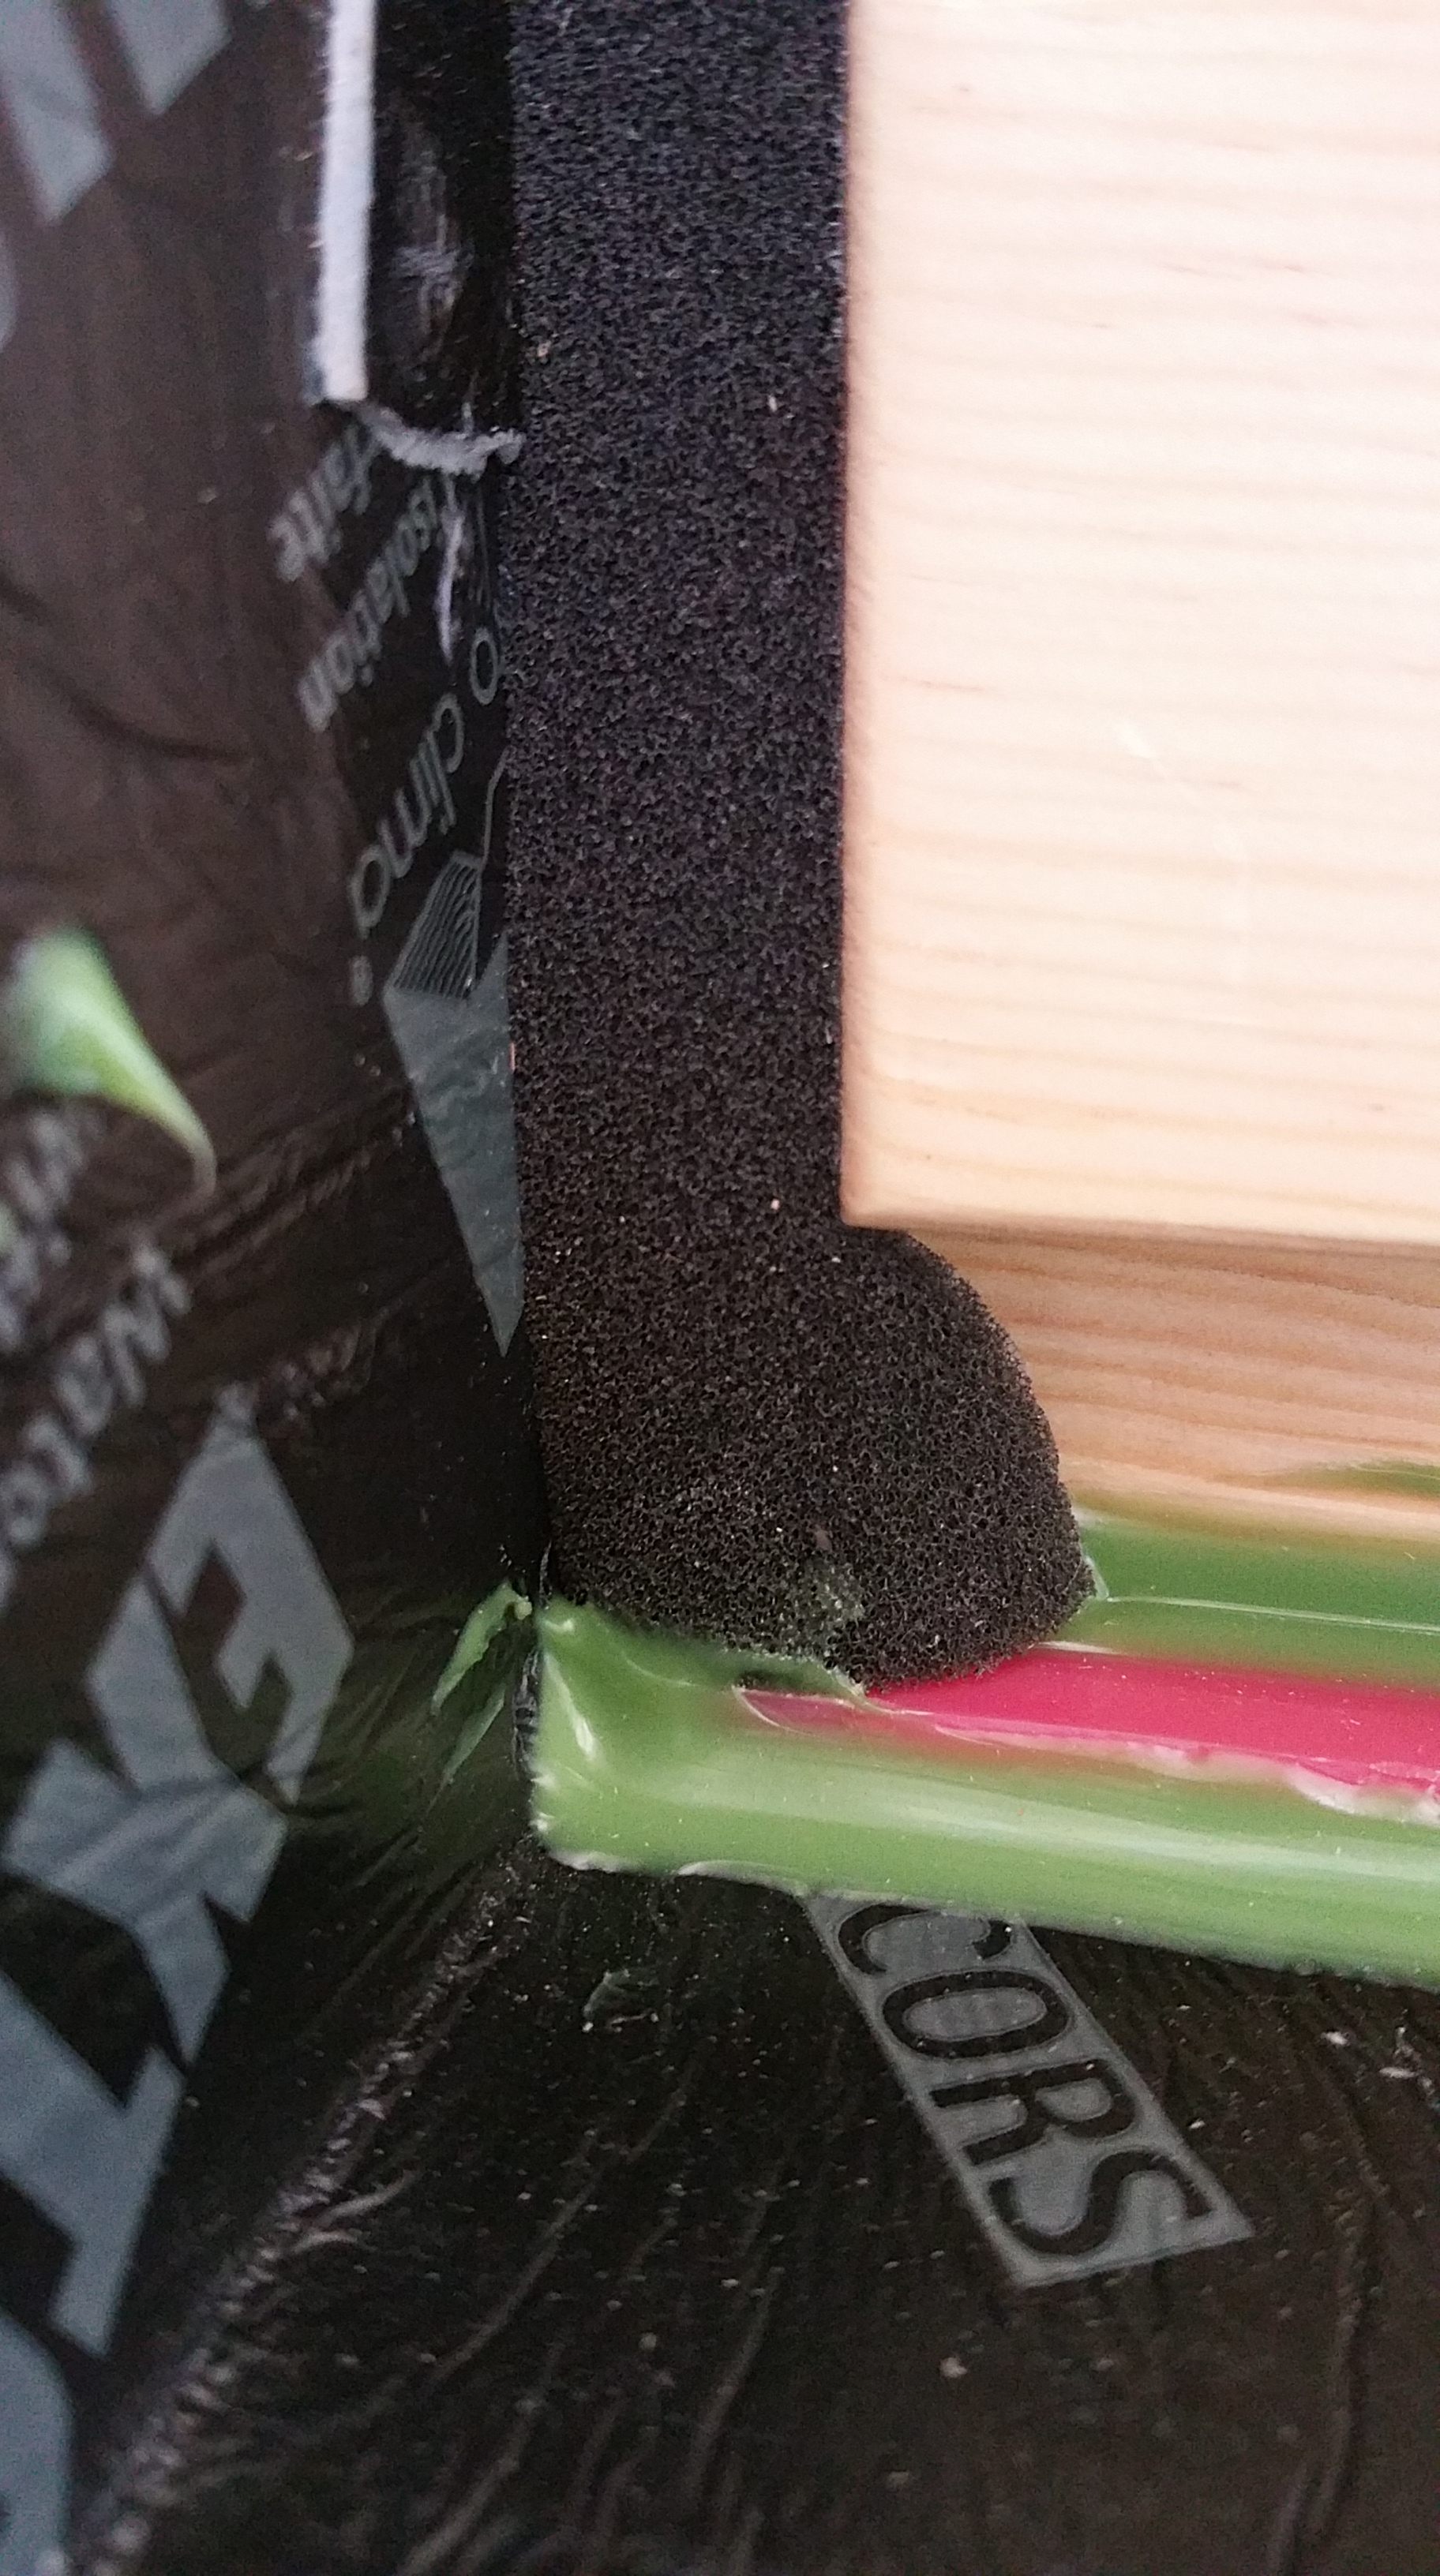
I didn’t use the Profil tape for the two lower outside corners since these areas would eventually get throughly covered by the Extoseal Encors sill pan tape.
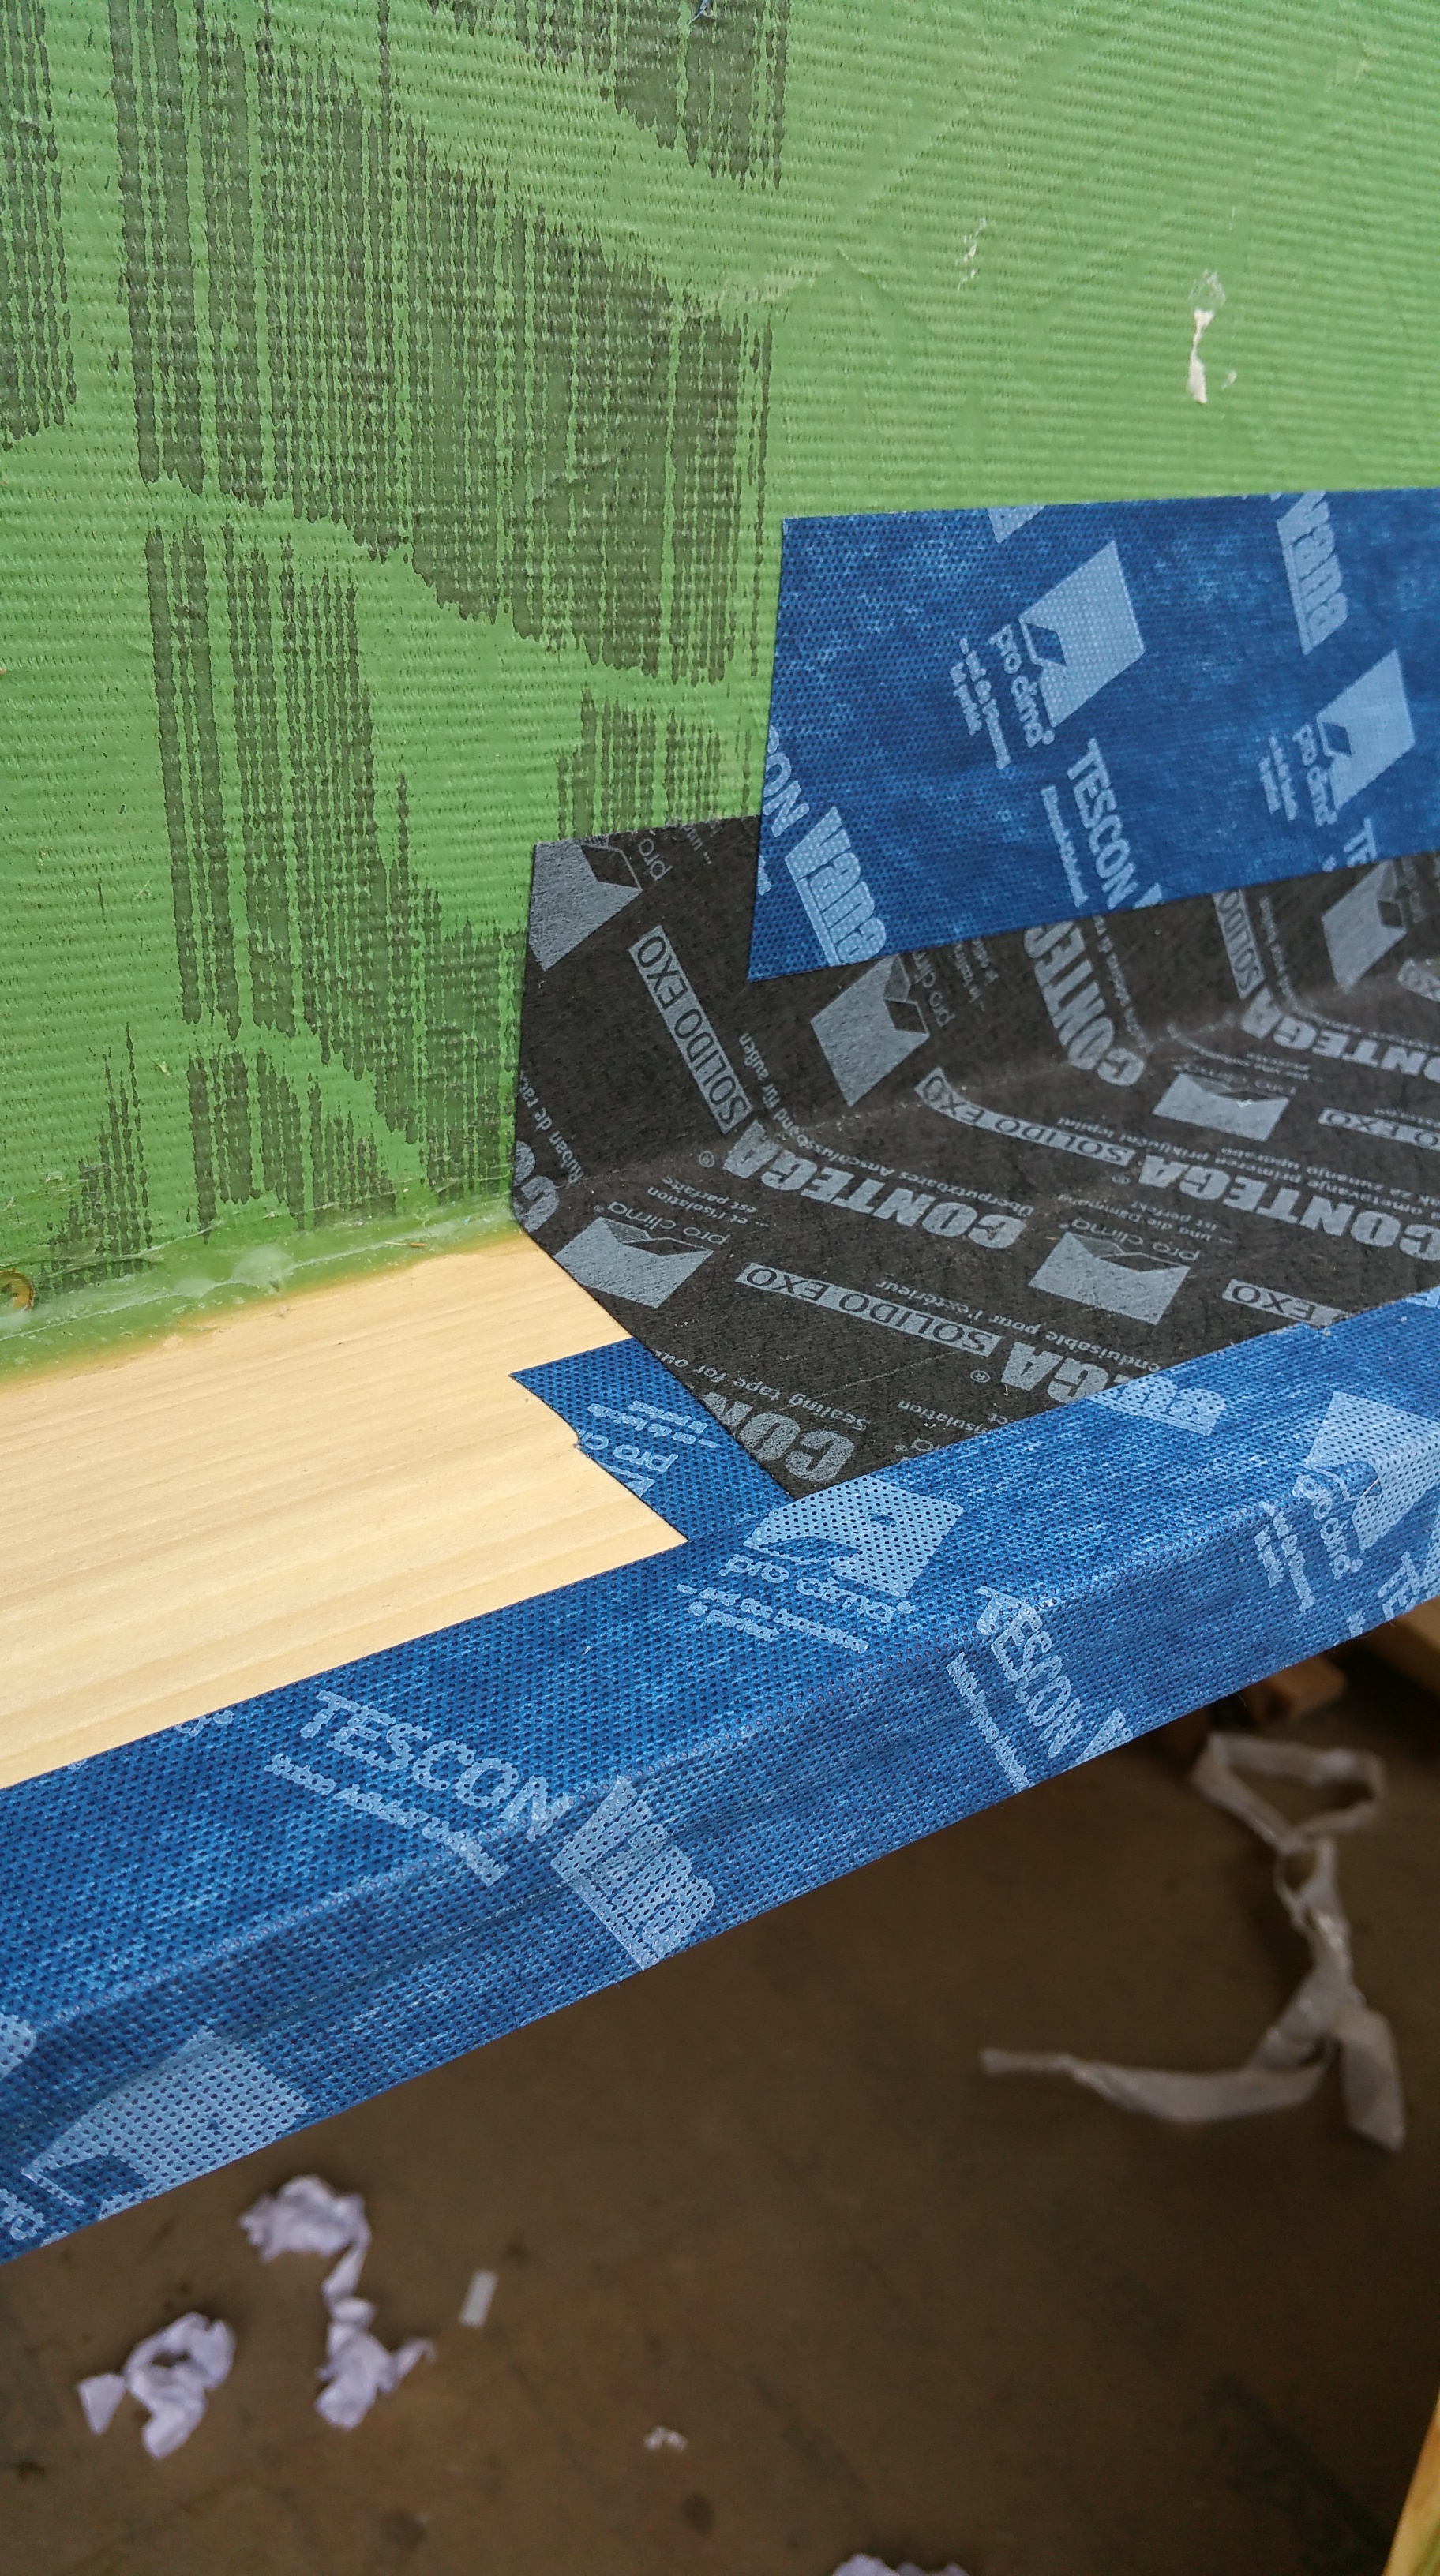
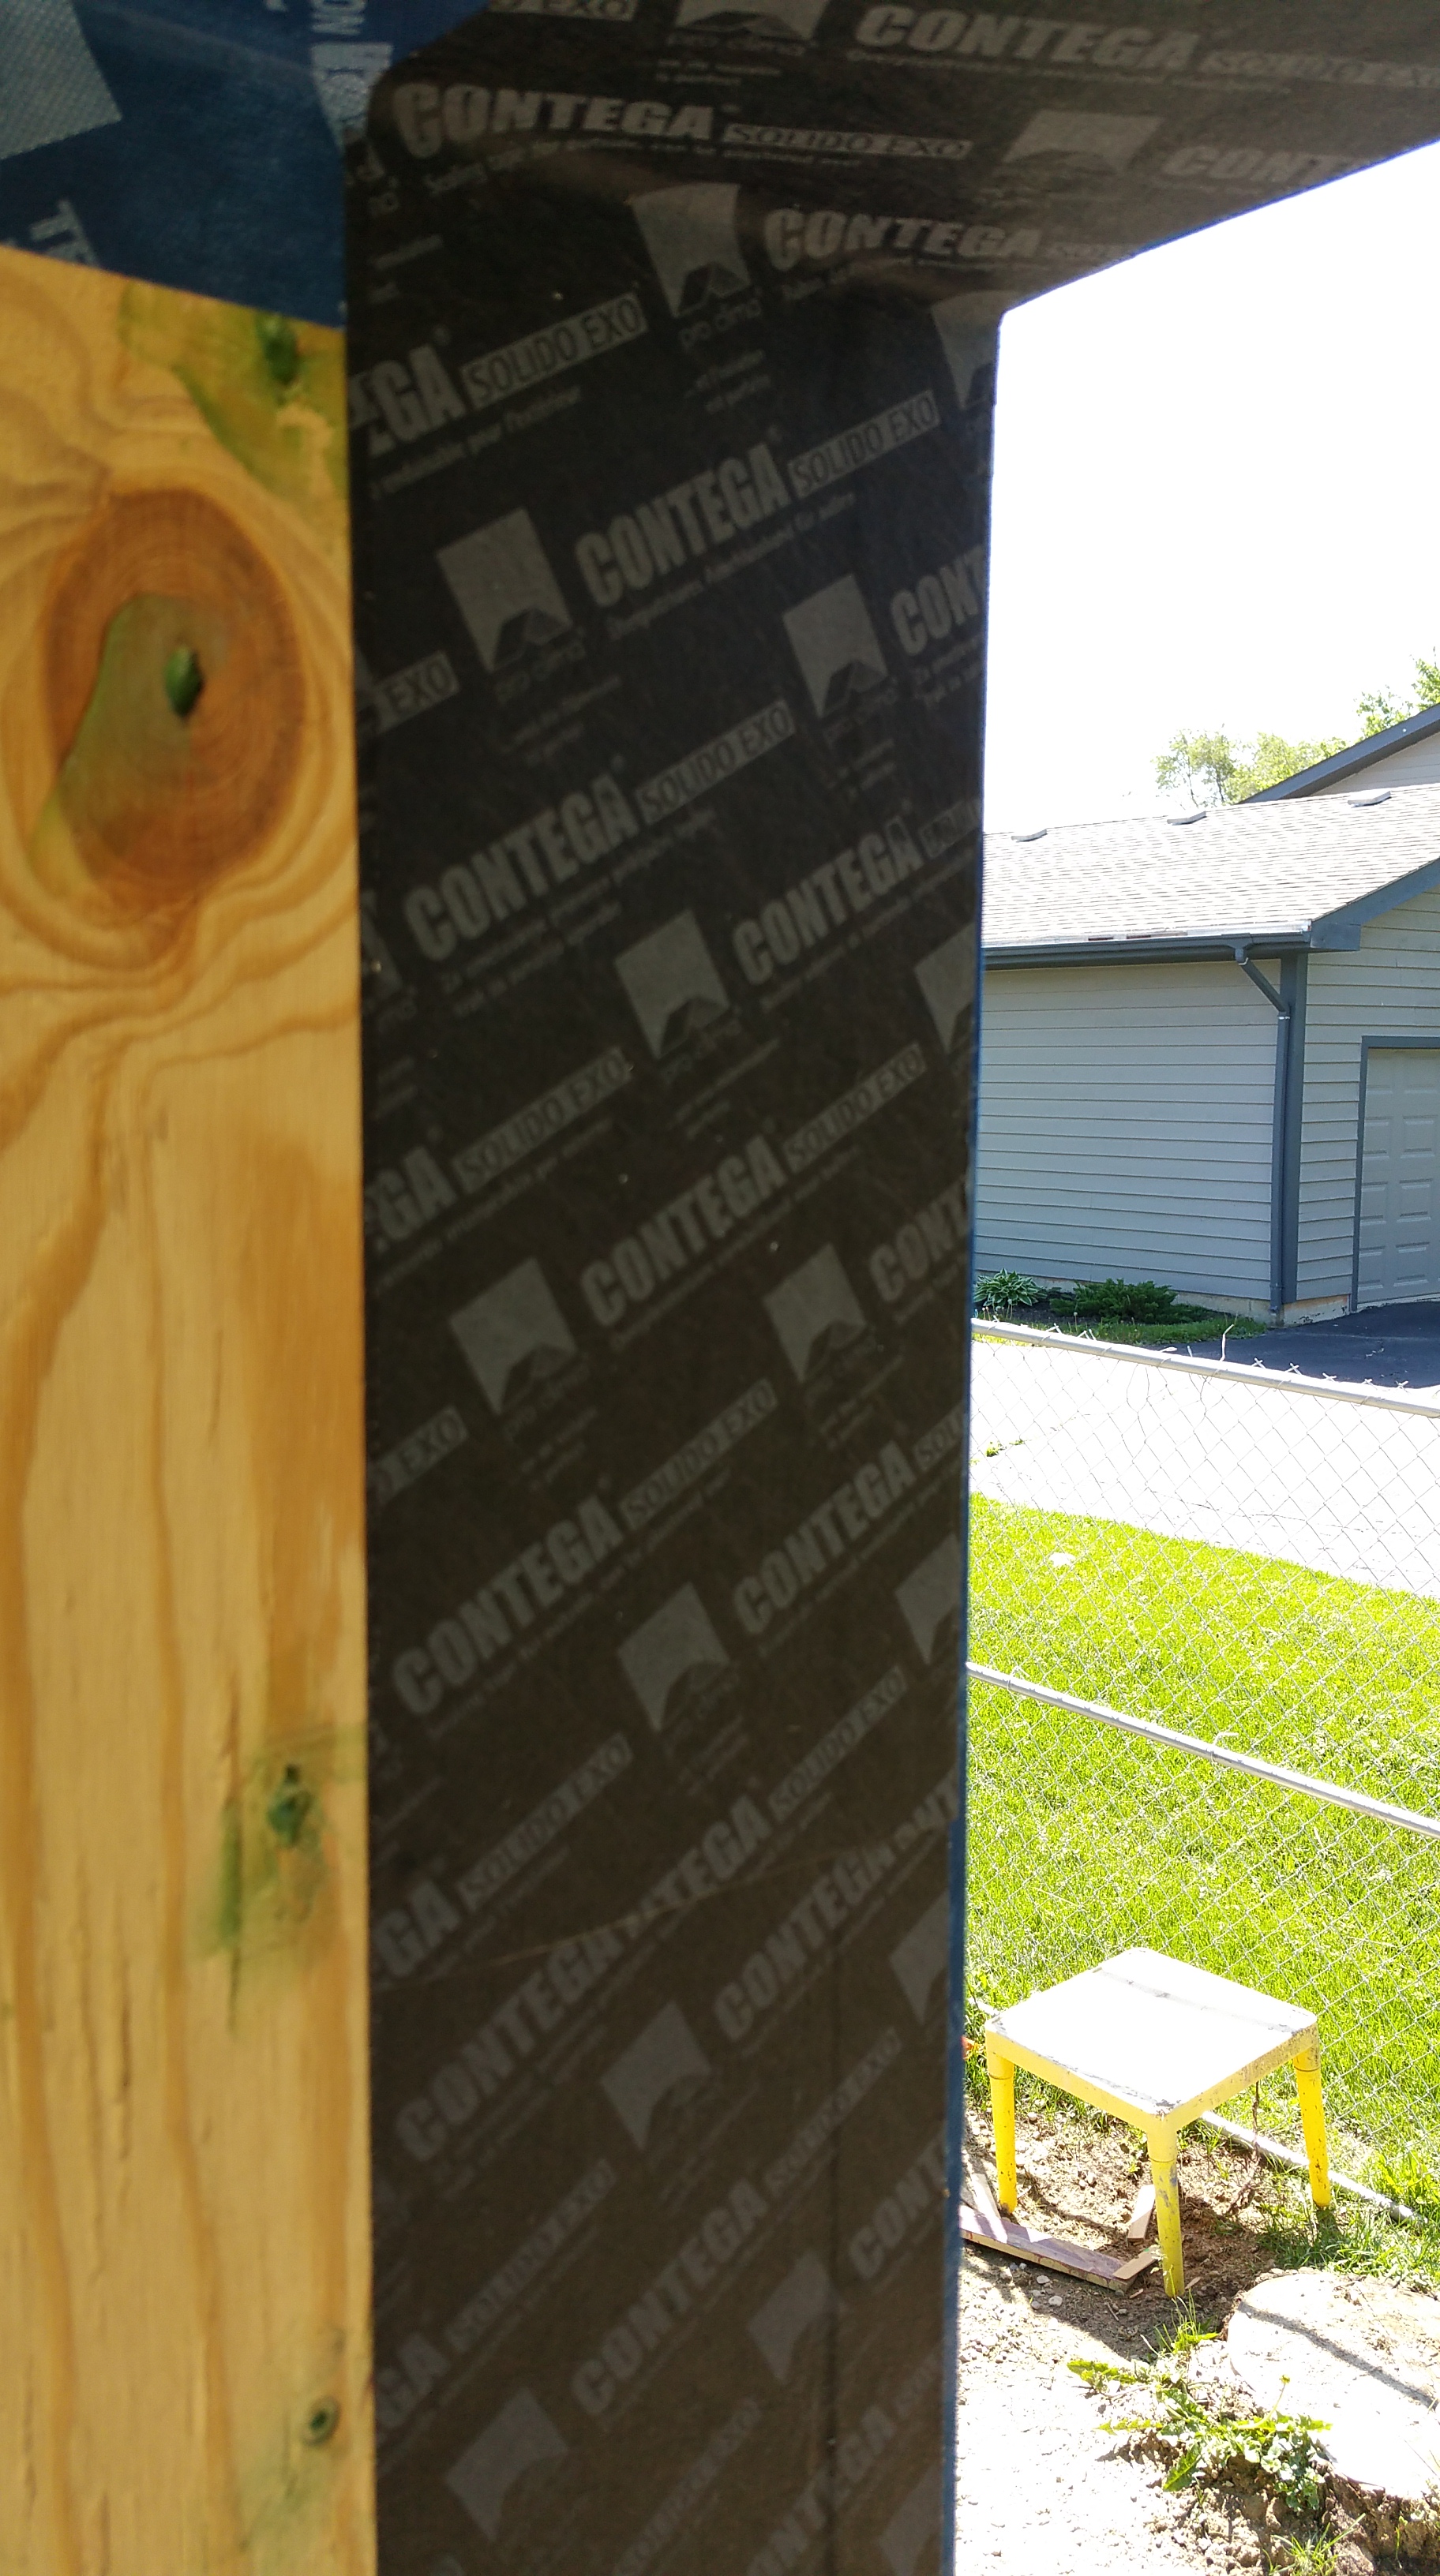
Once the corners were taped up, I moved on to the bottom of the buck, using the black Contega Solido Exo tape.
First piece of Contega being applied to the bottom of a buck where it meets the Zip sheathing:
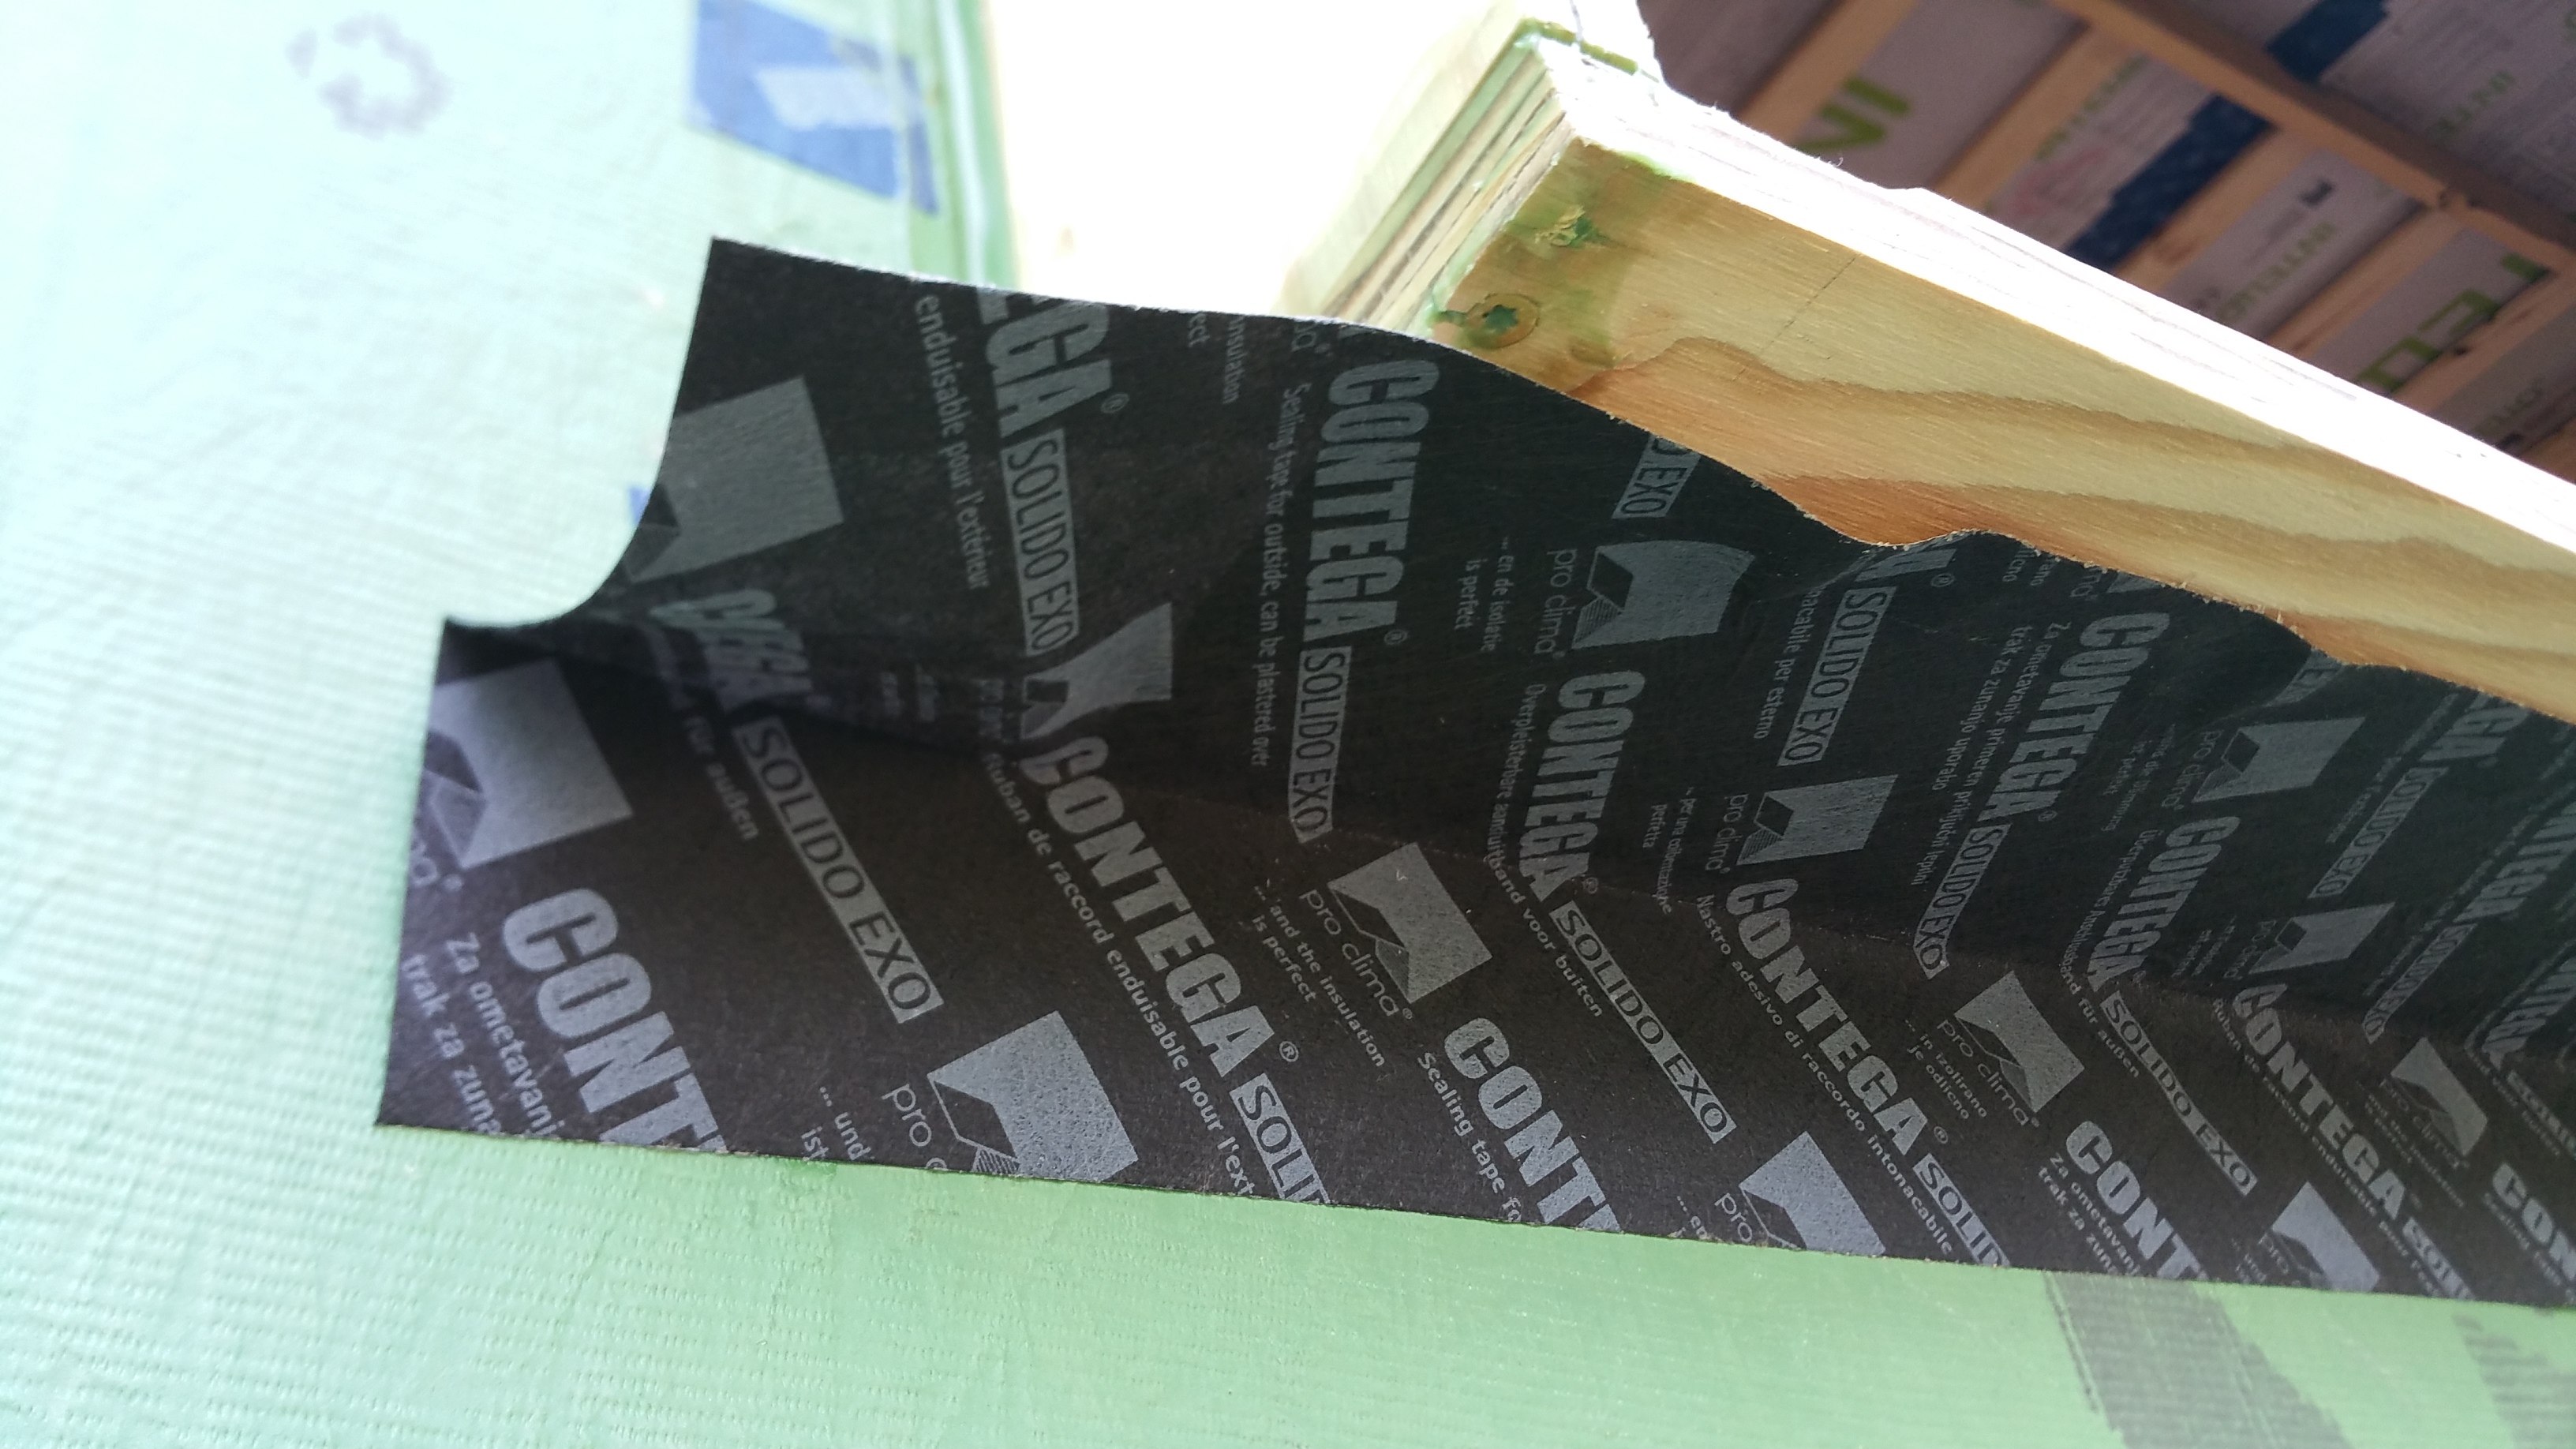
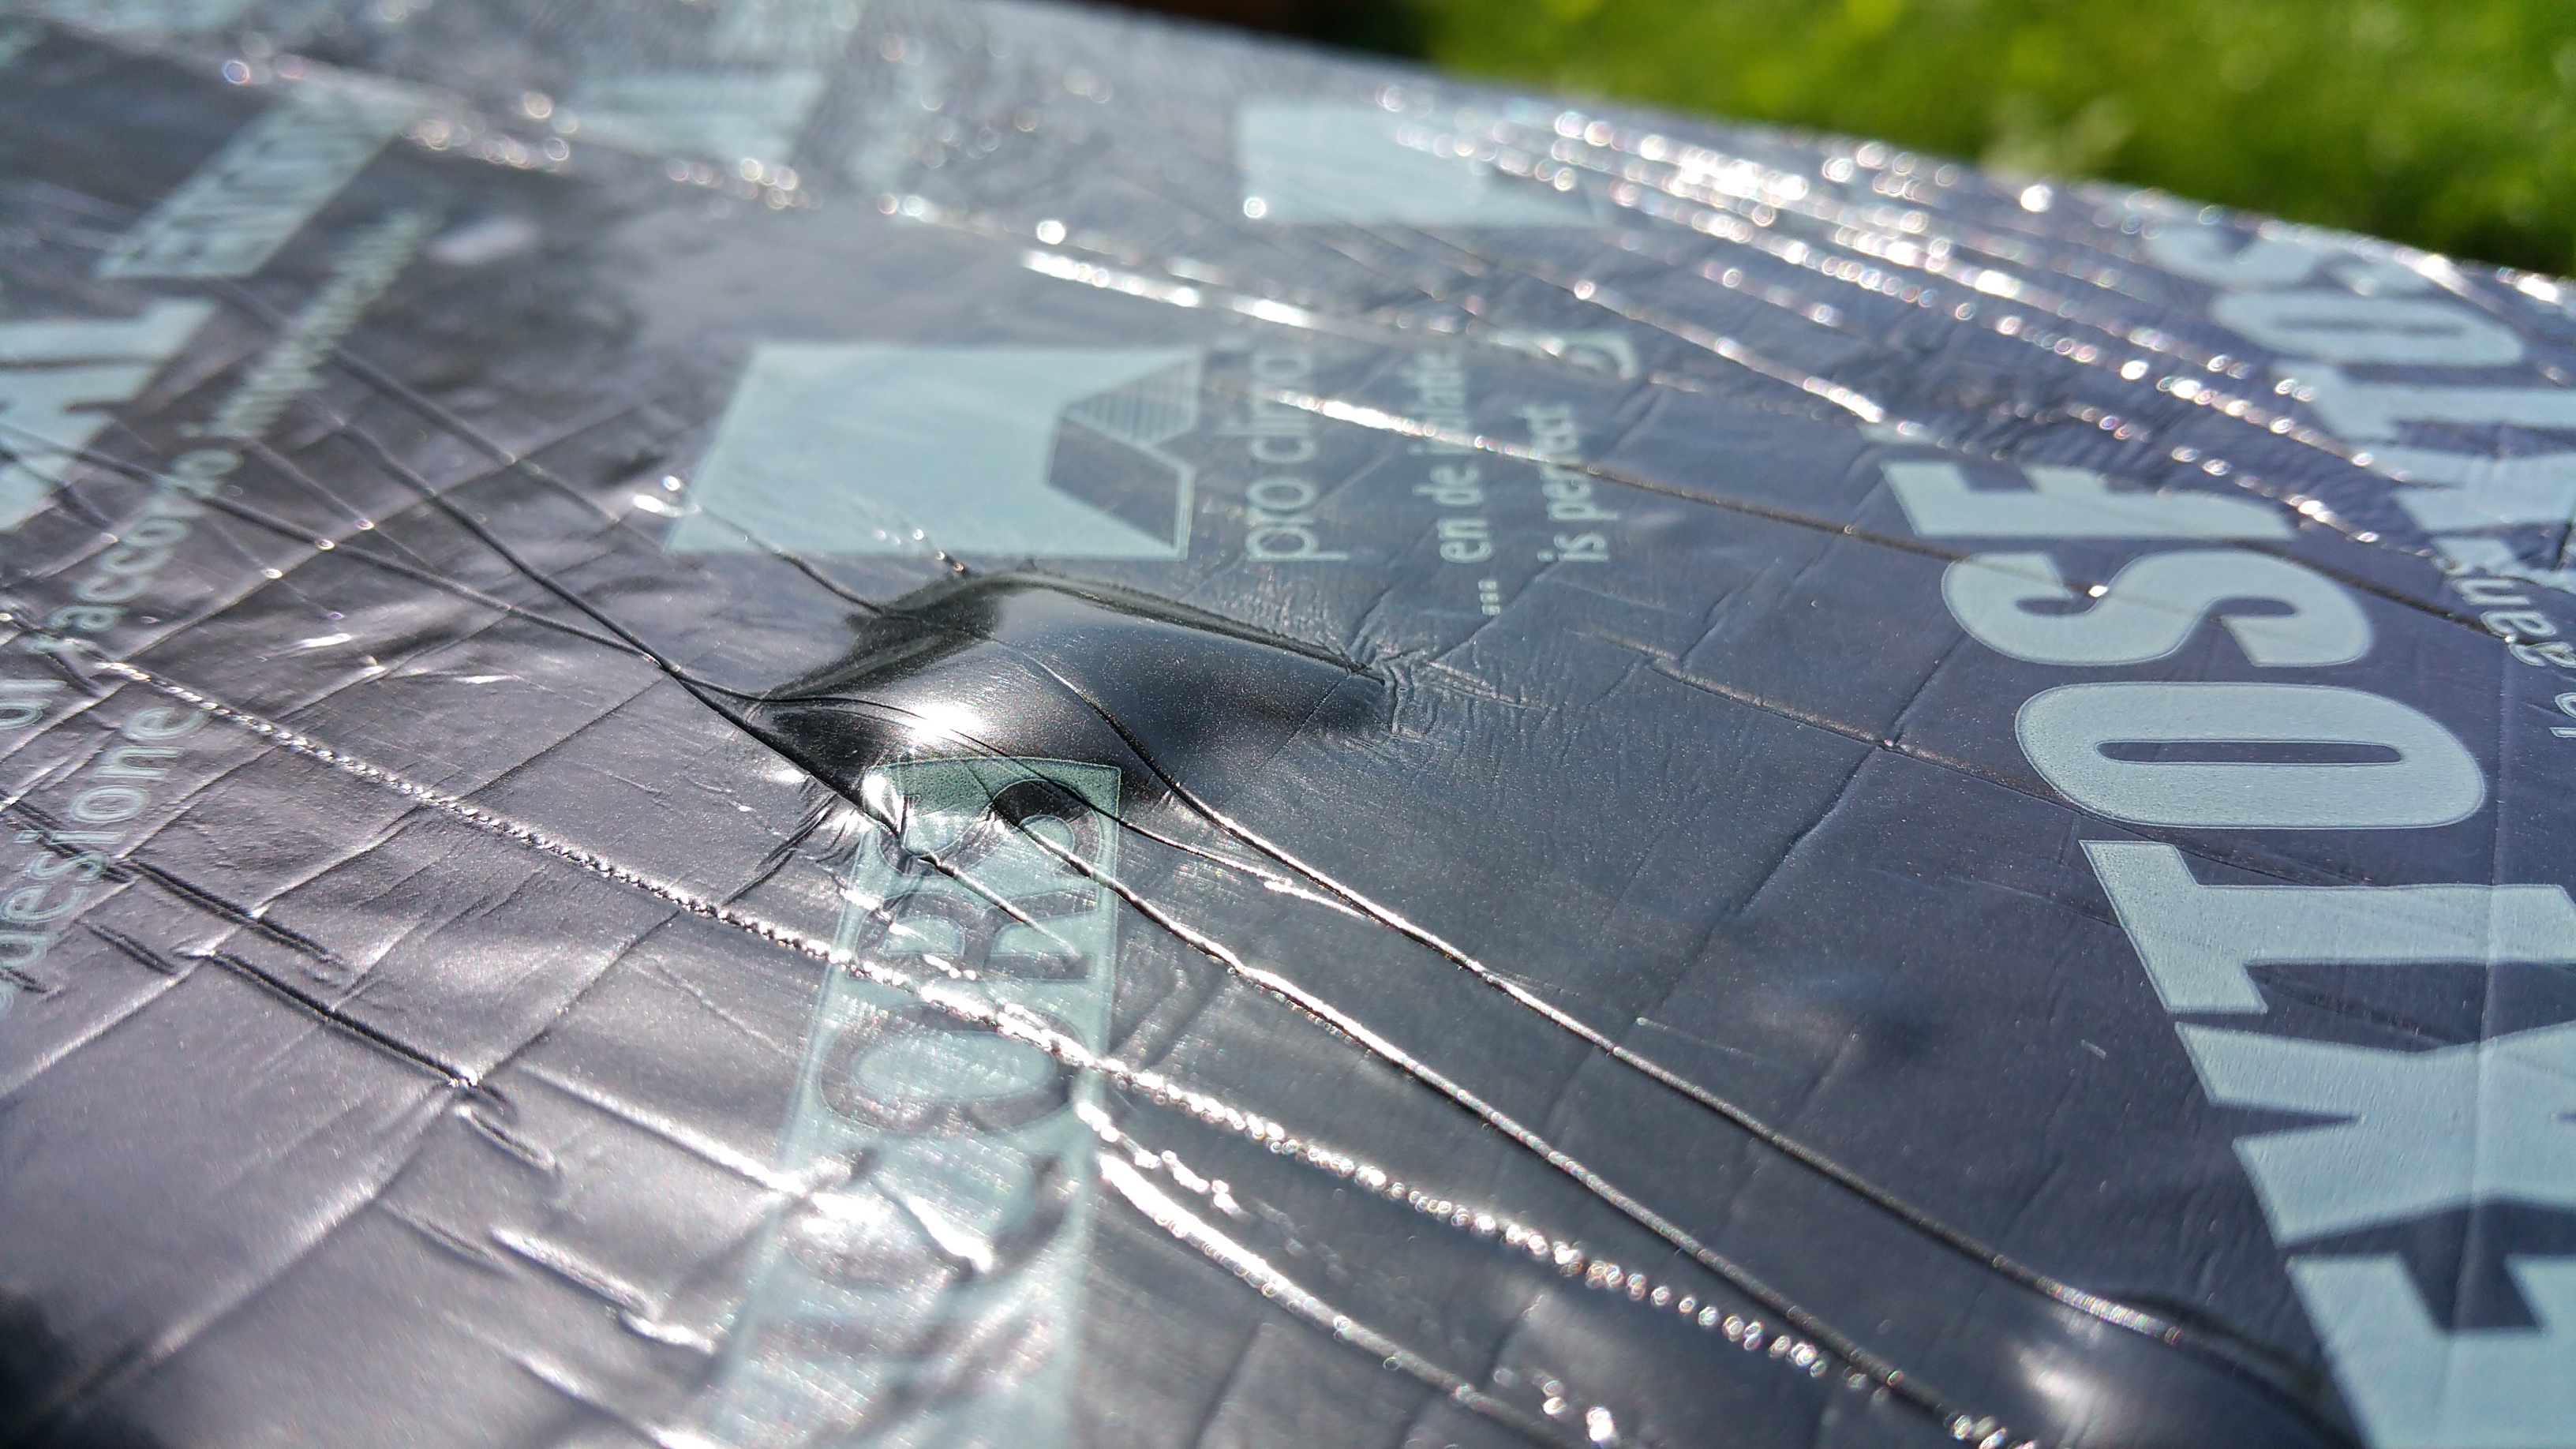
The same area once the piece of Contega is cut to allow it to partially wrap up the side of the buck:

Note the white paper backing that helps to position the Contega exactly where you need it, while also reducing the chances for wrinkles to form (an area for potential air leaks).
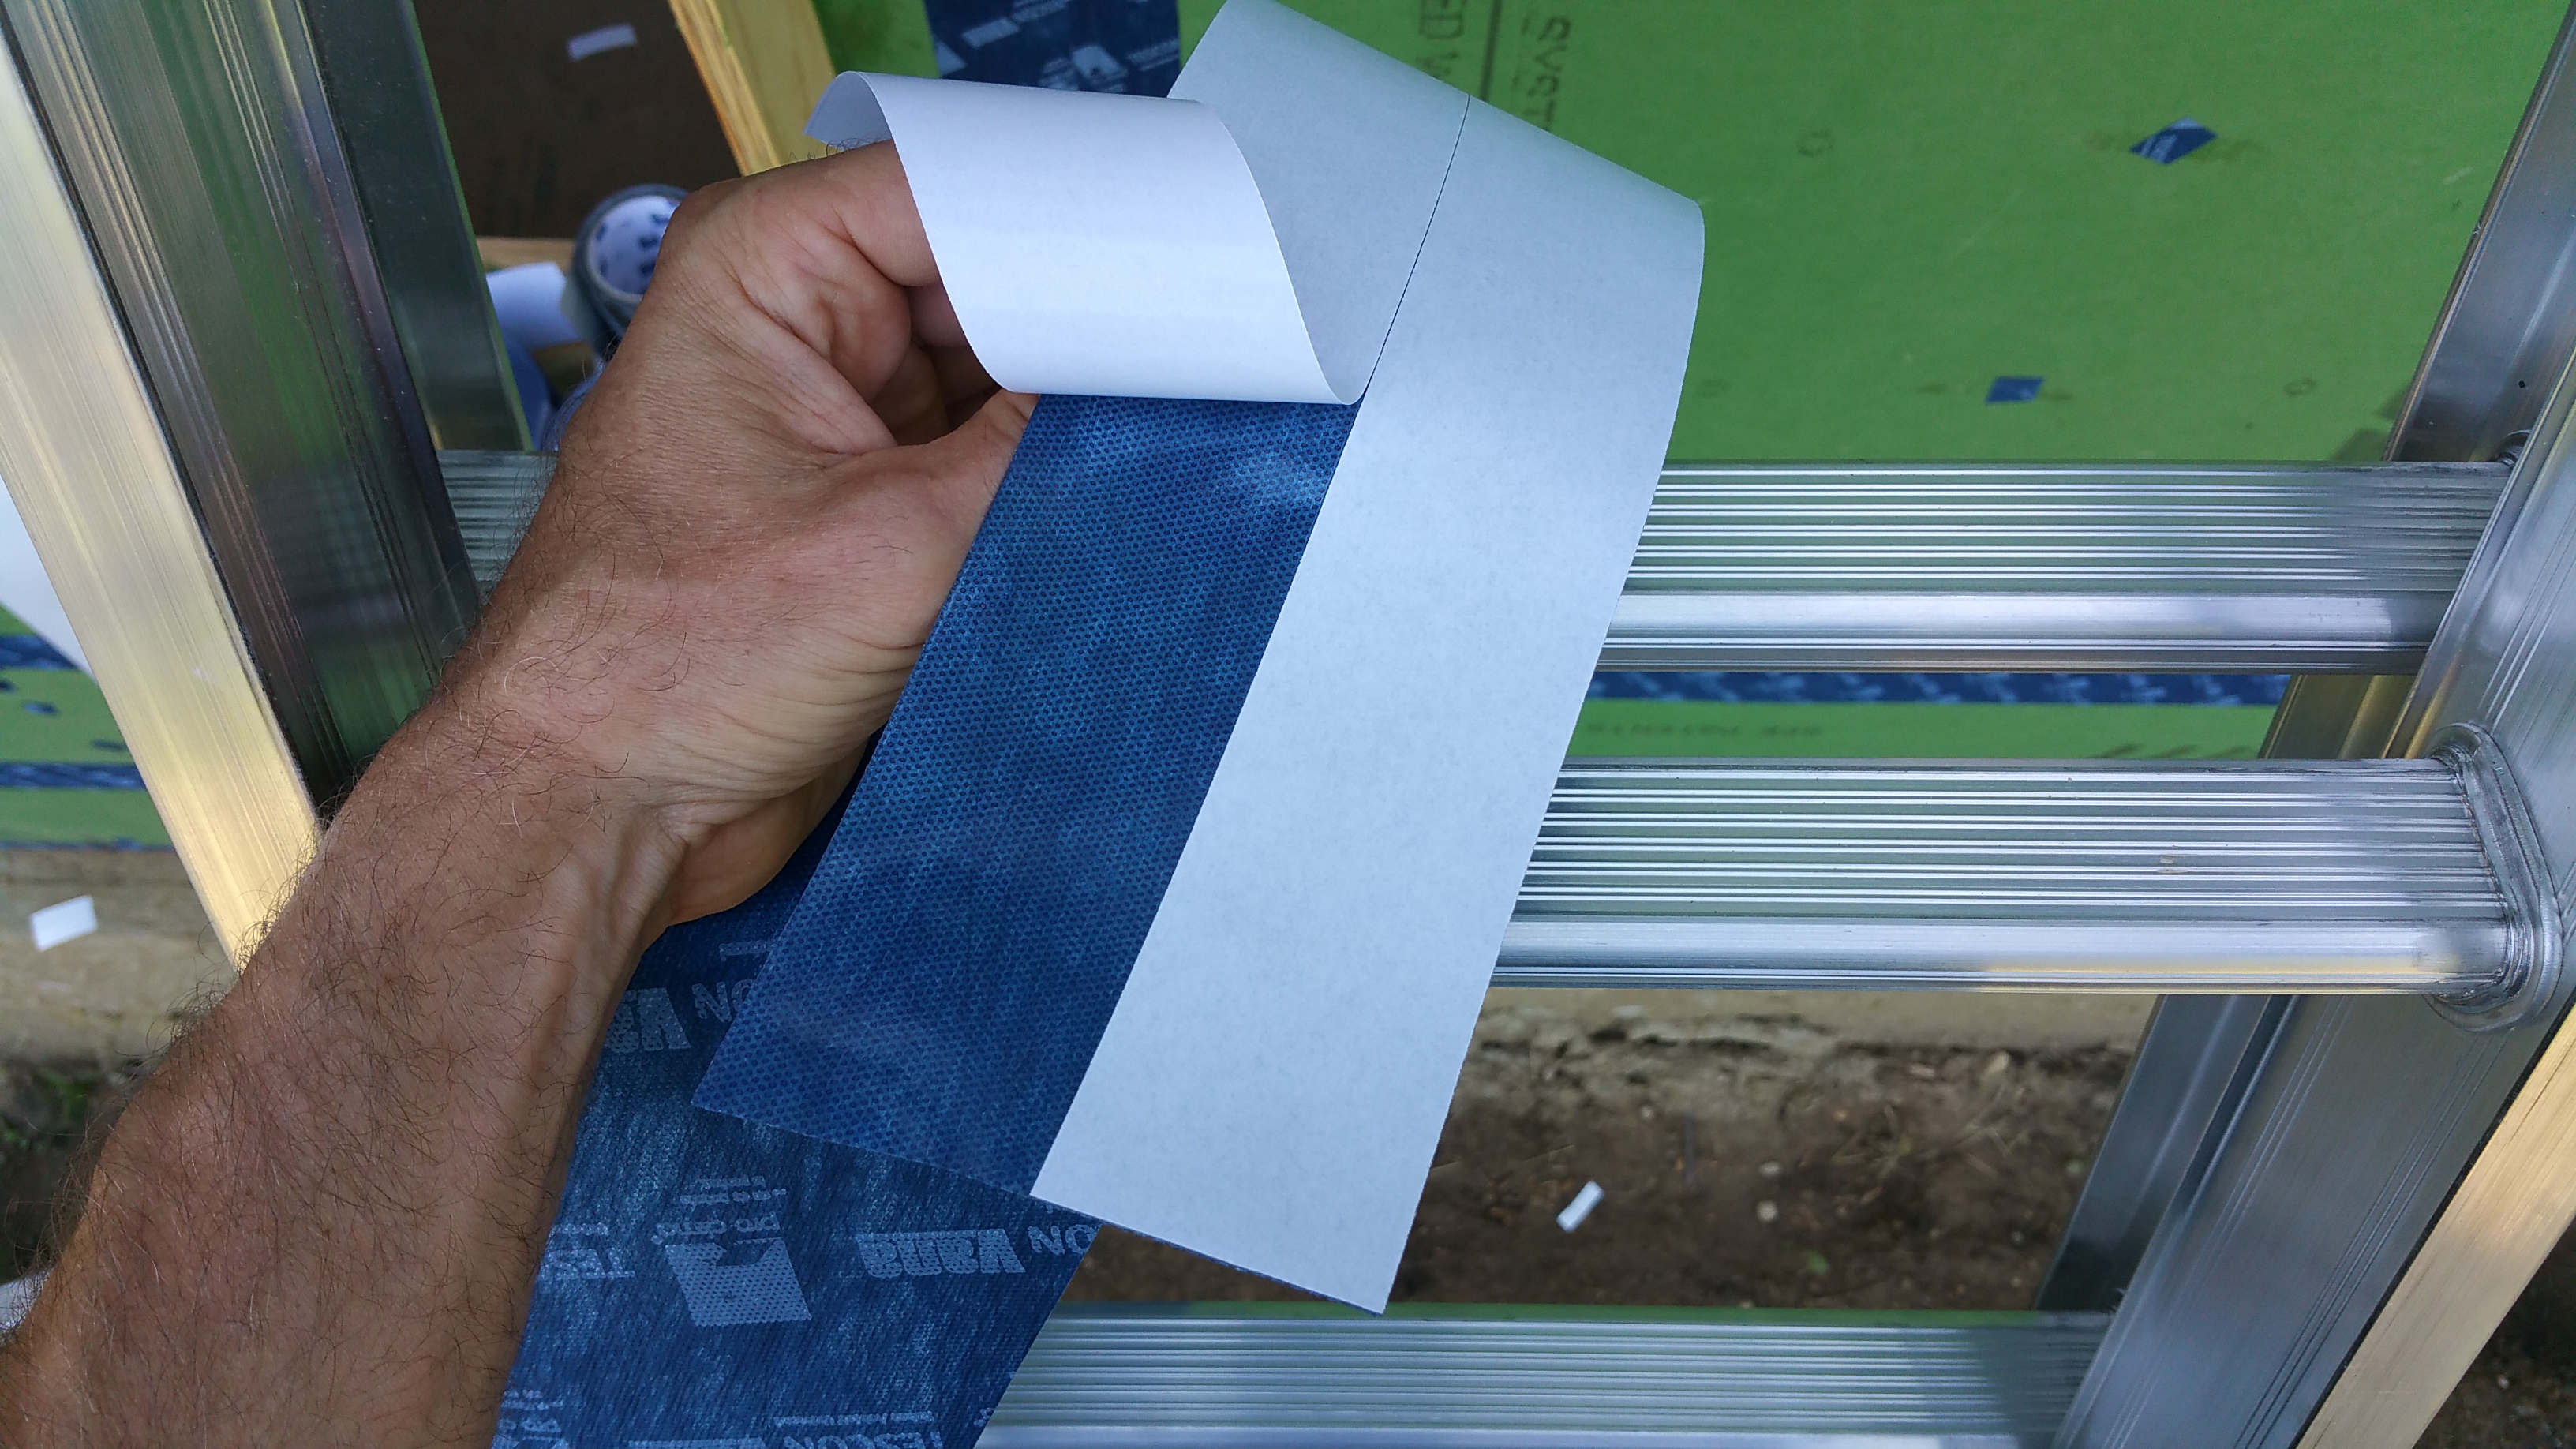
The Contega, like the light blue Profil, comes with a 3-part split backing. Although this 3-part backing helps a lot, I still struggled at times to avoid wrinkles with the Contega. The Contega is noticeably thinner than the blue Tescon Vana, which is probably why I found the Tescon Vana much easier to use. In fact, if I had it to do over, I would just use a wider version of the Tescon Vana to replace the Contega.
The nice thing about the wider versions of the Tescon Vana is it also comes with a split back for ease of placement:
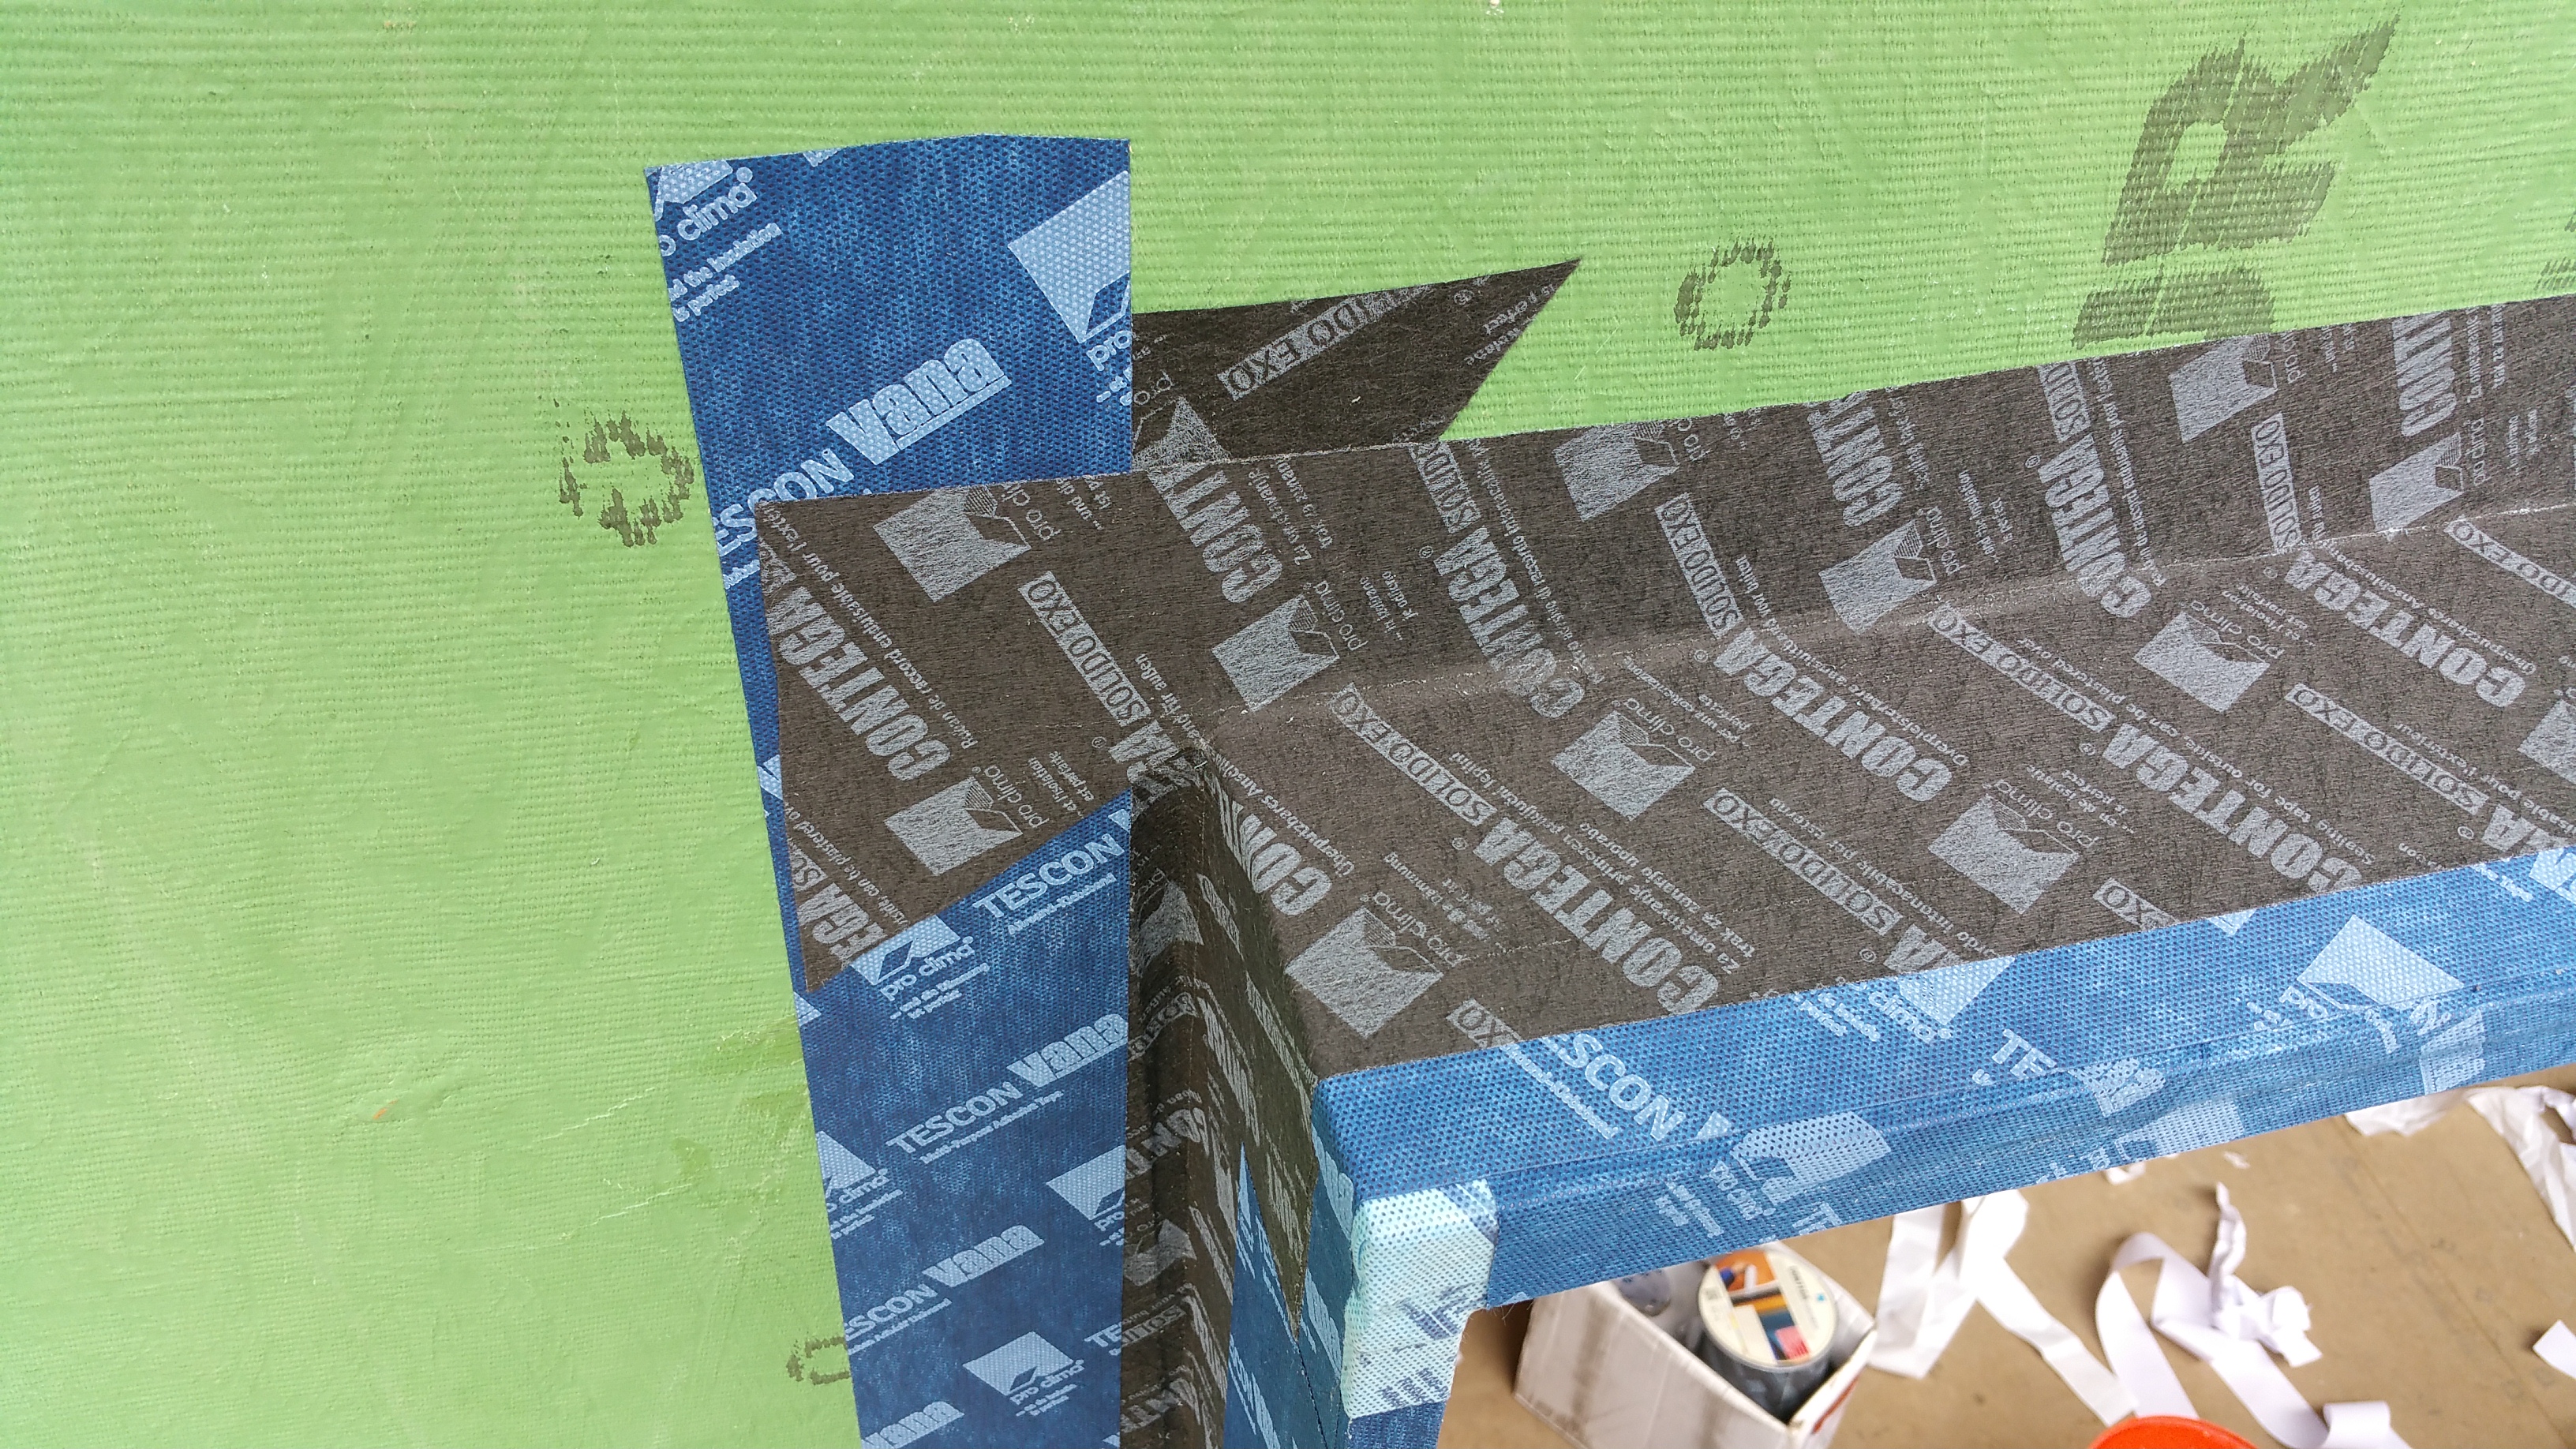
Once an initial piece of Tescon Vana (3″) covered the exposed front outside edge of the plywood, I applied the wider Tescon Vana (6″), before applying the Contega to the Zip – buck – bottom piece of Contega connection, effectively bringing these adjoining areas together.
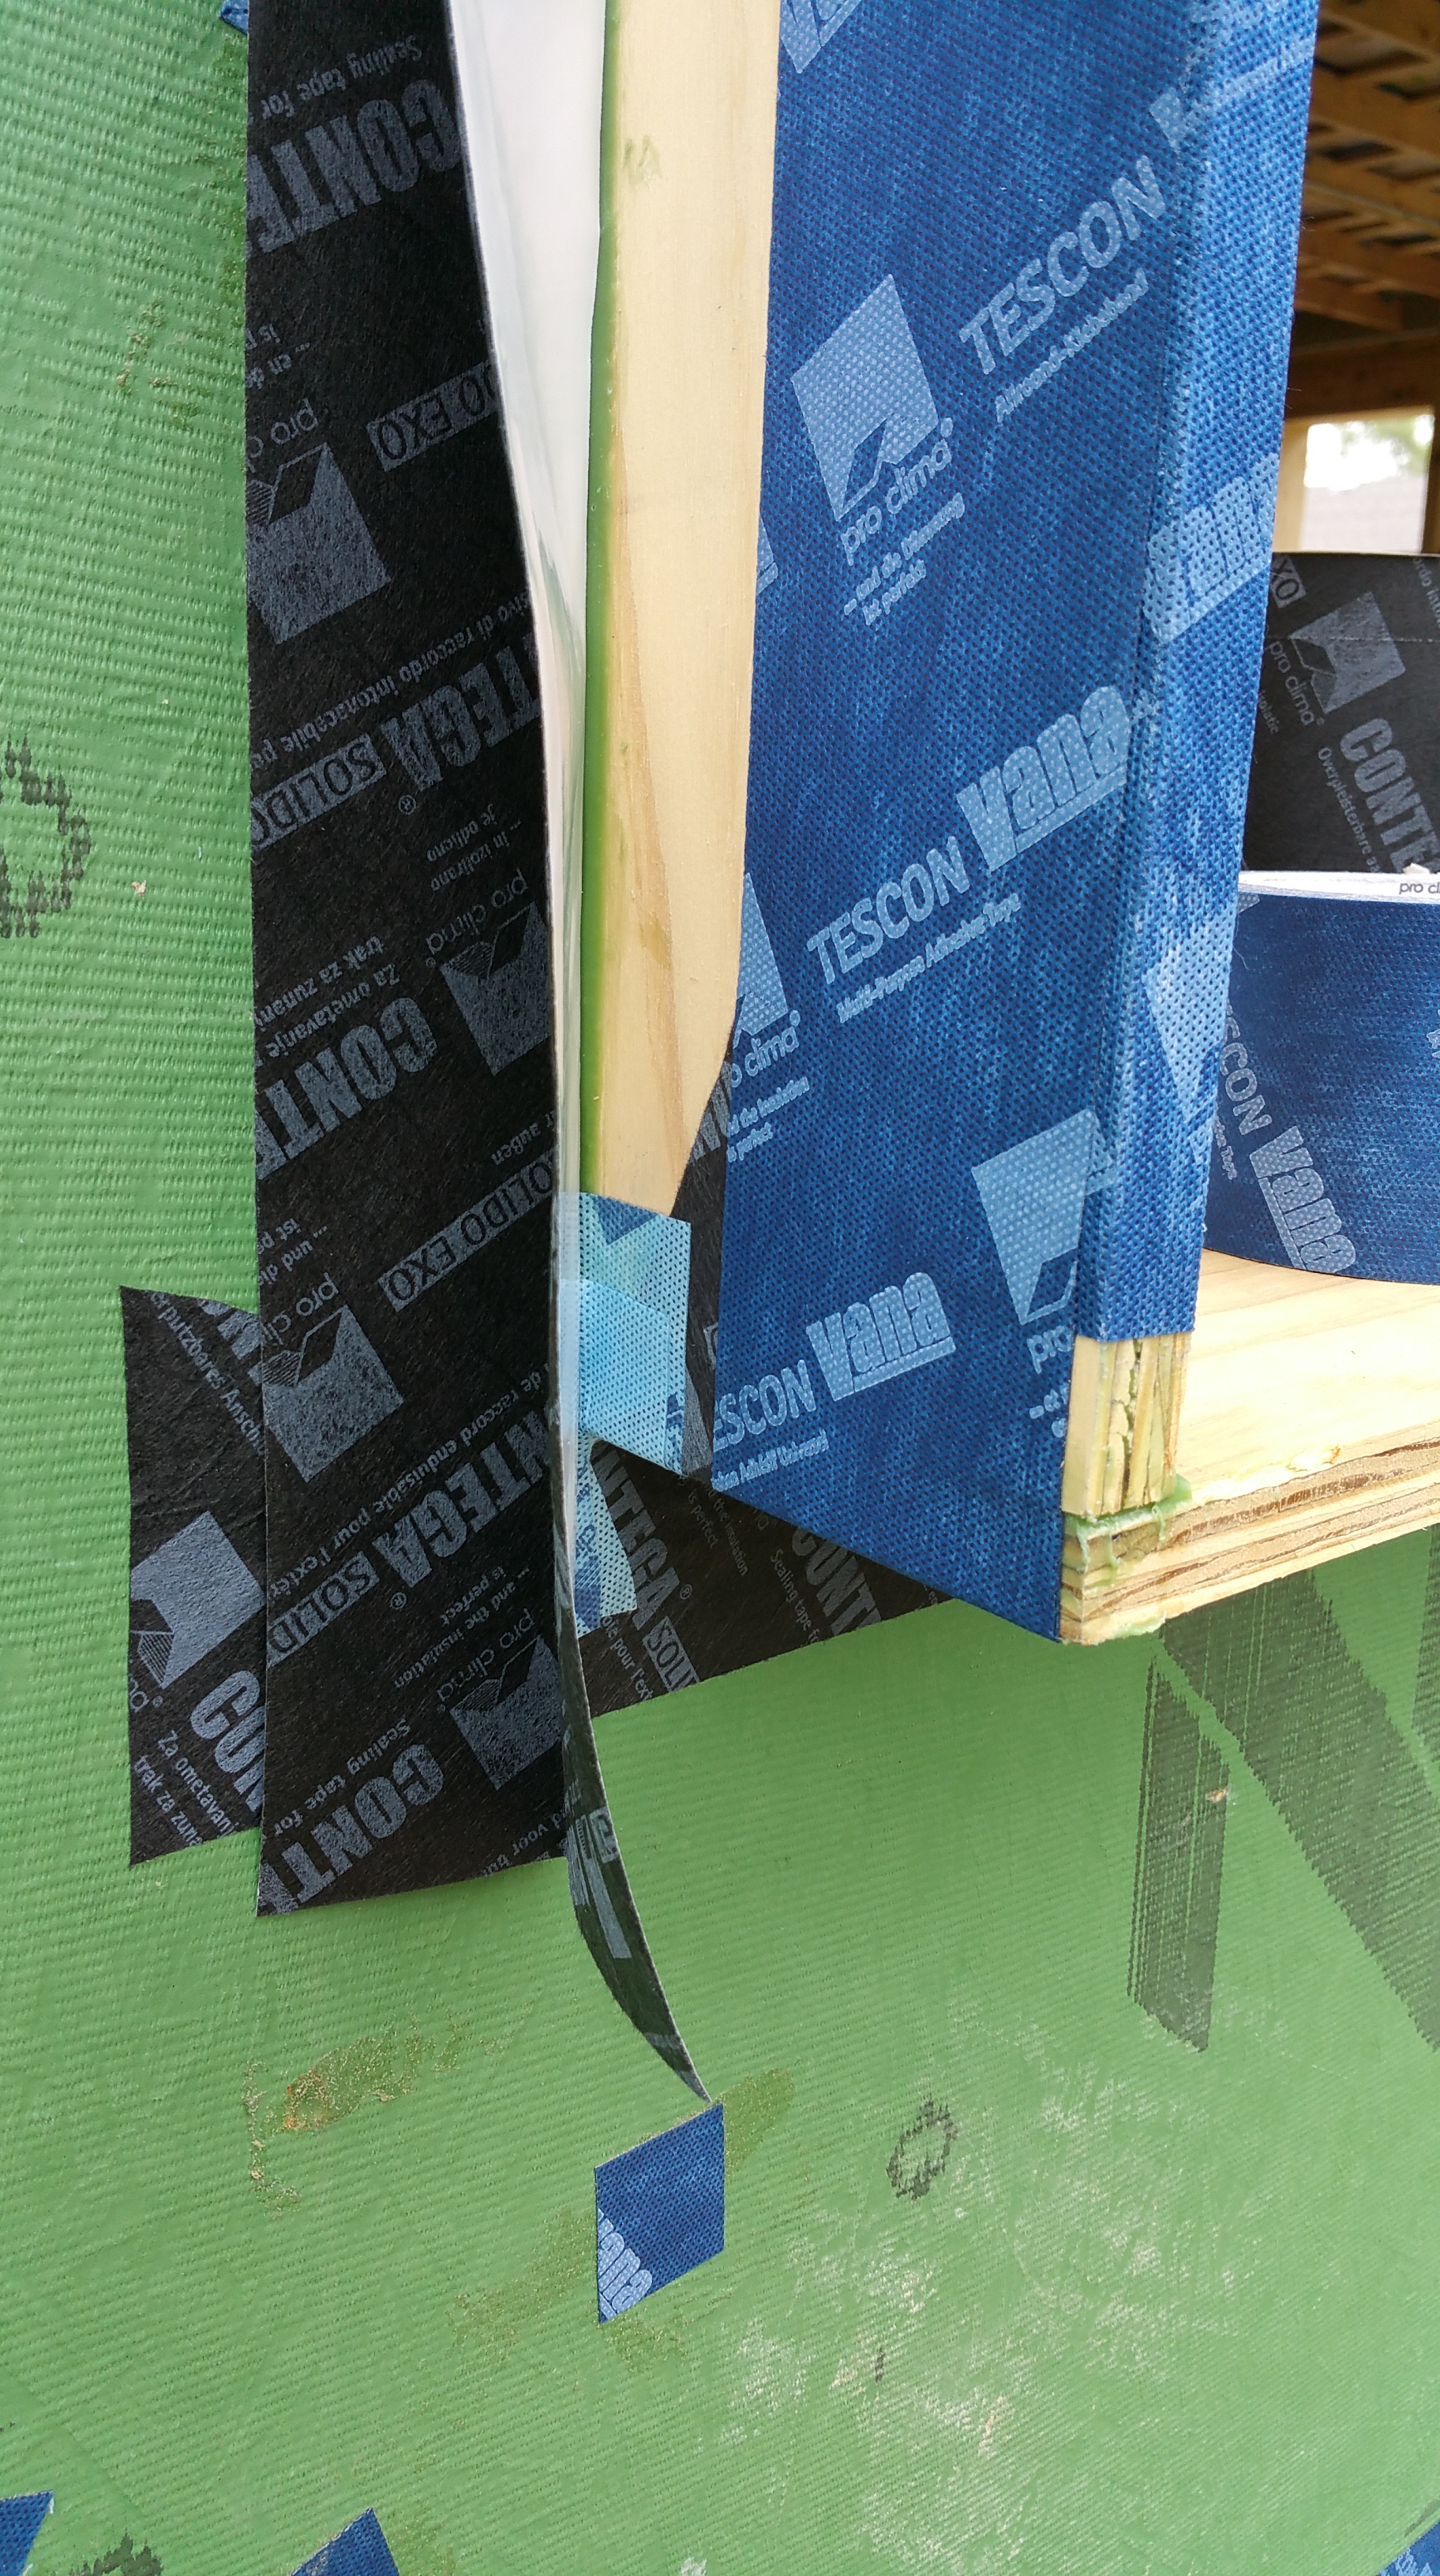
Getting the first third of the Contega attached to the Zip before removing the remaining 2 strips of white paper backing seemed to help get it to sit flat without too many wrinkles.
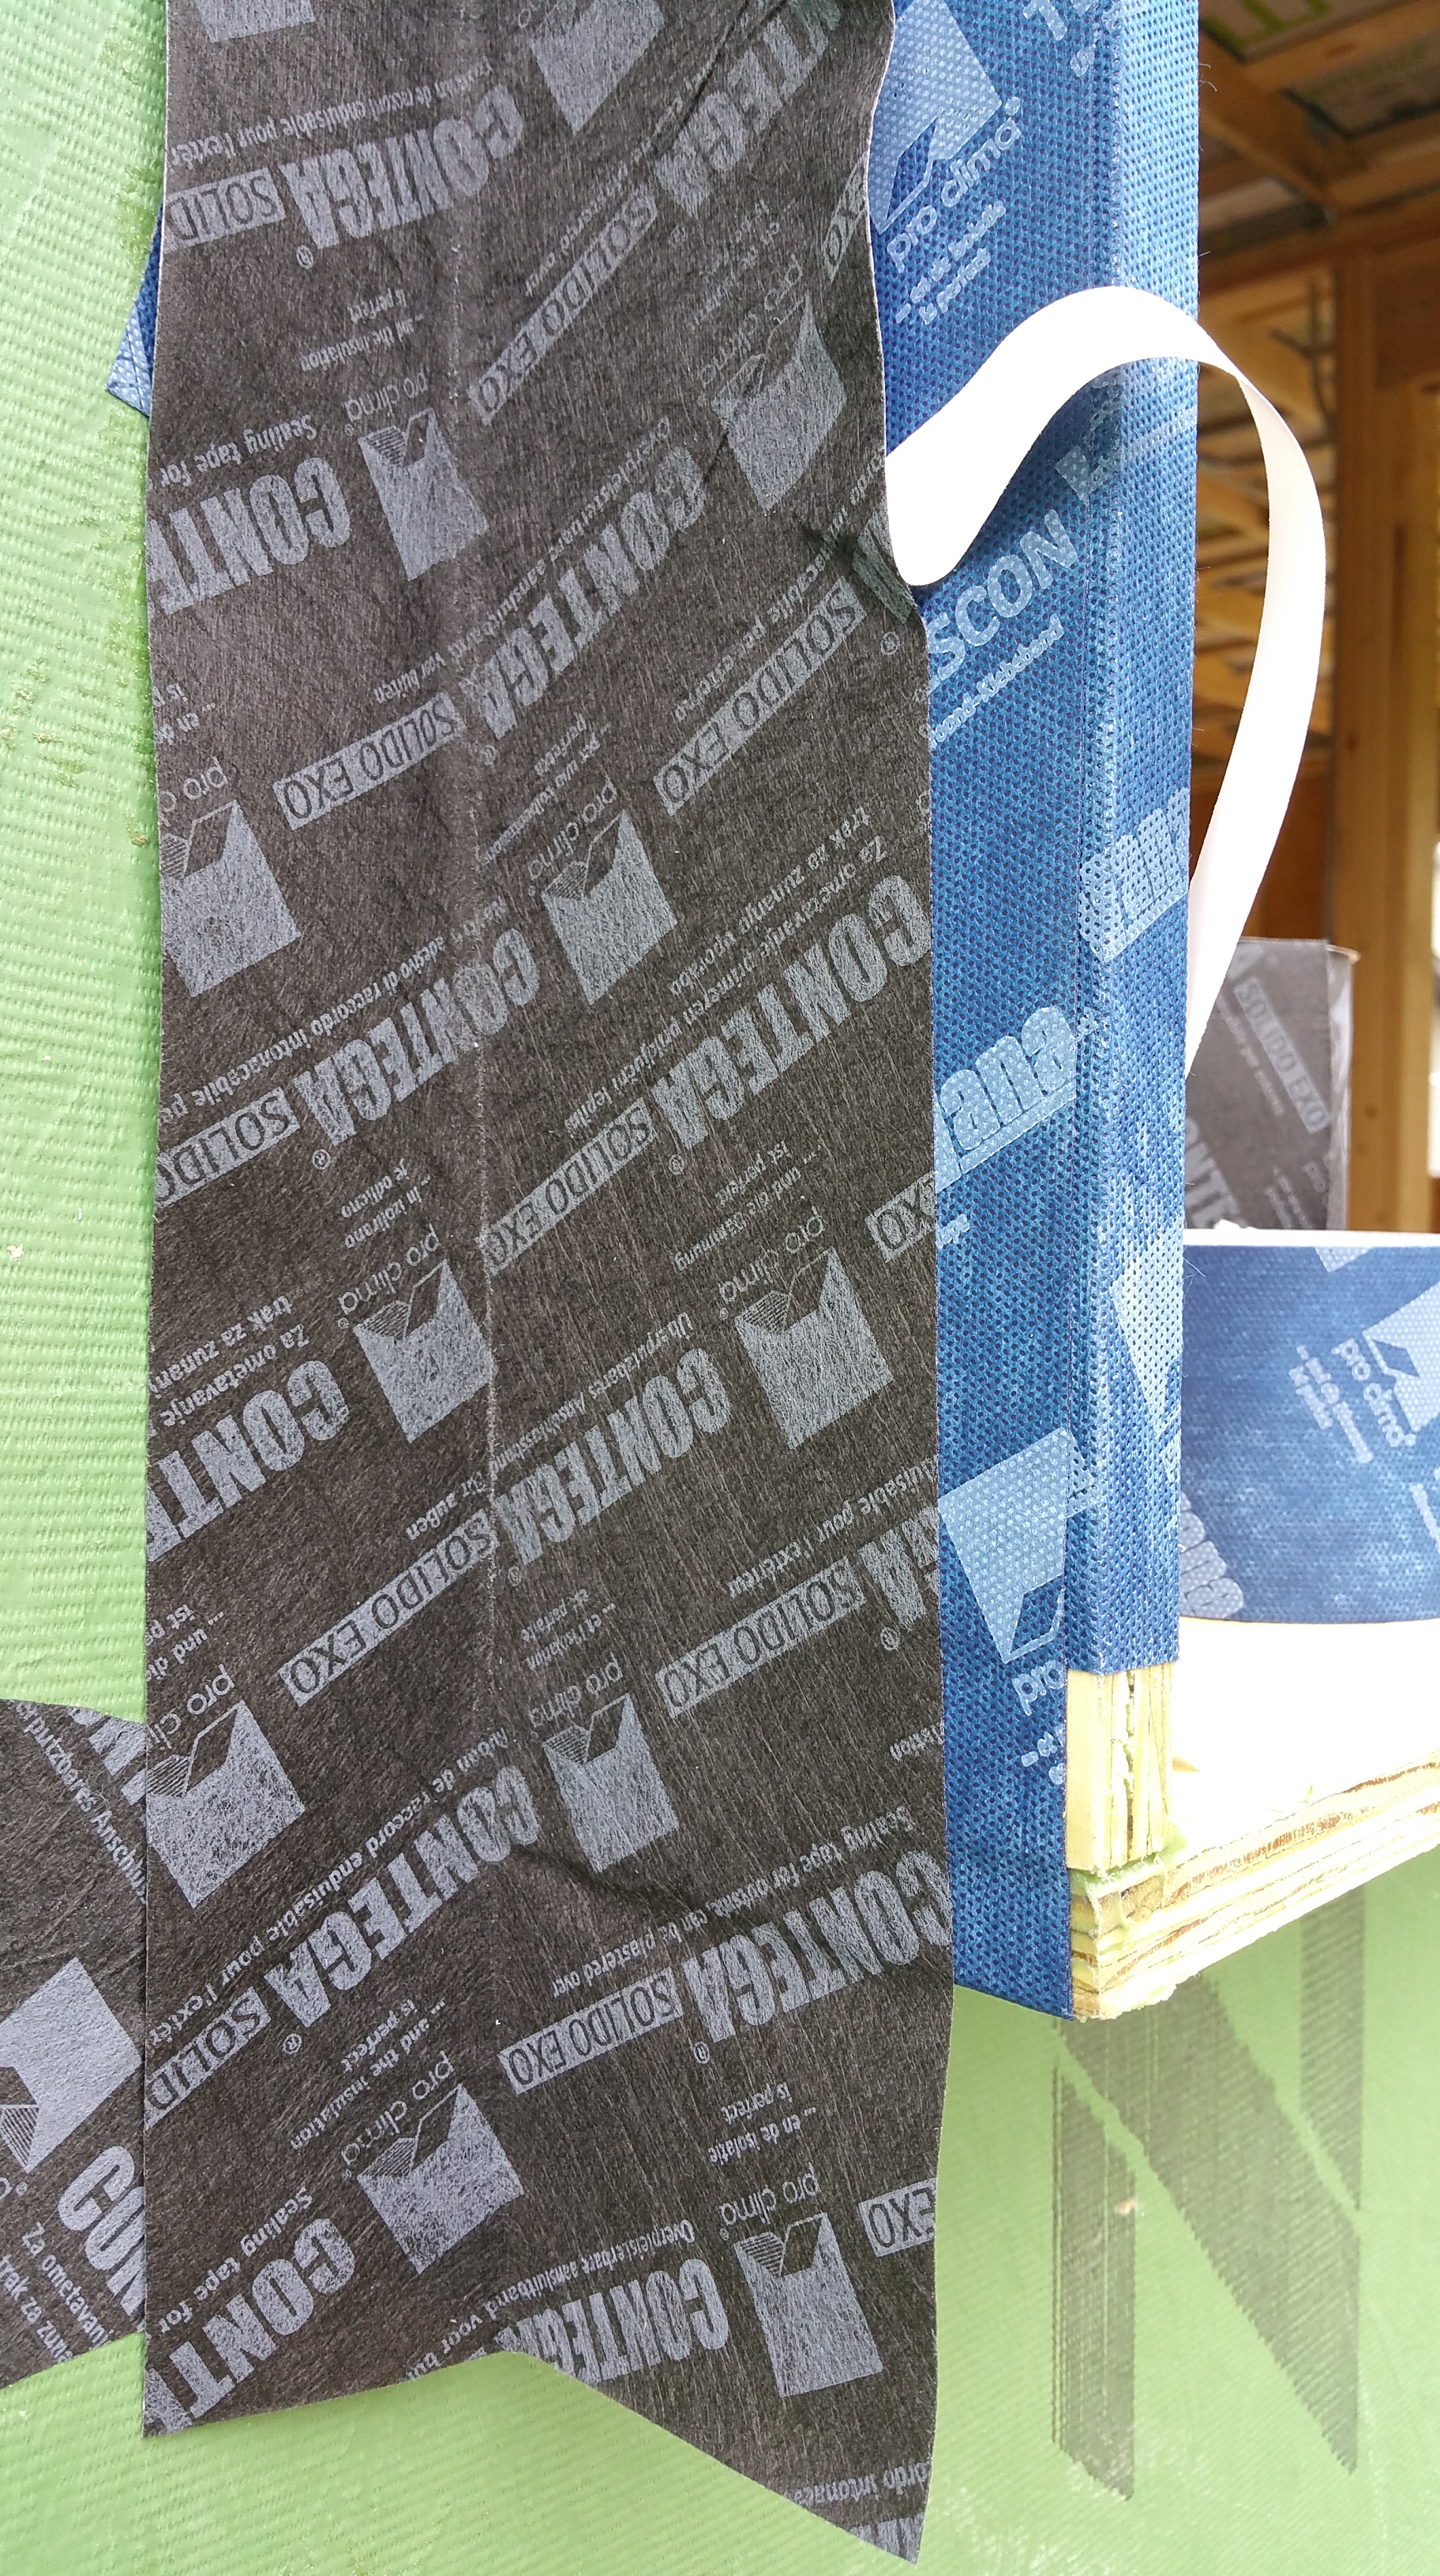
The Contega was then cut so that it lapped the first piece of Contega on the bottom of the window buck.
And here is the Contega as it ends up on the top of the window buck:
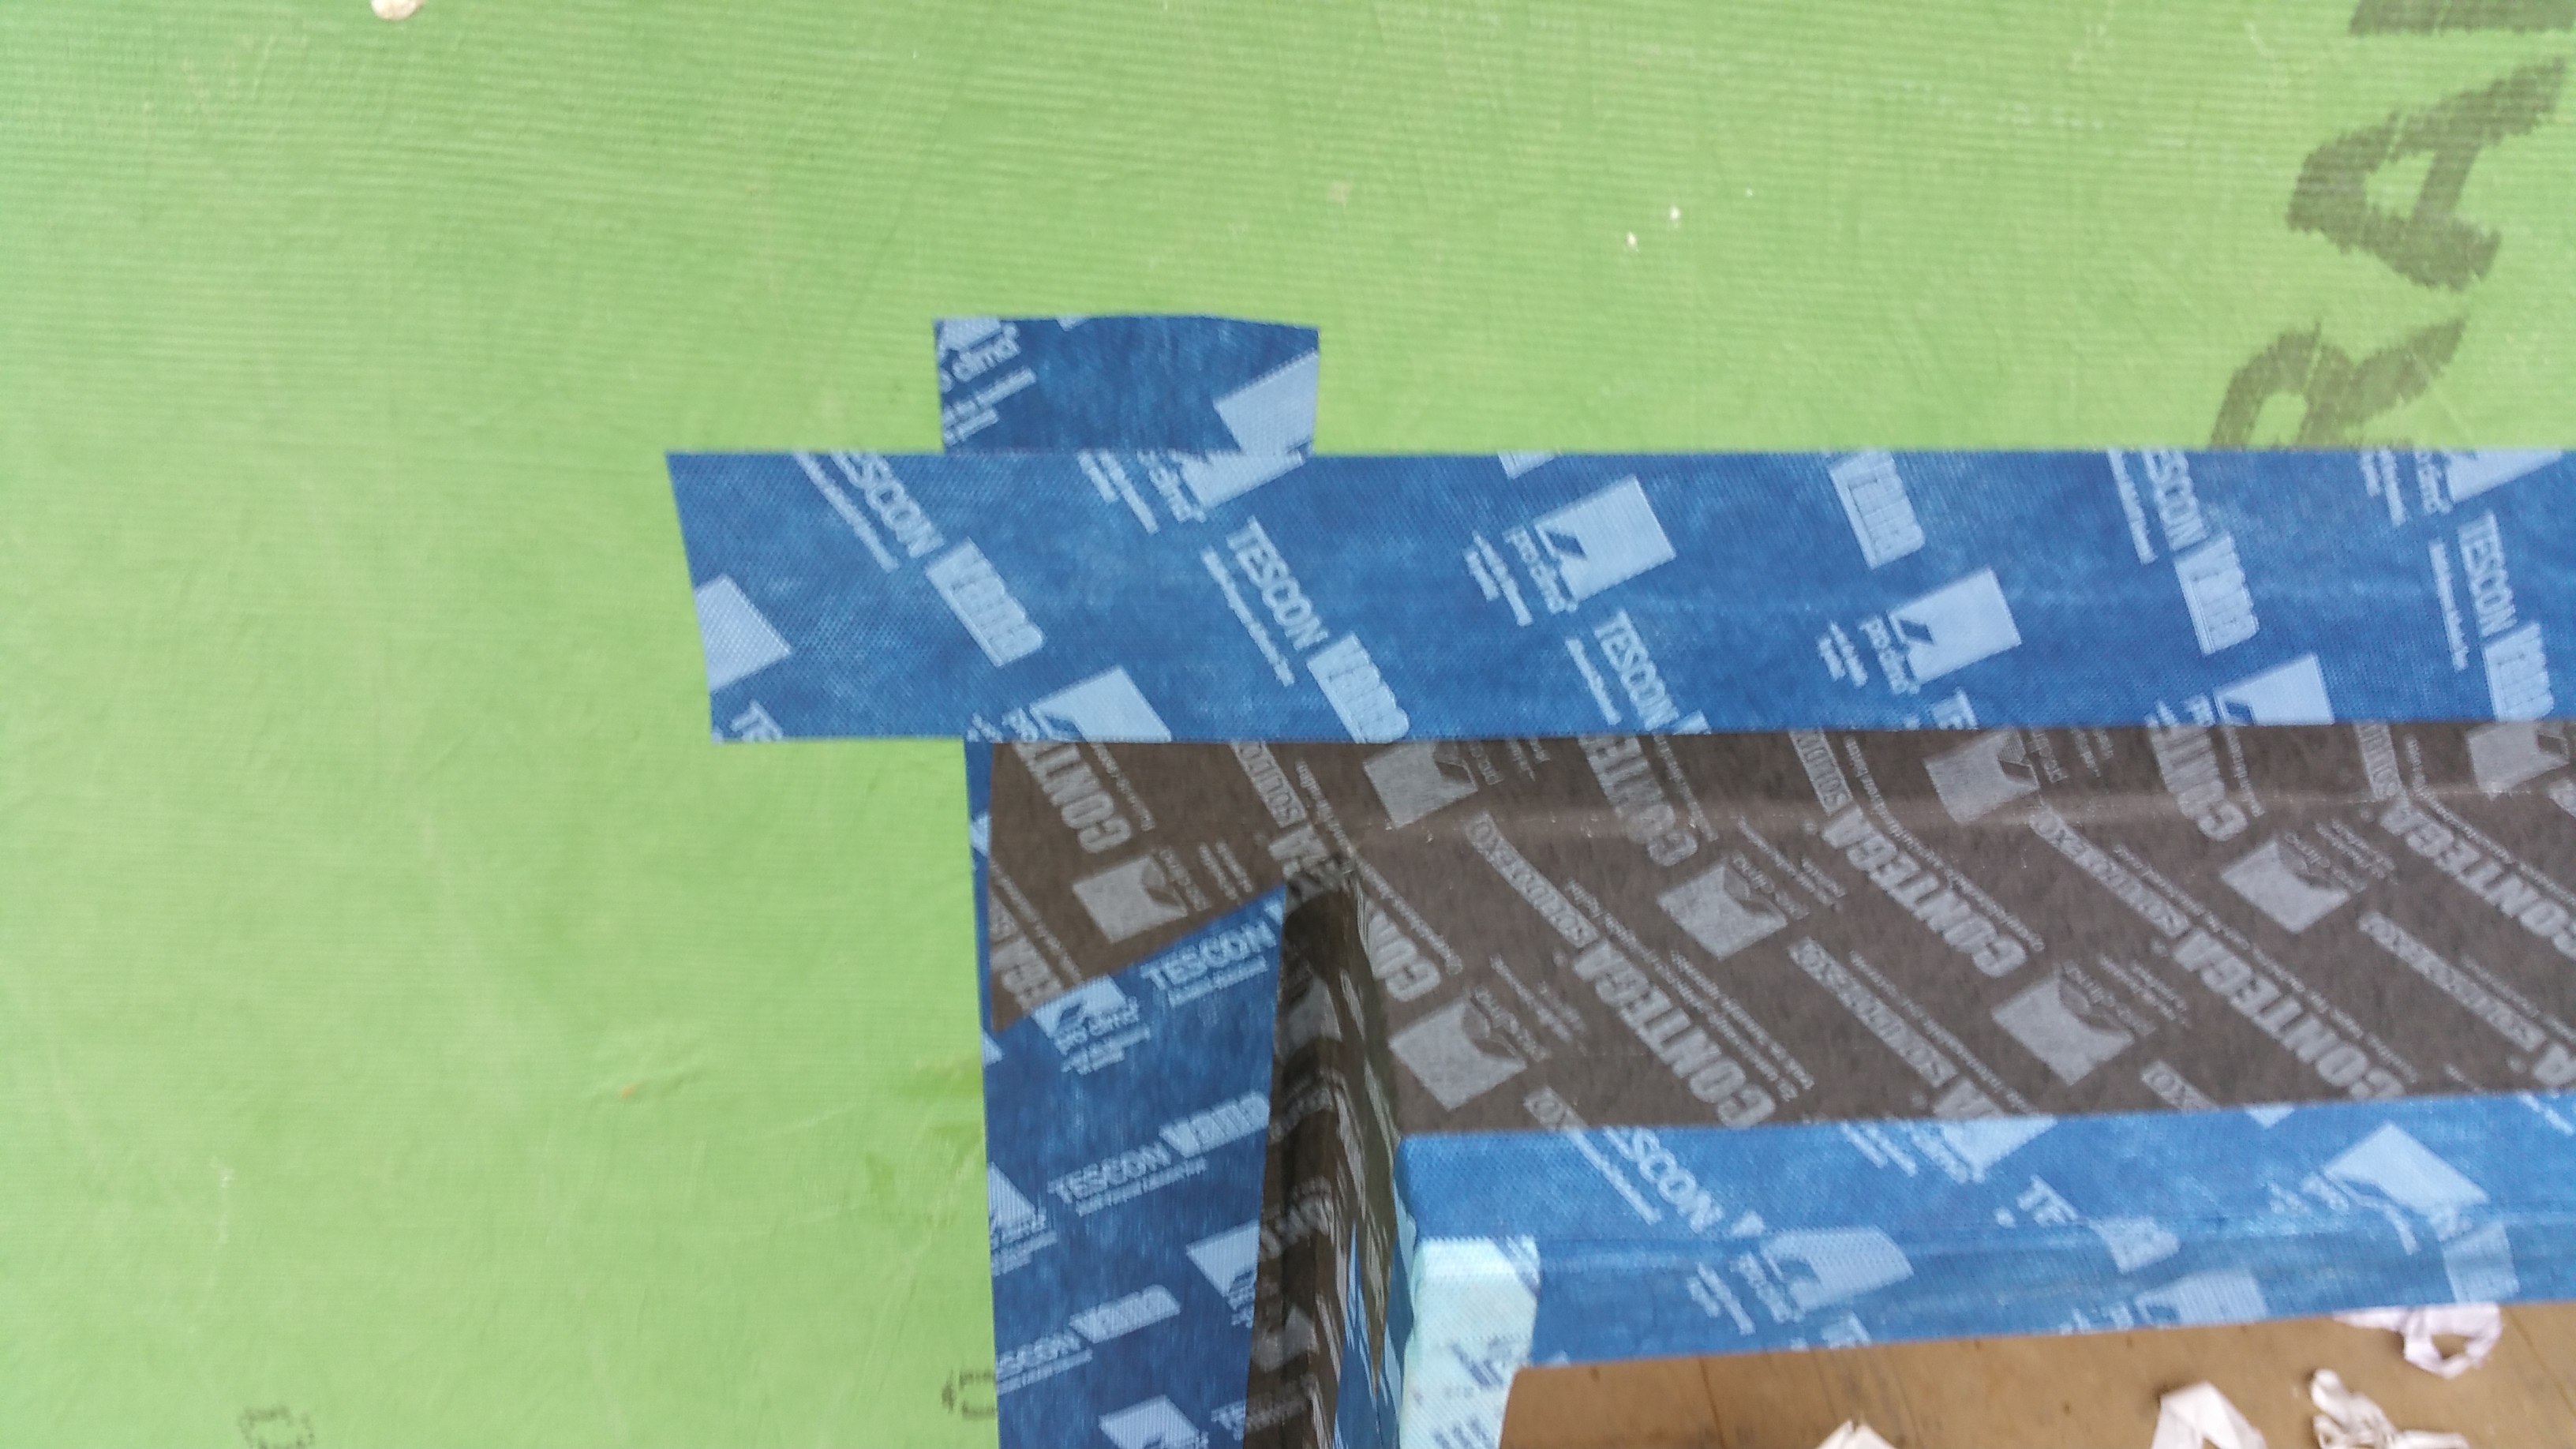
Making progress across the top of the window buck, building up the layers in shingle fashion — first with the Tescon Vana on the exposed front edge of the plywood, then moving up with the Contega, before finishing with a final strip of Tescon Vana on the Zip sheathing:
Top of the window buck almost complete:
Same area finished off with a strip of Tescon Vana:
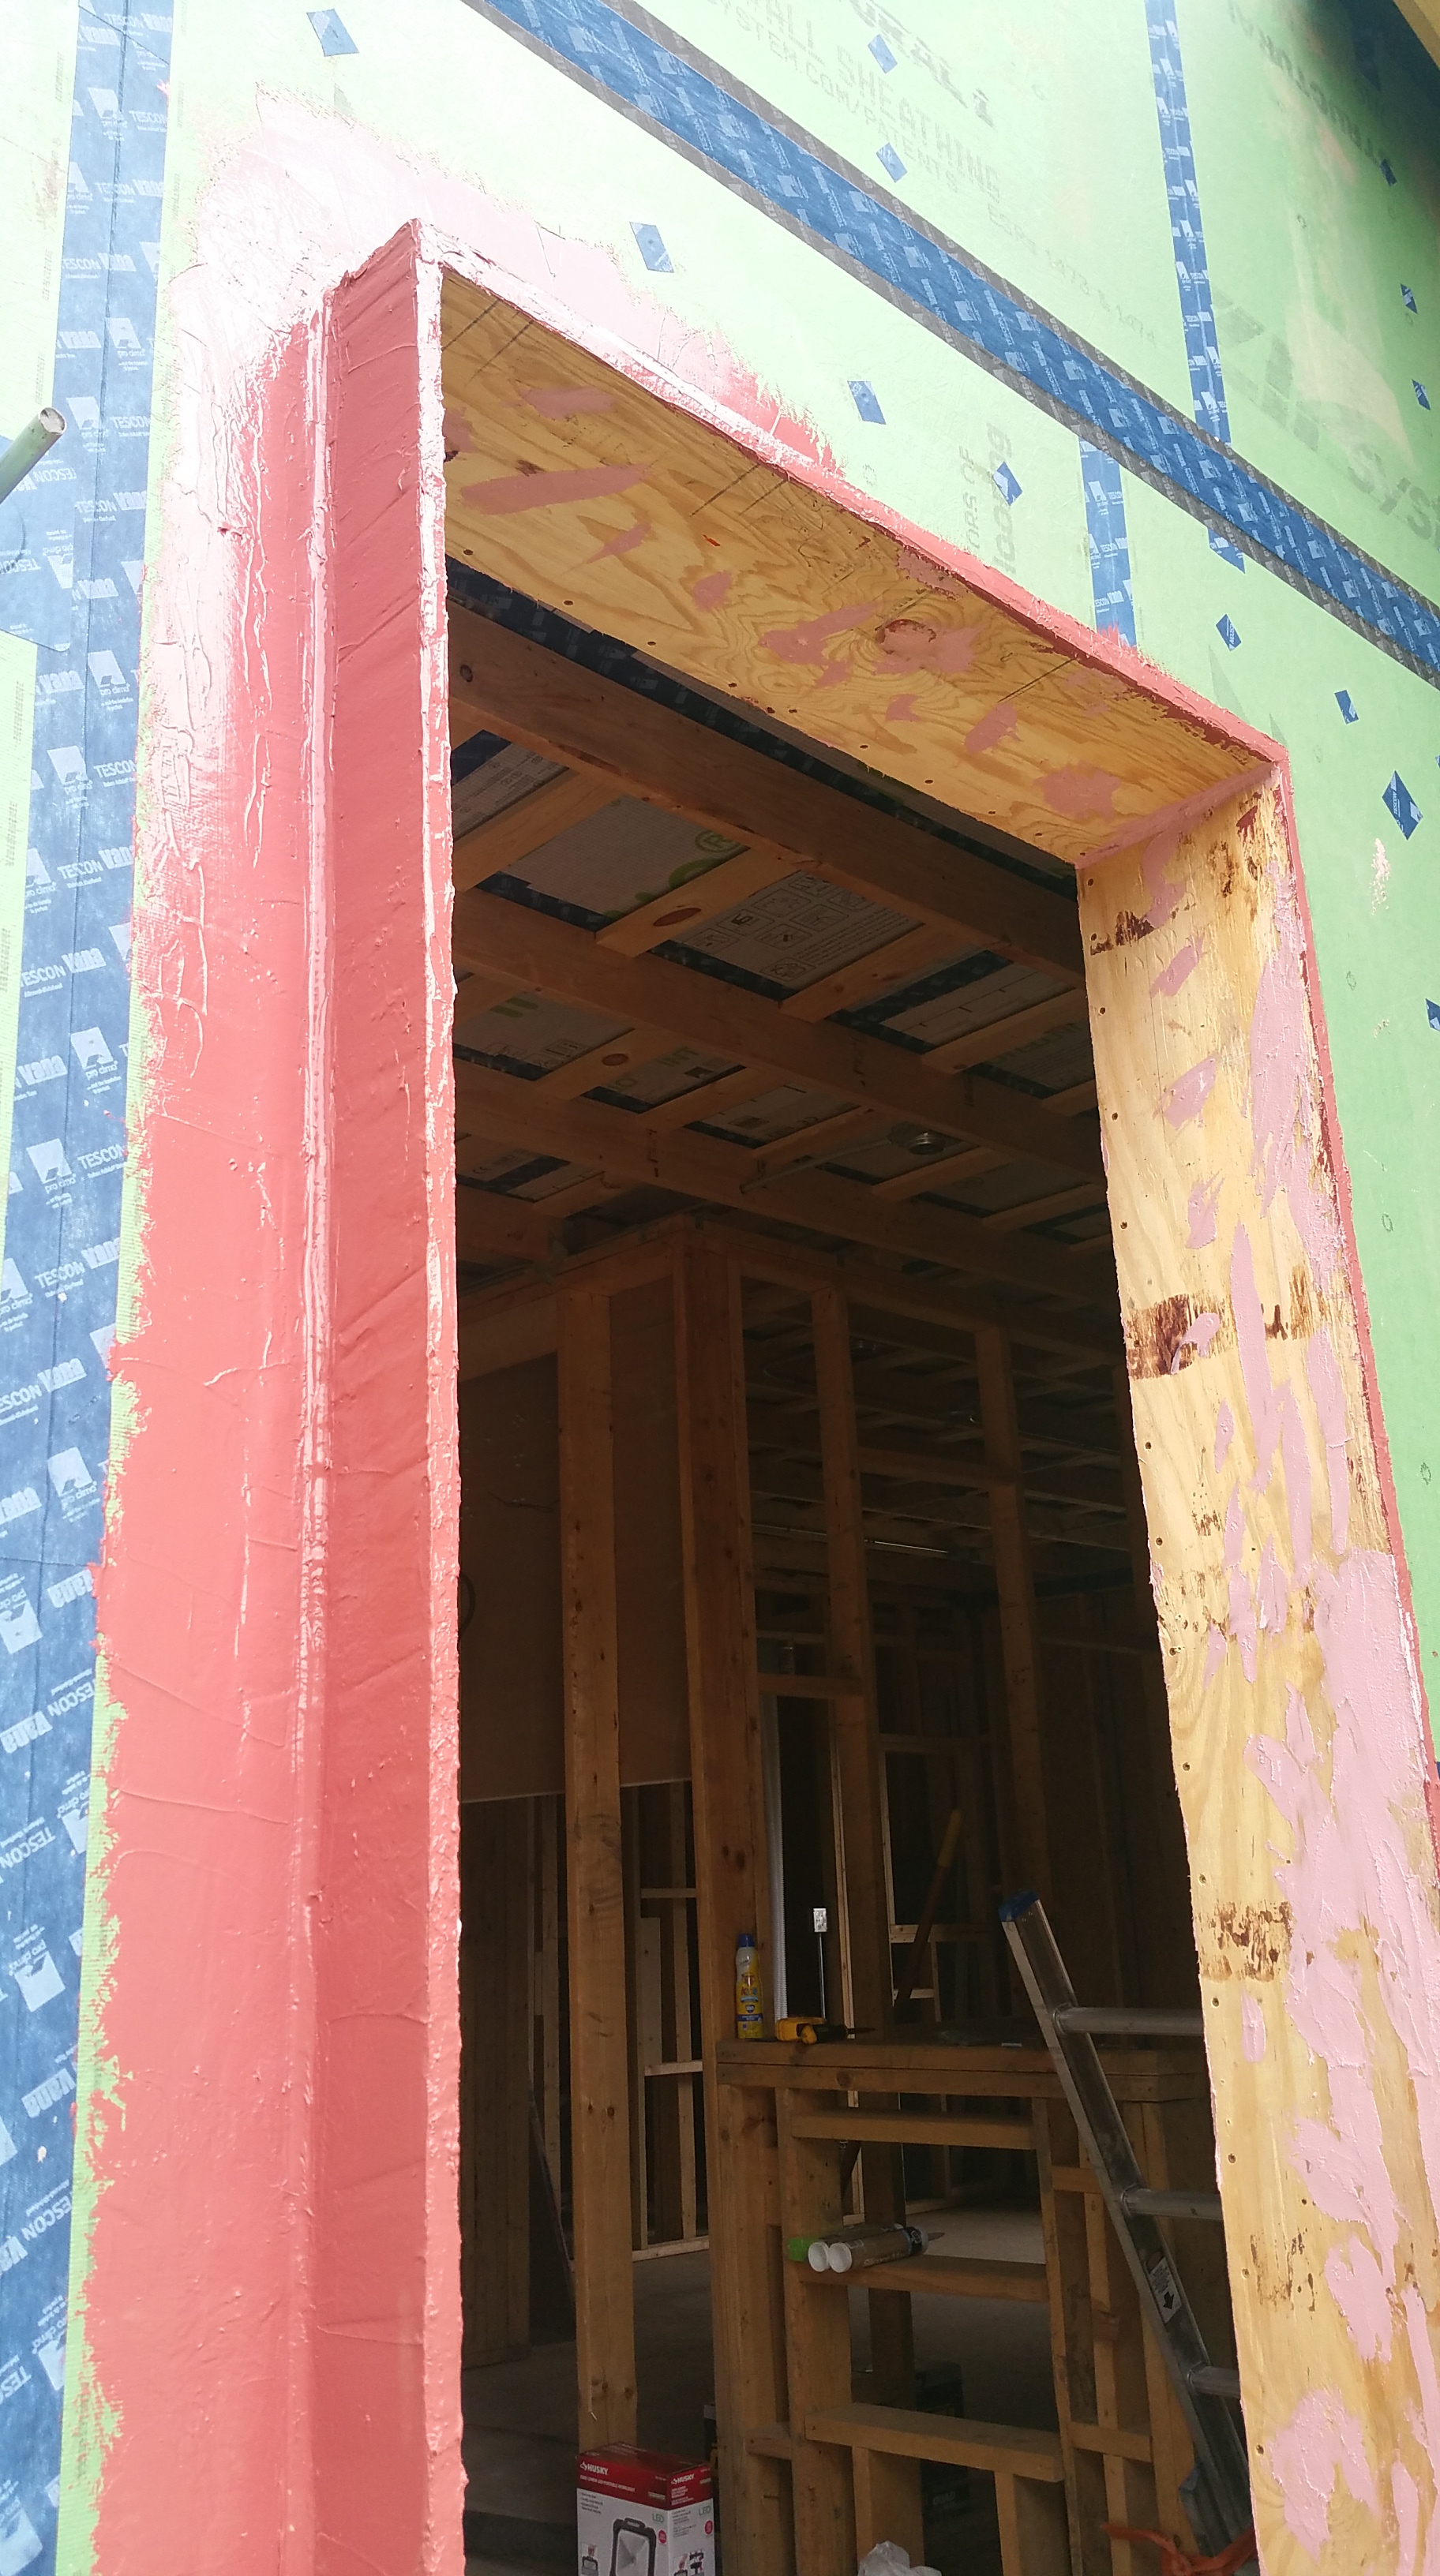
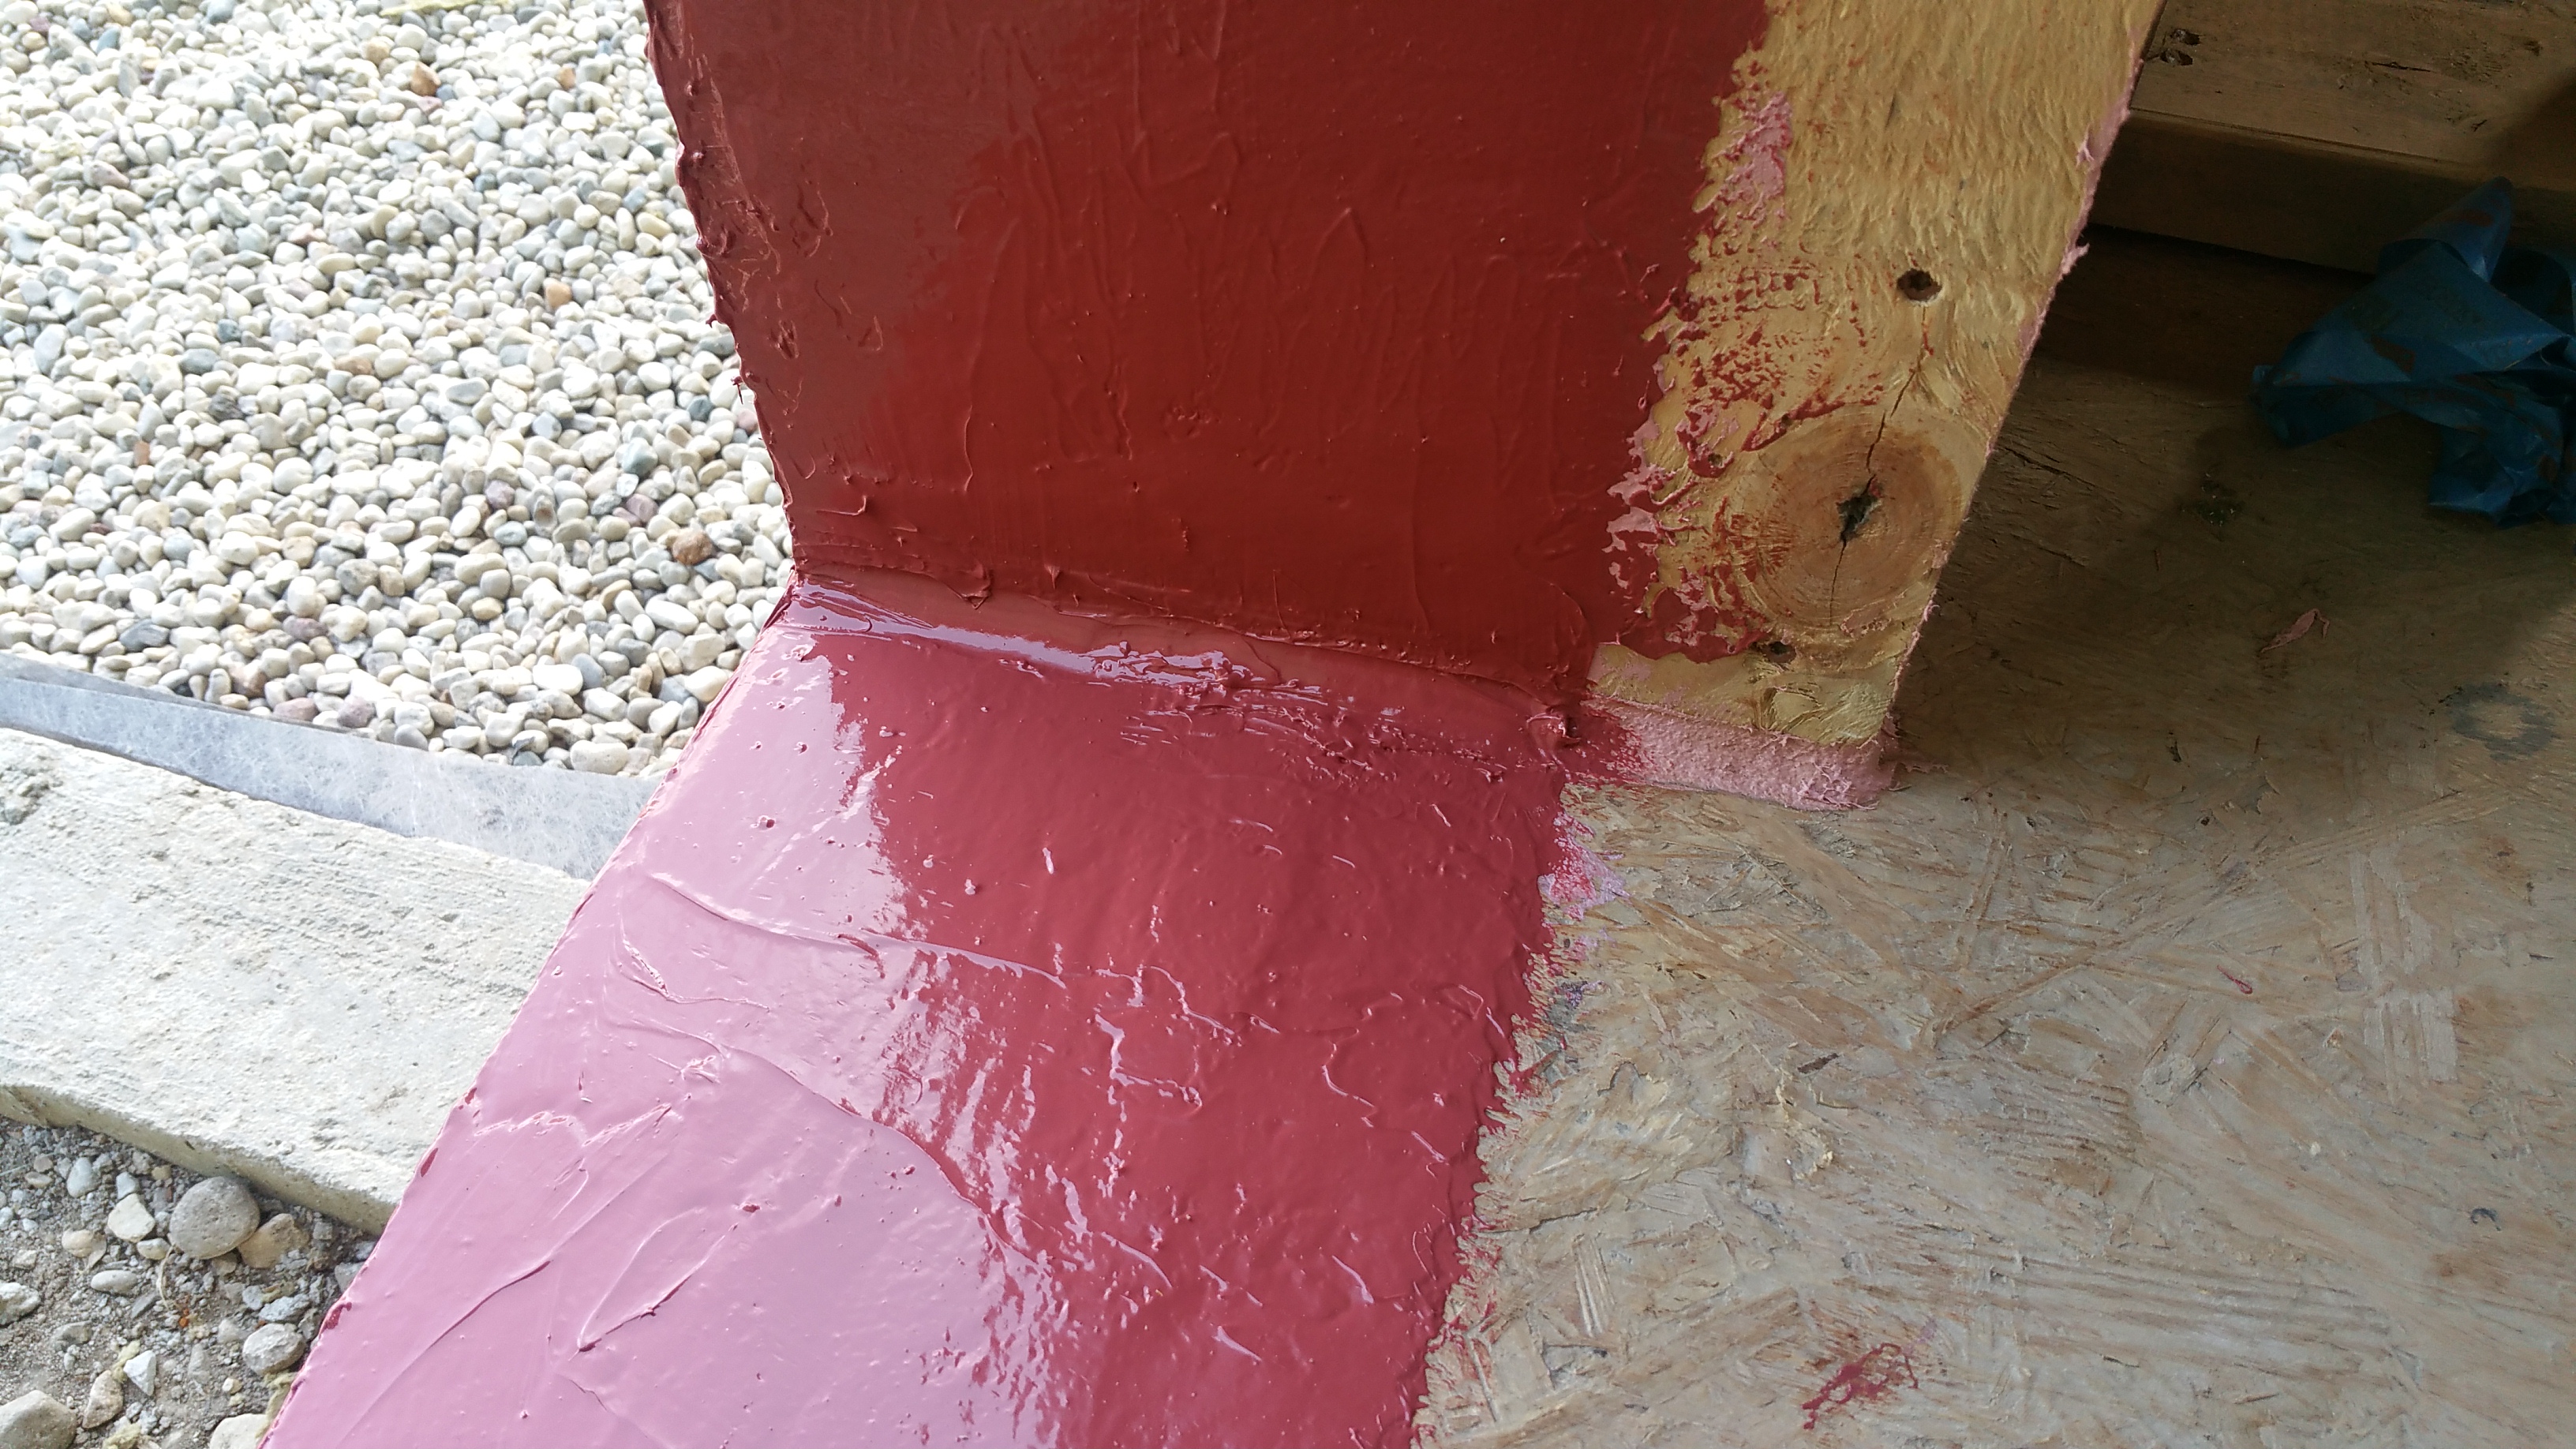
Here’s a side view of a completed window buck. Note the sloped top, achieved with a piece of beveled cedar siding. Hopefully water won’t make its way to this area above each window or door (it’ll have to get past 4″ of Rockwool), but the slope that’s present will hopefully encourage any water that does so to harmlessly drip off rather than hang around to cause potential damage.
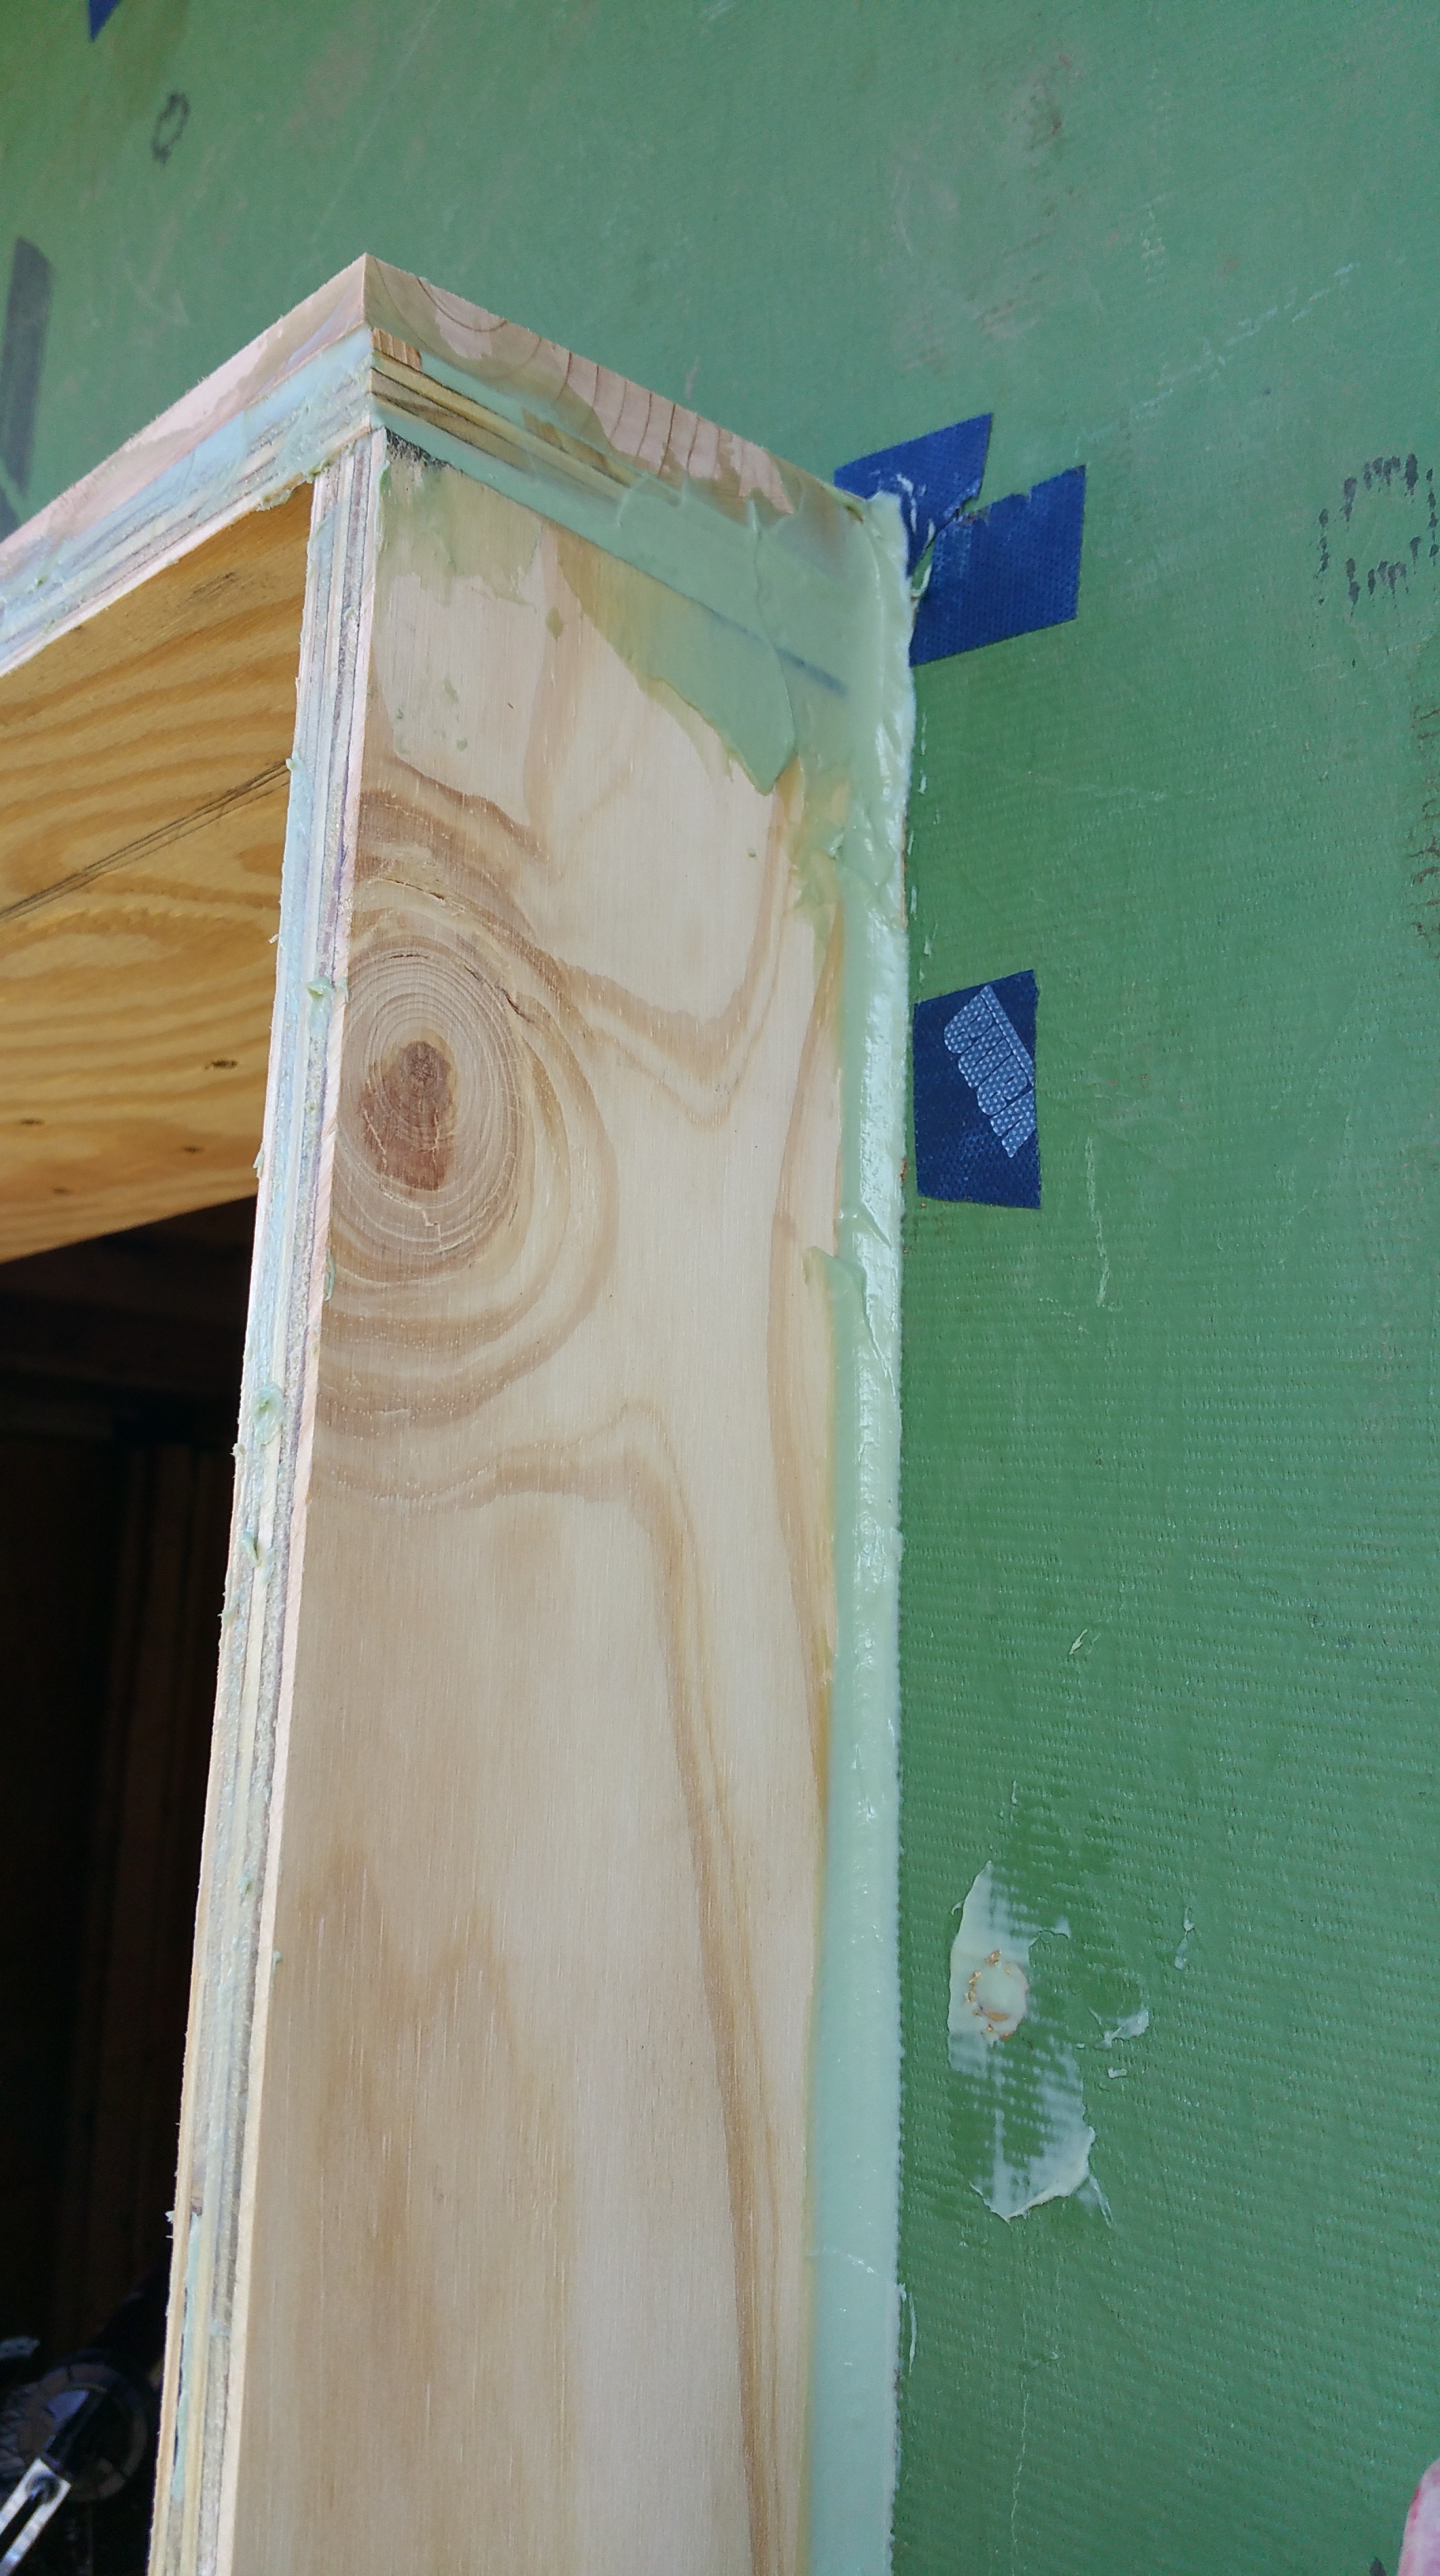
Once the exterior of the window bucks were complete, I went inside to cover the interior head and legs of each buck.
Here’s a Siga video I only recently came across, showing another way to deal with corners:
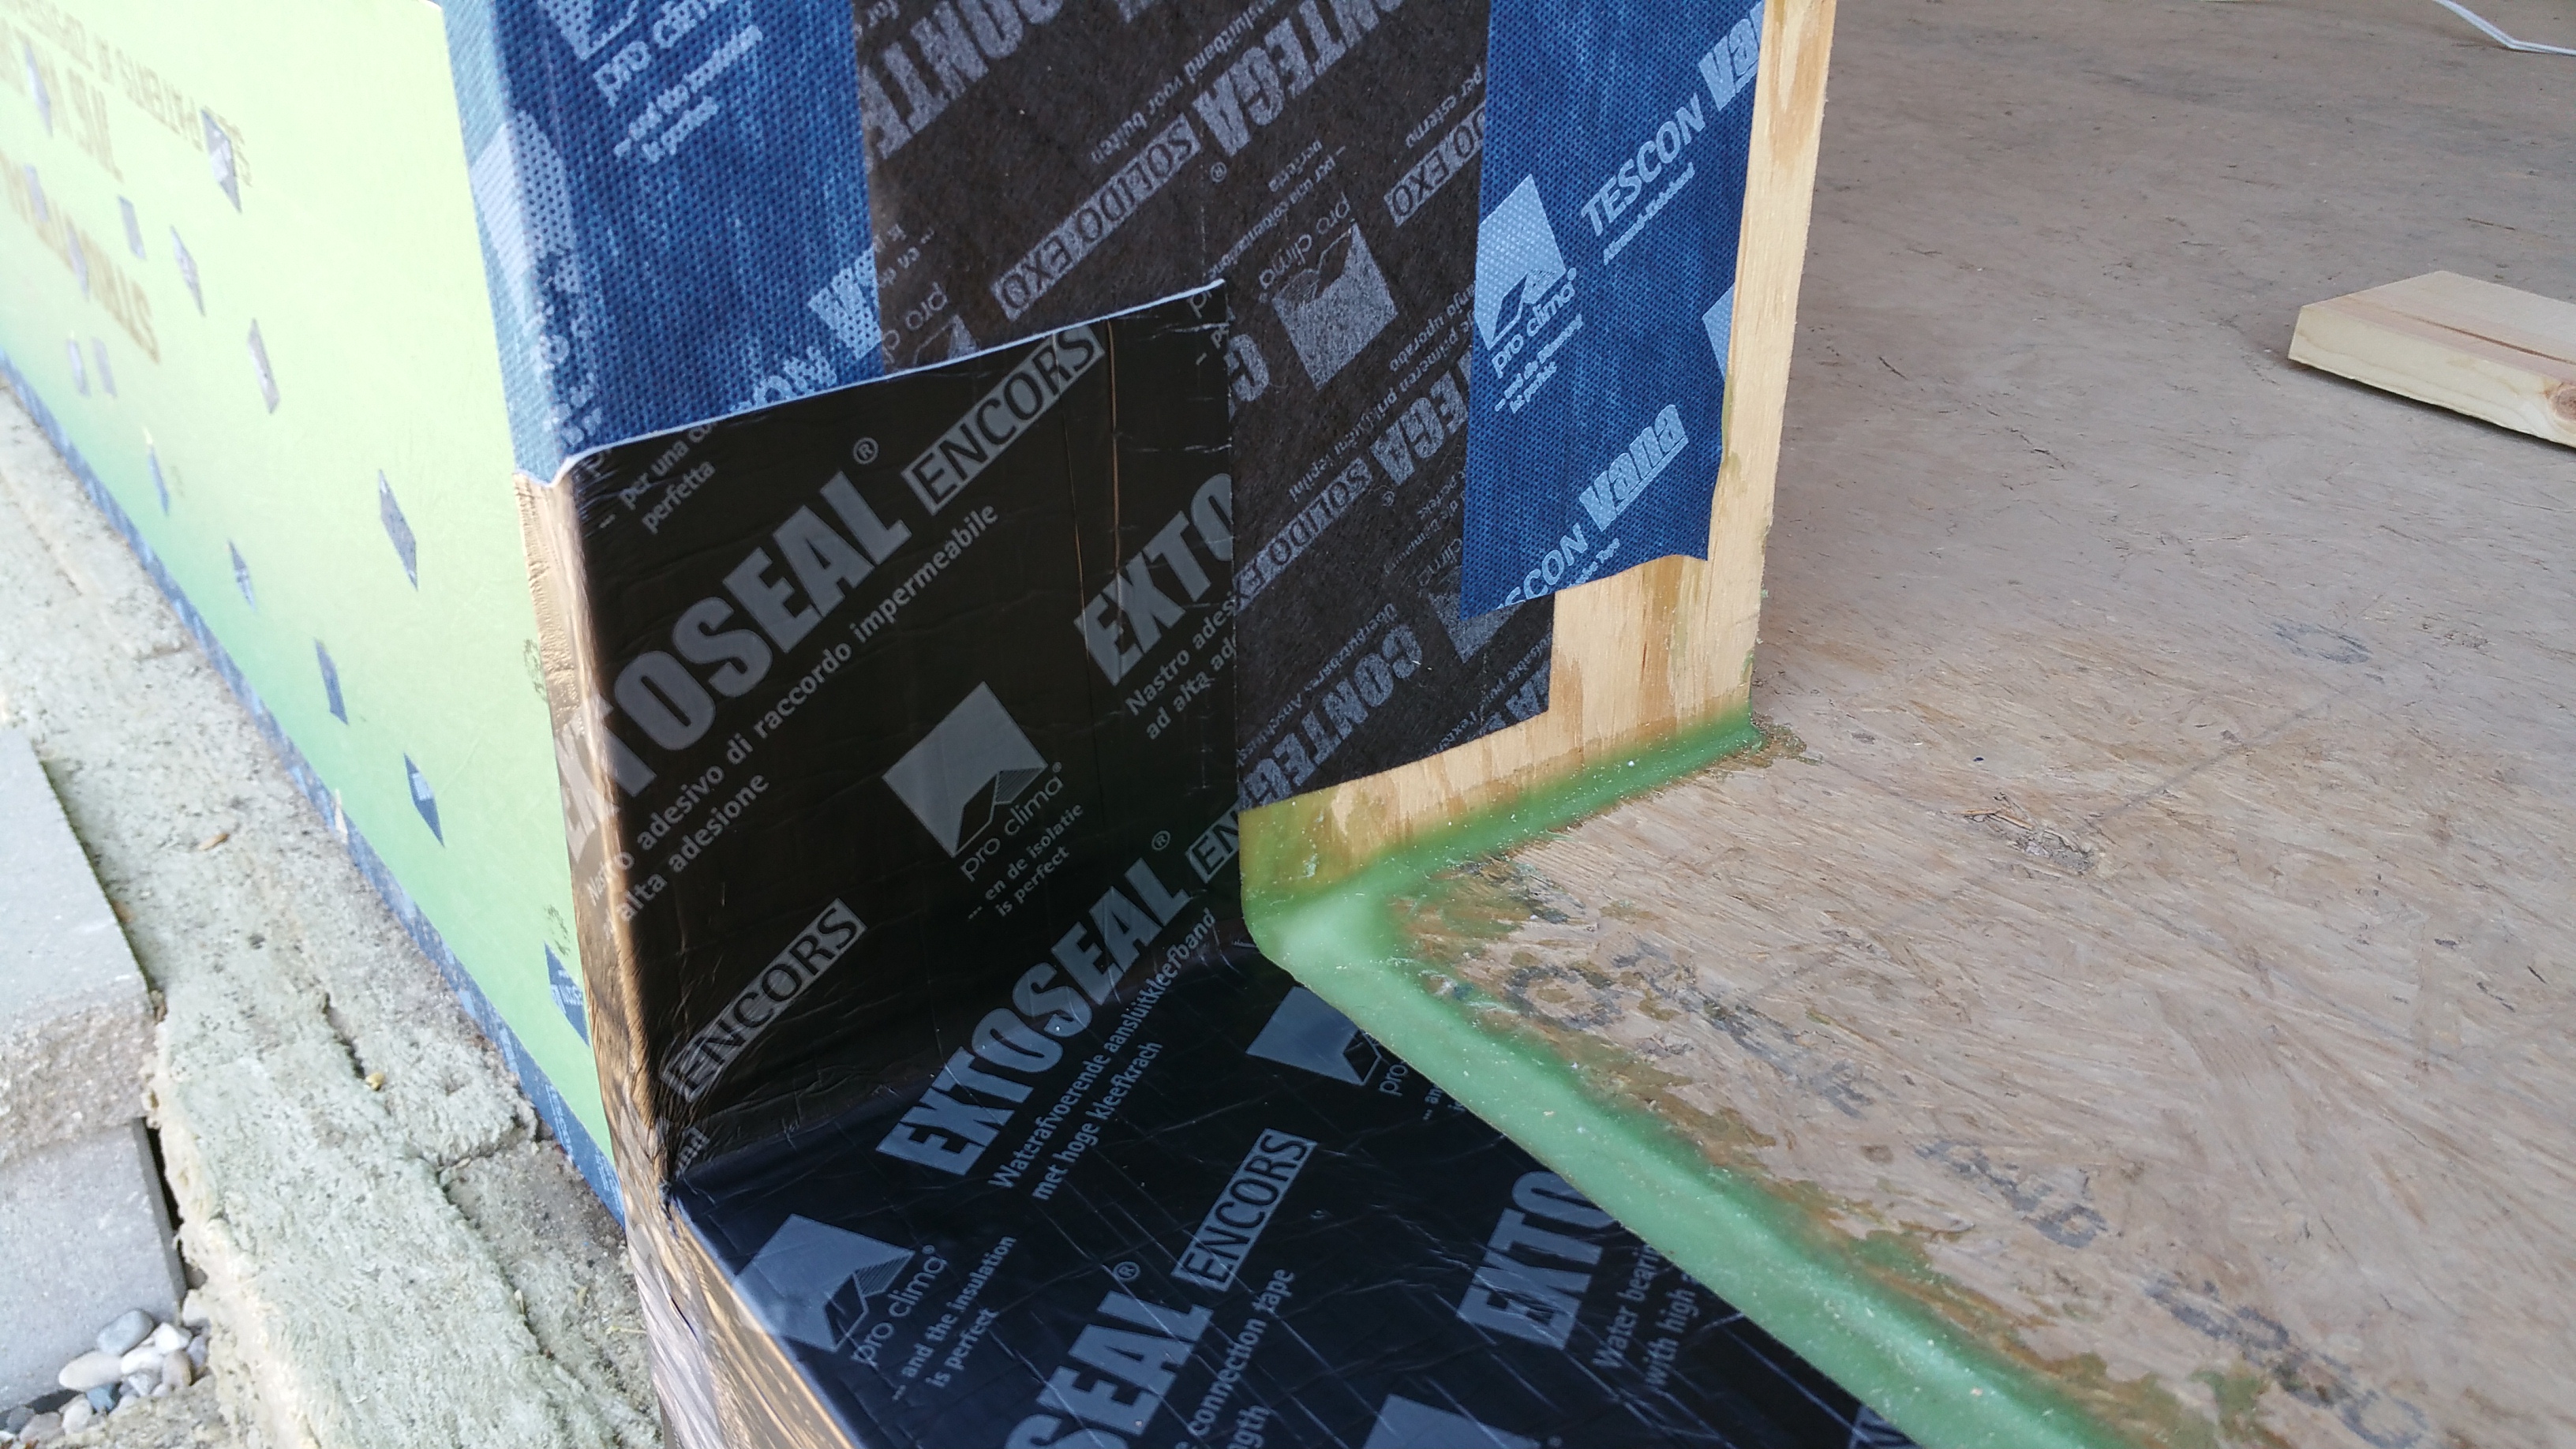
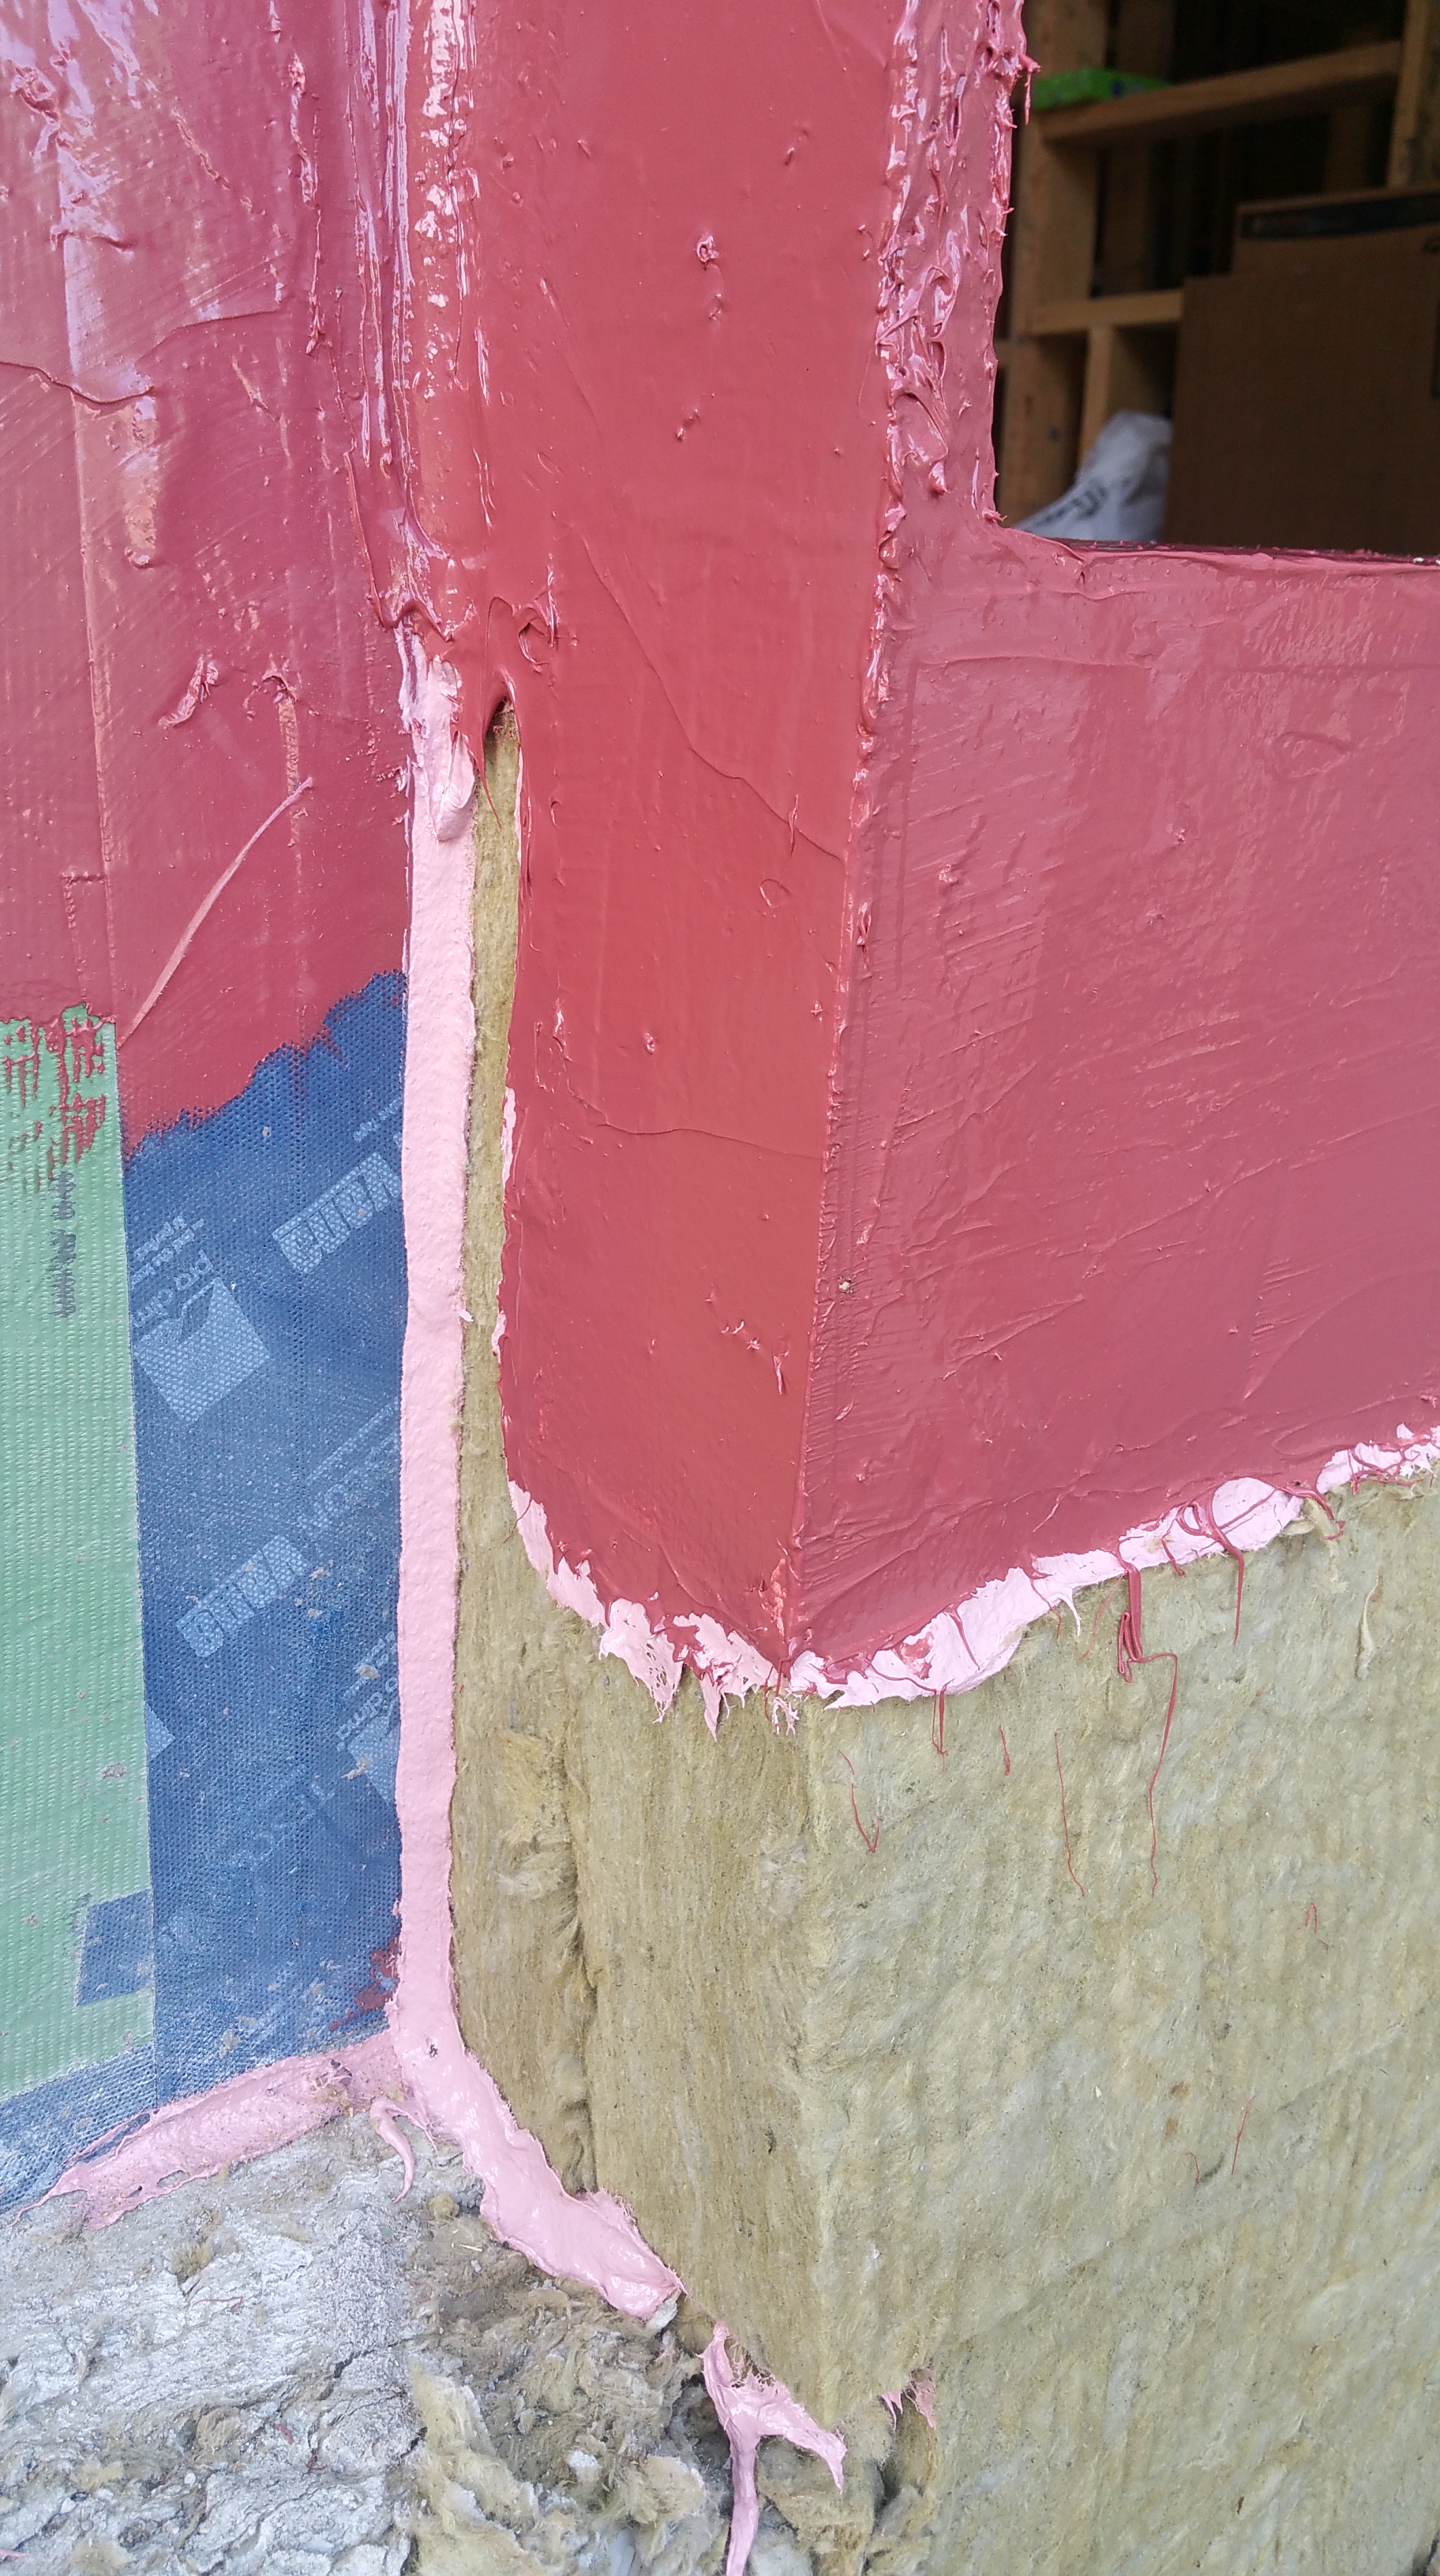
The last area to be addressed was the window sills. For this area I used the Extoseal Encors product. It’s vapor-closed, highly pliable, but also thick to prevent any water that ends up on the sill from entering the structure.
I really enjoyed using the Extoseal Encors, although you do need to avoid thinning it out as you wrap it around outside corners.
The only time I had a problem with it was on my last window buck. Temperatures were rising and I was working in direct sunlight. It was only in the high 60’s, but that was enough to cause some bubbling in the material.
In my experience, the Extoseal Encors performed at its best the colder it was outside.
Door Bucks
Once the window bucks were installed, I could move on to the two door bucks (front entry and side kitchen entry).

Plywood portion of the door buck complete with bottom piece installed:
Note the small voids in the plywood pictured below. Because of gaps like these, I chose to cover the edge grain of all the plywood window and door bucks with the HF sealant before applying tapes, just to ensure no air could migrate through the layers of plywood.
After completing the plywood door buck, it was time to give it support from underneath. Although about 2/3 of the door would rest on the subfloor/floor joists, leaving that remaining 1/3 unsupported made me nervous.
While there’s plenty of information available regarding the use of window bucks, I found surprisingly little regarding the installation and weather-proofing of door bucks. I couldn’t find any information for this detail in my Passive House books, or any description of it online, so I consulted with a local GC to come up with a solution.
As an aside, Rick, from Cypress Builders in Palatine, Illinois, proved to be an invaluable resource for a whole host of design problems and issues during our build. After firing our two GC’s, he was kind enough to take on the role of building consultant: Every couple of weeks I would come up with a list of questions, and he would stop by the job site to run through answers and possible solutions.
To his credit, the level of detail involved in a Passive House build didn’t scare him off — it did for many of the other GC’s, carpenters, and siding companies I had out to the job site for estimates — none more blunt than one particular carpenter who could only shake his head over and over as I went through the components of our wall assembly before finally blurting out in frustration: “Why the fuck would anybody build this way”. It’s funny now, but it wasn’t at the time when I was struggling to line up subcontractors in order to try and finish the project.
Rick was incredibly generous with his time, knowledge, and experience — it’s no overstatement to say it’s doubtful we would’ve completed our build without him. His decades in the building industry allowed him to offer sage advice, and I always ended up calmer and more confident about completing the next stage of the build after each of his site visits. I would definitely recommend him to anyone in the Chicago suburbs looking to build or remodel (the mix of experience, honesty, and excellent communication skills is hard to find).
And for any other DIY self-builds, I can’t recommend strongly enough how important it is to look for a similar mentor for your own project. Even if things are going well, whether in the design stage or even the actual build, it can’t hurt to have a construction veteran stop by and try to spot problems, or potential problems. A second set of eyes, eyes that have seen decades of construction acumen along with plenty of stupidity, can only improve the quality of your own build. As invaluable as online resources like GBA, BSC, and Hammer and Hand have been to our build, none of those resources could visit our job site directly, so someone like Rick helped to complete the circle of advice and knowledge that can make the difference between a successful build and total disaster.
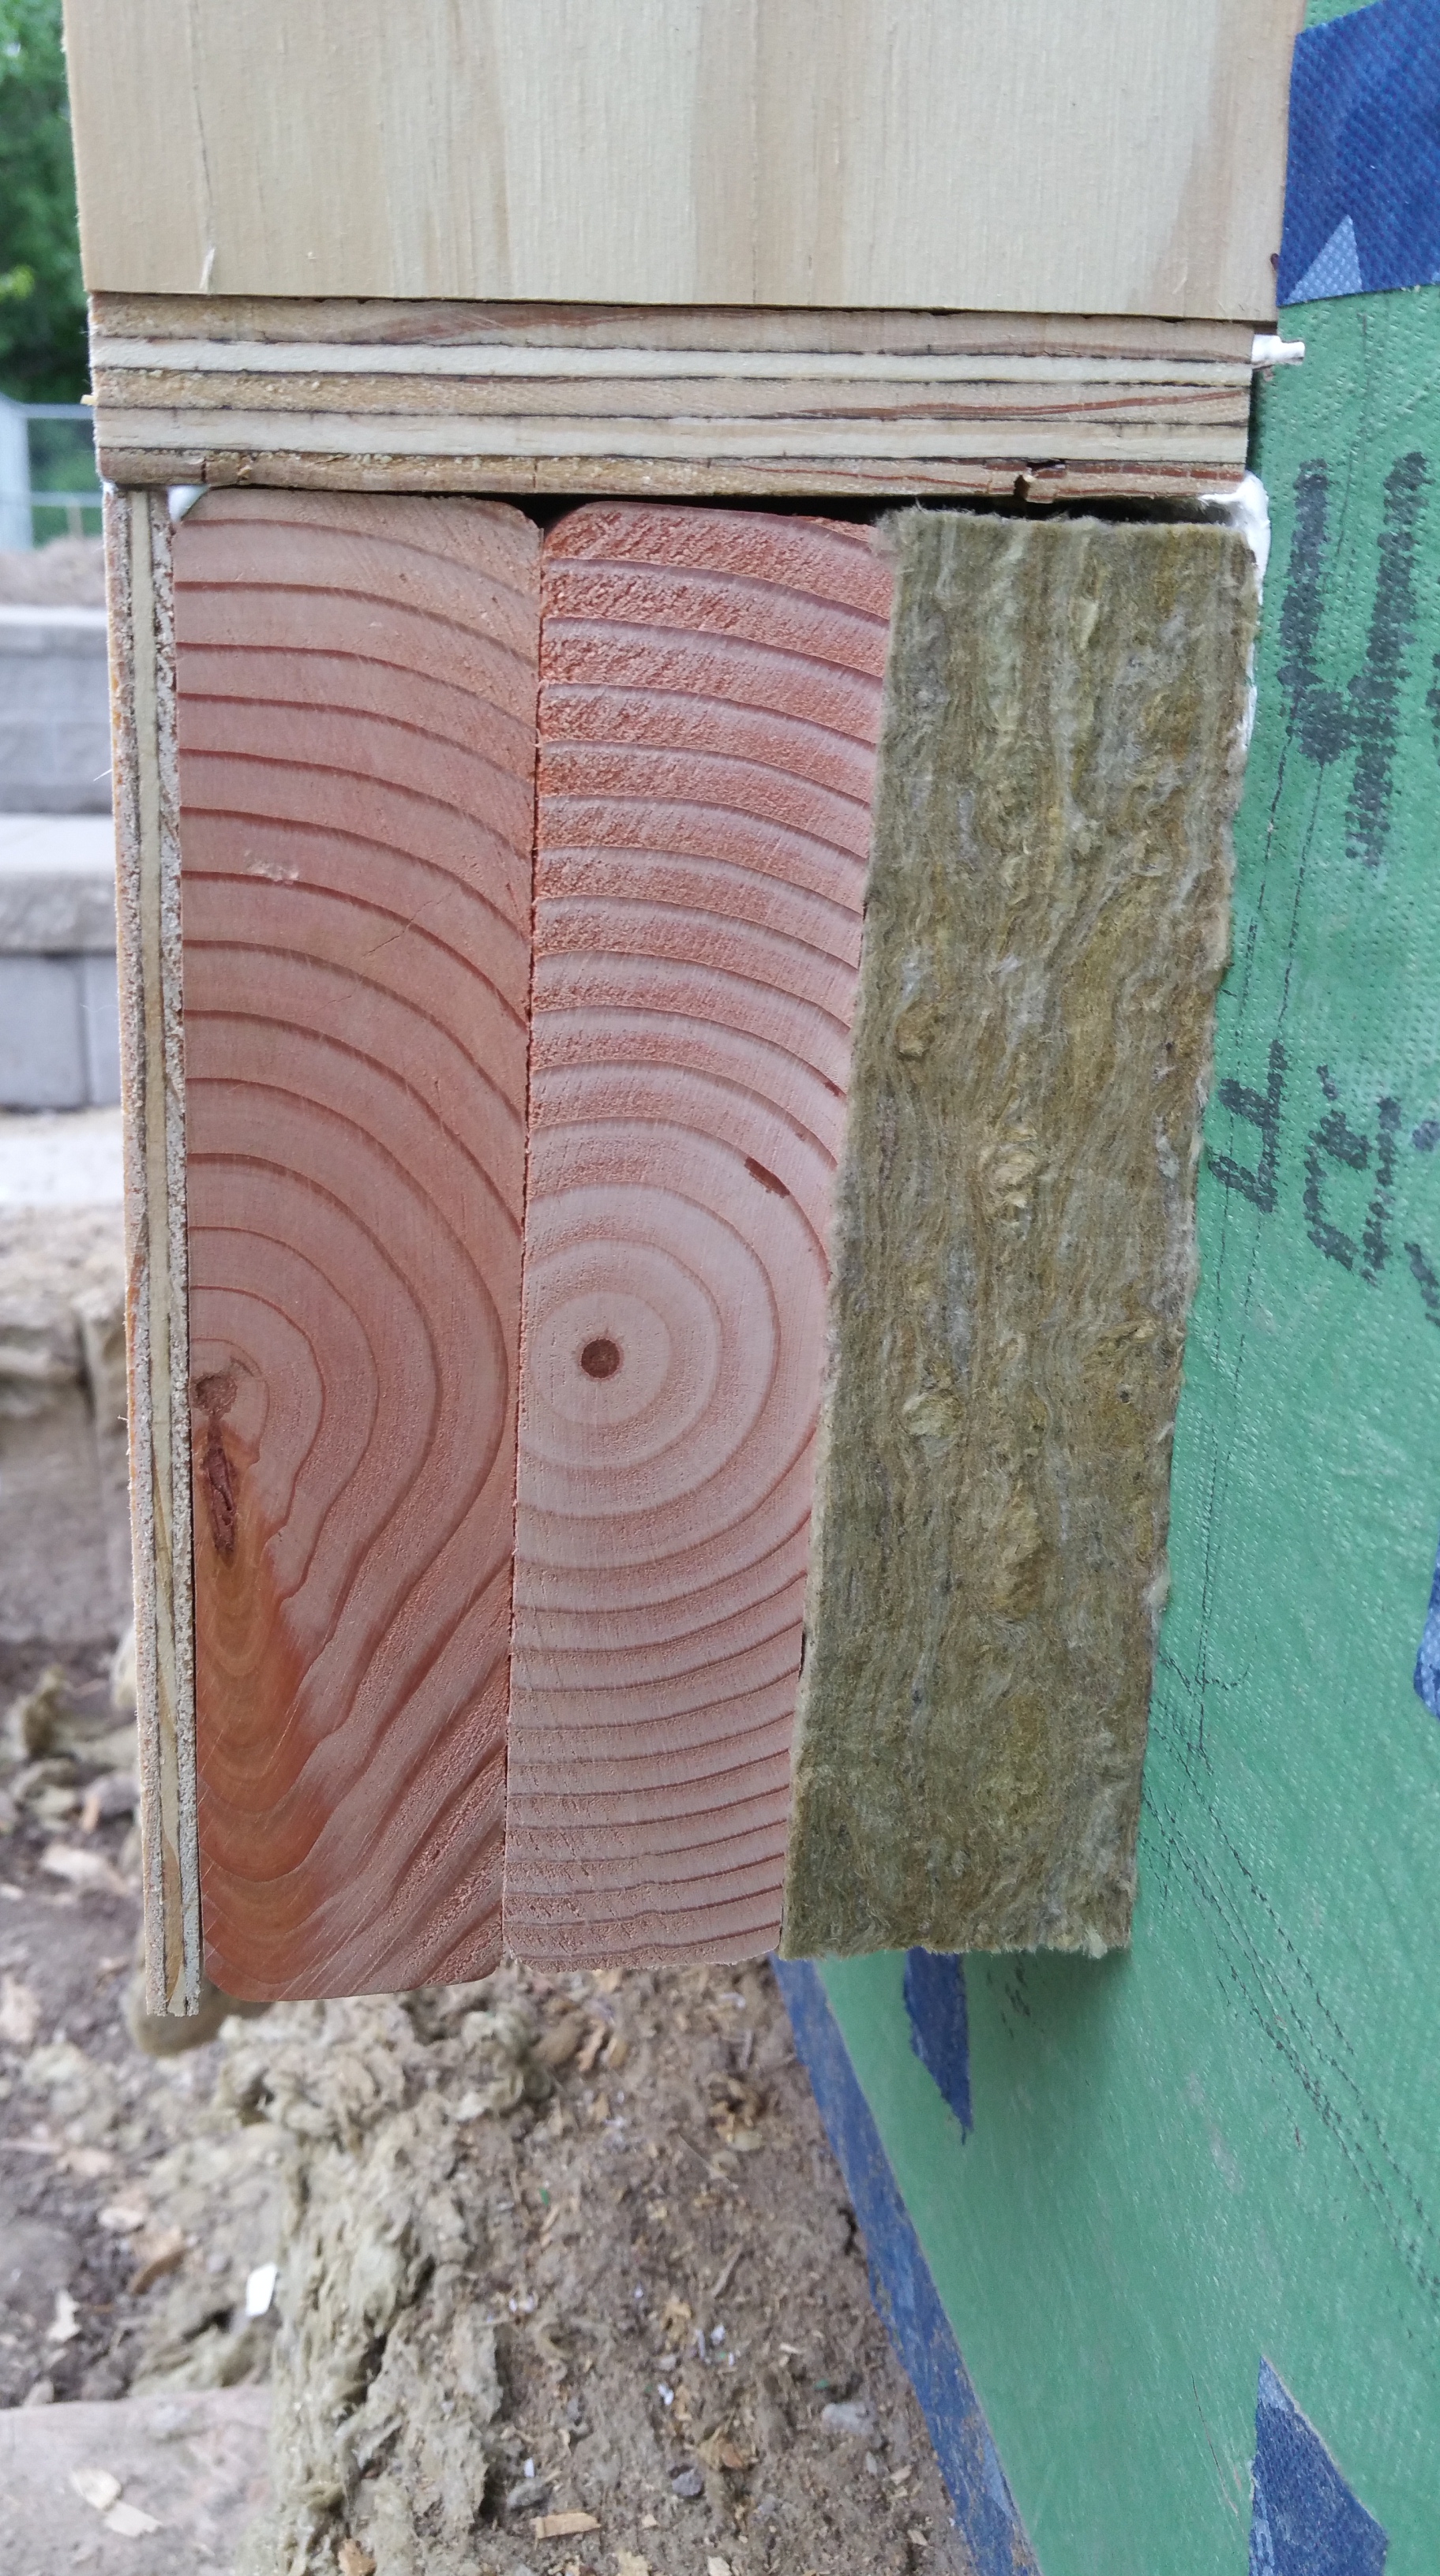
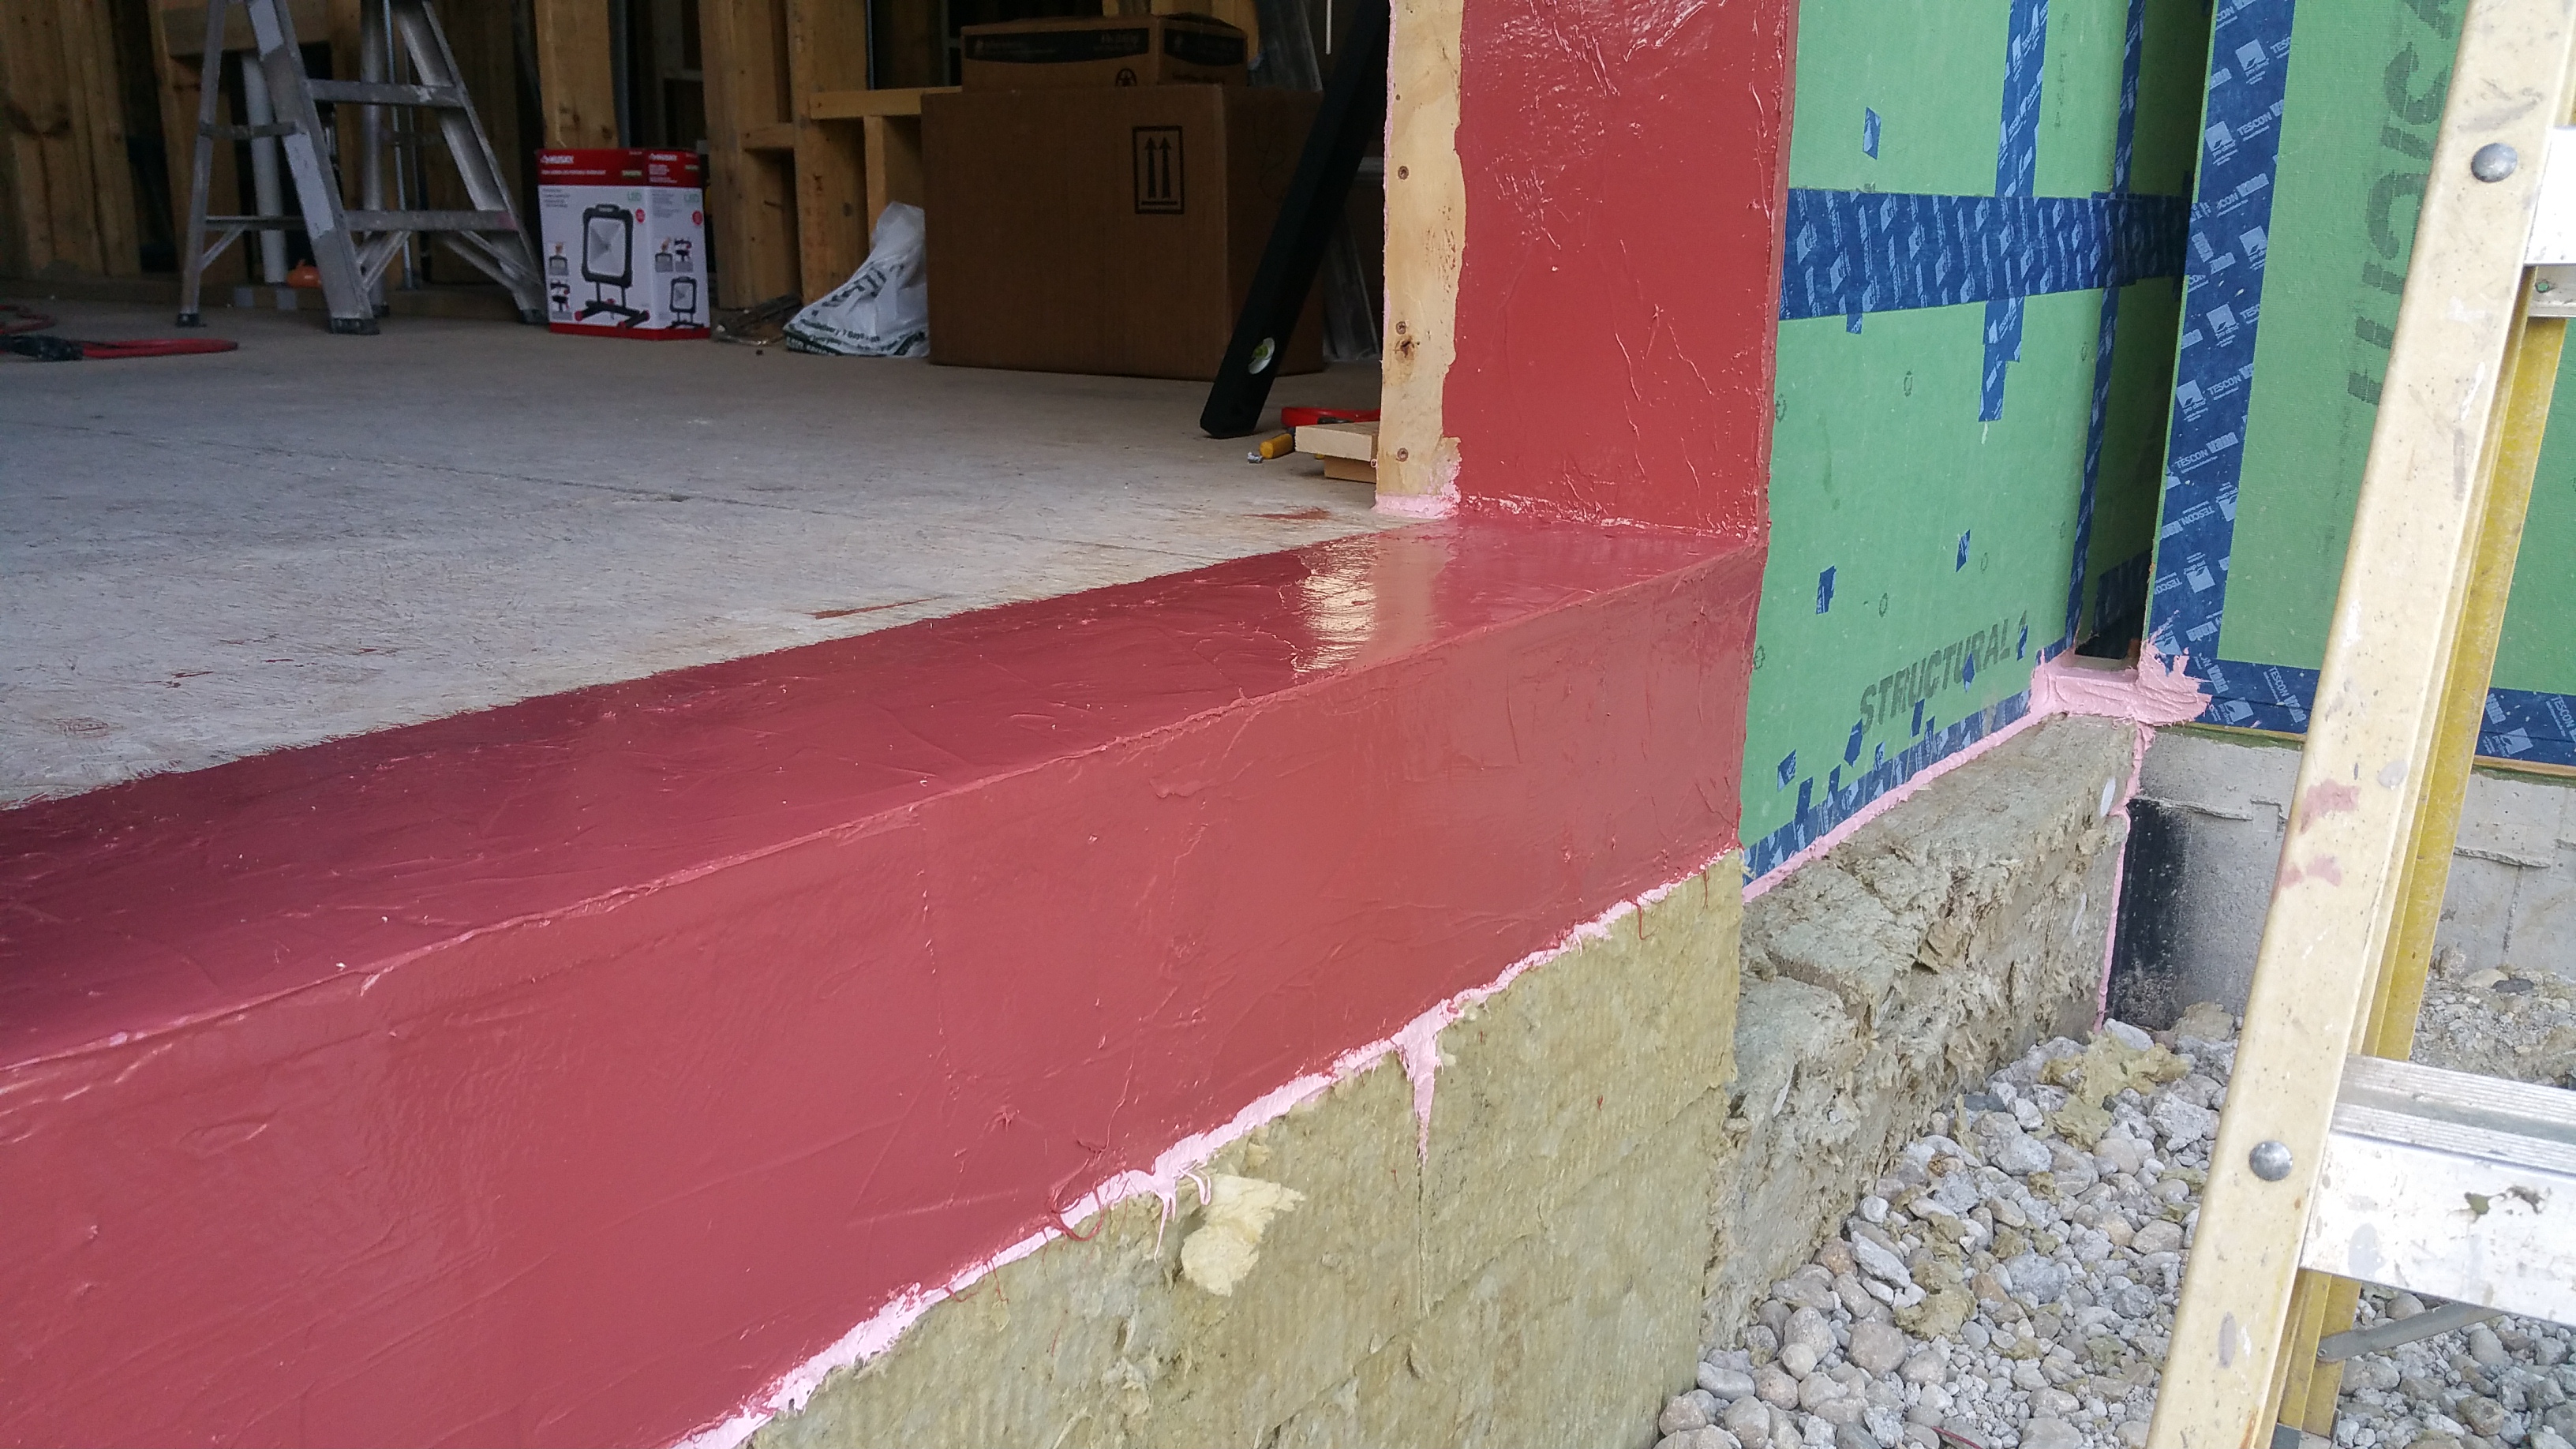
To try and give the door buck structural support, I first installed a layer of Rockwool against the green Zip sheathing directly underneath the door buck, attaching it initially with some construction adhesive. I was hoping this would act like the foam in an insulated header.
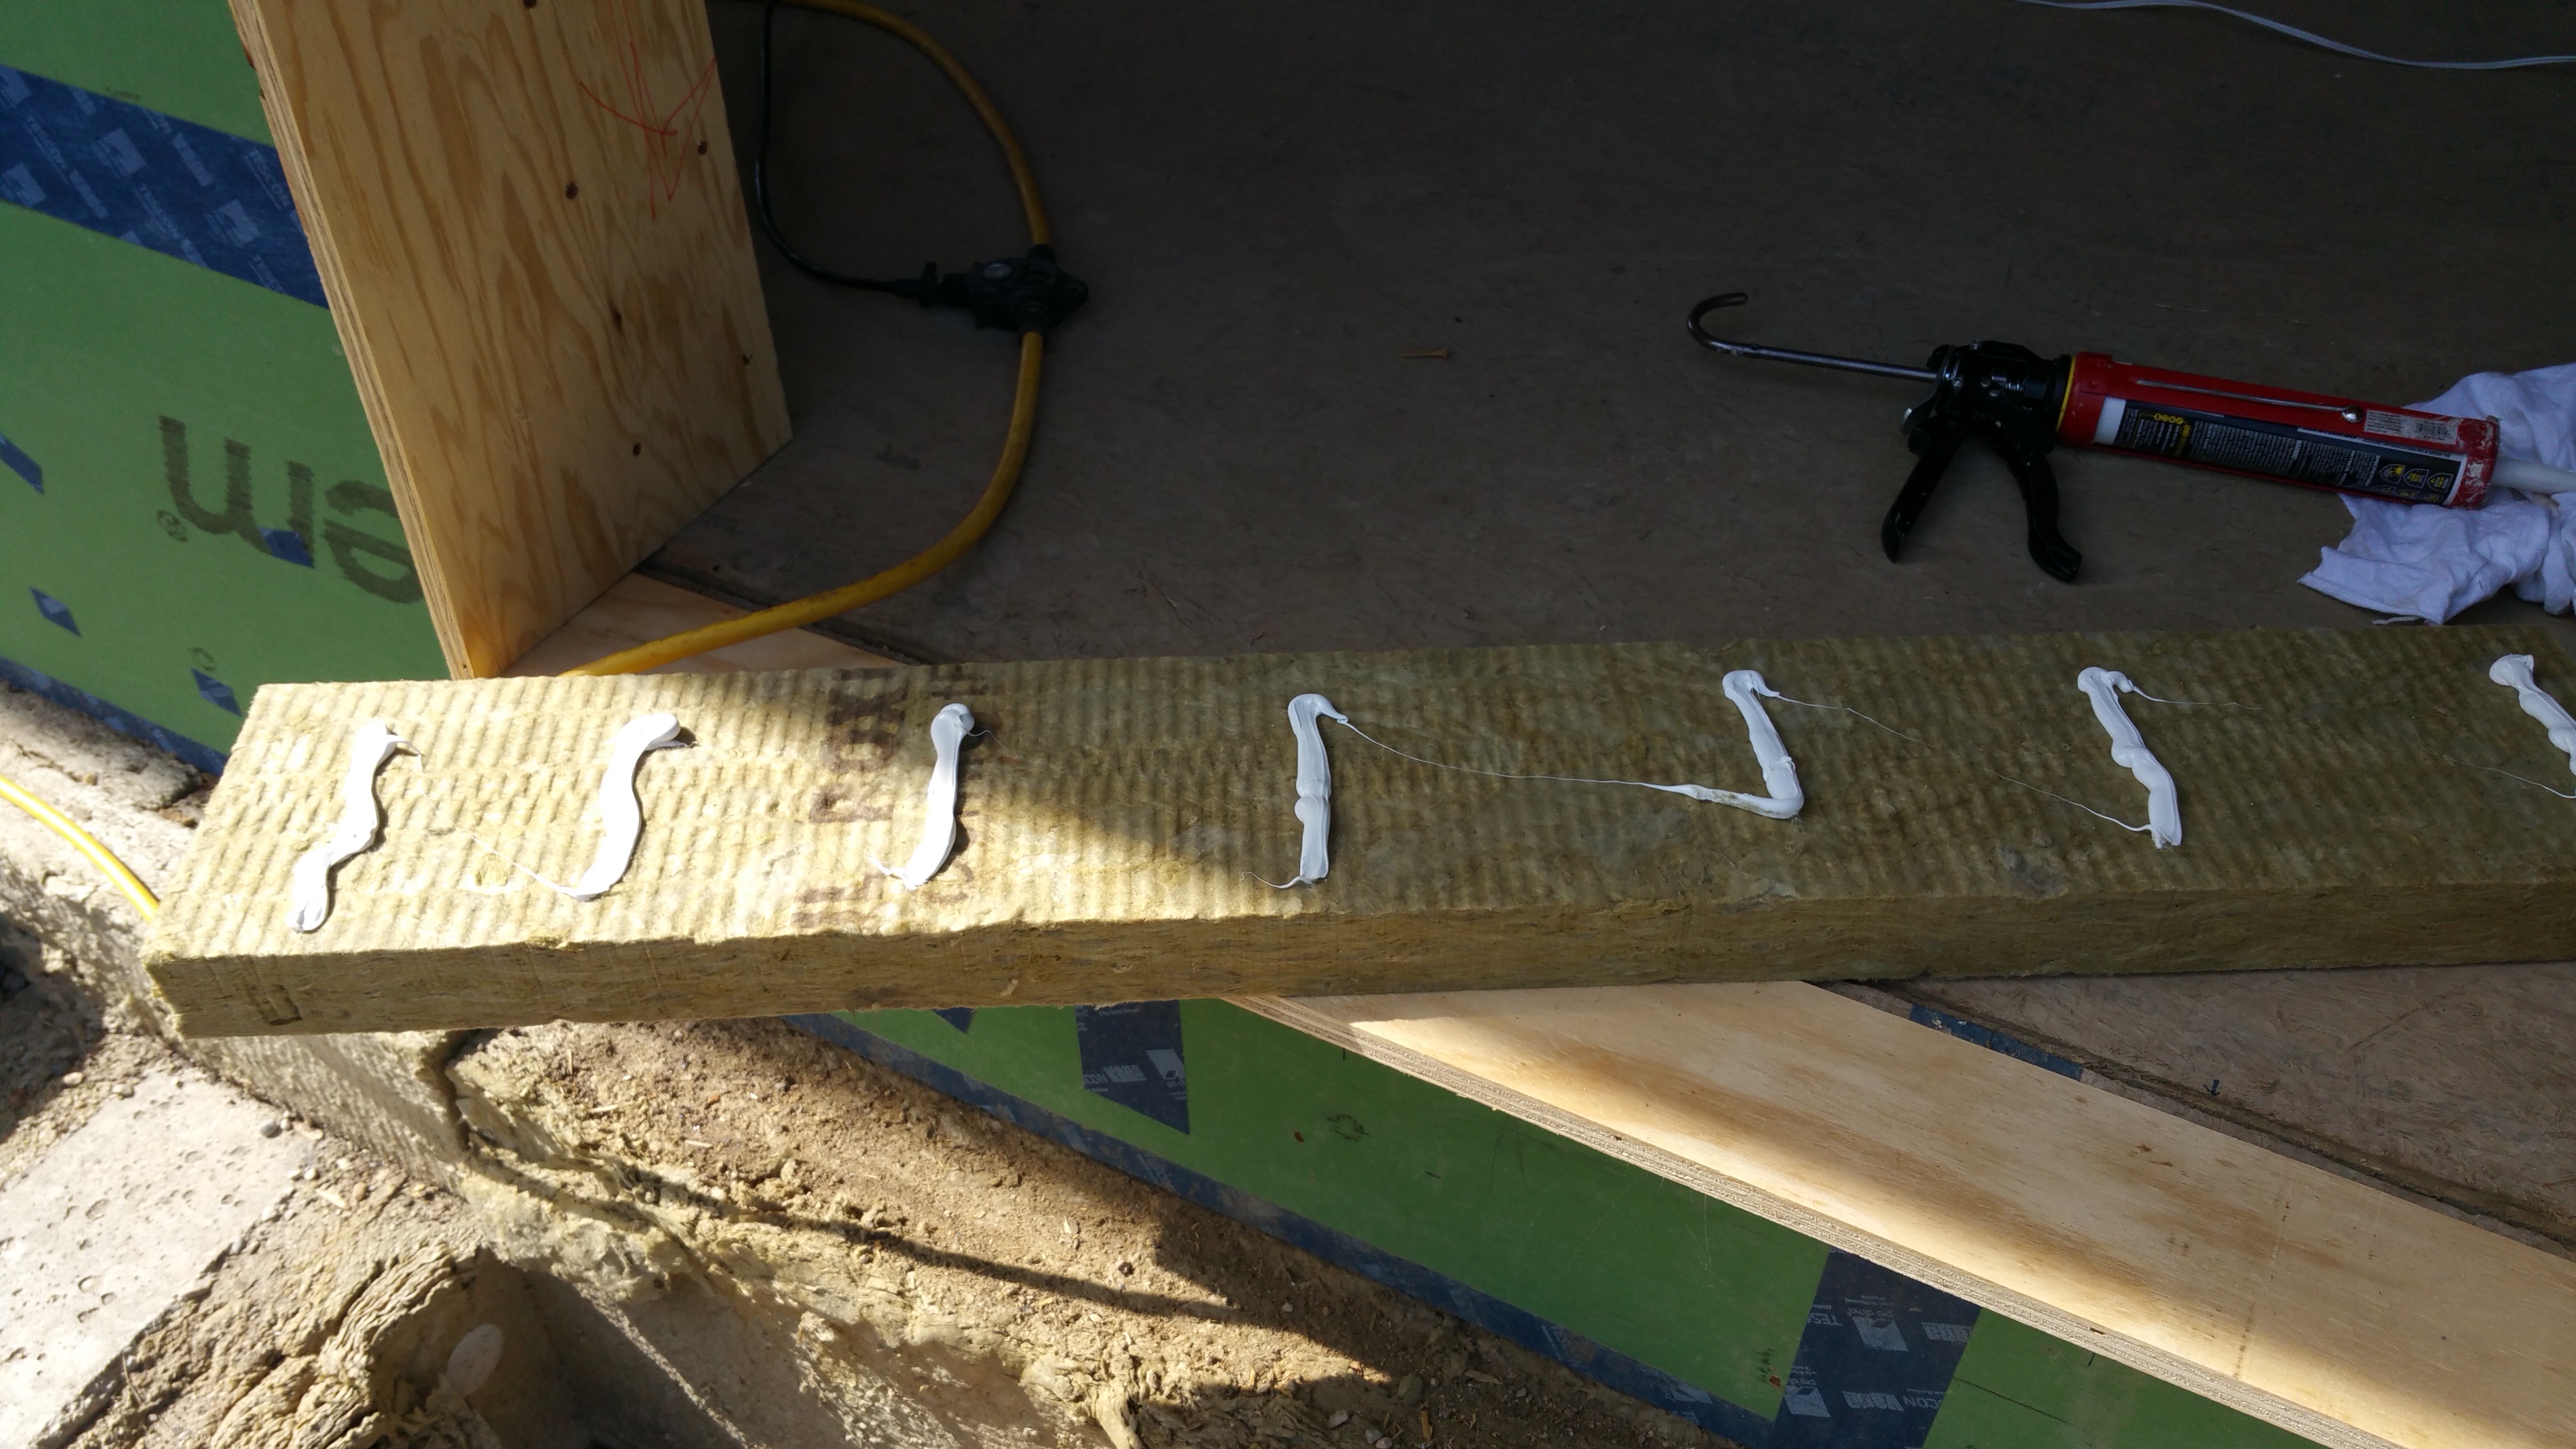
After the Rockwool (2″ Comfortboard 80), I attached two 2×8’s with eight Headlok screws through the Zip, rim joist, and some of the floor joists as well.
We would eventually use these screws extensively to attach our first layer of furring strips through two layers of 2″ Rockwool Comfortboard 80 and our Zip sheathing (again, more on this later). I also used their 4 1/2″ screw to correct a couple of window headers that were out of square. With the spider drive, they work incredibly well.
Unfortunately, when installing the two 2×8’s I accidentally compressed the Rockwool slightly, requiring a final layer of 1/4″ plywood. Thankfully I was able to avoid compressing the Rockwool for my front door buck, so the 1/4″ plywood wasn’t necessary.
Another view of the door buck with basic components installed:
Because of the Rockwool, sealing the end grain of the 2×8’s would’ve been difficult with only the tapes, so I first applied the HF Sealant to try and create a monolithic surface:

If I had it to do over, I’d use Prosoco’s Fast Flash since, unlike the HF Sealant, it’s vapor open, so probably a better long-term solution should moisture of any kind find its way to this area. Once the HF Sealant was dry, it was straightforward to apply the Extoseal Encors.
But before applying the Extoseal Encors, I applied the tapes in the same pattern and manner as I did for all the window bucks.
I also added additional layers of Rockwool and a final layer of pink rigid foam to bring everything out to the same plane before installing the Extoseal Encors.
Also, in addition to the Extoseal Encors across the face of the pink foam, the concrete sub later applied a layer of EPDM rubber to try and prevent moisture intrusion/damage in this area.
Although the Extoseal Encors looks great when it first goes on, once temperatures rise it becomes gooey in the sun, so it was a challenge to maintain its integrity before the door went in. If I could do it over, I would hold off on installing the Extoseal Encors until the day before, or the morning of, the door’s installation.

From outside, a close-up of the right outside corner of the door buck:
And a view of the completed door buck:

For the front entry door buck I repeated the same assembly of components (minus the 1/4″ plywood and pink rigid foam), the only major change a switch to Prosoco’s R-Guard series of products; namely their Joint and Seam and Fast Flash, replacing the Pro Clima tapes and HF Sealant.
Before the start of construction, I intended to use the Prosoco products for all the air and water sealing details, but when it looked like construction would happen in the winter of 2016-17 I knew I had to change to tapes since most of them can be applied below 20° F (this includes the HF sealant), while the R-Guard series of products can only be applied in above-freezing temperatures (you’ll want to contact the manufacturers for exact installation directions and requirements).
Since it was August by the time I did the front door buck, I decided to try the Prosoco products just so I could compare them to the European-style tapes I had been using. I was able to find the R-Guard series of products online at World Class Supply.

Exterior head and legs of the door buck covered in Joint and Seam and Fast Flash:
Upper right corner of the front door buck after applying Joint and Seam and Fast Flash:

Lower left outside view of the front door buck after Rockwool, 2-2×8’s, Joint and Seam, and Fast Flash have been installed and applied:
There were a few gaps between the Rockwool and other components around the house where the Joint and Seam seemed to work surprisingly well as a sealant. Even though the Rockwool is fibrous, the Joint and Seam was still able to stick tenaciously — hopefully it continues to work in the long-term.
And here’s a couple more pics of the completed door buck, ready for the front door:
Standing indoors, looking down at the right corner of the front entry door buck:
As things turned out, this front door buck would end up exposed to construction foot traffic and the elements for about 4 months. Having a cheap, temporary front door helped to keep most of the rain out, but even so, the Fast Flash held up surprisingly well. Apart from a couple of tiny touch-ups with additional Fast Flash just prior to the front door being installed, there was little damage to the membrane.
And once the house was done, most people when entering or exiting skip the metal flashing and the door’s threshold (the area I was trying to give added support), preferring to step directly from the concrete stoop into the house and onto the tile since it feels more natural, but it’s nice to know that if these areas ever do see serious weight (e.g. moving heavy appliances or furniture) that it’s fully supported.
Just recently I had time to look through William Maclay’s book The New Net Zero, a fantastic resource I would’ve loved to have before and during our build, and I noticed in a diagram on page 343 the use of a (4″ x 4″) piece of fiberglass angle: “… fasten to rim joist to support extension of floor at door opening”.
If I could do it over, I would use the fiberglass angle instead of the two 2×8’s. Last winter we had a cold spell for about two weeks where temperatures stayed in single digits, and although I checked behind my Rockwool in the basement just below my two door openings at the rim joists for any signs of moisture issues and found nothing (luckily), the fiberglass angle seems like a much simpler solution since it’s thermally broken and much smaller than my two 2×8’s, which would’ve meant I could’ve almost completely insulated below the door bucks while also giving this area plenty of long-term structural support.
Of course, consulting a structural engineer or architect wouldn’t hurt either, just to establish exactly what’s required for tackling this area.
For anyone who’s interested, I found the following suppliers for fiberglass angle online:
Grainger
Strongwell
Air Sealing Products: Tapes or Liquid Membranes?
In regards to air sealing, I was really impressed with the Pro Clima series of tapes and their HF Sealant. I was equally impressed with the Prosoco R-Guard series of products (Joint and Seam, Fast Flash, and Air Dam).
Because I found the Prosoco series of products slightly easier to use since they’re less fussy to apply, I would choose tapes or liquid membranes based on the weather conditions of the job site: If it’s going to be too cold to use the Prosoco, then I would use the tapes (and the HF Sealant). Otherwise, I’d probably stick to the liquid membranes. I’m guessing the choice typically comes down to personal preference of the installers (apart from weather restrictions), or what the architect specifies on the drawings.
Here are some videos showing various liquid membranes in action:
And there are now other copycat products available:
And 475 HPBS and Pro Clima now offer their own version of a liquid applied membrane:
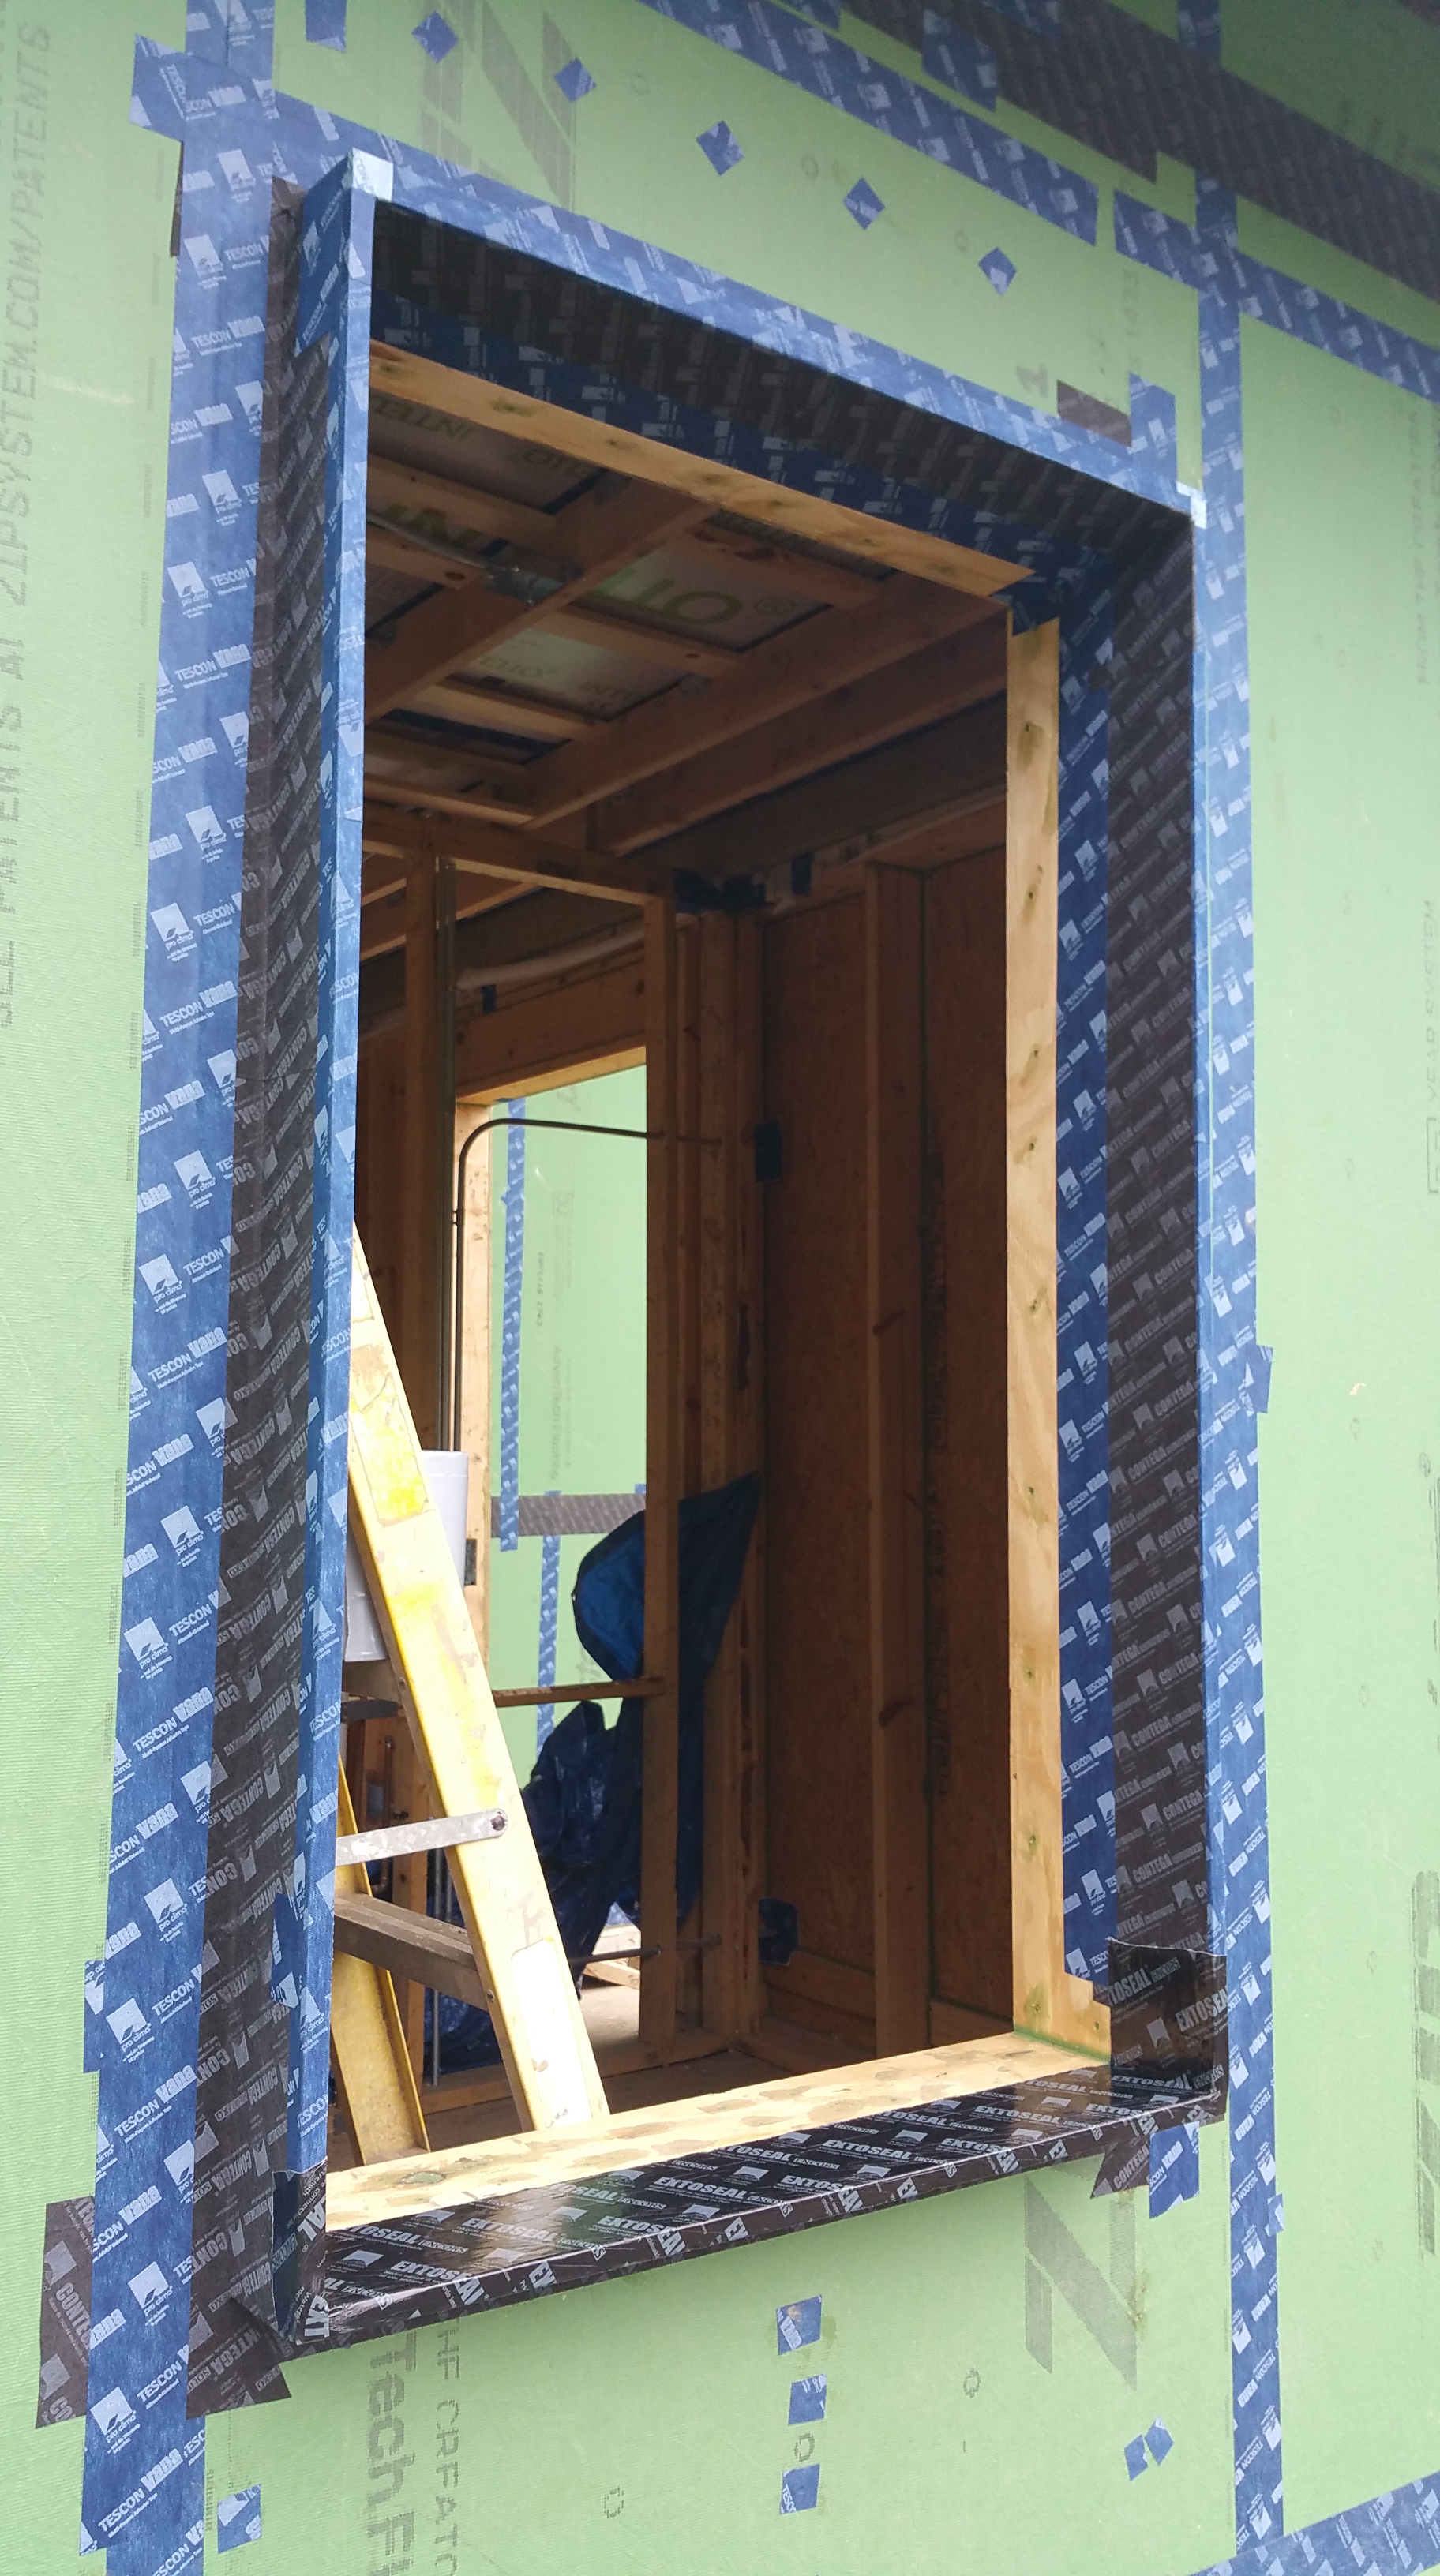
Completing Air and Water Sealing of the Windows and Doors (Interior)
Our Unilux sales rep was nice enough to arrange for Bob Riggs and his crew to come down from Wisconsin to install all of our windows and doors. After firing our two GC’s, we really didn’t know who to use for the install. Not many contractors in the Chicago area have experience with these type of windows and doors, so it was hardly straightforward to find someone.
We had ordered our windows in September, 2016, we had fired our GC’s in February, 2017, and we were finally able to install our windows June, 2017. It had been a long wait, so we were excited and nervous to watch them go in. Familiar with Germany’s reputation for engineering excellence, it was one of the more exciting aspects of the build.

Bob and his crew did a great job for us. We’re lucky and extremely thankful that they were willing to come down to help us out of a jam. And the guys they used from JPK Builders to help them with the install were also extremely professional and easy to work with (more on this below).
As far as installation details, for the most part the guys followed the steps outlined in this Hammer and Hand video, only changing the Tremco illbruck tape for Hannoband 3E tape:
I chose to go with the Hannoband 3E tape, but there are any number of options for air and water sealing around windows and doors:
Here’s a video detailing the use of the Hannoband 3E black expanding foam tape, which I purchased from Small Planet Supply:
The Hannoband tape has some nice characteristics, such as adding some R-value to the gap, it’s water and air tight, but it’s also vapor-open. It’s also easy to work with and install, it performs really well, and using it means not having to fill the gap between window and framing with canned spray foam (prone to failure according to some Passive House designers and builders). Overall, it just seems like an elegant solution for air and water sealing what can otherwise be a difficult gap to address effectively.
Here’s a short video from Tremco showing how these expanding black foam tapes work:
And here’s a photo of the Hannoband 3E, dramatically showing just how much expansion it’s capable of if left unimpeded:

It also comes in different sizes to better match the gap that needs filling.
The photo below was taken shortly after installation, before the foam had a chance to fully expand.
Here’s a similar corner after the foam has had time to completely expand. The HF Sealant in the corner is just added insurance against air leaks.

It was pretty impressive to see gaps like this on the day of installation:
Only to come back the next day to find the gap completely closed by the expanding foam tape:
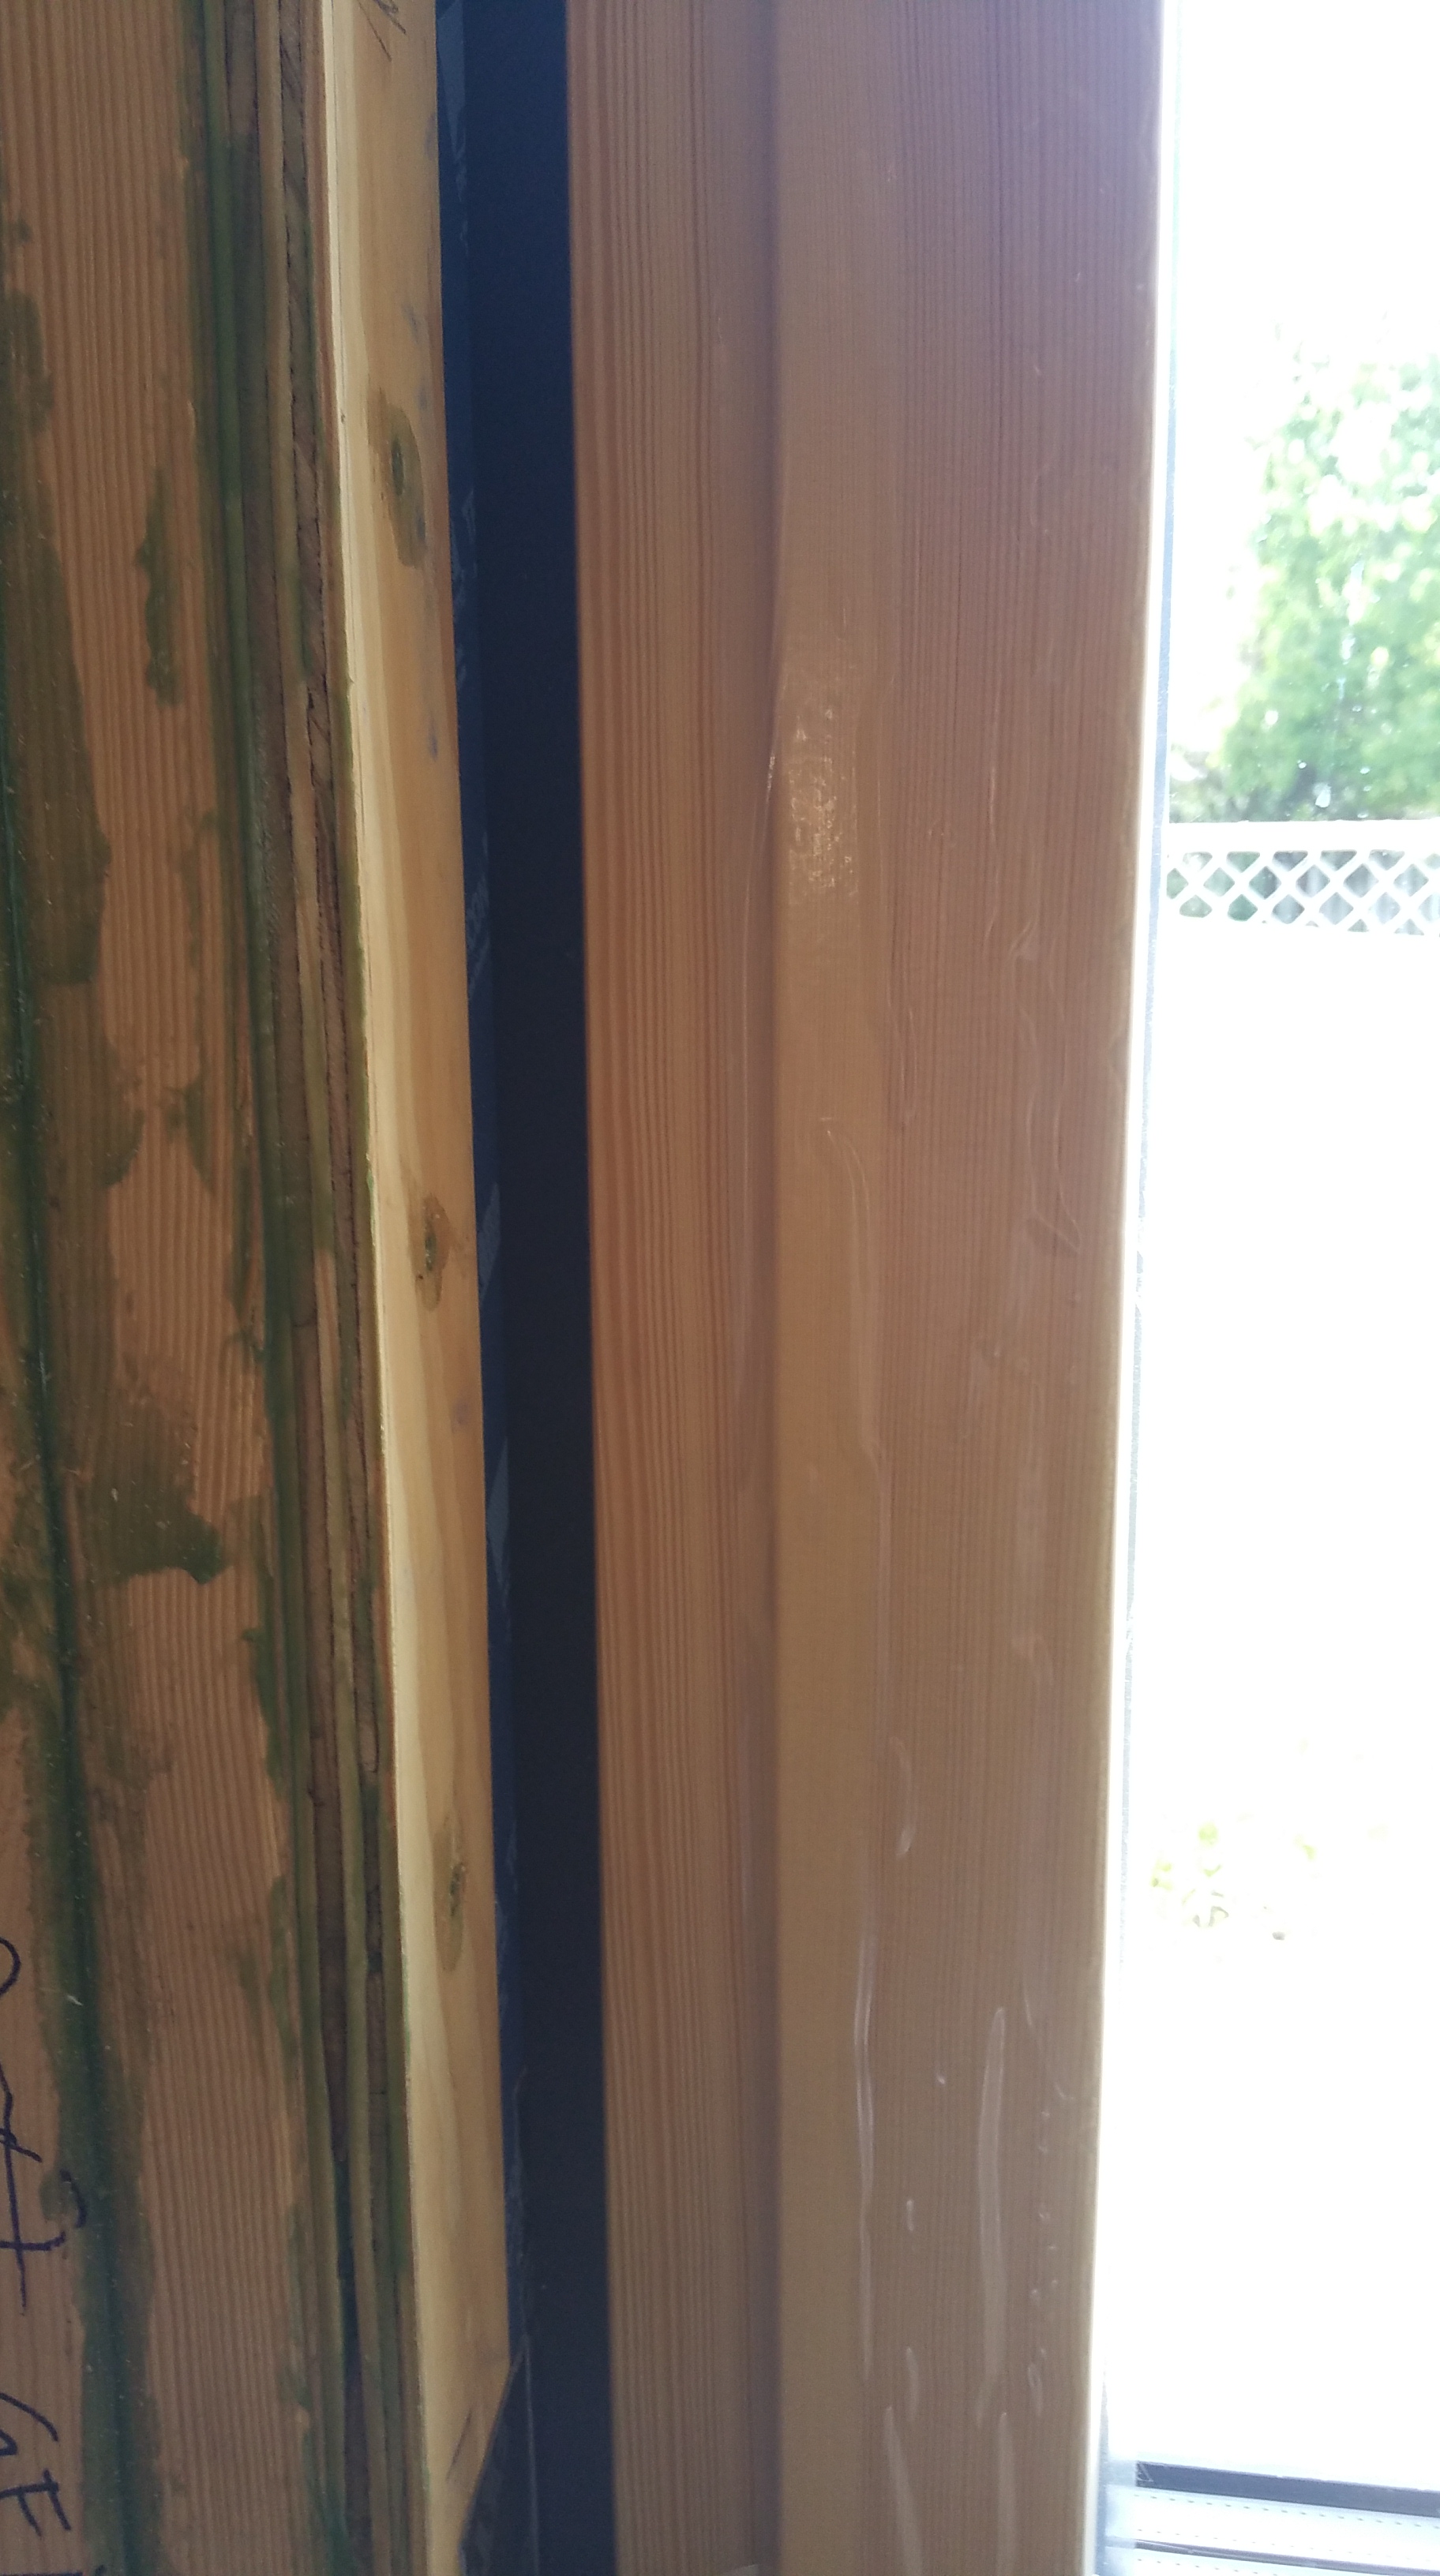
I put the Hannoband on ice the morning of the installation since the cold is said to slow down the rate of expansion, giving installers plenty of time to set windows and doors.
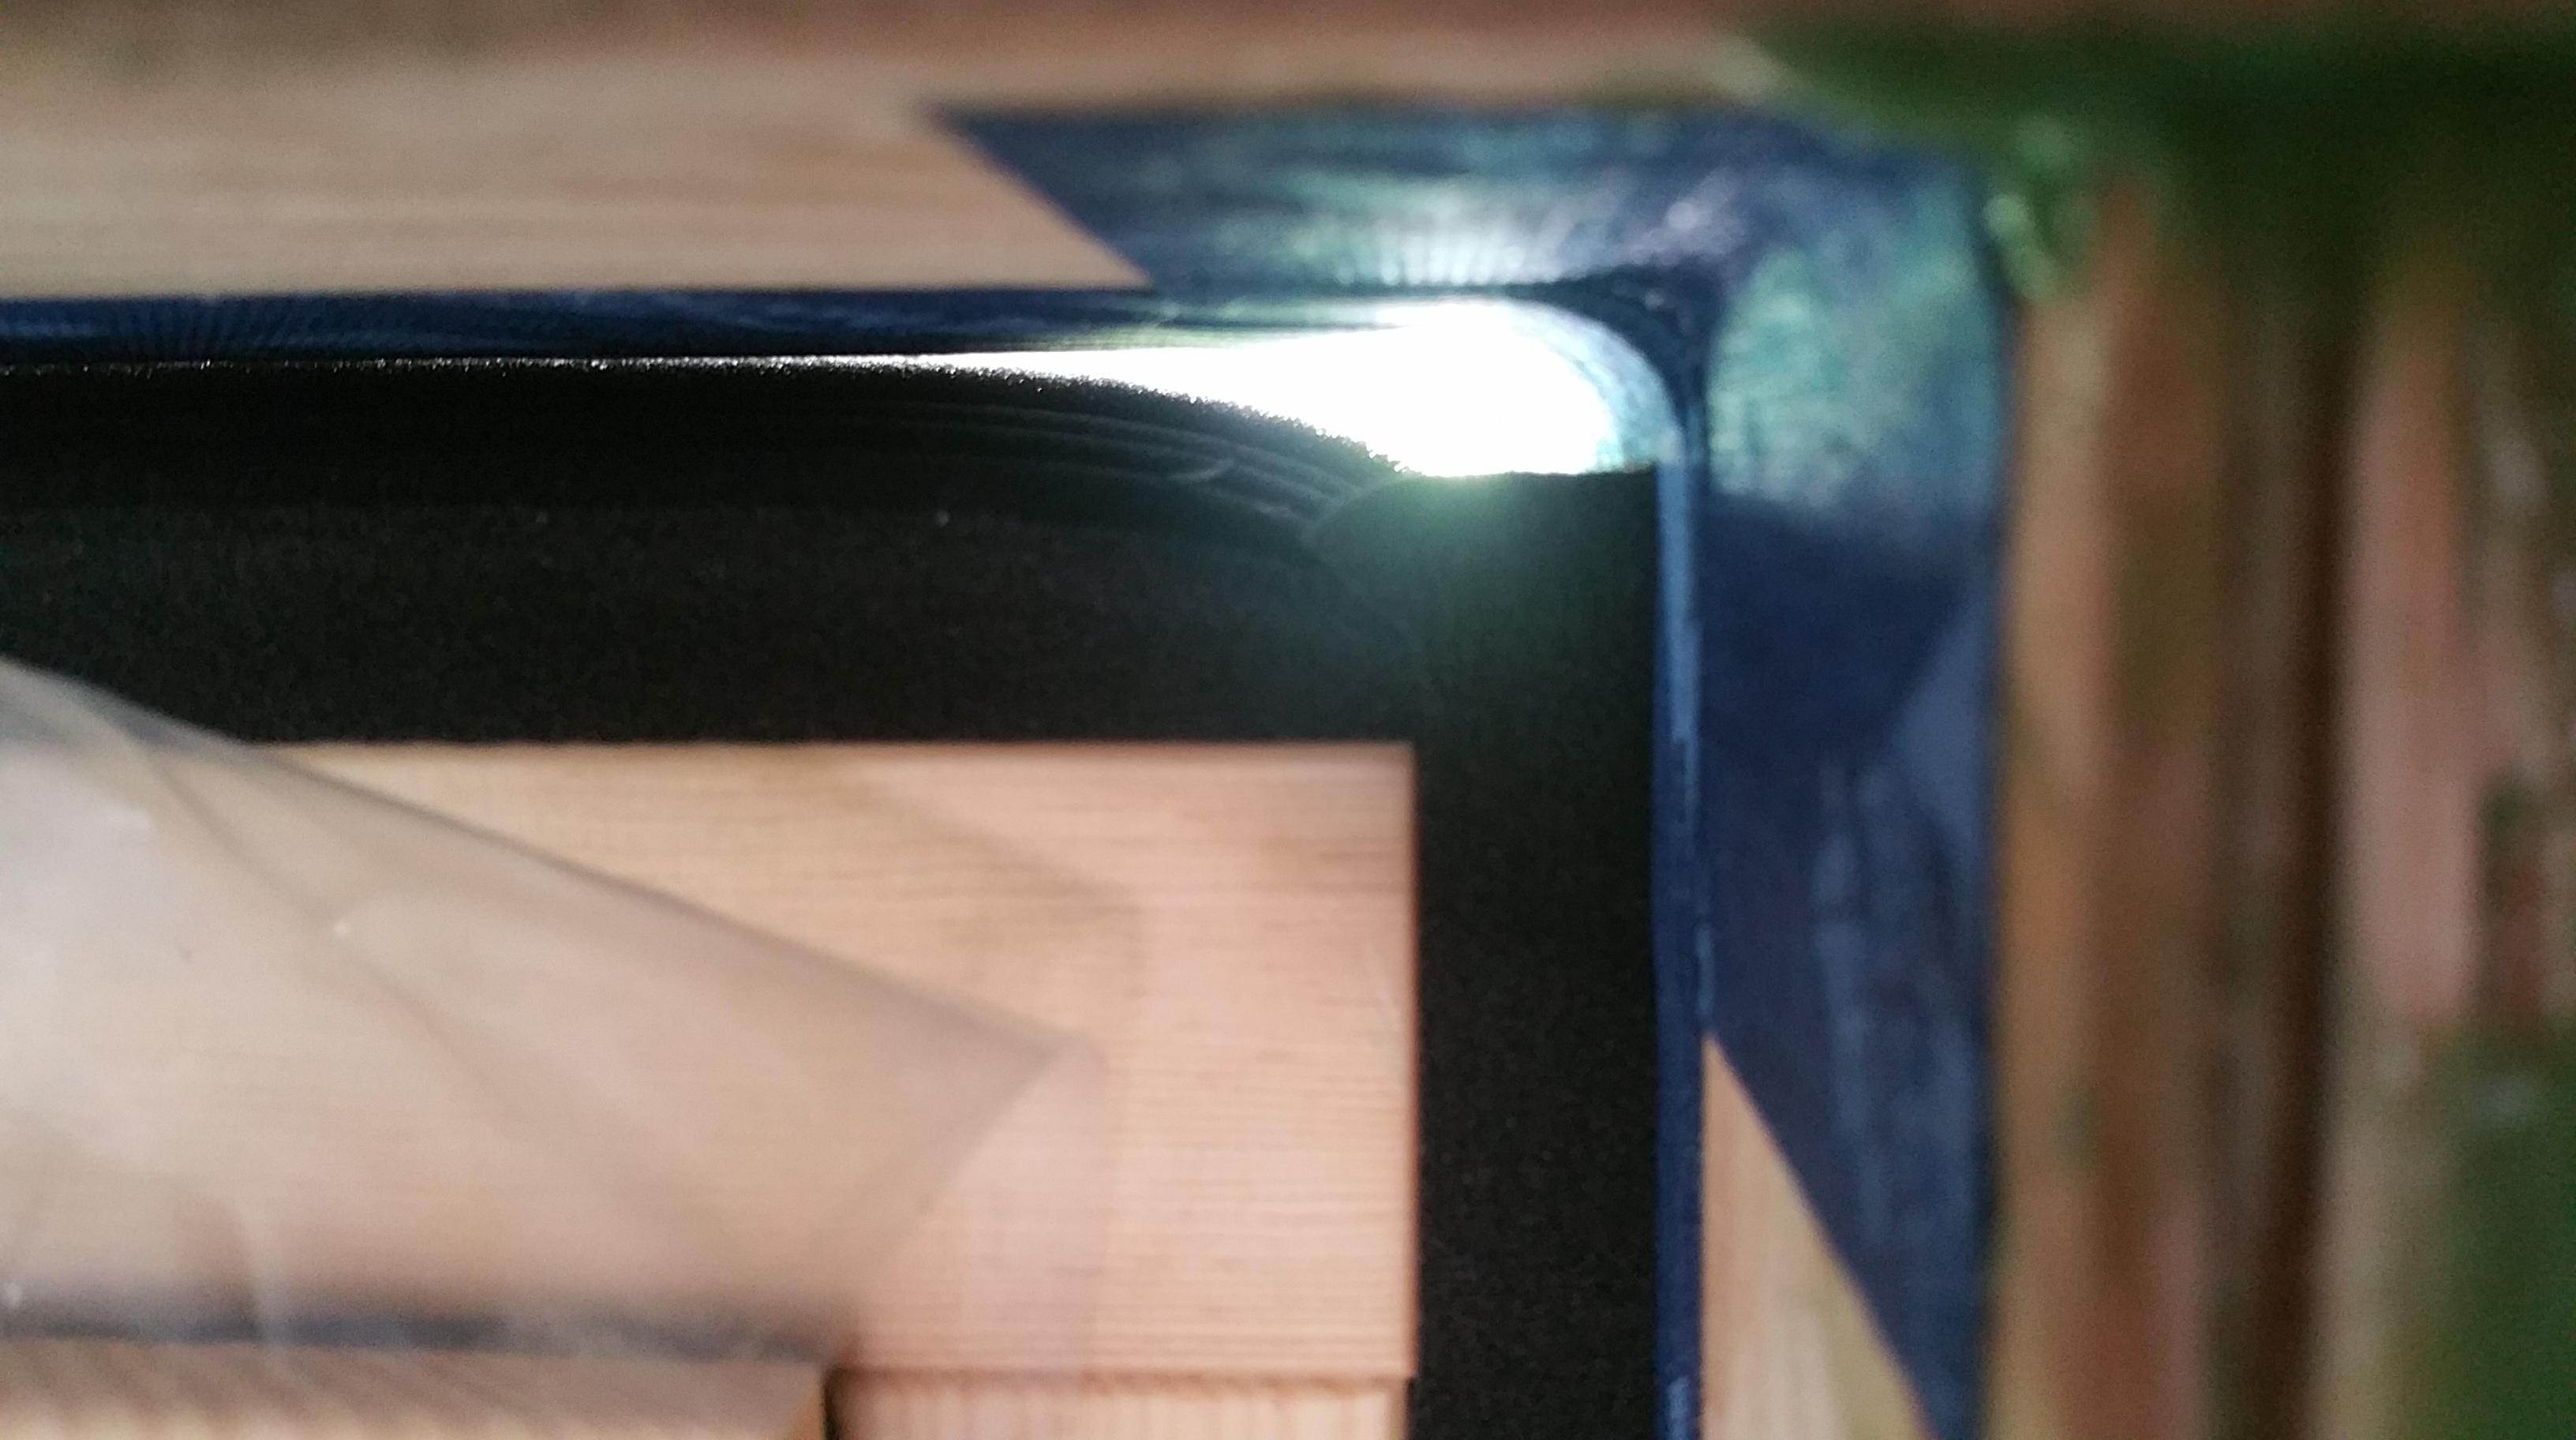
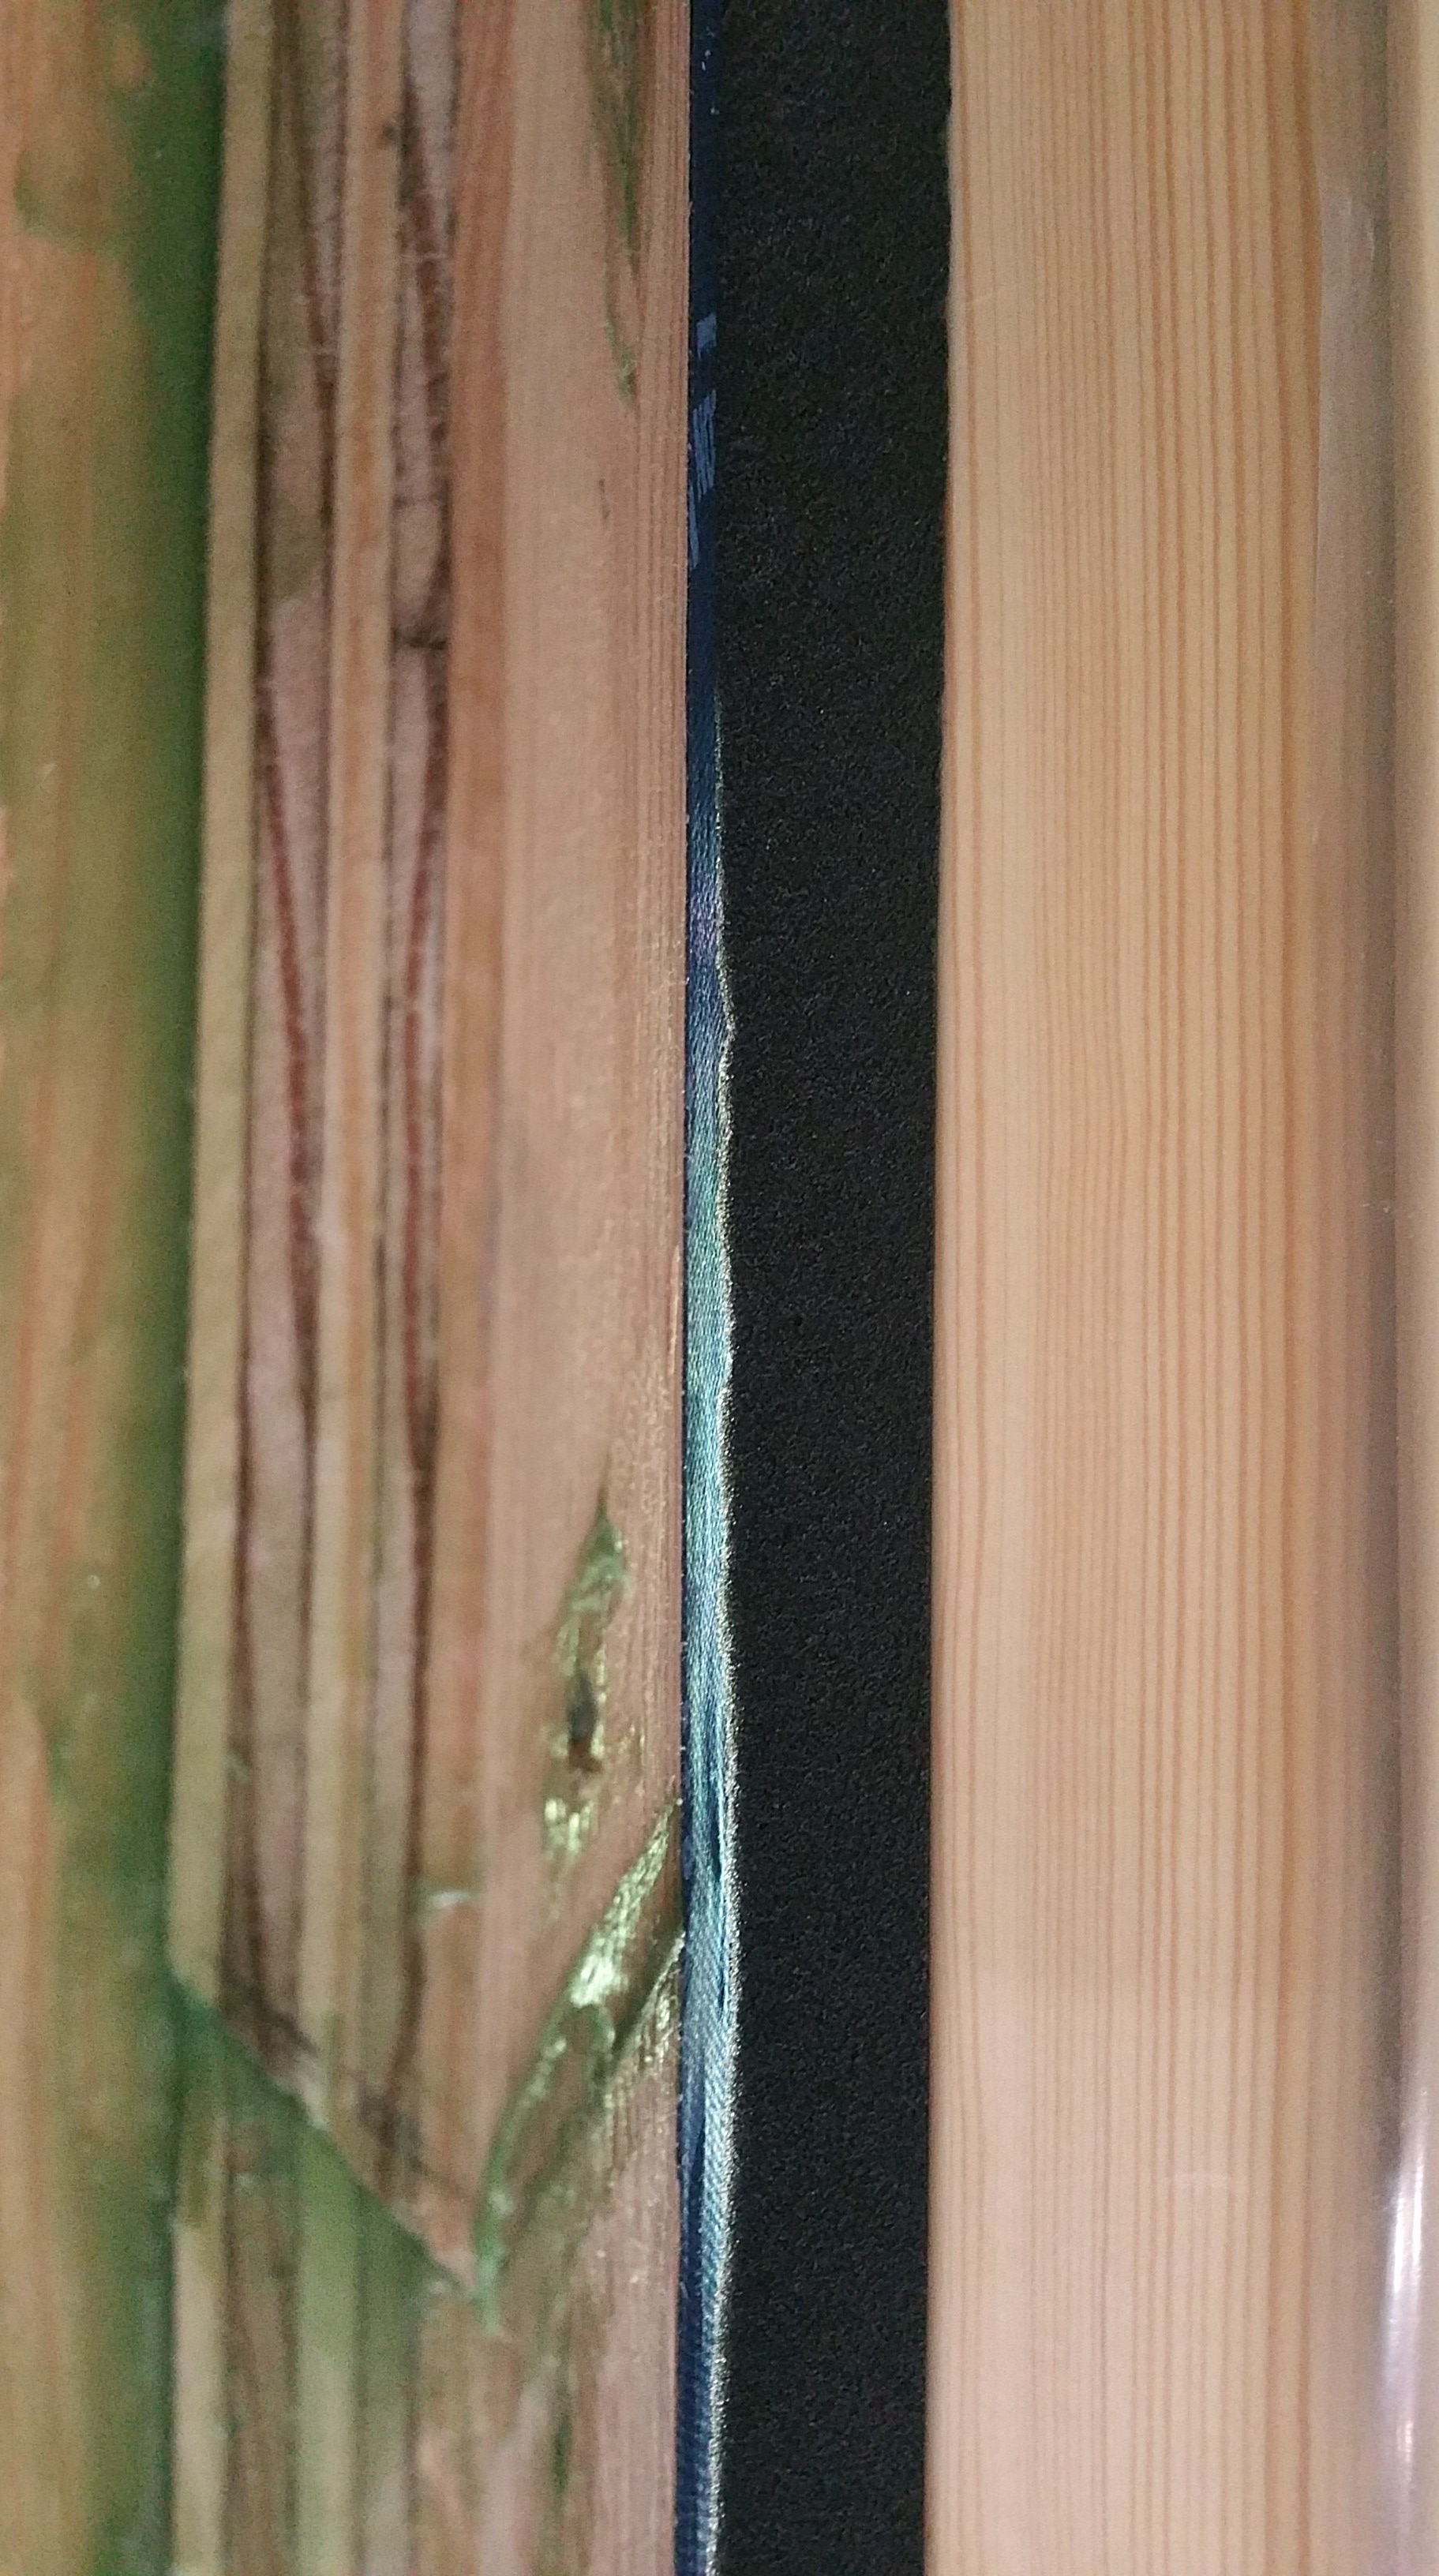
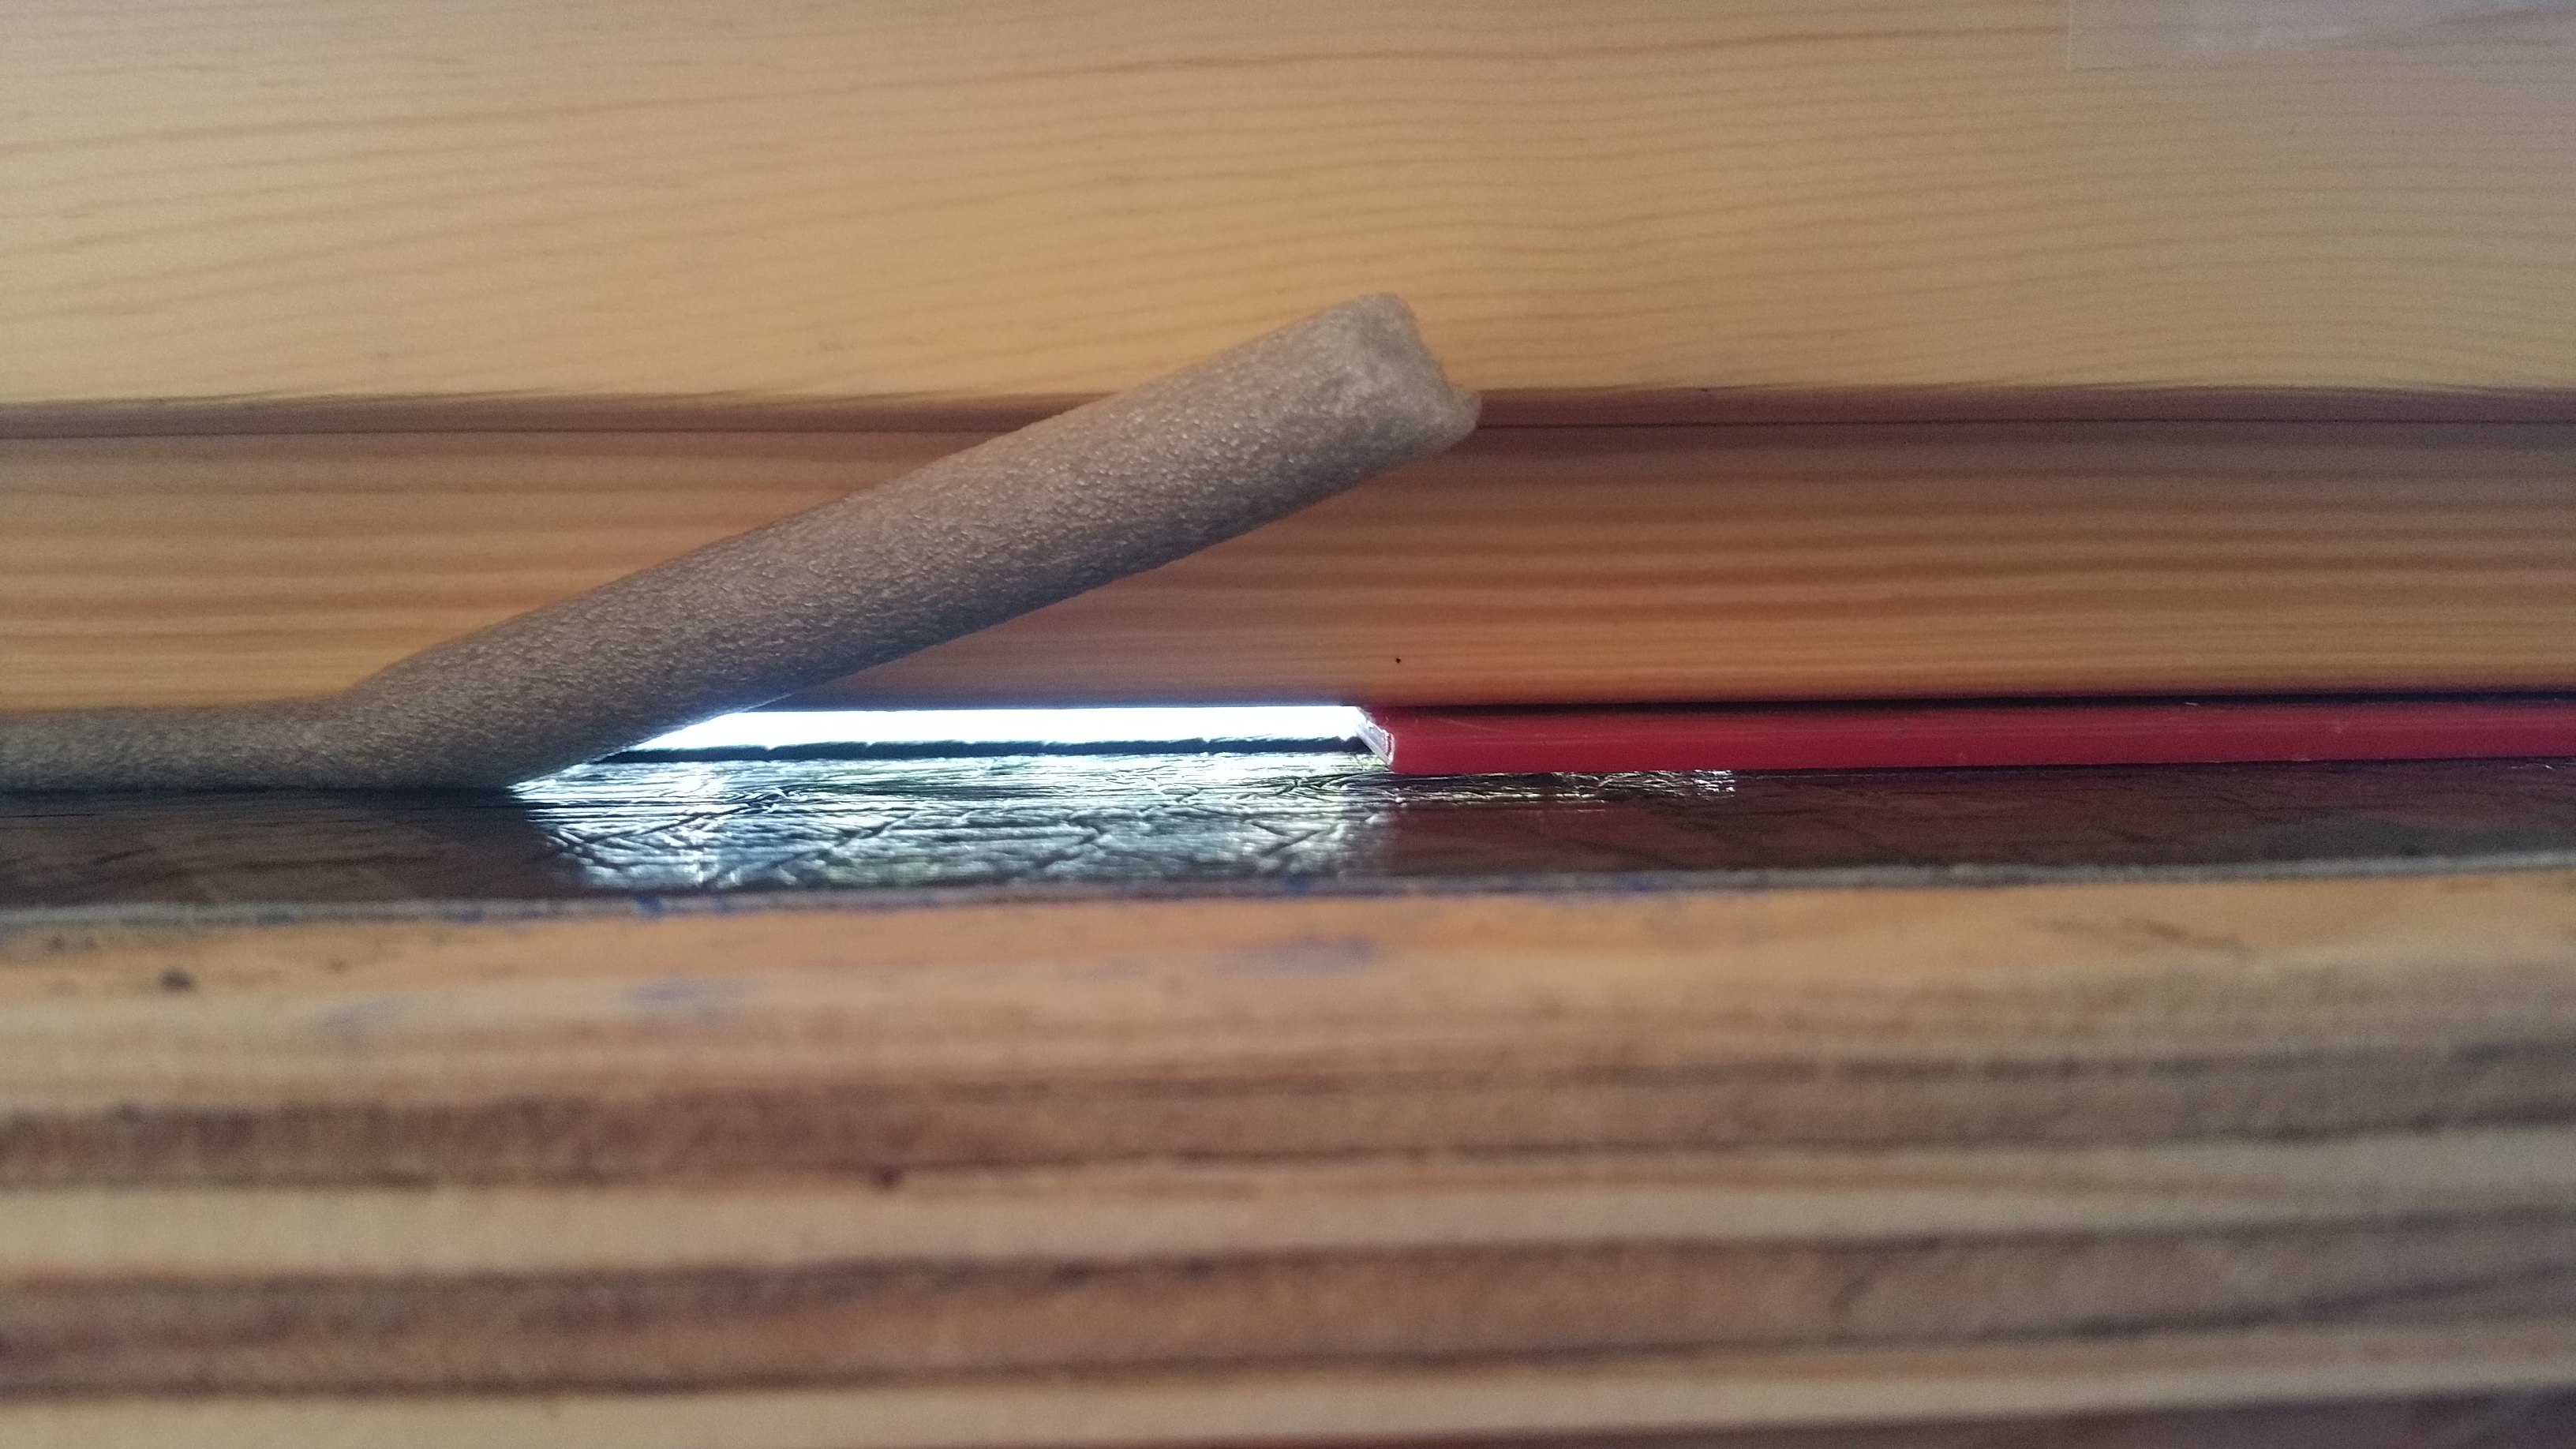
A closer view of the Hannoband 3E tape fully expanded between the window buck on the left, and the window frame on the right:

A closer view of the upper left corner of one of the windows after the Hannoband has had a chance to fully expand:
The tapes aren’t cheap, but I thought they were worth every penny.
For the bottom of the window, it wasn’t really clear if the Hannoband tape was appropriate for this area, so I followed Hammer and Hand’s lead, using backer rod to fill the bottom gap before applying HF Sealant (instead of Air Dam like in their video).
Lower left corner of the window after the Hannoband tape, backer rod, and HF sealant have been installed.
Later, for the basement windows, when I had the Prosoco R-Guard series of products on hand, I completely sealed the interior side of the two windows with the Air Dam product, which worked really well. I also used the Air Dam to seal the connection between my basement slab – rigid foam – and foundation walls. It worked really well in that application as well.
Once the Hannoband tape had a chance to completely expand (roughly 48 hours), I proceeded to tape the perimeter of the windows and kitchen door, both from the interior and the exterior. This included the exterior sills (a common air sealing technique for European windows; considered a big no-no for American-style windows).
Unfortunately, when I was outside, before applying the Profil tape across the bottom of each window, I forgot to stuff in some Roxul Comfortboard 80 (as suggested in the Hammer and Hand video above). I only realized this misstep after reviewing photos for this blog post. Worried about potential negative consequences, I asked a question on the Q&A section of GBA, and I also contacted Floris at 475 HPBS. Although this roughly 1/8″ tall gap is an unnecessary thermal bridge (thanks to my mistake), it shouldn’t impact the long-term durability of the windows or the bucks.
I rented a FLIR thermal imaging camera to check this area, and to just see how the overall structure of the house has turned out in terms of air sealing and insulation (we moved in this past Spring, 2018). Unsurprisingly, the space between the window frames and the bucks/drywall is one of the weakest areas on the entire house. Fortunately, the sills don’t show up any colder than the rest of the frame (I’ll delve more into this in a later post, including some FLIR images from around the house, after detailing the installation of our exterior insulation and siding).
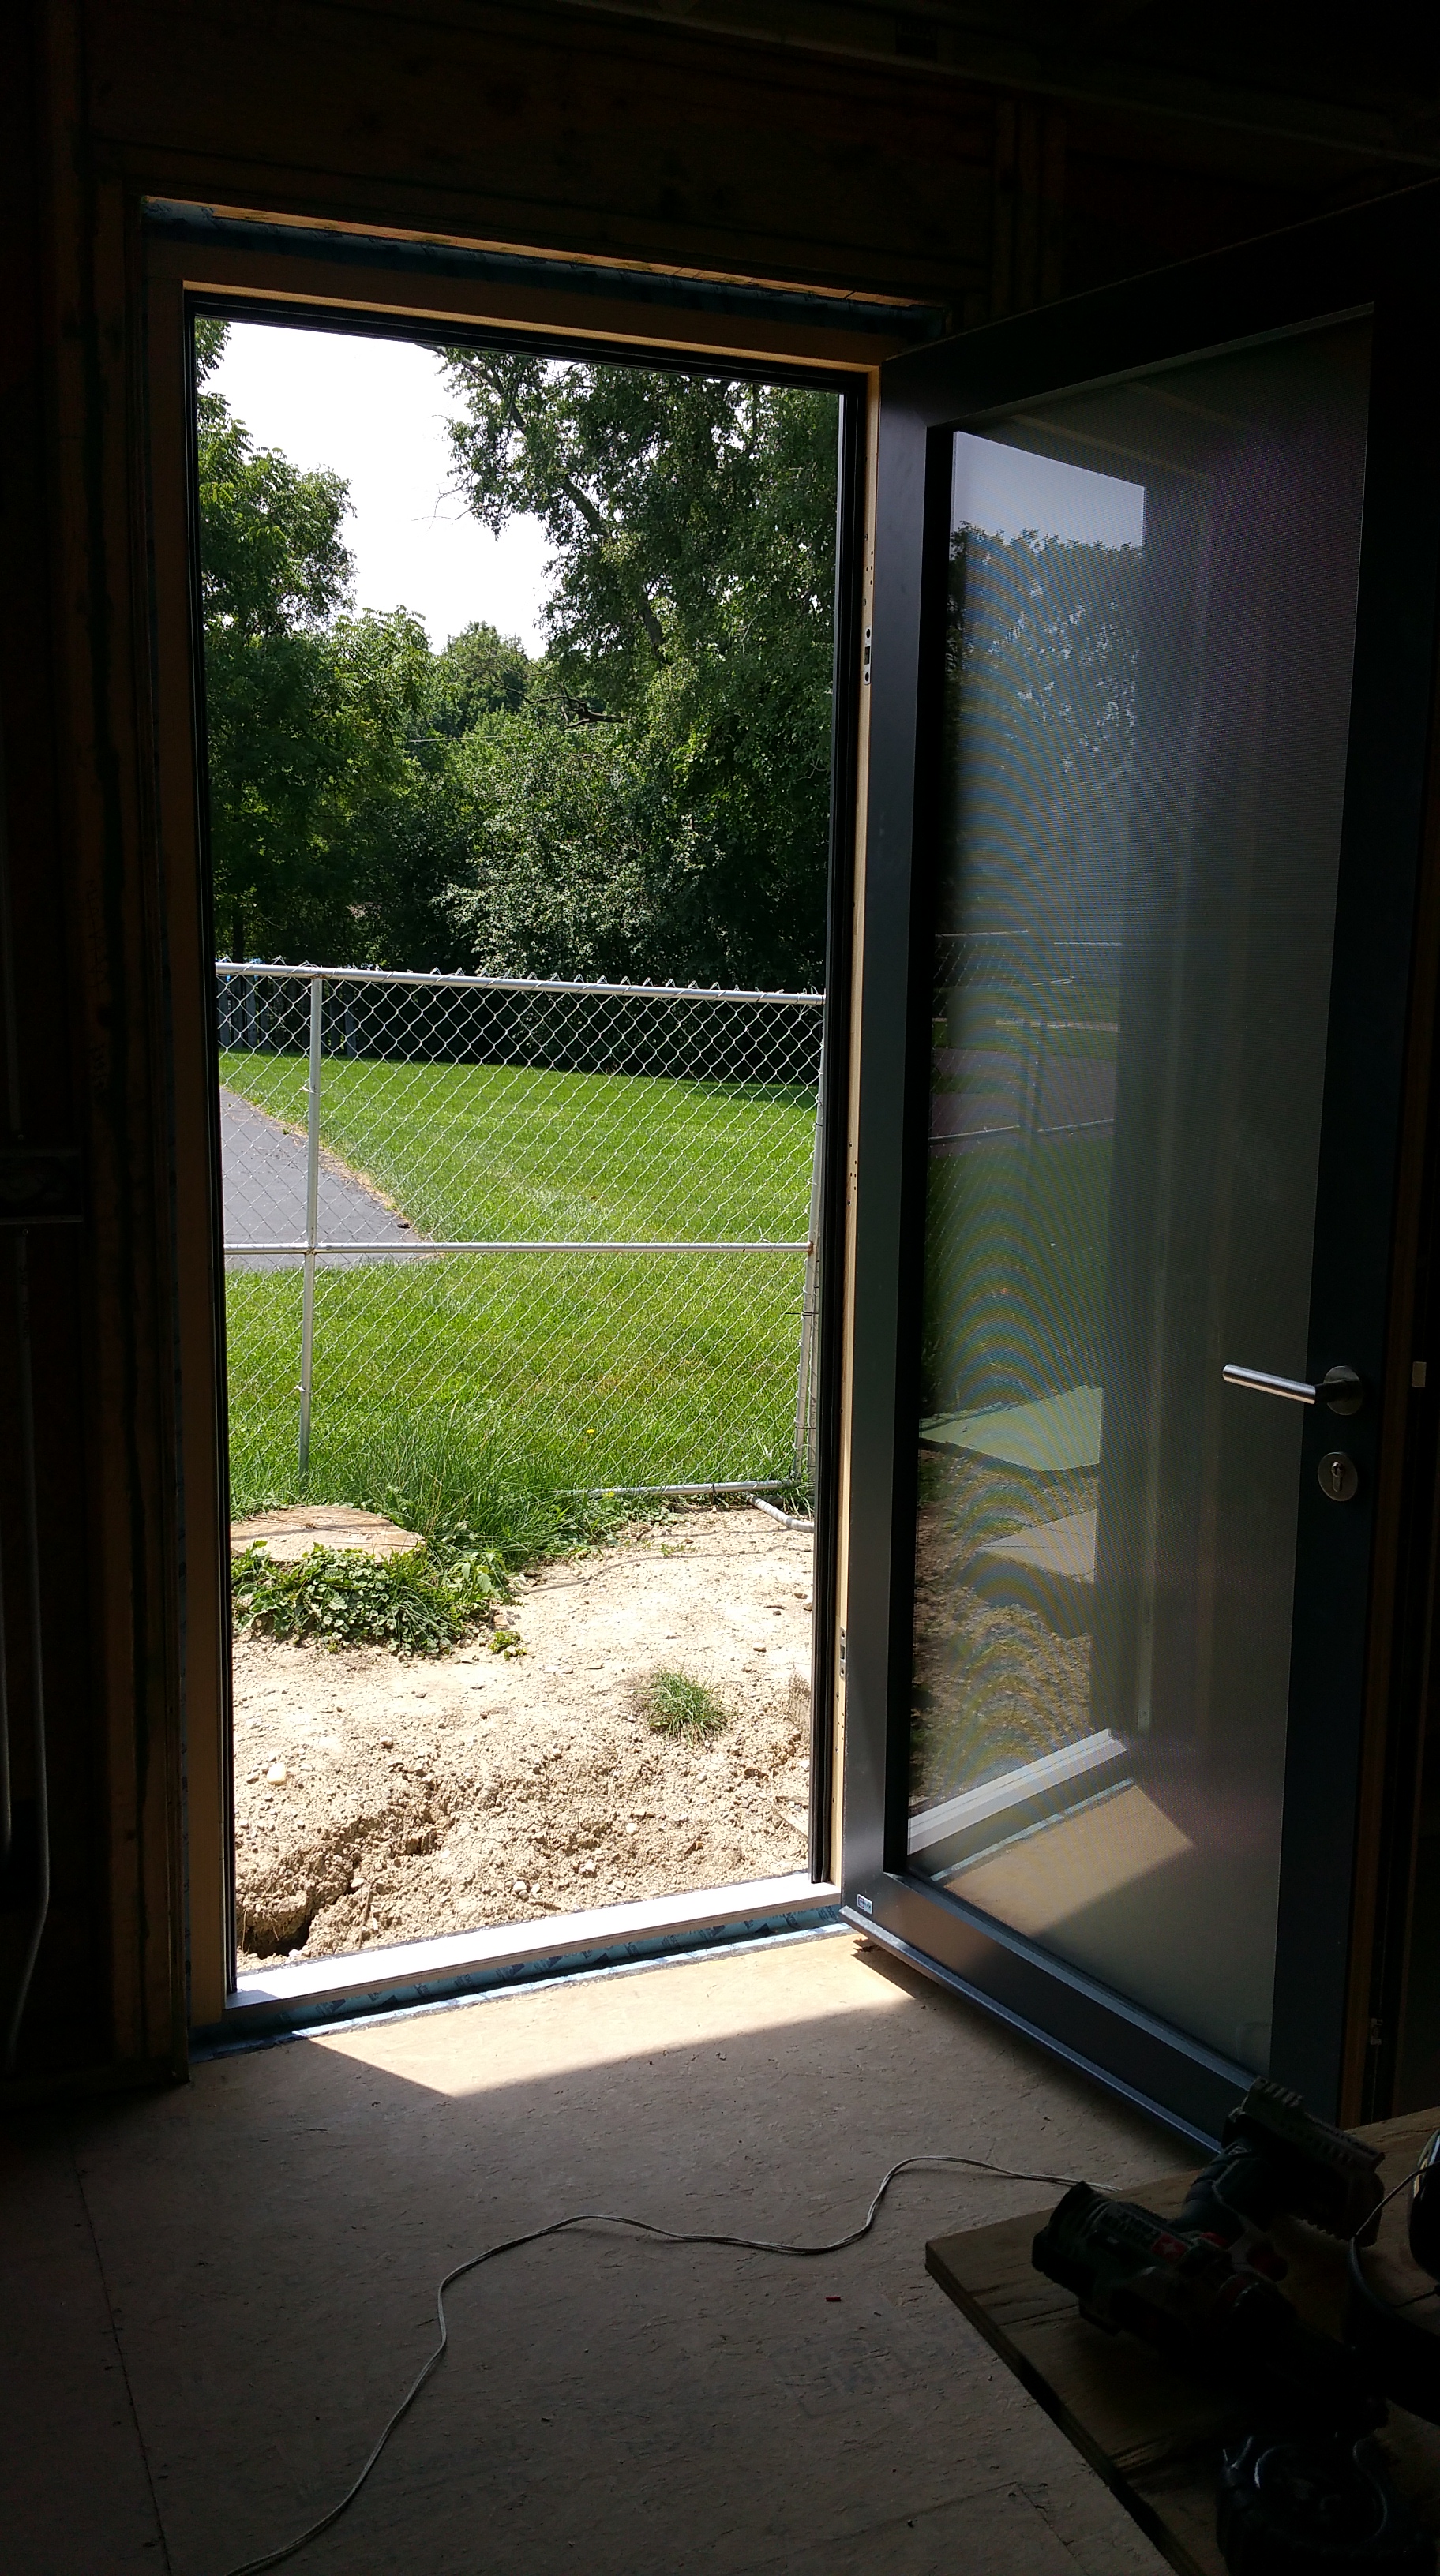
For the front door, we held off on installing it until later in the build in order to protect it from the construction process as much as possible.

Using the Profil tape for this made the process a lot easier. With its 3-part split backing, I could use the narrowest section on the window frame. It was important not to get too much tape on the frame in order to avoid interfering with final trim details (in our case, drywall returns).
On the exterior I tried using the Tescon Vana initially, thinking the gap was wide enough between frame and buck, but the Profil tape was simply much easier to use in tight spaces.
I added a little HF Sealant to all the corners just for added protection against air leaks and water intrusion.

From the outside in we had Profil tape, the Hannoband tape, and then another layer of Profil tape on the interior. Doing it this way involved some time and money, but I thought it was worth it to protect against air and water infiltration for the long-term. I would also only have one chance to get these details right, so some added redundancy also meant added peace of mind.

I also addressed the brackets on the top of the windows with a mix of HF sealant and tape after the Hannoband had fully expanded:


Over-insulating High-Performance Window Frames
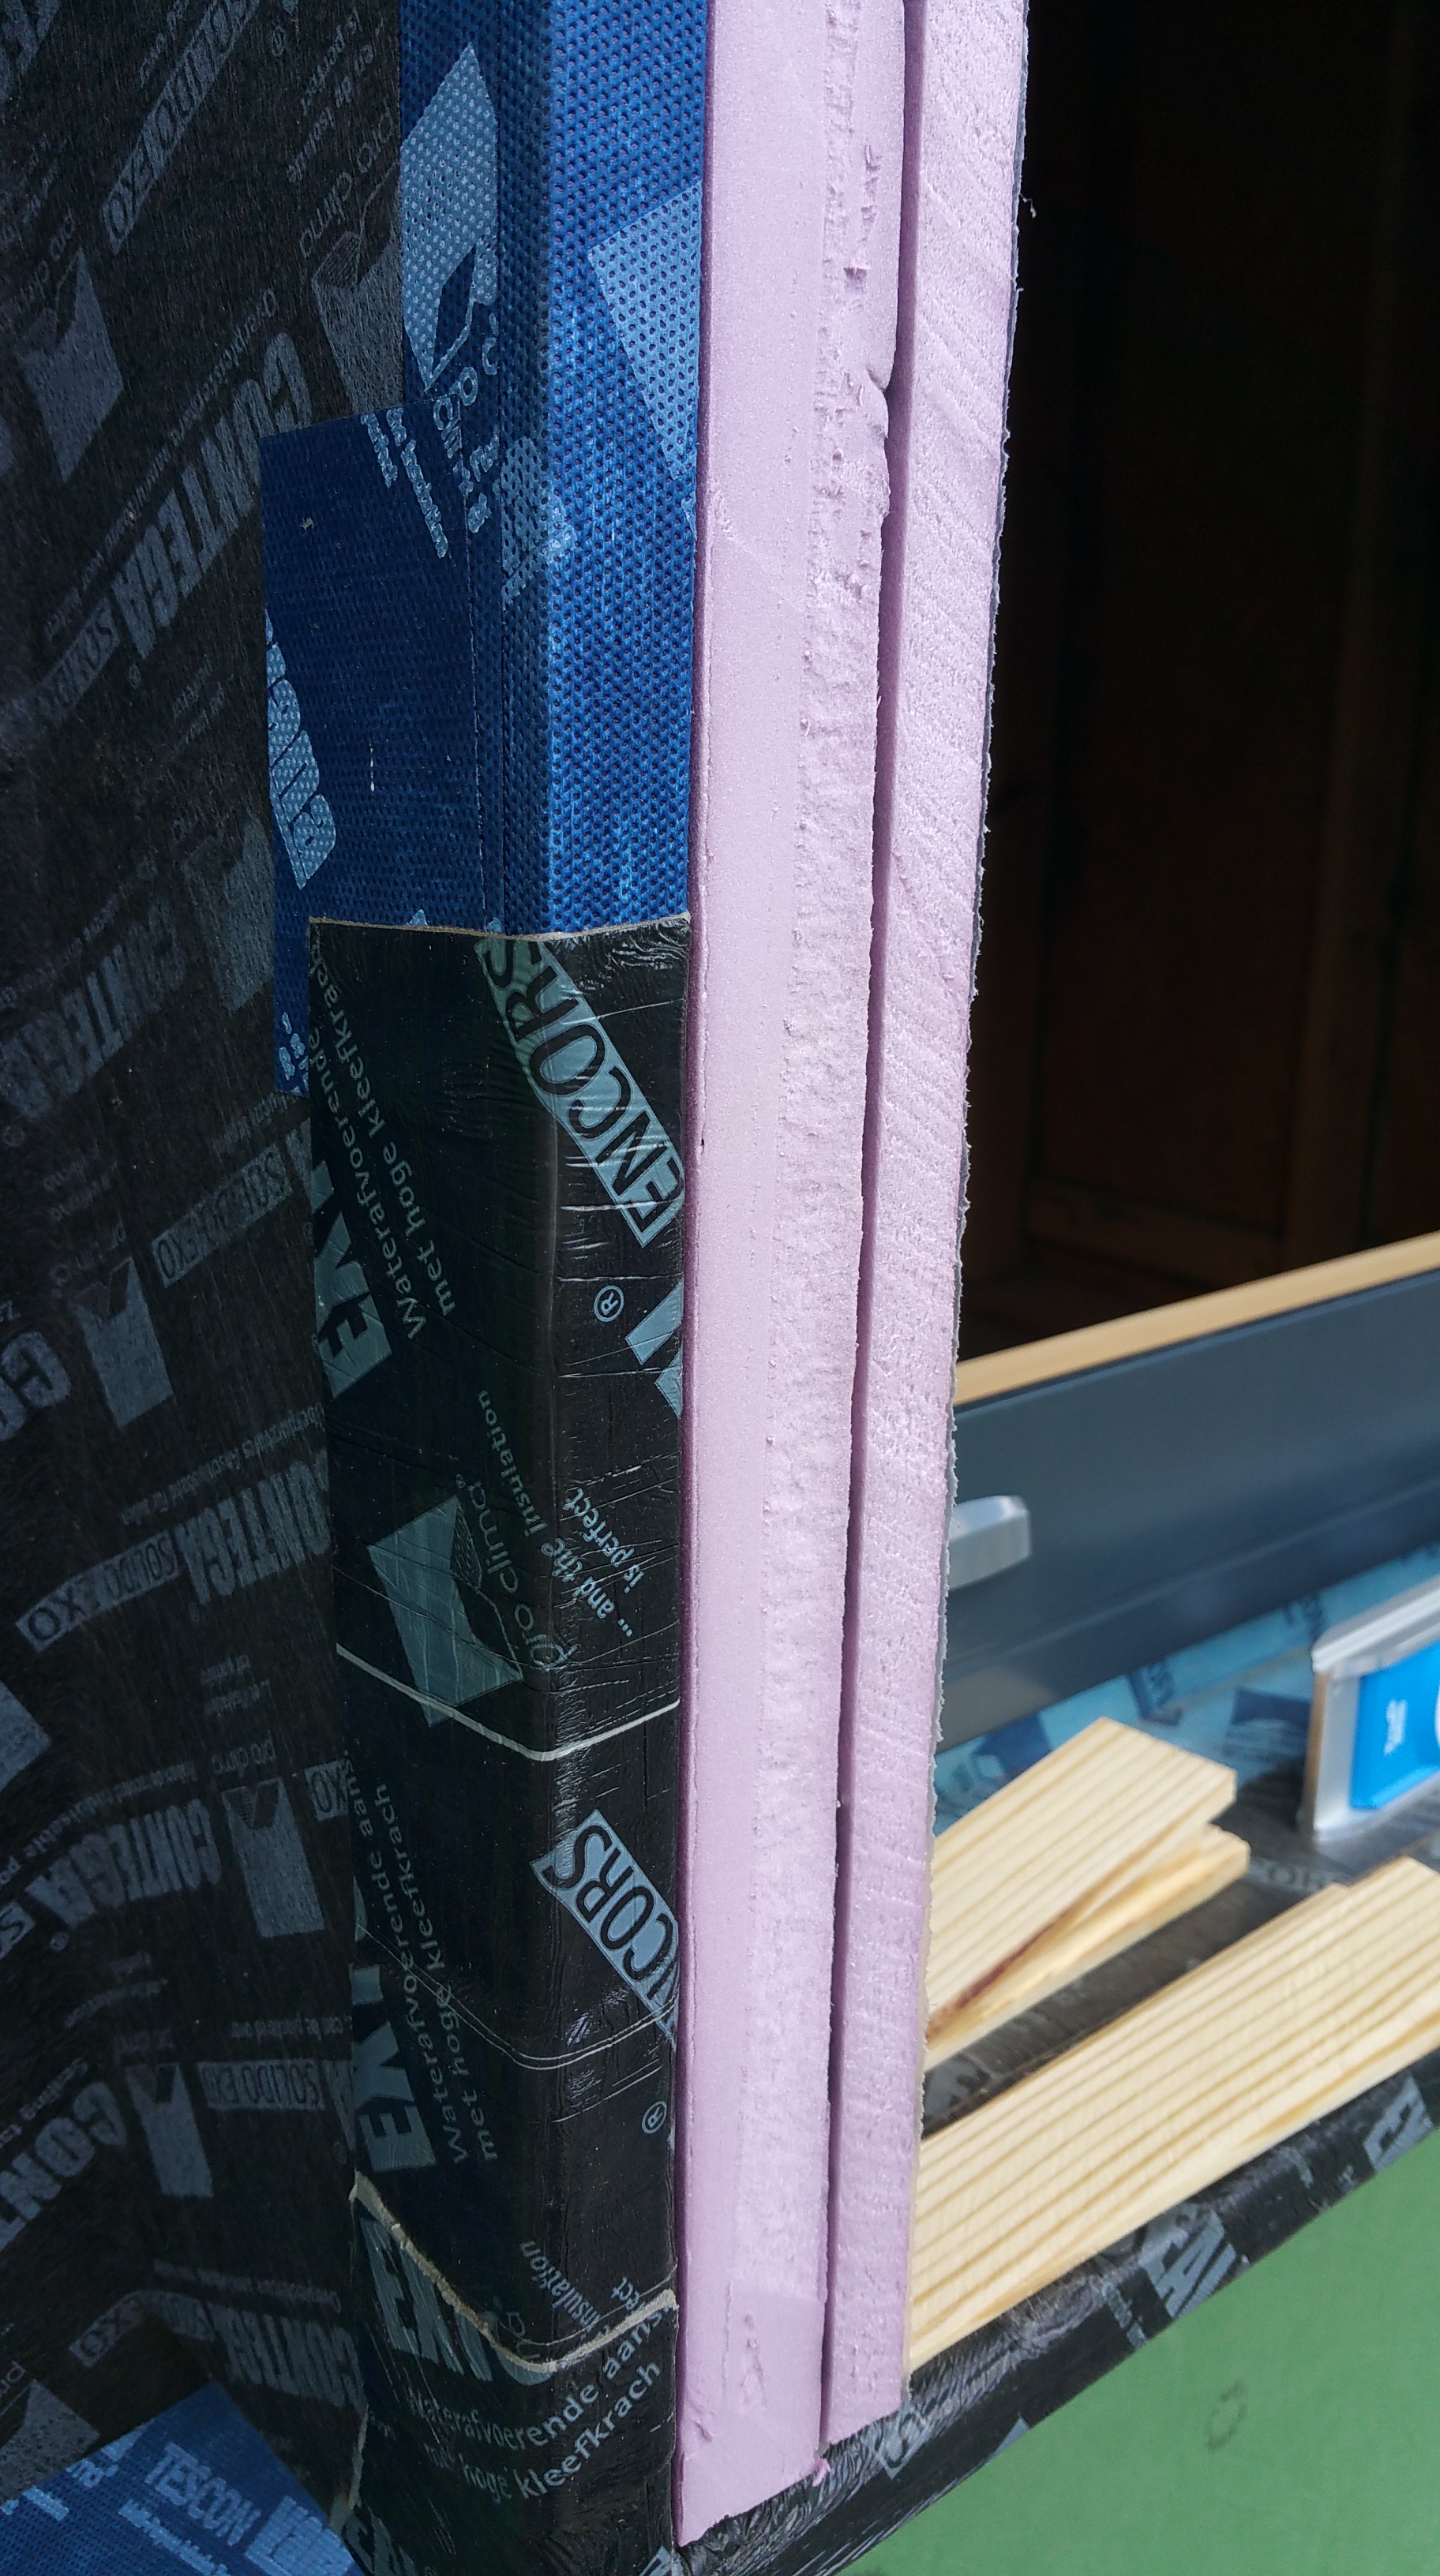
When the window bucks were made air and water tight, I took the advice of Hammer and Hand and over-insulated the exterior frames with rigid foam:
I wanted to use Roxul for this application, but it would’ve taken too much time to order and deliver to site (roughly 2 weeks), and the foam was frankly cheaper and readily available at Home Depot. We tried to go “foam-free” as much as possible, but this was an area where we made a compromise — insulated headers and the gap between our basement slab and foundation walls were the two other areas where rigid foam was used to any great extent.
The exterior aluminum cladding had been held back 1″ from the edge of the wood window frame, allowing me to install 1.5″ of foam between the edge of the aluminum cladding and the window buck (the 1/2″ gap around the perimeter of the window buck opening allowing for proper placement of each window).

For the most part this went well, but there were some areas where the interior 1/2″ thick piece of foam did overlap the aluminum frame slightly. As Speier points out in the video, this probably short circuits the intended thermal break somewhat, but by how much I don’t really know (hopefully not entirely).
Also, even if over-insulating the window frames is executed perfectly, it still leaves the window bucks themselves as thermal bridges. I’m sure these show up in the PHPP (the Passive House Planning Package) used for energy modeling, but I’m guessing the energy penalty is slight.
Instead of using 3/4″ plywood or 2x framing lumber to create window bucks, some builders, trying to avoid this area of thermal bridging, have used Thermalbucks as an alternative, but depending on the thickness of the wall assembly there may be limits to their use.
Another view of the over-insulated frame:
I’ll add additional photos of the windows and doors to a later blog post discussing exterior insulation, the ventilated rainscreen, flashing details, and our siding.
Issues Arise with our Unilux Sales Representative
The biggest disappointment regarding our new windows and doors was the behavior of our Unilux sales rep.
For instance, when Riggs and his crew were ready to set the first window in place we realized the integrated window sills were going to be way too short (the Unilux sills ship separately and need to be screwed to the front of each window unit). Our Unilux rep immediately suggested moving the windows farther out, near the outside edge of the bucks, in order to make these shorter sills work.
There are a couple of reasons why this was infuriating. First, and most importantly, it would’ve undermined the integrity of the windows since they would’ve been resting solely on the 3/4″ plywood window bucks, rather than the 2×6 framing (the units were heavy, especially our family room and master bedroom windows, which were each 9′ wide and 4′ tall). Secondly, his suggestion immediately told me he had not bothered to look at the construction drawings and Hammer and Hand videos I had emailed to him so he could order the proper sized sills and better understand the wall assembly the windows were going into. The drawings clearly note the proper placement for the windows, and I had explicitly noted this desired mid-wall position in an email.
Luckily, before I could say anything, Tony, one of the carpenters, spoke up and pointed out that the windows needed to be screwed into the 2×6 framing members. I can’t tell you how grateful I was that he had the courage to speak up (in my experience, most people wouldn’t).
The guys also pointed out that I could have custom sills made and then installed during the siding process. Not the end of the world. Sounds good.

Later, our Unilux rep was leading Riggs and the guys through the process of installing the Suntuitive glass in the empty west-facing window frames. The guys seemed visibly nervous, and understandably so, as our Unilux rep led them through the process for the first time.
Once the Suntuitive glass was installed, the guys broke for lunch. The Unilux rep then pointed out to me when we were alone that of the 6 pieces of glass 4 of them had the Suntuitive glass logo installed upside down. He shrugged and smirked, perhaps suggesting that it was the carpenters’ fault, or that it was no big deal.
Fair enough, I guess, since it doesn’t impact performance but, boy, does it look dumb.
Instead of taking a few extra seconds with each piece of glass to make sure that it had the proper orientation, our Unilux rep either forgot to do this, or he just didn’t care. It was hardly the carpenters’ fault since they had never installed Suntuitive glass before.
Still later in the day, when it came time to start installing handles, rather than having what I had ordered on site, our Unilux rep had a cardboard box filled with random handles of various styles: “Is this yours?” “No.” “Is this one yours?” “No.” He only had 2 of the correct handles out of 9. At the very least, this gave the impression that our Unilux rep was disorganized. It turned out he was missing all of the drip caps as well.
Near the end of the first day of installation the guys started installing the kitchen door. Once in place, our Unilux rep went to install the lockset. Something went wrong. He struggled for what seemed like an hour (it may have only been 20 minutes) to get it installed properly. Once he had it installed, he turned and began telling me I would need to remove it to file some parts down to improve the action. For a second time, Tony immediately spoke up, telling me explicitly not to do this, to just use it for a couple of months and it would be fine — which is exactly what happened.
With just my daughter’s bedroom window and the two basement windows left to install, the guys came back the following morning for a couple of hours to finish up. The Unilux rep showed up the second day, dropping some drip caps and the basement handles on a table for me to install. This annoyed me since I had never installed either, and it would’ve taken the Unilux rep a few minutes to do it himself while the guys were working.
And then later, as everyone was leaving, our Unilux rep suggested now that I had seen the guys install the kitchen door surely I’d be fine installing the front door on my own (these Passive House doors are heavy, and ideally require 2-3 guys to install them safely — and preferably by someone who has done it before). They’re also expensive, as I noted earlier, so why would I even contemplate installing it on my own. For a third time Tony probably saw a look of terror on my face, immediately spoke up, and offered to come back to install the front door once we were ready for it.
By chance, Tony somehow managed to be standing next to me each time our Unilux rep made an asinine suggestion. I can’t put into words how grateful I am that Tony spoke up for me and, really, the integrity of our build — he certainly didn’t have to, which probably tells you all you need to know about the quality of his character.
Happy to just have all my windows and kitchen door in, and knowing that Riggs and the guys were willing to come back to install the front door, I said nothing to our Unilux rep about his behavior.
Later that week, however, we received the Unilux rep’s final invoice. It showed that he was double billing us for job site delivery. It was for just over $300. Not the end of the world, and an easy fix, but, nevertheless, annoying since it seemed to suggest he sent us a final invoice without consulting the original contract.
The invoice also had a storage fee for $1500. He had mentioned months before in an earlier email, after we had just fired our two GC’s, that storage fees were a possibility. At that time we had a lot going on, so I didn’t consult the contract we had signed with him. I just assumed storage fees were in the details of the contract, so when I got the final invoice I planned to pay for it.
But then my wife’s cousin found out about the storage fees, and he expressed surprise, telling us that, in his opinion, no one in the industry does this.
So I went back and looked at the contract. Not a word about potential storage fees. Nothing about when storage fees would begin to accrue, and no fee schedule noting how much per day, week, or month. In an industry plagued by delays, if storage fees were a legitimate billable cost shouldn’t our Unilux rep have the details outlined in his contract?
So then I separately asked a couple of people who work in the construction industry about our situation, one with over 30 years in residential work, the other with over 20 years in commercial construction. They, unsurprisingly, had similar responses:
“What’s in the contract?”
“Nothing.”
“Well, then…”
The one who works in commercial construction was much more blunt:
“So it’s bullshit. He made it up.”
My wife wrote an email to our Unilux rep asking about the double billing for job site delivery and the storage fees, and expressing frustration with how he behaved on the job site during the installation. He responded with a series of emails that can best be described as unhinged or histrionic.
We contacted people above our Unilux rep to see if someone else could come back to finish things up — in addition to installing the front door, a piece of glass broke during installation (we think it was a manufacturing error in the glass), and a different subcontractor broke a part on a basement window that needed to be replaced. They told us our rep was the only one available in the Chicago area, probably, in part I’m guessing, because they wanted our Unilux rep to resolve the situation. Unfortunately, that didn’t happen.
He came back to the site to see the broken part on the basement window, removing the working stay arm (I assumed to make it easier for him to order the correct part, which was a cylinder on the frame that attached to the stay arm). He also dropped off the rest of the missing drip caps and the rest of our correct handles.

A few months after this, in November, after drywall had started, the Unilux rep came back to install the replacement glass for the broken window, and the part for the basement window. He was visibly angry and petulant, clearly still annoyed that we had complained about him.

When we were in the basement he just handed me the working stay arm that he had removed months earlier, apparently for me to install myself. When I pointed out that he hadn’t given me the part for the frame — the actual part that had been broken and needed replacing — he just stared at the open basement window for a few long seconds before we both realized he had failed to order the correct part.
It had been almost six months since I originally requested the part. Making matters worse, he told me from the outset that the window was unsafe to use until the part had been replaced, so we had never had use of this window since its installation.
He also asked if I had the Unilux owner’s manual. No, I didn’t. He never gave me one. I didn’t know one existed. Why he didn’t give me one the first day of installation back in June, or frankly prior to installation, via email, I’ll never know. Instead, I received the owner’s manual nearly 6 months after the windows had been installed.
The owner’s manual emphasizes how important it is that the windows be opened for at least 30 minutes 3 times a day for “forced ventilation” while drywallers are mudding to ensure no moisture damage occurs to the wood on the windows. If he hadn’t happened to be on site while the drywall guys were present, odds are I never would have received this information, thereby putting the long-term integrity of our windows at risk.
And if there had been damage, then what? Replace the sashes? Replace sashes and frames (the entire window units)? Who would’ve paid for it?
Bob Riggs, his son Brian, and Jason from JPK Builders, came back a few weeks after this to install the front door without our Unilux rep present (I didn’t want him near my house again, I think for obvious reasons). The lockset for the front door was installed without incident. In fact, it happened so quickly I didn’t even see them do it. Clearly there’s nothing inherently difficult about installing Unilux locksets.
We couldn’t be happier with Bob and all the guys he brought to the job site. They work hard, they’re detail-oriented, they’re willing to learn new ideas and techniques, and they have excellent communication skills — not to mention a high level of integrity. We wouldn’t hesitate to recommend Bob or JPK to family or friends. They were a pleasure to have on site, and they were very easy to work with. All of which begs the question: Why doesn’t Unilux recruit someone like Bob to sell and install their windows and doors? He’s used to selling his services anyway, and he has all the necessary construction knowledge to properly install high performance windows and doors. It seems like it would benefit both parties.
A few more months go by, it’s the end of June, 2018, and I still hear nothing about the missing part for my basement window, even though our Unilux rep had assured me in an email back in November, 2017 that he would make sure to order it and send it to me. We couldn’t use the basement window for almost a year at this point.
Reluctant to contact our Unilux rep again, I looked around on GBA and found Hawkeye Windows and Doors out of Iowa who installs Unilux windows. I spoke with Larry Martin, the owner, but it turns out he doesn’t sell Unilux windows anymore. Nevertheless, after I explain my predicament, he’s nice enough to offer to hunt down the same, or similar, Roto hardware part for me.
Within a week or two I have the part in my hand. Think about that for a second. I wasn’t even really his customer. It would’ve been so easy for him to just say no, he can’t help me. Instead, he invested time hunting down this random, miscellaneous part for me. I got better customer service from Larry for a $50 part than I did from our own Unilux rep after ordering a whole house worth of windows and doors. It’s astounding in a way, and what a world of difference from a client’s perspective.
During construction it feels like a miracle when you run across people like Bob Riggs, Tony, or Larry Martin — especially after having to deal with someone like our Unilux rep who needlessly made life difficult for us.
Unfortunately, when I go to install the part, although it could work, I realize it would require drilling new holes in the sash and frame. At that point, I get angry again: Why should I have to drill new holes in a brand new window simply because my Unilux rep is too lazy or incompetent to get me the right part?
I contact a couple of people above our Unilux rep, but I don’t hear back from them right away (one was out of town at the time), so I think I have no choice but to contact our Unilux rep again.
Here’s how our Unilux rep chose to respond to my email, carbon copying me and Eric Murray, the East Coast Regional Manager for Unilux:
“They broke this part after the installation; I had ordered one but then lost it [emphasis added]. According to what you mentioned to me a month ago. I’ve thought Eric Whetzel was so upset with me after all ( despite all my goodwill , hard work and honesty trying to stay with them in good terms….it has been such an unfortunate experience with these clients; it never happened to me during my entire 30 year career…) I don’t understand why is he still speaking with me if he didn’t want to deal with me again? Anyway, if you did not order this yet, I will have Helmut ship directly to them and done with it”
It’s true, we wanted nothing to do with him, and I think for legitimate reasons. But what’s also true is that after more than a year he still hadn’t gotten me the part for my basement window — either out of malice, incompetence, or some mixture thereof. In addition, he claims to have ordered the part, lost it… and then what? He chose to do nothing? Unbelievable.
After this last email from our Unilux rep, he did, in fact, order the part for me, but when it arrived it turned out to be the wrong part, so it was totally incompatible with my window — wasting everyone’s time yet again.
Eventually, Eric Murray and George Wright from Unilux were nice enough to get me the part that I needed, although I’m sure they have better things to do with their time.
Just as a quick summary regarding our Unilux rep:
- He ordered window sills with the wrong dimensions (wrong by almost 3″), even though I supplied him with construction drawings so he could get this measurement right. And his proposed solution to this problem ignored our construction drawings and what we were trying to accomplish with an “innie” window placement.
- He didn’t bring most of the handles we had ordered to site. He never found the missing ones, so he had to re-order them.
- He didn’t bring the drip caps.
- He almost broke the lockset to our kitchen door, and then told me to remove it and file parts of it down to improve its action. Tony had to interject and explain why this was inappropriate.
- He installed most of our Suntuitive glass upside down (4 out of 6 units).
- He suggested I should install my $5,000 front door on my own.
- He failed to give me the Unilux window and door owner’s manual, putting the integrity of our windows and doors at risk as drywall was being installed.
- He tried to double bill us for job site delivery of the windows and doors.
- He was going to charge us $1,500 for storage fees even though the contract says nothing about potential storage fees.
Obviously some of these items on their own would be no big deal, but when considered together what other conclusion is there but that this person is disorganized and can’t be bothered to get details right (this is the nicest way to interpret his behavior). This seems like an awful lot to get wrong for someone who was on the job site for only a day and a half.
The whole situation is unfortunate, as I explained to George Wright in an email, since we really like our windows and doors. Apart from an adjustment required on our front door and a kitchen window, they’ve been wonderful to live with. They’re beautiful to look at, and they function really well. All of this is undermined by the actions of our Unilux sales rep.
Of all the trades and services we knew we’d have to hire for our build, our Passive House window and door supplier was the last one we expected to have issues develop with customer service.
Suntuitive Glass Performance
Bob Riggs and the guys installed the windows with the Suntuitive glass at an ideal time of the year (June, 2017), just heading into the hottest and sunniest weeks of the year for us here in the Chicago area. It immediately gave us an opportunity to see what the glass can do, and how it behaves on a daily basis.

It took a couple of days to get used to the colored tint, but we don’t even notice it anymore. It’s a subtle, beautiful gray that goes well with our charred cedar siding (more on that later).
We quickly realized how well the glass works in direct summer sunlight. The picture above doesn’t really tell you much, but in the picture below you can see just how deep the tinting gets when someone who’s standing in the middle of the window puts their arm out of an open side window. The Suntuitive glass really is like sunglasses for a structure.

And even when it’s at its darkest, it doesn’t take long for it to go clear once the sun begins to set:

And you get a real sense of just how effective the tinting is when you stand inside and look out between a picture window and an open window:

Here are some more photos of the Suntuitive looking out from the interior:
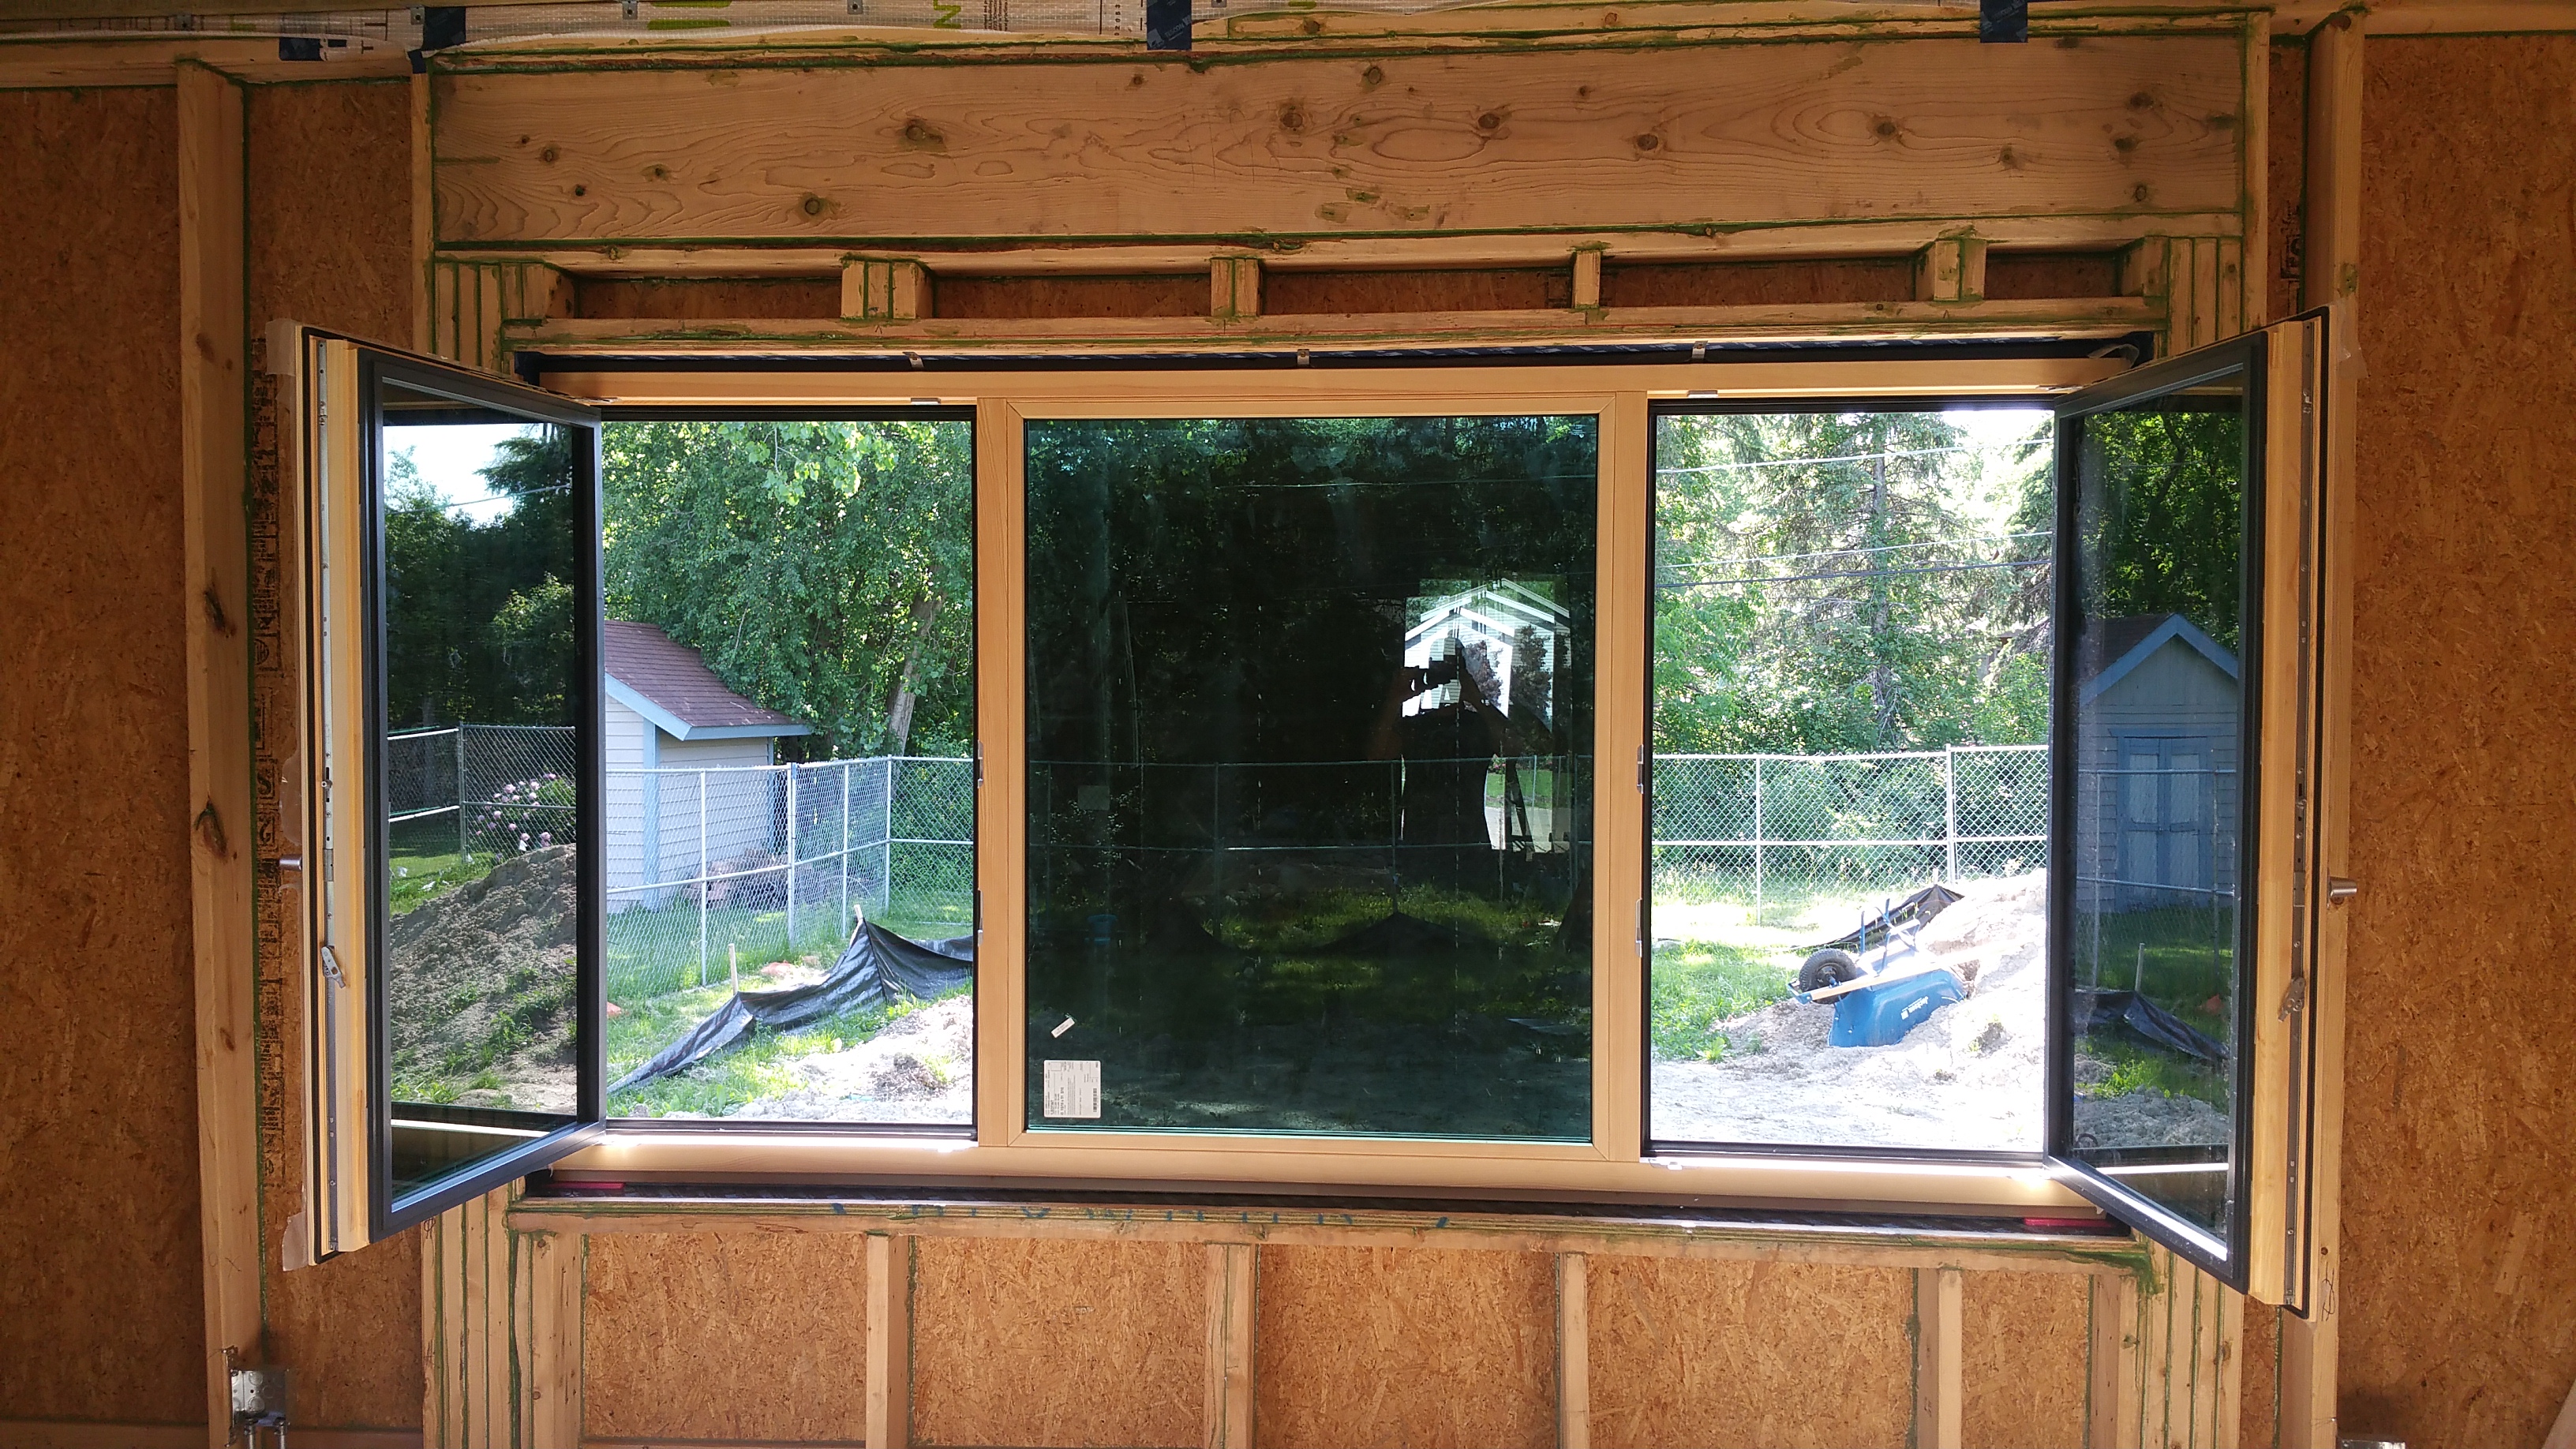
Even in the hottest sunlight, the interior side of the glass only warms slightly. It’s a really impressive product.

Another view of the Suntuitive going clear in the evening:
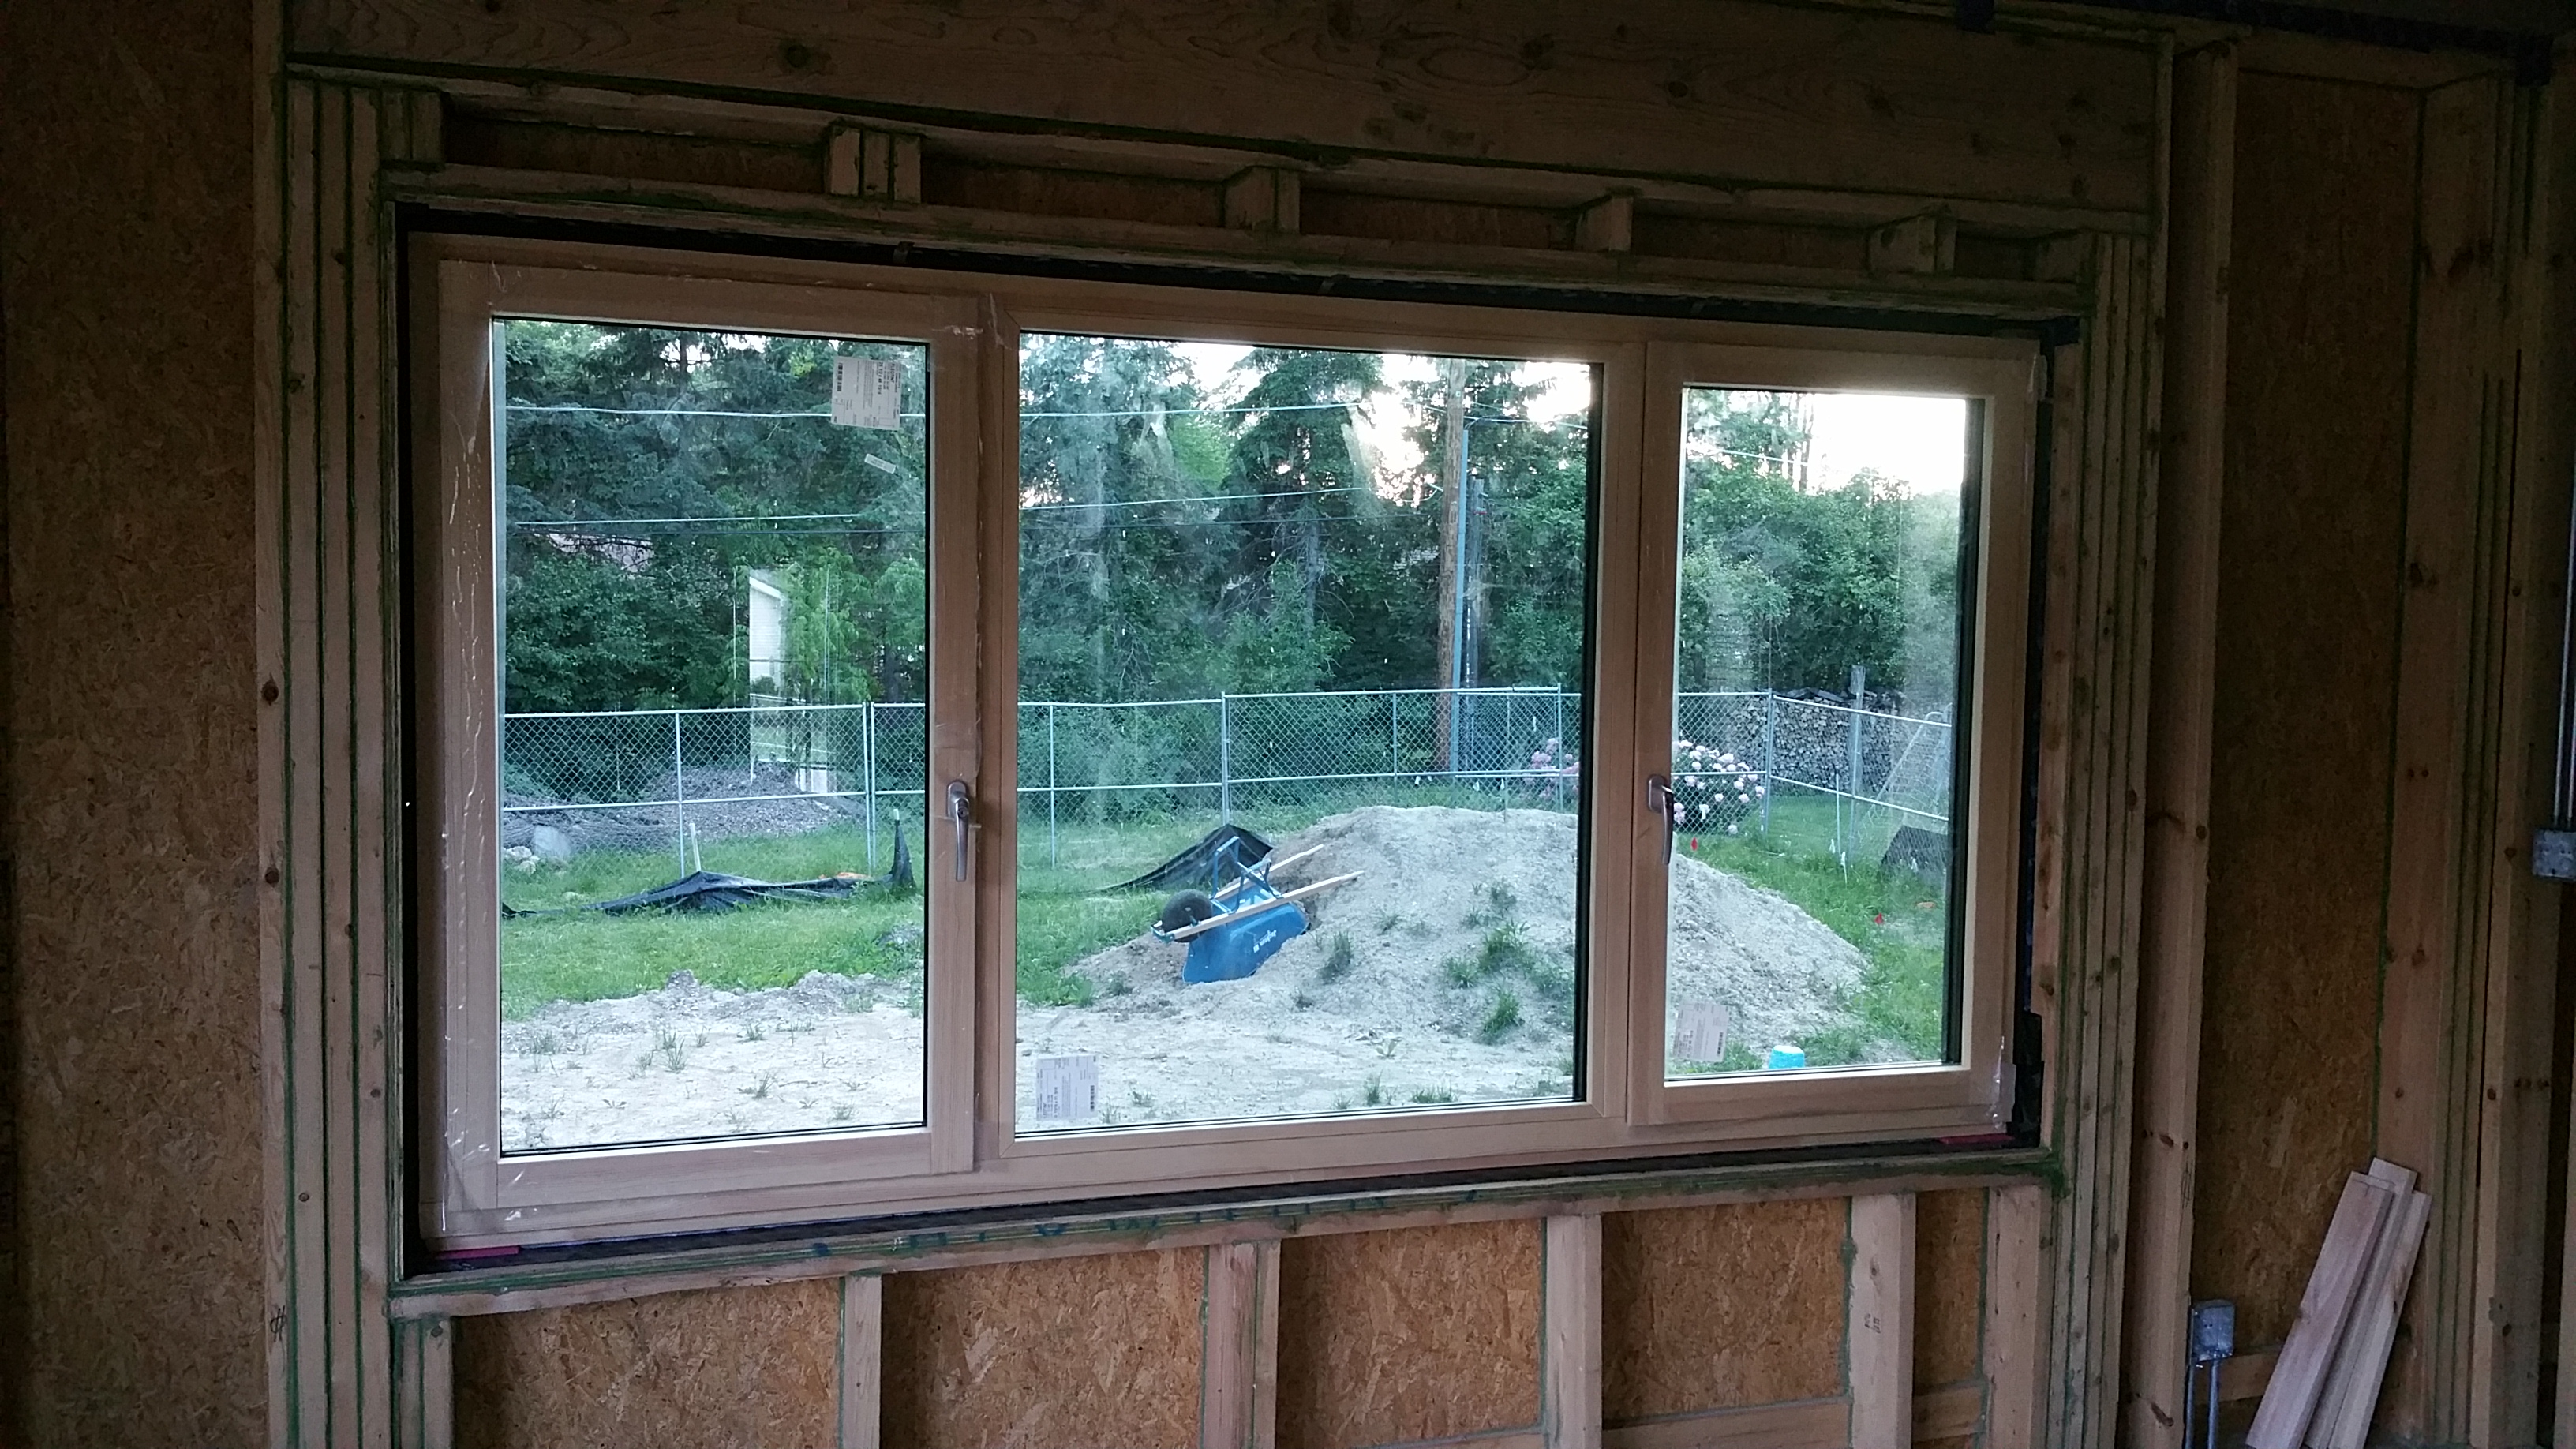
In the picture below you can see the glass beginning to tint even though the sun hasn’t quite made it into the backyard to hit the Suntuitive directly from the west. Because the tinting isn’t automatic, its effect is subtle and feels natural as it changes.

With most of the windows and doors installed, I could start thinking about installing my ERV and ductless mini-split system, planning for my first blower door test, and scheduling the install of our siding.
It felt like a really big step in the build — and it meant no more blue tarps covering the window openings to keep the rain out.
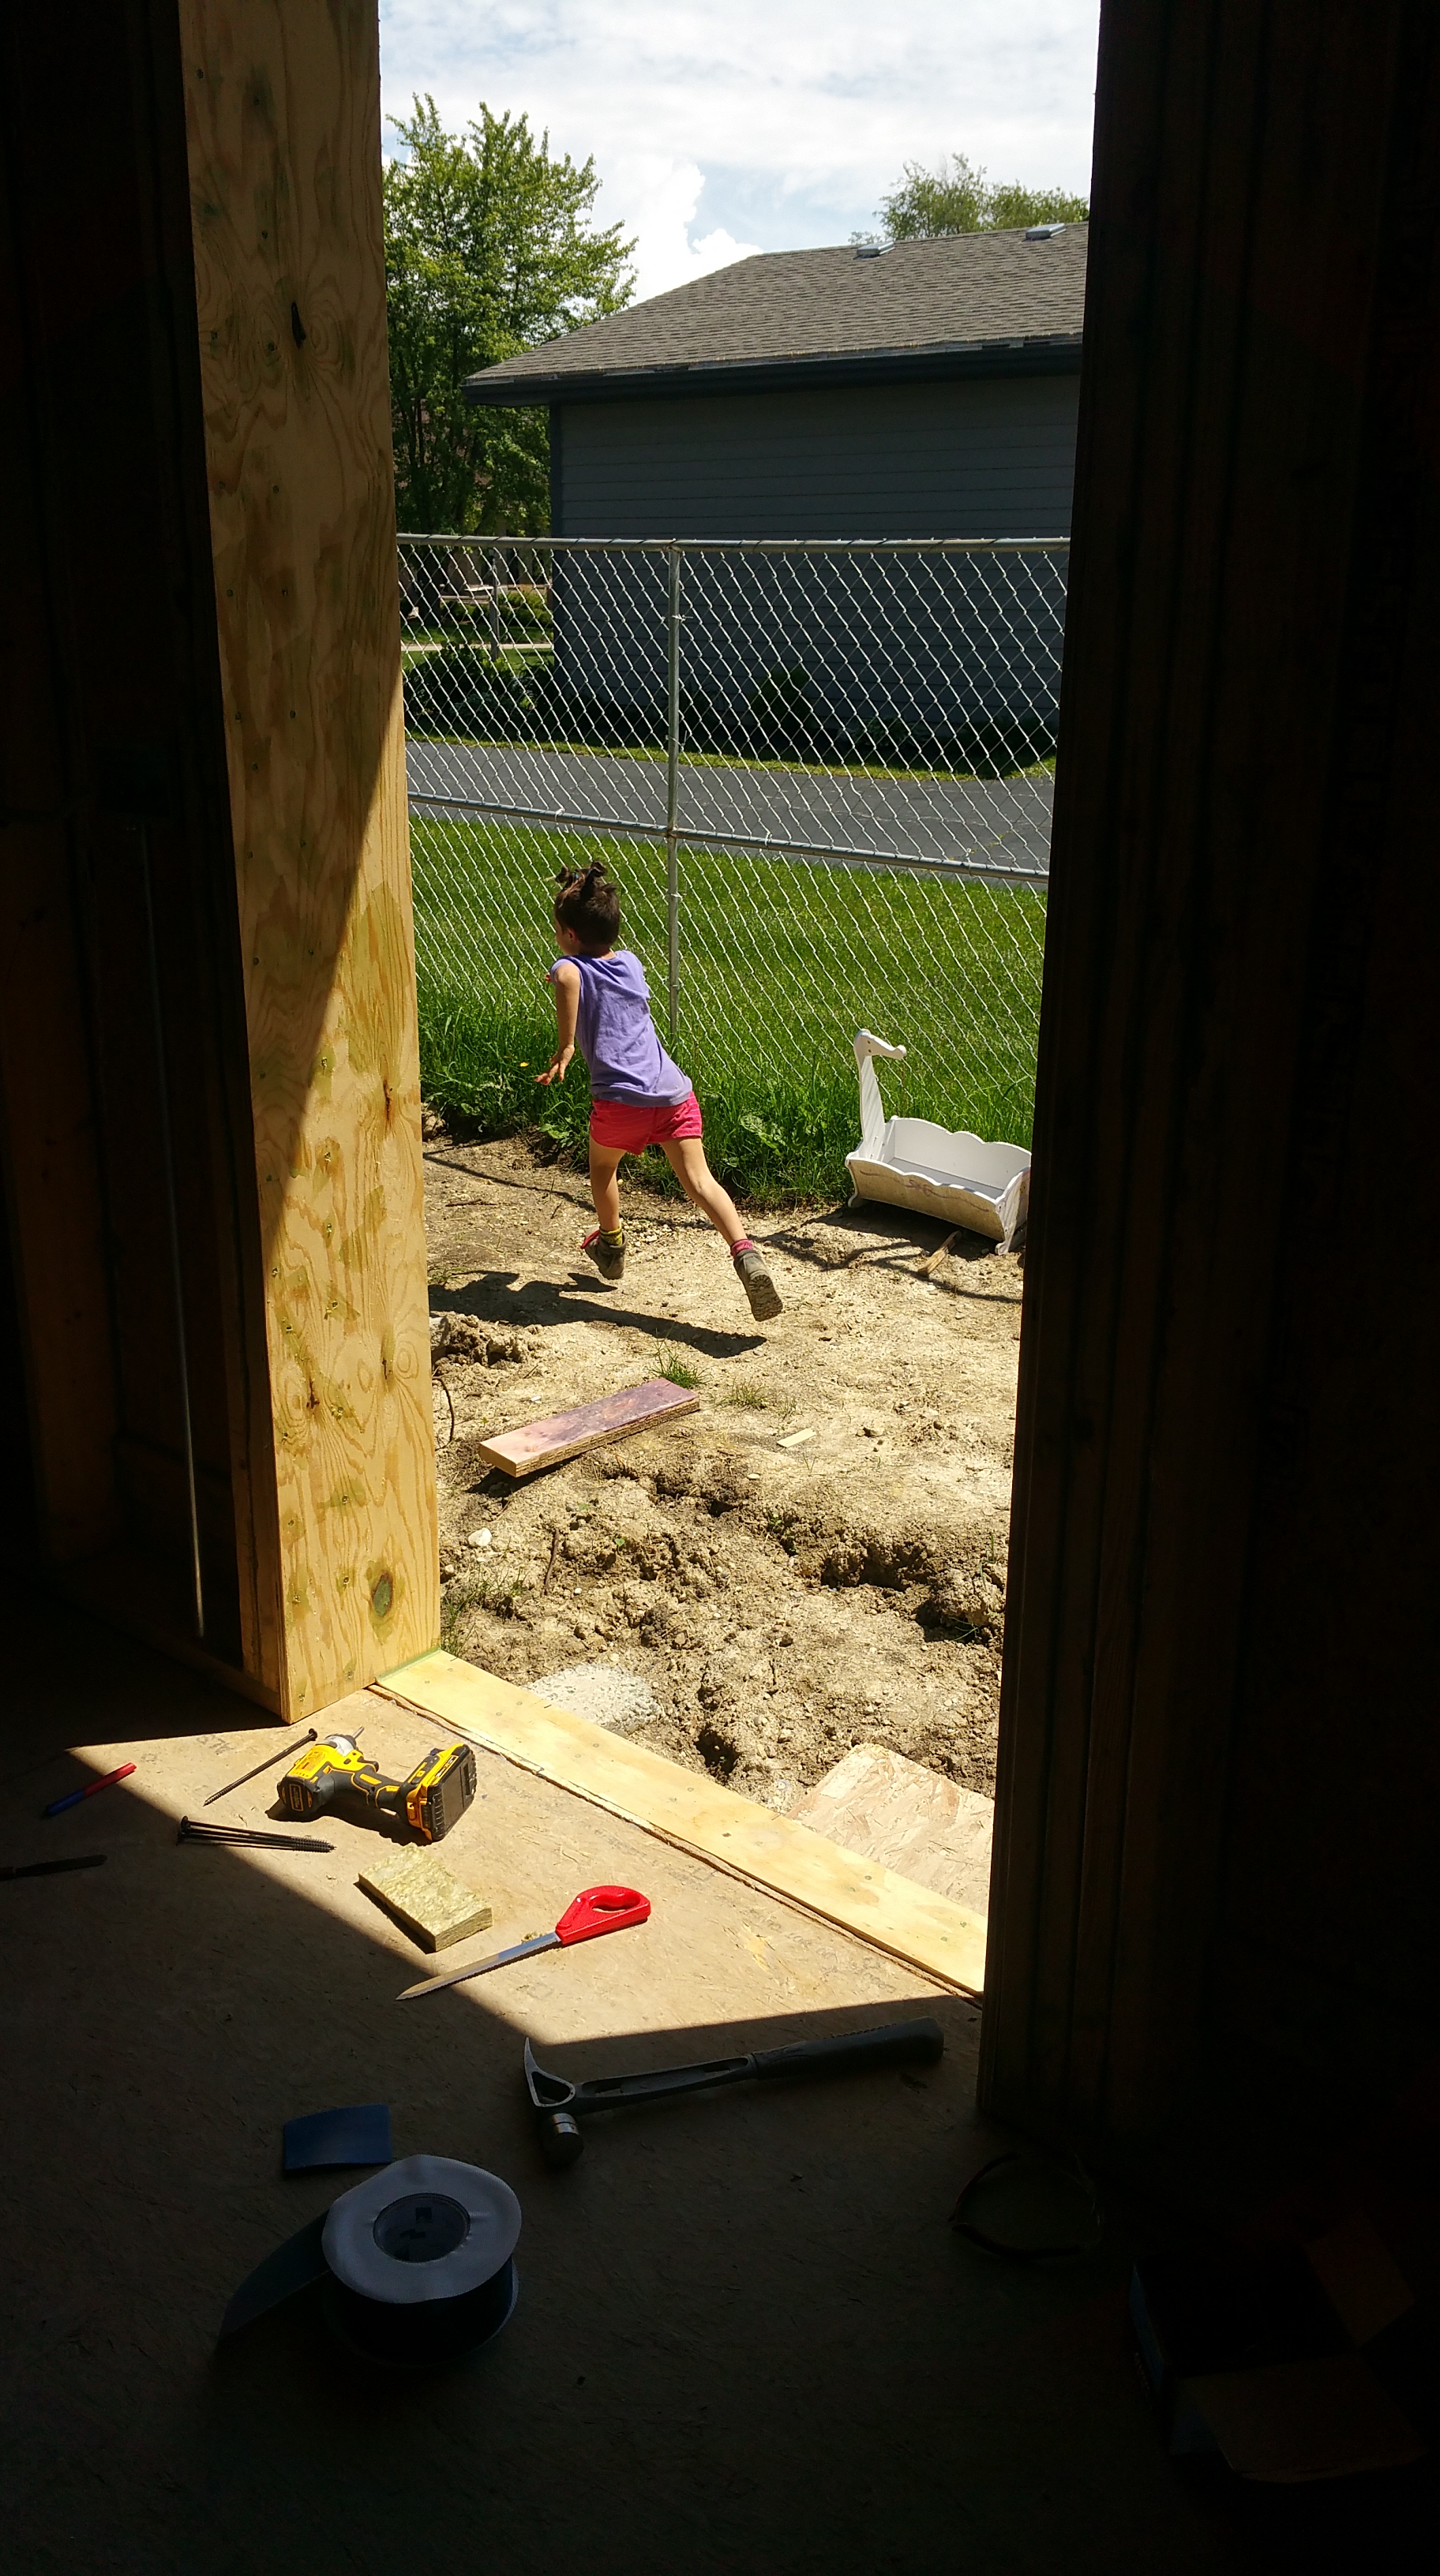
Although the days were long, it helped having my wife and daughter on the job site all the time. It also gave my daughter a once in a lifetime chance to play on an active construction site, and she had a blast.
It’s been fun to mark progress in the build through photos. In fact, looking through photos sometimes produces real surprises:

Six months had gone by, and we had already survived a lot, with much more to come.


You must be logged in to post a comment.