
Observe and Change
Growing up, my parents always had a garden plot of vegetables in our backyard. Pulling weeds in the hot sun is my strongest childhood memory of these gardens. Needless to say, the memory is unpleasant. Growing vegetables seemed like a sweaty, tiresome chore. More to the point, it seemed entirely unnecessary since we had so many grocery stores in our area.
It was only many years later, after living in our first house for awhile, that an interest in plants, of any kind, was sparked. My wife and I were living in a fairly standard suburban tract-home subdivision. Most of our neighbors had foundation plantings around their homes; some even had additional flower beds carved out of their well-kept lawns, although these were the exception. Apart from these plantings up close to each home, the subdivision was almost entirely a repeating pattern of roads, homes, and then their individual patch of green lawn.
In an effort to improve our curb appeal (we had zero plantings and only lawn grass), we started with some basic perennials like ornamental grasses, flowers, and some small shrubs around the front entry.
After realizing how much fun it was to plan out and arrange these plants, the border edging, and even the shape of the borders themselves, each subsequent spring meant carving up more patches of lawn in order to develop our plant varieties and combinations.
It was during this period that I began reading Mother Earth News, Fine Gardening, and ordering online from suppliers like Seed Savers Exchange and Johnny’s Seeds.
After starting out copying what I had seen my parents do — using store-bought chemical fertilizers and pesticides to manage plant health — we quickly moved in the direction of organic solutions. Not only were they less dangerous to handle, they were also less detrimental to the overall soil food web.
“Think of scooping up a handful of soil and leaf litter and spreading it out on a white ground cloth, in the manner of the field biologist, for close examination. This unprepossessing lump contains more order and richness of structure, and particularity of history, than the entire surfaces of all other (lifeless) planets. It is a miniature wilderness that can take almost forever to explore.”
— Edward O. Wilson, Biophilia
Initially viewing the soil in our yard as a lifeless medium requiring endless varieties of supplements in order to achieve the results we were looking for, as I read and learned more, we began to focus on the soil as our main building block for everything we wanted (vegetables, shrubs, flowers — even a healthy lawn).
In fact, an early prod to trying something unconventional occured after realizing our lawn care service had only one solution to every problem that cropped up in the yard: using either larger quantities of chemicals, or just different varieties of chemicals. There wasn’t any concern for site conditions or causes; the only emphasis was on treating symptoms, namely, weeds.
“… how chemical companies have always handled the problem of pest resistance: by simply introducing a new and improved pesticide every few years. With any luck, the effectiveness of the last one will expire around the same time its patent does.”
— Michael Pollan, The Botany of Desire
At some point, after we had a couple of growing seasons with mixed results, I came across Masanobu Fukuoka’s The One Straw Revolution and Toby Hemenway’s Gaia’s Garden. Each, in their distinctive way, advocated for a ‘nature first’ approach when gardening or farming, emphasizing the importance of setting up structures and plant relationships that would allow nature, over time, to do most of the work for us.
“Nature, left alone, is in perfect balance. Harmful insects and plant diseases are always present, but do not occur in nature to an extent which requires the use of poisonous chemicals. The sensible approach to disease and insect control is to grow sturdy crops in a healthy environment.”
— Masanobu Fukuoka, The One Straw Revolution
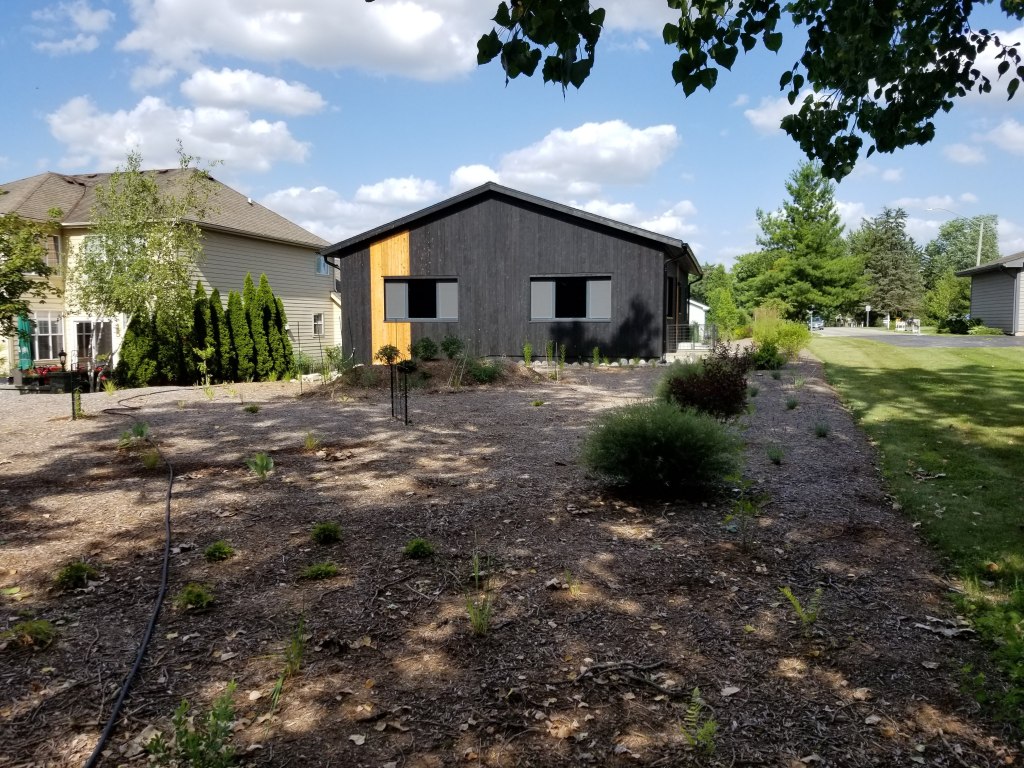
After my daughter was born, and my wife grew tired of her hour-long commute, we decided to sell our home and move closer to her work. By that time I had also learned about Passive House and Pretty Good House, in addition to Susanka’s Not So Big House series of books — homebuilding design strategies that were defiantly moving away from conventional norms (not unlike Permaculture).
The more we thought about what we would want from our new home, the more this combination of Passive House and Permaculture design principles appealed to us.
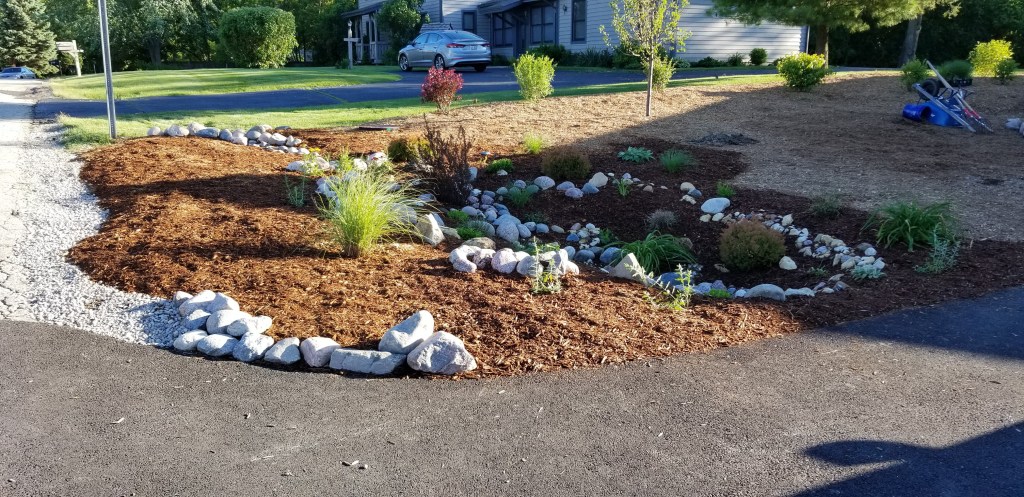
Here’s one example of what can be achieved on a suburban lot:
In terms of the Permaculture, we knew we wanted to experiment more with growing our own food, to the extent that’s possible in our Climate Zone 5 region, here in the suburbs of Chicago. After trying to grow a whole host of veggies our first few years gardening — thumbing through any number of seed catalogs in winter became a favorite pastime — we slowly learned what we enjoyed growing and what we thought was more hassle than it was worth.
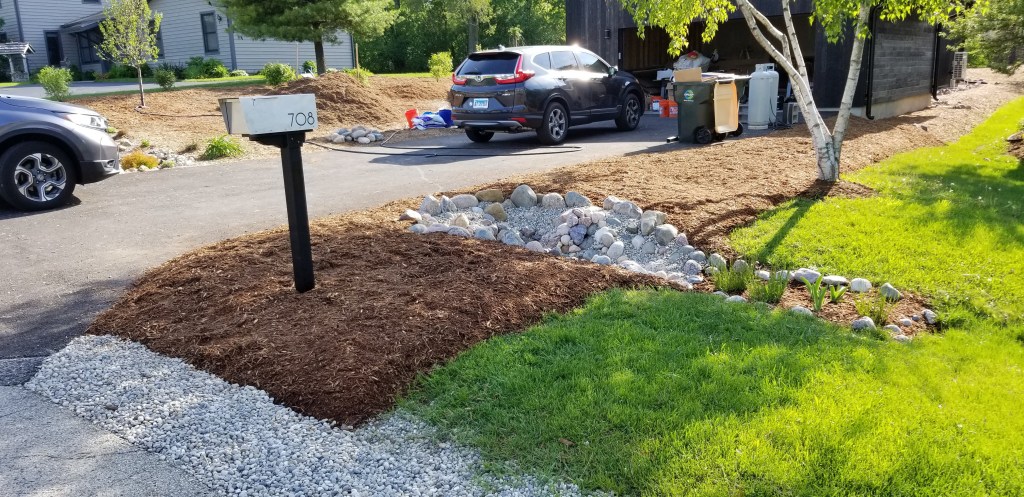
Here’s another example of what can be achieved in the suburbs:
Short of an end times scenario, in which every calorie we consume would first need to be harvested from our yard, we whittled a potential list of food options down to a workable number of herbs, fruits, and vegetables. With its focus on soil health, a side benefit of setting up a Permaculture-inspired landscape is that a patch of ornamental flowers or grasses can be quickly converted to food production, in most cases within a single season.
Additional resources for Permaculture design ideas:
Sepp Holzer Permaculture: A Practical Guide to Small-Scale Integrative Farming and Gardening
Jessi Bloom Practical Permaculture: for Home Landscapes, Your Community, and the Whole Earth
Peter Bane The Permaculture Handbook: Garden Farming for Town and Country
Although we were excited about trying new fruit varieties (whether in tree, shrub, or vine form), our main design goal was to be largely ornamental in focus — especially at first glance to any passerby, with food items woven in amongst the bold mix of colors and textures.
Permaculture is still a new idea in most parts of the US, so we felt more confident that our neighbors would be supportive so long as things looked ‘pretty’ for most of the year. We were also confident that, with the right mix of plants, we could welcome in the local wildlife, no matter the scope of our overall food production.
Here’s an example of what time plus significant acreage can produce:
Regardless of the name applied to its specific scale or form — Permaculture, Agroforestry, Edible Landscape, Food Forest, Regenerative Agriculture — we knew that our design would begin with a foundation of thick mulch (similar to the Ruth Stout method).
In addition to going lawn-free, here are some of the other main goals for our yard:
- Avoid digging (e.g., no seasonal plowing of the soil for growing vegetables)
- Avoid outside inputs; as much as possible, create a closed loop system
- e.g., no synthetic fertilizers, herbicides, fungicides, or pesticides
- Xeriscaping techniques
- plant selection and placement based on water needs
- limit plants that do require more water to those areas where water tends to sit, or else plant close to the house for easy, quick watering (e.g., dahlias)
- leave no bare soil exposed
- no dedicated irrigation system
- occasionally hand water new plants for the first year until established
- water vegetables, and flowers like dahlias, infrequently but deeply
- use sprinklers only after prolonged period of drought and plants are visibly stressed
- use thick base layer of mulch to retain moisture and even-out temperatures seasonally, in addition to building long-term soil health
- encourage rainfall to stay on site and be absorbed rather than allow it to run-off
- plant selection and placement based on water needs
- No waste
- dedicated compost bin (for plant-based kitchen food waste)
- compost or ‘chop and drop‘ cuttings in situ (e.g., Russian comfrey, shrub prunings, perennial cut-back in spring)
- again, the goal is a mostly closed loop system
- After getting soil and plant relationships established, mimic Fukuoka’s ‘do-nothing‘ approach
When confronted with a problem in my first years gardening, it’s easy to recall the immediate impulse to reach for a chemical solution, or to look online for a quick (typically industrial) fix of some kind. This knee-jerk reaction ebbed over time, particularly as I learned more and I experimented with natural or even ‘hands-off’ ways of reaching the same solution.
Many of the ideas associated with organic or Permaculture-based growing become obvious, even second nature, once they’ve been adopted and the subsequent positive results speak for themselves. Even so, it does take some time for this change in perspective to fully develop (again, the same is often said of Passive House building principles).
An anecdote from Sepp Holzer regarding voles illustrates this change in mindset — working with nature to get what you want, rather than engaging in a pitched battle of costly resistance:
“… If I fight them (with poison, gas or by catching them), the territory will only become free for others. The lower population density will be balanced out by more and more empty territories. Voles will produce more offspring or even just produce more males. Instead of catching, poisoning or gassing pests, it is better to consider the cycle of nature. If I let the voles work for me, I will have aerated, loose and well-drained soil and also lush, diverse vegetation. The vole will no longer appear as a cause of damage. Moreover, poisoning and gassing will contaminate the soil… The energy required to repair damage to the soil is much greater than the supposed damage caused by the voles eating crops. It is important to make sure that there are always enough decoy plants available to them… If there are enough available, the voles will leave the fruit trees alone. It is not a question of what I can do to fight the ‘pests’, but what can I do for them, so that they will not cause damage and even work to my benefit [emphasis added]. “
— Sepp Holzer, Permaculture: A Practical Guide to Small-Scale, Integrative Farming and Gardening
As Permaculture advocates are quick to point out, in many cases ‘the problem is the solution‘. This approach to problem solving requires imagination and a willingness to question assumptions while also thinking through potential unintended consequences. Far different from the normal way of doing things, rooted in a ‘better living through chemistry’ approach, one that assumes a fix must already exist, so it’s on a store shelf somewhere and you just need to find it.
Rather than attempt a deep dive on the science and design principles associated with Permaculture, what follows is more of an overview of our experience setting up the basic foundation and structures of our design, with commentary on what we find works and where issues have come up for us.
Please consult the many excellent resources outlined above for a more in-depth look at all the possible techniques and plant relationships, and how they can be organized to fit the scale of your own project (from patio to homestead).
For some additional options, go here: Resources
Getting Started
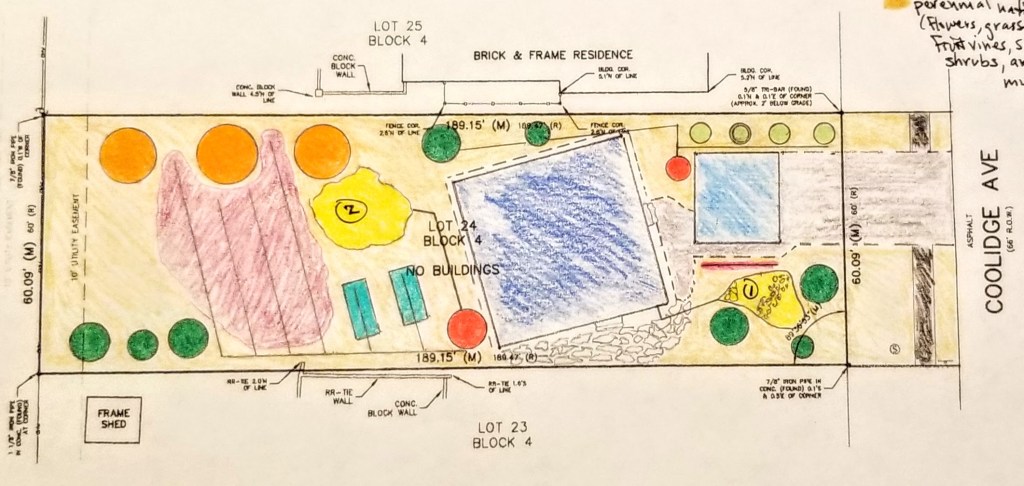
Our lot is roughly 60′ x 190′, so about a quarter of an acre. It was an infill lot that had been sitting idle since at least the subdivision was first developed.

Except for a single, large elm tree, with its open southern exposure the lot was mostly ideal for Passive House (e.g., passive solar heating and rooftop solar panels) and Permaculture design goals.
“We owe it to the fields that our houses will not be the inferiors of the virgin land they have replaced. We owe it to the worms and the trees that the buildings we cover them with will stand as promises of the highest and most intelligent kinds of happiness.”
—Alain de Botton, The Architecture of Happiness
Unfortunately, the large elm tree needed to be removed since it would’ve been right outside what would become our kitchen door.

Thankfully, none of it went to waste. The mulch would be used up fast once we neared the end of construction and could begin to concentrate on landscaping. Even the larger logs, along with some additional logs donated by a neighbor after one of their trees fell down, would be kept towards the back of our lot. In this area they would serve as excellent mushroom food, a break between our yard and the utility easement, and a fun spot for my daughter to run and jump from log to log.
As far as soil conditions, after testing we learned it was ideal for our basement foundation. However, below the first 6-12″ it was predominantly clay.
“The great issues facing our environment — both locally and globally — are linked to the innumerable organisms that live underground. The health of our soils and gardens and fields have suffered from a dependence on chemical fertilizers and a lack of appreciation for the contribution to soil fertility of the myriad creatures that labor underground. Their interactions below ground result in a balance between the processes of growth and the processes of decay. The humus that these creatures generate during the processes of decay is essential to fuel the processes of growth. Without humus, mineral nutrients from fertilizers are soon lost from the soil, along with the pore spaces that hold the moisture and the air that make a well-structured soil so productive and fertile. Countless reciprocal interactions between life belowground and life aboveground shape the world in which we live.”
—James B. Nardi, Life in the Soil: A Guide for Naturalists and Gardeners
This became readily apparent once excavation began and the soil horizons were exposed:

Without much attention or care (apart from regular mowing), at least in the conventional sense, the lot had flourished without any chemical inputs or irrigation for years. Although not exclusively lawn grass, any number of ‘weeds’ were growing happily alongside one another in a thick, healthy green turf. Unfortunately, once construction began, much of this fertile top layer would end up being disturbed or damaged.
Design Plan for the Yard
A quick overview of conditions on our lot:
Our house runs mostly east-west along its longest axis. Even so, our north side, beginning in spring and going until fall, gets a significant amount of early and late afternoon sunlight.
In the backyard, which faces west, the neighbor’s imposing trees offer ample shading beginning around noon, before the sun breaks through once more, briefly, in the evening as the sun sets.

In terms of grading, most of the yard is sloped towards the north, although there’s a small section near the very back of the lot where the pitch reverses itself (thus, the far south-west corner is always the wettest section of our yard; here, water can collect and experience mostly shade conditions).
“Consider the site and its buildings as a single living eco-system… People always say to themselves, well, of course, we can always start another garden, build another trellis, put in another gravel path, put new crocuses in the new lawn, and the lizards will find some other pile of stones. But it just is not so. These simple things take years to grow — it isn’t all that easy to create them, just by wanting to. And everytime we disturb one of these precious details, it may take twenty years, a lifetime even, before some comparable details grow again from our small daily acts.”
— Christopher Alexander, et al., A Pattern Language
Once we purchased our lot and had some sense of the size of home we would be building, I could start planning the layout for Permaculture design ideas.
One of the first elements for our yard would be a deep mulch layer. While suppressing weeds, it could also help break up the clay just below the surface, while also improving drainage (soaking up large quantities of water like a sponge) as it slowly decomposes to make ‘black gold’ or compost (acting, essentially, as a slow release fertilizer).
In lieu of fencing, we thought a wide variety of shrubbery (height, width, color, and texture) along the southern edge of our property, with additional shrub layers to parts of the north and west, would be an excellent way to gain some privacy while also maintaining mostly open views. As these various shrubs matured, they could offer excellent shelter and nesting sites to birds in the area. One of our main defenses against insect pests would prove to be welcoming in the birds.
“… creating ideal conditions for wildlife by permitting fencerows to grow up, by the establishment of multiflora hedges, and even ‘islands’ of undergrowth or multiflora in pines in large open fields. Even the unpopular house sparrow makes a contribution in keeping down insect populations, a contribution far beyond that for which he is given credit… I have seen the house sparrow in our gardens stripping every green aphid from the roses…
The hedges, the birds, are merely a part of a general pattern based upon natural checks and balances in the operations of nature and have contributed enormously to the material welfare of Malabar Farms, as well as to the pleasure and beauty contributed by the hedges and by the presence and increase of bird life of every sort.”
— Louis Bromfield, From My Experience
These shrubs could also offer us some protection from wind once they mature. In effect, we would be setting up a fairly traditional hedgerow, with many of the same benefits enjoyed by pre-industrial farms.
Out at the street, a mix of perennials, flowers, grasses, ground covers, and smaller shrubs could handle some neglect away from the house, while also surviving winters covered by plowed snow and salted roads.
The north side of the driveway would be a mix of mostly shorter perennials, mainly chosen for their color and texture. Since this area would experience run-off from vehicles on the driveway, we thought it best to avoid growing any food here.
The remainder of the yard, meaning most of the front and back, could be used to grow a variety of food items, while also affording us the opportunity to play around with a wide range of plantings to boost visual interest and biological diversity.
The north side, we always assumed, would be a blank slate until most of the yard was started. As we experimented in other areas, we could incorporate what we learn on this side of the house.
Some of the ideas for our house and yard that were eventually dropped due to budget, time, or site specific constraints included composting toilets, a gray water system, and on-site water storage such as cisterns or above-ground tanks — ideas that are well worth exploring whenever possible.
“Our current ways of getting rid of sewage poison the great bodies of natural water, and rob the land around our buildings of the nutrients they need… Almost every step in modern sewage disposal is either wasteful, expensive, or dangerous.”
— Christopher Alexander, et al., A Pattern Language
As a basic overview, this framework would serve us well when the time came to begin purchasing and placing plants on site.

It was only as we headed towards the tail end of construction that we could even begin to address the site conditions in preparation of our Permaculture goals.
Since we wouldn’t be putting down grass seed or sod (going lawn-free was one of our earliest design goals), the first priority was to address water management, in particular those areas of the yard that were most under pressure from soil erosion every time it rained.
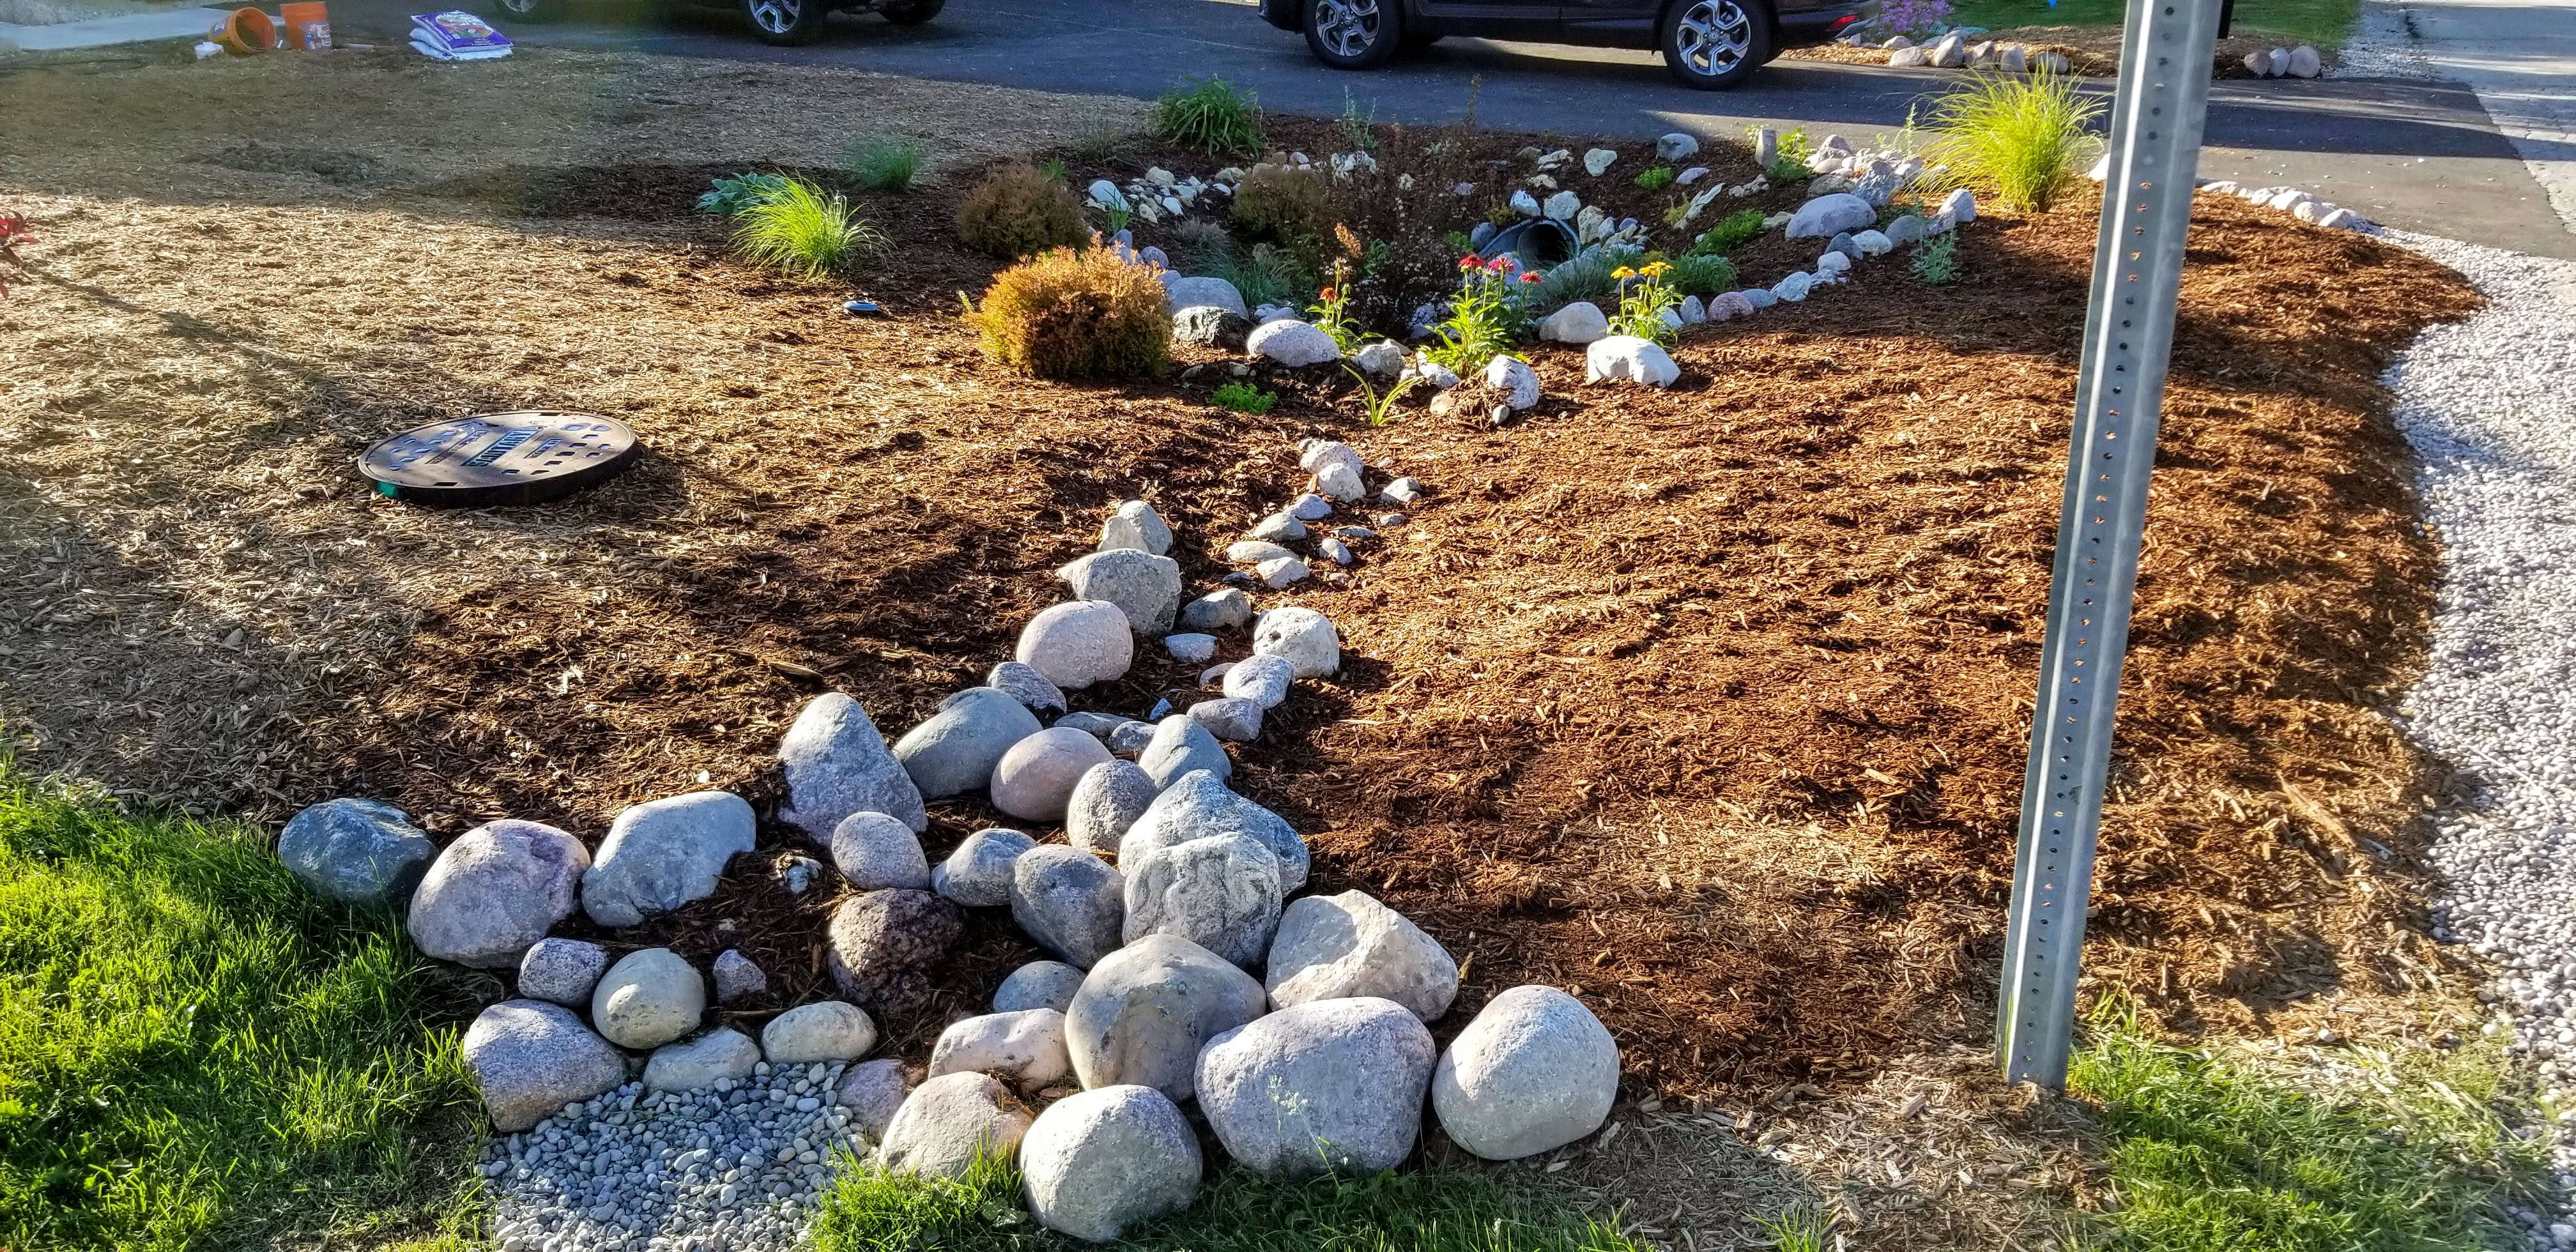
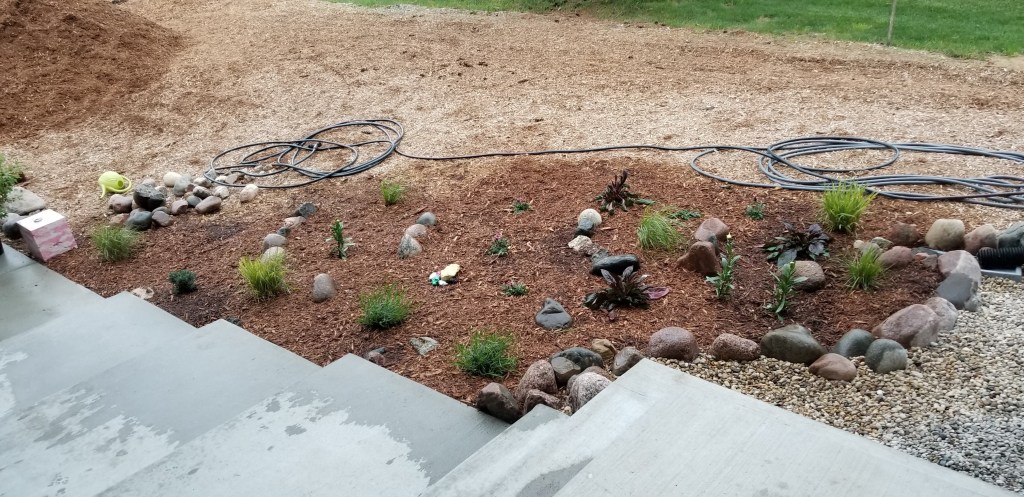
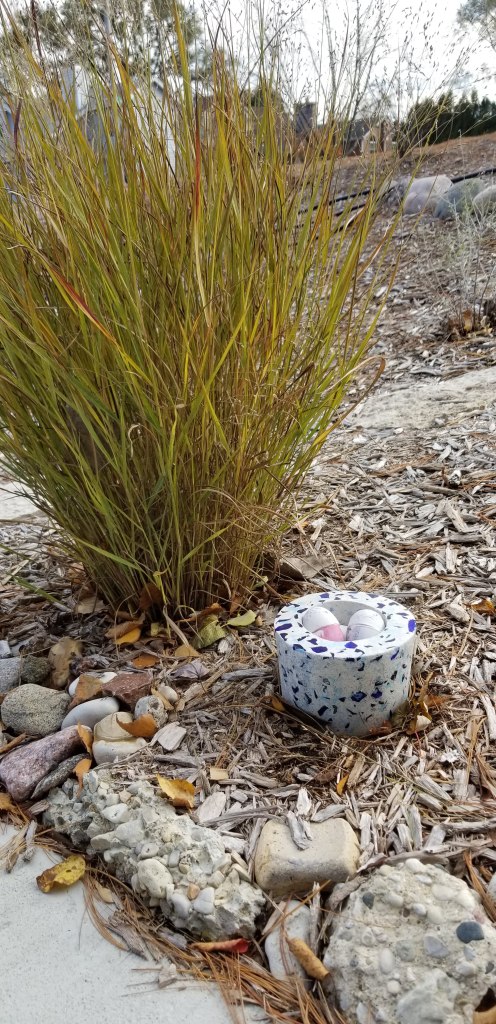
First batch of plants for around our front yard culvert:
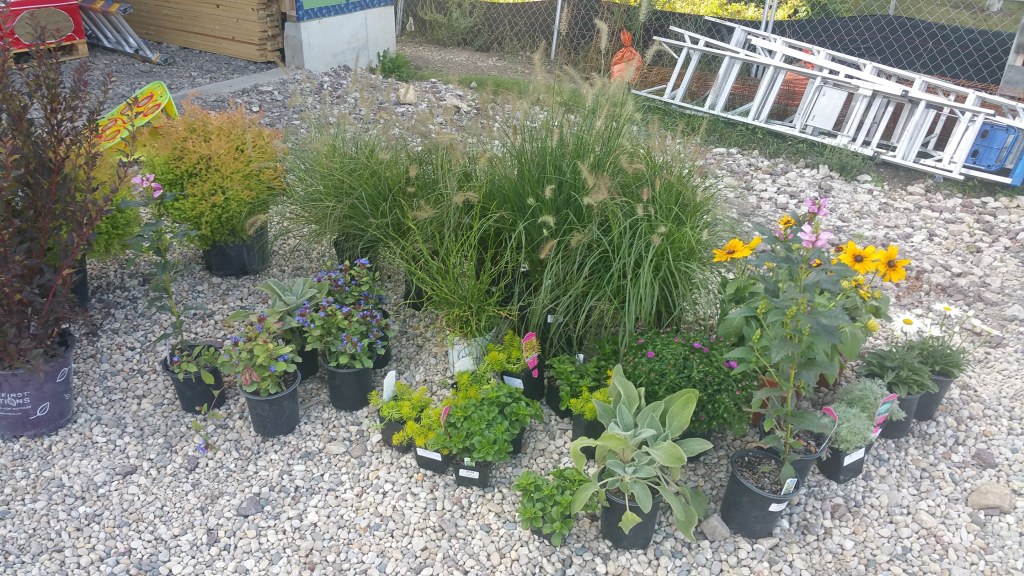
In addition to the perimeter of the house and garage, it was also important to get mulch, stone, and plants set up around our culvert out by the street. This culvert was under typical pressure from direct rainfall, but also my neighbor’s sump pump and gutters, as well as water from our own sump pump.
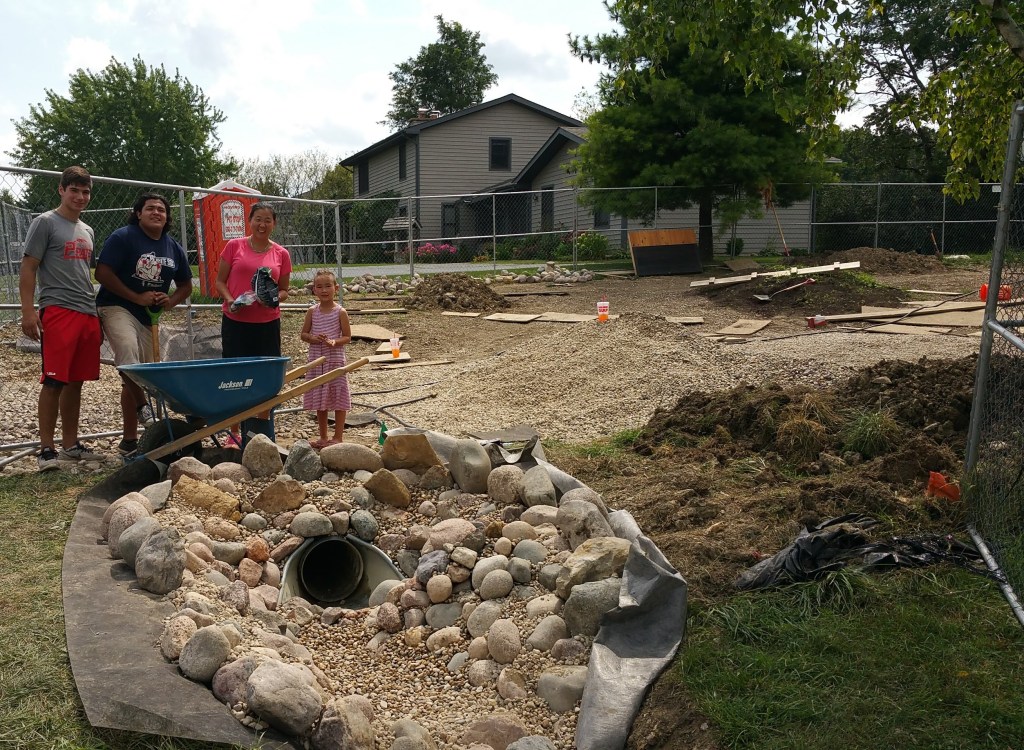
Along with purchased stone, we also scavenged chunks of concrete from the job site:

To decorate the termination point in the culvert for our sump pump discharge, we decided to go with a combination of decorative stone and a variety of plantings. The usual suspects — Luke, Eduardo, and Jesus (not pictured) — were back to help us set up the culvert along with the border around our house.


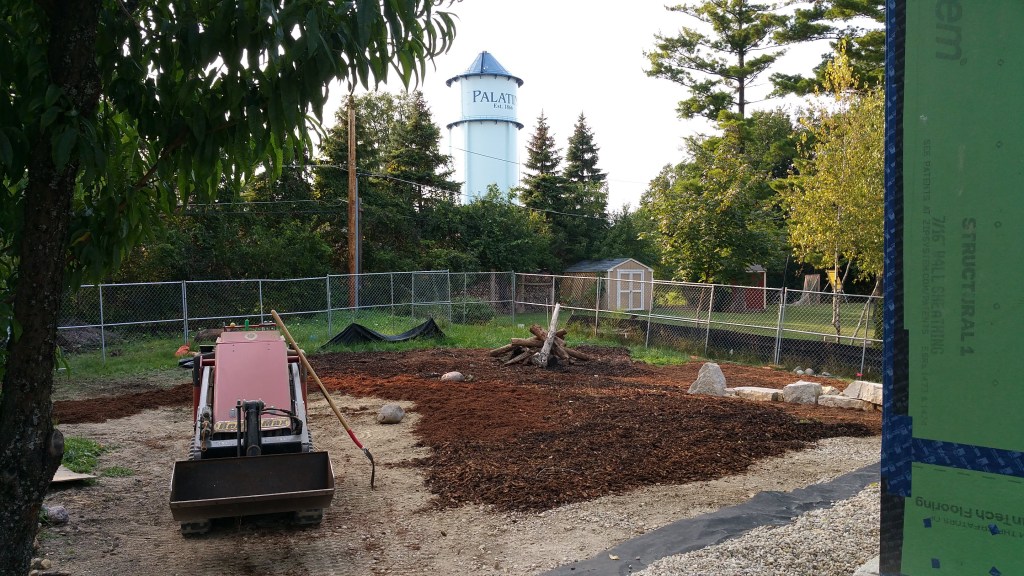
The soil directly around the house had been visibly damaged by equipment and foot traffic during construction, so we decided to heavily mulch these areas without putting down cardboard first for sheet mulching, as we would later do for the remainder of the yard.
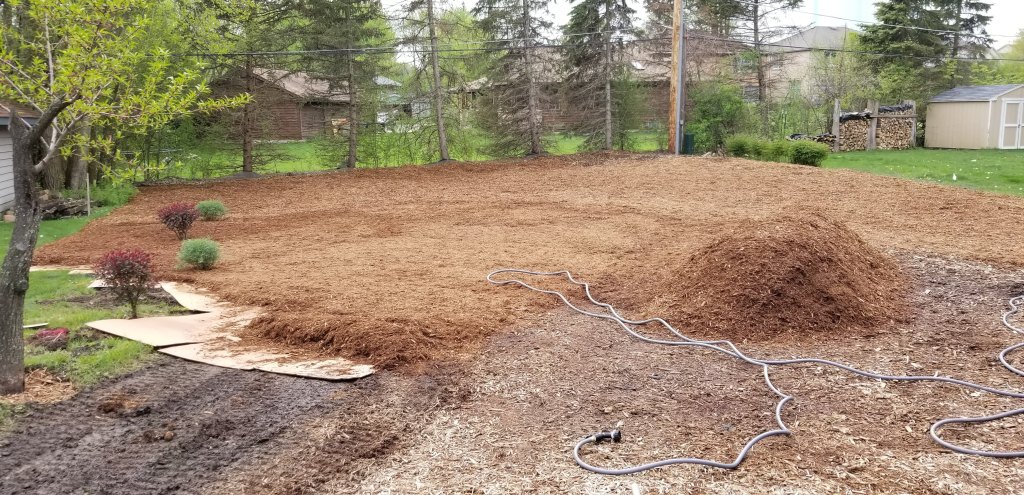
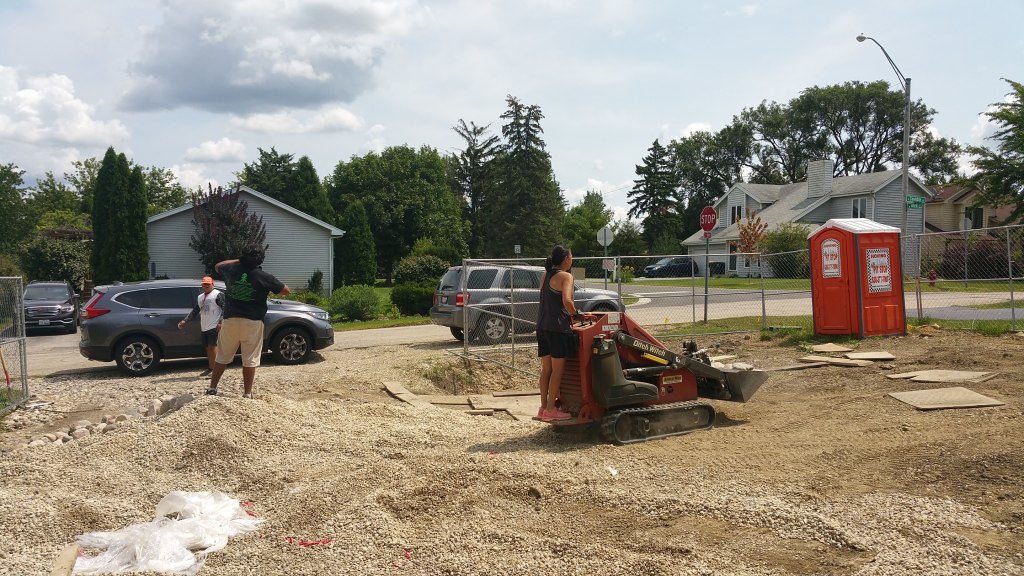
Our excavator was back for final grading:
With the final grading complete, we were ready to put down an initial layer of hardwood mulch. Here, again, the dingo proved its worth, as my wife used it to carry loads of mulch to the backyard.
South-west corner of the house as we put down an initial mulch layer:
Even with a shortened growing season, our new plants around the culvert were heading into their first winter happy and healthy.
Another view of the front yard after final grading and an initial layer of mulch has been put down.

Yellow garden spider:

Even with all the disruptions of construction, wildlife — of various sorts — was making itself known on site.
The mulch was down for only a few weeks, but it was long enough for some mushrooms to show up in various spots around the house. We were looking forward to seeing mushrooms sprout as the mulch breaks down. So far, we’ve been happily surprised at how quickly and consistently they began to appear.

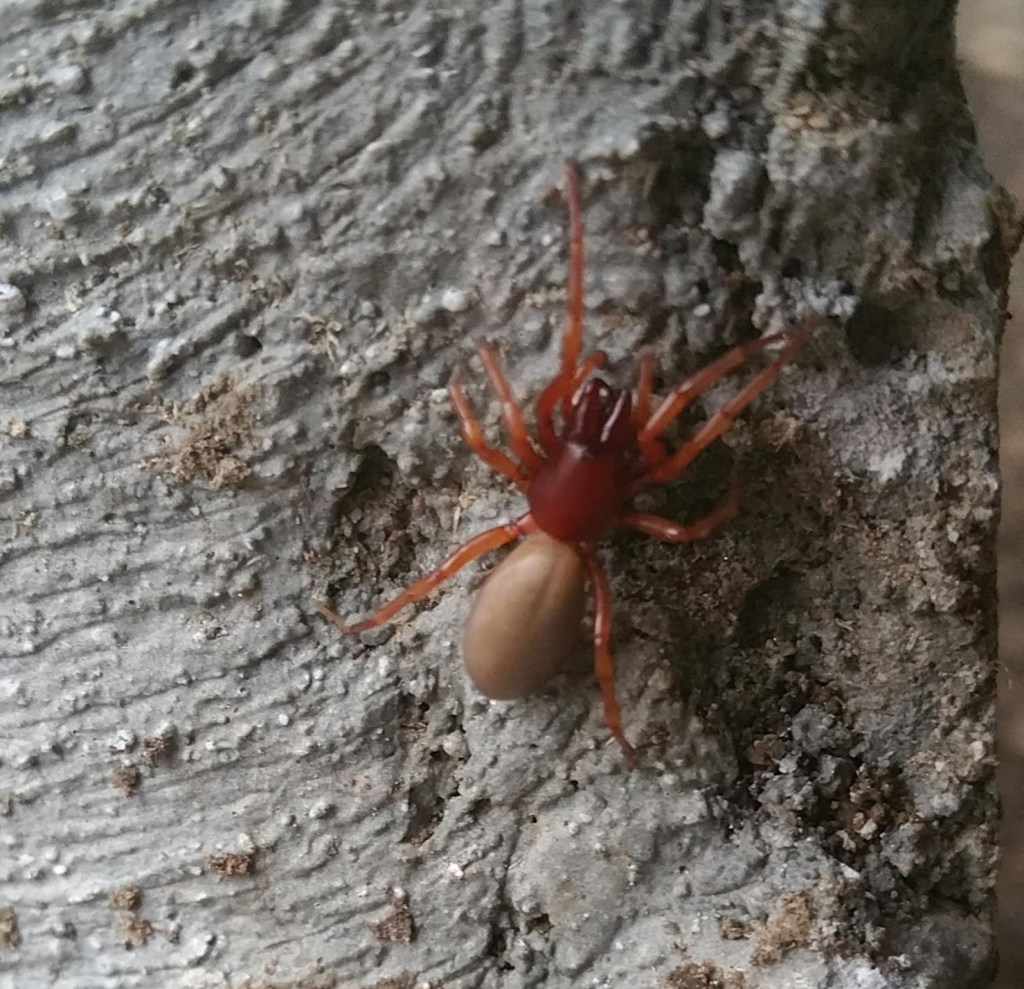
As I dug out some clay soil in preparation for decorative gravel along our front walkway, this reddish spider showed up on our front steps.
Woodlouse Hunter Spider:
We were excited about building attractive habitat for local wildlife, so these early signs of life were encouraging, particularly since so little had been put in place up to this point.
Drywall and interior finishes were next up for the house. This work would occupy us through the winter.

In spring, we could look forward to sheet mulching and getting some basic structural elements of our Permaculture design in place.

In the meantime, we put the yard to bed for the winter as best we could, and, with the help of countless plant catalogs, began making our plans for next year.
First Spring: Sheet Mulching and Hügelkultur Raised Bed
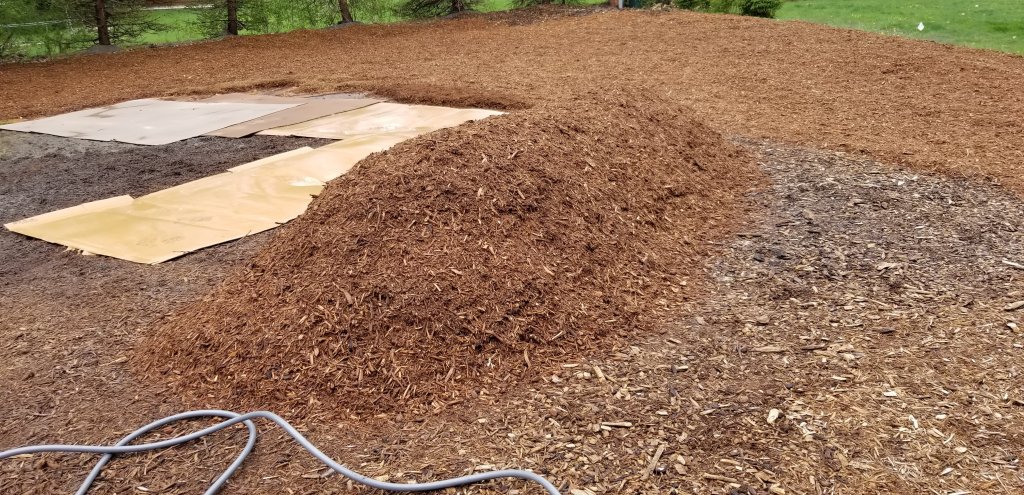
Sheet mulching a quarter acre suburban yard requires large quantities of cardboard. Luckily, a source near us, ABT Electronics, is happy to give it away in the form of appliance and mattress boxes. These thick, oversized boxes make relatively quick work of large spaces, which speeds things up when you’re trying to cover a lot of area fast.
After calling ahead to schedule a time to pick up the boxes, my daughter and I showed up in a rental van to load them up.
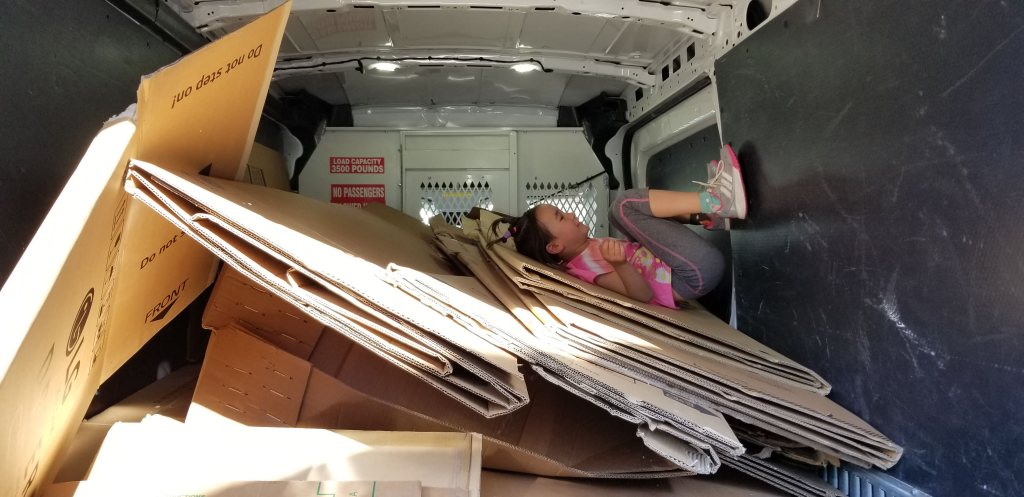
Once unloaded at home, we worked our way through the boxes, removing as much plastic shipping tape and staples as possible.

The boys and I began laying down the cardboard boxes just a few at a time, careful to overlap all of the edges by a few inches (this makes it tougher for weeds to fight their way through to the surface). After soaking the boxes with a garden hose, we then began putting down a thick layer of mulch over the top of the boxes.
At our previous home, I was used to putting down 2-4″ layers of mulch. Here, we were putting down 8-10″ of mulch, which seemed like a lot at the time. If I had it to do over, however, I would’ve gone even thicker, with a solid foot as a goal. Because there’s some settling that occurs once the mulch has been in place for awhile, and because it’s difficult to get a perfectly uniform layer across an entire lawn, I wish now we had gone thicker.
Looking back, another option, at least in the backyard, would’ve been to cut what remained of the existing turf at the back of our lot as low as possible, and then seeded the area with green manure, in the hopes that these plants could outcompete the existing ‘weeds’. If successful, then it would be possible to eventually cut down or remove the green manure plants in order to transition to fruits and veggies, or more ornamental options. If it worked, it would doubtless be less expensive than sheet mulching (time and money). Perhaps worth trying in a small area before expanding over wide expanses.
In terms of keeping costs down, one option is to call around to tree service companies in your area to see if they’d be willing to deliver wood chip mulch from felled trees and brush. Because this material is often destined for a landfill, which require disposal fees, companies will sometimes prefer delivering to your home for free.
In our case, we had mixed results pursuing this. When the timing was right, we managed to get a handful of deliveries from a couple of local companies, but it wasn’t always easy to match demand with supply (companies are unlikely to drive very far out of their way to deliver to your home).

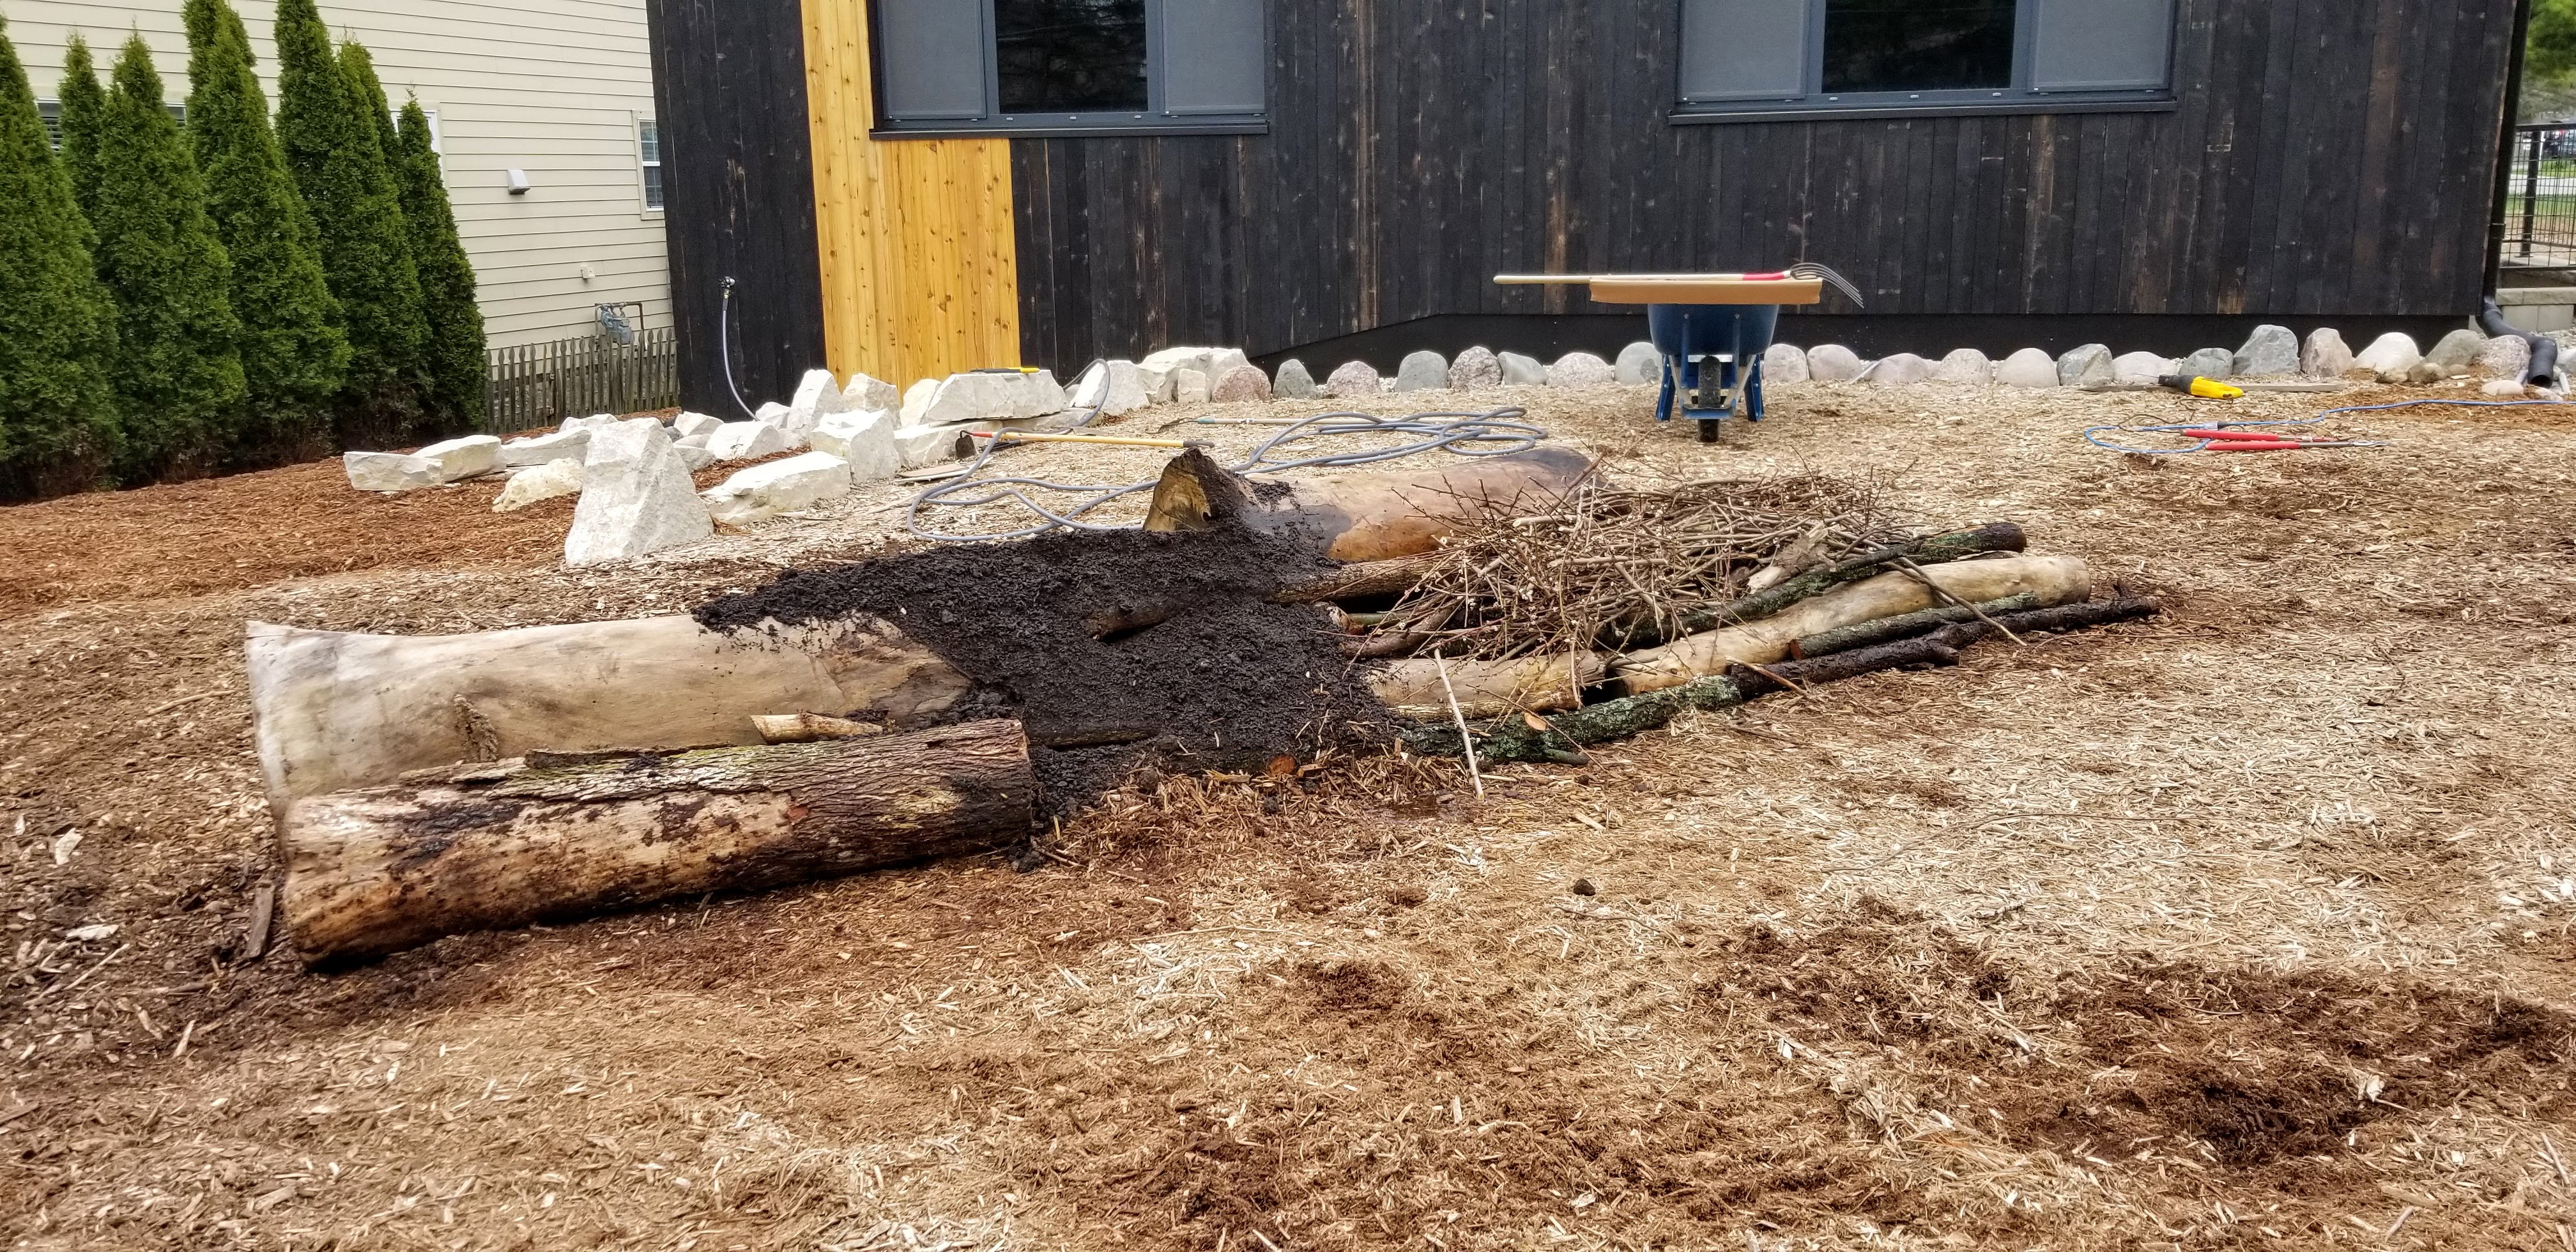
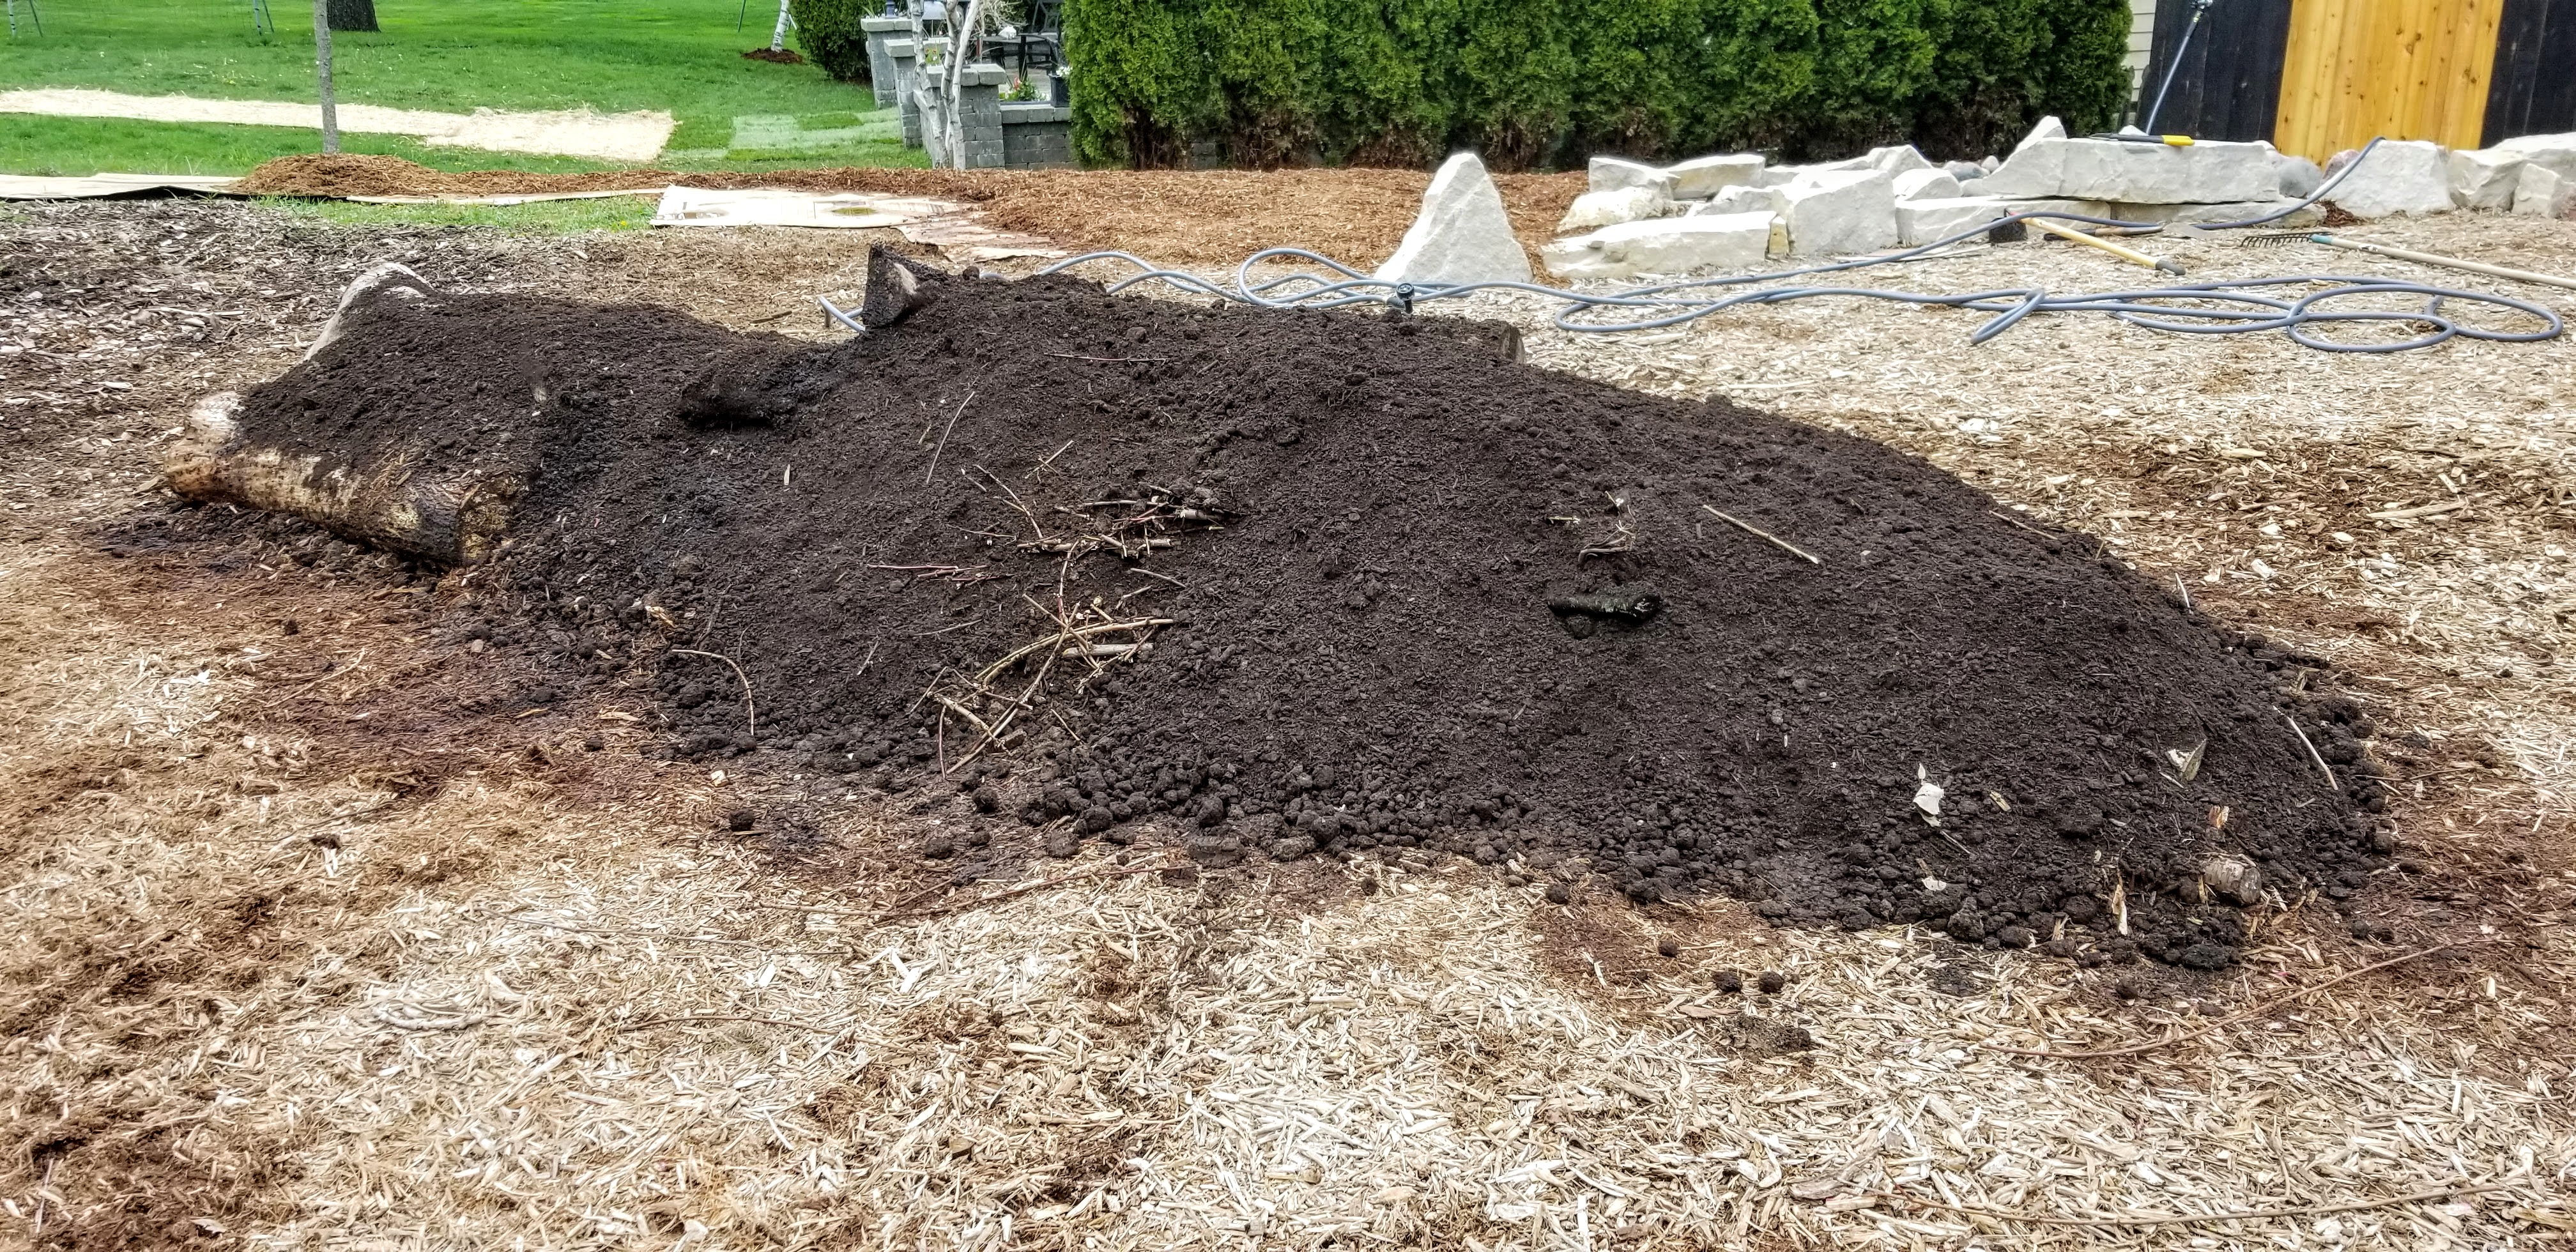
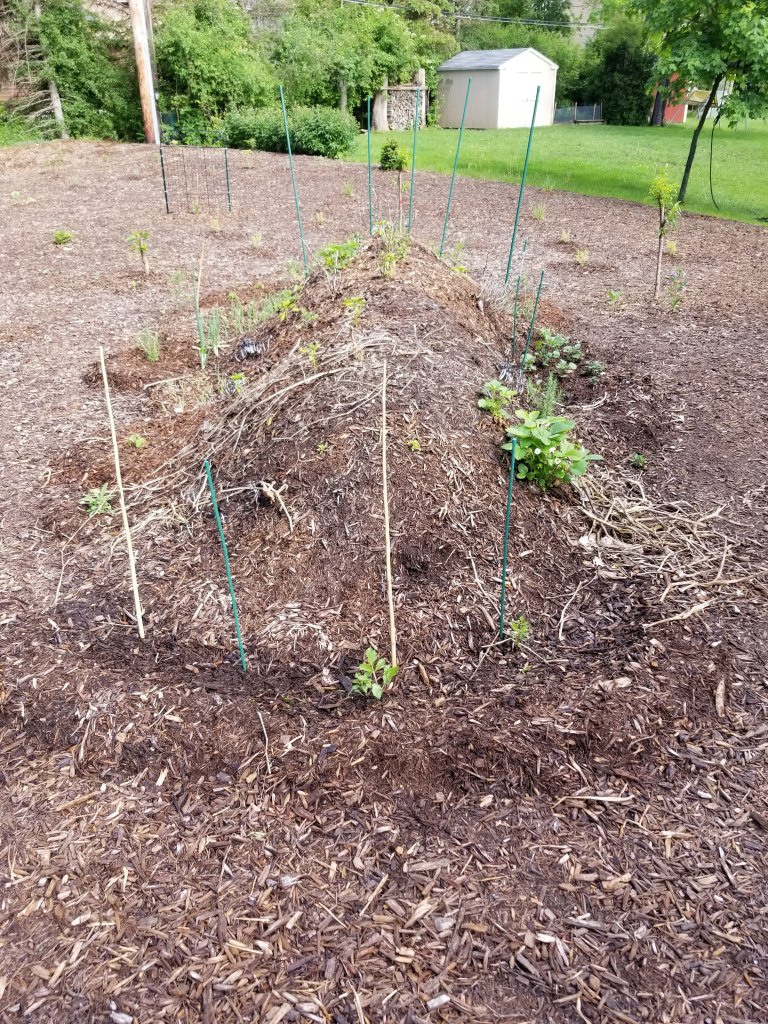
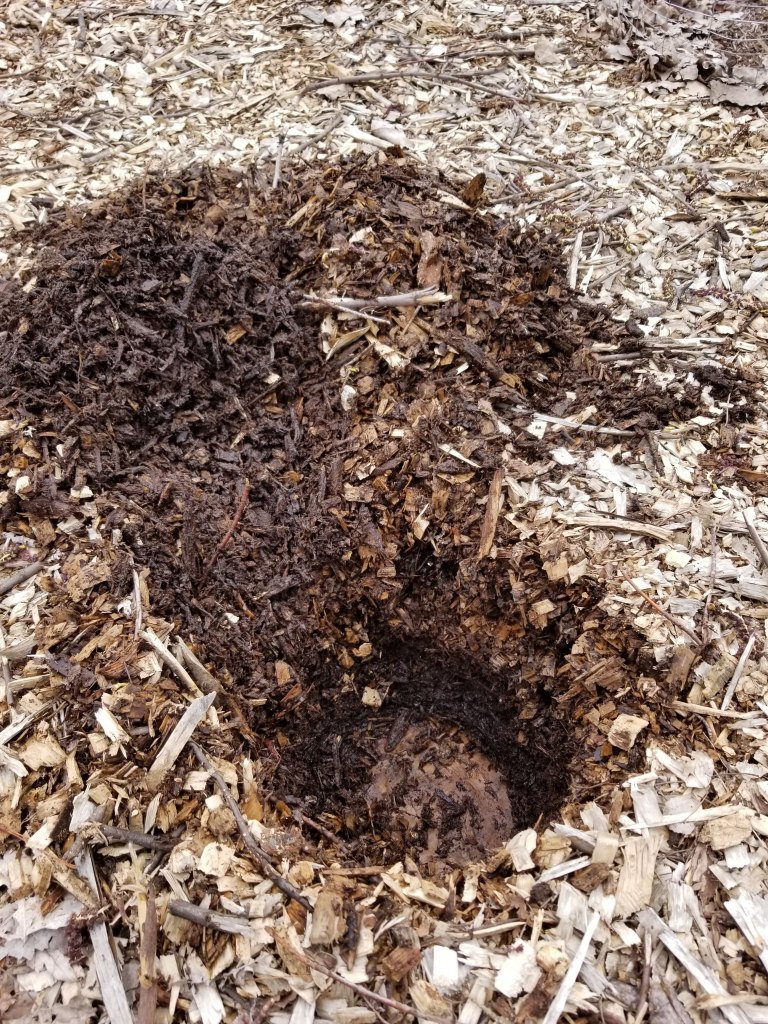
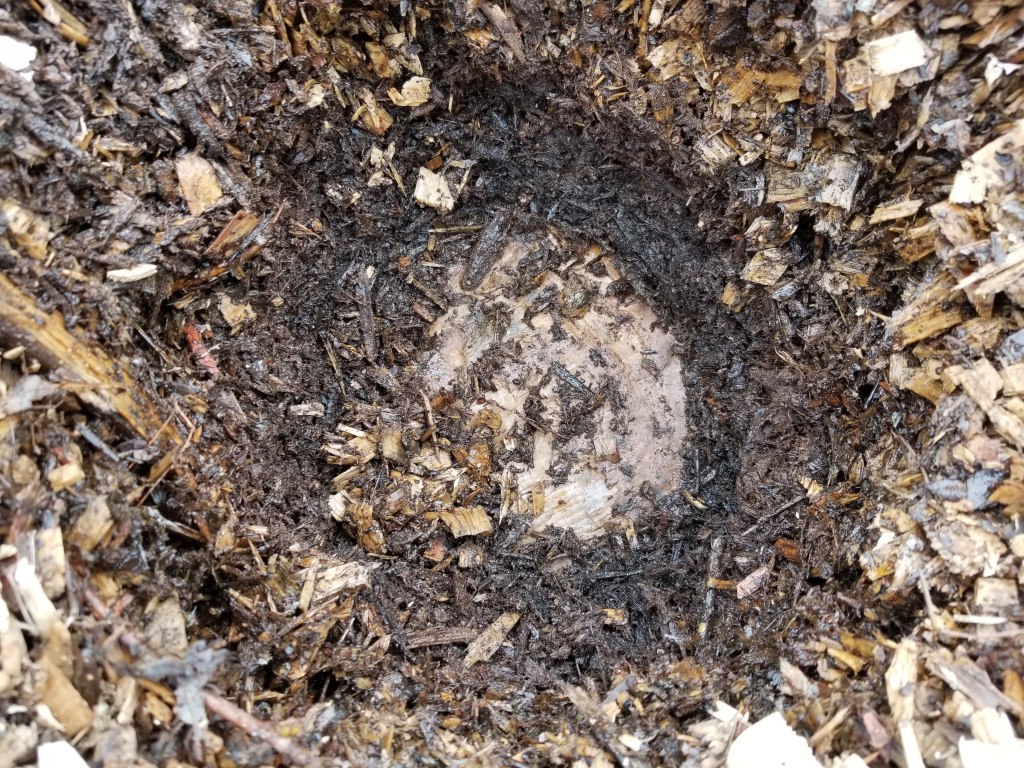
With a good portion of the backyard complete, we moved on to creating our hügelkultur bed. The basic structure was formed using portions of our remaining elm tree, branches, twigs, and random pieces of bark. On top of this we placed a layer of topsoil mixed with some mushroom compost.

As with the mulch, we wish we had gone bigger with the hügelkultur bed. Even so, we used up every scrap piece of wood that we had on site, so if we had gone bigger it would’ve required that we bring in additional material.
If you look around online, you can see some impressively massive hügelkultur raised beds. Some so large they act as effective windbreaks.
A wider view of the backyard:
Note the diminutive shrubs off to the left. The purple sandcherry and dwarf blue arctic willow won’t stay tiny for long. While buying smaller plant options requires some patience, it makes meeting budget constraints easier, even as it allows you to purchase a wider variety of plants.

For the most part, I’ve been able to avoid designing-to-death every square inch of space in our yard. By adopting a more generalized idea of what I think can work in a certain area, it’s allowed for much more happy and successful outcomes, even the occasional happy accident.
This also helps when getting ideas down on paper, or even after plants have been purchased and you’re ready to put them in the ground. By being more open to various arrangements and combinations, the outcome tends to be more interesting, both aesthetically and even in terms of function.
Below is one area of exception. Pretty much everything shown was purchased and planted. In the case of these various shrubs, the idea was to create a living fence, one that offered privacy to my neighbor to the south, but also an opportunity for wildlife to have access to flowers, shelter, nesting sites, and even some fruit. By varying the heights and shapes of the plantings, we’ve tried to create more visual interest while avoiding the soldiers-standing-at-attention look that sometimes happens when the same plant is used down a long line to mark a border, as a windbreak, or for privacy.
Included in the list are dogwood, almond (they didn’t survive — we were pushing it in terms of climate region), purple sandcherry, a maple shrub, shasta viburnum, several privets, a weeping cherry, and a crabapple.
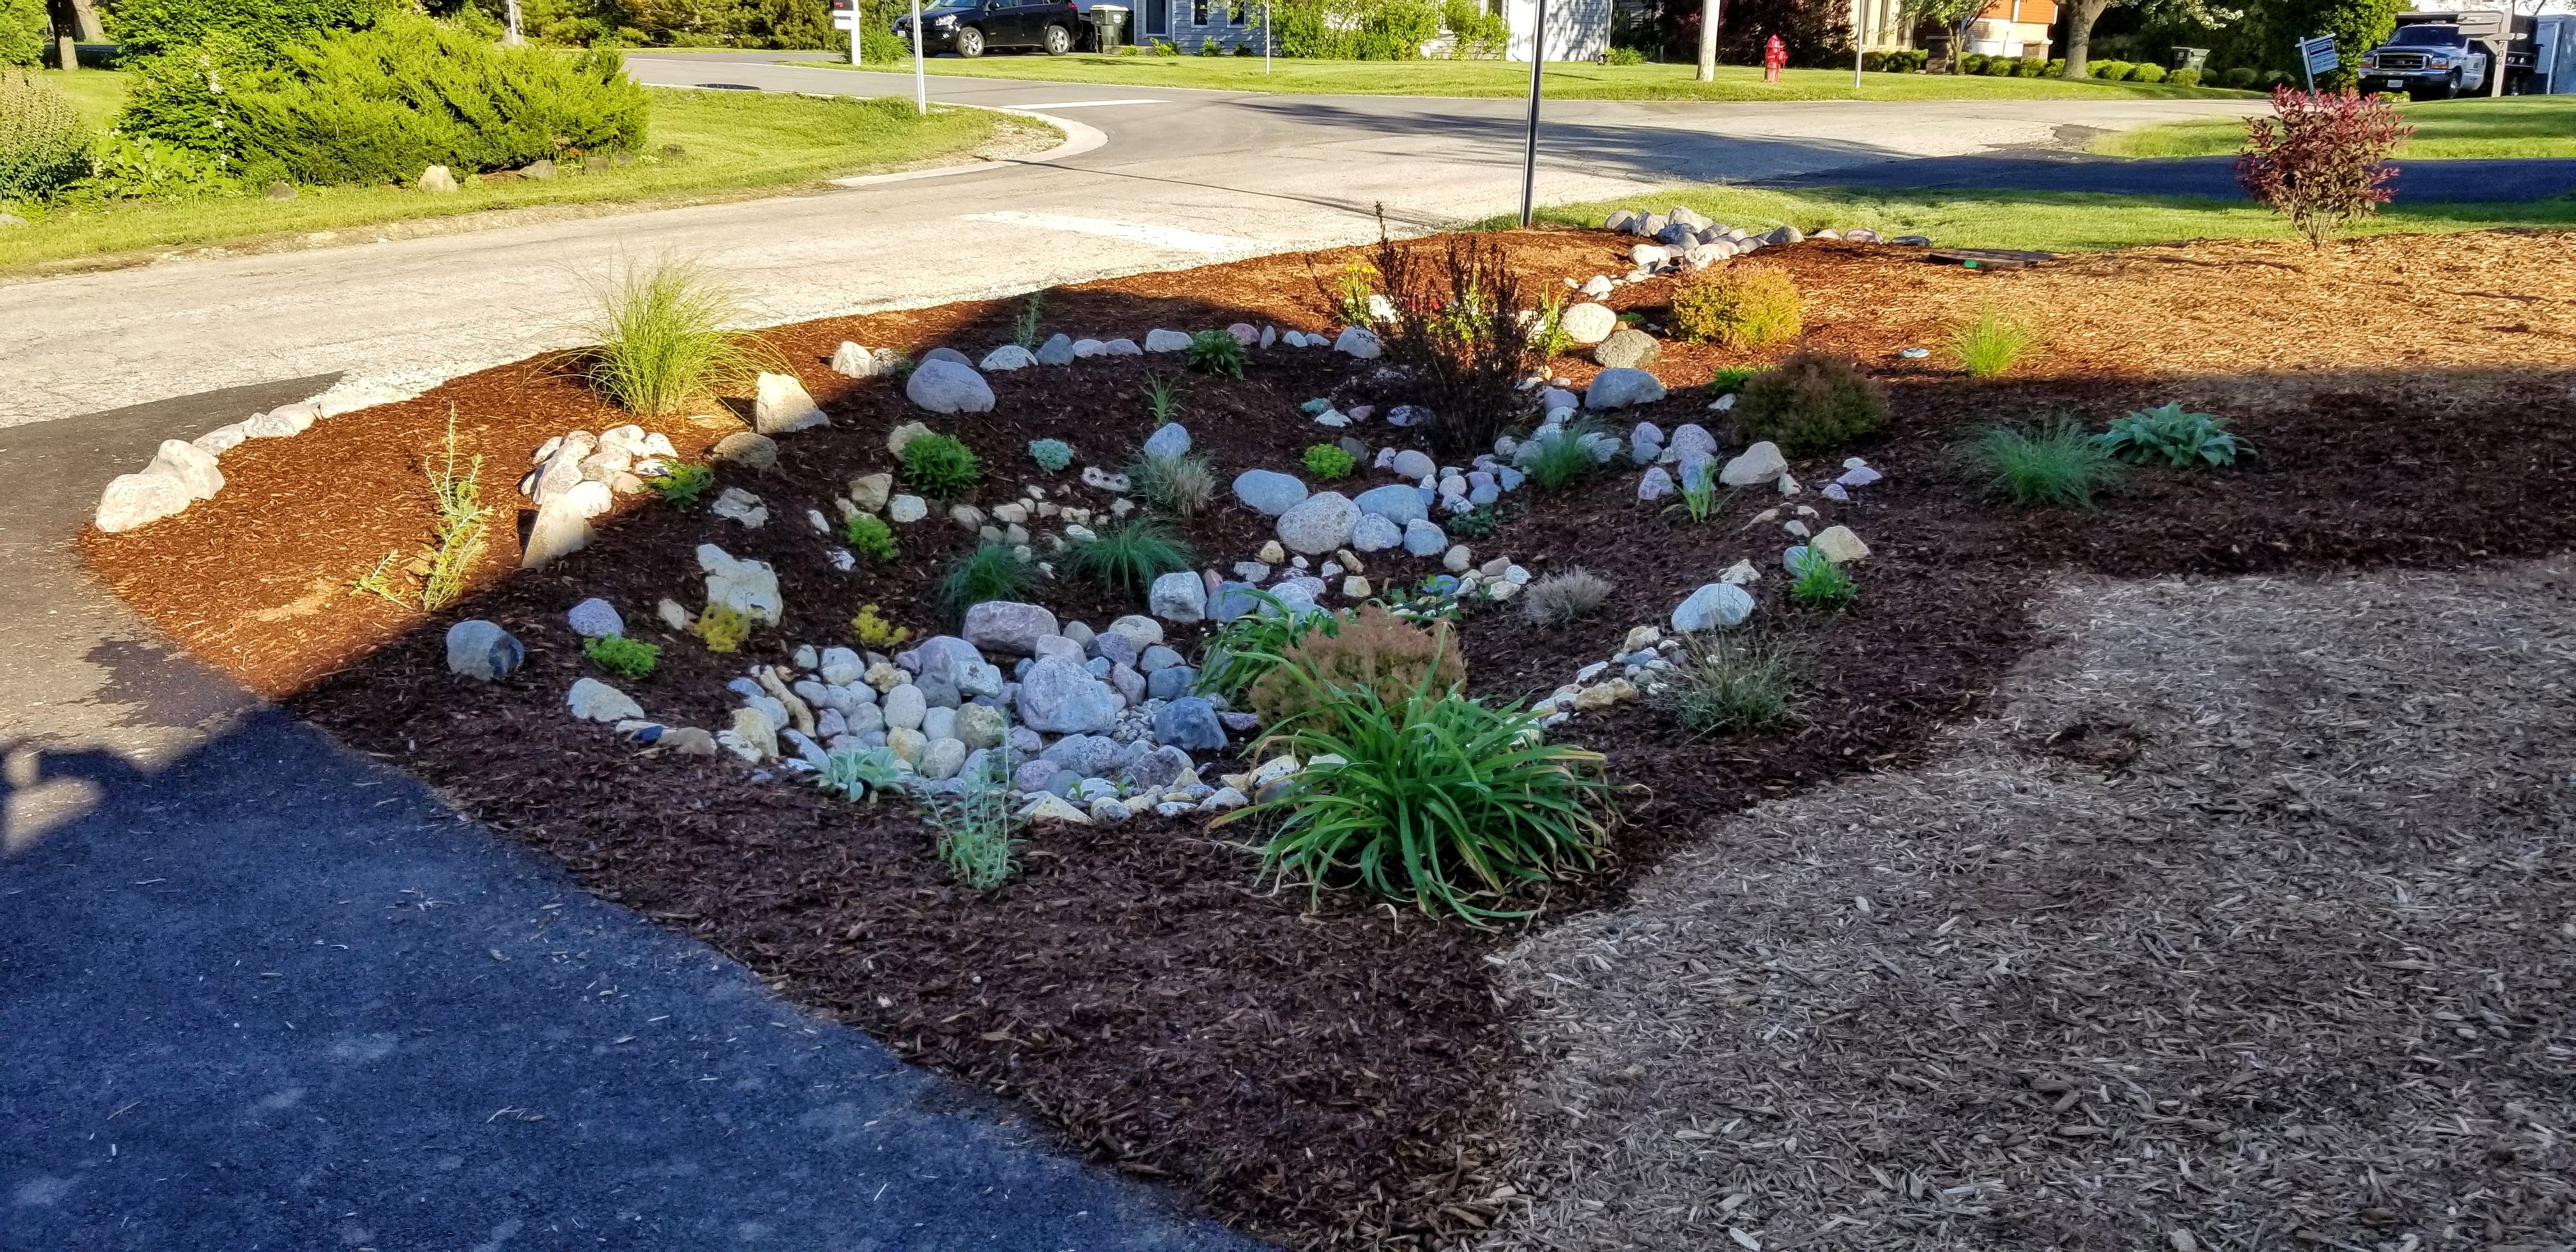
With the back and sides of the house mulched, we were able to move on to the front yard. With the house almost ready for us to move in, it was exciting to get plantings arranged by the front step.
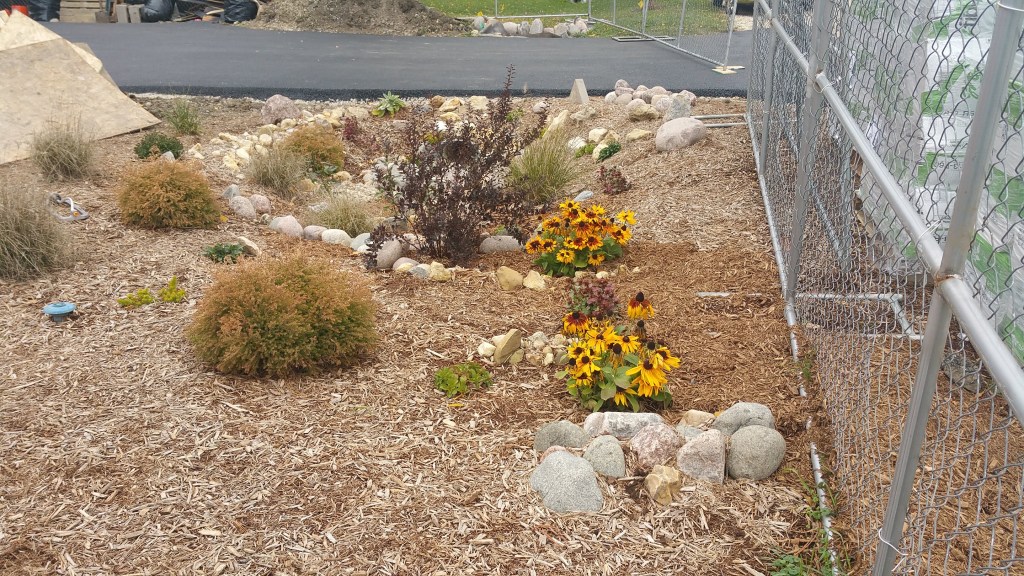
As with much of the yard, we started with basic structural elements. For instance, a rain garden next to the downspout, with ample amounts of rock and what will become robust ornamental grasses. Also added into the mix are colorful favorites like echinacea, shasta daisies, penstemon ‘dark towers‘, and a few lavenders. Keeping the lavender next to the concrete steps, where we’re sure to brush up against it, will make easy work of collecting the spent flowers.
With a few adjustments over time, this setup easily manages the sometimes heavy flow of water from the nearby downspout. The first year saw some erosion in the mulch layer, but after adding some more stone as the plants had a chance to get established, this area has subsequently been issue-free and, arguably, one of the most cohesive and well-developed areas in the yard.
“Most of our job in relation to water is to intercept and direct its flow into a variety of storages — tanks, ponds, swales, rain gardens, livestock, plants, the soil — and only release it once it has done a whole series of duties… If you store water, you must also provide for its release and continued flow. You can only slow water down. You have a right to use it, but you don’t own it. All of it must sooner or later be released, if not to the stream, then to the soil or the air.”
— Peter Bane, The Permaculture Handbook
Boulders, gravel, thick mulch, and a variety of plants work together, encouraging water from the downspout to infiltrate rather than run-off. Over time, we’ve implemented this strategy at each downspout, even on the north side where there’s only a few feet to the neighbor’s property line. Even in this case, the goal is to encourage as much of the water exiting the downspouts to infiltrate into our yard, rather than escaping to the neighbor’s property. While the rocks and stones help to slow the water down, the thick mulch and plant roots are able to absorb surprisingly large quantities of water.
In theory, this strategy can even help recharge aquifers. If the infiltration is slow and consistent, it can encourage water to remain on site where it can be a source of water that some plants can call on during severe drought conditions. Instead of looking at water as strictly something to be gotten rid of (this is the case when it comes to the structure of our house), in permaculture terms it needs to be cultivated and managed in a way that’s beneficial to the plants and soil.
Out front, by the street, we added a parkway tree, some additional stone, and a handful of new plants.
Below, the view of the north side of the house and yard shows very little planted, and not much around the downspouts at this point. Because the north side is the smallest area in the yard in terms of square footage, and it gets minimal foot traffic, we decided to hold off on addressing it. It also gives us more opportunity to figure out exactly what we’d like to see on this side of the house.
The stone-filled culvert where water from our sump pump exits is both functional and slightly improved with the addition of mulch and a plant combination of Lychnis ‘Petite Jenny’ and blue iris where the water eventually passes out of the culvert and into our neighbor’s yard.
In the backyard, around the hügel bed, my daughter helped me plant a series of bare root fruit trees. Utilizing Ann Ralph’s techniques, laid out in her small tome, Grow a Little Fruit Tree, we cut these back hard right after planting. The goal is to keep these fruit trees compact but fruitful (ideally under 6′ tall to make harvesting easy).
“Ask yourself what seems best, listen to your own good opinion, and cut something out. These choices are entirely up to you and not nearly as consequential as you fear.
The tree responds. You watch what happens. You learn. The tree grows and creates new choices for you in the form of new branches. You can always make adjustments and corrections next time.”
— Ann Ralph, Grow a Little Fruit Tree
On the hügel itself, we planted a series of herbs, including sage, basil, and lemon balm, along with a series of strawberries. Later we would add some tomatoes and peppers. We also planted some potatoes that we’ve yet to dig up (the vegetation and flowers continue to come up each summer).
The trees in the backyard were a mix of nectarine, peach, plum, and cherry.
“In the climates where fruit trees grow, the orchards give the land an almost magical identity: think of the orange groves of Southern California, the cherry trees of Japan, the olive trees of Greece. But the growth of cities seems always to destroy these trees and the quality they possess.”
— Christopher Alexander, et al., A Pattern Language
In the front yard, we did a mix of red apple and Granny Smith (hopefully for apple pie one day).

In addition to fruit trees, we also planted a series of blueberries and strawberries, spreading them throughout the front and backyard, in the hopes of upping the quantity and variety of food available in each successive growing season. In the case of strawberries, we’ve opted for everbearing varieties.
Marking Progress
In the photo below, even though things look pretty thin so far, there’s actually a foundation of plantings that have been put in place.

For instance, in the back, off to the left, are the logs donated by a neighbor after their tree fell during a storm. Also, in the far right back corner, there’s a mix of Miscanthus giganteus and Sante Fe Maximillian sunflower, along with three ‘Tiger Eyes‘ Sumac and some ‘Walker’s Low‘ catmint. The Miscanthus and Maximillian sunflower (which is perennial) are our attempt at a bamboo alternative.
When fully grown, these plants range in height from 8-15′, offering the size and dense layering associated with bamboo (it takes 2-3 years for these two varieties to really get established).
The Sumac and catnip are complements in terms of height, flower color, and texture. The small yew evergreen will eventually be our perennial ‘Christmas tree’ once it matures (and gets wrapped in solar powered lights during the holiday season).
Immediately around the hügel are the fruit trees, matched with Russian comfrey (a favorite in Permaculture design) for added mulch and nutrients. We’ve had good luck with the comfrey — it’s easy to ‘chop and drop’ under each fruit tree several times each growing season. When it’s happy, comfrey produces large, vivid green leaves with dainty lavender flowers that bees love to visit.
Between the hügel and the back corner, there’s a mix of wildflowers and ornamental grasses. We’ll need to add to this area over time, as there’s still plenty of open space available.
There’s also been some erosion in the mulch layer after heavy rains. As the summer progressed it was clear that some areas, especially in the backyard, were showing signs of having thinned out. It was significant enough that we even had some weed seeds show up in a couple of areas.
Overall, the sheet mulching was incredibly effective at weed suppression. To date, the only ‘weeds’ that have managed to survive are Virginia creeper and some bindweed. The Virginia creeper is concentrated towards the back corner of the yard, intermingled amongst the Miscanthus and sunflowers. The bindweed pops up along the entire northern edge of our property.
Both weeds are sparse, emerging in only limited areas. They are easy to pull once they get a few inches up above the mulch. Unfortunately, this is the best option for controlling them, as any herbicide is unlikely to kill the entire plant. Clearly happy to grow and spread beneath the mulched surface, even if you managed to kill it in one spot, they’d likely pop up elsewhere.
Utilizing this disciplined approach of constantly pulling it as soon as it pops up was effective against a patch of chufa, or nutsedge, at our last house:
It took time, 2-3 summers in fact, but eventually the constant pulling seemed to exhaust the individual plants and they eventually disappeared. We’re hoping for the same result with these weeds. Worst case may be controlling rather than eradicating them altogether.
Interestingly enough, the lawn grass of our neighbors to our north and south is easily the most relentless invader, spreading by rhizomes, relentlessly trying to invade our mulched border. Several times a year we cut a groove into the line between our mulch and their grass, pulling up the grass that’s trying to get established in our mulch. It’s relatively easy work, but absolutely necessary in order to avoid being overrun.
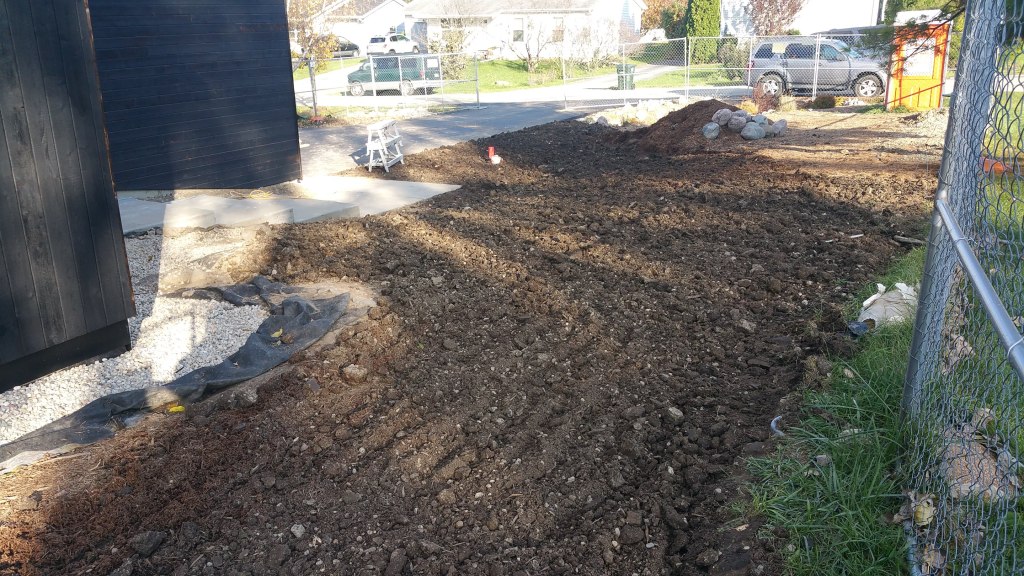
As we put in new plantings we were always careful to pull back the mulch until we had dug down to the clay layer so that we could add actual soil before setting the new plants in place.
In many spots the cardboard hadn’t disintegrated yet, although there were a couple of areas where it was mostly gone. Presumably, in another year or two, it will be gone.
Digging down 8-10″ past the mulch layer to expose the original clay soil:
While putting in the new plants, we also saw evidence of white mycelium developing just below the surface of the mulch, along with plenty of earthworm, spider, and insect activity. All hopeful signs for the future health of our yard.

Apart from the decorative stone throughout the yard, the shrubs, ornamental grasses, and sunflowers are the basis of our structural layer (in visual terms) up to this point.
Later in the summer a couple varieties of basil pretty much took over the top of the hügel. To the left, a tuft of new leafy growth is visible on the fruit tree. In the background, near the house and downspout, the first year of growth on the Helenium ‘Dancing Flames‘ and the beginnings of a rain garden are visible, even though at this stage it’s still mostly just stone slowing down the water in this area.

A view of this same area, but from inside the house:

Erosion in the mulch layer is clearly evident in the many tiny gullies formed as water moved away from the downspout. Nevertheless, the stone and plants are in place to at least establish the beginnings of a rain garden.
During construction, when the ground was pretty much bare, our sump pump ran almost continuously during every rainstorm. With a heavy layer of mulch and the rudimentary beginnings of a rain garden at the mouth of every downspout, the sump pump ran noticeably less often, even during the heaviest of storms (in one case, 3″ in about an hour).
View from the south-west corner of the house: shrubs and grasses, just off the kitchen door, slowly getting established; the hügel and plantings in the backyard taking shape.
From left to right: four privets, Karl Foerster feather reed grass, Shasta viburnum, more grass, and then a crabapple barely in view.
In just a couple of years the privets and the viburnum will completely dwarf the grasses.

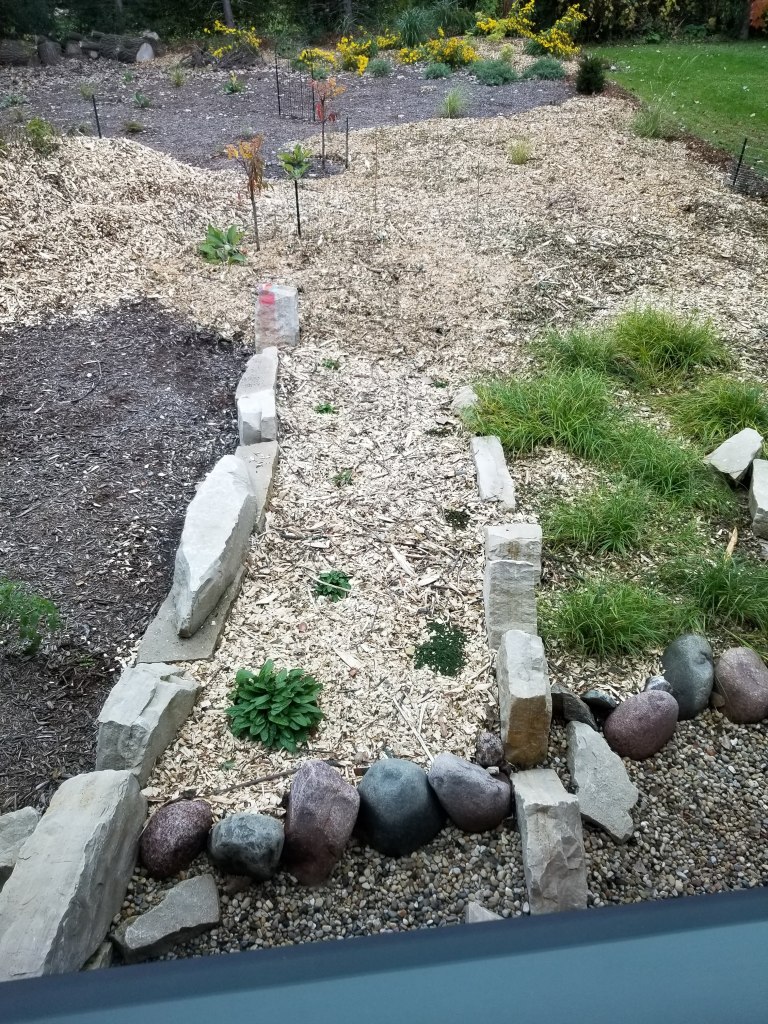
Another view of the backyard, this time from the far, south-west corner. In the foreground is a mix of perennials (flowers and grasses), beyond them is the hügel, and then, running along the southern edge of our property, the series of shrubs that one day should grow together into a living fence.
In the front, many of the perennials, especially the grasses, have enjoyed decent growth, and even the shrubs have leafed out well and taken on some new height. The area just behind the pile of stones was used extensively during construction as a staging area for building components, thus suffering a lot of abuse.

The soil in this area has compacted, and it’s been a struggle to grow much of anything so far.
To help this area recover we’ll try mostly a green manure mix, and then transition eventually to mostly flowers in order to add more color to the front yard.
Post-construction, this area has continued to be a staging area for materials, including gravel, decorative stone, topsoil and mushroom compost, and, of course, many yards of mulch.
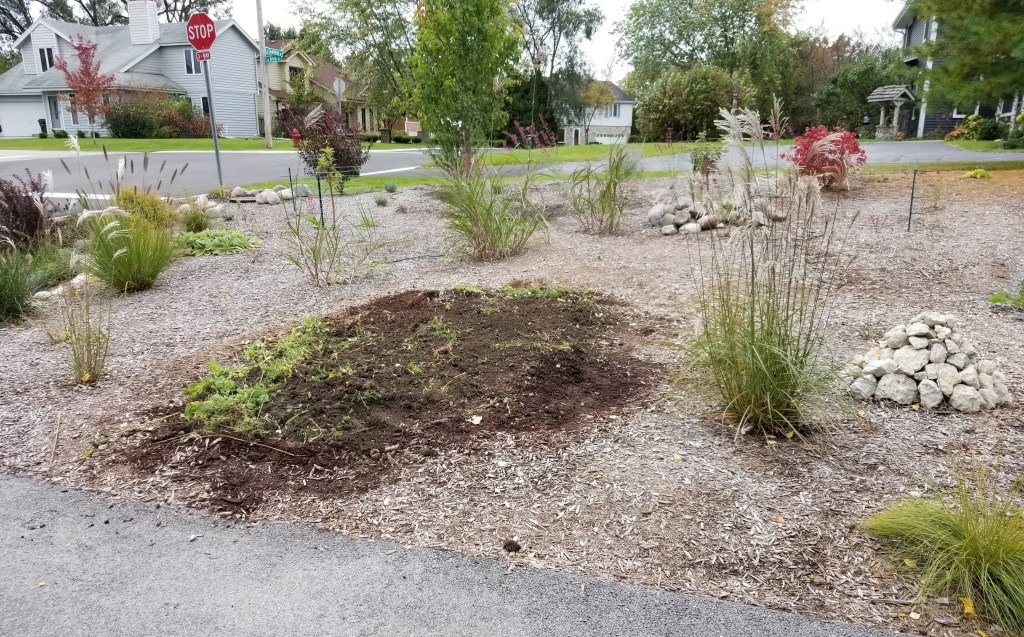
If we can loosen the compaction in this area sufficiently, we could probably even sneak in at least three more fruit tree guilds.
First Harvest
In our first full season of growing we’ve had some nice development, although much of what we’ve planted is nowhere near maturity, remaining undersized and often wispy in appearance. This is to be expected so early in the process. The main goal, so far, has been to establish a base; both in terms of visual weight and in the long-term sense of function.

Even in the photo above, the rough outlines are present. For example, out at the culvert a series of plants are in place to absorb heavy rain events while also being resilient enough to survive periods of extended drought. The goal is to avoid having to water anything that far away from the house. Apart from last year, when the first plants went in, we’ve been able to let things flourish on their own. The thick layer of mulch does wonders in this regard.
They’re hard to see at this stage, but there are also apple trees, strawberries, and some blueberries planted in amongst the shrubs and perennials. They’re all just getting started.

Even though it’s early days for the yard, we’ve still managed to garner a decent harvest this first summer. From the backyard we’ve enjoyed a fair number of tomatoes, peppers, and basil. From the front, it was exclusively lavender and some peppermint.
Lavender we’ll use in satchels to go next to pillows or inside drawers for aromatherapy:
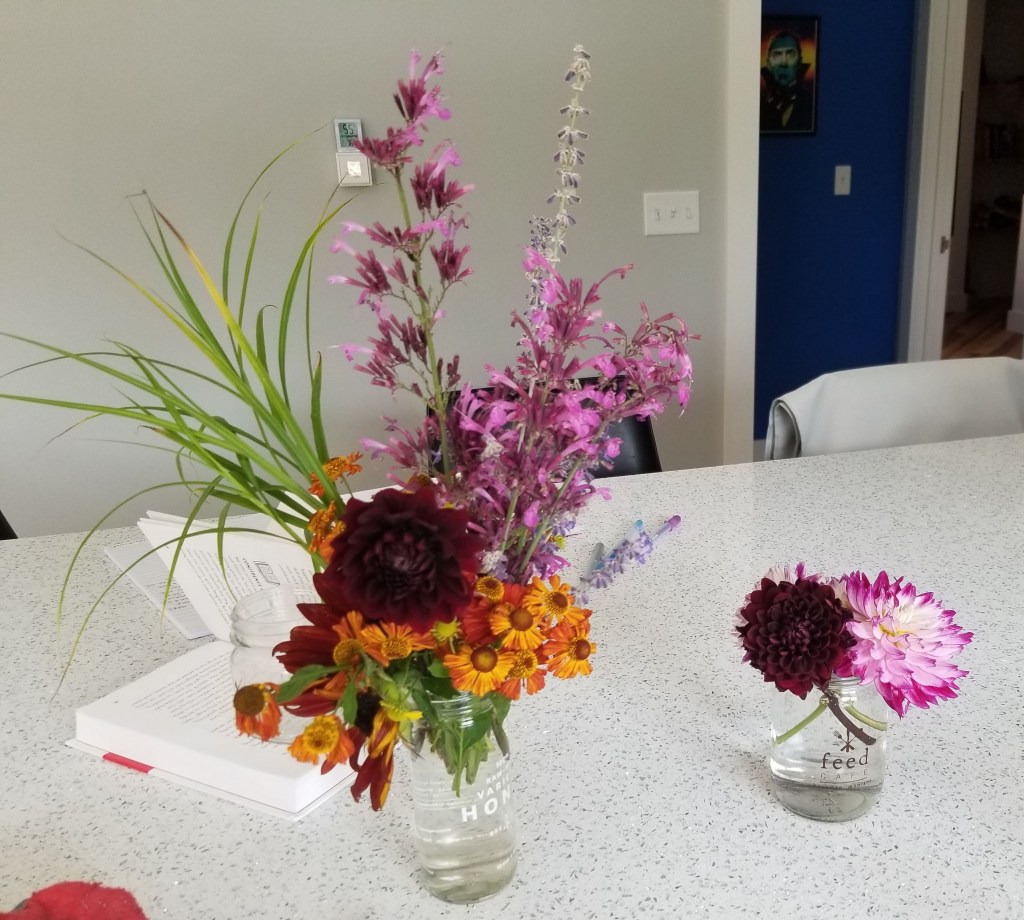
During our first full growing season we also managed to bring in our first flower cuttings, including two plants that have been a mainstay for us since our last house: agastache ‘Ava’, one of the more durable and long blooming flowers in our yard (loved by pollinators and hummingbirds alike); and Russian sage, an equally impressive magnet for pollinators. Also, one of our favorite perennial ornamental grasses, Palm Sedge, which helps to fill out and add texture to a bouquet.
In the fall, the hügel bed finally filled up a little. The fruit trees, which had been aggressively cut back in the spring, had taken on a nice flush of leafy growth. In the far back corner of the yard, our Miscanthus giganteus and Maximilian sunflowers were doing well, even if they were stunted in their first year as they acclimate to their surroundings. We look forward to next year when they grow together in a thick wall of leafy green, mimicking a stand of bamboo.
At this stage the yard is, admittedly, still looking mostly like a mulched moonscape. A small price to pay in order to patiently and methodically decide how we want to fill in all the remaining gaps. It was tempting to purchase enough mature, or at least semi-mature plants (at much greater cost, of course), to fill the entire yard and then hope we had guessed right in our placement and mix of sizes, colors, and textures.
Our approach, although it requires more patience, should allow us to experiment and observe seasonal changes as plants develop and grow together. And we’re certainly not afraid to remove or move things around to improve the relationships between plants.
In addition, the wildlife is still showing up, be it ever so slowly. Even with relatively few flowers, we’ve still managed to have our share of bees and wasps, hummingbird moths, and even a single hummingbird.
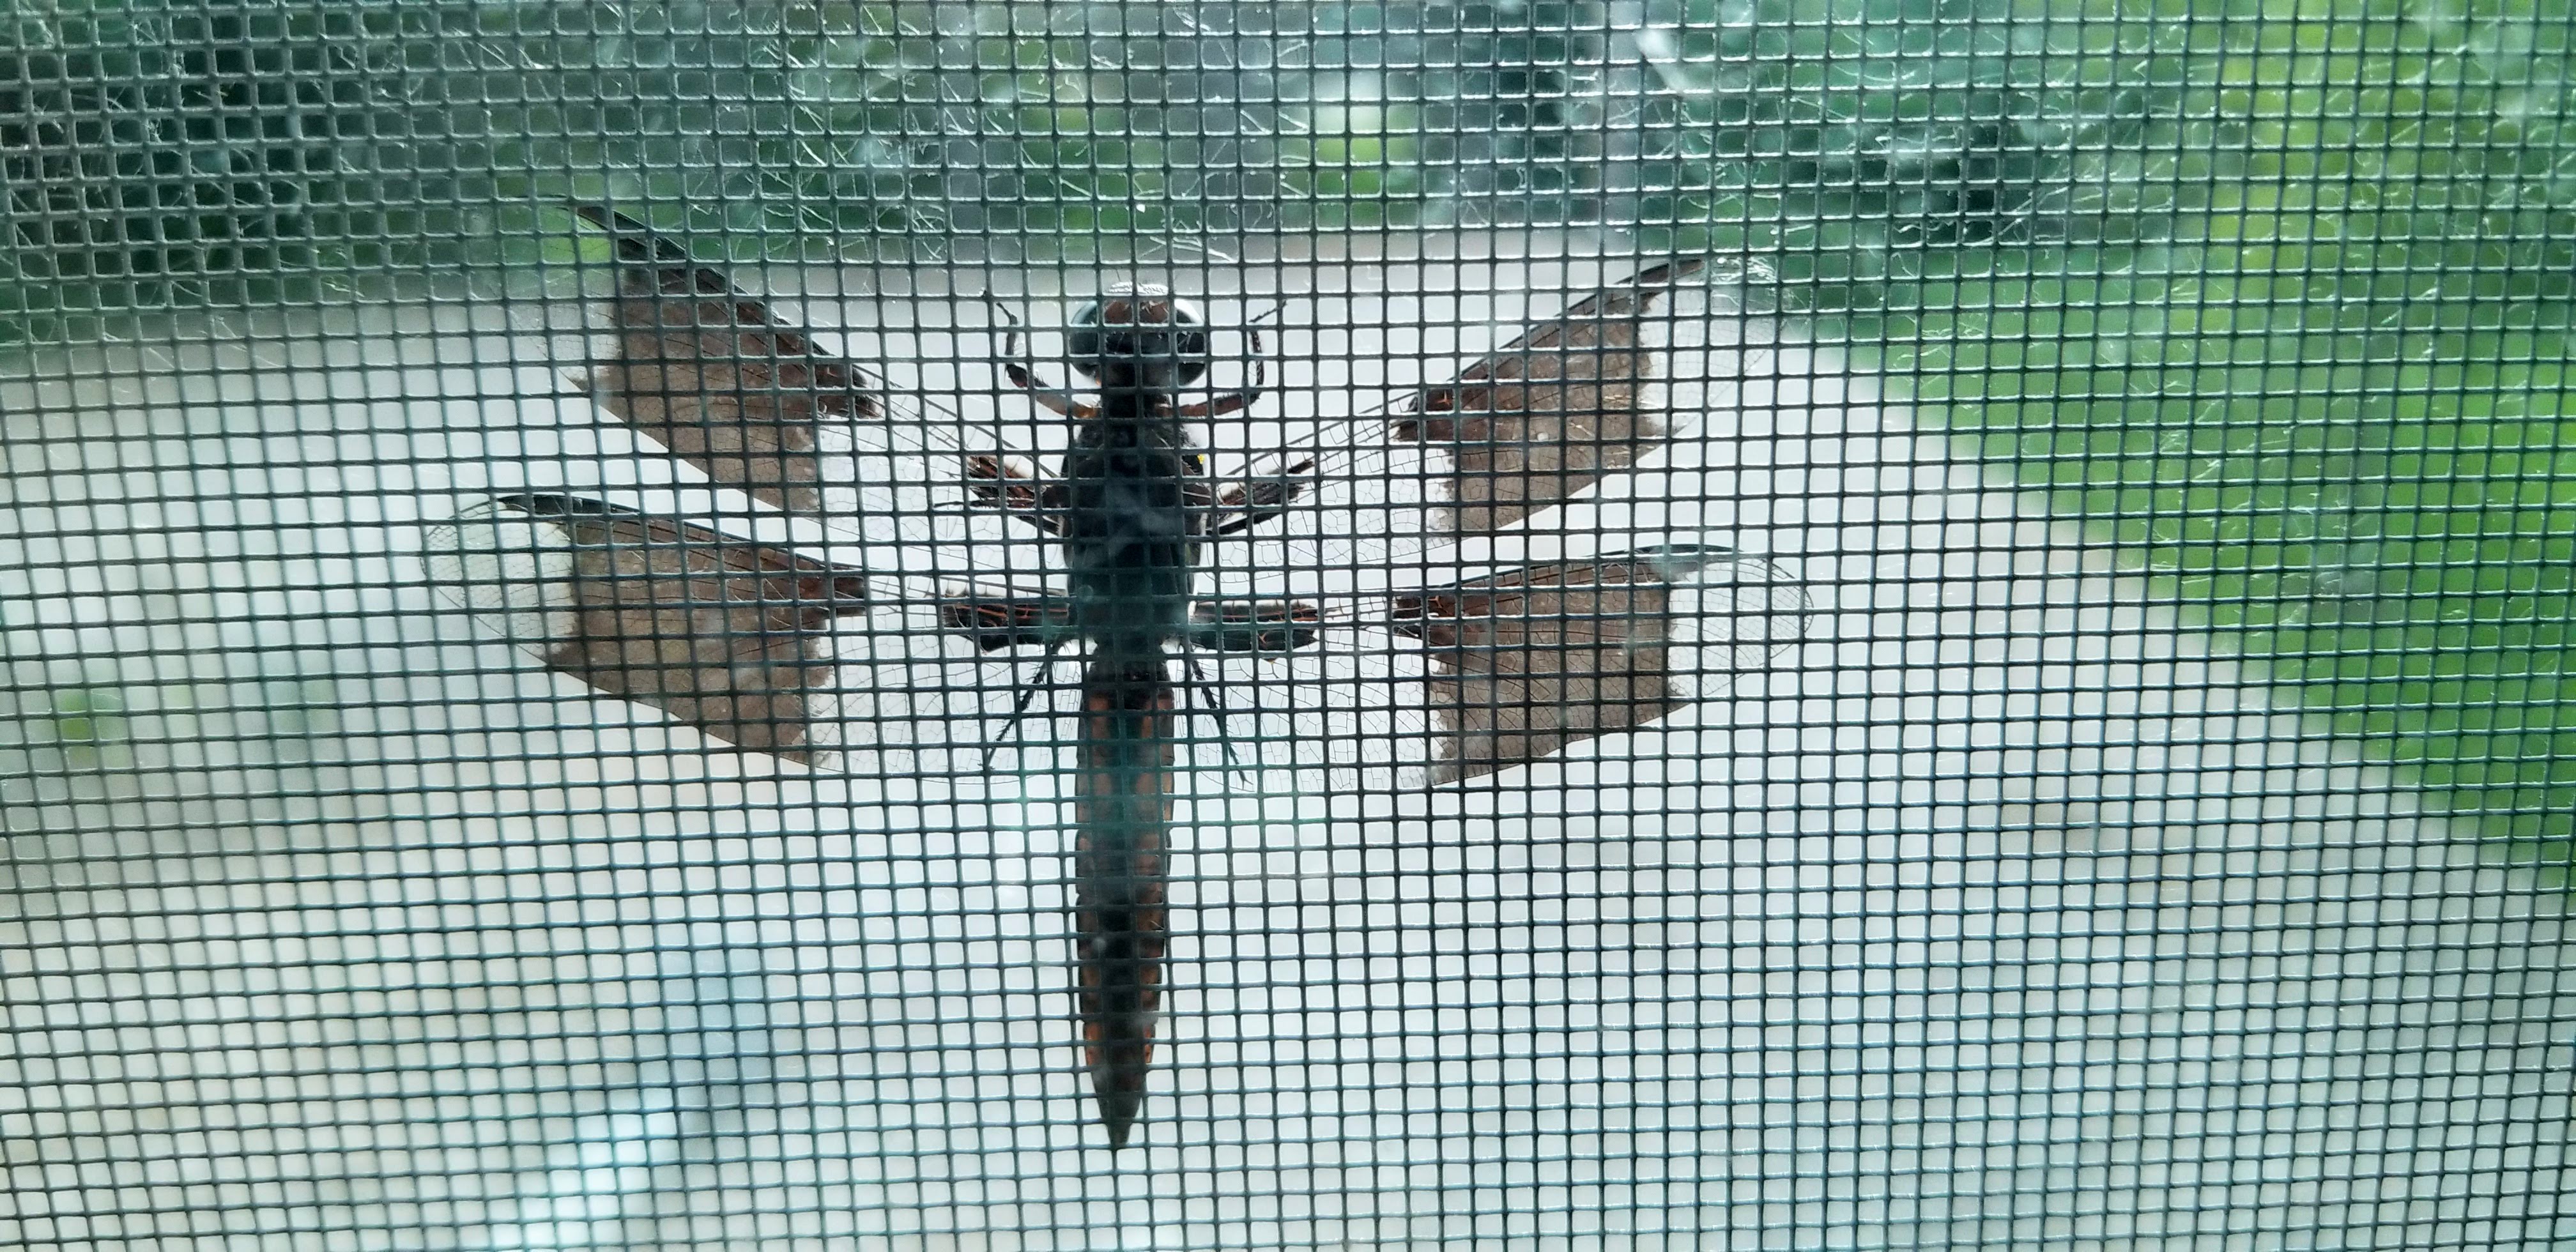
The dragonflies have taken notice of the yard, too, even showing up on a window screen to dramatic effect:

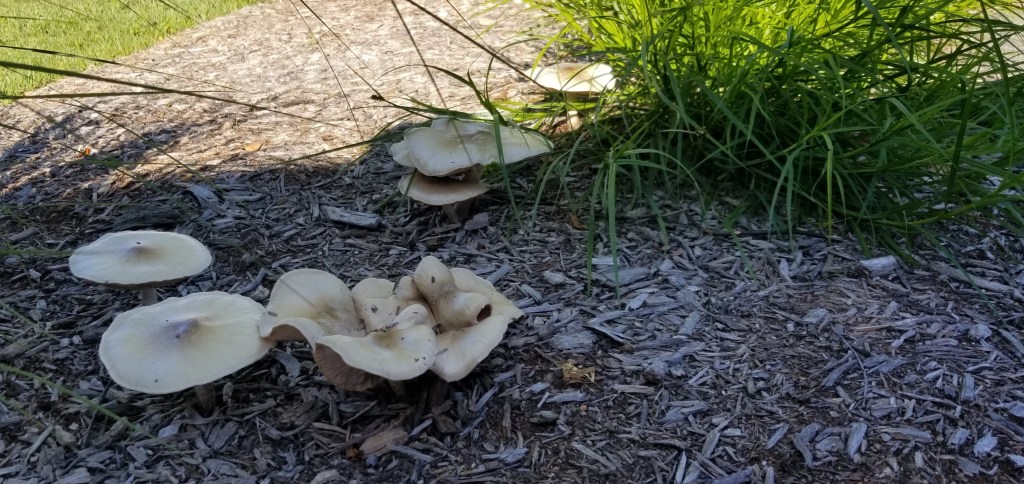
We had our share of mushrooms again this year, although not as much as we anticipated.
We even had a moth show up on our soffits, presumably to enjoy the breeze coming from air entering the vented attic.
More Mulch
Although we didn’t get to enjoy the yard as much as we would’ve liked (there was plenty of work to finish up on the interior of the house — trim, cabinetry, painting, and storage), we still had a lot of fun watching the yard come to life this year.
Even so, it was apparent by the end of the summer that most of the yard could benefit from a deeper layer of mulch. Our options seemed to be either wait a couple of years and add more mulch, or just do it now and hopefully be done with mulch for the foreseeable future. In the end, it seemed like it was easier to commit to mulching now rather than later, mainly because so much of what we had planted was still undersized, with plenty of gaps remaining between plants. If we waited even a couple of years, the plants would begin to fill out and knit themselves together.
When a tree service was working near my daughter’s school, and they agreed to drop off a few loads of wood chips, it seemed too good to pass up.

The wood chip mulch encompassed a wide variety of textures, particle sizes, and even the occasional clump of grass and dirt. Once it was down, it didn’t really look all that different from hardwood mulch. Initially it was more pokey, and just generally messy, but with some rain and time it flattened out and began to weave together into a carpet, similar to a quality hardwood mulch. By the following spring, after the sun had a chance to bleach the color to a mixed brown-gray, it was indistinguishable from the substantially more expensive hardwood mulches.
For the hügel bed I tried to build the mulch up in layers, giving it a terraced look. Over time this would mostly disappear, but it did seem to help with erosion on the mound.

With the first couple of loads I made sure to increase the depth of the mulch in the far back corner of the yard, around the Miscanthus and the sunflowers. After that area was covered, I worked my way up the north side of the yard towards the house.
Around the boulders in the photo above: at right, there is a mix of native grasses (in this case, palm sedge), and then between the two rows of boulders there is a combination of stachys hummelo and creeping thyme that is just beginning to take root. We hope the thyme will eventually spread out and spill over and around the boulders.

It was nice to at least get started on all the mulch that would need to be put down next spring. The cooler fall temperatures made it an enjoyable task.
Overall, things were progressing nicely and, even in this early stage, a yield was being produced (even if it wasn’t always for us).
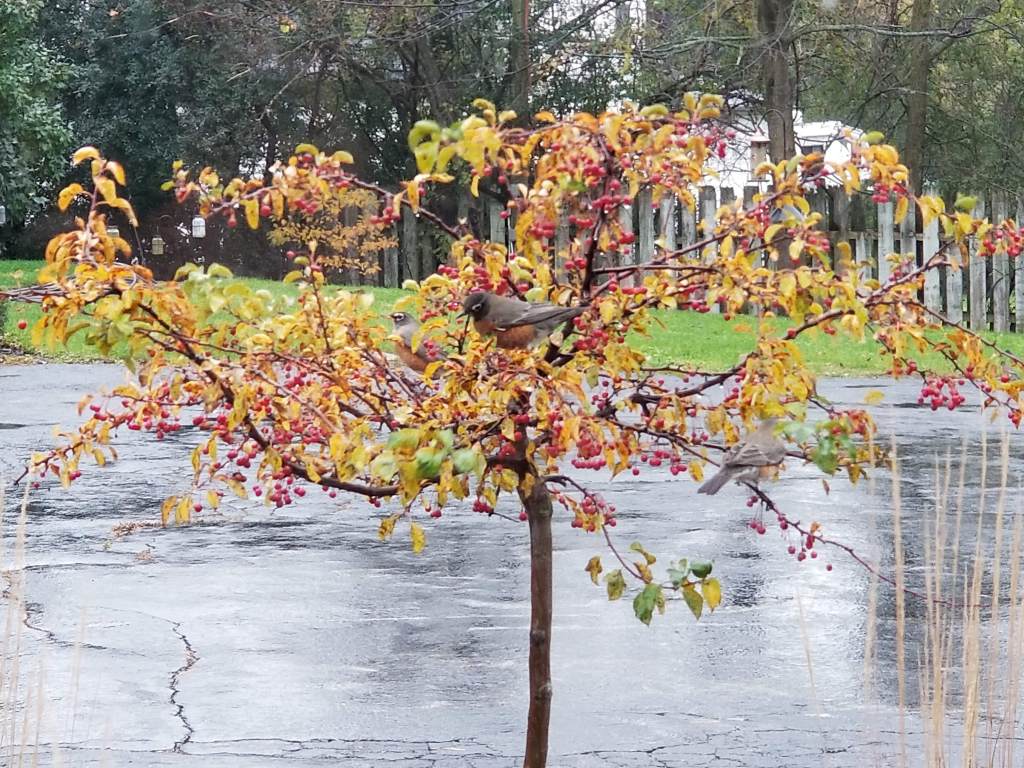
Robins have discovered the crabapples outside our kitchen window:
Winter can test even the most celebrated gardens with deep, lingering snow, extreme fluctuations in temperatures, and harsh windstorms. Moreover, the structure of various plants is on full display, unable to hide behind lush foliage or showy flowers. Even though we have managed to fill some of the voids in our yard, the visual interest isn’t quite where we’d like it to be yet. But, then, that’s what ‘next year’ is for.
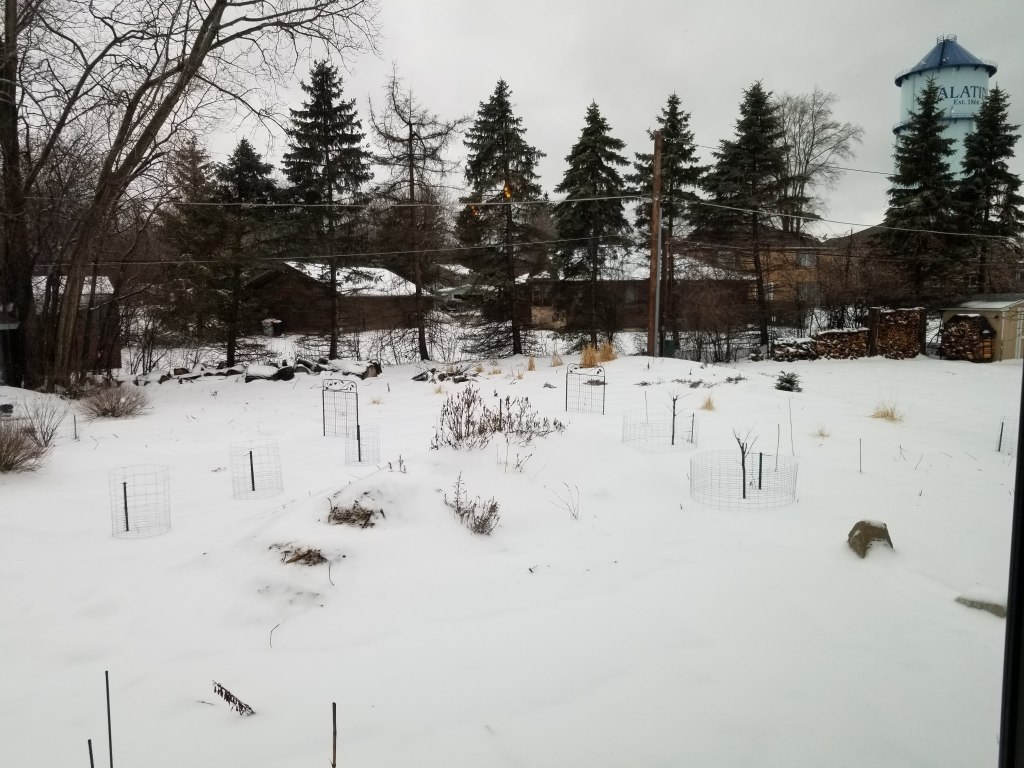
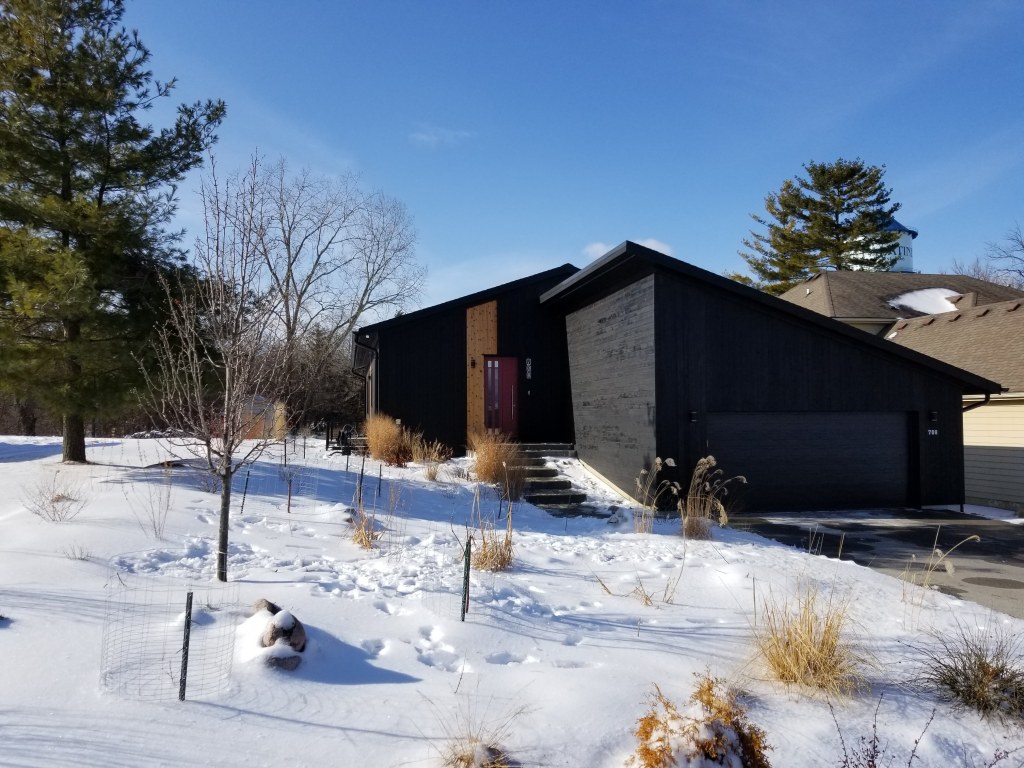
The front yard has only the beginnings of some structure, although, in this case, our ‘little black box’ in snow helps to improve the view.
One last look back at summer…


You must be logged in to post a comment.