kimchi & kraut

Passive House + Net Zero Energy + Permaculture Yard

Monthly Archives: September 2016

Vivian Maier and the Search for Rust

0

I can still remember seeing the striking cover of Vivian Maier: Street Photographer for the first time. The image hints at the story of her life — the mystery surrounding a great talent who went unheralded while alive, but who is now universally recognized and celebrated — while remaining dramatic all on its own.

The documentary about the discovery of her cache of photos, her life, and the work, is equally compelling:

There is something oddly electric about walking the streets of a large city and capturing life as it happens in beautiful photographs. There is an intensity in the captured moment that would otherwise go unseen if not for the skilled and curious eye of a photographer like Vivian Maier. To be able to see the world through someone else’s eyes is always a gift, but especially when the outcome is such mesmerizing images.

After the initial interaction (whether positive or negative), the real test for art, it seems to me, is: Does it compel you to come back again and again? On this basis, Vivian Maier’s work is one of my personal favorites. I never find the images boring, or find myself hurrying past some images to get to others. Her photos almost force you to slow down and really take in what she’s looking at.

Portfolios: Street 1
Portfolios: Street 2
Portfolios: Street 3
Portfolios: Street 4
Portfolios: Street 5
Portfolios: Color

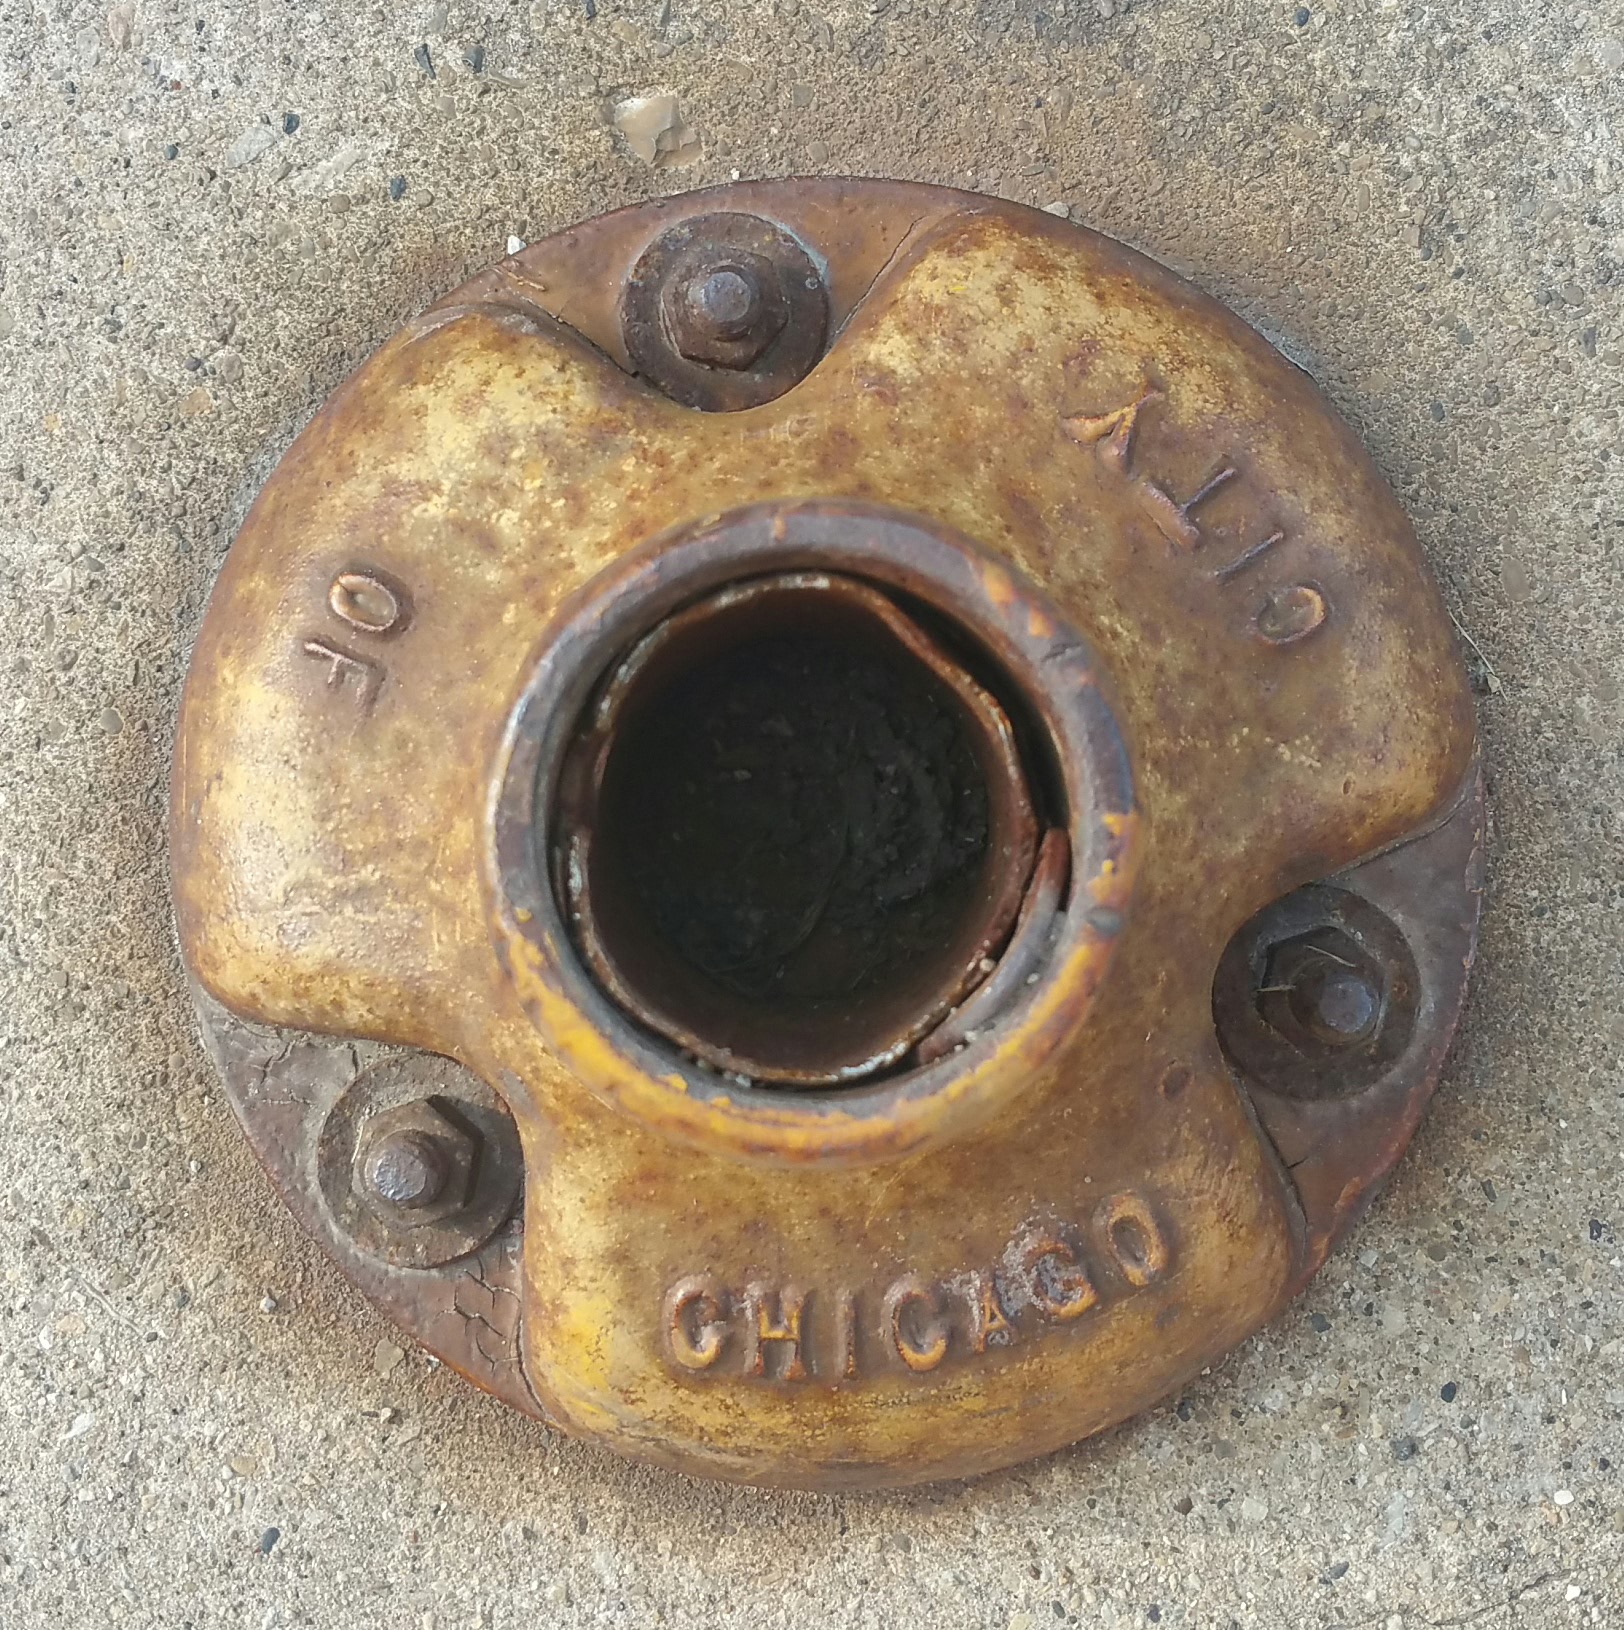
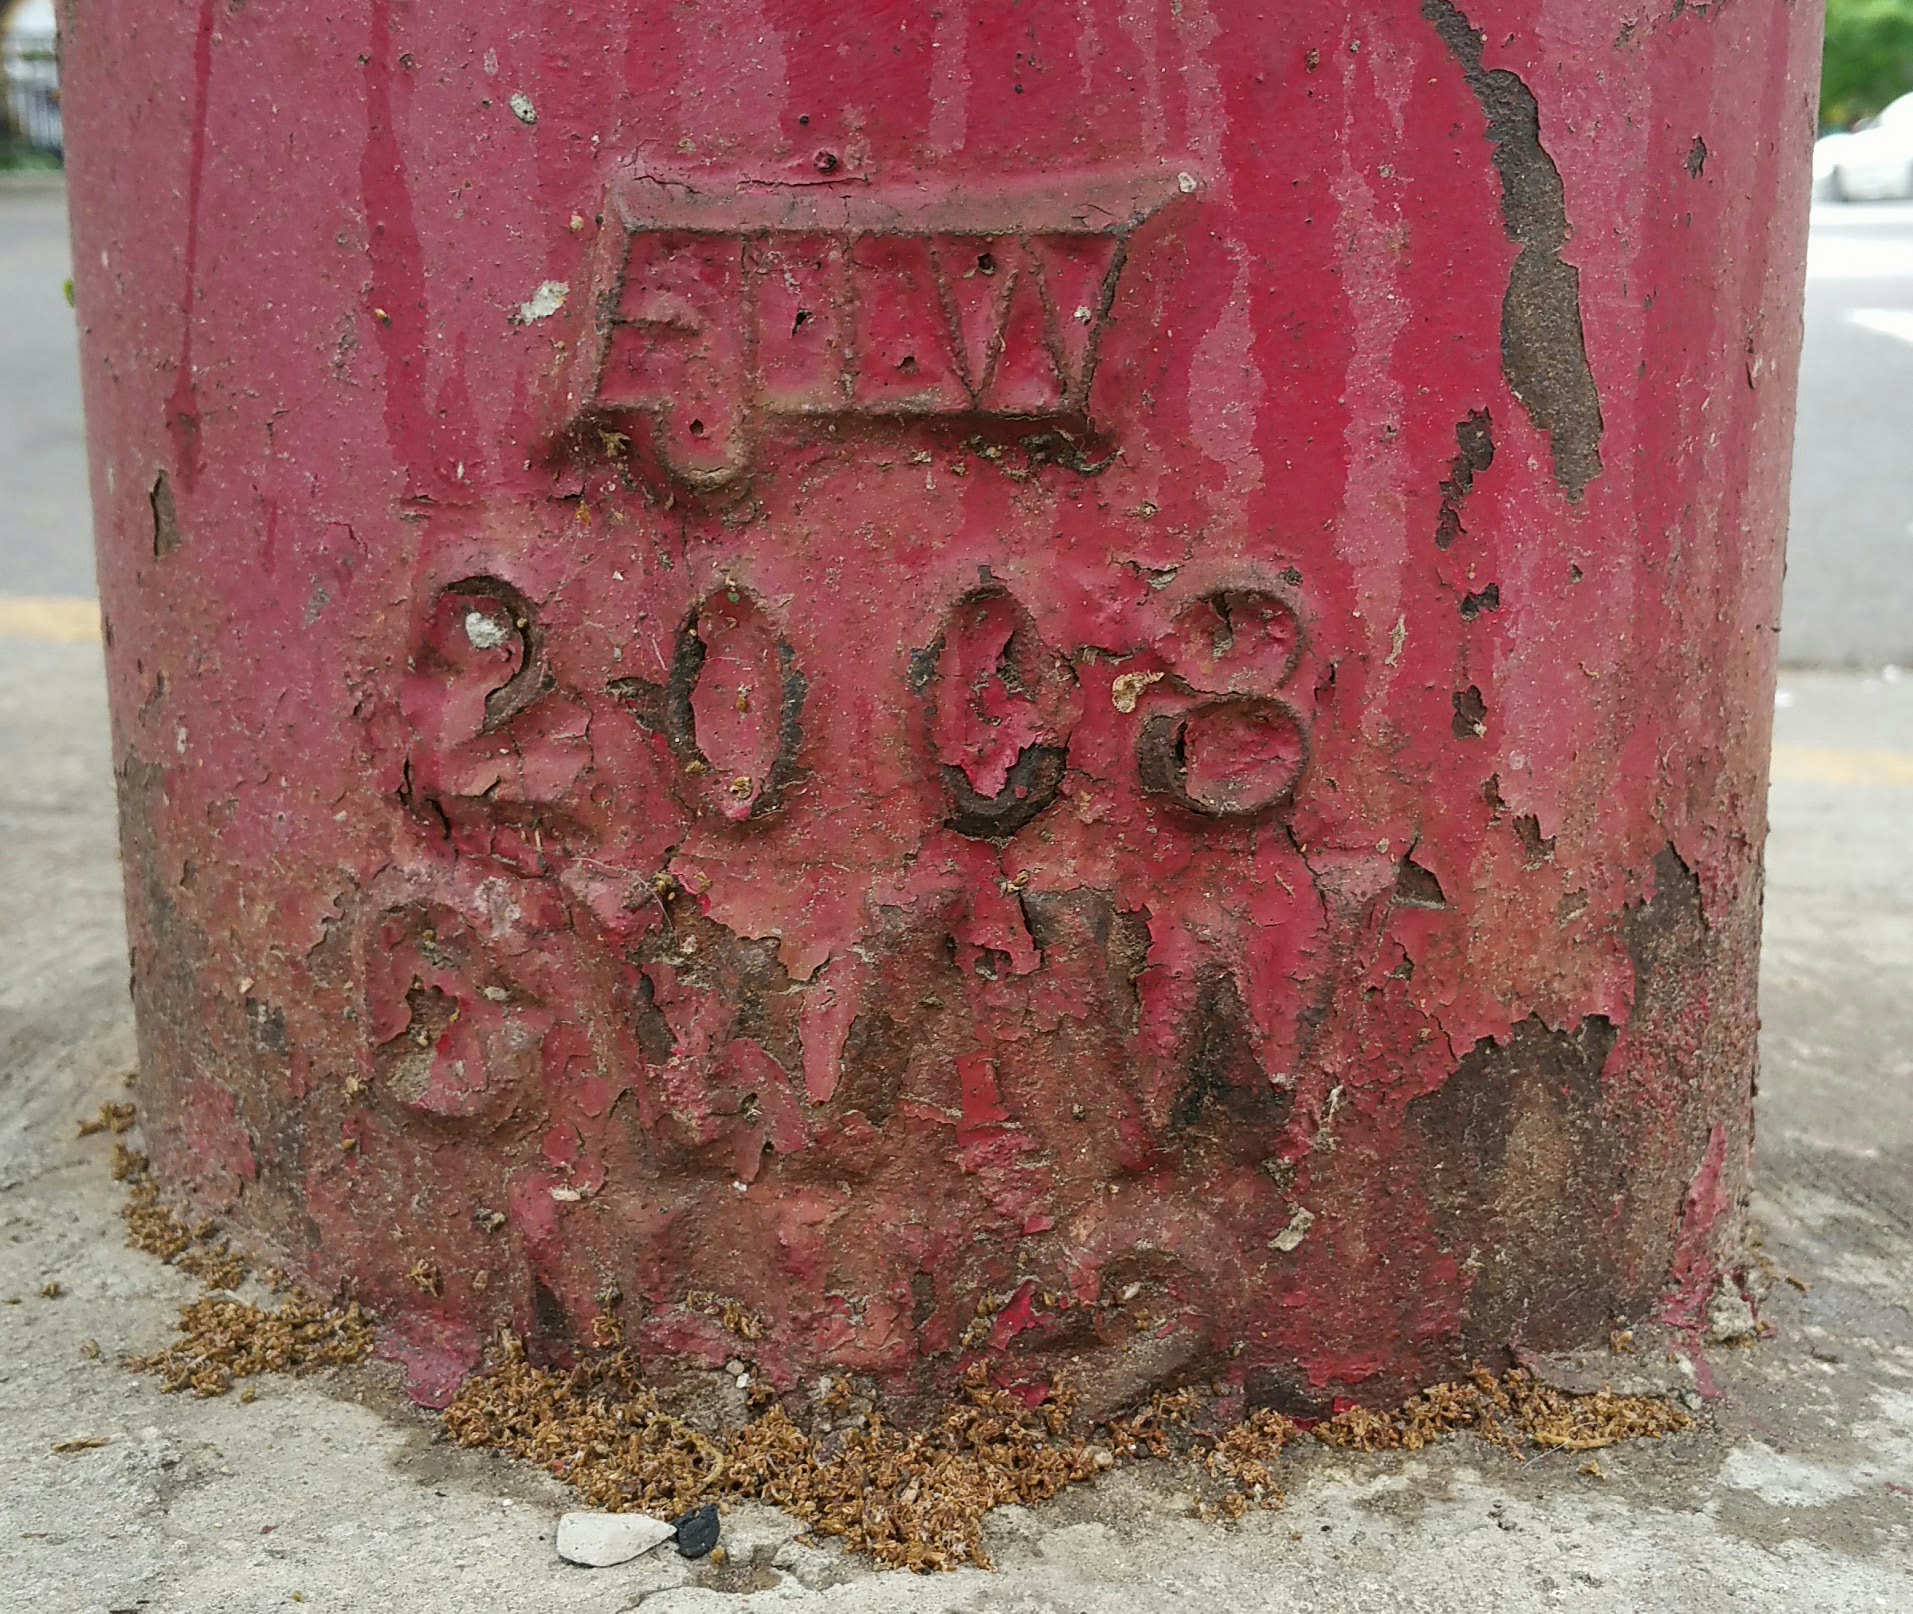
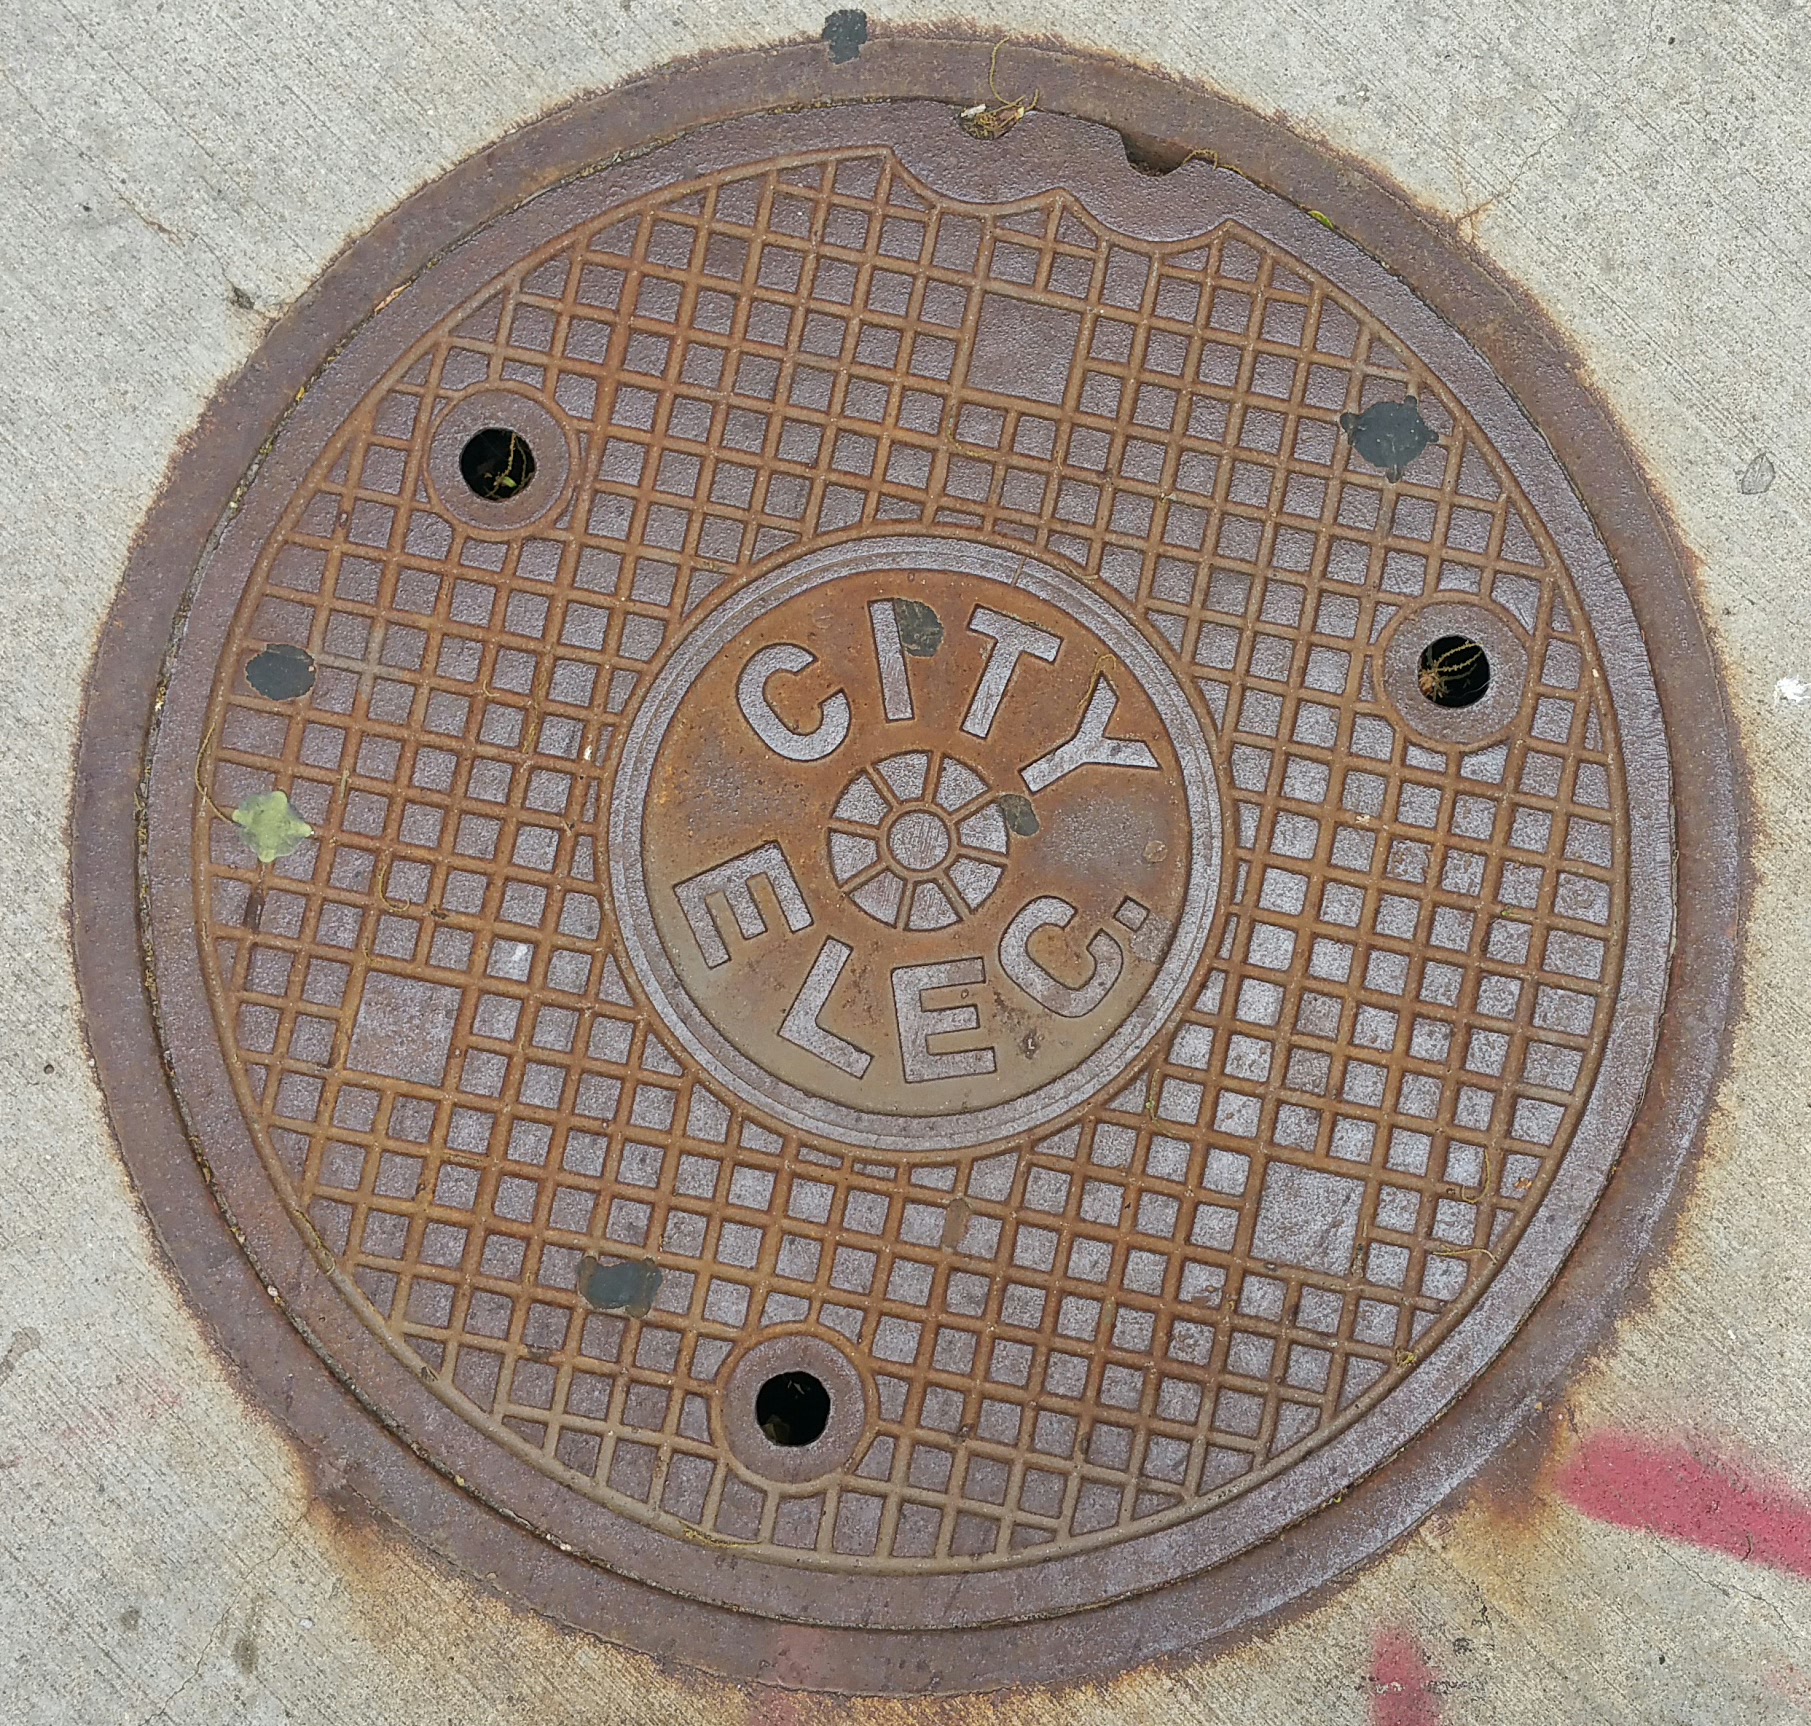
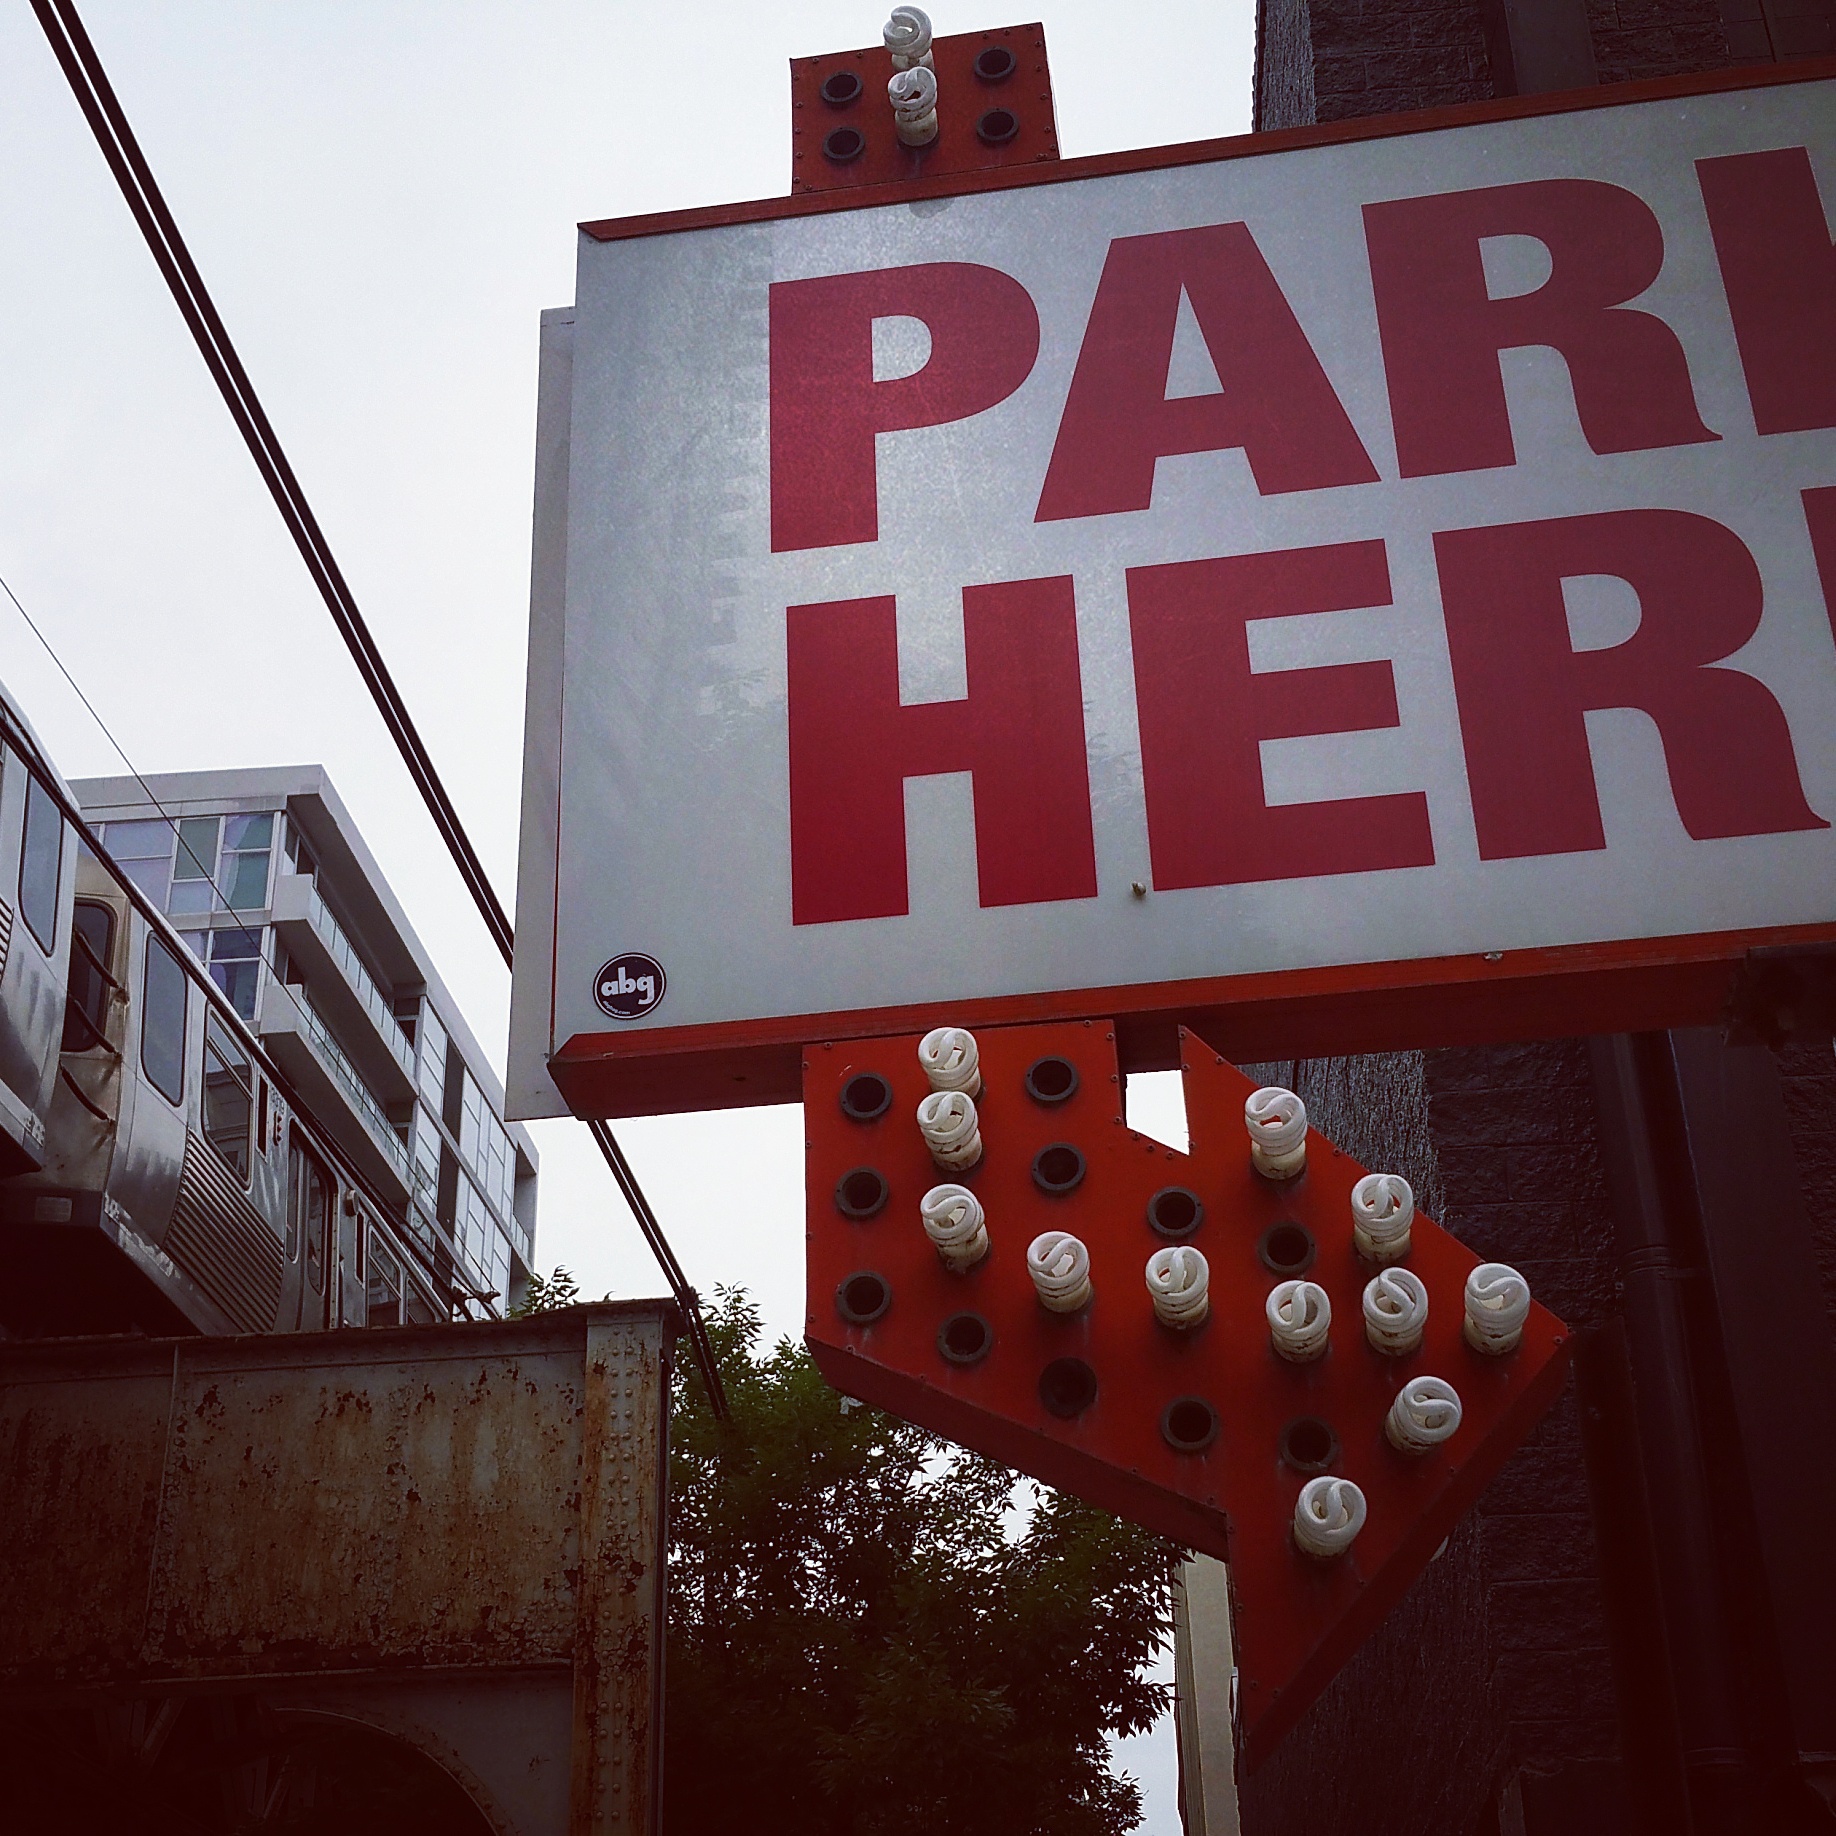
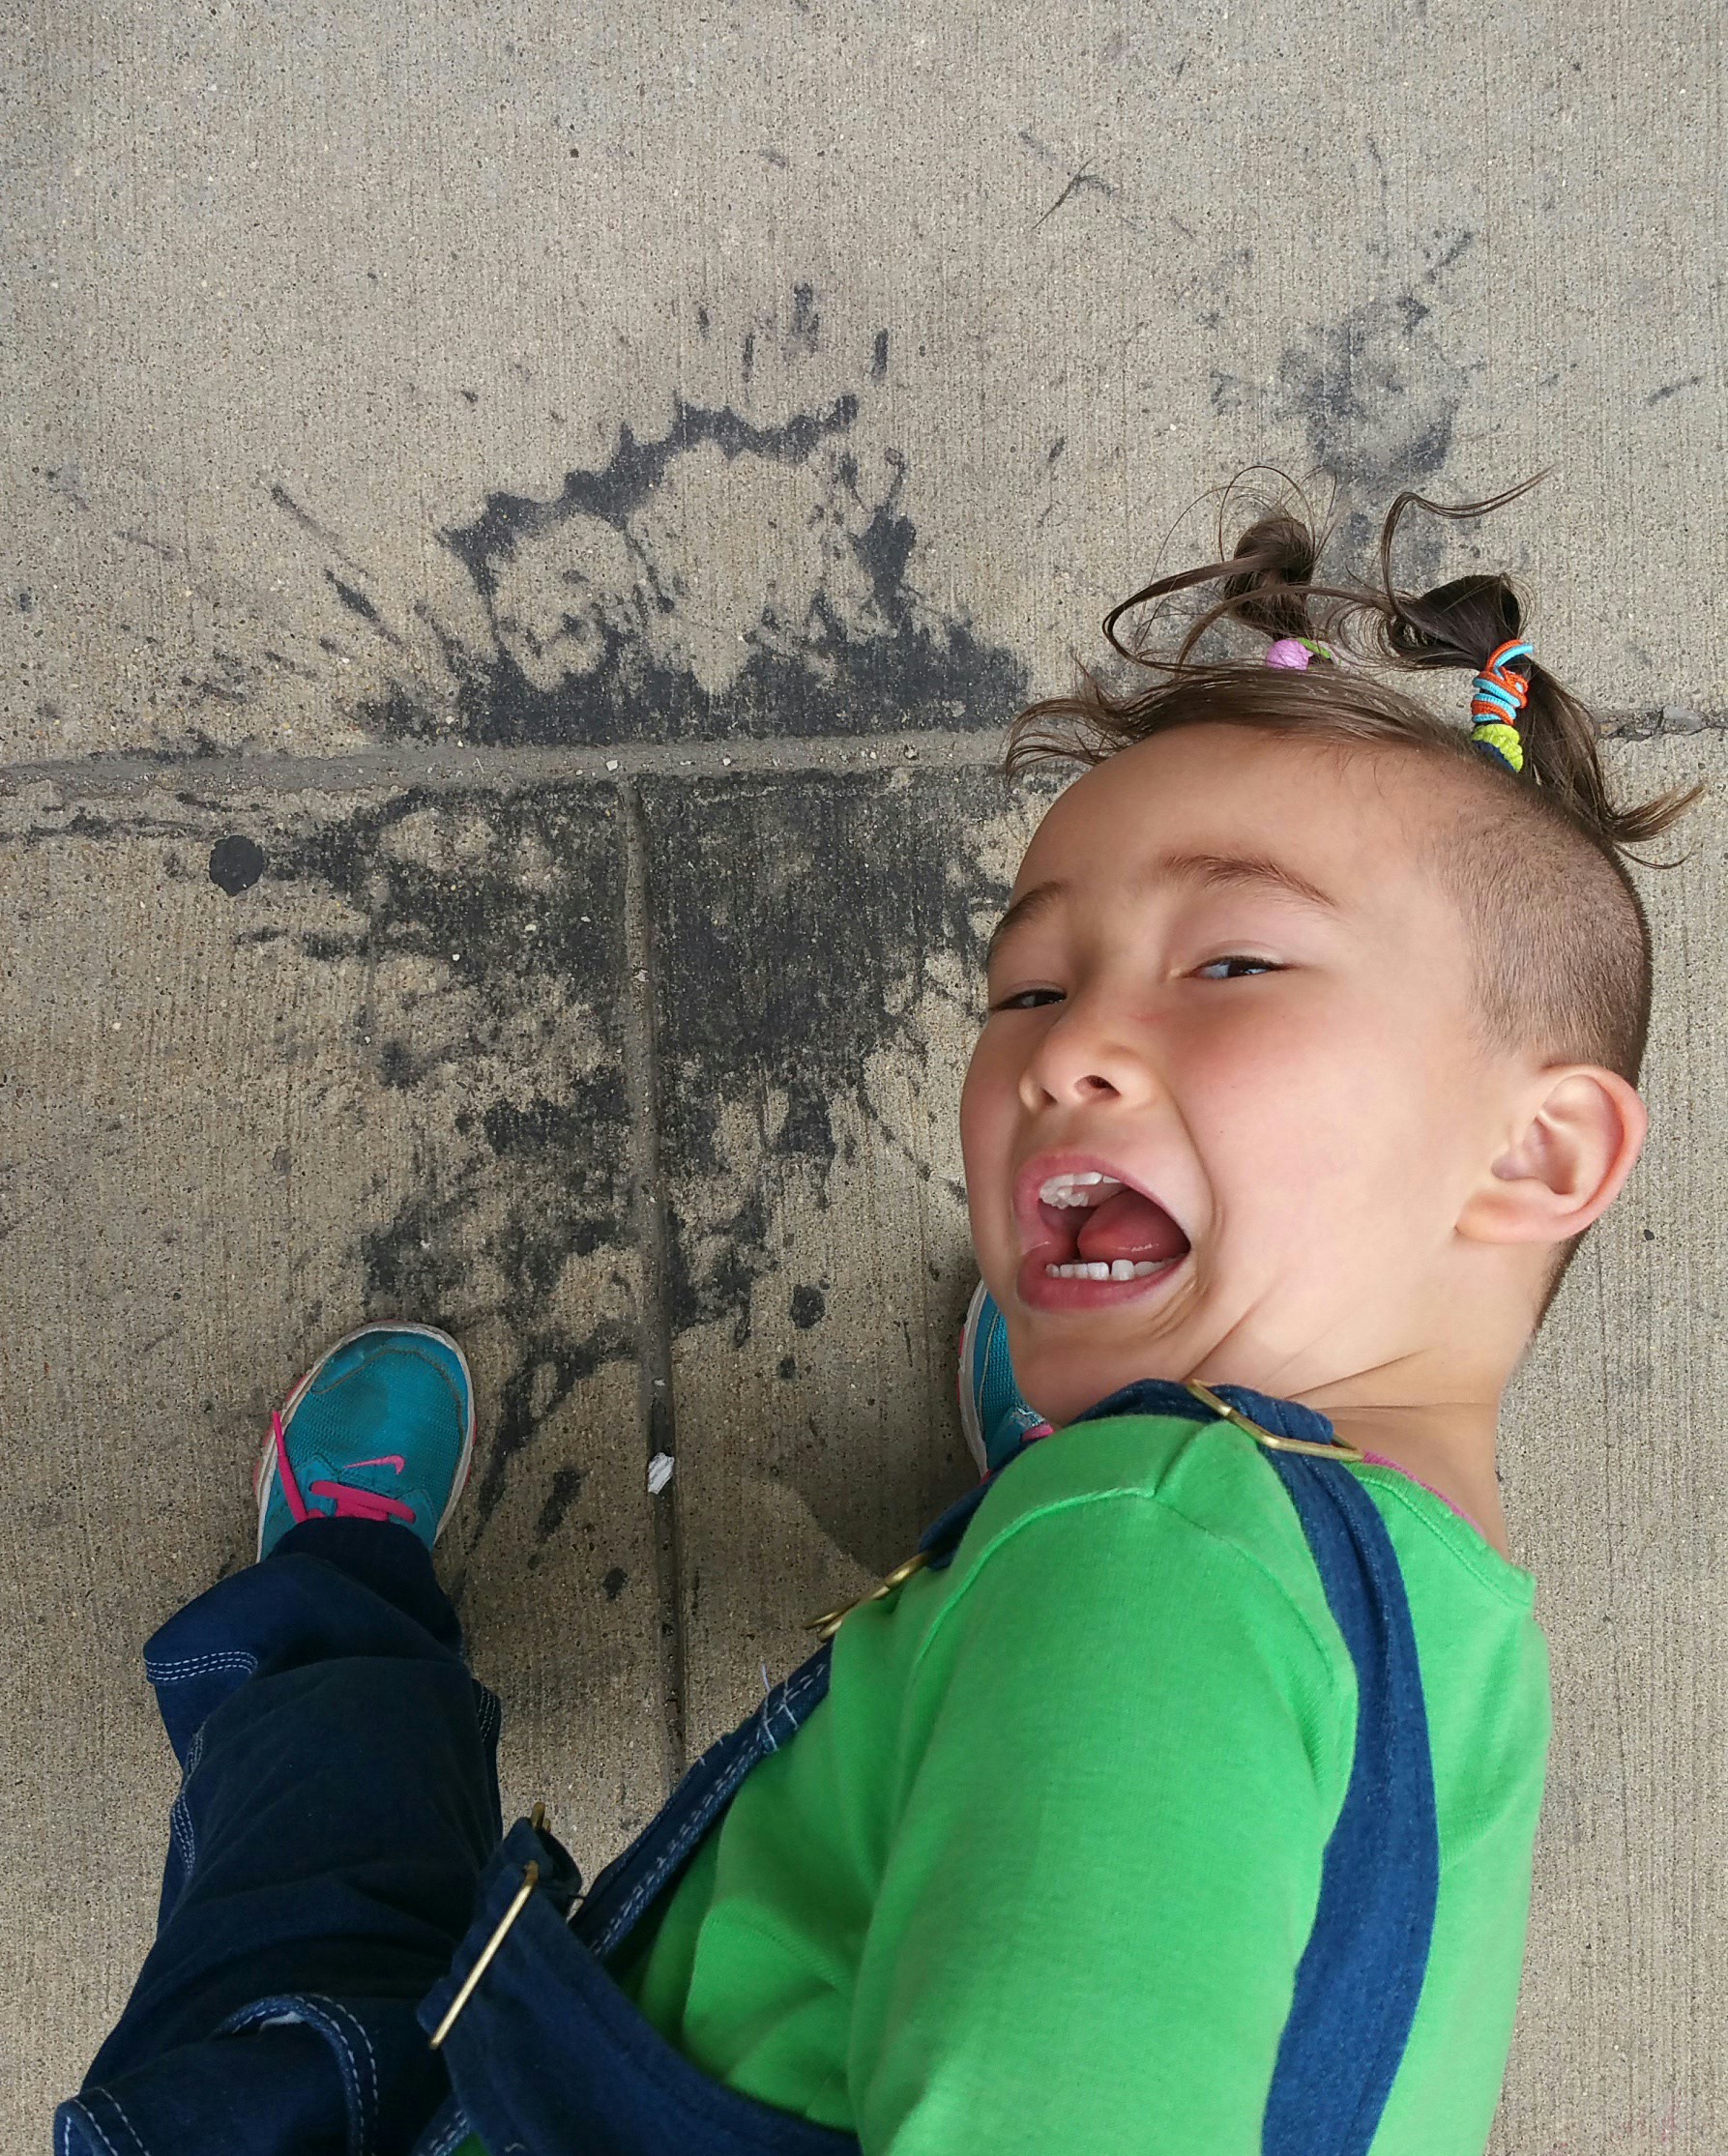
Since my daughter was already showing an interest in taking photos (i.e. taking advantage of a moment’s distraction to snatch our smartphones and go directly to camera mode), we decided to go on an adventure into Chicago to take some pictures. Using Vivian Maier as our inspiration, we headed into the city with cameras ready. Instead of people watching, we went looking for a particular subject matter, having narrowed our focus down to rust.

The challenge would be to find areas of rust that we thought could make compelling photographs (the real challenge was editing down the hundreds of — mostly forgettable — photos we ended up taking):

2016-06-14-00-35-03
fire-hydrant
rusted-bolt-chipping-paint
electric-cover
elevated-tracks
park-here
switch

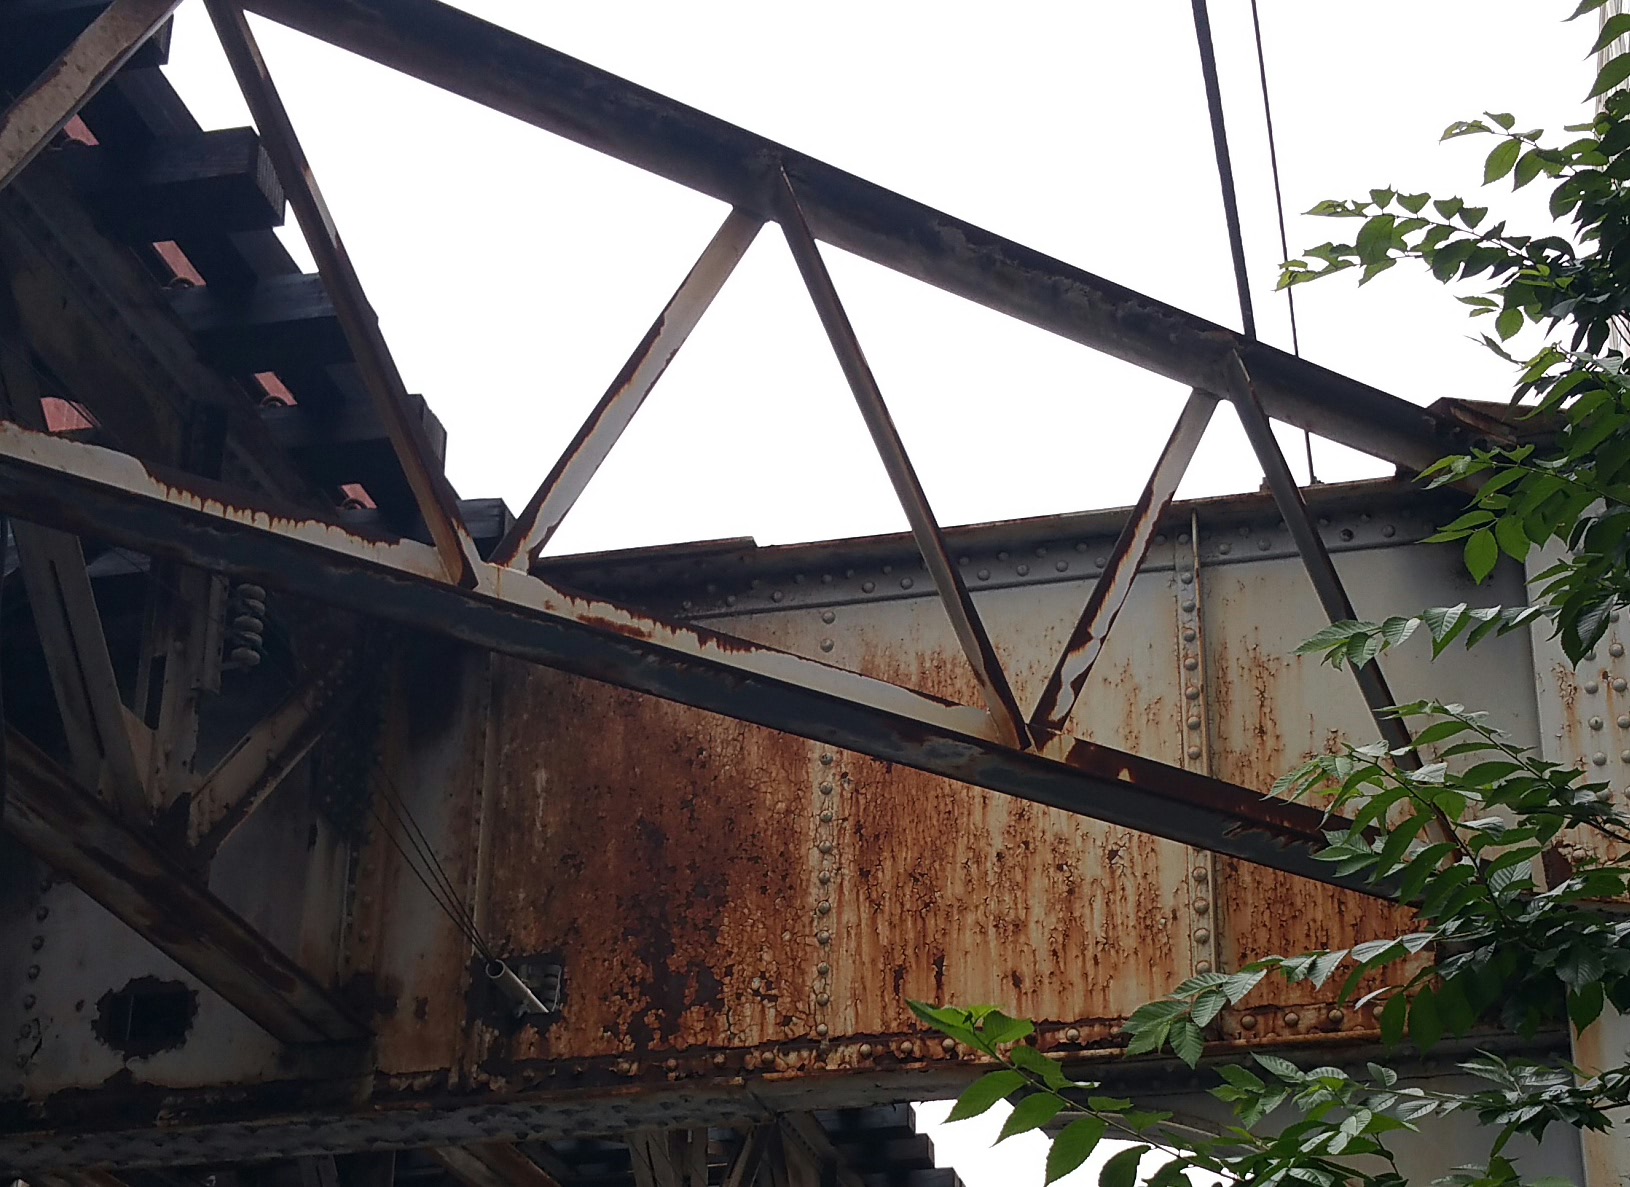
After spending the better part of a day in the city looking for rust, one side-effect was we saw intriguing areas of rust everywhere we went for days afterward. For instance, the last photo above was taken at a farm near us. Even now, if we’re out walking, my daughter still points to interesting examples of rust. It’s amazing how well the human brain can focus if you tell it where to look.

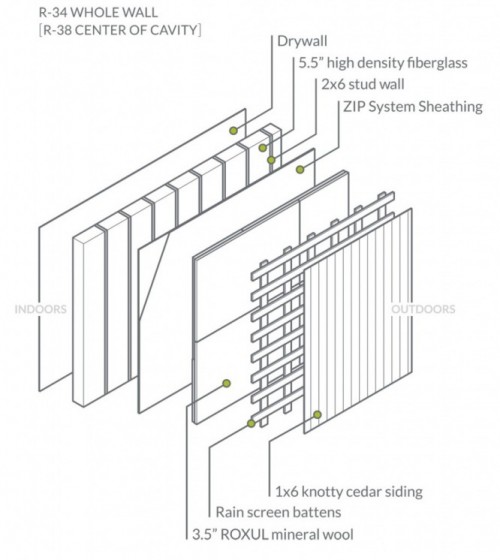
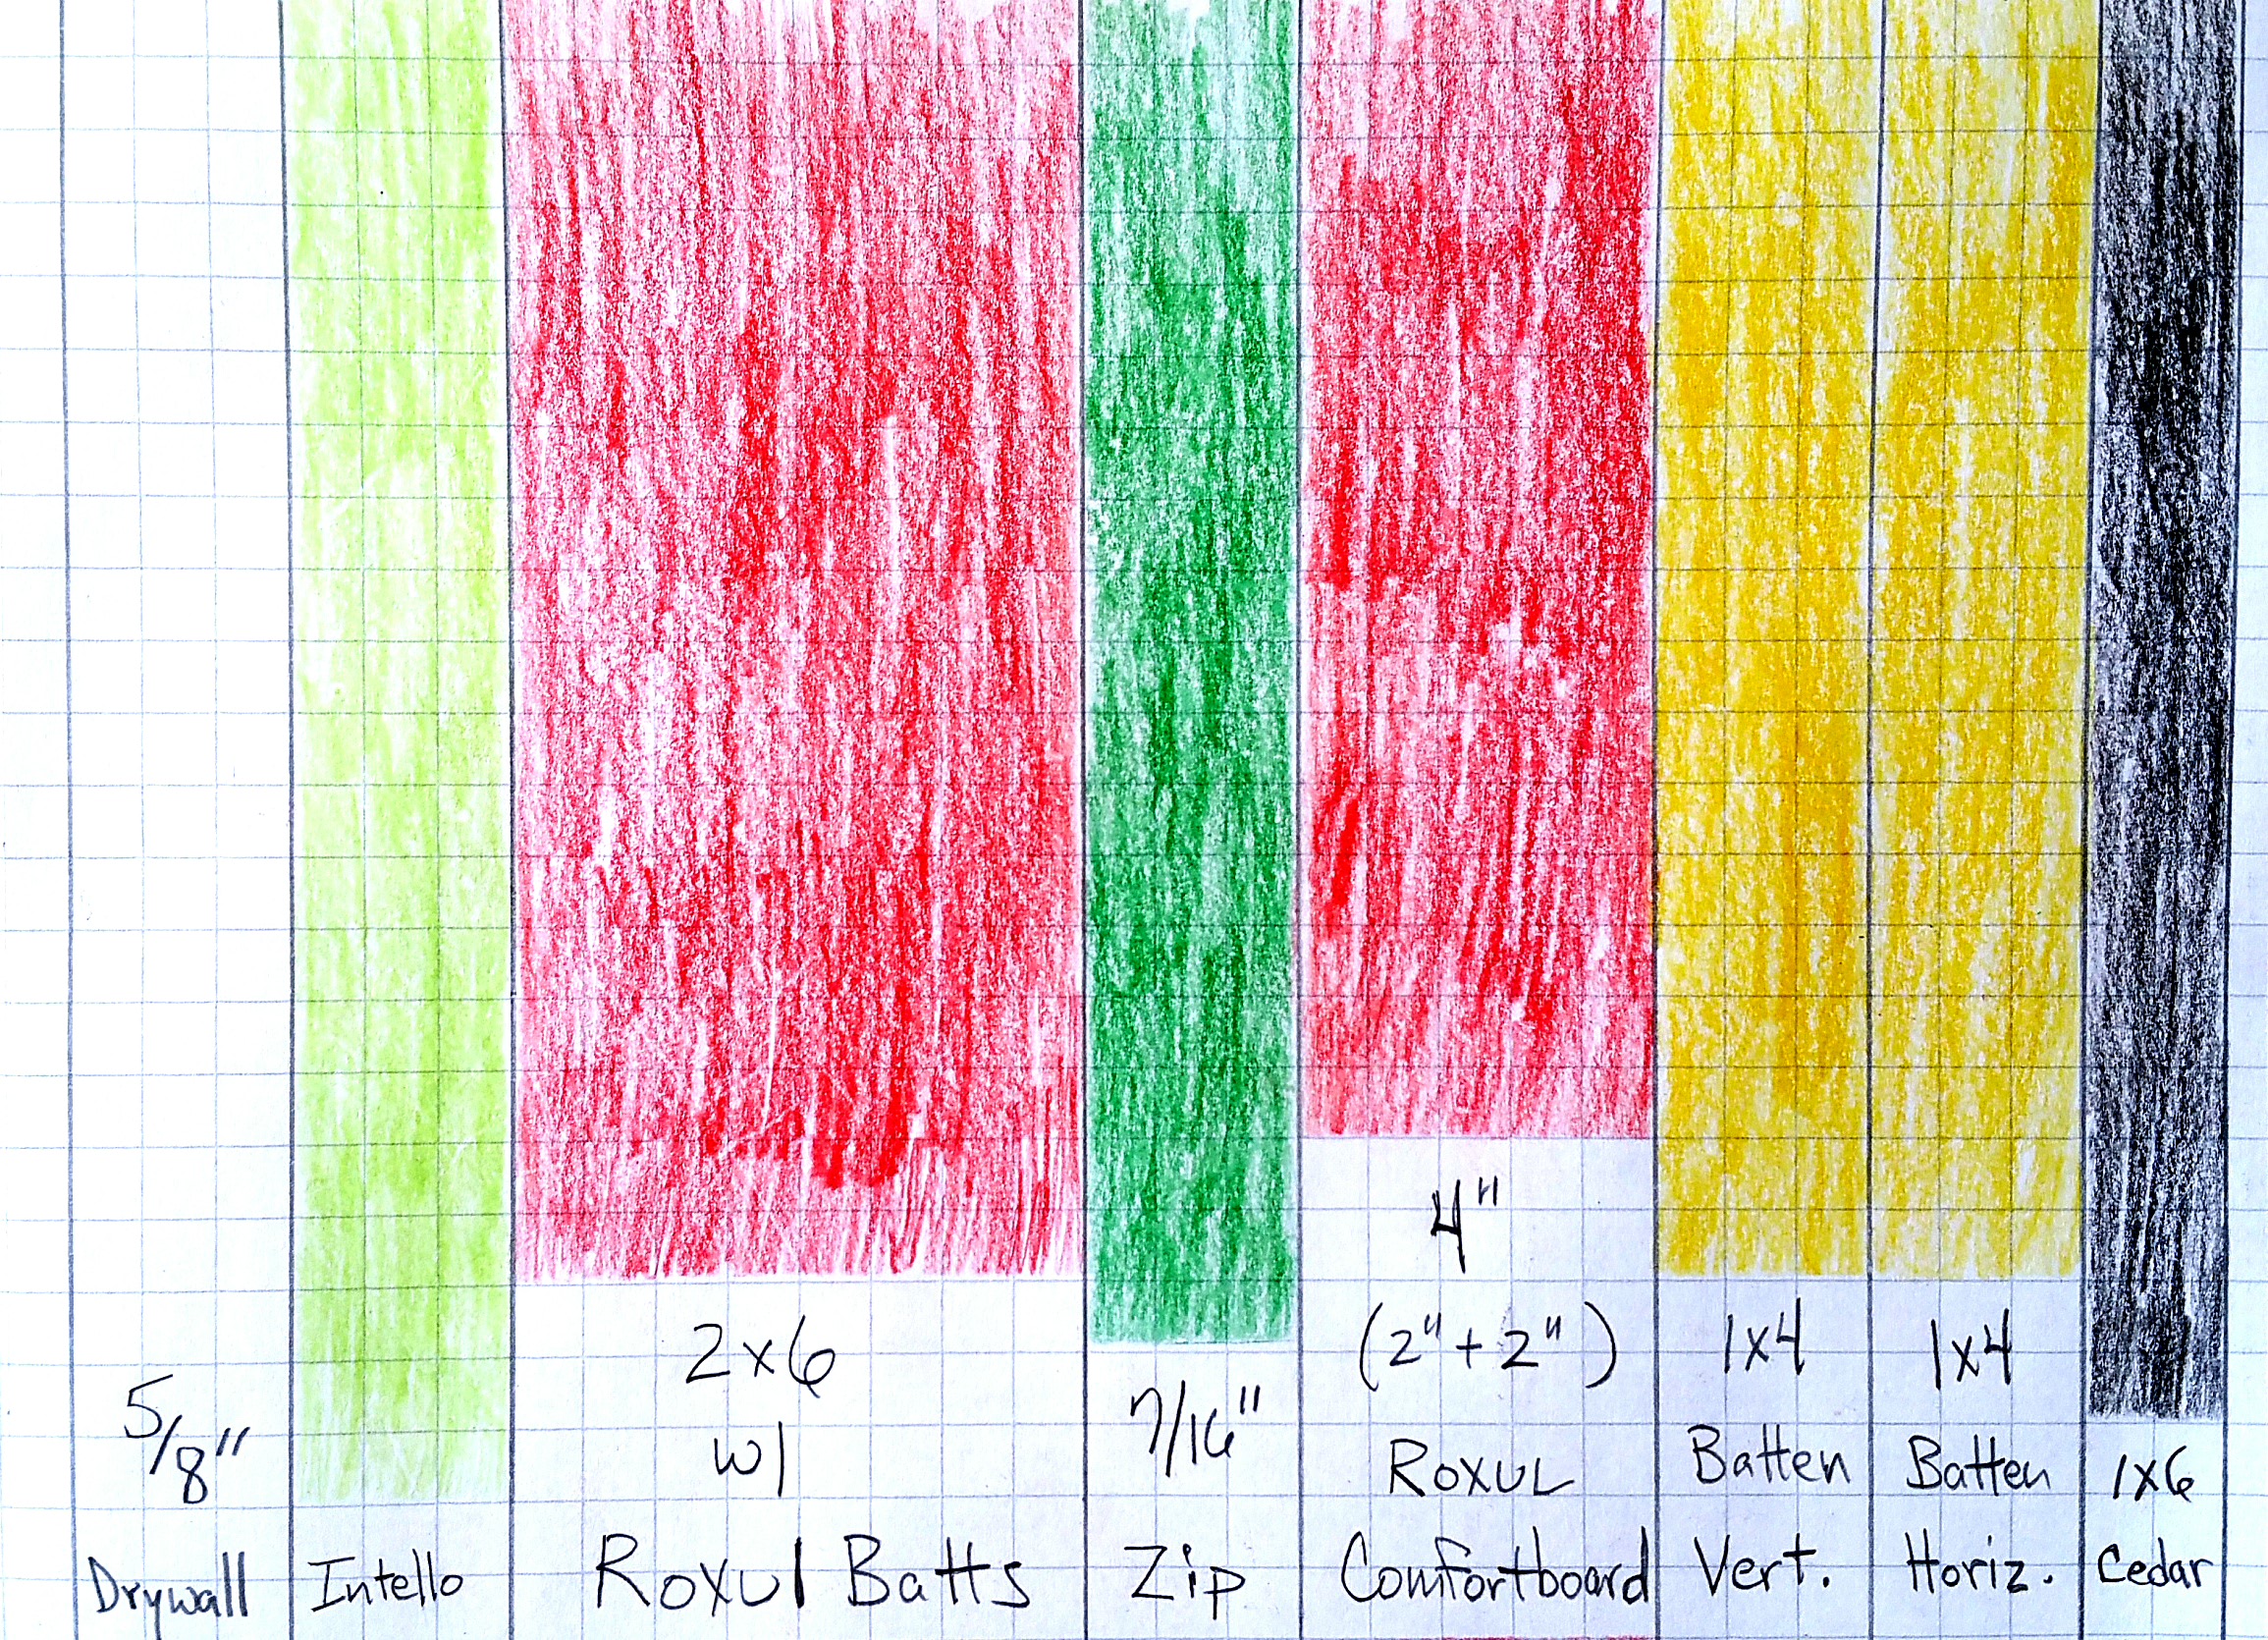
Part of the ulterior motive behind our day of photography was to start thinking about rust as a design element for our new house. Since we will have an Urban Rustic theme, we knew what the basic elements were going to be:

Wood

Concrete

Metal

For metal, I knew it would include exposed lag bolts, washers and nuts, along with some industrial/farm tools, in addition to a couple of areas dedicated to rust. Incorporating rust in a dramatic, yet limited, way would prove more challenging and time consuming than I first imagined (more on this later).

#rustisbeautiful
photo-bomber
Our little photo bomber.

Wall Assembly

2

Or: Dude, what’s in your walls?

When choosing what to put in our walls, we knew we wanted to try and balance high R-values (well above the current building code) with a limited environmental impact.

Here are three articles that address the issue:

Best Wall Choices
Without Foam
Twinkies

After evaluating various materials, including sheep wool,

goodshepherdwool.com

blackmountaininsulationusa.com

we decided to use many of the following elements employed by Hammer & Hand:

madrona-wall-assembly-914x1024-e1459377577722
Hammer & Hand wall assembly for their ‘Madrona House’.

In terms of materials, there are any number of options for putting a wall assembly together. For instance, we really wanted to use the sheep wool, but cost and worries (unfounded or not) about availability, led us eventually to Roxul (the Hammer & Hand videos below proved especially helpful in this regard).

After seeing the wall assemblies Hammer & Hand has been using, and how they’ve evolved over time, we felt the Madrona House set-up represented a good balance between cost-environmental impact-availability-ease of installation. We will also be following their lead by using the Prosoco R-Guard series of products to help with air-sealing our building envelope.

Nevertheless, we did make a couple of changes to the Madrona House set-up. For example, we’re using 4″ of Roxul Comfortboard 80 on the exterior side of the Zip sheathing (based on our colder climate zone), and we will be using Roxul R23 batts in the stud bays, along with the Intello vapor retarder, stapled and taped to cover the stud bays. Otherwise, we will be sticking pretty close to the Hammer & Hand Madrona House wall assembly.

So from drywall to exterior siding (interior – exterior), this will be our wall assembly:

  • 5/8″ Drywall
  • Intello Plus vapor retarder (475 High Performance Building Supply)
  • Roxul R23 Batts in 2×6 stud bays (24″ o.c.) (roxul.com)
  • Zip board (for structural sheathing and WRB; seams covered w/ Joint and Seam Filler)
  • 4″ of Roxul Comfortboard 80 (two layers: 2″ + 2″)
  • 2-Layers of 1×4 furring strips (aka battens or strapping) as a nailing base for the cedar siding
  • 1×6 T&G Cedar (charred and oiled with a few boards left natural as an accent — most of it oriented vertically, hence the need for a second layer of furring strips).
wall-assembly-color-coded
A crude rendering of our wall assembly using my daughter’s colored pencils.

A collection of helpful videos explaining the various elements we’re going to use, and why they’re effective:

Without the information available from sources like Building Science Corporation (they have a lot of interesting research documents) and design-builders like Hammer & Hand (not to mention Green Building Advisor and similar sites and forums that allow consumers to Q&A with expert builders and designers in “green” architecture), trying to build structures to such exacting standards (e.g. Passive House – Pretty Good House – Net Zero) would be exceedingly difficult, if not impossible, for those without previous, direct experience in this type of building program. I can’t express how thankful I am that so many individuals and businesses like these are willing to share their years of experience and knowledge with newbies like myself.

Here are the Hammer & Hand videos that initially sparked my interest in using Roxul rather than foam:

Instead of using tape for exterior seams, we are going to use the R-Guard series of products from Prosoco:

For various interior seams and connections we anticipate using the Tescon Vana tape, or an appropriate gunned sealant.

GBA (Green Building Advisor): Building Green (Starter Q&A)

GBA: Article on minimum thickness of exterior foam by climate zone

GBA Question: Foam vs. Roxul

GBA: 10 Rules of Roof Design

GBA: “Greenest”

GBA: Passive House Design (5-part video series) Requires membership after Part I, but well worth it.

BSC (Building Science Corporation): Perfect Wall (pdf)

BSC: Hygrothermal Analysis of Exterior Rockwool Insulation (pdf)

BSC: Moisture Management for High R-Value Walls (pdf)

BSC: Cladding Attachment Over Thick Exterior Insulating Sheathing (pdf)

GBA: Mineral Wool Over Exterior Sheathing

Passivhaus Trust (UK): how-to-build-a-passivhaus-rules-of-thumb (pdf)

Also worth considering:

GBA: The Pretty Good House

GBA: Passive House Certification: Looking Under the Hood

Architect vs. Client

0

Can they both be right?

During the design phase of our build, a clash of ideas occurred over a relatively small detail in the plans. I thought revealing it here might prove helpful to other homeowners about to embark on the design phase of their own build or renovation.

Our overall floor plan is divided down its long, East-West axis, separating the public (kitchen and family room) from the private (bedrooms and bathrooms). This is straightforward, and nothing that hasn’t been done countless times before by other architects and builders. Sounds simple enough, but debate arose over how to transition from the public space to the second bedroom and bathroom, which are both just off the kitchen.

This is what our architect initially proposed:

2016-08-17 21.58.01

Our architect was clearly going for maximum efficiency in terms of space planning. In addition to a straight, open line from kitchen to bathroom, this design put the doorway to the second bedroom just around the corner, mostly out of sight. The architect believed, and rightly so, that this was the most efficient use of the limited space in this area.

Nevertheless, in my own head, I always assumed that there would be a “jog” (we worked hard to eliminate as many hallways as possible, but I suppose there’s no denying that’s what we’ve ended up with here).

This is what I was picturing:

bathroom - bedroom version 2

As a result, I argued for the second design, believing the jog/hallway offered a level of privacy to those using the bathroom lacking in the original drawing. This is a polite, civilized way of saying it. A friend put it more bluntly: “Why do I wanna make eye contact with somebody who’s just taken a dump?”.

Crass, to be sure, but his comment does get to the heart of the matter: If you’re standing in the kitchen as someone exits the bathroom, won’t this be an awkward situation for everyone? And how uncomfortable will it be for the person in the bathroom if they have the “bubble guts” when they know people are congregated in the kitchen?

Why not, as depicted in the second version, move the wall between kitchen and bathroom a little to the right, thereby eliminating any direct sight lines from the kitchen into the bathroom? Doesn’t this layout afford someone in the bathroom a much higher level of privacy and, therefore, comfort?

If the client (in this situation, or one like it) can acknowledge that the second layout is a less than ideal efficient use of the space, should the architect (in this situation, or one like it) acknowledge that the trade-off — between efficiency and privacy — is worth it? Or should efficient space planning be understood as an absolute and be applied accordingly?

It would be interesting to know what decision other people would make in this situation. In addition, if clients (or architects for that matter) have struggled with similar situations regarding a balance between space planning efficiency and other needs or wants — and how they resolved the problem.

In our case, we’ve opted for privacy, but we don’t pretend our choice is perfect. This raises the question: Can architect and client both be right (even if it’s for different reasons)?

What do you think?

Places Journal (Client and Architect)  

Life of an Architect  

Reasons to Employ an Architect  

Coffee with an Architect

Postscript: 

There were also selfish design reasons for the jog/hallway — e.g., artwork that will be featured on the hallway wall (seen as you exit the kitchen and head for the bedroom or bathroom), in addition to artwork that can be viewed as you exit the bathroom sink area (on the new wall between the kitchen and the bathroom). I also thought that by not being able to see directly, or easily, into the bathroom and the bedroom from the kitchen that it might add a little ‘drama’ to the floor plan, if only for first-time visitors — ‘Hmmm, wonder what’s back there?’ At any rate, I think I’ll always enjoy this effect (along with the added privacy).